

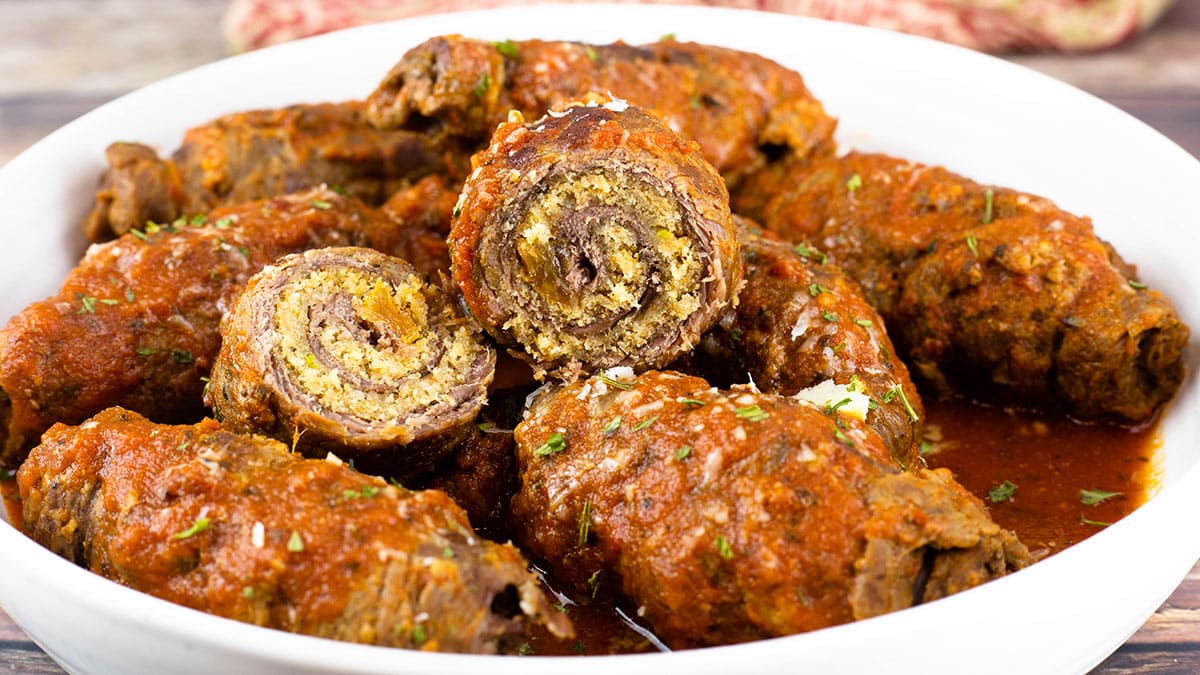
Beef braciole is a delicious Italian dish made by rolling up thin slices of beef with a flavorful filling. Traditionally it's simmered in tomato sauce for a few hours to tenderize the beef and develop all the wonderful flavors. Well, guess what... you can get the same results much quicker by using your pressure cooker!
I was blown away at how tender the beef was and how everything was flavored perfectly in only 5 minutes of pressure cooking time! 5 minutes!
Would you like to save this recipe?
What I love most about this recipe is how easy it is to prepare, yet it's kind of fancy when you serve it. Rolling the beef literally takes under 10 minutes from start to finish, so this is not an involved recipe at all.
If you haven't heard of Italian beef braciole before, it's basically thinly pounded meat filled with a mixture of bread crumbs, herbs, parmesan cheese, and a few other ingredients of your choice. My friend's mom always put pine nuts in hers and I chose to use raisins in mine. That same friend also taught me how to say beef braciole. It's harder to pronounce than this beef braciole recipe is to make! If you are unsure how to pronounce it, here is Amber to help you out like she helped me out!
Say it with Amber...
What is the Difference Between Braciole & Involtini?
I thought I would touch on this topic since this recipe would technically be called Involtini. Braciole refers to a large piece of meat that is pounded thin, stuffed with the savory filling and rolled. It is then braised in a tomato wine sauce and sliced before serving. Some examples would be using a flank steak or skirt steak and pounding it thin before stuffing it or using a large pork steak pounded thinly.
Involtini refers to individual slices of beef (or it can be made with other types of meat) filled and rolled before simmering in a tomato sauce. Since this recipe uses thinly sliced top round that is stuffed with the filling and rolled as individual rolls, it's technically Involtini. The term braciole is often used to describe both Involtini and Braciole.
Ingredients & Substitutions
Meat
I used beef slices in this recipe that were already pounded thin. At my local grocery store this thinly sliced top round is labeled Milanesa. Milanesa is actually a dish that uses a thin slice of meat that is lightly breaded and pan fried. If you can find this type of beef, it makes this recipe super easy because you don't have to pound out the steak. It's done for you.
If you can't find it, pick up a London broil or flank steak and cut it into 6-8 servings. Use a meat mallet or the flat side of a meat tenderizer to pound it out very thin. It's easiest to do this if the beef is between two pieces of parchment paper or plastic wrap.
You can also substitute the beef slices with veal, pork or even chicken.
To make a large roll instead of individual ones, use a flank steak pounded thin, put the filling on top and roll the entire piece of meat into a single roll. I actually tested the recipe the first time with a flank steak, but found it to be a little labor intensive to pound out the meat thinly enough to be super tender. If you do want to do this, the pressure cook time will increase to 10 minutes with a full natural release. Once the meat is removed from the pressure cooker, snip the kitchen twine and slice into thick slices for individual portions.
If you wanted to make a vegetarian version, use thinly sliced eggplant instead of the beef. Reduce the pressure cook time to 1-2 minutes if using eggplant.
Filling
The basic filling is made from breadcrumbs, grated parmesan cheese, herbs and seasonings. I added golden raisins to mine, but that is totally optional. You could add pine nuts or spinach if you like. I would lightly wilt the spinach to remove the excess liquid before adding to the filling.
You can also stuff the beef rolls with other types of filling, like sautéed onions, mushrooms, and Swiss cheese or make cheesesteak beef rolls with onions, peppers, and cheese. Make sure to cook the vegetables before adding to the filling because they won't soften that much during the pressure cooking process. Any combination of ingredients that you love can be used to create your own unique beef roll-ups!
You can also use slices of prosciutto that you lay down over the beef before adding the filling, if you want to.
Sauce
This recipe uses a can of tomato sauce that is well seasoned and it works perfectly. It results in a flavorful sauce that is super easy to throw together. You could also use your favorite spaghetti sauce or Italian gravy. A simple marinara sauce also works great.
If you are using a different filling, like the cheesesteak version, you can skip the tomato sauce and, after the beef has cooked, remove it and add some cheese to the beef stock and beef juices along with a little cream to make a cheese sauce.
I also use a little beef broth to deglaze the pot and provide the thin liquid. You can substitute part of the broth with red wine if you like. I would suggest about ¼ cup of red wine and ½ cup of beef broth or beef stock.
How to Make Beef Braciole (Involtini)
If you were lucky enough to find the thinly pounded steak (often called milanesa) at your grocery store, most of the prep is already done for you.
If you weren't able to find it, then take your pieces of beef and pound them very thin using the flat side of a (affiliate link)meat tenderizer or meat mallet. I usually place the meat between two sheets of plastic wrap or parchment before pounding it out.
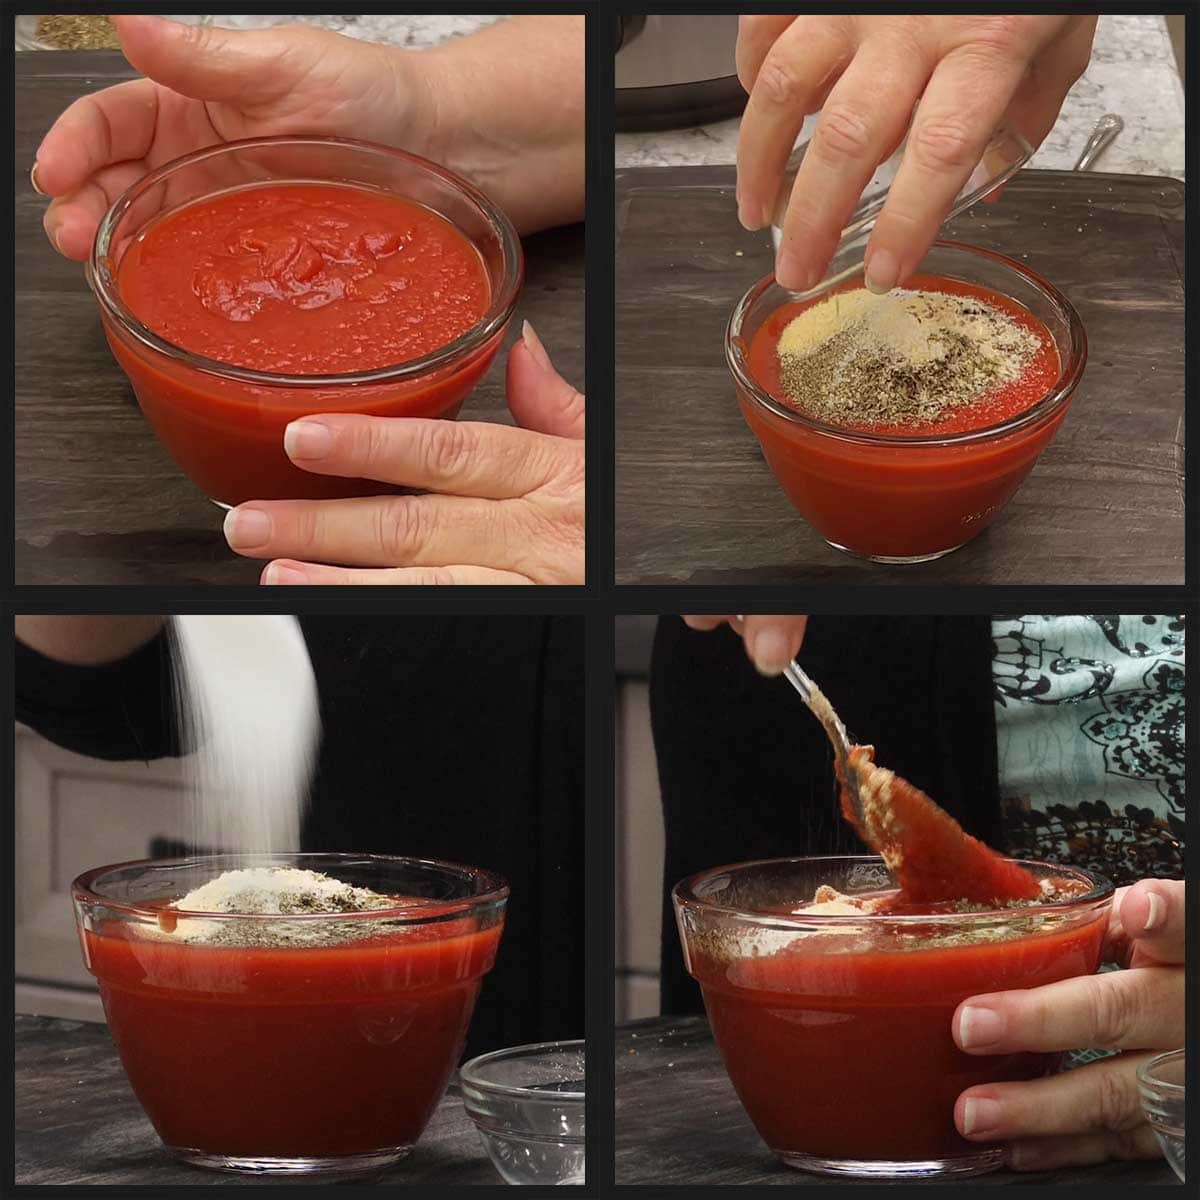
Next, prepare your tomato sauce. I used one 15-ounce can of tomato sauce and added spices, a little sugar and mixed it up. It worked perfectly in this recipe. ** In the Youtube video, I forgot to say that I added Italian seasoning.
The spice blend I used is:
- 1 teaspoon salt
- ½ teaspoon pepper
- 1 teaspoon garlic
- 1 teaspoon onion powder
- 1 teaspoon sugar
- 1 teaspoon basil
- 1 teaspoon Italian seasoning
- red pepper flakes if desired
You can also use your own homemade spaghetti sauce, your favorite jarred spaghetti sauce, or a simple marinara.
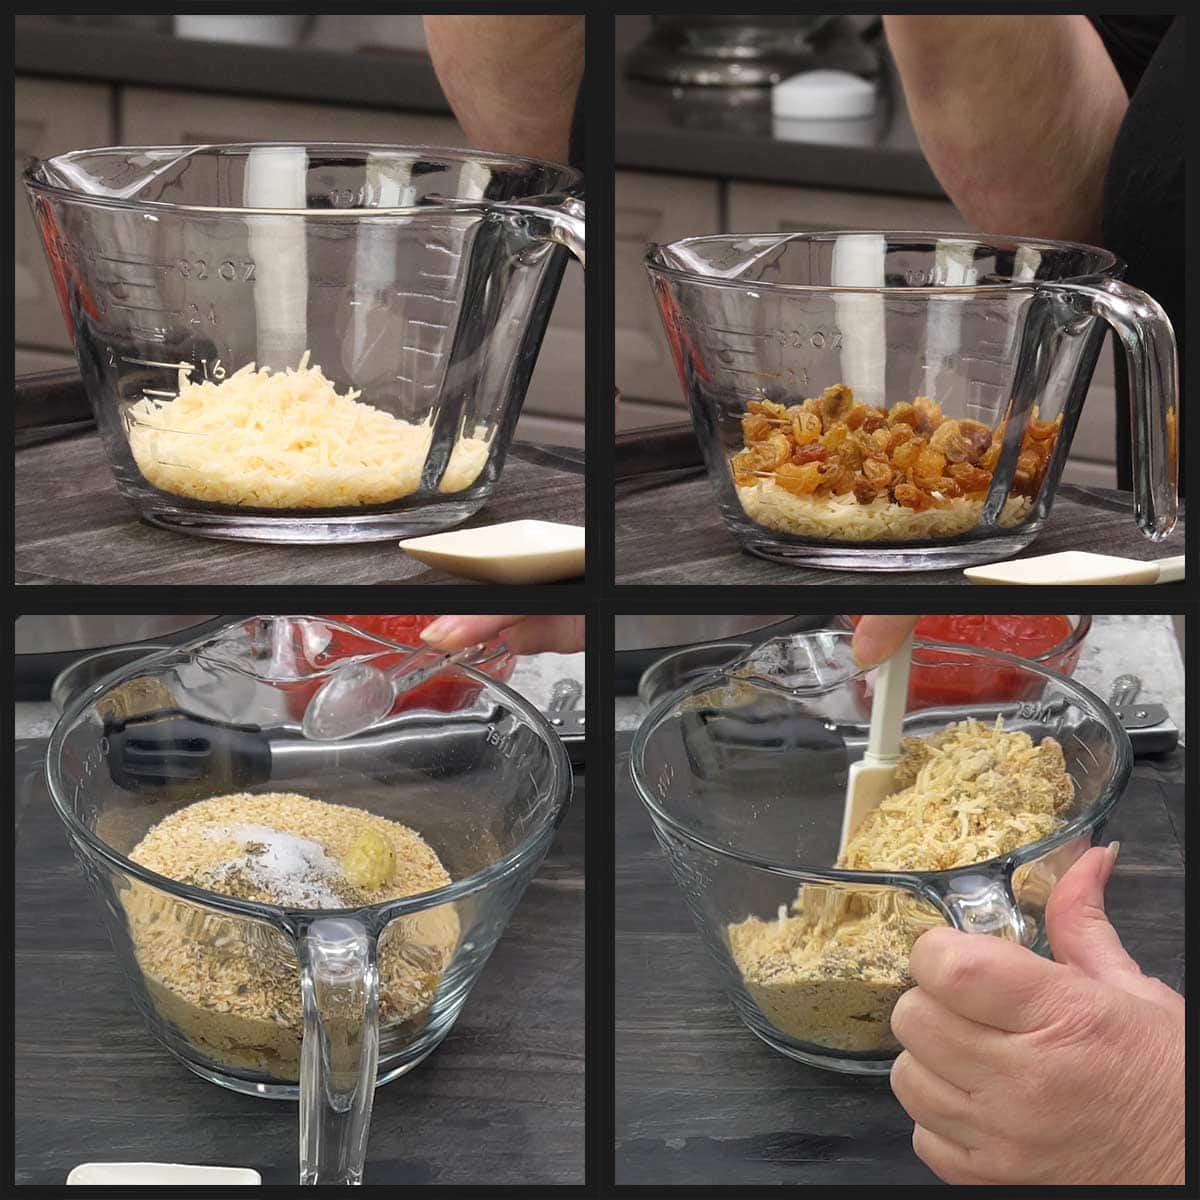
Next make the filling by combining 2 ounces of grated parmesan cheese, ½ cup of golden raisins (you can also use regular raisins, but I like the look of the golden ones better), breadcrumbs, about 1 teaspoon of minced garlic, and the spice blend. *In the Youtube video, it says to add Italian seasoning, but I didn't add that in the test recipes. Either is going to be fine though.
The spice blend I used for the filling is:
- ½ teaspoon salt
- ¼ teaspoon pepper
- ½ teaspoon basil
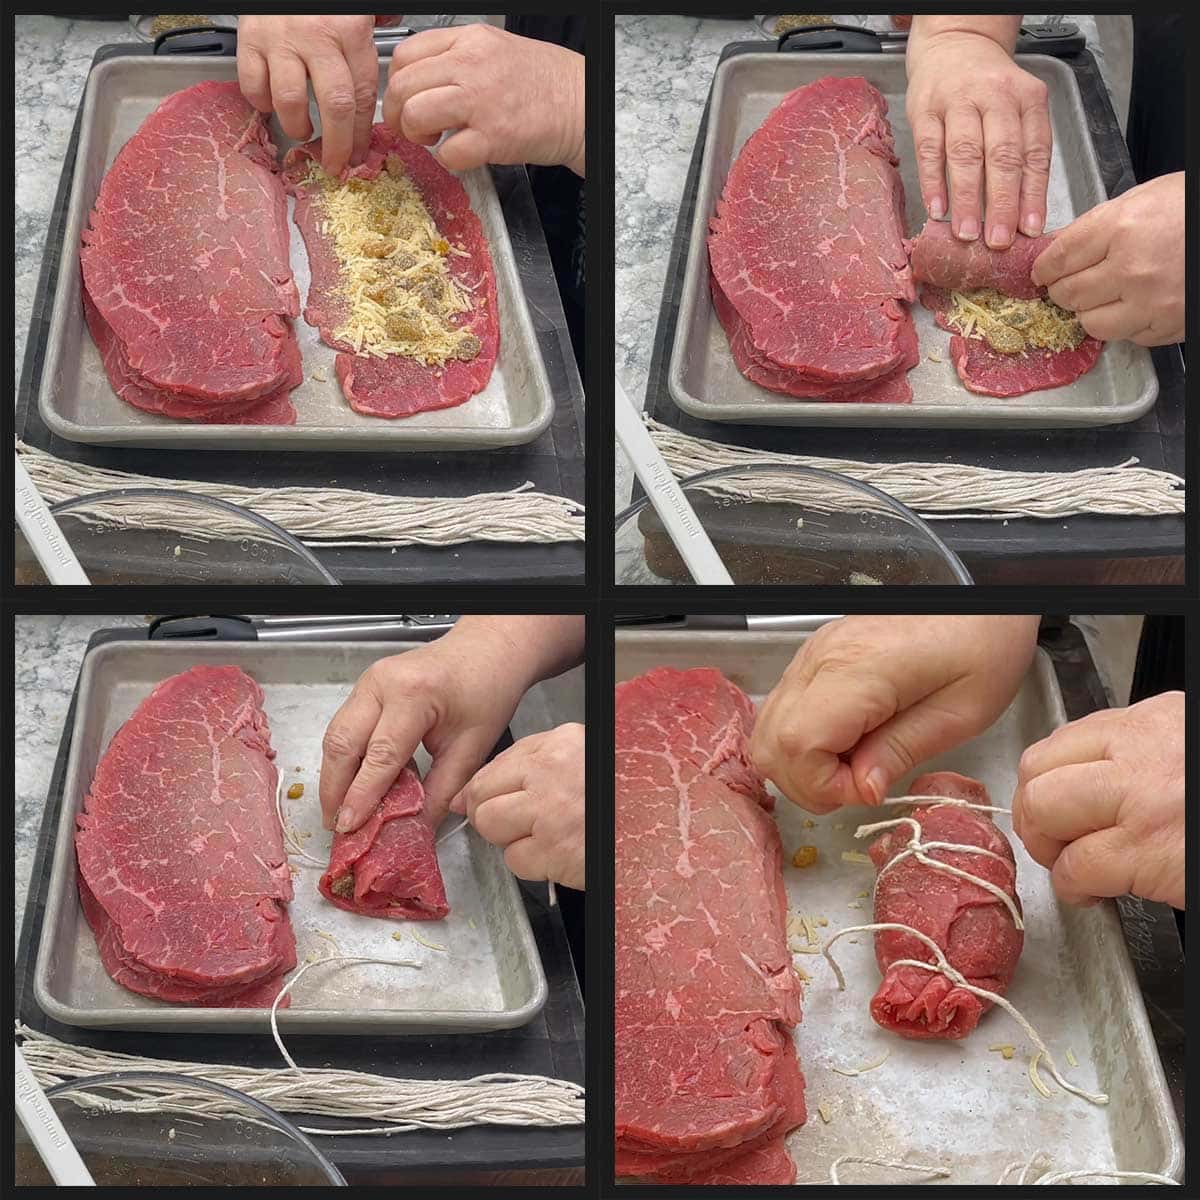
I like to season the beef on each side with salt and pepper. Combine 1½ teaspoons of fine grind sea salt or kosher salt with 1 teaspoon of pepper and lightly season each side as you start to put on the stuffing.
Use about 3 Tablespoons of the breadcrumb mixture per slice of beef and spread it out, leaving about ½" along the edges that doesn't have the filling.

Roll each slice of beef into a tight roll and either secure with toothpicks or butcher's twine. I prefer using the twine over the toothpicks because it's easier to brown the beef, but either will work.
The cooking twine I use is on Amazon and it's relatively inexpensive and lasts quite a while: (affiliate link)Kitchen Twine on Amazon
You can just wrap one piece of kitchen twine around the middle, but I like to also secure the ends to keep the filling where it belongs and it makes for a beautiful beef roll.
Repeat the process for each slice of beef.
Preheat the Ninja Foodi or Instant Pot on high sear/sauté and let it heat up for about 5 minutes. Add in 2-3 Tablespoons of oil and let that heat up for 2-3 minutes.
Add the beef rolls to the hot oil in a single layer. If you are making a double batch, you will want to brown them in batches. Cook for 2-3 minutes on the one side and then flip over to brown the other side. The meat will tell you when it is ready to be flipped because it will release easily from the pot with tongs. If you meet resistance, let it cook another minute.
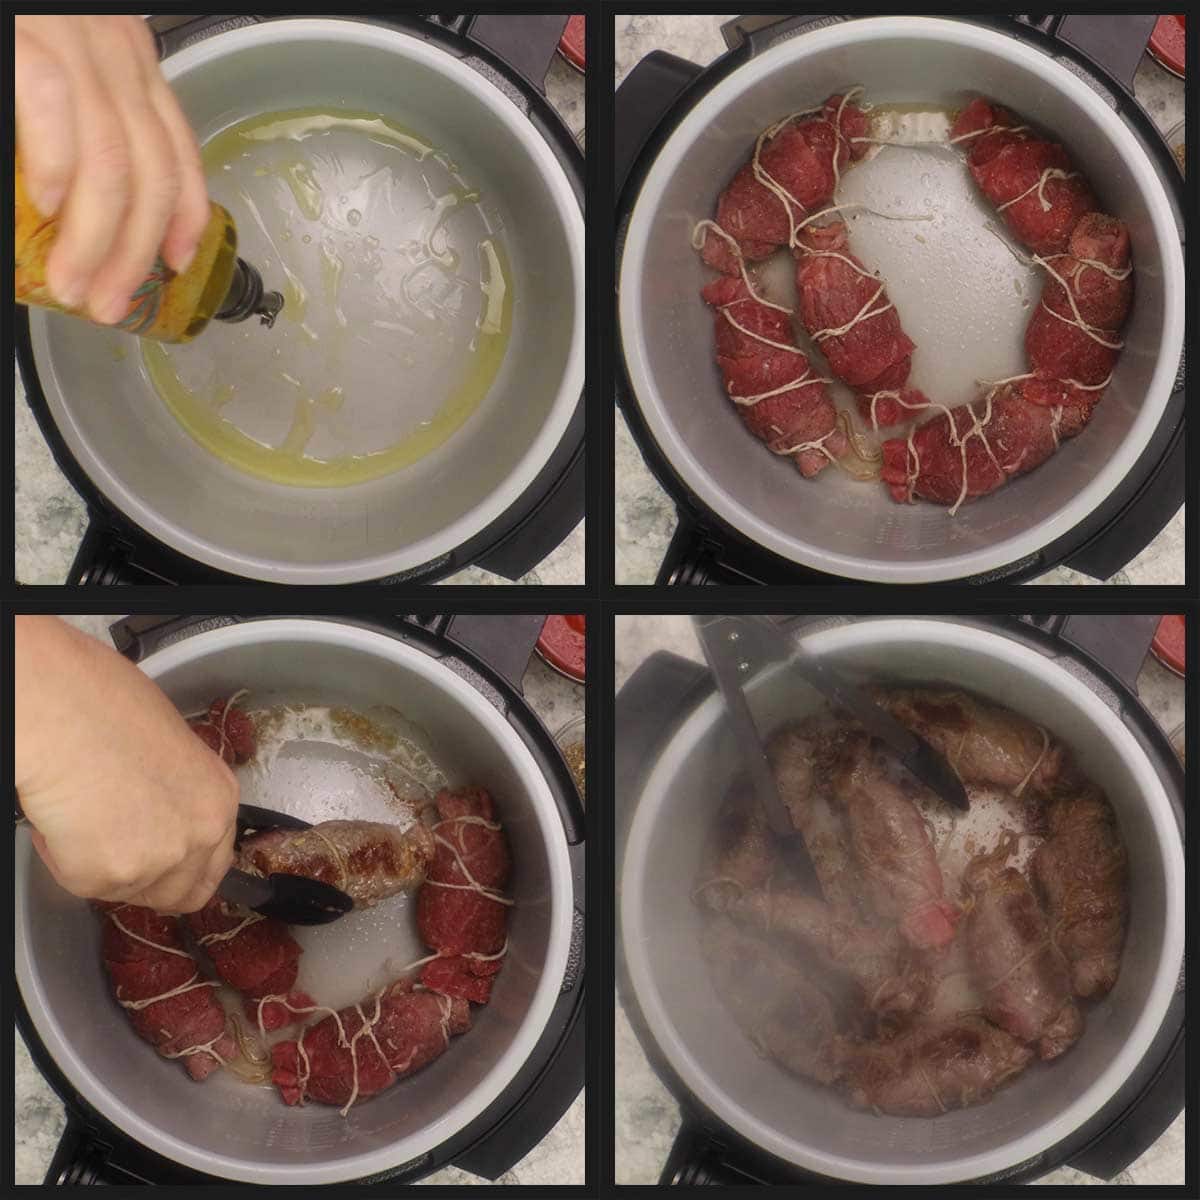
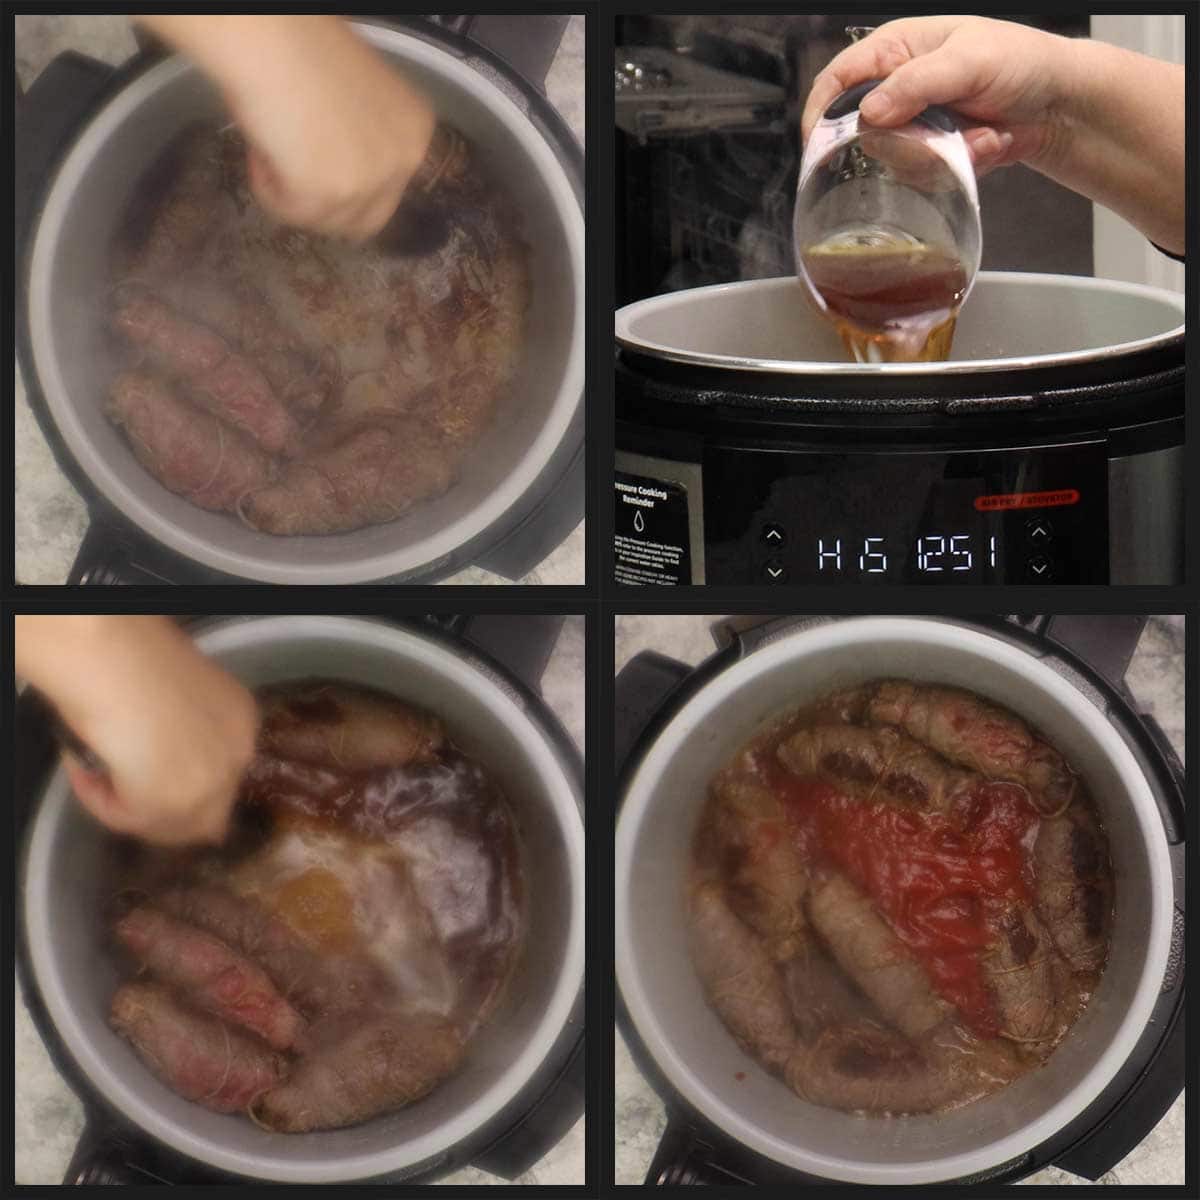
Once all the beef is browned, deglaze the pot with the beef broth. This is very important to get all the browned bits (fond) off the bottom. Take your tongs and scrape along the bottom of the pot to remove any of the stuck on fond. This will prevent the water/burn notice and it brings great flavor into the sauce.
Next, pour the tomato sauce on top, but DO NOT stir. This is very important. You want the thin beef broth on the very bottom in order to produce the steam needed to go under pressure.
If you are new to pressure cooking or want to better understand how it works, please read this article: Pressure Cooking 101
Put the pressure lid on (or close the Smart Lid on the Ninja Foodi and hit start/stop) and set the pressure to high for 5 minutes. If you are using the Ninja Foodi OL series, make sure to slide the slider to the far left. Make sure the vent is sealed and hit start.
The pot will come to pressure fairly quickly because the pot is hot and the broth is already boiling. Once the 5-minute pressure cook is done, allow the pot to naturally release the pressure. This means, do nothing until the pin drops and the pressure has been released. This takes about 12 minutes or so.
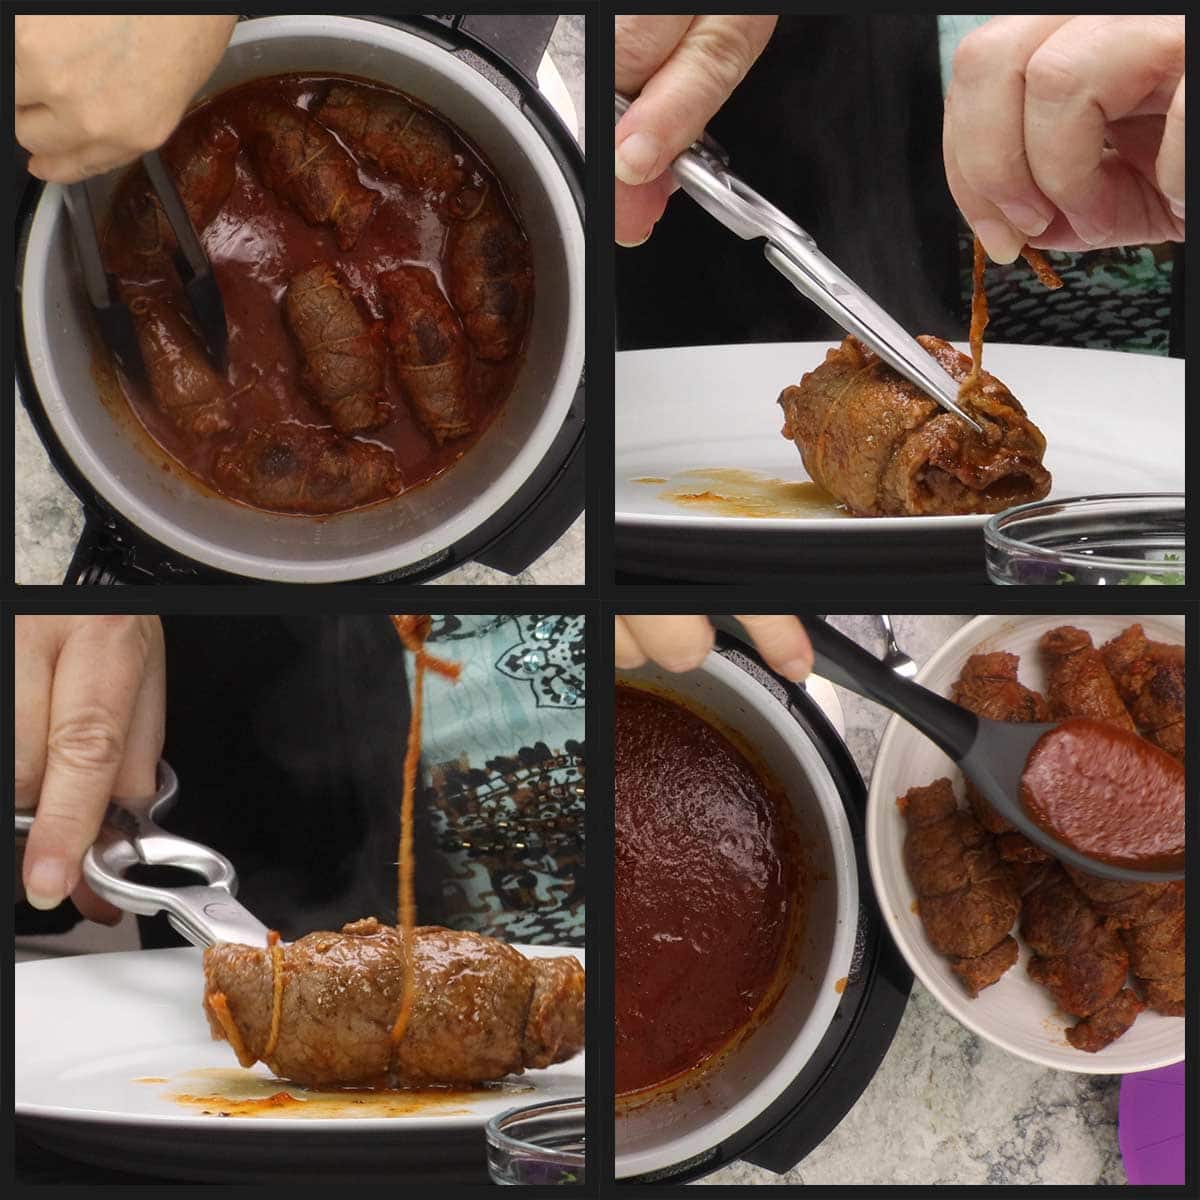
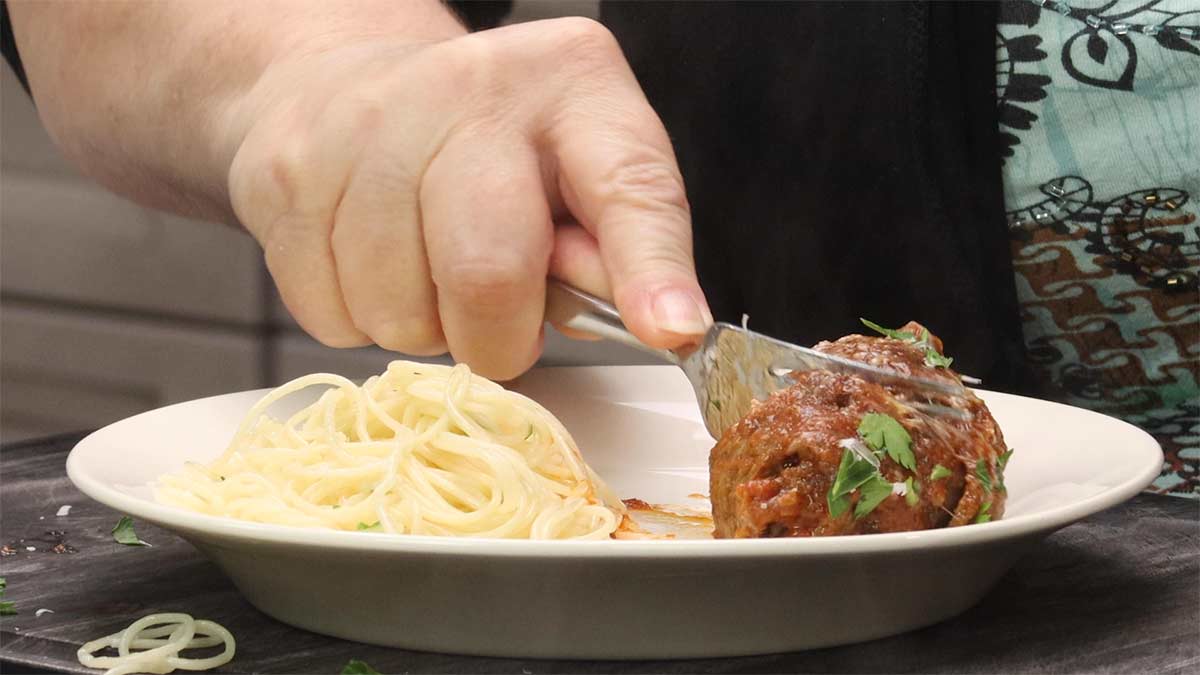
Remove the lid and turn the rolls over to lightly coat in the sauce. Place the beef rolls on a plate or cutting board. Use some kitchen scissors or a sharp knife to remove the strings. Place the beef rolls onto a serving plate or bowl. Spoon the delicious tomato sauce over all of the rolls.
Lastly, garnish with fresh parsley or fresh basil and some grated parmesan or pecorino romano just before serving. This dish is perfect for a Sunday dinner!
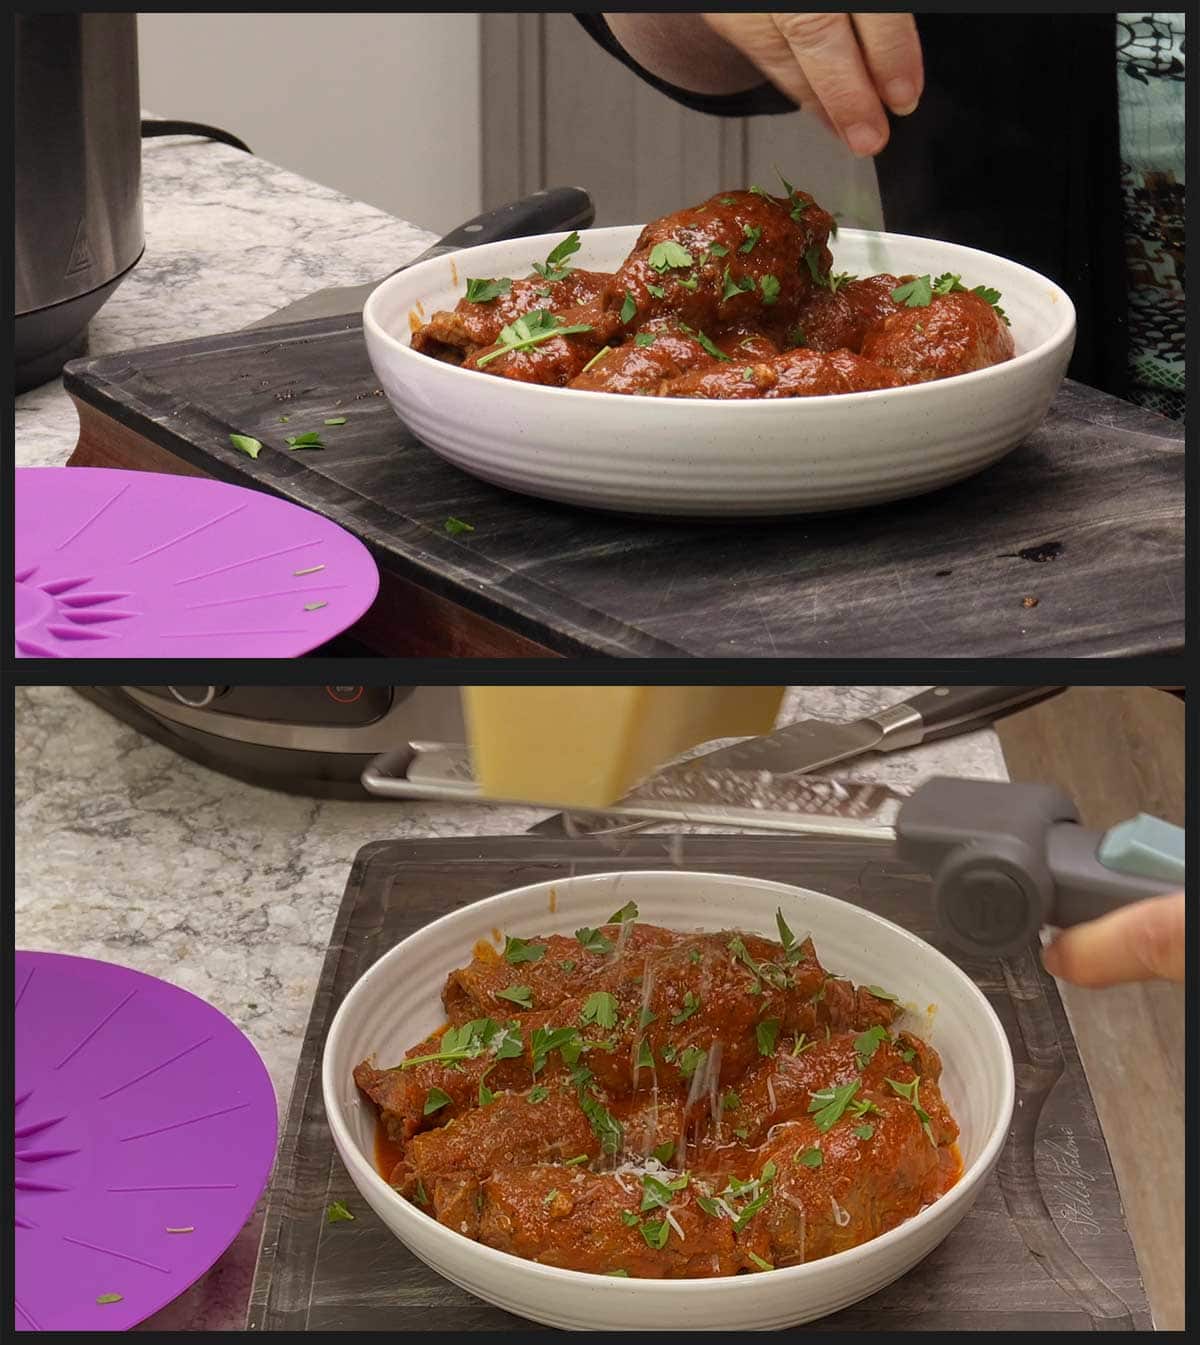
The meat is fork tender! Enjoy!
Frequently Asked Questions
Absolutely! Just let the beef rolls cool completely. Package in airtight containers or freezer bags with the sauce. Get as much air out as you can and freeze. It will stay good for up to 6 months when packaged properly.
Yes, absolutely! Simply increase or decrease the number of meat slices and filling. Keep the liquid and tomato sauce the same and the cooking time the same.
EASY Pressure Cooker Recipes!
Although this recipe for beef braciole looks fancy, it's so simple to make and you can save so much time by using your pressure cooker. If saving time and making easy recipes sounds good to you, then check out these recipes!
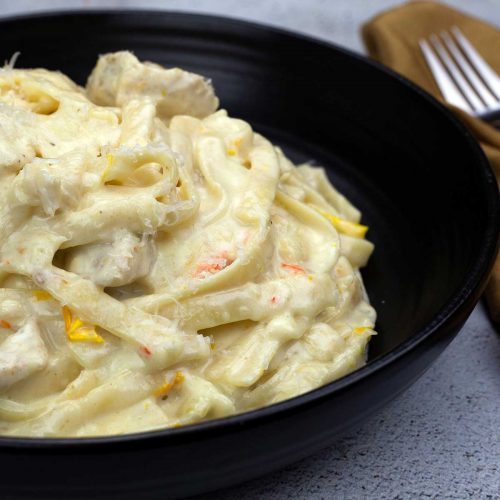
- Chicken Alfredo in the Ninja Foodi/Instant Pot
- Shrimp Rasta Pasta (Stovetop or Pressure Cooker)
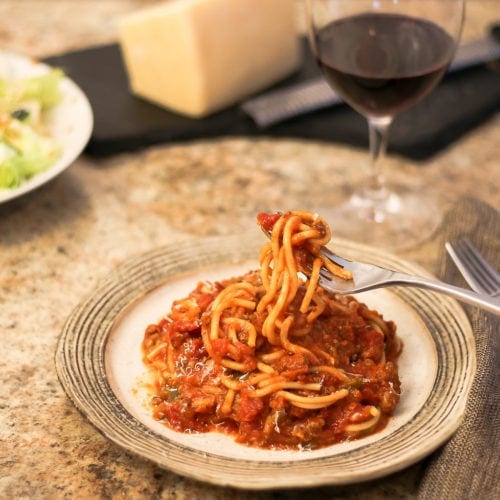
- Ninja Foodi Spaghetti Recipe
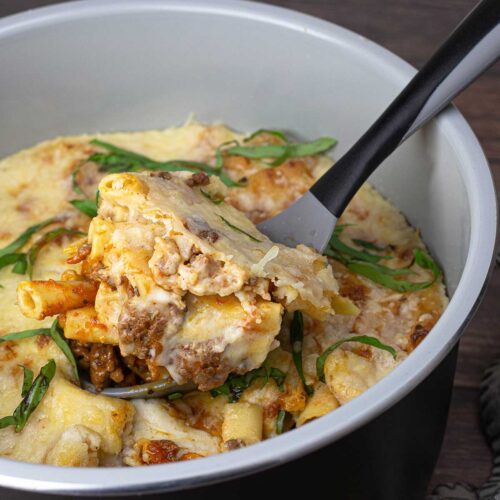
- Ninja Foodi Baked Ziti
- Cheesy Shrimp and Grits in the Ninja Foodi or Instant Pot
- Easy Shrimp Scampi in the Ninja Foodi
- Easy Gumbo Recipe in the Ninja Foodi / Pressure Cooker
- One-Pot Sausage Peppers & Pasta ~ Pressure Cooker Recipe


Beef Braciole Pressure Cooker Recipe
Equipment
- Pressure Cooker
Ingredients
Tomato Sauce
- 15 ounces tomato sauce canned
- 1 teaspoon fine grind sea salt or kosher salt
- 1 teaspoon garlic powder
- 1 teaspoon onion powder
- 1 teaspoon white sugar optional
- 1 teaspoon dried basil
- 1 teaspoon Italian seasoning
- ½ teaspoon black pepper
- ¼-½ teaspoon red pepper flakes optional
Filling Ingredients
- 2 ounces parmesan cheese shredded
- ½ cup golden raisins
- ¾ cup plain breadcrumbs
- 3 cloves garlic, minced about 1 teaspoon
- ½ teaspoon fine grind sea salt or kosher salt
- ½ teaspoon dried basil
- ¼ teaspoon black pepper
Beef Braciole
- 1½ pounds thinly sliced beef slices (look for beef prepared for milanesa)
- 1½ teaspoons fine grind sea salt or kosher salt
- 1 teaspoon black pepper
- 2 Tablespoons olive oil
- ¾ cup beef broth
Garnishes
- fresh parsley or basil
- freshly grated parmesan cheese
Would you like to save this recipe?
Instructions
Tomato Sauce
- In a small bowl, mix together the canned tomato sauce and the spices until thoroughly combined. Set aside for use later.15 ounces tomato sauce, 1 teaspoon fine grind sea salt, 1 teaspoon garlic powder, 1 teaspoon onion powder, 1 teaspoon white sugar, 1 teaspoon dried basil, 1 teaspoon Italian seasoning, ½ teaspoon black pepper, ¼-½ teaspoon red pepper flakes
Filling
- In a medium size bowl, combine the filling ingredients and mix together. Set aside for use later.2 ounces parmesan cheese, ½ cup golden raisins, ¾ cup plain breadcrumbs, 3 cloves garlic, minced, ½ teaspoon fine grind sea salt, ½ teaspoon dried basil, ¼ teaspoon black pepper
Beef Braciole Instructions
- Cut the kitchen twine into 24 strings, each being about 10" long.
- Mix the salt and pepper together and season each side of the beef slices with salt and pepper.1½ pounds thinly sliced beef slices, 1½ teaspoons fine grind sea salt, 1 teaspoon black pepper
- Spread about 3 Tablespoons of the filling along the slice of beef. Leave about ½" around all sides not covered with filling. Starting at the wider end, roll the slice of beef into a tight roll and secure in the middle and on each end with the twine. Repeat for each slice of beef.
- Turn the Ninja Foodi or Instant on high sear/sauté and let the pot heat up for about 5 minutes. Add in 2 Tablespoons of olive oil and let heat up for 2-3 minutes.2 Tablespoons olive oil
- Place the beef rolls in a single layer in the pot and brown each side for 2-3 minutes.
- Deglaze the pot with the beef broth and scrape the browned bits off of the bottom of the pot.¾ cup beef broth
- Pour the seasoned tomato sauce over top. DO NOT STIR.
- Close the pressure lid and make sure the valve is sealed. Set the pressure to high for 5 minutes. When the time is up, do a full natural release. This means, do nothing until the pin drops and the pot has depressurized. This takes about 12 minutes.
- Open the lid and roll each of the beef rolls in the sauce. Place the beef rolls on your cutting board or a plate to remove the twine or toothpicks.
- Place the beef rolls onto your serving platter. Spoon over the tomato sauce. Garnish with fresh parsley or basil and grated parmesan cheese if desired. Serve & Enjoy!fresh parsley or basil, freshly grated parmesan cheese
Nutrition
About the Recipe Author, Louise Long
Louise is a full-time recipe creator and food blogger @ The Salted Pepper. She has over 30 years of experience with cooking and recipe development. She owned a restaurant for several years and was a full-time RN until retiring to blog full-time.

She published her first cookbook in the Fall of 2018 and is very interested in writing several more.
Louise is also the creator of an online Ninja Foodi Pressure Cooking Course with over 100 instructional step-by-step videos. People absolutely rave about the course and all the value they have received from it.
Louise has several very active Facebook groups that help people with the basics of cooking and learning more about the appliances they love.
Ninja Foodi Pressure Cooker & Air Crisper 101
Ninja Woodfire Outdoor Grill & Smoker
Louise is also a YouTube creator and you can find most of her recipes in video format on The Salted Pepper YouTube channel.
She is very responsive to messages and eager to help in any way she can. Get more Information about Louise & contact information
I WOULD LOVE TO SEE WHAT YOU ARE COOKING UP IN YOUR KITCHEN! TAG ME @THESALTEDPEPPER ON YOUR FAVORITE SOCIAL MEDIA PLATFORM WHEN YOU MAKE A DISH!
BE SURE TO FOLLOW THE SALTED PEPPER RIGHT HERE ⇓⇓⇓⇓⇓
Dawnmarie Dickinson says
I gotta tell you I have been eating Braciole my whole life and it makes me a happy girl! But eating it made in my Foodi makes me a VERY happy girl!,, I did add a couple of things to the recipe, such ass fresh parsley and pine nuts. 🤤
I have to tell you I get up every Sunday morning grab a cup of coffee take the remote from my husband and tune in to your show! I just love trying your recipes. Thank for all the time you put into showing us how to get the most out of our foodies.
Louise says
Thank you so much! Looking back, I really should have put in fresh parsley. I bet that makes it even better! I didn't have any when I tested the recipe and figured many people would be in the same boat and only have dry parsley, so I kept it that way. Once I convince myself to pay the price for pine nuts, I am going to add those too! I'm thrilled that you are enjoying the recipe videos!
Dee Landree says
I love to watch you cook and it helps me with my Ninja foodi. You make it look so easy. I tried to print this recipe but it didn't work. I will come back later. Thanks for what you do.
Louise says
See if refreshing your browser works.
Ryan says
Thank you, Louise, for checking off one of my bucket list “I need to cook” menu items. For years, I’ve wanted to make braciole, yet I was intimidated by the steps and messing up the beef rolls. Thanks to your photos, video, and detailed instructions, I was able to make this incredible recipe that was a hit for the family and guests. Without having every step explained so clearly, I’d still have braciole on my list. So simple to make, also. Thanks again.
Louise says
I'm so thrilled to hear this! I'm glad everyone enjoyed it!