
Pressure cooking chickpeas (aka garbanzo beans) from dry is the best way to control the texture and, of course, the flavor. While not as quick as opening up a can of chickpeas, it is a very easy process and the results are so worth it! I have found that it is especially beneficial to pressure cook dried chickpeas when you want to make Air Fryer Chickpeas. The results are amazingly different!
Would you like to save this recipe?
Any electric pressure cooker can be used for this recipe and the timing will be the same as long as you are using a 6-8 quart pressure cooker. You can also cook your dried chickpeas on the stove, but that usually requires soaking them in water prior to boiling and it's a lot more hands on. If you have a pressure cooker, I highly recommend using it for dried chickpeas and other dried beans. It works great! I used the Ninja Foodi pressure cooker & air crisper in this recipe, but you can use any Instant Pot pressure cooker or another brand of electric pressure cooker.
Frequently Asked Questions
Nope! In my opinion, there isn't any benefit to soaking before pressure cooking. You can use the soak method and your PC time will be reduced, but the hassle is simply not worth it to me, so I always use unsoaked chickpeas.
Once cooked, they will last 4-5 days in the refrigerator, as long as the other ingredients you put with them also last that long. Make sure to store them in an airtight container. You can also freeze them for longer storage. I recommend freezing them in the cooking water or liquid for the best results. Make sure they are cooled completely before putting into your freezer bag or other freezer container.
Yes, you can. I only used 1 cup of dried chickpeas, which resulted in about 3 cups of cooked chickpeas. The amount of chickpeas you can cook at once will depend on the size of your pressure cooker.
Make sure, no matter which size you have, that you don't go over the halfway way mark with your chickpeas and water. Chickpeas will at least double and usually triple in volume as they absorb the water during the cooking process, so you want to make sure you have enough room in your pressure cooker for the increased volume.
If you wanted to cook 2 cups of chickpeas with 4-6 cups of water, you can decrease your pressure cooking time by about 2 minutes. Since it will take longer for the pot to come to pressure (which is cook time), shaving off a few minutes will help to avoid overcooking them. This is not necessary if you want really soft chickpeas for hummus or mashing.
Timing for Pressure Cooking Chickpeas
I know you don't want to hear this, but it depends. One of the most skipped over discussions in recipes is desired result and it most certainly comes into play here in a big way. Most failed recipes are a result of not thinking first about desired result and this is a huge factor in choosing a cooking method, cook times, and cooking temperatures. You don't have to worry about that as far as chickpeas go, I've already done all the testing and I can tell you exactly how long to pressure cook your chickpeas for to get the result you want.
The first question to ask yourself is, "What am using the cooked chickpeas for?" One common use for chickpeas is to make homemade hummus and for that you would want really soft chickpeas all the way through. Another use for pressure cooked chickpeas is to add them to salads. For this you would want a medium to firm chickpea. You may just want to make homemade chickpeas for a hot dinner side dish and, if that is the case, then you want to add different seasonings during the pressure cooking time and cook them so they are soft, but not mushy.
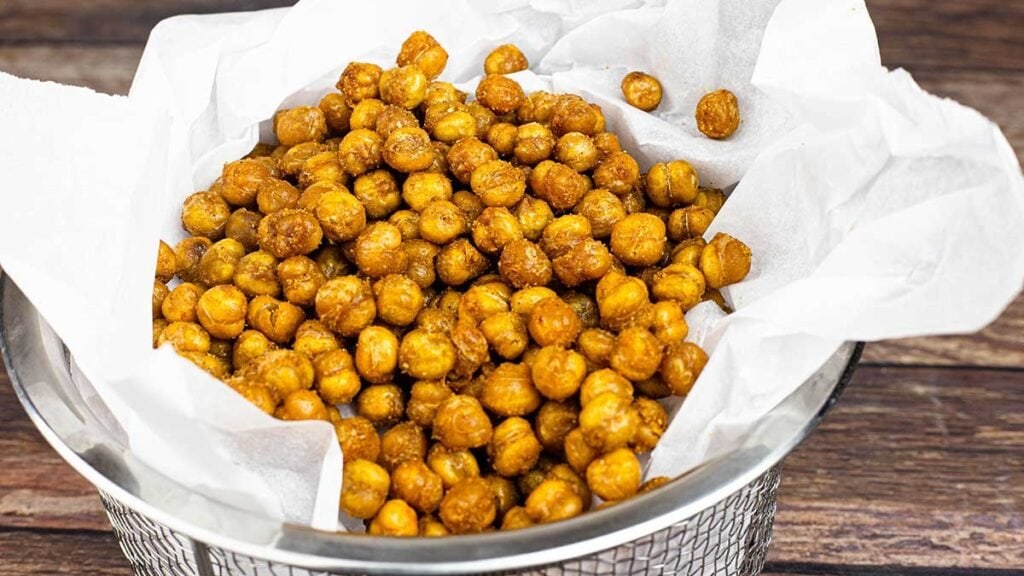
If you want to make Air Fryer Chickpeas, you definitely want to start with dry chickpeas instead of canned and cook them to firm.
After pressure cooking about 12 cups of dried chickpeas, I think I have a pretty good handle on the amount of liquid and cooking times for all of these different results. Each test was done with 1 cup of dried chickpeas and between 2-3 cups of cooking water/liquid.
Soft Chickpeas
Soft Chickpeas are the texture of canned green peas. While they hold their shape, they mash very easily and have a smooth consistency all the way through. This timing is perfect when you want to make hummus or mashed chickpeas. Although a food processor works great to pulverize cooked chickpeas into a mash or hummus, for a really smooth texture it's important that they are very soft to begin with.
Add 1 cup of dry chickpeas and 3 cups of water or cooking liquid (suggestions below) to the inner pot of the Ninja Foodi or Instant Pot. Put the pressure lid on and turn the valve to seal. Cook on high pressure for 45 minutes. When the time is up, allow the pot to naturally release for 10 minutes and then manually release the remaining pressure. You will have a good amount of liquid left, so you can either use some of it for mashing or drain it off.
Medium Chickpeas
These would be most like canned chickpeas, but they have just a bit more texture. They hold their shape, but are soft enough blend or mash. With medium-cooked chickpeas, you may still have a bit of texture, they are not as smooth when mashed like the soft chickpeas are. This timing is perfect when you want to serve cooked chickpeas as a side dish. This is my favorite cooking temperature for perfect chickpeas for a side dish or a cold salad. Add some roasted garlic, butter, and some shredded parmesan and you will be in heaven!
Add 1 cup of dry chickpeas to 2 cups of water or cooking liquid (suggestions below) to the inner pot of the Ninja Foodi or Instant Pot. Cook on high pressure for 35 minutes with a full natural pressure release (this takes about 12 minutes). There will be a little liquid left that can be drained or used in your side dish.
Firm Chickpeas
These firmer beans are slightly undercooked and perfect for making Crunchy Air Fryer Chickpeas or to use in dishes that require additional cooking. The texture is quite firm and, while they are edible as a side dish, they will not mash well.
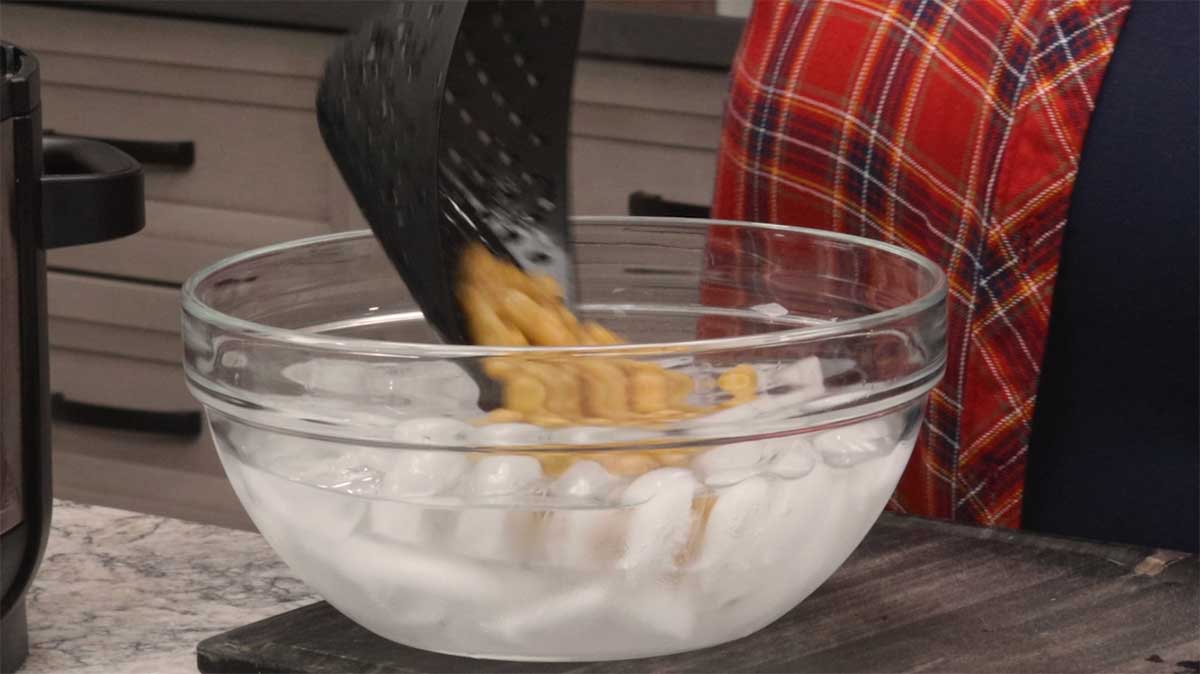
1 cup dry chickpeas to 2 cups water or cooking liquid, PC for 30 minutes with a full natural release of pressure, then scoop out your chickpeas and plunge them into a large bowl of ice cold water to stop the cooking process.
Liquid Suggestions for Pressure Cooking Chickpeas
- Plain water: This is the best choice if you want neutral flavored chickpeas that you can add to various different recipes.
- Vegetable Broth or Stock: Also a great choice to add a little boost of flavor, while staying neutral enough to use in any recipes.
- Chicken Broth or Stock: This is my favorite cooking liquid when pressure cooking chickpeas for a side dish. Be careful not to add additional salt to the liquid, as it can cause the chickpeas to be too salty, in my experience. I recommend seasoning with salt after the cooking process.
- Beef Broth or Stock: I have not used beef broth before for chickpeas and I assume that they will turn a slightly darker color, but this would be a great choice if you wanted to use the chickpeas in a dish that calls for ground beef or mushrooms. I think the beefy flavor will add a nice addition to umami dishes.
- White Wine: While I would probably not use all white wine, using a ¼ cup or so along with water or chicken stock would add a nice flavor.
- Lemon Juice: Just like the white wine, I would not use all lemon juice, but a Tablespoon or two would be fine. Lemon juice, white wine, and chicken stock would be a great combination for pressure cooking chickpeas for a side dish.
- Apple Juice: This is a great choice if you are using your chickpeas in a cold salad or just want to add a little fruit flavor.
- Beer: Another option and one that I would definitely try if I was to make hot and spicy air fryer chickpeas with the pressure cooked chickpeas.
- Any Thin Liquid: You can get as creative as you want with the liquid, but make sure it is thin. Anything that is slightly thick, like tomato sauce or coconut milk may impede the pressure cooking process as the liquid won't be as readily absorbed as a thinner liquid.
How to Pressure Cook Chickpeas
Prep
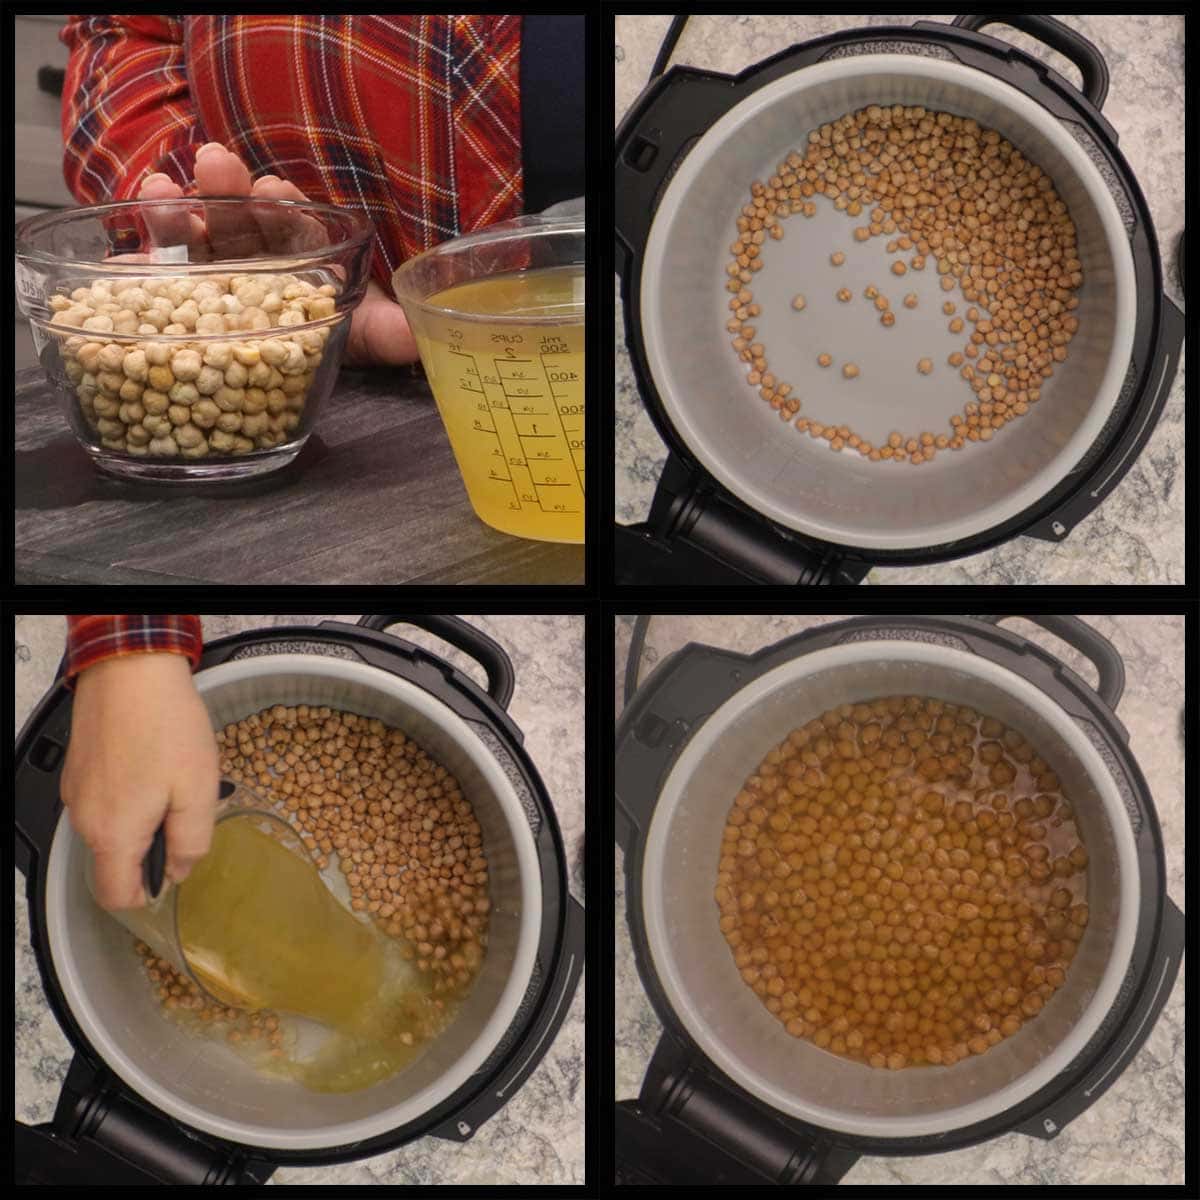
There isn't any! Just grab your dried chickpeas and some liquid and you are all set!
Pressure Cooking
Add the dry chickpeas to the inner pot with either 2 or 3 cups of thin liquid (see the section above).
Put the pressure lid on and turn the valve to seal. Pressure cook on high for the desired time. The pressure release also varies. Here is a quick recap.
Firm Chickpeas: pressure cook with 2 cups of liquid for 30 minutes with a full natural release and plunge into ice water after removing the pressure lid.
Medium Chickpeas: pressure cook with 2 cups of liquid for 35 minutes with a full natural release.
Soft Chickpeas: pressure cook with 3 cups of liquid for 45 minutes with a 10 minute natural release, then manually release the remaining pressure.
When the time is up and the pin has dropped, remove the lid. Use your pressure cooked chickpeas in all your favorite recipes or place in the refrigerator for up to 5 days.
Serving
Time to get creative! Think of the chickpeas as a blank canvas on which you paint the flavor picture. You can keep it simple with just a touch of salt or add all your favorite salad ingredients and make a chickpea salad.
Below are a few ideas!
Quick and Easy Recipes for Pressure Cooked Chickpeas
Now that you've got your chickpeas all cooked up, what should you make with them? There are so many things you can do with chickpeas, they really are a blank slate from which you can create all kinds of traditional and nontraditional dishes.
If you are looking for an easy hummus recipe, try one from The Mediterranean Kitchen. She recommends cooking your own chickpeas and you will want to use the timing for soft chickpeas.
As far as side dishes go, here are some of my quick & easy favorites! You will want to use the timing for medium chickpeas.
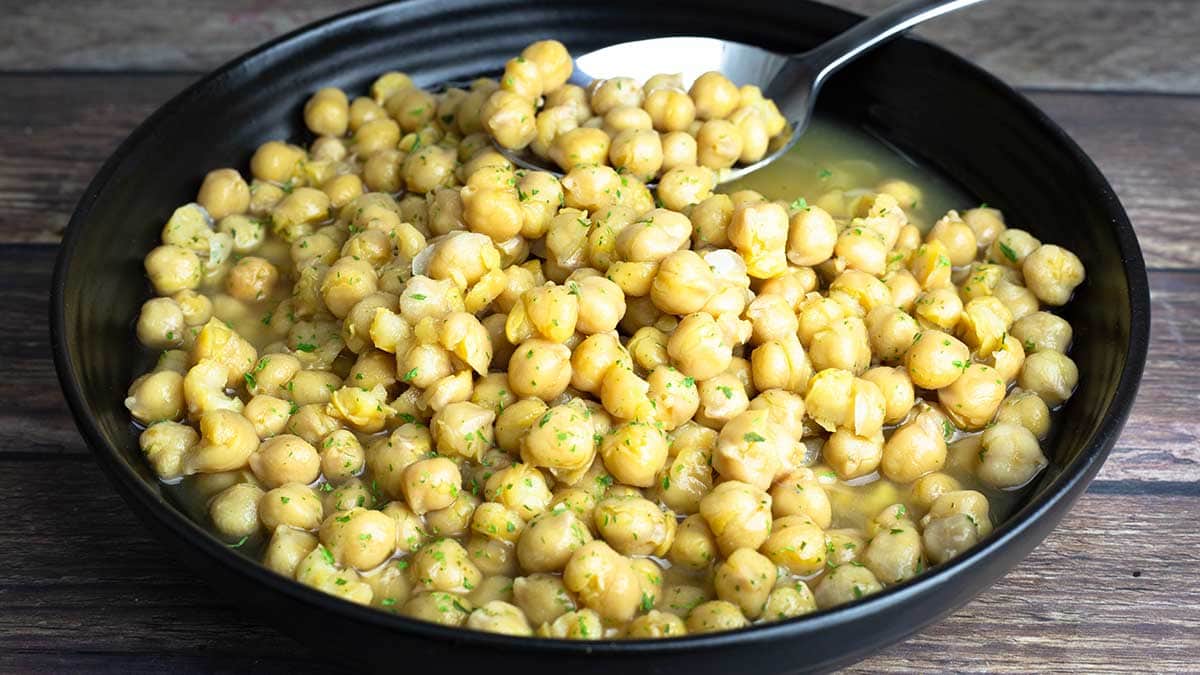
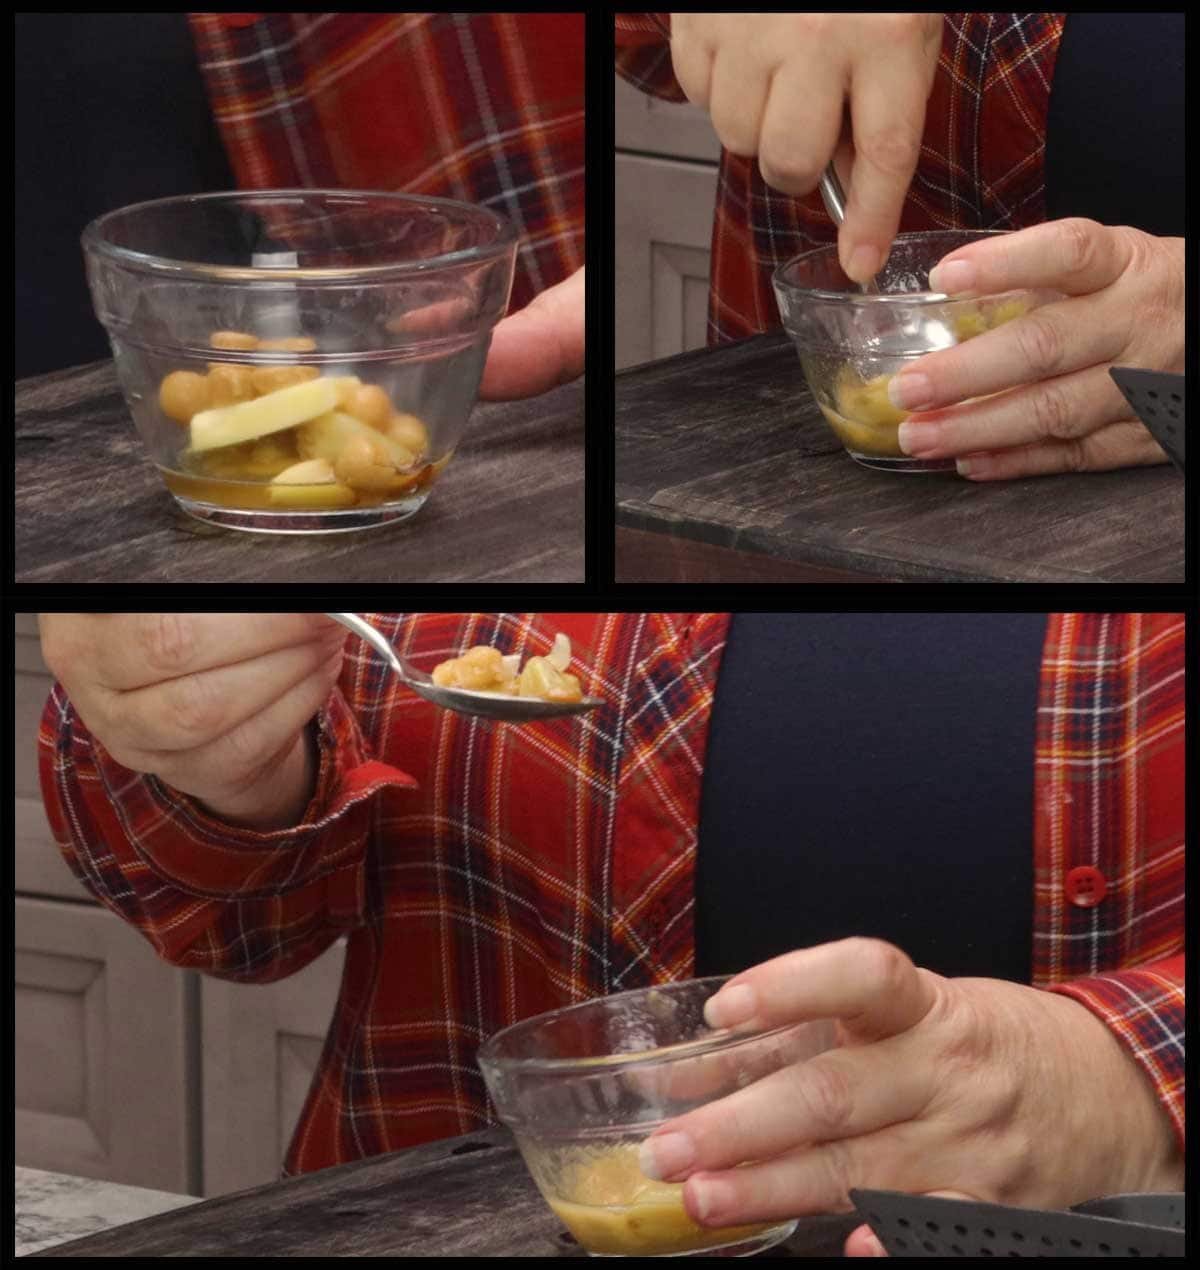
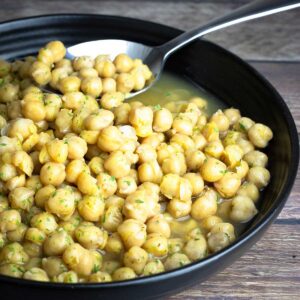
Garlic Butter Chickpeas: Cook the chickpeas in chicken stock and leave them in the liquid (you can strain off some if like) and add 1 bulb of roasted garlic and 4 Tablespoons of salted butter. Mash the garlic into a paste and add to the chickpeas. I like to mash some of the chickpeas and leave some whole. Stir and then season with salt and pepper to taste. Add some fresh or dried parsley for a boost of color.
The picture below is me making a single serving of garlic butter chickpeas.
Mexican Style Chickpeas: I tried to do some research to see if chickpeas are used in traditional Mexican cooking, but I didn't see much about it. I'm guessing they aren't used often, if at all, however, you can certainly create a lovely and flavorful side dish by adding in some simple ingredients that are used in more traditional Mexican dishes. I would cook the chickpeas in chicken broth/stock or a combination of beer and water and season the water with a sliced chili pepper (any kind you like) or a pinch of chipotle powder, along with 1 teaspoon kosher or fine grind sea salt, 1 teaspoon cumin, and 1 teaspoon of chili powder. Use the cooking time for medium chickpeas. Drain most of the liquid from the chickpeas. Zest and juice 1 small lime and add to the chickpeas. Add a handful of chopped cilantro and 2-4 Tablespoons of crumbled Cotija cheese. Stir and season to taste with salt or any other seasonings you like.
Italian Garbanzo Bean Salad: Cook the chickpeas in water or other liquid of choice using the cooking time for medium cooked chickpeas. When done, strain the liquid and put the chickpeas in a bowl of ice water to stop the cooking process. Remove from the cold water and drain as much water as possible. You can add all kinds of different ingredients based on what you like. I like to add diced cucumber, diced roma tomatoes, thinly sliced red onion, small mozzarella pearls, and lightly dress the salad with your favorite Italian vinaigrette.
There is so much you can do with pressure cooked chickpeas, so get creative and add your own flare! Be sure to let me know what you make!
Pressure Cooking Chickpeas (Garbanzo Beans)
Equipment
- Electric Pressure Cooker
Ingredients
Pressure Cooker Chickpeas
- 1 cup dried chickpeas
- 2-3 cups water or other thin liquid
Garlic Butter Chickpeas
- 3 cups pressure cooked chickpeas to medium texture
- 2-4 Tablespoons salted or unsalted butter
- 1 bulb roasted garlic
- 1 teaspoon dried parsley or 1 Tablespoon fresh parsley
- salt and pepper to taste
Would you like to save this recipe?
Instructions
Pressure Cooker Chickpeas
- Place the dried chickpeas with 2-3 cups of liquid (see notes below) in the inner pot. Put the pressure lid on and turn the valve to seal. Set on high pressure. Determine the cooking time and pressure release time based on how you want them cooked (see notes below).
- When the time is up, remove the lid. Use the chickpeas in your favorite recipes or refrigerate up to 5 days.
Garlic Butter Chickpeas (as pictured in the recipe)
- Once the chickpeas are cooked to medium texture remove them from the inner pot to a serving bowl. You can drain off some of the liquid, but I recommend leaving at least ¼ cup.
- Mash the roasted garlic and add to the chickpeas along with the butter. Stir and break up some of the chickpeas with a fork. Season with salt and pepper to taste. Add the parsley, stir and serve.
Notes
Pressure Cooking Times
Best for making mashed chickpeas or hummus Soft Chickpeas: Pressure cook with 3 cups of thin liquid for 45 minutes with a 10 minute natural release. Best for side dishes and salads Medium Chickpeas: Pressure cook with 2 cups of thin liquid for 35 minutes with a full natural release. Best for making Air Fryer Chickpeas Firm Chickpeas: Pressure cook with 2 cups of thin liquid for 30 minutes with a full natural release.Nutrition
About the Recipe Author, Louise Long
Louise is a full-time recipe creator and food blogger @ The Salted Pepper. She has over 30 years of experience with cooking and recipe development. She owned a restaurant for several years and was a full-time RN until retiring to blog full-time.

She published her first cookbook in the Fall of 2018 and is very interested in writing several more.
Louise is also the creator of an online Ninja Foodi Pressure Cooking Course with over 100 instructional step-by-step videos. People absolutely rave about the course and all the value they have received from it.
Louise has several very active Facebook groups that help people with the basics of cooking and learning more about the appliances they love.
Ninja Foodi Pressure Cooker & Air Crisper 101
Ninja Woodfire Outdoor Grill & Smoker
Louise is also a YouTube creator and you can find most of her recipes in video format on The Salted Pepper YouTube channel.
She is very responsive to messages and eager to help in any way she can. Get more Information about Louise & contact information
I WOULD LOVE TO SEE WHAT YOU ARE COOKING UP IN YOUR KITCHEN! TAG ME @THESALTEDPEPPER ON YOUR FAVORITE SOCIAL MEDIA PLATFORM WHEN YOU MAKE A DISH!
BE SURE TO FOLLOW THE SALTED PEPPER RIGHT HERE ⇓⇓⇓⇓⇓
Elaine Harden says
We love chickpeas and had seasoned ones but couldn’t find a recipe yours sounds absolutely delicious.I buy dried ones and was cooking on stove or in crockpot but dug out my pressure cooker can’t wait to try ,we add to salad’s couscous pasta .thxs for the recipes.
Louise says
I hope you enjoy the chickpeas!
Mike Watts says
Heads up to anyone using alcohol in their recipe. It won't cook off in a pressure cooker so any alcohol content will remain in the dish.