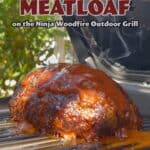

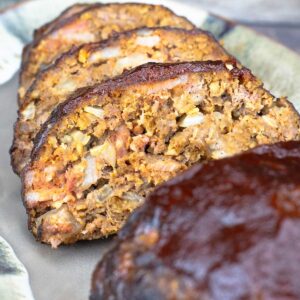
If you have never had a smoked meatloaf, you are in for a treat! The smoky flavor combined with the perfectly seasoned meat and the perfect BBQ glaze on top of the meatloaf is going to have your friends and family asking for more!
Would you like to save this recipe?
The meatloaf recipe is so simple to make and then you load it on the smoker and let it smoke away! You don't even need a loaf pan for this one!
Suggested Kitchen Tools for Smoked Meatloaf
- Electric or Pellet Smoker
- Mixing Bowl
- Basting Brush
- Serving Platter
- Sharp Knife
- Larger Turner (to remove the meatloaf from the smoker)
- Cutting Board
What is the Ninja Woodfire Grill & Smoker?
Ninja Kitchen broke into the outdoor grilling and smoker market with their new outdoor grill and it is quite the buzz. While there are some drawbacks compared to a traditional pellet smoker, it is a powerhouse and very easy to use. There are so many various functions, including the ability to cold smoke on the US models.
The Ninja Woodfire is an electric smoker that only uses the pellets for flavor and not as the heat source. This provides perfect temperature control when smoking foods. The only thing I miss from my old Rotisserie-style smoker is that perfect smoke ring! You'll be hard-pressed to find one on meats smoked in the Woodifre, but the convenience of this small and portable smoker is worth it!
For more information about the Woodfire and the Woodfire XL Outdoor Grills/Smokers, see my full comparison and review here: Ninja Woodfire Outdoor Grill & Smoker Comparison Guide
Ingredients & Substitutions
Ground Meat
I use a combination of ground beef and finely chopped bacon in this recipe, but any combination of meats that you like will work just fine as long as they contain enough fat. You don't want the ground meat to be too lean or it will dry out in the smoker.
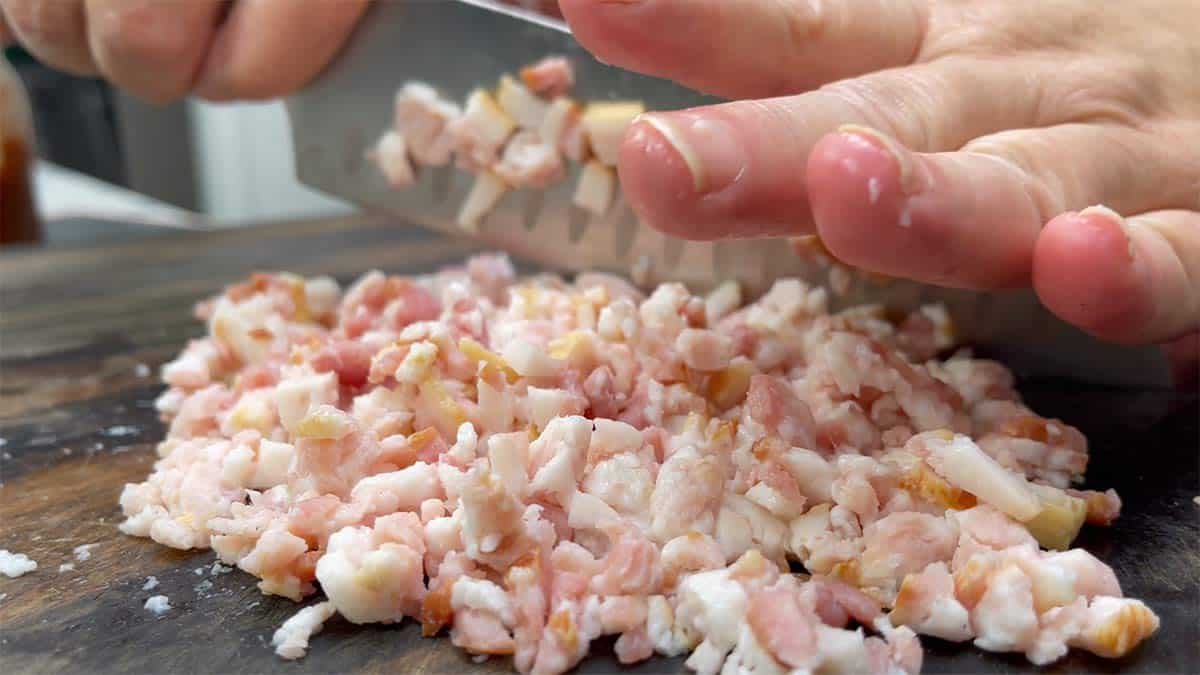
I recommend using thin bacon instead of thick-cut in this recipe. Both work fine, but the texture of the meatloaf is a little better with the thin cut bacon. Make sure to chop it as fine as possible.
The bacon adds a little more fat and of course flavor to the meatloaf, but you could also use a combination of 1 pound of ground beef and 4 ounces of ground pork, or Italian sausage would also work great!
I use 80/20 ground beef and that is the fat content that I think works best. You can use a fattier ratio and omit the bacon or a leaner ratio and increase the moisture in the meatloaf by adding in extra vegetables or a little extra liquid.
Many meatloaf mixes at the grocery store are a combination of ground beef, ground veal, and ground pork. This is absolutely fine to use in this recipe.
If you want to make your meatloaf with ground turkey or chicken, use this recipe for Turkey Burgers as a guide to making the meat mixture. You will also want to lower the heat to 200℉/95℃ so it cooks slowly enough to infuse the smoke flavor without overcooking or drying out.
Seasonings
In this recipe, I use my 10-minute BBQ sauce as well as my Beginners Luck BBQ rub that I used in my BBQ restaurant for pulled pork and ribs.
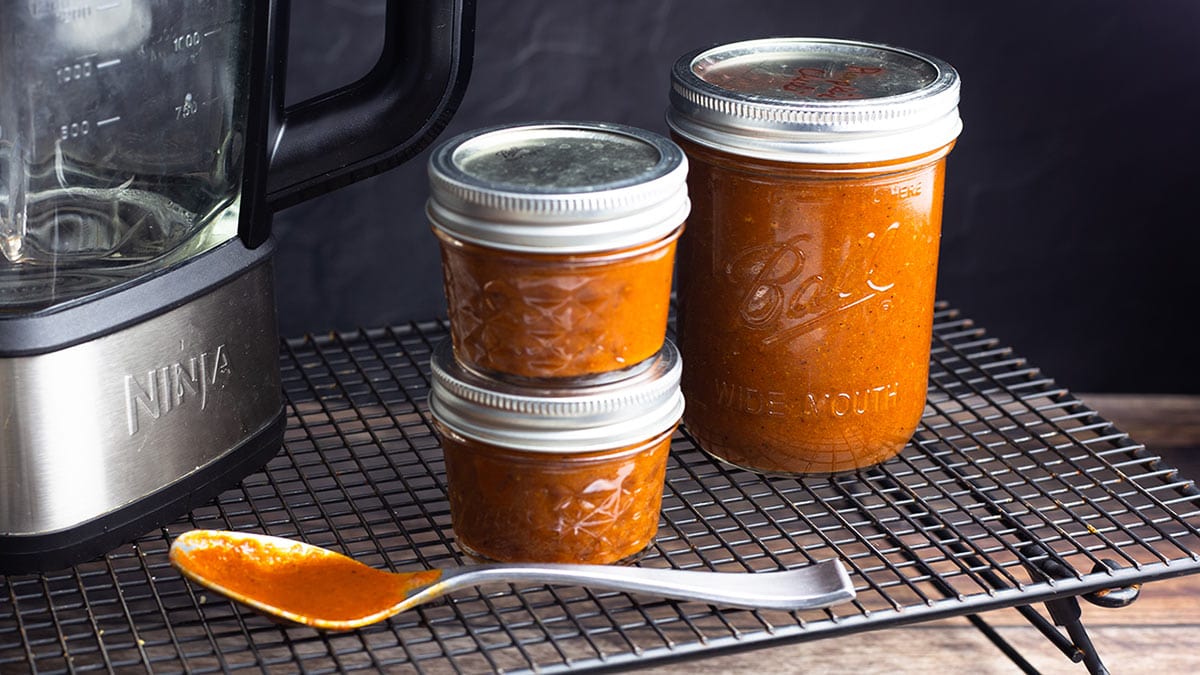
You can choose to use my ingredients (and I will provide the rub recipe in this article) or you can substitute with your favorite BBQ sauce and seasoning blend if desired.
You can also make the meatloaf based on your favorite meatloaf recipe and smoke it instead of baking it in the oven or air frying it.
Vegetables
I only use finely chopped onion in this recipe to give some extra flavor and moisture to the meatloaf, but you can add in whatever vegetables you like. Make sure they are diced small so they incorporate with the meat mixture.
I would not add more than 1 cup of diced vegetables or you may have issues with your meatloaf holding together.
Binders
Meatloaf usually has some binders like egg and bread crumbs to help hold it all together. These combine with the other ingredients and create a glue of sorts and keeps your meatloaf in a formed shape.
There are many variations you can use instead of the egg and bread crumbs. You can use milk and bread cubes, or oatmeal and an egg.
Crushed crackers are also another good choice instead of bread crumbs.
Beginners Luck BBQ Rub Recipe
Makes about a cup of rub
- ¼ cup white sugar
- 2 ½ Tablespoons onion powder
- 2 Tablespoons seasoned salt
- 2 Tablespoons smoked paprika (regular paprika is fine)
- 1 ½ tablespoon chili powder
- 1 tablespoon sea salt
- ½ tablespoon celery salt
If you can't find celery salt, you can omit it and add extra salt if needed.
- add in some cayenne pepper or chipotle powder for a little spicey heat. Start with ¼ teaspoon and adjust as desired.
Mix all the seasonings together in a small bowl. Store the leftover rub in an airtight container.
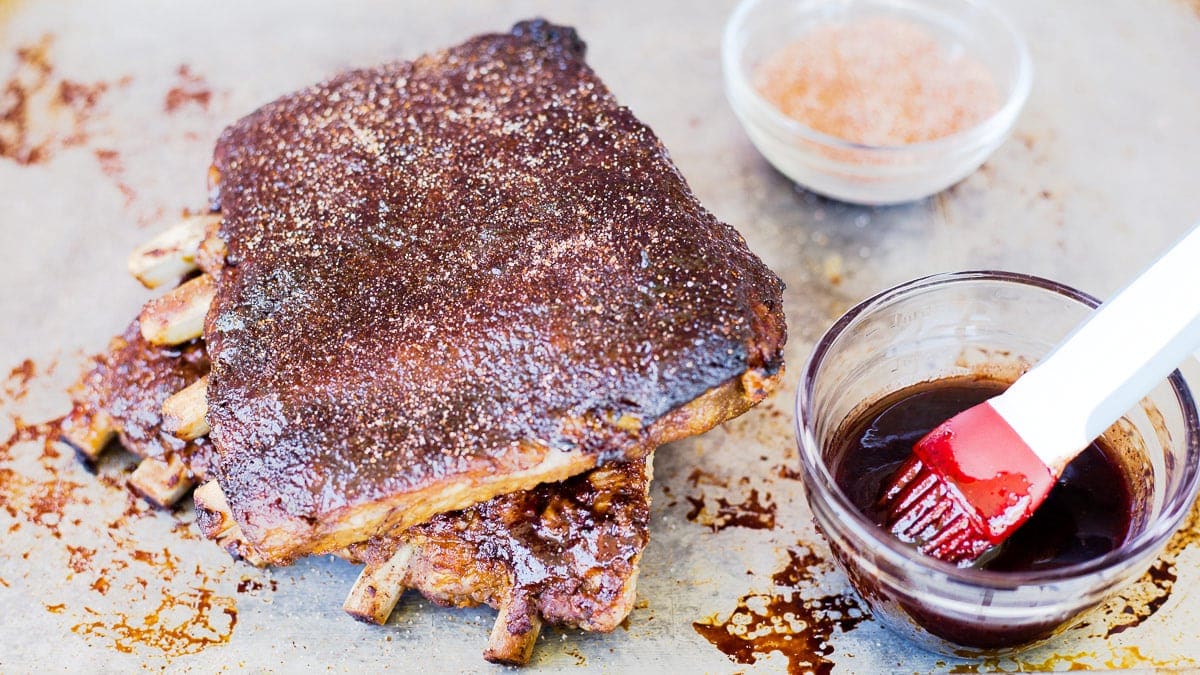
This rub recipe is incredible on Ribs and Pulled Pork! The raspberry glaze on the ribs is so good, I hope you try it!
How to Make Smoked Meatloaf on the Woodfire Grill/Smoker
This recipe can be made on any type of smoker that you have, but I tested the recipe in the Ninja Woodfire Grill using the smoking function and those are the instructions provided in this recipe.
If you use a different smoker, the meatloaf preparation is the same. Simply set up your smoker as you normally would. Because the Woodfire is a smaller smoker, it cooks faster than larger smokers like a Traeger, so I recommend increasing the smoker temperature by about 25 degrees and letting the meatloaf smoke for at least 75 minutes or until the internal temperature of the meatloaf reaches 165℉/74℃.
Mise En Place (Prep)
If you are using a smoker that takes a while to heat up and start the actual smoking process, get it set up first. The Ninja Woodfire will only take about 5 minutes before it's ready to start smoking, so I usually wait until after I make the meatloaf mixture before starting it.
Measure out all of your ingredients and grab a large bowl. Cut the bacon into a fine dice, the smaller the better. I try to aim for about ¼" in size. If the bacon is in bigger pieces, it doesn't render and cook as well in the meatloaf. You could also grind the bacon if desired.
Dice up the onion and any other vegetables you want to use into a fine dice no larger than ¼". You can also grate the onion if desired, just squeeze some of the moisture out before adding your meatloaf mix.

Make the Meatloaf Mixture
In a large mixing bowl combine ground beef with all the other meatloaf ingredients and mix well to combine. If you are using a different rub blend or another barbecue sauce, start out small with the measurements and after mixing them into the ground beef, follow my instructions for cooking a small amount of the mixture and adjust the seasonings from there.

I find using clean hands is the best way to make sure the meatloaf mix is evenly blended.

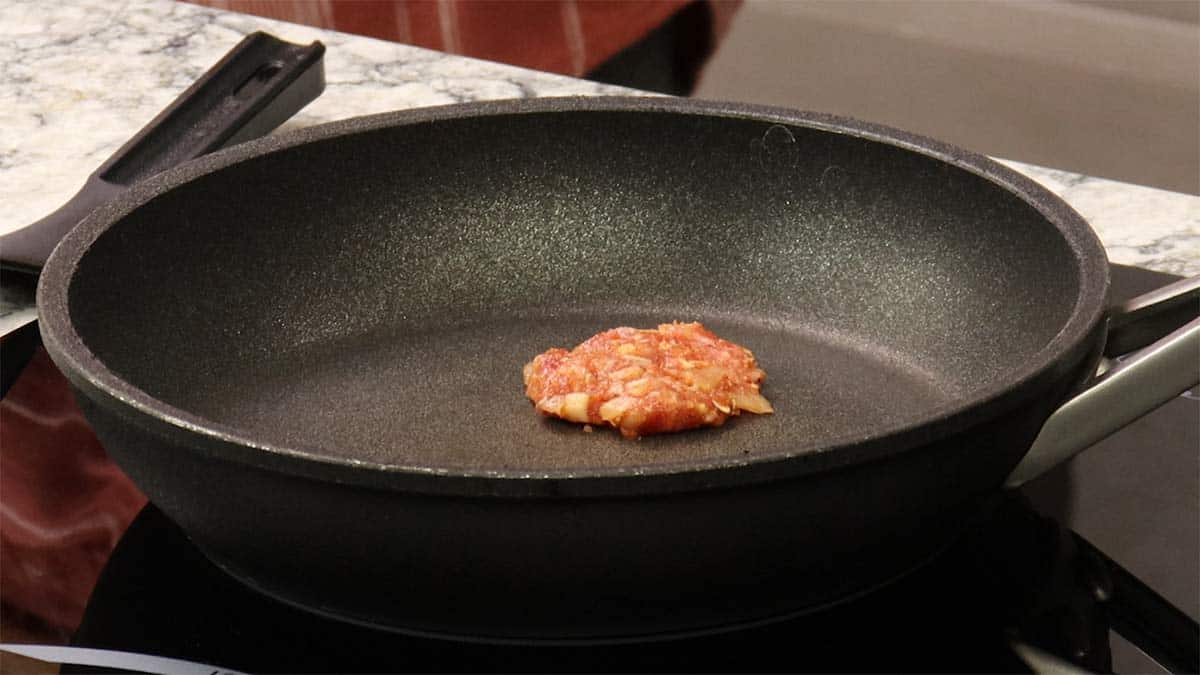
Although this is optional, I highly recommend tasting the mixture of ground beef and seasonings prior to forming the meatloaf and smoking it. I do that by heating a small frying pan on the stove and pinching off about a quarter-sized piece of the mixed meatloaf mixture, flattening it into a small disc, and cooking it until it's done. This takes less than 5 minutes and is completely worth it!
Once the sample of meatloaf mix is cooked, taste it and see if it tastes good to you. This is the time to adjust your seasonings as needed. There isn't a whole lot you can do if it's over-seasoned except add more ground beef, then another egg, and more bread crumbs. This is why I recommend starting out with less seasonings and add more as needed.
You can repeat the taste test several times and I recommend doing it as often as needed until you have the perfect balance of seasonings to suit your taste.
Prepare the Smoker
After I mix the meatloaf, I get the Woodfire Outdoor Grill set up for smoking. The ignition process only takes about 5 minutes, but it is fine to let some of the smoke burn off before the meatloaf is put on to smoke. So, if it takes you longer to form your meatloaf, it's no problem.
With the Woodfire, it is best to let the white smoke which can be acrid and leave a not so great flavor burn off when cooking burgers, meatloaf, and smaller proteins like chicken or fish.
With larger cuts of meat like brisket and pork shoulder this is not as big of a deal.
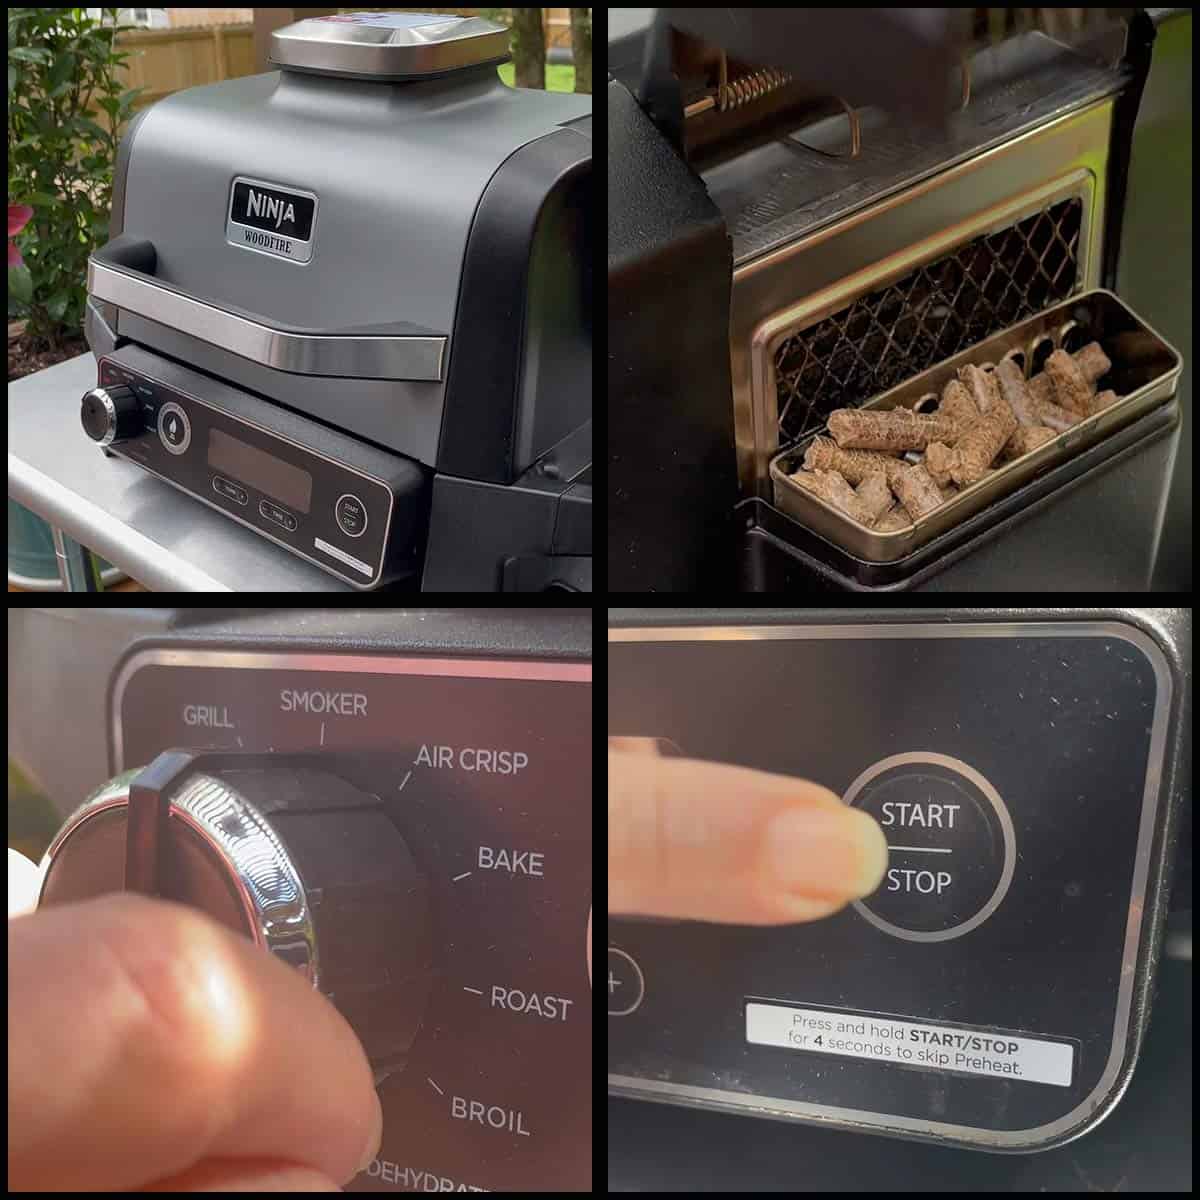
Setting up the Ninja Woodfire Outdoor Grill for Smoking
- Fill the hopper with ½ cup of pellets. I love using the (affiliate link)Apple Wood Pellets from Camp Chef. The apple pairs perfectly with the meatloaf and has a nice mild smoke flavor.
- Make sure the grill grate is in place.
- Close the Lid.
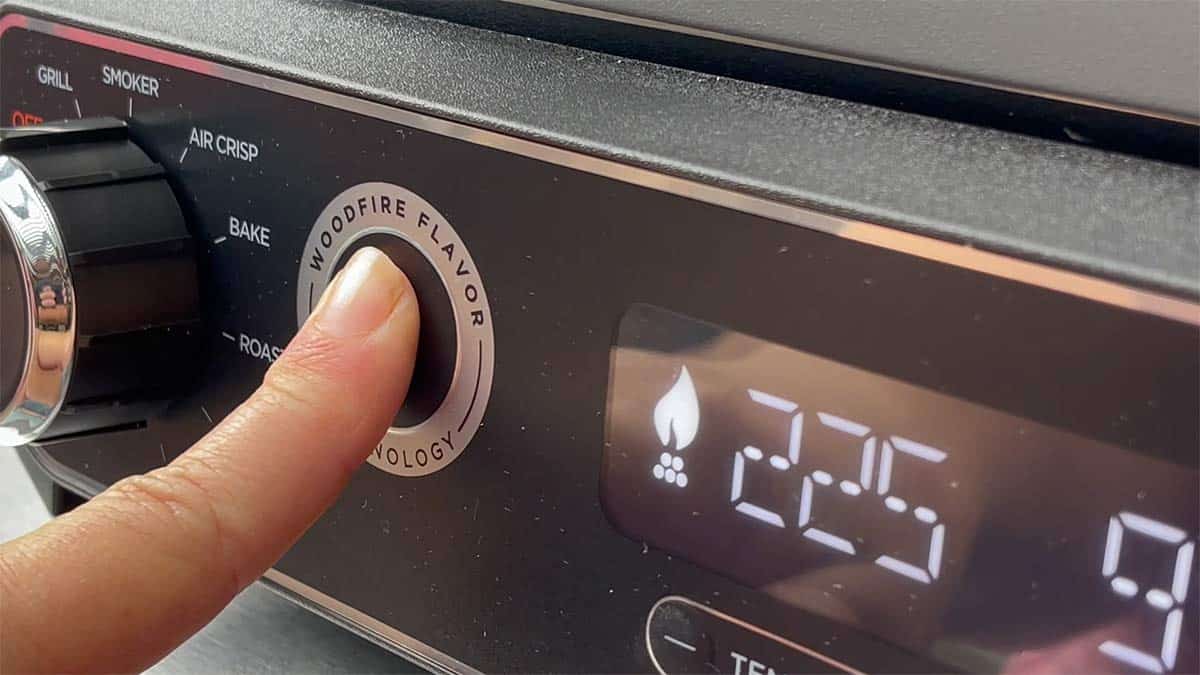
- Turn the dial to select the smoker function.
- Set the temperature 225℉/105℃.
- Set the time for 90 minutes.
- Press Start.
Form the Meatloaf
Perhaps the most important part of making meatloaf after making sure it is seasoned correctly is forming it! This is especially important when you aren't using a meatloaf pan and instead placing the formed meatloaf directly on the grate of the smoker.
Can you cook a meatloaf in a pan on the Woodfire Grill & Smoker? Yes, but if you want the smoke to really circulate around the meatloaf and penetrate the meat, then leave it out of the pan.
You want to pack the meat mixture together enough so it doesn't fall apart when cooking. I do this by smacking it and shaping it for several minutes on my cutting board until the ingredients are compressed together and I don't see any visible splits in the outside of the meatloaf.

Sometimes it is more helpful to see exactly how I form the meatloaf, so here is a quick video where I form my air fryer meatloaf and you would do the same for the smoked meatloaf.
Smoke the Meatloaf
Once the meatloaf is formed, place it on the grill grate and close the lid to the Woodfire. Adjust the time to 90 minutes if needed.
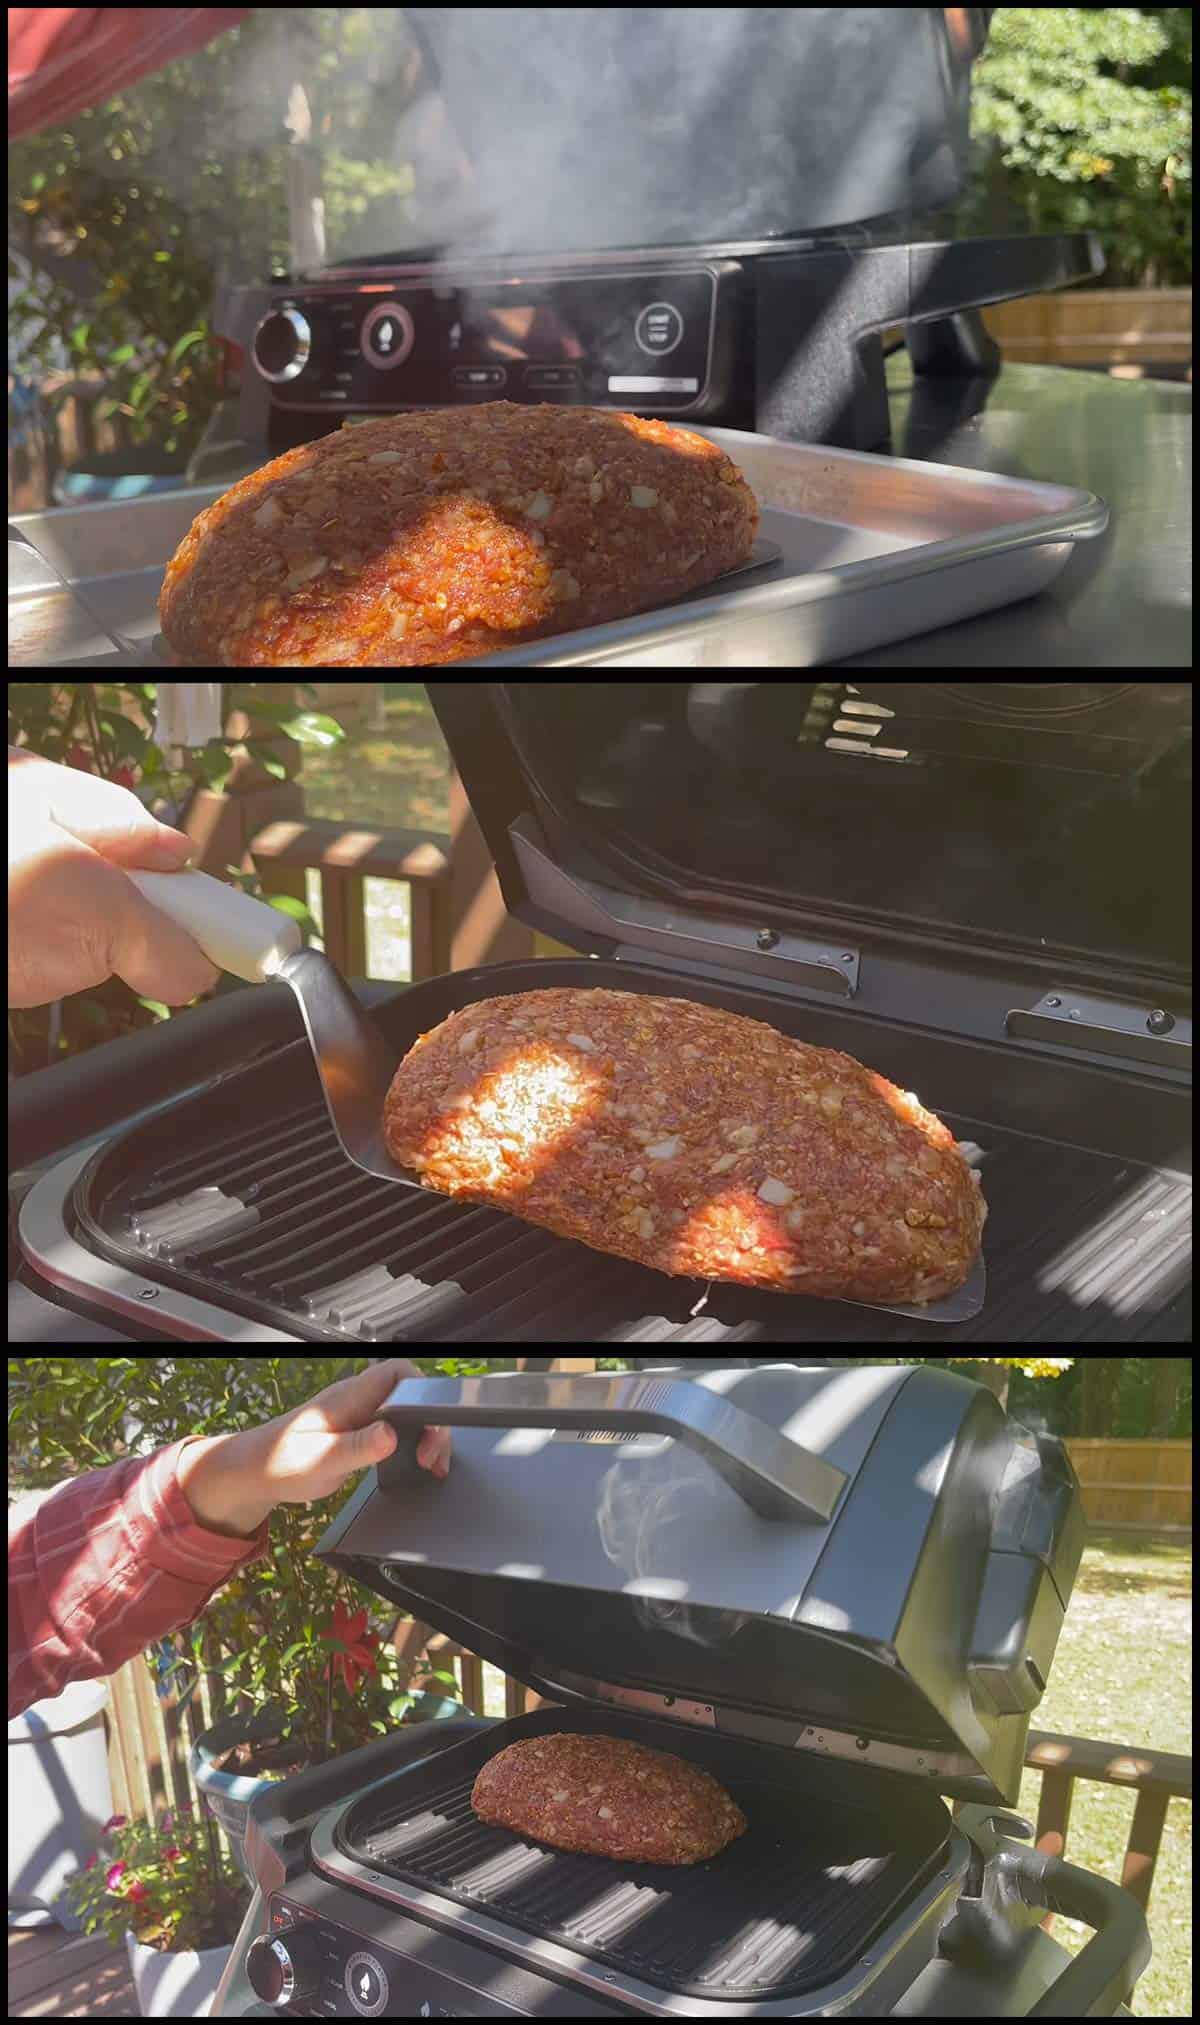
Leave the smoker alone and don't open the lid. You want to keep the lid closed until it's time to baste with bbq sauce so the smoke infuses its flavor into the meatloaf.
After about 30 minutes, check the hopper. If it is halfway full, add another ¼ cup of pellets to fill it back up. I found that using a total of ¾ cup of pellets was the perfect amount of smoke flavor.
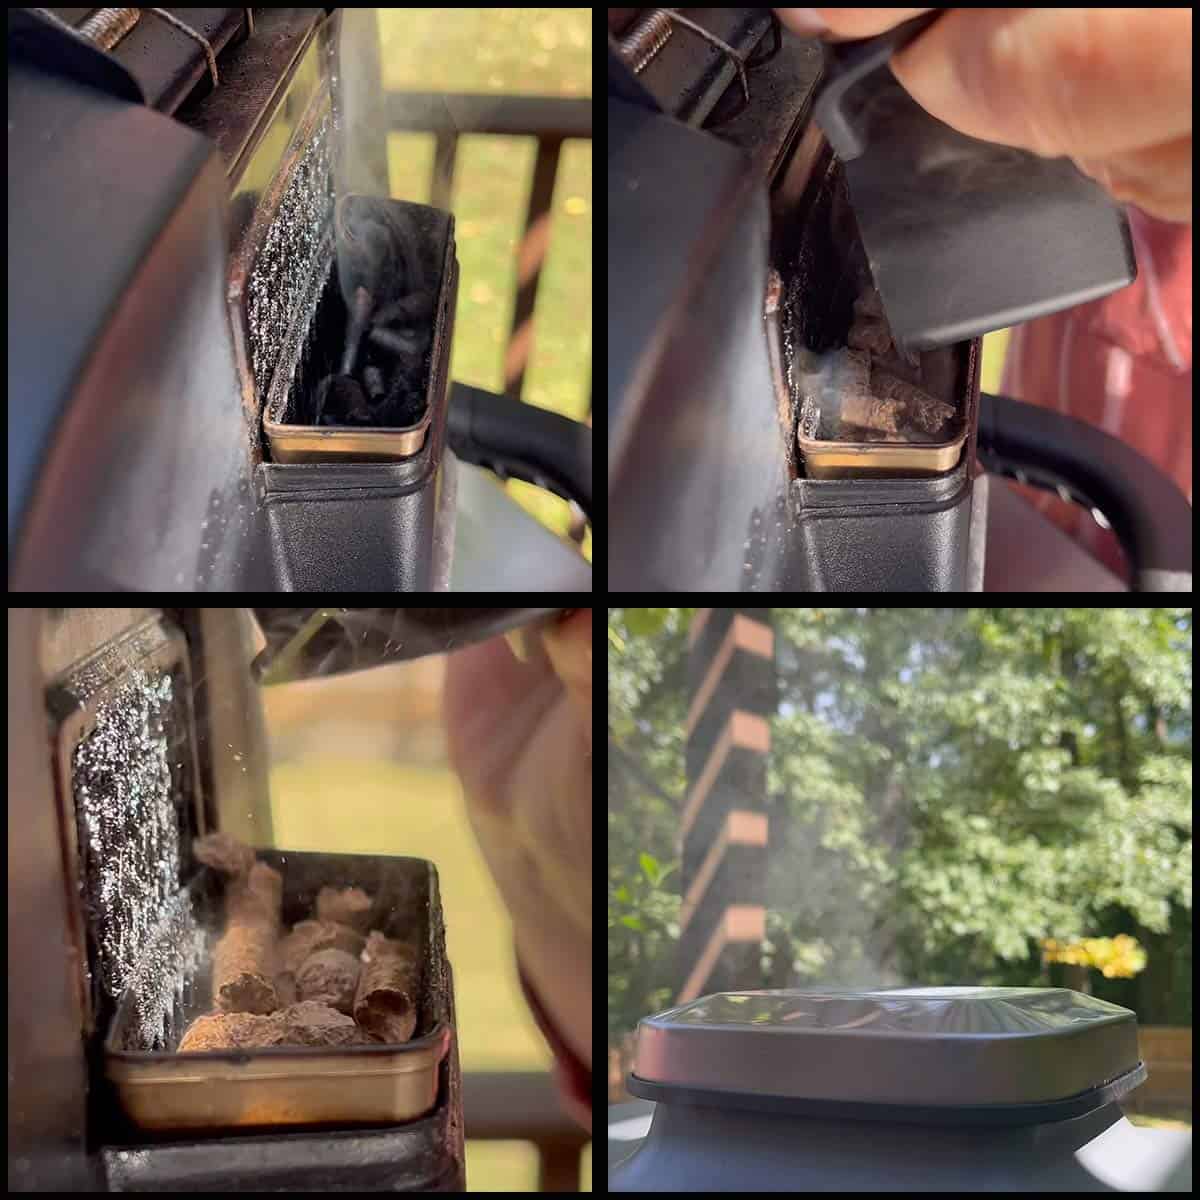
The pellets will ignite by the remaining burning pellets so you don't have to do anything else. If for some reason they have burned completely or are no longer smoking, fill the hopper box with pellets and then hit the ignite button on the front of the grill. It's the button that says "woodfire technology."
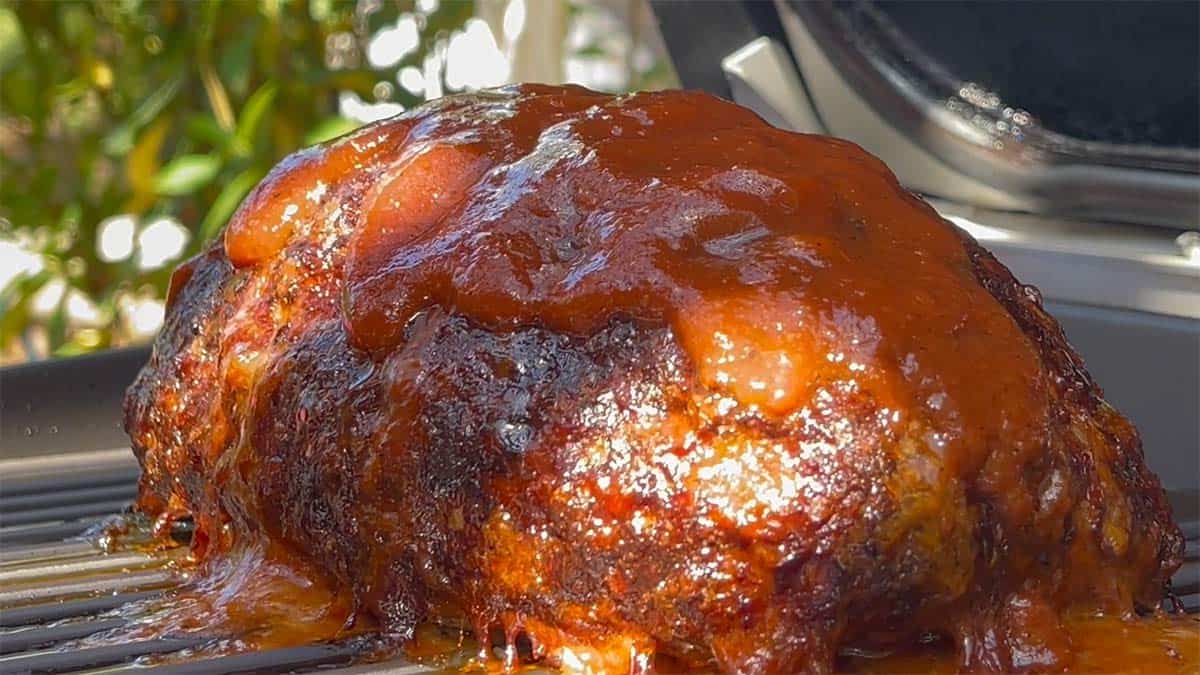
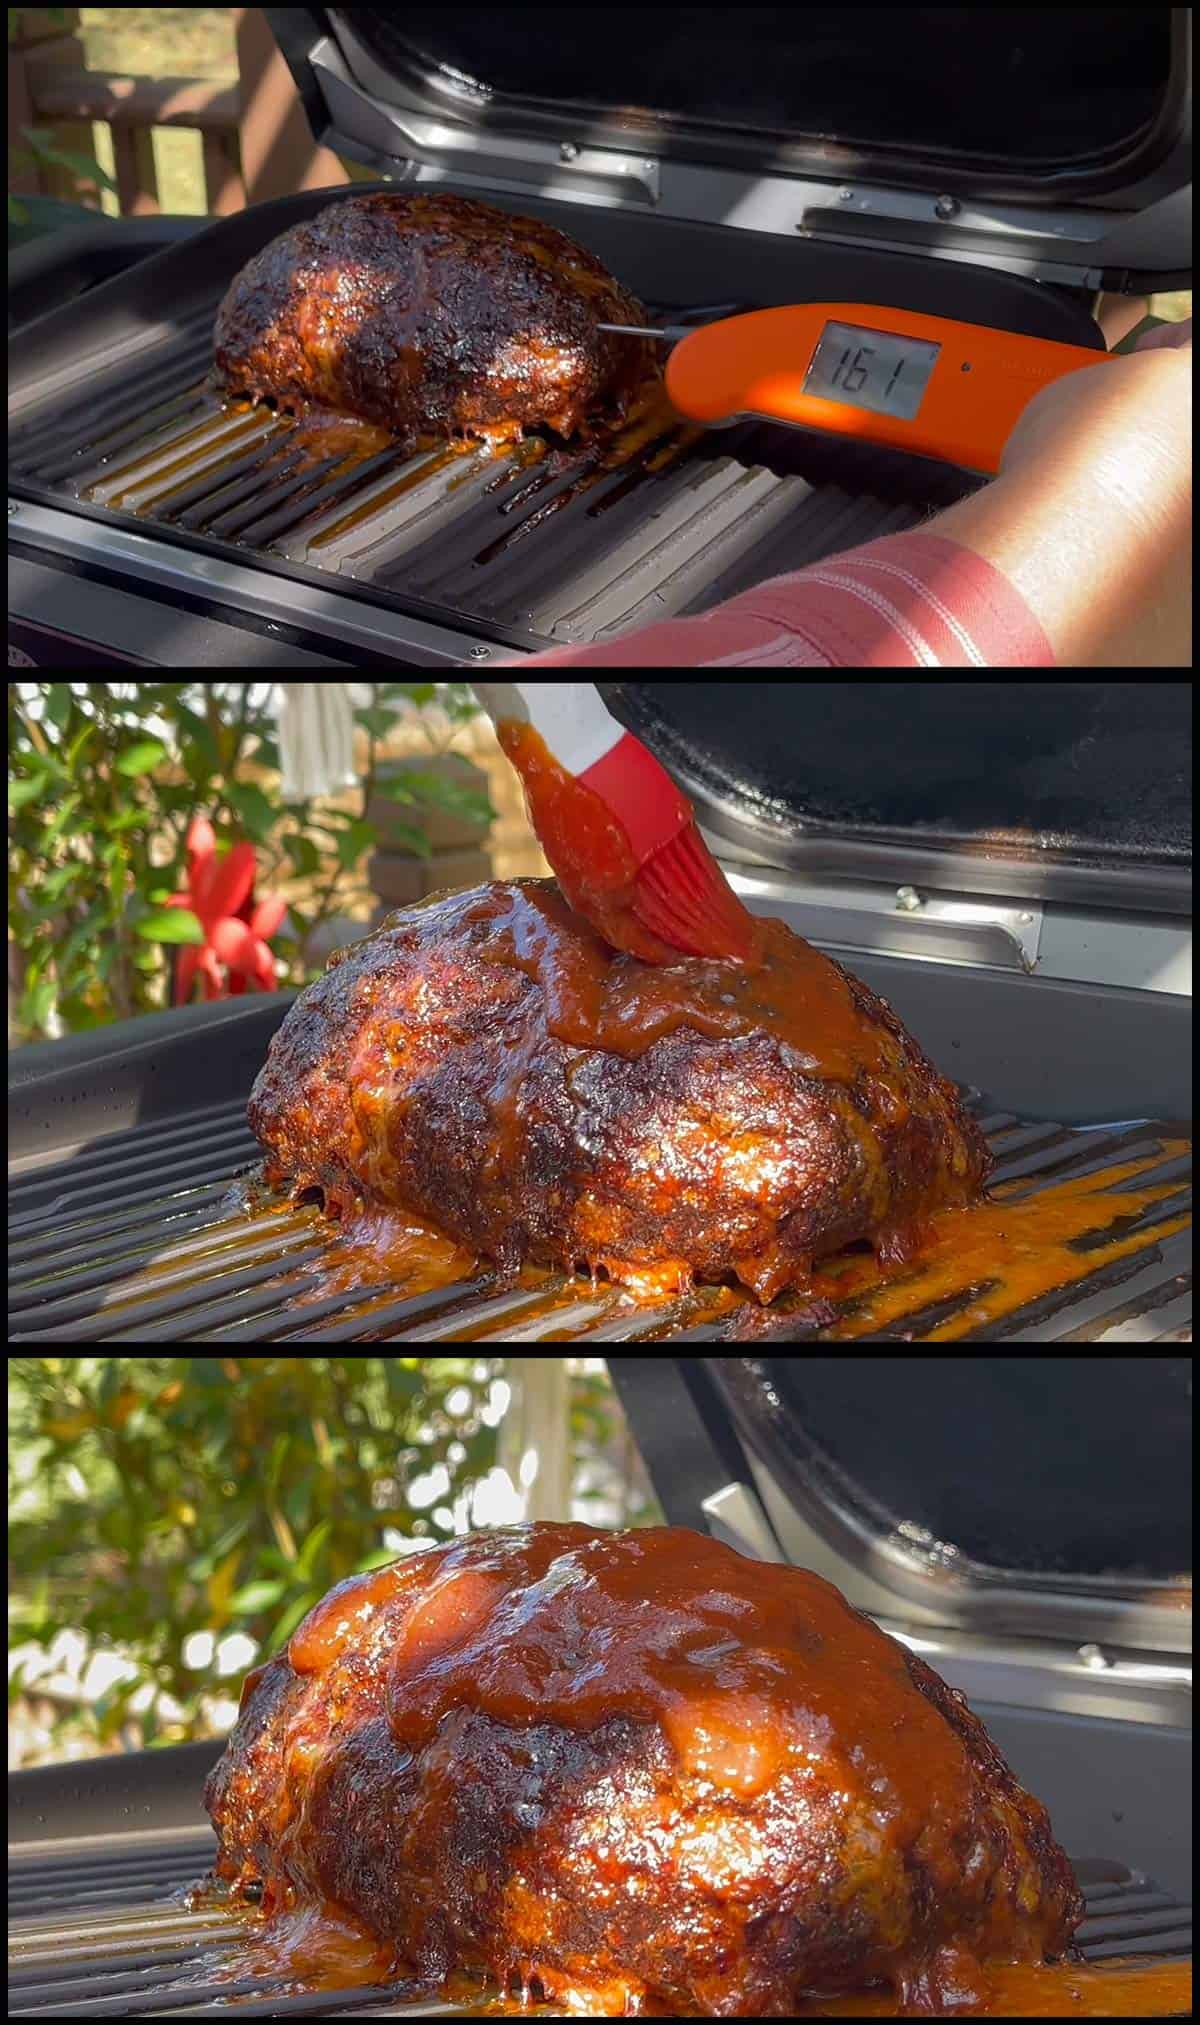
After 70 minutes of cook time, it's time to baste with the bbq sauce.
I like to use a (affiliate link)pastry brush and 2-3 Tablespoons of sauce and I apply a thick layer to the top of the meatloaf allowing some to drip down the sides.
I also usually check an internal temperature at this time and it should be somewhere around 150-160℉/65-70℃. If it is lower than that, increase the temperature to 250℉/275℉(120-135℃). If the meatloaf is above 175℉/80℃, then you can either increase the temperature and cook just a few minutes or keep things the same and let it cook the full 90 minutes at 225℉/105℃.
I have found that even when the internal temperature of the meatloaf reaches 180℉/82℃ and higher, it is still perfect and not dry at all. I did experiment with different temperatures and timings when testing this recipe and the flavor was the best when it smoked a full 90 minutes.
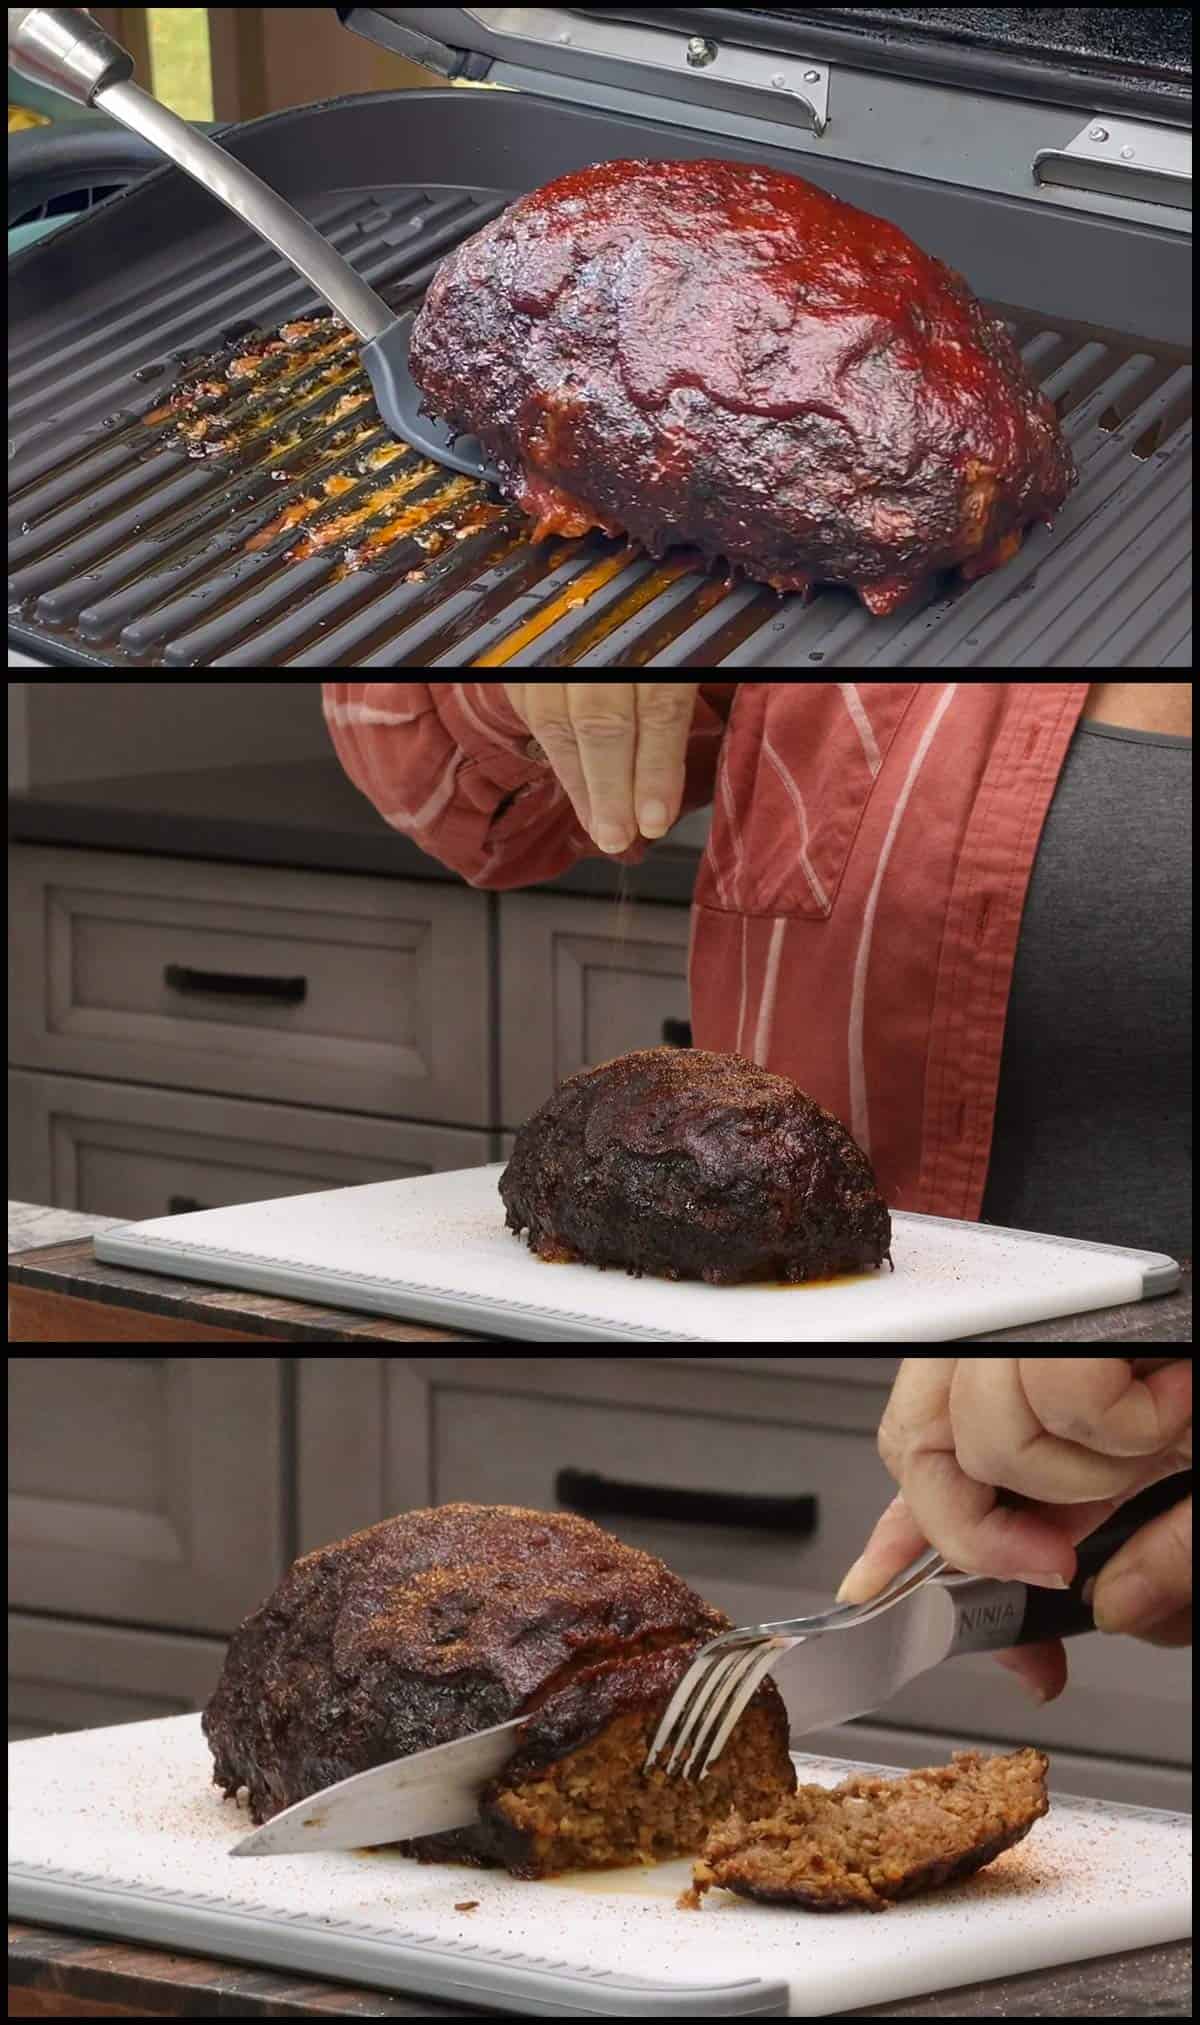
Once the meatloaf is done, remove it from the smoker and let it cool for a few minutes before slicing. This helps hold the meatloaf together when slicing.
I also like to sprinkle some extra rub on top.
Serve & Enjoy!
BBQ Meatloaf without a Smoker
If you don't have a smoker and want to make a bbq meatloaf, follow the same recipe and add about ½ teaspoon of liquid smoke to the meat mixture. I recommend trying apple flavored: (affiliate link)Colgin Apple Flavored Liquid Smoke
You can use a meatloaf pan or form the meatloaf by hand and bake it in a preheated oven on 350℉/175℃ for 50-60 minutes or until the internal temperature reaches at least 165℉/74℃.
Baste the top with barbecue sauce about 40-45 minutes into the cook time.
Remove and let rest for 10-15 minutes before slicing and serving.
Storage & Reheating Instructions
How to Store Leftover Meatloaf
For the best results when storing and reheating, only slice as much of the meatloaf as you think you are going to eat. It is better to reheat larger pieces of meatloaf instead of individual slices to preserve the texture and moisture.
Refrigeration
You can wrap the meatloaf in aluminum foil or place it in a sealable bag or other airtight container and store it in the refrigerator for up to 3 days.
Freezer
Before freezing it is very important that the meatloaf is cold, so I recommend refrigerating the leftovers overnight before freezing them.
If the food is warm when packaged for freezing, steam can be produced inside the container or freezer bag, resulting in ice crystals forming.
Air is another issue when freezing food, so make sure you choose a container that is the proper size for the amount of leftovers. You don't want a large container for a small amount of meatloaf or there will be too much air trapped in the container which can lead to decreased quality of the meat.
My preferred method for freezing is using a vacuum sealer which eliminates this issue.
You can freeze properly stored meatloaf in the freezer for at least 6 months.
How to Reheat Meatloaf
Oven
I recommend reheating meatloaf wrapped in aluminum foil or in a dish that you can cover. Reheat on 275℉/135℃ until the internal temperature is 165/74℃. The timing will depend on the size and shape of the meatloaf.
Sliced will take 10-15 minutes usually and larger pieces can take up to 30 minutes.
Steaming
Another great option for reheating meatloaf is steaming. You can do this stovetop or use your Ninja Foodi or any appliance that has the steam function.
I like to steam using a covered pan, but you can steam the meatloaf right in the basket or on the rack.
Place 2 cups of water in the inner pot and put the pressure lid down. Make sure it is to the vent postion. Place the meatloaf on the rack either in a covered container or open (this will result in a wetter meatloaf, but it will reheat faster). Steam for 5-10 minutes or until the meatloaf reaches 165℉/74℃. The steam time will vary depending on the size of the meatloaf.
You can steam from frozen by increasing the steam time to around 20 minutes, depending on the size.
Frequently Asked Questions
The size and shape of the meatloaf are what determines cooking time. If you double the recipe and make two meatloaves they will cook at the same time as stated in the recipe.
If you make one big meatloaf, it will take longer to cook if you cook it at the same temperature in the recipe. For this recipe, I would increase the smoking temperature to 250℉/120℃ and plan on 90-100 minutes total. You can also increase the temperature a little more and shorten the cooking time.
At 225℉/110℃ I would expect it to take about 2 hours.
When cooking meatloaf, it is always better to rely on the internal temperature rather than cook time because there are many variables that will affect the total time.
Absolutely! I would follow the same instructions and set the oven up for smoking. Place the meatloaf on the roasting tray and cook as directed in the recipe.
Leftover meatloaf makes incredible grilled sandwiches. I put a little mayo on two slices of bread, thinly sliced meatloaf and cheese. Butter the outside of the bread and grill just like you would a grilled cheese or you can air fry it!
You can also make nachos, put it into soups, and use it any way you would cooked ground beef. Just remember the spices you used in the meatloaf will be in whatever dish you make.
What to serve with BBQ Meatloaf
Everything goes with this meatloaf! You can pair it with traditional sides like green beans and mashed potatoes or coleslaw and potato salad.
Here are a few sides that will pair beautifully with your smoked meatloaf.


Smoked Meatloaf with BBQ Glaze Recipe
Equipment
- (affiliate link)Woodfire Outdoor Grill and Smoker
Ingredients
Wood Pellets
- ¾ cup Apple Wood Pellets or your favorite wood pellets
Meatloaf Mixture
- 1 pound 80/20 ground beef
- 4 ounces thin bacon raw and diced small
- ½ sweet onion diced small (about ¾ cup)
- 1 large egg
- ⅓ cup oatmeal
- 2 Tablespoons Beginners Luck BBQ Rub or your favorite BBQ seasoning blend
- 2 Tablespoons 10-Minute BBQ Sauce or your favorite BBQ sauce
BBQ Glaze
- 3-4 Tablespoons 10-minute BBQ Sauce or your favorite BBQ sauce
Would you like to save this recipe?
Instructions
Making the Meatloaf
- In a large bowl, combine the ground beef, diced raw bacon, diced onion, oatmeal, BBQ sauce, and rub* See recipe notes below for how to make the rub.1 pound 80/20 ground beef, 4 ounces thin bacon, ½ sweet onion, 1 large egg, ⅓ cup oatmeal, 2 Tablespoons Beginners Luck BBQ Rub, 2 Tablespoons 10-Minute BBQ Sauce
- Mix all the ingredients thoroughly. Transfer the meat mixture to your cutting board and begin to form the meatloaf. You want to pack the meat mixture together enough so it doesn't fall apart when cooking. I do this by smacking it and shaping it for several minutes until the ingredients are compressed together and I don't see any visible splits in the outside of the meatloaf. See video in the recipe article for demonstration.
Preparing the Woodfire Smoker
- Fill the hopper with ½ cup of pellets. Make sure the grill plate is in the Woodfire Smoker. With the lid closed, turn the Woodfire Grill on and turn the dial to the smoker setting. Set the temperature to 225℉/105℃ and the time for 90 minutes. Press start.
- The Woodfire will start the ignition process of the pellets automatically and then go into preheat mode. Let it preheat fully and it is perfectly fine if the countdown starts before you put the meatloaf on.
Smoking the Meatloaf
- Open the lid once the smoker has fully preheated and let the white smoke dissipate. Place the formed meatloaf on the grill grate of the Woodfire and close the lid.
- After about 30-45 minutes, check the hopper, and when the pellets have reduced by about 50%, add another ¼ cup of pellets. They will ignite from the heat of the burning pellets so you don't have to do anything else. If you let the pellets burn complete out, refill the hopper with ½ cup of pellets and press the ignite button on the front of the smoker.
- After 70 minutes of cook time, baste the top of the meatloaf with the bbq sauce and cook another 20 minutes or until the meatloaf reaches an internal temperature of at least 165℉/74℃. Do not worry if the meatloaf temperature is above that, mine usually gets to around 180℉/82℃ and it's perfectly fine. The meatloaf needs 90 minutes to take on the full smoke flavor.3-4 Tablespoons 10-minute BBQ Sauce
- Remove the meatloaf from the Woodfire. Let the meatloaf cool slightly before slicing so it holds together better. Slice & Serve!
Notes
Beginners Luck BBQ Rub Recipe
Makes about a cup of rub- ¼ cup white sugar
- 2 ½ Tablespoons onion powder
- 2 Tablespoons seasoned salt
- 2 Tablespoons smoked paprika (regular paprika is fine)
- 1 ½ tablespoon chili powder
- 1 tablespoon sea salt
- ½ tablespoon celery salt
Brenda Jewell says
This is an awesome recipe! I have never liked meatloaf before I tried this one. I made extra & froze in fall of 2024. Thawed in the refrig tonight, put in Ninja Possible pot with 1/2" of water in the bottom of Possible pot & meatloaf in a small casserole dish on the rack and baked at 350 for 45 minutes. Our kitchen smelled like I has just made on the Ninja grill & brought inside. Very moist and the the favors were there as I had just smoked it. I have to make more this summer to freeze again! Thank you for the GREAT recipe!
Louise says
That is so wonderful to hear!
Jeff B says
Cooked this for Thanksgiving yesterday. Did 2 lbs and doubled the ingredients. 2 hours on at 225, topped off the pellets at 40 minutes, and glazed at 90 minutes. Used my own rib rub recipe and doctored up some G Hughes hickory BBQ sauce with a little Shak Nasty cajun honey mustard. It was amazing! This is going to be in my regular rotation from now on. Can't wait to try more recipes from this site.
Louise says
I'm so glad you enjoyed it!
Diane Shoff says
I used my own recipe with 2lbs Turkey meatloaf. I didn’t realize that there was a recipe for the rub. Next time I will add the rub for sure. Took about 100 minutes at 225. Everyone loved it and especially liked the smoked flavor. It was most and smoky.
Louise says
That's great!