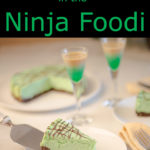

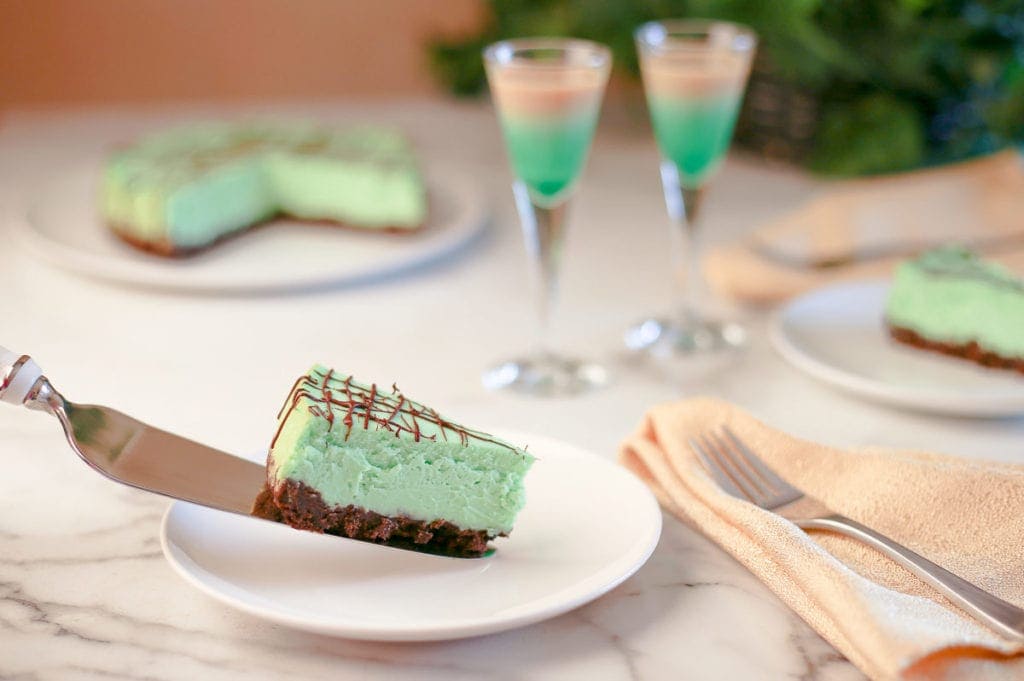
 Yep, that's right! It's cheesecake time! Only, this isn't any ordinary cheesecake. Nope! It's a Mint Cheesecake in the Ninja Foodi!
Have you ever had an Andes Chocolate Mint Candy? That is exactly what this cheesecake tastes like and it's quite delicious!
There was a time, many moons ago, that I disliked cheesecake. I'm sorry, but it's the truth. My friends would rave about it, I would try it. No, not so much. In fact, the only time I would ever eat cheesecake anything was when my Mom would make her mini cheesecake bites with cherries on top. Now, those were GOOD!
So, why did I like her mini versions and not the full on cheesecake? Texture & Sweetness. I'm sure of it. Traditional cheesecake is too dense and... well, cheesy for me. I'd rather use that cream cheese and make jalapeno poppers, crab dip or this delicious recipe for Sun Dried Tomato & Chicken Pasta.
This post may contain affiliate links. If you make a purchase after clicking a link, I may earn a small commission. Thank you for your support!
I sure did like that sweet cherry topping, though! I think the (almost savory) cream cheese part of Mom's cheesecake just went really well with those super sweet cherries; kind of like baked brie with fruit on top. Okay, I'm a bit fussy when it comes to cheesecake. I admit it. When I think of a cheesecake; I think of a creamy, slightly sweet and fluffy center with a crisp crust. I want a cheesecake that doesn't need the fruit on top to make it taste good. I found my answer with this recipe for Mint Cheesecake in the Ninja Foodi. I just love the Ninja Foodi! Don't you?
I was a bit concerned about how the cream cheese would pair with mint, but it actually works perfectly! Don't knock it until you've tried it; and this recipe is so easy to make... right in your Ninja Foodi!
I always thought cheesecake was hard to make. I'm not sure why, but I had that in my head for the longest time and it couldn't be further from the truth. There are only a few ingredients in a cheesecake and you can whip one up really quick and then let the Ninja Foodi do all the work!
Does Pressure Cooking a Cheesecake save time?
Honestly, no. It doesn't save any time. By the time the Ninja Foodi comes up to pressure and you cook the cheesecake under pressure for 25 minutes with a 15 minute natural release, you can bake one in the oven. That's the truth and that's also why I had never pressure cooked a cheesecake before this one. So, why do it? That's a good question! It tastes better... much better!
Does a Pressure Cooked Cheesecake taste better?
Why switch from a known cooking technique to a new one? Curiosity was what did it for me. I saw people raving about their pressure cooked cheesecakes and when I asked in an Instant Pot group what was the big deal, the response I got kind of floored me. A lady told me to just try it. Really? I don't want to try something without having some idea how it is going to turn out. Tell me why it's better. Talk about the texture. Talk about the crust, because I'm positive that it can't end up crisp.
I mean really? We are cooking under pressure in a hot steam bath. Right? That crust has to be soggy and gross. No one was kind enough to enlighten me as to why I should jump in with two feet and pressure cook a cheesecake. I won't do that to you. I'll tell you exactly why you want to pressure cook a cheese cake and especially this Mint Cheesecake in the Ninja Foodi!
- It's easier. Not quicker, but easier. You don't have to check the oven 4,000 times and run the risk of ruining your cheesecake. You can't do that under pressure. If you do, your cheesecake will take forever! Release pressure, build pressure, release pressure, build pressure. Two days will pass and your cheesecake still won't be done. With this recipe, all you do is set the time and not worry! The Ninja Foodi is doing all the work and that's why we purchased one. That set it and forget it style of cooking. Right?
- It won't burn on top. In fact, you won't get any browning... unless you want some. If you want a few of those brown spots, just put the Tender crisp lid down at the end of pressure cooking and you can have them! Isn't that the beauty of the Ninja Foodi? I actually did this on my first test of the Mint Cheesecake in the Ninja Foodi and guess what? Brown spots don't look good on green. It's a fact. Another fact (or maybe just a fact in my head): a perfect cheesecake doesn't have any brown spots. I don't like a cheesecake with brown spots. They have a weird texture to me. I could never avoid them in an oven and now I can! YAY!
- It tastes better. Seriously, much better. A cheesecake cooked under pressure is creamier, fluffier, and it just tastes better. I said that already. It really does! I guess I just have to say, "you just have to try it." Sorry, but you really do need to make a cheesecake in the Ninja Foodi and I hope you make this recipe for Mint Cheesecake in the Ninja Foodi!
Can I make this mint cheesecake in an oven?
Of course! Although, I would really suggest looking into a Ninja Foodi. You will not be sorry! I have made some fantastic meals on the stove and in the oven. I even have a professional grade Blue Star range and I don't use it anymore. When we moved, I told my husband that I had to have my stove installed right away. It is still sitting in our little building outside because I don't even use the stove that came with the house we bought! I use the Ninja Foodi for every single meal... every single day. I love it! If you are interested in reading more about the Ninja Foodi, here is an article I wrote on Getting Started with the Ninja Foodi.
If you don't have a pressure cooker or a Ninja Foodi and want to make this mint cheesecake, here is how you do it.
Pre-heat your oven to 325°F and set a pan of water in the bottom of the oven. Put your cheesecake in the springform pan on the middle or lower rack and bake for 40-50 minutes. Try not to open the oven during the baking time. Every time you open the oven, you let the heat out and that affects the temperature in the oven.
I would suggest checking on your cheesecake at the 25-minute mark. This will give you a good idea if your oven is at the right temp and if your cheesecake is baking properly. At 25 minutes, you should be seeing the cheesecake slightly puffed up and no browning on the top. If you see browning or cracking, your oven is too hot. Reduce the heat by 25° F and continue to cook. Even though you may think your cheesecake is done because it has browned on the top, I can assure you that at 25 minutes it is not done.
Check it again at 40 minutes and by this time your cheesecake should be almost all the way done. It should look set, have very little browning and the center will jiggle a bit.
Allow to cool on a rack for 30 minutes and then refrigerate the cheesecake for at least 4 hours.
What if I don't like mint?
One of the great things about cheesecake is the ability to customize it to suit your taste.
If you don't like mint, just leave out the liqueur and mint extract. Be sure to add in a teaspoon or so of vanilla extract for a boost of flavor.
You can also substitute Amaretto in place of the mint liquor and replace the mint extract with almond extract or vanilla for an almond flavored cheesecake. In fact, this sounds so good... I think I'll work on this recipe!
The possibilities are endless! Get creative and focus on the flavors you like. Just don't add more than ¼ cup of liquid or your batter might be too runny. Have fun and be sure to let me know what type of cheesecake you created!
Okay, my friends! It's time. Let's make a Mint Cheesecake in the Ninja Foodi!
If you'd rather watch me make this cheesecake, you can right on YouTube:
The very first thing you want to do is allow your cream cheese and eggs to come to room temperature. This is extremely important because the softened cream cheese is able to blend better with the sugar and reduces or eliminates lumps in your cheesecake batter. If there are lumps in your batter there will be lumps in your finished cheesecake. They don't go away, unfortunately.
Prepare your 7" Springform Pan. Cut a parchment round and place on the bottom of the springform pan. This will allow you to remove the cake easily from the pan onto a cake plate. It also protects your pan if you want to cut slices right from the pan.
Then, let's make the crust. I'm suggesting a chocolate animal cracker crust in this recipe because the chocolate is yummilicious with the mint. If you can't find the chocolate animal crackers at your local store (I found this kind at walmart), you can always use any type of chocolate wafer, even oreos would work.
If, for some reason, you don't want to use a chocolate crust, you can certainly go with a simple graham cracker crust or even a vanilla cookie crust.
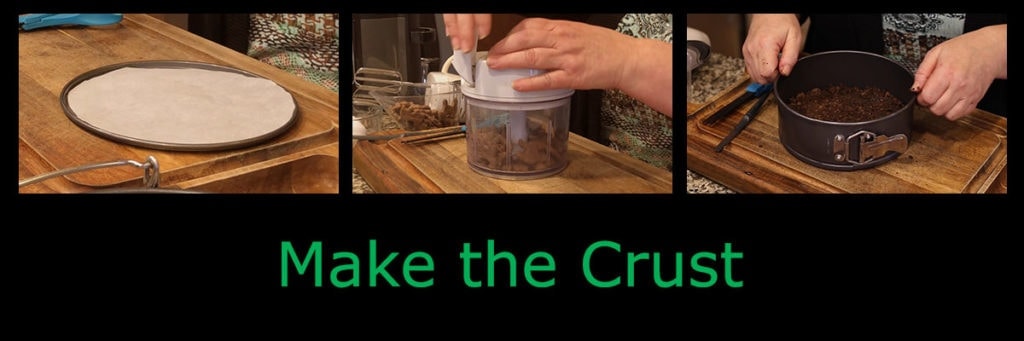
If you have a food processor, place ⅓ of the animal crackers into the bowl and process them until they become a course crumble. Add another ⅓ of animal crackers and repeat until all the animal crackers are a course crumble. I like to use my manual food processor from Pampered Chef because I like the control it gives me over the size of my chocolate pieces. It also makes the best salsa, and quick! If you don't have a food processor, no worries. Just fill a sealable bag with the cookies and use a rolling pin to crush the cookies.
Melt the butter in the microwave or you can melt it in the Ninja Foodi if you want, just follow the instructions for melting chocolate in this recipe for Chocolate Cake Bites in the Ninja Foodi. Mix the butter into the cookie crumbs and pour into your 7" Springform Pan.
Let's make the filling. In a large mixing bowl, combine cream cheese and sugar. Using a stand mixer or a hand mixer, blend until sugar is combined and cream cheese is smooth.
Add one egg at a time and blend on low to medium speed to incorporate the first egg before adding in the second egg. You don't want to over beat the cream cheese mixture, but you do want the eggs to be well incorporated

Add in Crème de Menthe, mint extract and 10 drops of food coloring. Blend on low speed until combined and uniform in color. Pour filling into the crust.
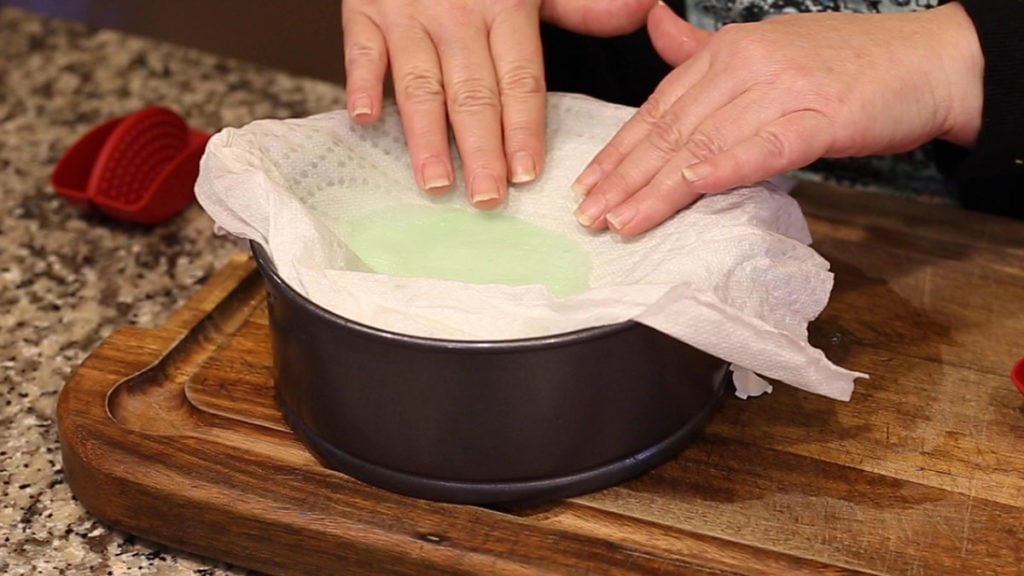
Place a paper towel on top of the springform pan (not directly on the cheesecake) and cover with aluminum foil. Don't skip this step. It is important to help reduce the moisture on the top of the cheesecake during pressure cooking.
Put one cup of water into the inner pot of the Ninja Foodi and set the rack in the low position. Place the springform pan onto the rack and set the Ninja Foodi to high pressure for 25 minutes.
When the time is up, allow the Ninja Foodi to natural release its pressure for 15 minutes. Please note that while the red button might depress before the 15 minutes is up, you want to let the cheesecake sit in the Ninja Foodi with the lid on the entire 15 minutes.
Uncover the cheese cake and dab any extra moisture that has collected on top of the cheesecake. Place in the refrigerator for at least 4 hours.
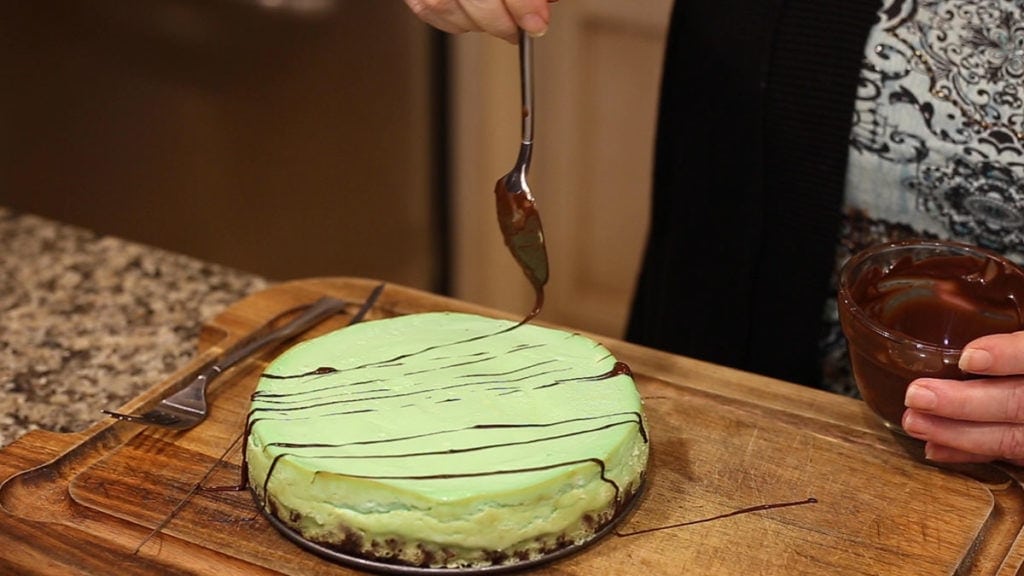
When chilled, melt some dark chocolate and decorate the top of the cake with any design you like. What I did was get an even flow of chocolate off of the spoon and then moved it back and forth across the cake top in alternatingmotions. Pop the cake back into the fridge for just a few minutes until the chocolate is set.
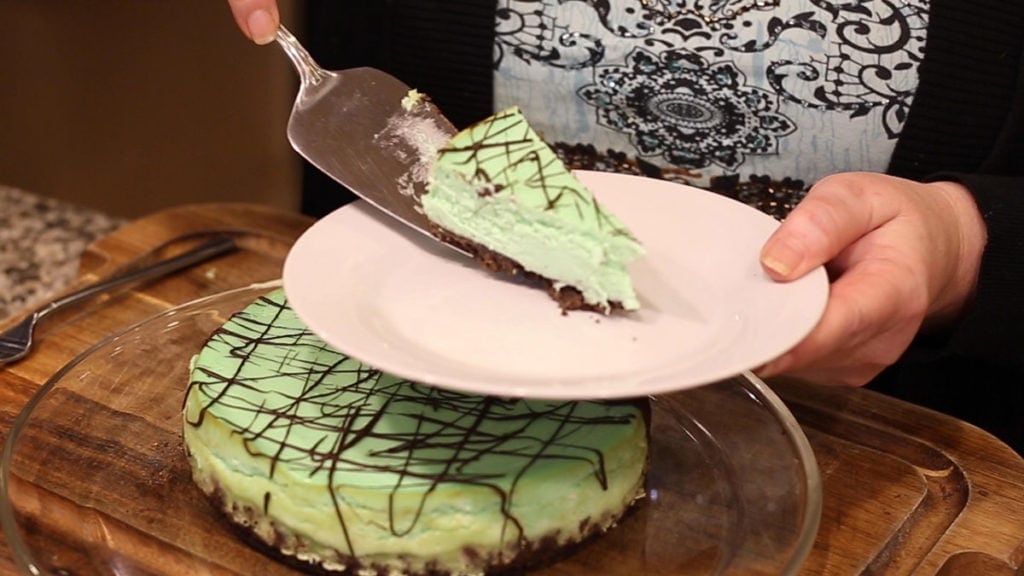
Serve & Enjoy!
ARE YOU MAKING THIS RECIPE? YAY! DON’T FORGET TO TAKE A PICTURE AND TAG US @THESALTEDPEPPER ON YOUR FAVORITE SOCIAL MEDIA CHANNEL!
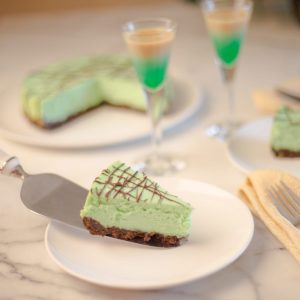
Mint Cheesecake in the Ninja Foodi
Ingredients
- 2 cups chocolate animal crackers measured whole
- ¼ cup butter salted
- 16 oz cream cheese
- ½ cup sugar
- 2 eggs
- 2 Tbsp Crème de Menthe
- 1 teaspoon Mint Extract
- 10 drops green food coloring
Would you like to save this recipe?
Instructions
- Remove the cream cheese from the fridge several hours before you make the cheese cake to allow it to come to room temperature.
- Crush 2 cups of chocolate animal with food processor or a large bag and a rolling pin. Melt butter and combine with crushed animal crackers. Gently press mixture into the bottom of a 7" springform pan and allow to go up the sides about a ½" or so.
- In a large mixing bowl, combine cream cheese and sugar. Using a stand mixer or a hand mixer, blend until sugar is combined and cream cheese is smooth.
- Add one egg at a time and blend to incoroporate. Scrape down the sides of the bowl between each addition.
- Add in Crème de Menthe, mint extract and food coloring. Blend until well incorporated. our filling into 7" springform pan.
- Place a paper towel on top of the springform pan (not directly on the on the cheesecake) and cover with aluminium foil. See video for more details.
- Put one cup of water into the inner pot of the Ninja Foodi and set the rack in the low position. Place the springform pan onto the rack and set the Ninja Foodi to high pressure for 25 minutes.
- When the time is up, allow the Ninja Foodi to natural release its pressure for 15 minutes. Please note that while the red button might depress before the 15 minutes is up, you want to let the cheesecake sit in the Ninja Foodi with the lid on the entire 15 minutes.
- Uncover the cheese cake and dab any extra moisture that has collected on top of the cheesecake. Place in the refrigerator for at least 4 hours.
- When chilled, melt some dark chocolate and decorate the top of the cake with any design you like. What I did was get an even flow of chocolate off of the spoon and then moved it back and forth across the cake top in alternating motions. Pop the cake back into the fridge for just a few minutes until the cake is set. Serve & Enjoy!
Nutrition
Are you looking for more dessert ideas? Check out these beautiful desserts made right in the Ninja Foodi!
Sheri Yuckert says
I made this for a BBQ at my bosses home…everyone loved it! I’m now making my second one for my husband for a Father’s Day surprise. I made my own crust using biscoff cookies/crackers and it was AMAZING!
Louise says
That sounds wonderful! I hope he enjoyed his Father's Day surprise!
Terry Miller says
OMG! This was DELICIOUS! I think readers need to know changes that I made. I'm currently not allowed to have dairy products, so I used Violife cream cheese, and it turned out PERFECT! Sorry Lousie I didn't make the crust myself either (LOL), I used one of those pre-made chocolate graham crust pies. I was expecting a disaster, but it is so YUMMY! Thanks Louise!