
- (affiliate link)Ninja Combi
- Food Processor
- Hand Mixer or Stand Mixer with Paddle Attachment
- 4-Cup Cupcake Pan
- Small Saucepan
- Tart Shaper or Back of a Spoon
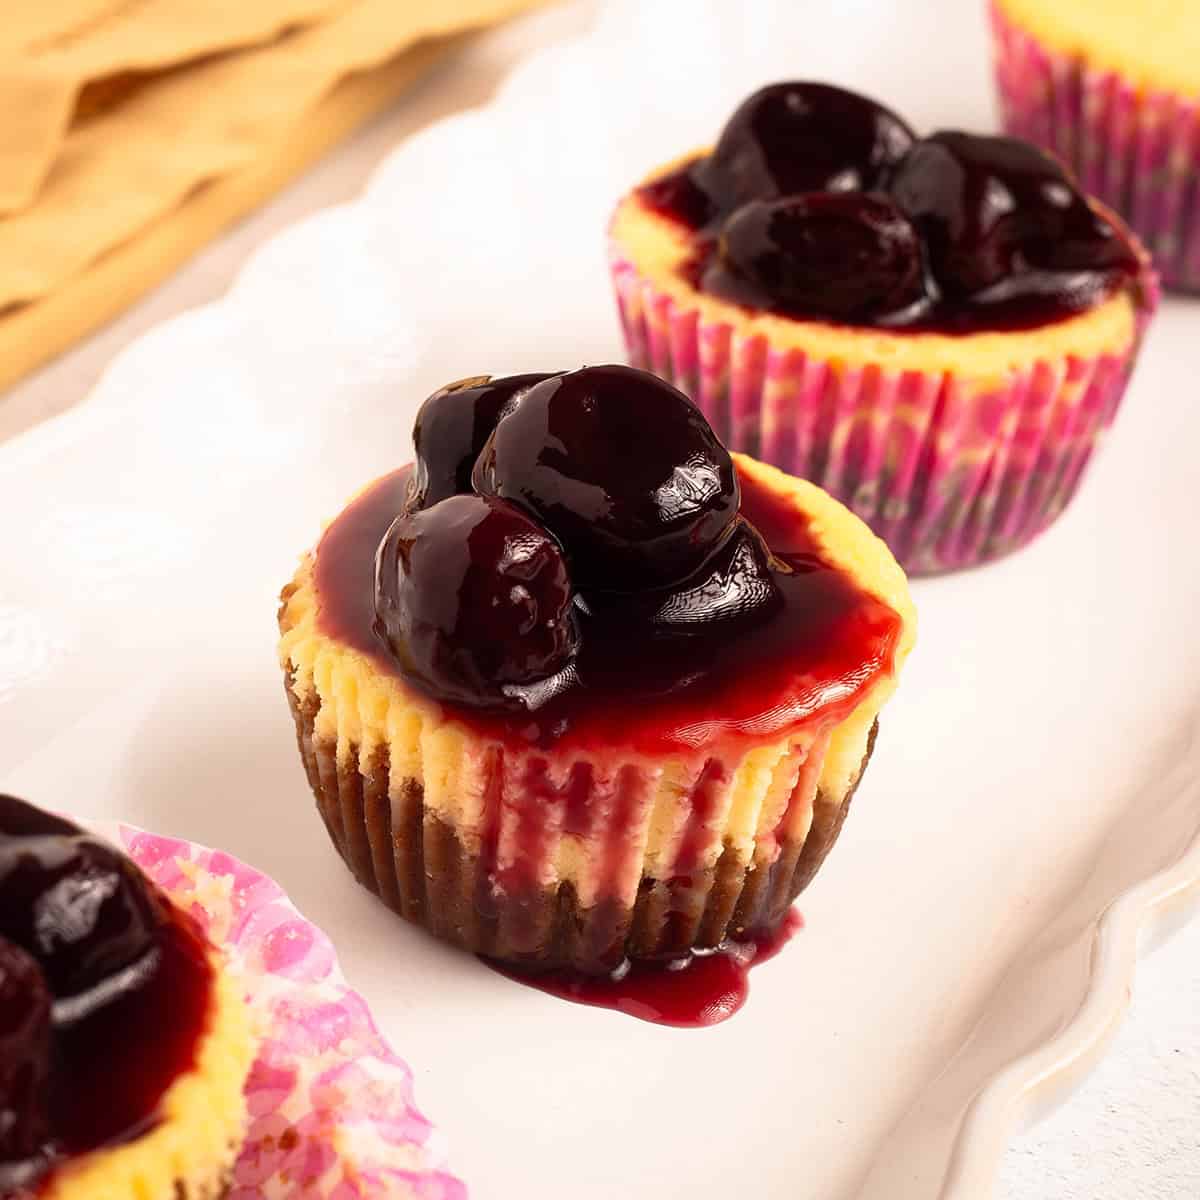
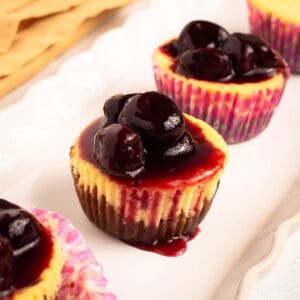
If you love cheesecake but don't want to deal with a springform pan and a water bath, these mini cherry cheesecakes are about to become your new favorite dessert. They come together in three easy steps, bake up perfectly in the Ninja Combi, and the crust is absolutely amazing!
This recipe makes just 4 mini cheesecakes, which is perfect when you don't need a whole batch of 12. They're the ideal bite-sized treats for a baby shower, a special occasion, or just a Tuesday night when you want something sweet. And if you do need more, the recipe scales up easily.
We're using Biscoff cookies for the crust instead of traditional graham crackers, and let me tell you, it makes all the difference. That warm, caramelized cookie flavor pairs so perfectly with the creamy cheesecake filling and the homemade cherry topping. And the best part? The crust stays crunchy. Like, actually crunchy. I was not expecting that the first time I made these, and it was the most delicious surprise.
Would you like to save this recipe?
Suggested Kitchen Tools for Mini Cherry Cheesecakes
- (affiliate link)Ninja Combi
- Food Processor (a small one or use a bag and a rolling pin)
- Hand Mixer or Stand Mixer with Paddle Attachment
- (affiliate link)4-Cup Cupcake Pan with Paper Liners
- Small Saucepan
- (affiliate link)Tart Shaper or Back of a Spoon
- Silicone Spatula
Ingredients & Substitutions
These mini cherry cheesecakes use simple, everyday ingredients that you can find at any grocery store. The combination of the Biscoff cookie crust, creamy cheesecake filling, and homemade cherry topping creates the most delicious little desserts.
Biscoff Cookies
Used in Recipe: Biscoff cookies are finely ground in a food processor and mixed with melted butter to create the crust.
What it Does: The Biscoff cookies create a crunchy, caramelized cookie crust that holds up beautifully and stays crispy even after chilling. The warm spice flavor of the cookies adds a layer of flavor that traditional graham cracker crumbs just cannot match.
Substitutions: Graham cracker crumbs can be used instead, measured ¾ cup finely ground. Oreo cookies are another option for a chocolate cookie crust. Mini vanilla wafers also work well. Any cookie or cracker that grinds fine will do the job.
Butter
Used in Recipe: Melted butter is mixed into the finely ground cookie crumbs to bind the crust together. Unsalted or salted butter both work.
What it Does: The butter acts as the binding agent that holds the cookie crust together. It gives the crust that wet sand consistency that allows you to press it into the cupcake liners and build up the sides. Without enough butter, the crust will crumble apart.
Substitutions: While butter gives the best flavor, any neutral cooking oil will work.
Cream Cheese
Used in Recipe: Full-fat cream cheese is the base of the cheesecake filling. Don't used whipped cream cheese or the ingredient ratios will be off.
What it Does: Cream cheese gives these individual cheesecakes their rich, dense, creamy texture.
Substitutions: Always use full-fat cream cheese for the best results. Light or reduced-fat cream cheese will change the texture and may not set properly. Mascarpone cheese mixed with a little bit of sour cream can work as an alternative.
Sugar
Used in Recipe: Granulated white sugar sweetens both the cheesecake filling and the cherry topping.
What it Does: The sugar sweetens both the cheesecake and the cherry topping.
Substitutions: While I have not tested the recipe with sugar alternatives, you shouldn't have any issues using your favorite 1:1 artificial sweetener like Swerve. You can also use brown sugar if you want to bring in a little molasses flavor to the cherry topping. Using brown sugar in the cheesecake filling will also work, but your cheesecake may be darker in color.
Egg
Used in Recipe: One large egg is added to the cheesecake filling.
What it Does: The egg provides structure and helps the cheesecake set as it bakes. It gives the filling that classic New York style cheesecake texture that holds up perfectly in this mini cheesecake form.
Substitutions: I have not tested the recipe using anything but an egg, however some people substitute 1 tablespoon of cornstarch mixed with 3 Tablespoons of water and mix that in to the batter to replace the egg.
Vanilla Extract
Used in Recipe: Vanilla extract is used in both the cheesecake filling and the cherry topping.
What it Does: Vanilla rounds out the flavor of both components, adding warmth and depth. In the cheesecake filling, it enhances the cream cheese flavor. In the cherry topping, it ties the sweetness together beautifully.
Substitutions: Vanilla paste can be used or almond extract can be substituted in the cheesecake and/or the cherry topping for a lovely twist that pairs beautifully with the cherries.
Frozen Cherries
Used in Recipe: Frozen sweet cherries
What it Does: The frozen cherries create a beautiful, thick, glossy topping with whole cherries that stay intact.
Substitutions: Canned or jarred tart or sweet cherries can be used or you can top them with store-bought cherry pie filling. You can also change up the fruit and use any kind of fruit you love.
Cornstarch
Used in Recipe: Cornstarch is mixed with water to create a slurry that thickens the cherry topping.
What it Does: The cornstarch slurry transforms the cherry liquid into a beautiful, glossy, thick topping that coats the cherries and sits perfectly on top of each mini cheesecake. It needs a gentle simmer to activate properly.
Substitutions: Tapioca starch or arrowroot powder can be used as a 1:1 substitute. You can also use xanthan gum to thicken. Start with ½ teaspoon mixed into the sugar and then add more if needed. Don't add xanthan gum directly to the cherry filling or it will clump. If you need to add more, mix it in a little melted butter first and then add it to the mixture until you achieve your desired thickness.
How to Make Mini Cherry Cheesecakes
There are three steps to making these easy mini cheesecakes, and they are all very simple. We'll make the Biscoff cookie crust, whip up the cheesecake filling, steam bake them in the Ninja Combi, and then top them with a homemade cherry topping that takes just about five minutes to make.
Mise En Place (Prep for Recipe)
- Set cream cheese and egg out ahead of time so they come to room temperature
- Line the (affiliate link)4-cup cupcake pan with double paper cupcake liners
- Measure out all ingredients for the crust, filling, and cherry topping
- Make sure the Ninja Combi is completely cold and has not been recently used
Step One: Make the Biscoff Cookie Crust
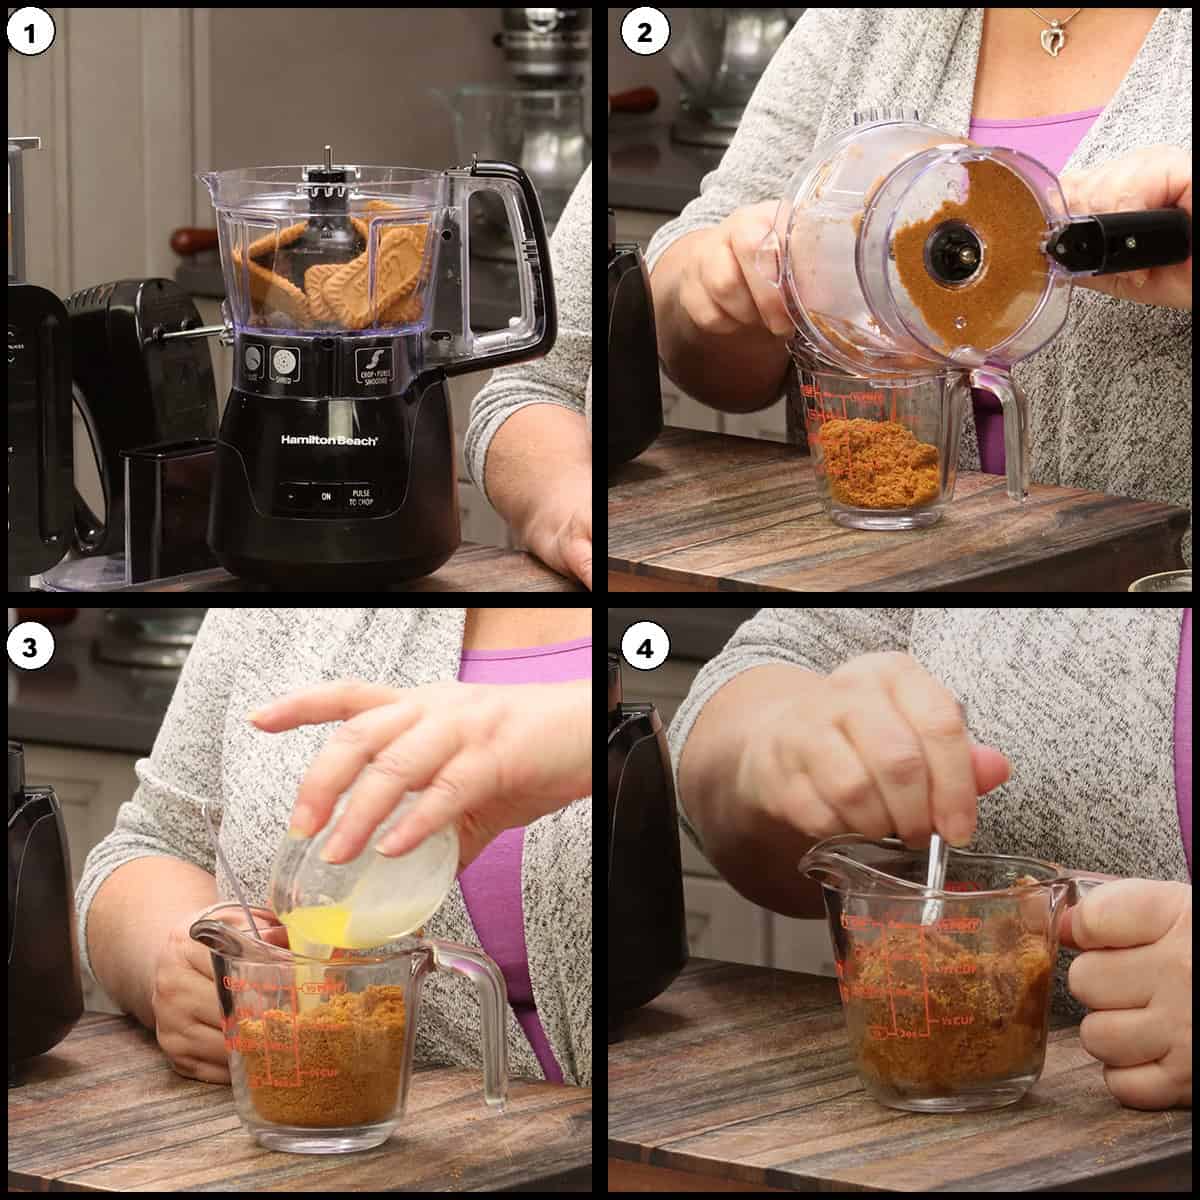
Place 8 Biscoff cookies into a food processor and pulse until they are super fine. This is really important because the finely ground texture is what makes the crust hold together and stay crunchy after baking and chilling. Transfer the cookie crumbs to a small bowl and mix in the melted butter until everything is combined and the mixture resembles wet sand.
Quick Tip
Use a small food processor to get the Biscoff cookies super fine. A blender or a zip-top bag and rolling pin can work, but the food processor gives you the most consistent, fine texture for the best way to get a crunchy crust that holds together.
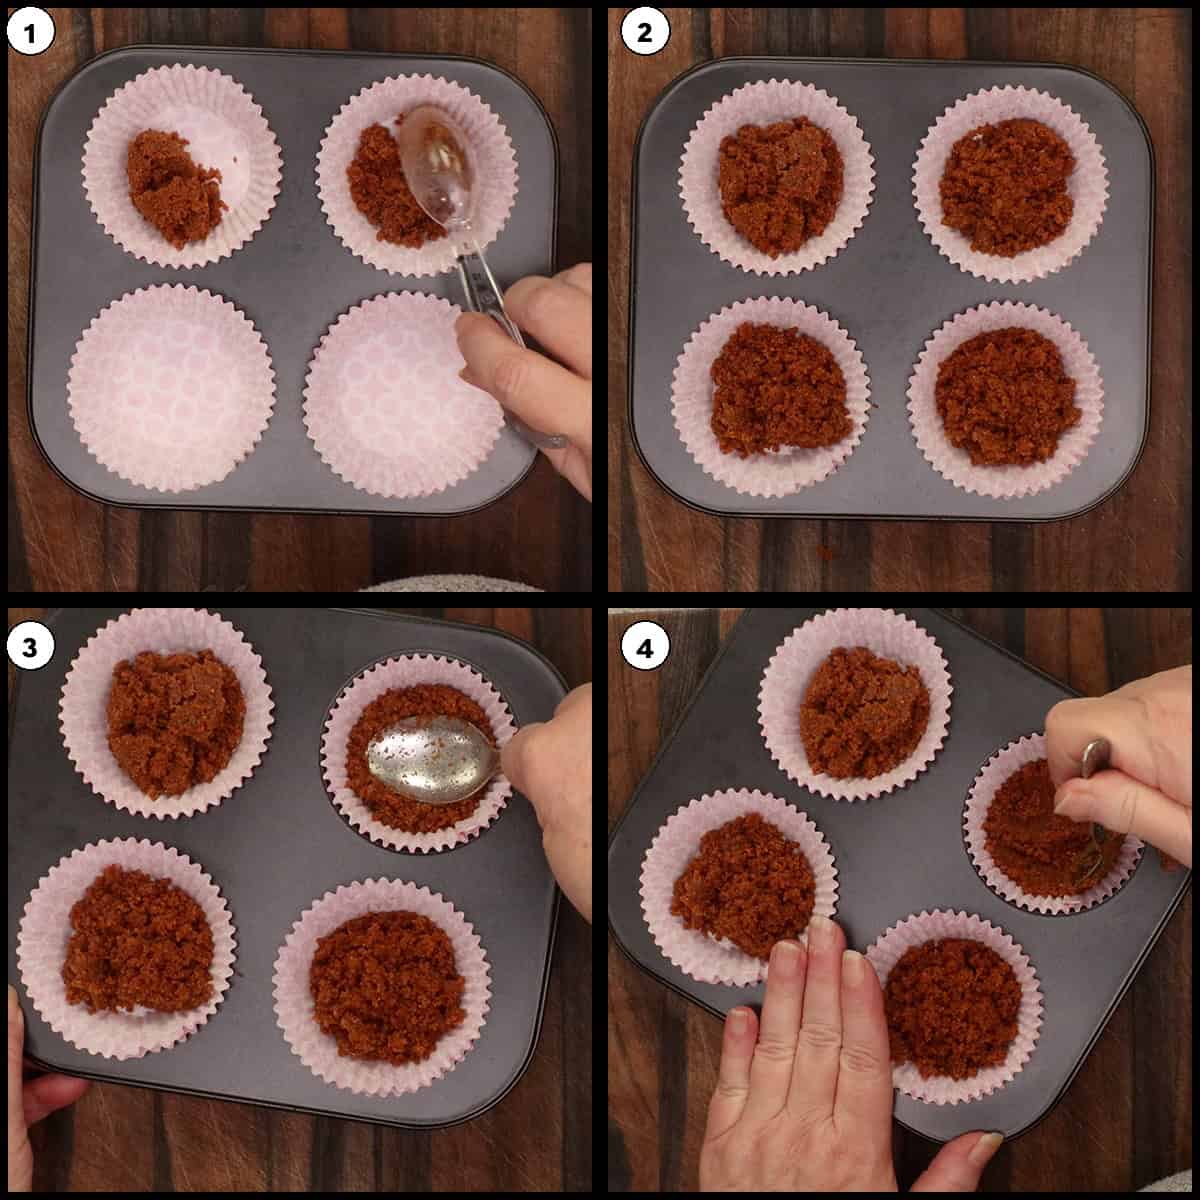
Add about 1½ tablespoons of the cookie mixture to each cupcake liner. You will use all of the cookie mixture so if there is any leftover, distribute it between the 4 liners. Using a tart shaper or the back of a spoon, press the mixture down firmly to create a sturdy base. Then work the mixture up the sides to about halfway. The base needs to be sturdy and a little thicker than the sides so the whole thing holds together when you pick it up. If you want the cookie crust to go all the way up the sides, increase to 10-12 cookies and add more butter if needed.
Step Two: Make the Cheesecake Filling
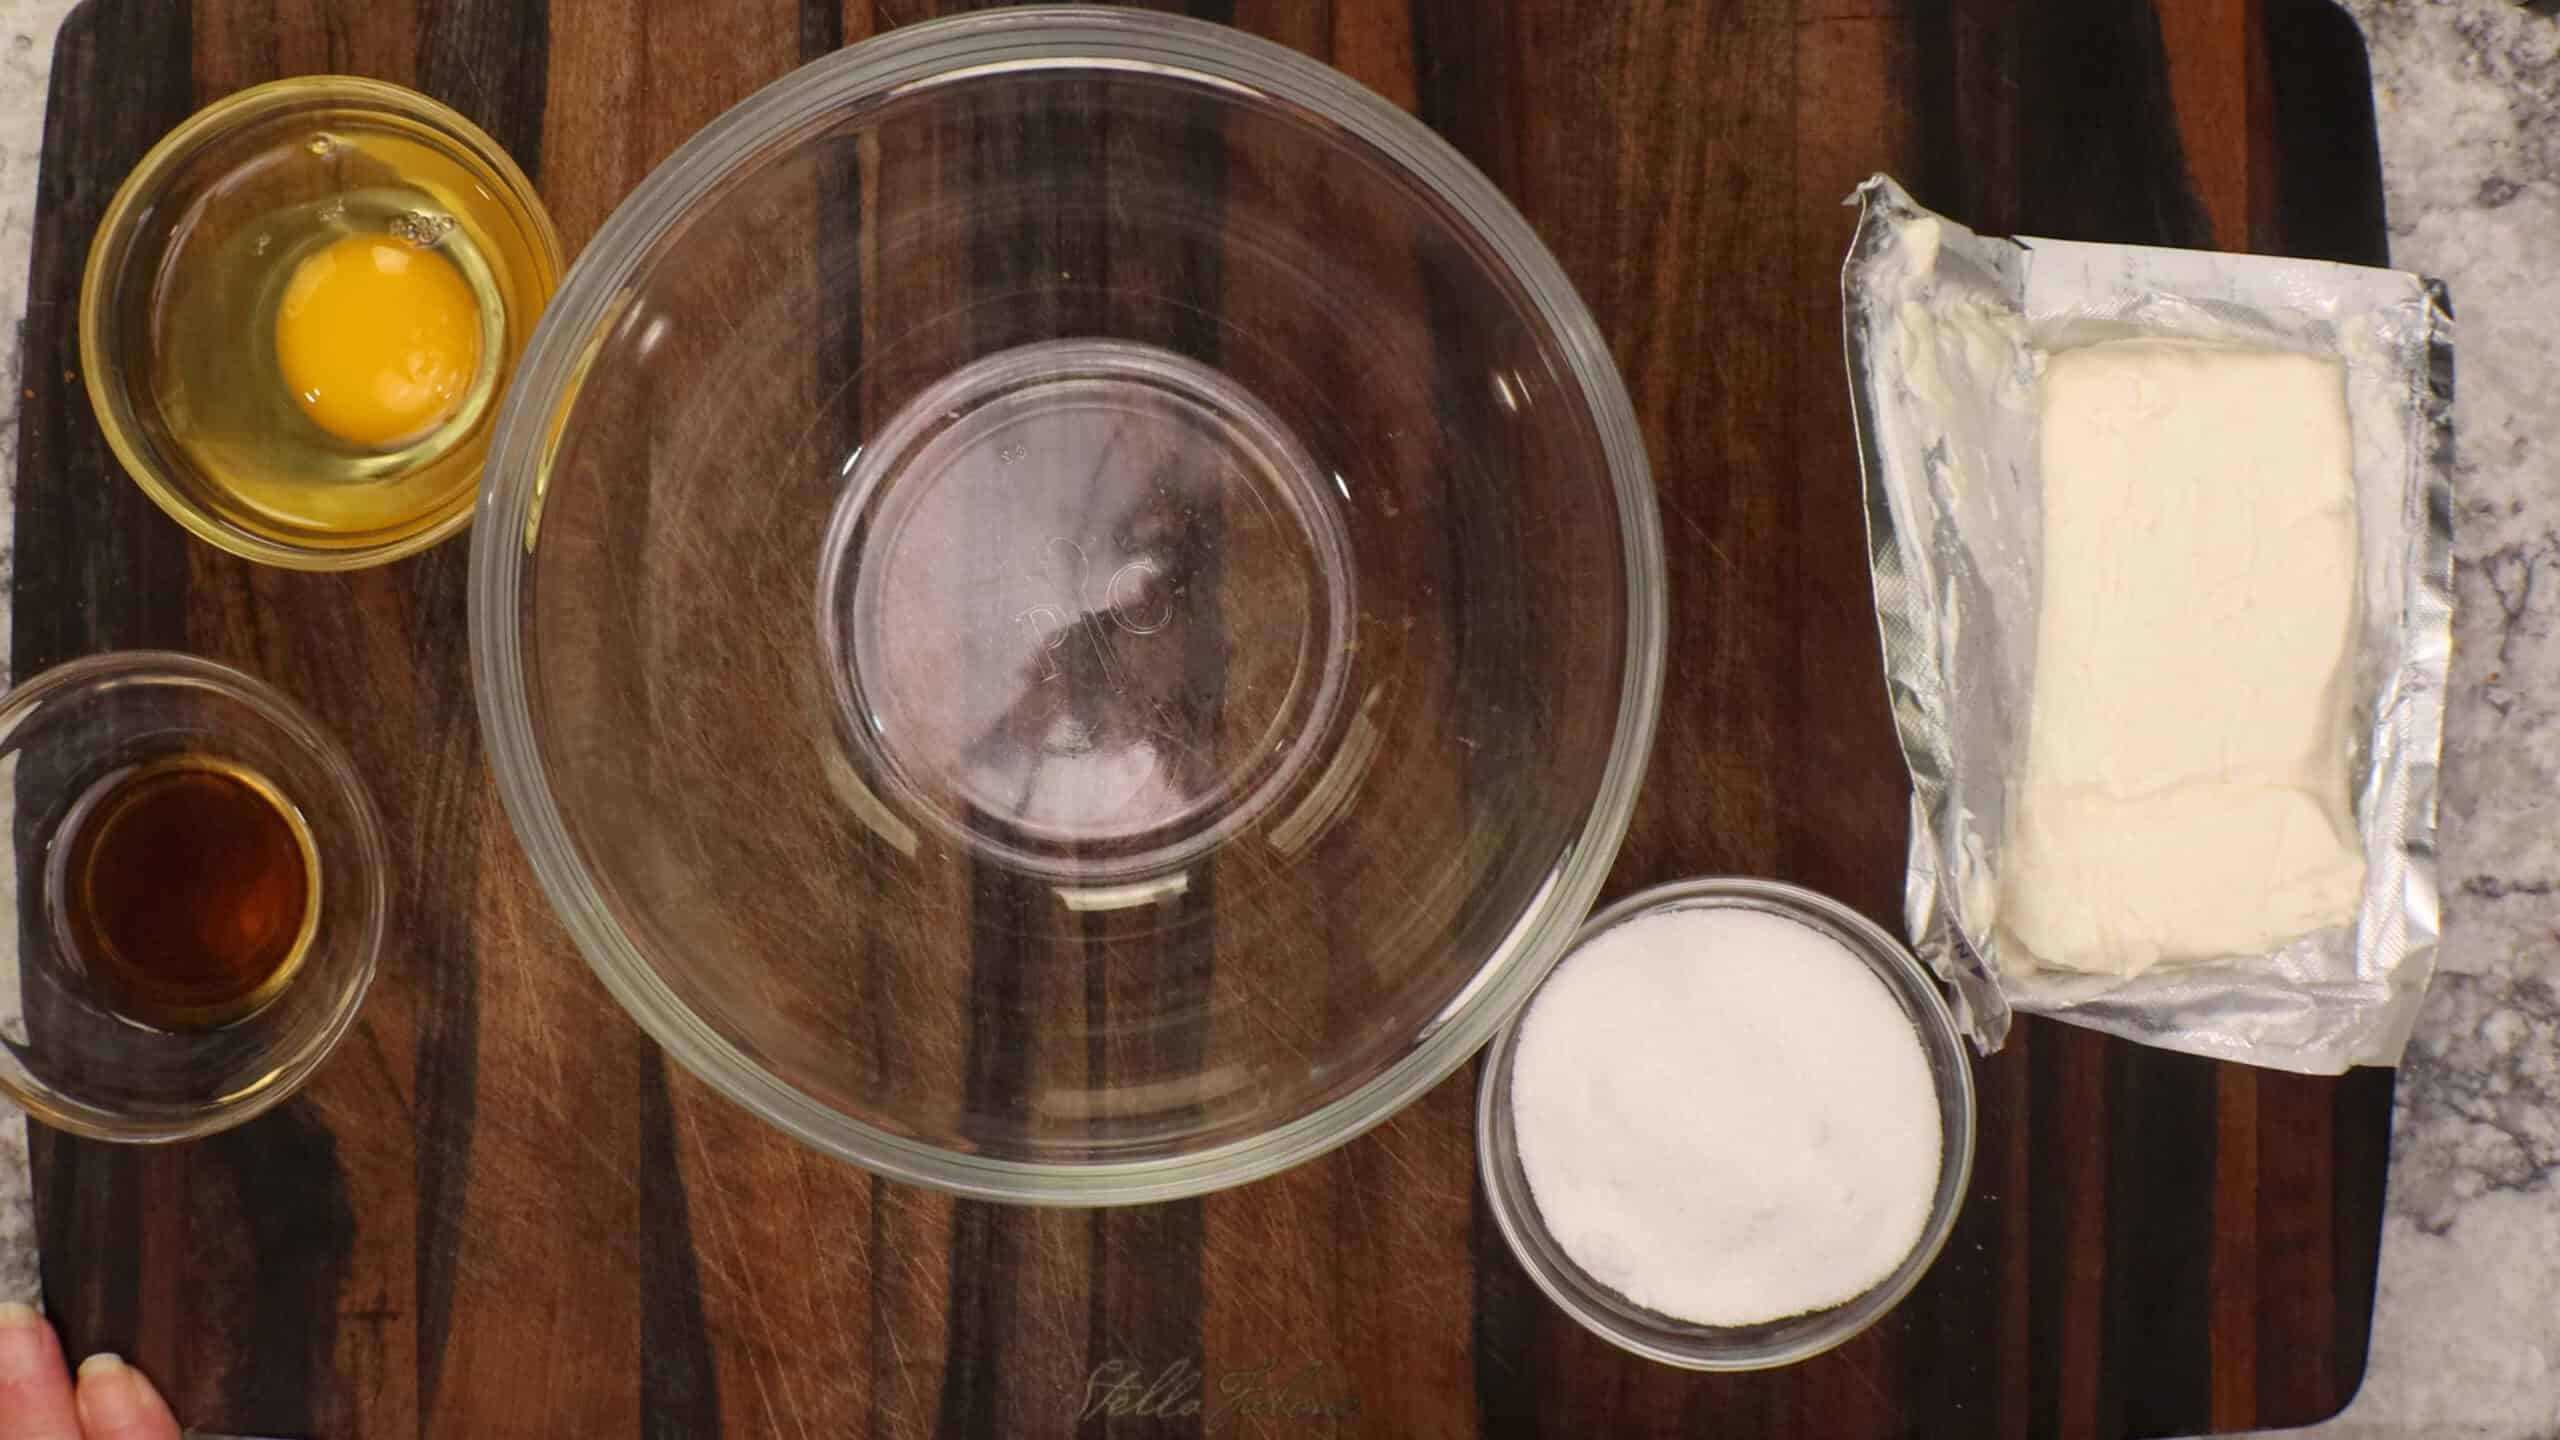
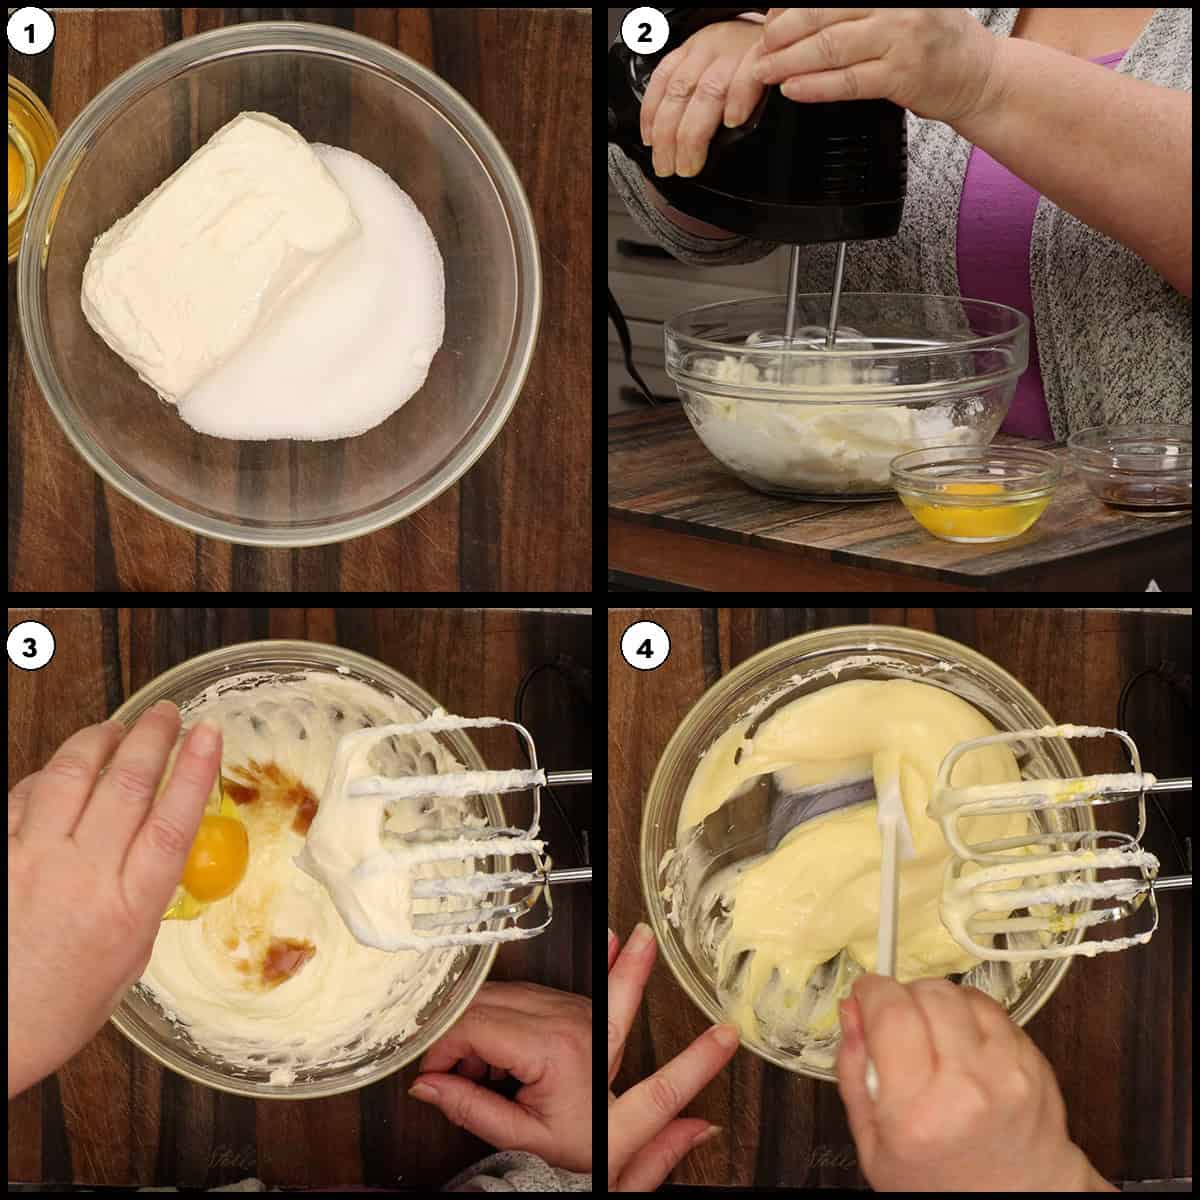
Here is a little trick that makes a huge difference. Put your sugar in the bowl first, then add the room temperature cream cheese on top. The grit of the sugar helps break down any lumps in the cream cheese, and you will have a much smoother cheesecake batter. I found this out by accident, and it works like a charm.
Using a hand mixer or stand mixer with the paddle attachment, combine the cream cheese and sugar on low speed until smooth. We are going for a dense, New York style cheesecake here, so you do not want to whip too much air into the batter. Keep it on low speed throughout.
Add the salt, vanilla extract, and one large room temperature egg. Mix on low speed just until everything is incorporated. Then take a spatula and scrape down the sides and the bottom of the bowl. If there are any lumps of cream cheese hiding, they will be right on the bottom. Give it one more brief mix and you are done. The consistency should be smooth and thick, almost like pudding that has not quite set.
Quick Tip
Do not try to warm up cream cheese in the microwave. Plan ahead and leave it out for several hours or you can place it in a sealed bag in a bowl of warm water for 30 minutes.
Step Three: Fill and Steam Bake
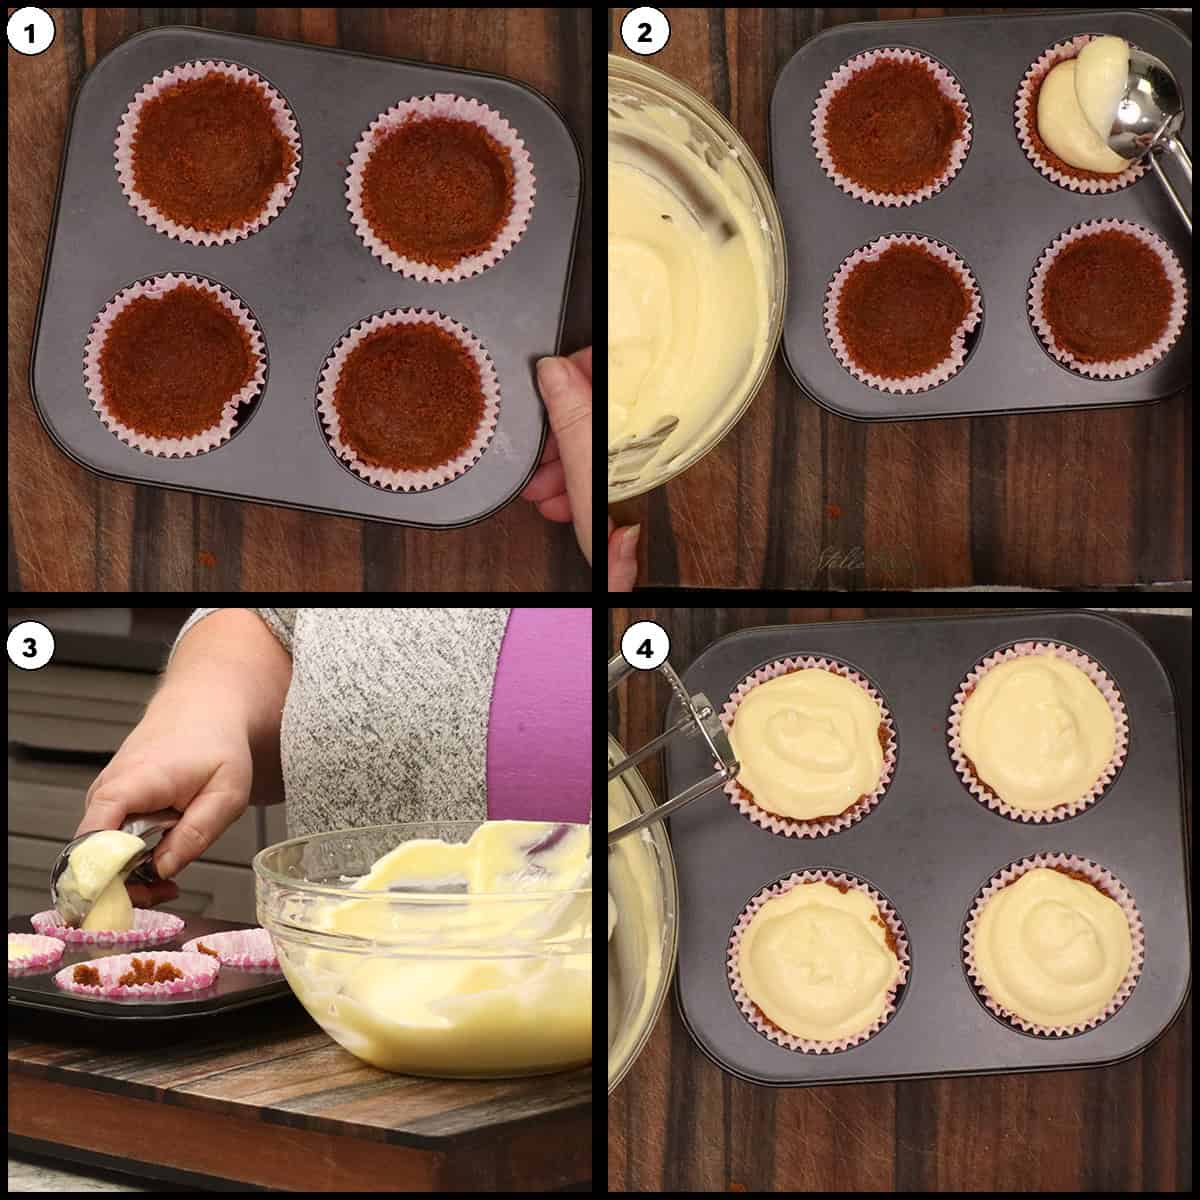
Scoop 3 tablespoons of the cheesecake filling into each prepared crust. The filling is going to look like it is overfilled, but trust the process. It works out perfectly, and you will still have room for the cherries on top. Use any remaining filling to go back and top off each cheesecake evenly.
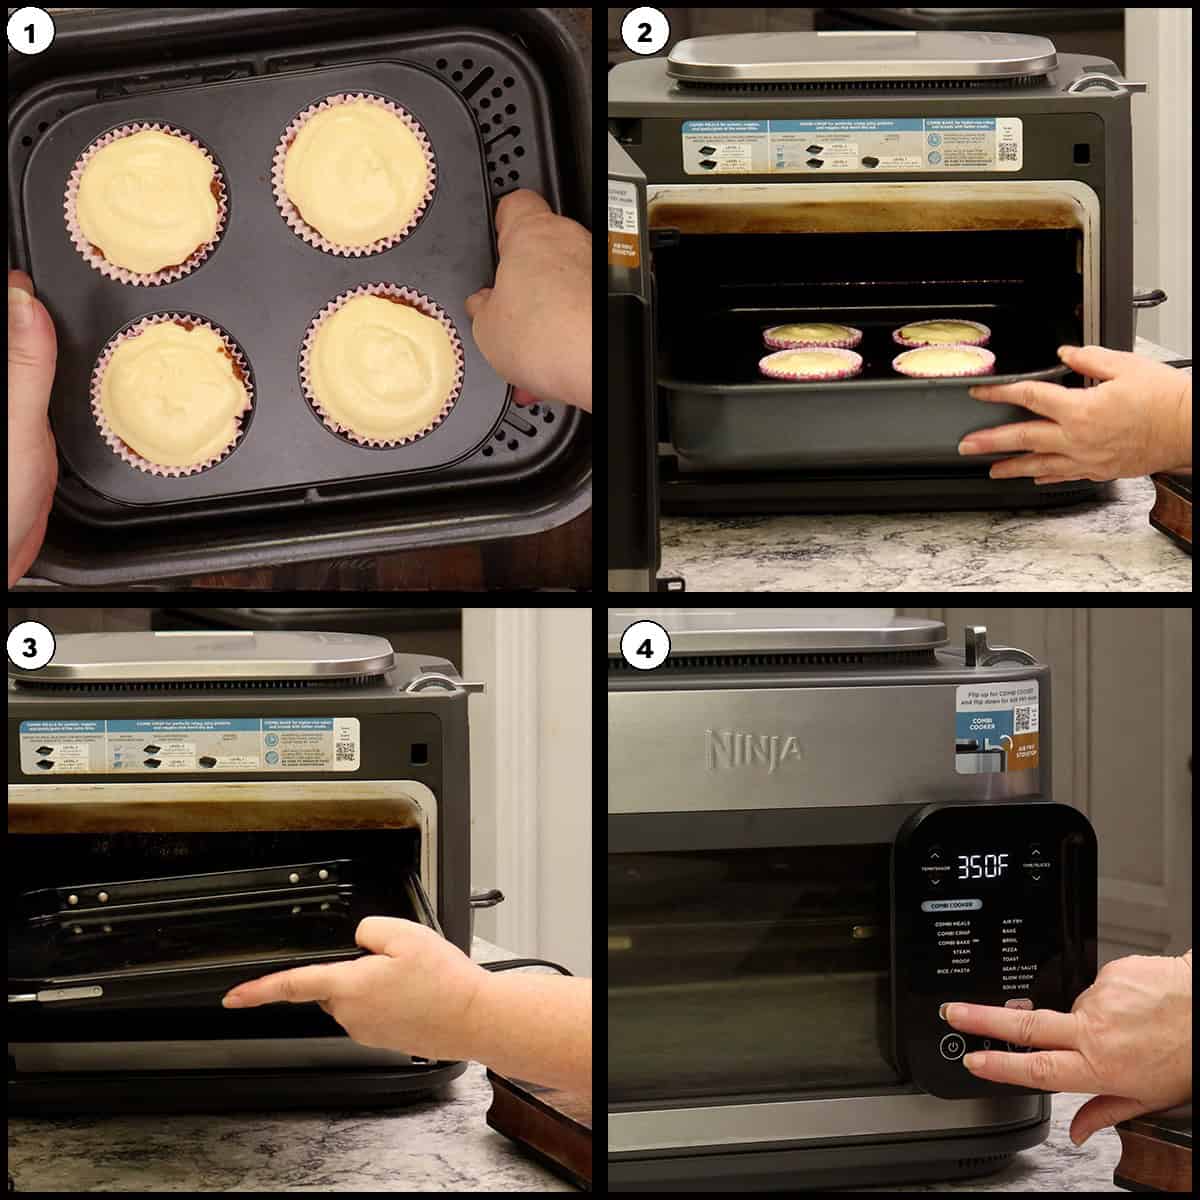
Set up the Ninja Combi with the bottom pan and rack insert. Add 1 cup of room temperature water to the bottom pan. Place the cheesecakes on the bottom level. Now take the upper rack and place it on the top level. This does two things: it prevents excess steam from falling directly onto the cheesecakes, and it deflects the fan once the bake mode kicks in.
Flip the switch up, select Combi Bake, set the temperature to 350℉/175℃, and set the time to 3 minutes. Now, it is not really just 3 minutes. The Combi runs a 20-minute preheat and steam cycle first, then the 3-minute bake begins. So the total cook time is about 23 minutes. Make sure you select Combi Bake specifically. Do not use Combi Meals or Combi Crisp, or the cheesecakes will not cook correctly.
Quick Tip
Make sure the Ninja Combi is completely cold before you start. If you have just finished cooking something else in it, let it cool down for at least 30 minutes. Starting with a warm appliance will throw off the timing for the steam bake cycle. This applies anytime you use Combi Bake, Combi Crisp, or Combi Meals.
Step Four: Make the Homemade Cherry Topping
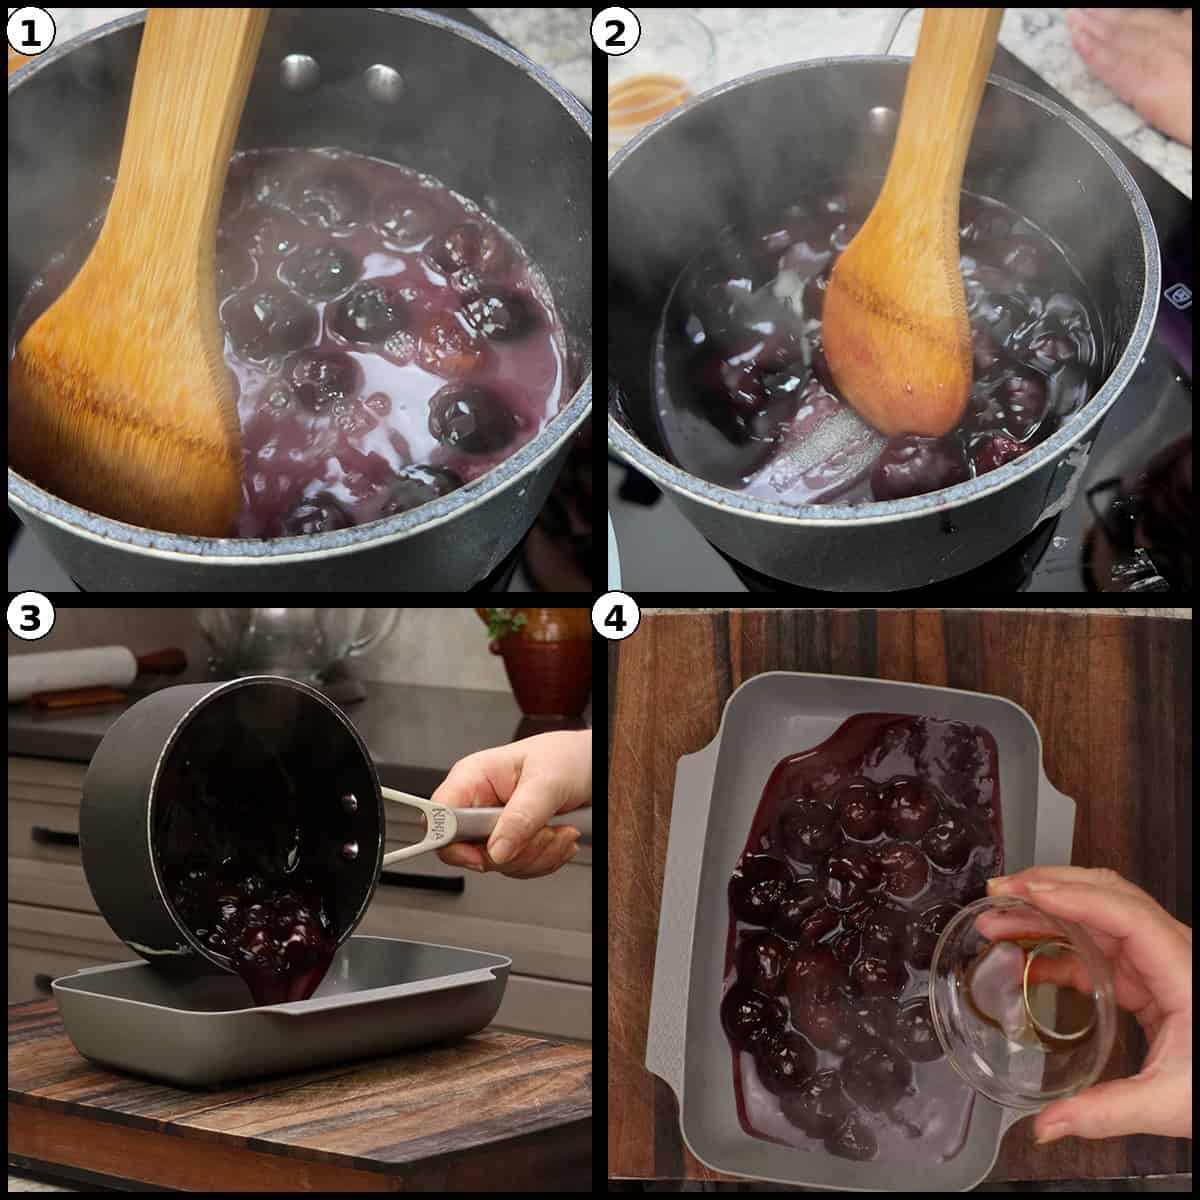
While the cheesecakes are baking or cooling, you can make the cherry topping. It only takes about 5 minutes. Add the frozen cherries, water, and sugar to a small saucepan over medium to medium-low heat. Give it a stir and bring the liquid up to a gentle simmer. You do not want a full boil here because when we add the cornstarch slurry, too much heat can make it clumpy.
Mix the cornstarch and water together to make a slurry. If you prepped it earlier, give it one more stir right before you add it, because the cornstarch likes to settle to the bottom. While stirring the cherry mixture continuously, pour in the cornstarch slurry. Keep stirring.

It is going to look cloudy and a little weird at first, but that will resolve as the cornstarch activates and thickens.
You will know it is done when you can scrape across the bottom of the pot and see the liquid separate.
Remove from heat and stir in the vanilla extract. The cherries should still be whole and intact, not broken down. Transfer to a shallow dish and pop it in the fridge to cool. You want this to be completely cooled before you top the cheesecakes.
Quick Tip
The homemade cherry pie filling will be a darker color than store-bought because there is no food dye. Personally, I like the flavor better of homemade!
Step Five: Chill and Serve
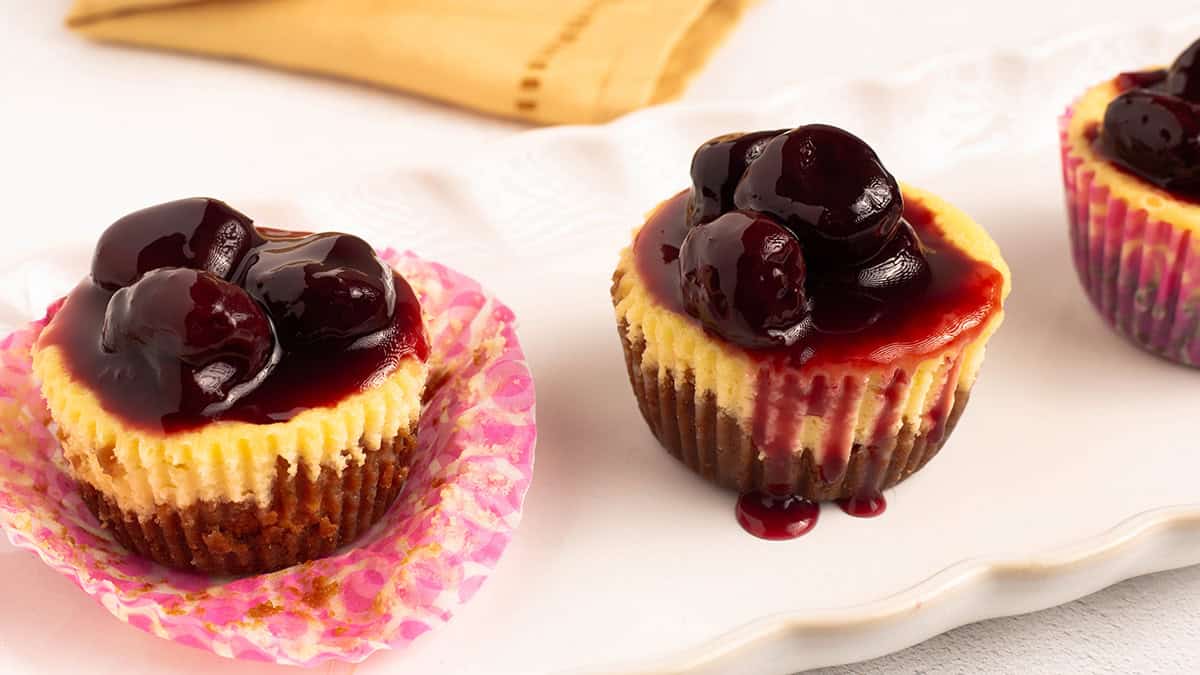
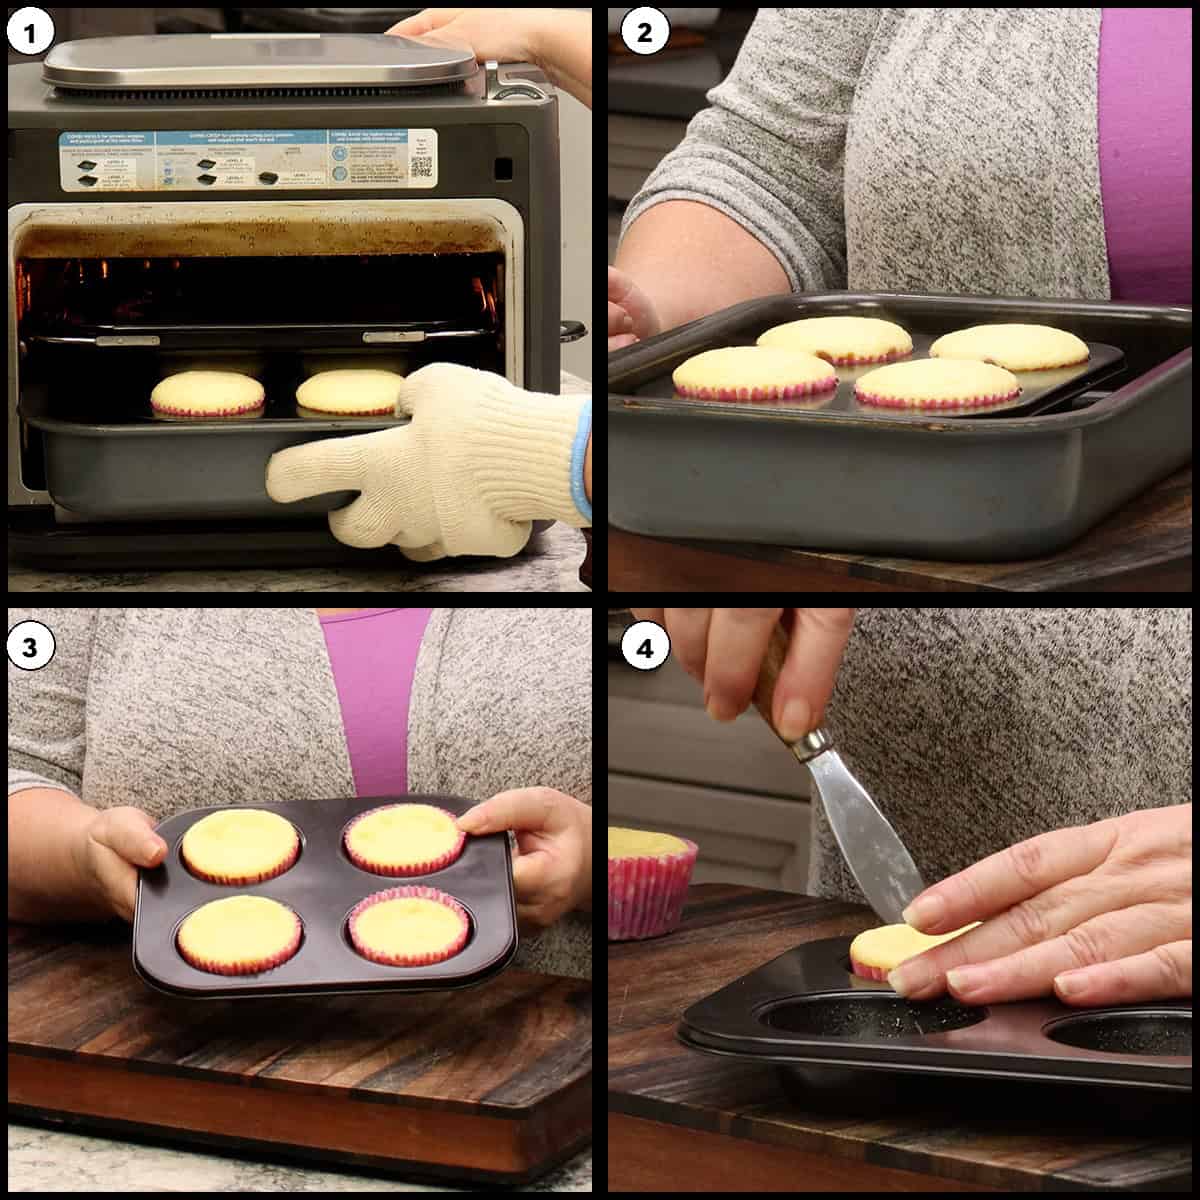
When the cheesecakes come out of the Ninja Combi, they are going to be domed up like perfect little cupcakes. That is exactly what you want to see. As they chill, they will compress down and leave plenty of room for the cherry topping. Pop them in the refrigerator for at least 2 hours, or overnight if you have the time. I leave the uncovered to chill, but after a few hours, you can cover them if you aren't serving them that day. You can also freeze them before adding the topping.
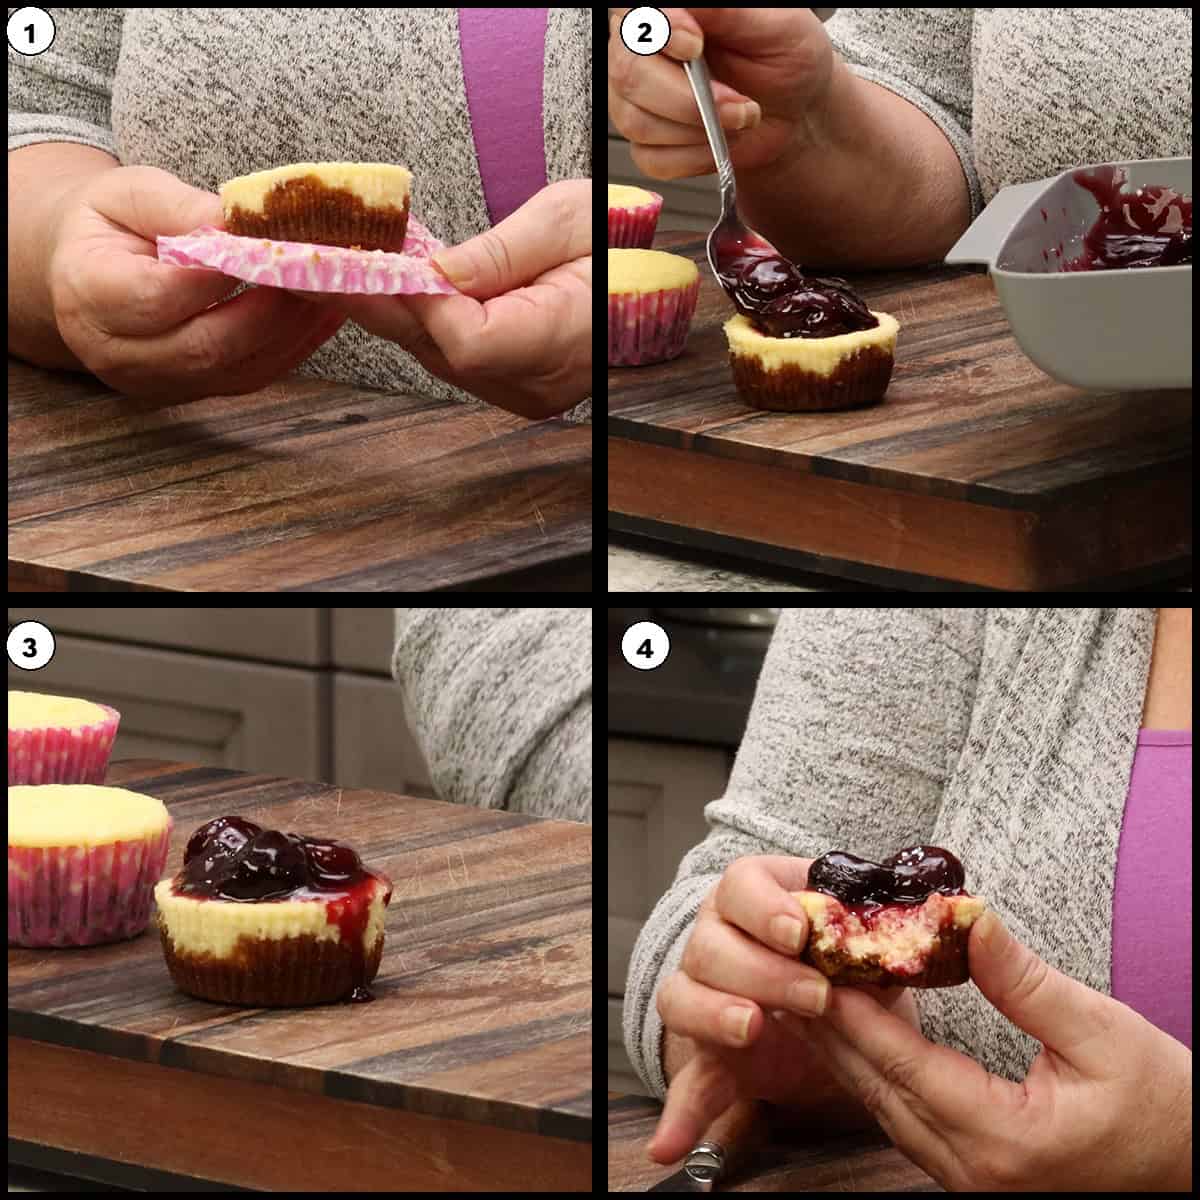
Once chilled, gently remove them from the cupcake pan. If any are a little stuck, just use something that is not sharp to gently lift them up. Unwrap them and arrange them on a platter for a beautiful dessert table presentation. Top each one with 2-3 cherries and a little bit of that gorgeous cherry juice. The end result is a crunchy Biscoff cookie base, a dense and creamy cheesecake filling, and a sweet, glossy homemade cherry topping. These are absolutely stunning and taste even better than they look.
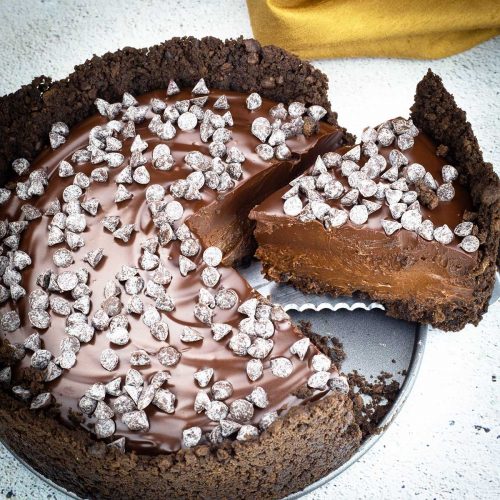
If you love cheesecake in all its forms, you should also check out my Turtle Cheesecake and Triple Chocolate Cheesecake for a full-size versions
Alternate Cooking Instructions
- Oven: Preheat your oven to 350℉/175℃. Place the filled cupcake pan in a deeper dish that you can fill with just enough water to come about halfway up the sides of the cupcake pan. Bake for 18-22 minutes or until the cheesecakes are set around the edges but still slightly jiggly in the center. Let cool completely, then refrigerate for at least 2 hours.
- Other Steam Bake Appliances: If your appliance has a steam bake or follow the same setup. Use 1 cup of room temperature water, 350℉/175℃, and adjust the time based on your appliance's preheat cycle. The key is the combination of steam and a short bake for moist, perfectly cooked cheesecakes.
Storage & Reheating Instructions
How to Store Leftover Mini Cherry Cheesecakes
I recommend adding the cherry topping just before you serve them.
Refrigerator: Store the cherry topping in a sealed container in the fridge for up to 4 days. Store the cheesecakes in a sealed container or bag in the fridge for up to 4 days.
Freezer: Place the chilled cherry topping in a freezer bag or container and freeze for up to 3 months. One completely cool, wrap each cheesecake in plastic wrap and place them in a freezer bag. Freeze for up to 3 months.
Mini Cherry Cheesecakes with Biscoff Cookie Crust
Equipment
- (affiliate link)Ninja Combi
- Food Processor
- Hand Mixer or Stand Mixer with Paddle Attachment
- 4-Cup Cupcake Pan
- Small Saucepan
- Tart Shaper or Back of a Spoon
Ingredients
For the Crust
- 8 Biscoff cookies finely ground to ¾ cup; graham crackers can be substituted
- 2 tablespoon melted butter salted or unsalted
For the Filling
- 8 oz cream cheese, room temperature must be soft; do not microwave to soften
- ⅓ cup sugar adjust to taste; ¼ cup for less sweet, ½ cup for sweeter
- 1 large egg, room temperature room temperature incorporates more easily
- 1 teaspoon vanilla extract vanilla paste can be substituted
- ⅛ teaspoon salt optional, balances sweetness
For the Cherry Topping
- 1½ cups frozen cherries 8 oz; canned tart cherries or morello cherries can be substituted. Use the juice from the can, too.
- ⅓ cup sugar adjust to taste
- ¼ cup water omit if using canned cherries
- 1 tablespoon cornstarch mixed with 1 tablespoon water to make a slurry
- 1 tablespoon water for the cornstarch slurry
- ½ teaspoon vanilla extract almond extract can be substituted for a nice twist
Would you like to save this recipe?
Instructions
- Place 8 Biscoff cookies into a food processor and process until super fine. Transfer the cookie crumbs to a small bowl and mix in 2 tablespoons of melted butter until the mixture resembles wet sand. If the mixture is too dry, add a little more butter. If too wet, add a few more crushed cookies. The finely ground texture is important for a crunchy crust.8 Biscoff cookies, 2 tablespoon melted butter
- Line a 4-cup cupcake pan with double paper liners. Add 1 and a half tablespoons of the cookie mixture to each liner. Using a tart shaper or the back of a spoon, press the mixture down firmly to create a sturdy base, then press up the sides to about halfway. Make sure the base is thicker than the sides so it holds together when picked up.
- Add one-third cup of sugar to a mixing bowl first, then add 8 ounces of room temperature cream cheese on top. Using a hand mixer or stand mixer with the paddle attachment on low speed, beat until smooth. Adding the sugar first helps the grit break down lumps in the cream cheese for a smoother filling. Do not mix on high speed, as you do not want to whip air into the batter.⅓ cup sugar, 8 oz cream cheese, room temperature
- Add ¼ teaspoon of salt, 1 teaspoon of vanilla extract, and 1 large room temperature egg to the cream cheese mixture. Mix on low speed just until incorporated. Scrape down the sides and bottom of the bowl with a spatula to check for any remaining lumps of cream cheese. Mix briefly one more time.1 large egg, room temperature, ⅛ teaspoon salt, 1 teaspoon vanilla extract
- Scoop 3 tablespoons of cheesecake filling into each prepared crust. The filling will look like it is overfilled, but it will settle as it cools. Use any remaining filling to top off each cheesecake evenly.
- Set up the Ninja Combi with the bottom pan and rack insert. Add 1 cup of room temperature water to the bottom pan. Place the cheesecakes on the bottom level. Place the upper rack on the top level to deflect steam and the fan from hitting the cheesecakes directly. Make sure the appliance is completely cold before starting.
- Flip the switch up and select Combi Bake. Set the temperature to 350 degrees Fahrenheit (175 degrees Celsius) and the time to 3 minutes. The appliance will run a 20-minute preheat and steam cycle before the 3-minute bake begins, for a total cook time of about 23 minutes. Do not use Combi Meals or Combi Crisp, as the cheesecakes will not cook correctly.
- While the cheesecakes are baking or cooling, make the cherry topping. Add 1 and a half cups of frozen cherries, one-quarter cup of water, and one-third cup of sugar to a small saucepan over medium to medium-low heat. Stir and bring the liquid to a gentle simmer. Do not let it reach a full boil.1½ cups frozen cherries, ⅓ cup sugar, ¼ cup water
- Mix 1 tablespoon of cornstarch with 1 tablespoon of water to create a slurry. Give it a stir right before adding it to the cherry mixture. While stirring continuously, pour the cornstarch slurry into the simmering cherries. Keep stirring until the liquid thickens and you can scrape across the bottom of the pot and see it separate. Remove from heat and stir in half a teaspoon of vanilla extract.1 tablespoon cornstarch, 1 tablespoon water, ½ teaspoon vanilla extract
- Transfer the cherry topping to a shallow dish and refrigerate until cooled. The cherries should remain whole and intact, not broken down.
- When the cheesecakes are done, remove them from the Combi. They will be domed up like cupcakes, which is exactly what you want. Refrigerate for at least 2 hours or overnight until fully chilled and set. The cheesecakes will compress down as they cool, leaving room for the cherry topping.
- Once chilled, gently remove the cheesecakes from the cupcake pan. Top each one with 2-3 cherries and a little bit of the cherry juice. Serve and enjoy the crunchy Biscoff cookie crust with the creamy cheesecake and homemade cherry topping.
Notes
• Cream cheese and egg must be at room temperature. Plan ahead and leave them out for several hours.
• Put the sugar in the bowl first, then add the cream cheese on top. The grit of the sugar helps smooth out the cream cheese and prevents lumps.
• Always scrape down the sides and bottom of the bowl after mixing.
• Use a food processor for the Biscoff cookies to get them super fine. This is important for the crust to hold together and stay crunchy. NUTRITIONAL DISCLAIMER:
Nutritional information provided is an estimate based on typical ingredient values and standard portion sizes. Actual nutritional content may vary significantly depending on specific brands used, ingredient substitutions, preparation methods, portion sizes, and individual cooking techniques. For precise nutritional information tailored to your specific ingredients and preparation, please consult with a registered dietitian or use laboratory analysis. This information should not be used for medical nutrition therapy or to manage medical conditions without professional guidance.
Nutrition
Variations
- Graham Cracker Crust: Swap the Biscoff cookies for graham cracker crumbs. Use ¾ cup of finely ground graham crackers mixed with the same amount of melted butter for a more traditional mini cheesecake recipe.
- Oreo Cookie Crust: Use Oreo cookies (cream filling included) for a chocolate cookie base. Process them the same way in the food processor and adjust butter as needed.
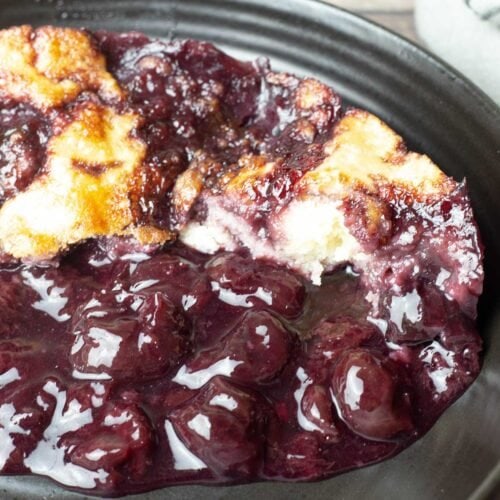
- Blueberry or Strawberry Topping: Use the same homemade topping method with frozen blueberries or strawberries instead of cherries. Adjust sugar to taste depending on the fruit.
- Full Batch (12 Cheesecakes): Triple the recipe to make a full batch of 12 mini cheesecakes using a standard muffin pan.
More Cheesecake and Dessert Recipes You'll Love
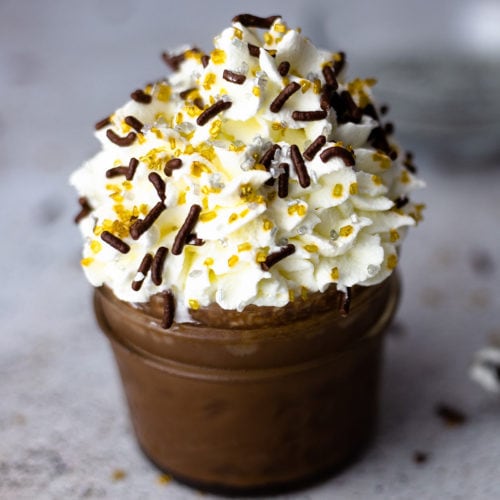
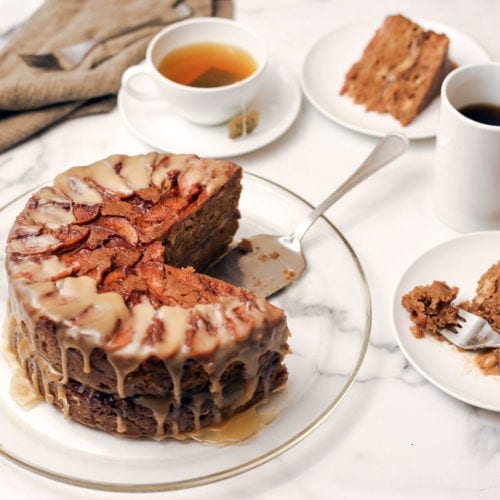
If you love these mini cherry cheesecakes, you will want to try some of my other favorite cheesecake and dessert recipes. From rich chocolate indulgences to fruity cobblers, there is something for every sweet tooth.
Frequently Asked Questions
Room temperature cream cheese is soft enough to combine smoothly with the sugar and egg without leaving lumps. Cold cream cheese will not mix properly and you will end up with a lumpy cheesecake batter. Plan ahead and leave it out for several hours before starting.
The grit of the sugar acts like a gentle abrasive that helps break down any lumps in the cream cheese as you mix. This simple trick produces a much smoother cheesecake filling than adding the sugar after the cream cheese.
The cheesecakes dome up like cupcakes during baking, which is completely normal and exactly what you want. As they cool and chill in the refrigerator, they will compress back down, creating the perfect flat surface with room for the cherry topping.
No. You must use Combi Bake for this recipe. Combi Meals and Combi Crisp use different heat and steam combinations that will not cook the cheesecakes correctly. Combi Bake provides the right balance of steam and gentle baking heat for perfectly moist, dense cheesecakes.
The dark color is completely natural. Store-bought cherry pie filling gets its bright red color from food dye. Homemade cherry topping made from real frozen cherries will be darker, and that is a good thing because it means you are getting real cherry flavor without artificial coloring.
Yes, these freeze beautifully. Freeze the cheesecakes without the cherry topping in an airtight container for up to 2 months. Thaw them overnight in the refrigerator, then add the cherry topping before serving. The cherry topping can be made fresh or stored separately in the refrigerator for up to a week.
About the Recipe Author, Louise Long
Louise is a full-time recipe creator and food blogger @ The Salted Pepper. She has over 30 years of experience with cooking and recipe development. She owned a restaurant for several years and was a full-time RN until retiring to blog full-time.

She published her first cookbook in the Fall of 2018 and is very interested in writing several more.
Louise is also the creator of an online Ninja Foodi Pressure Cooking Course with over 100 instructional step-by-step videos. People absolutely rave about the course and all the value they have received from it.
Louise has several very active Facebook groups that help people with the basics of cooking and learning more about the appliances they love.
Ninja Foodi Pressure Cooker & Air Crisper 101
Ninja Woodfire Outdoor Grill & Smoker
Louise is also a YouTube creator and you can find most of her recipes in video format on The Salted Pepper YouTube channel.
She is very responsive to messages and eager to help in any way she can. Get more Information about Louise & contact information
I WOULD LOVE TO SEE WHAT YOU ARE COOKING UP IN YOUR KITCHEN! TAG ME @THESALTEDPEPPER ON YOUR FAVORITE SOCIAL MEDIA PLATFORM WHEN YOU MAKE A DISH!
BE SURE TO FOLLOW THE SALTED PEPPER RIGHT HERE ⇓⇓⇓⇓⇓
Leave a Reply