You won't believe how delicious and juicy these air fryer frozen chicken thighs turn out! I'm not usually a big fan of cooking meat from frozen because the results can be less than great. However, using this step method for cooking meat from frozen is a game changer.
In about 30 minutes you can have tender, juicy chicken thighs with crispy skin right in your air fryer! Pair these crispy chicken thighs with some steam & crisped broccoli for a delicious low carb meal.
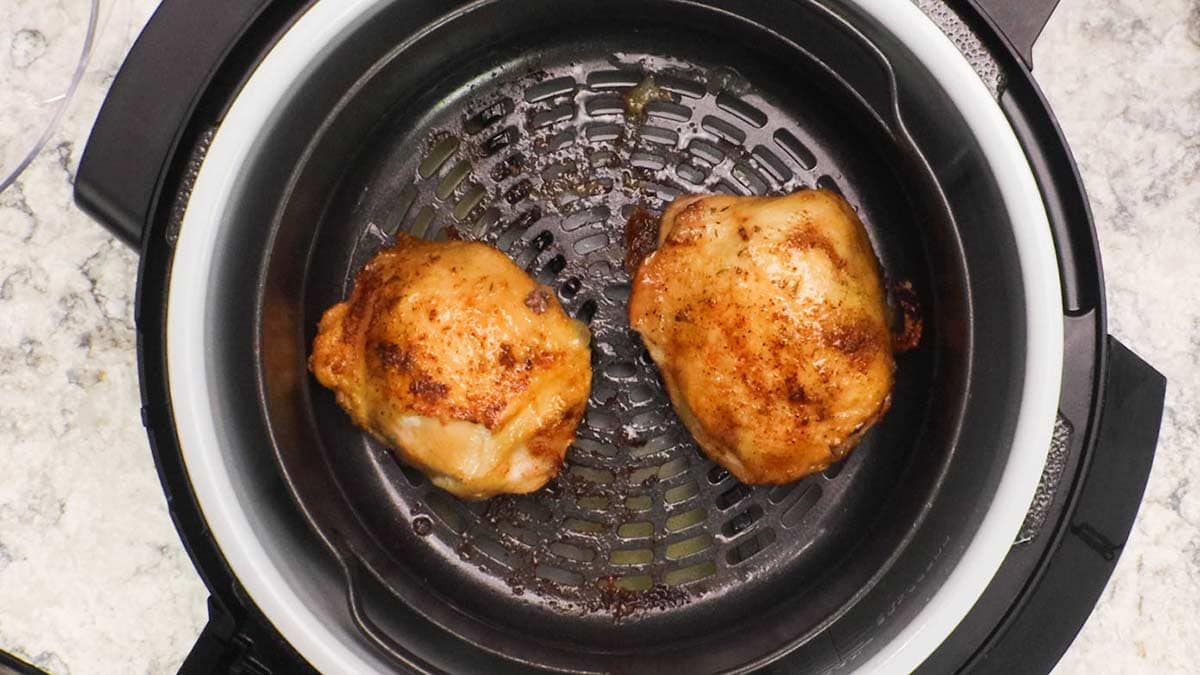
In this recipe post, I focus on chicken thighs, but you can use the step method to cook just about anything from frozen without sacrificing quality. For a detailed explanation of the step method, see my full article (coming soon): Cooking from frozen: Get great results using the step method.
I have applied this method over and over again with different types of meat and it works flawlessly as long as you understand the principles.
Ingredients & Substitutions
Frozen Chicken Thighs
In this recipe, I use bone-in, skin-on chicken thighs that are frozen. You can use any kind of chicken thighs that you have on hand, but the temperatures and times will be different. You can even use thawed chicken thighs and cook them in the air fryer, but here we are focused on frozen thighs. Although I used bone-in chicken thighs in this recipe, you can also use boneless chicken thighs and modify your times a little bit. My recommendation for the best results is to use thighs with the skin on, but you can use boneless skinless chicken thighs and refer to the chart below for temperatures and timings.
Like I said in the introduction paragraph, this step-method of cooking can be applied to all kinds of frozen meat, so be sure to check out the complete guide if you want to make frozen pork chops, frozen chicken breast, and a multitude of other frozen meats so you understand the principles behind deciding on timing and temperatures.
Seasonings
I use a basic spice blend of onion powder, garlic powder, dried thyme leaves, and salt and black pepper in this recipe. You can use any seasoning blend you like.
I do recommend using dry herbs instead of fresh in this recipe because many fresh herbs will burn during the air frying process.
I spritz with oil just so the seasonings stick, but you can also spritz with water if you don't want to use oil. I used avocado oil, but olive oil or any kind of oil you like will work just fine.
You can also use this recipe for making a delicious bbq chicken by cooking the chicken like I do in the recipe and applying the BBQ sauce the last 5 minutes of cooking and cranking up the heat to the air fryers highest setting.
How Food Cooks in an Air Fryer
To get started, let's talk first about how food cooks in an air fryer and what variables may be present that will require some changes.
Basically, an air fryer is a convection-style oven that is usually smaller and more compact with a powerful fan that circulates hot air around the food you are cooking. Air Fryers are more efficient and do a better job at crisping than a traditional convection-style oven because there is less heat loss, but all air fryers are not created equal.
I use the Ninja Foodi Pressure Cooker & Air Crisper and find the air fryer function works wonderfully. It is very comparable to the air fry function on the Ninja Air Fryers and the Ninja Indoor Grill air fry function. So, if you have a Ninja air fryer, you should be just fine with these instructions. However, make sure to check on your chicken during the air frying process and make adjustments in temp and timing as needed. Different styles and different brands of air fryers will cook differently, so I recommend taking some notes when you make something for the first time so you know what you did to get the results you want, and the next time you cook that same food, you can go on autopilot.
If you have been using your air fryer with other recipes and find you have to increase the temperature or time to get the best results for that recipe, then that will probably carry over to this recipe as well. Some air fryers are bigger, like the Ninja XL oven and don't always cook the same as smaller air fryers. The good news is it really doesn't matter what air fryer you are using for this recipe, you can adjust the step method to make perfectly cooked juicy thighs in any air fryer.
In cooking, there are always variables present. Understanding them and making adjustments is the difference between a recipe turning out perfectly for you or a complete failure. Always remember, recipes are guidelines only. As far as chicken thighs go, the thickness of the frozen chicken thighs are going to be a factor in how long they take to cook. The thicker they are, the longer it's going to take for the heat to reach the center and cook it. The fact that it's frozen only amplifies this and that is where the step method comes into play. If you have really thick chicken thighs, the second cooking step would be at a lower temperature and for a longer period of time. I definitely recommend an Instant read thermometer when cooking meat, whether from frozen or thawed. It is really the only way to have perfectly cooked meat every single time. Well... there is sous vide cooking, but that's a completely different topic.
How to Air Fryer Chicken Thighs from Frozen
As with any other recipe, we first need to do the preparation. With this recipe, it is super easy. The only prep is getting the frozen chicken thighs out of the freezer!
I like to put the frozen chicken thighs on a sheet tray, but you could also place them directly on your cutting board if you prefer.
Seasoning
I choose to season at the very beginning for the best flavor. However, spice rubs don't always like to stick to frozen food. To get around this, I use a little spritz of avocado oil. Olive oil or any kind of neutral-flavored oil will work just fine. You only need a little spritz, maybe a teaspoon for two chicken thighs.
If you love air frying as much as I do, you know that having an oil spritzer is so helpful. You also may know that many don't work that great. I have tried out several brands and the ones that have never let me down are these: (affiliate link)EVO Oil Spritzers
Spritz and season each side of the frozen chicken thigh. You can use my seasoning blend or whatever blend of seasonings you like. If you plan on using a sauce, like BBQ sauce, at the end, then maybe stick with simple salt and pepper or a BBQ-inspired seasoning.
Preparing the Air Fryer
This may vary depending on what style of air fryer you have, but most air fryers have an inner container or drawer and then a basket or a tray where you can elevate the food for better airflow.
You will want to add 1 cup of VERY HOT water just before you are ready to air fry. The purpose of the hot water is to create a little bit of steam in the air fryer that helps thaw the chicken quicker so you don't have to cook with dry heat as long.
This is what helps to keep the meat from drying out while you are getting it cooked to temperature.
If you are using an oven-style air fryer, you can put a dish on the bottom rack and the hot water in the dish.
Essentially, we are creating a combination of steam and air frying.
If you have the Ninja Foodi with Smart Lid, you can absolutely use the steam/crisp function. You will still use the temperature step method, but your air frying time will be reduced. Start out at 400℉/200℃ for the first 5-7 minutes after the countdown starts and then decrease the temperature as stated in the recipe. If the time runs out at any time when you are cooking the chicken, don't go back on steam/crisp, switch to air fry to finish cooking the chicken.
Air Frying the Chicken Thighs Using the Step Method
Once the water is in the air fryer and you have your basket or rack in the air fryer, place the chicken thighs in a single layer on the rack or in the basket.
The number of thighs you can cook at once will depend on your air fryer. I can fit 3 comfortably in my Ninja Foodi Pressure Cooker & Air Crisper using the basket and probably 4 if I used the rack.
Set the air fryer temperature to 400℉/200℃ and the time for 15 minutes.
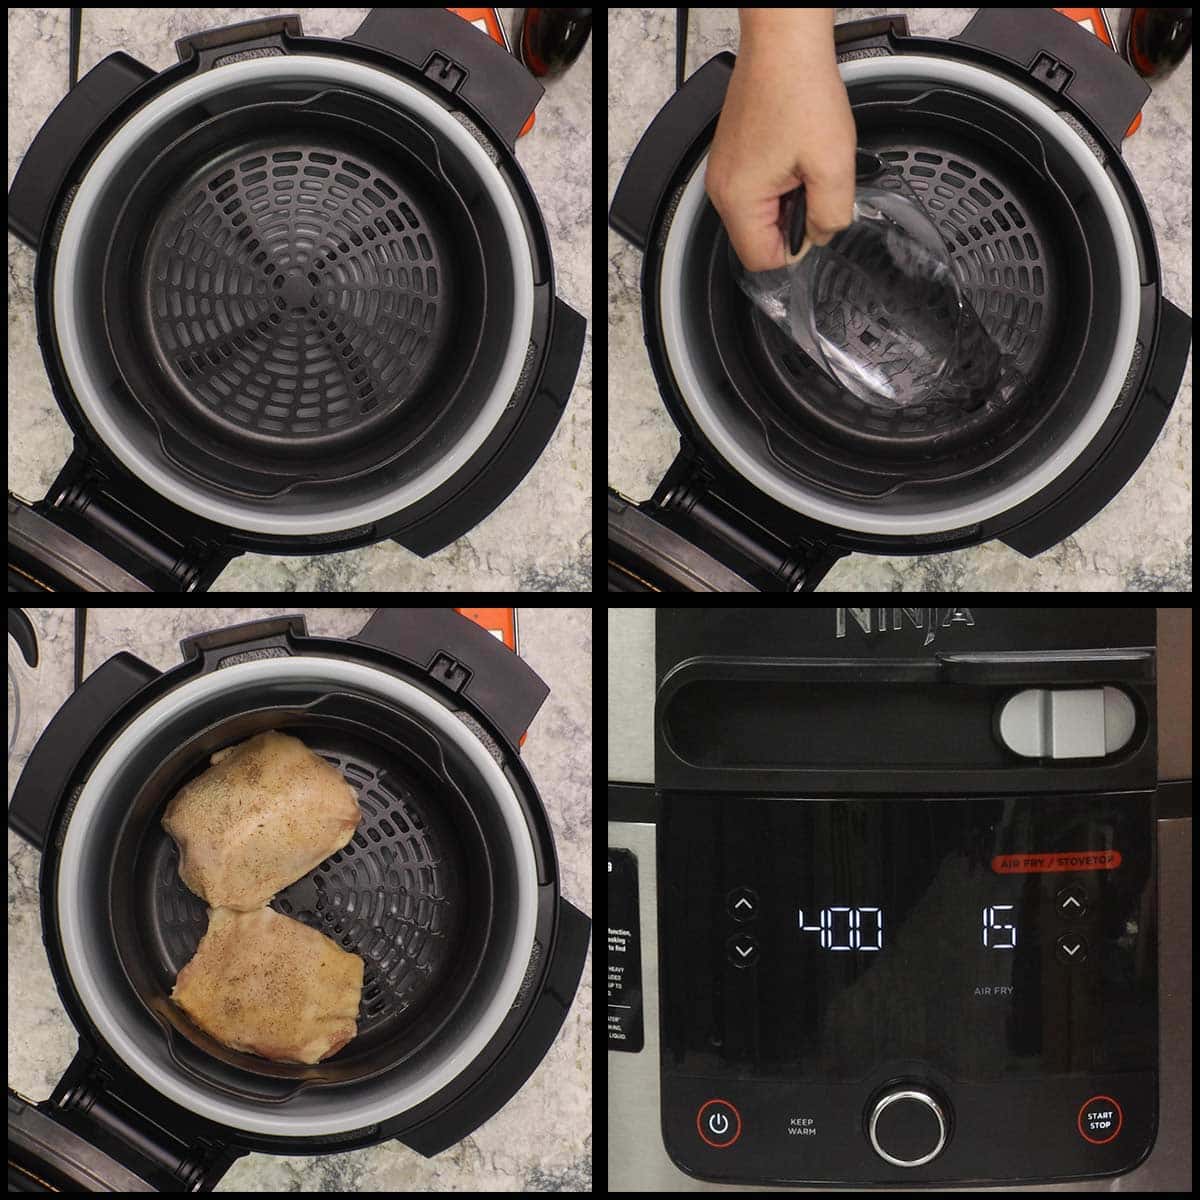
Once the time has gotten down to 14 minutes or so, open the lid and quickly take a peek at them. They should be starting to brown nicely and you can flip them over if you like. I usually do this so that each side cooks evenly.
Lower the temperature to 325℉/160℃ and let them cook another 10-15 minutes. I usually set the timer for 25 minutes, but have found that it takes between 30-35 minutes total time to air fry a frozen chicken thigh of average size. Smaller ones will take less time and bigger ones will take longer.
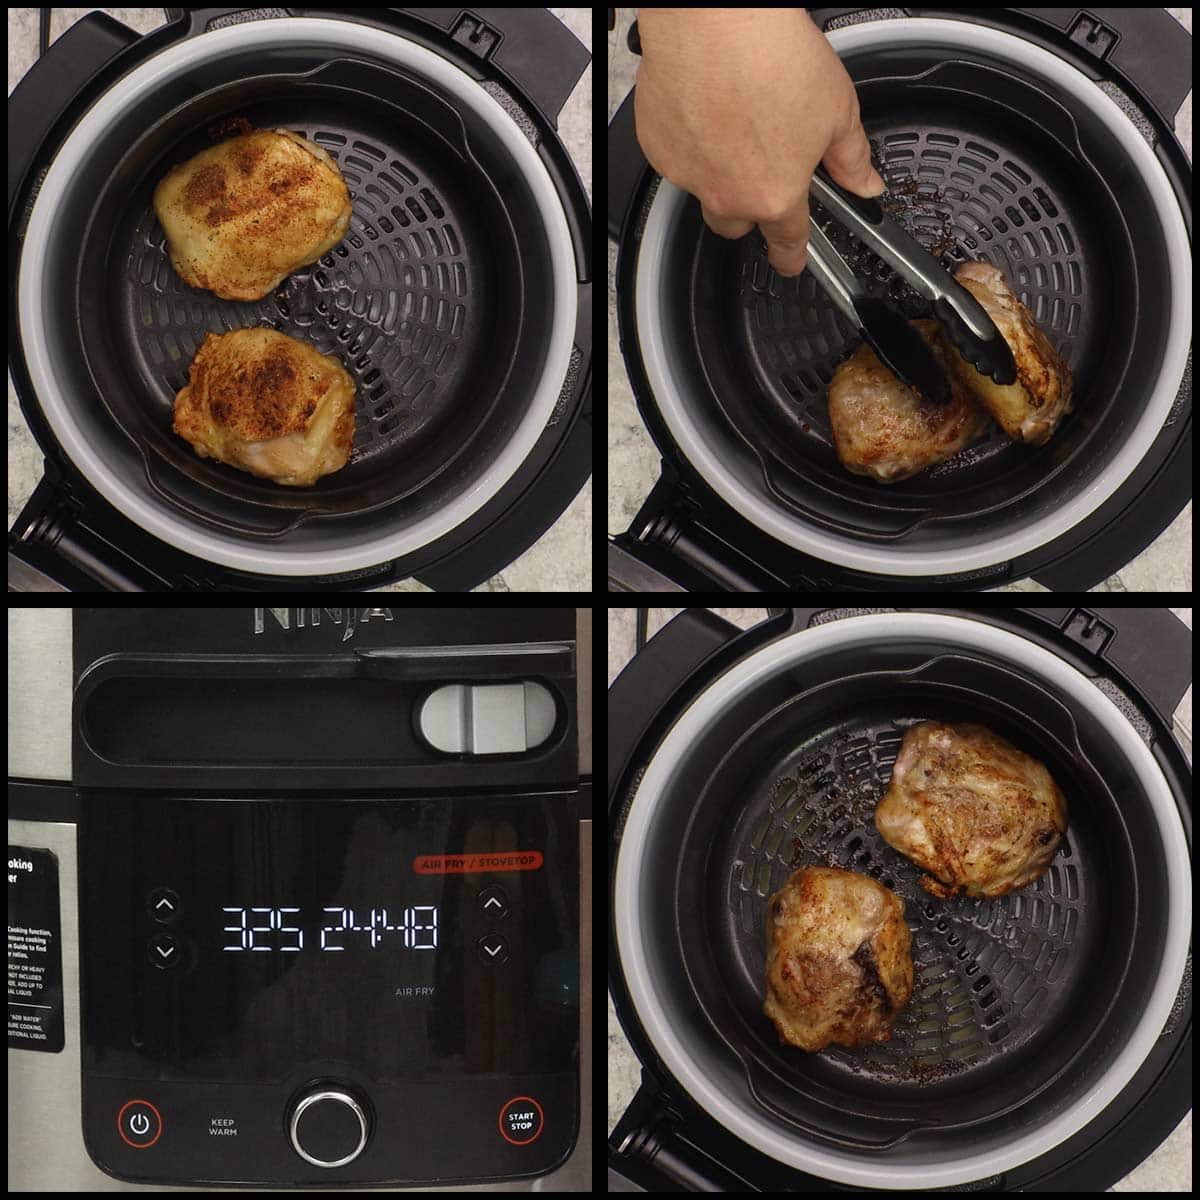
By starting out at a high temperature and then reducing it, you are allowing the skin on the chicken thigh to start to render the fat and crisp up, and then the reduced heat keeps the outside of the chicken thigh from burning before the inside has a chance to cook all the way through.
You may be tempted to just keep the heat at 400℉/200℃ the entire time and you will cook the chicken that way, but what happens is the outer part of the chicken meat becomes too dry and kind of stringy because it is overcooked by the time the inside of the chicken comes up to a safe temperature. For the best results, follow the step method.
After 10 minutes on 325℉/160℃, take an internal temperature using a meat thermometer. I use my (affiliate link)Thermoworks MK4 instant read, but any accurate instant read or probe thermometer will work fine.
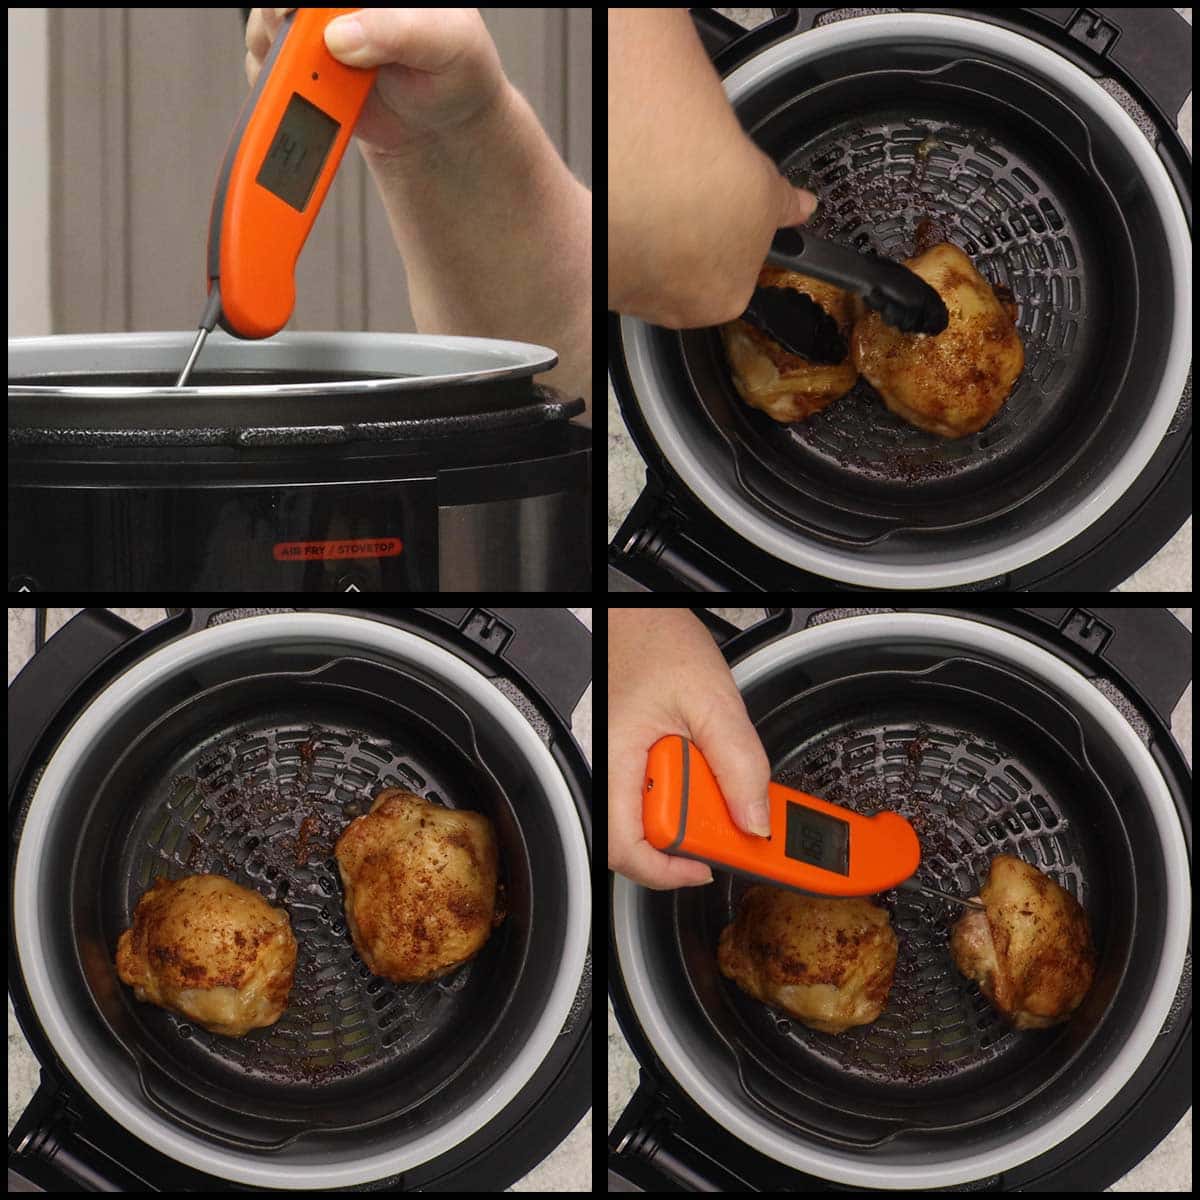
When the internal temperature reaches at least 160℉/71℃, you can pull the chicken thighs out and let them rest. During the rest time, the temperature will rise to 165℉/74℃.
The great thing about chicken thighs is how forgiving they are if you overcook them. Often times when the internal temperature gets to be around 155℉/68℃, I will increase the temperature to 400℉/200℃ again to get the skin even crispier.
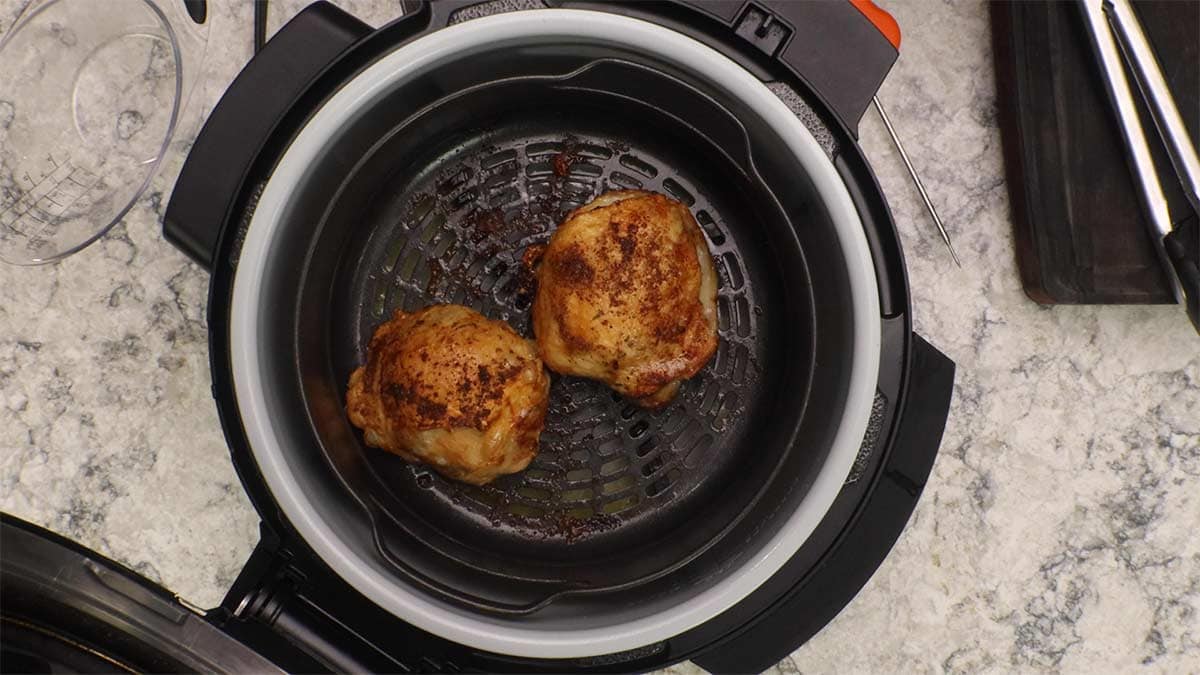
This is totally optional and really depends on how you like the skin cooked or if you plan on eating the skin. If you don't plan on eating the skin, there is no benefit to increasing the temperature during the last few minutes of the air frying cooking time.
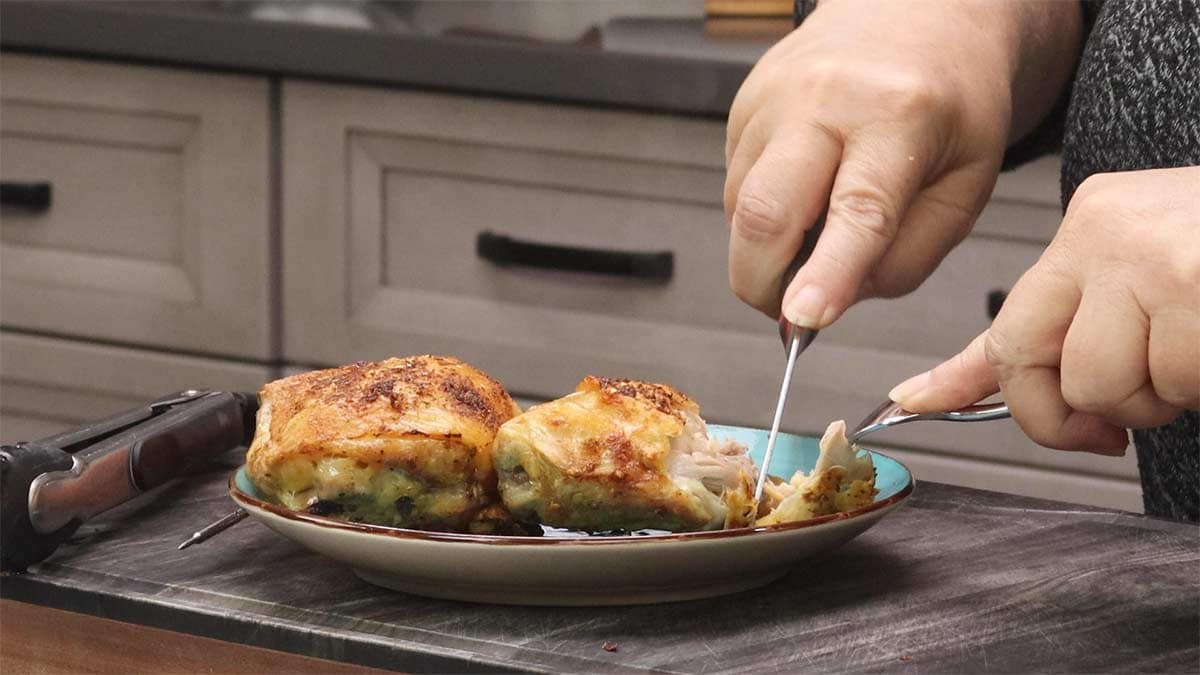
Once the chicken rests for 5 minutes or so, serve and enjoy!
Frequently Asked Questions
That depends on your air fryer and the type of chicken thighs you are making. For skin-on chicken thighs, you want the chicken thighs in a single layer as much as possible so they get the benefits of the air fryer and develop a nice crispy skin.
If the thighs are without skin and crisping isn't really the goal, you can pile them in the basket of your air fryer and cook at a low temperature, making sure to toss them around frequently until they are cooked to an internal temperature of at least 165℉/74℃
If the total cooking time to get your chicken cooked from frozen is less than 2 hours, it is always safe to cook chicken from frozen.
Longer cooking times require a little more research and thankfully, much of that research has been done especially since sous vide is such a big thing for home cooks now. Food safety is all about temperature and time. Higher temperatures kill bacteria quicker than lower temperatures. However, lower temperatures for longer periods of time can be just as effective at killing pathogens.
EASY Air Fryer Recipes
I love my air fryer and I'm constantly amazed at how well it transforms food into crispy bites of deliciousness!
If I want my food to be crunchy or mimic deep frying, I always turn to my air fryer. Here are some incredibly easy air fryer recipes for you to try out!
Air Fryer Frozen Chicken Thighs Recipe
Equipment
- Air Fryer
Ingredients
- 2 frozen chicken thighs skin on and bone-in
- oil for spritzing optional
- 1 cup very hot water
Seasoning Blend
- ½ teaspoon fine grind sea salt
- ¼ teaspoon black pepper
- ¼ teaspoon garlic powder
- ¼ teaspoon onion powder
- ⅛ teaspoon dried thyme leaves
Instructions
- Spritz each frozen chicken thigh with a little oil. Mix seasonings together and season each side.
- Add 1 cup of very hot water to the base container of your air fryer. This would be the inner pot of the Ninja Foodi Pressure Cooker & Air Crisper. Place the air fryer basket or rack in the air fryer and put the frozen chicken thighs, skin side up, in a single layer on the rack or in the basket.
- Set the air fryer to 400°F/200°C for 15 minutes. When the time is up, open the air fryer and flip the chicken if desired. Reduce the temperature to 325°F/160°C and set the time to 25 minutes.
- After 15 minutes at 325°F/160°F, open the air fryer and flip the chicken. The internal temp should be around 150°F/60°C. You can either keep going at this lower temp of 325°F/160°C for another 5-10 minutes or until the internal temp reaches 160-165°F/71-74°C or if you want more crisping and browning on the skin, increase the temperature back up to 400°F/200°C for 5-10 minutes or until the internal temperature reaches at least 160°F/71°C.
- Remove the chicken thighs from the air fryer and let them rest for 5 minutes. Serve & Enjoy!

Leave a Reply