
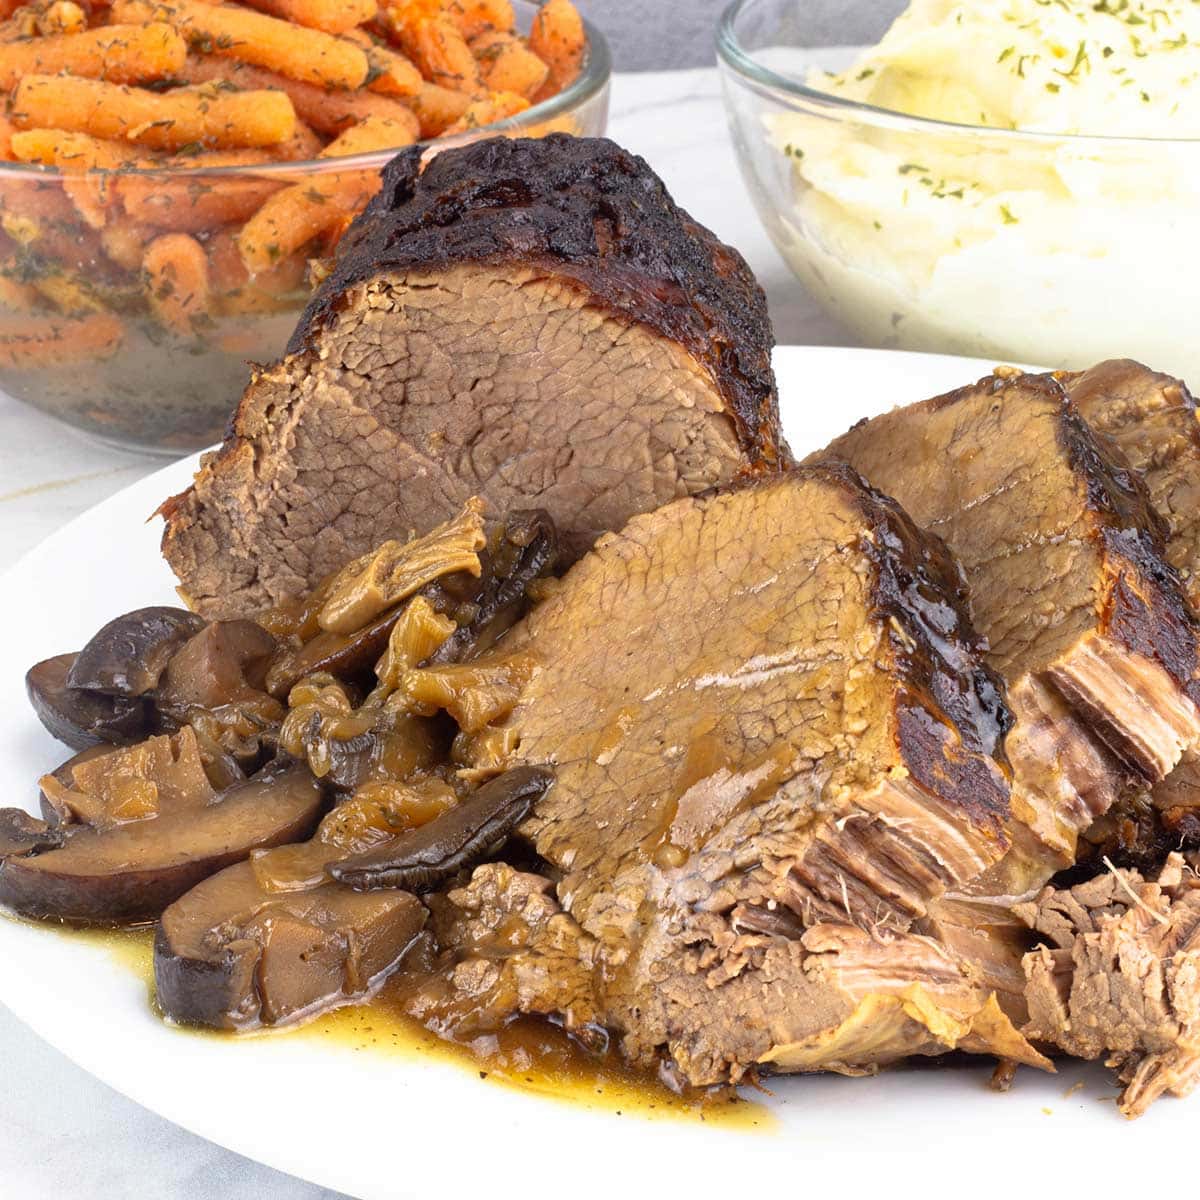
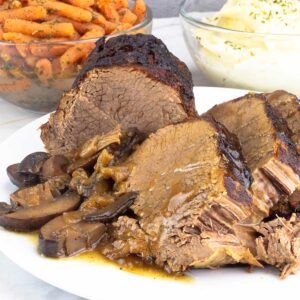
When I say tender, I mean cut-with-a-fork tender. When I say juicy, I mean it's juicy, not dry and stringy from overcooking like so many roasts can be.
When you think about this eye of round roast recipe, think about the best pot roast you've ever had. Now, make it perfectly round and sliceable. It's tender, juicy, sliceable, and simply perfect!
Would you like to save this recipe?
Simply put, this economical cut of beef can be tough and dry if not cooked properly. While there are certainly different cooking methods to get fork tender, yet sliceable results, the best way I've found is pressure cooking.
Then, I take it a step further and develop a nice crust by crisping up the fat cap after pressure cooking. This cooking technique is known as TenderCrisp and is what is so popular about the Ninja Foodi Pressure Cooker & Air Crisper or the Instant Pot Duo Crisp or Pro Crisp.
This same result can also be achieved with a Mealthy lid that fits on your Instant Pot.
If you don't have a crisping lid for your electric pressure cooker, you can always use the oven for crisping the fat cap.
Keep in mind that this recipe is not intended to be used for a medium rare roast beef. It is fully cooked to an internal temperature of greater than 190°F. What this does is break down the connective tissue enough to make a tender eye of round that can be sliced into thick slices. If you want a medium rare to rare roast beef for sandwiches, use this recipe: Perfect Roast Beef in the Ninja Foodi
Ingredients & Substitutions
Eye of Round Roast

The eye of round comes from the hindquarters of the cow and tends to be a very lean and tough cut of beef. While it looks similar to a beef tenderloin, it is not nearly as tender and the cooking methods are completely different. You want to look for an eye of round roast that has a decent fat cap on it. This fat will help keep the roast flavorful and moist as it pressure cooks. It also flavors the juices and provides the necessary fat to make a traditional flour gravy, if desired.
While you can use different cuts of beef, like a chuck roast or rump roast, to make this recipe, the end result will be different. A chuck roast is much fattier and definitely delicious, but it isn't going to slice nicely like the eye of round will. If you wanted to make a traditional pot roast using a chuck roast with potatoes and carrots, use this recipe instead: Ninja Foodi Pot Roast.
You could also use a bottom round roast or a even a top round; however, why use expensive cuts of beef when the eye of round will give you great results with this cooking technique and is usually much less expensive.
The roast I used was about 4 pounds (1.8kg) and the cooking times will depend on the size of your roast to a certain degree. More than weight, the shape of the roast plays more of a role in the cooking time. My roast was about 6" in diameter which is fairly typical for an eye of round. If you have a 5-6 pound eye of round that is about 6" in diameter, you can keep the cooking time the same.
For smaller roasts, you will want to decrease the cooking time just a bit. For a 2-3 pound eye of round roast, I would pressure cook for 60 minutes with a full natural release.
The most important thing to consider when cooking an eye of round is the results you want. If you are looking for a medium rare to rare piece of beef to thinly slice for tender roast beef sandwiches, the cooking technique would be completely different. Instead of pressure cooking, you would use a high temperature heat in a dry cooking environment to start the cooking process and then either turn the heat off or lower it considerably to finish cooking the roast to your desired temperature. My perfect roast beef recipe would work just fine with an eye of round for medium rare roast beef, however my preference for roast beef is always going to be a top round.
If you have eye of round steaks instead of a roast, the cooking time is much less. You can follow this recipe: Pressure Cooker Swiss Steak
Seasonings
I like to keep the seasonings very simple so I can use leftovers for various different beef dishes like shredded beef tacos or French onion beef sandwiches. I used salt, black pepper, and thyme. I purposefully didn't add garlic powder or onion powder to the rub because Jeff loves shredded beef tacos and my taco seasoning blend has those ingredients in it.
You can use whatever spices you love to make a delicious seasoning blend for your eye of round roast. Seasoning the eye of round roast can be done up to 2 days ahead of time and I definitely recommend seasoning at least a few hours in advance. Wrap the roast in plastic wrap and store in the fridge until just about 1 hour before you want to cook it.
Although I recommend seasoning ahead of time, I rarely remember to do this, so don't worry if you don't have time. Season just before searing and your roast will still be delicious. It just sometimes needs a little extra salt when serving.
Liquids
In order to pressure cook, we need liquid in the pot. However, you don't need a lot. Keep the total liquid under 1 cup because you will end up with a ton of liquid after pressure cooking. During my testing of this recipe, I started with 2 cups and ended up with over 10 cups of liquid.
The liquid you use is completely up to you. I like to use a combination of beef broth, red wine vinegar, and Worcestershire sauce. You could use red wine instead of red wine vinegar and I would use at least a ¼ cup of red wine and decrease the beef broth to ½ cup.
Vegetables
When choosing the vegetables to include with your eye of round, keep in mind the long cooking time. 90 minutes of pressure cooking with a full natural release (about 25 minutes) is a VERY long time for most vegetables.
Carrots and potatoes would be very soft even if left whole, so I don't recommend adding them at the beginning of pressure cooking. If you wanted to add them in, my recommendation is to pressure cook for 75 minutes, do at least a 15-minute natural release before releasing the remaining pressure. Add in the carrots and the potatoes whole or in very large pieces. Put the pressure lid back on and pressure cook for 2 minutes and then do a full natural release. This should be enough time to fully cook the carrots and potatoes, but not have them falling apart.
I used onions, whole cloves of garlic, and mushrooms. The onions and mushrooms are cut into ½" thick slices. You could even go bigger with the onions and leave the mushrooms whole. I slice mine because I like to use them to top sandwiches made with the leftover roast.
If you wanted to use minced garlic, use about 1-2 teaspoons and sauté it for a minute or two after you sear the roast.
It is not necessary to use the onions, garlic, or mushrooms in this recipe. You can simply just cook the roast by itself. However, the onions, garlic and mushrooms make for a delicious tasting au jus!
How to Make a Tender Eye of Round Roast in the Pressure Cooker
Preparing the Eye of Round Roast for Cooking
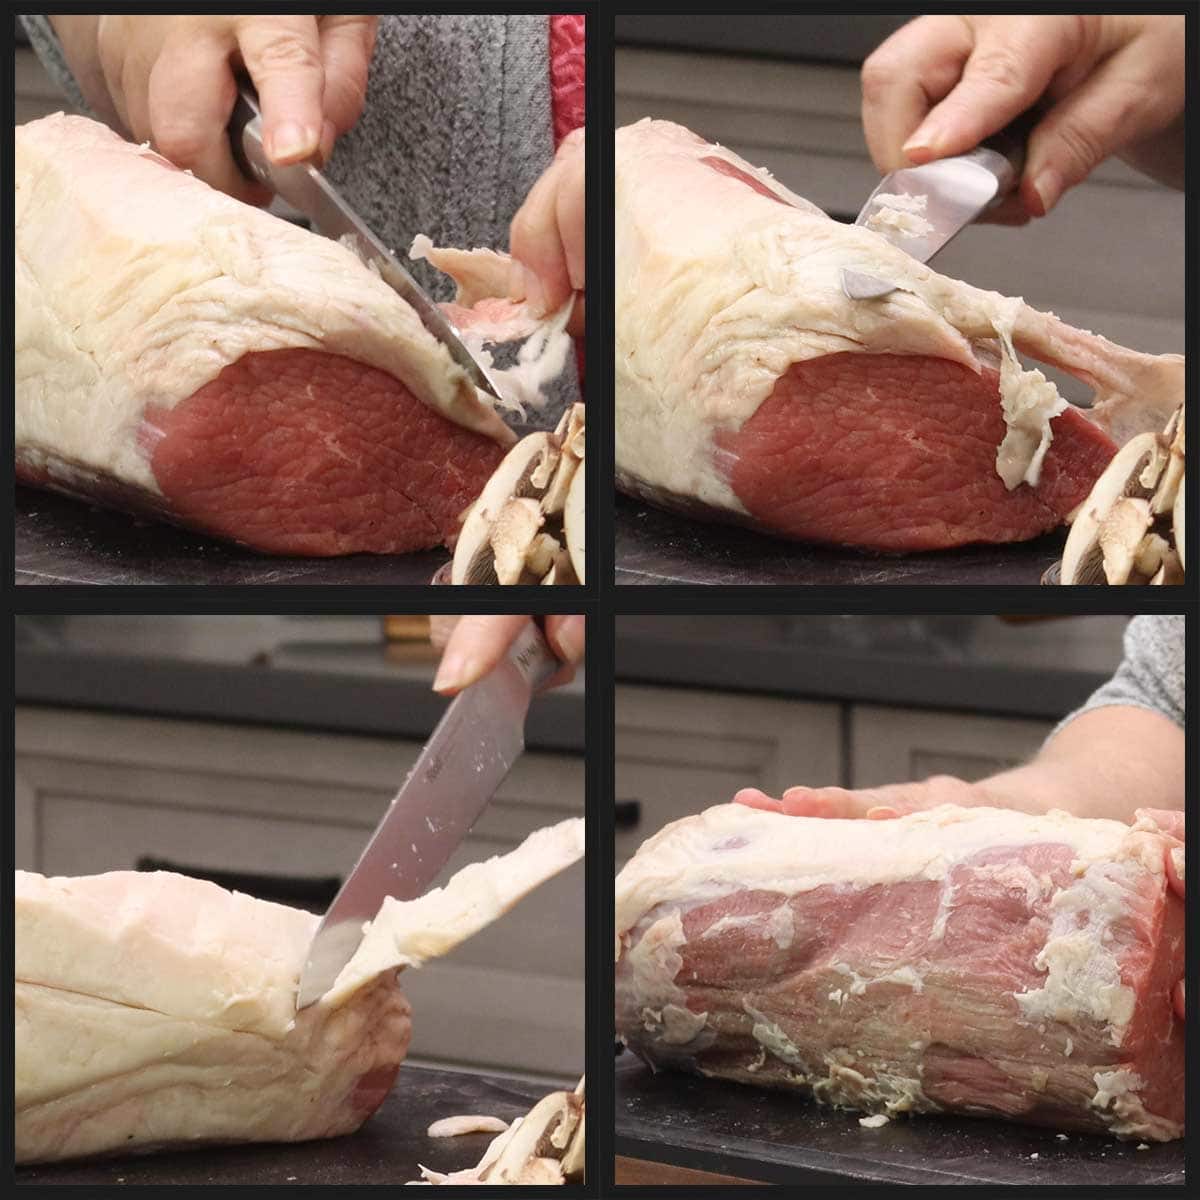
While this step is optional, I do find that trimming the fat from the sides of the beef helps keep the juices from being too fatty. Not all eye of round roasts are going to need to be trimmed. Some will have very little fat on the outside (referred to as fat cap) and some, like mine, will have a quite a bit.
When picking out an eye of round, definitely look for one that has at least ¼" of fat covering one side. Some fat is good, but too much fat makes the au jus too fatty.
Anything more than that can be trimmed away with a sharp knife. If you are really ambitious, you can render the trimmed fat and make tallow. I've done this once and honestly, I'm not sure why I don't do it more often. I still have some in the cabinet and it's amazing to use in place of oil in savory recipes.
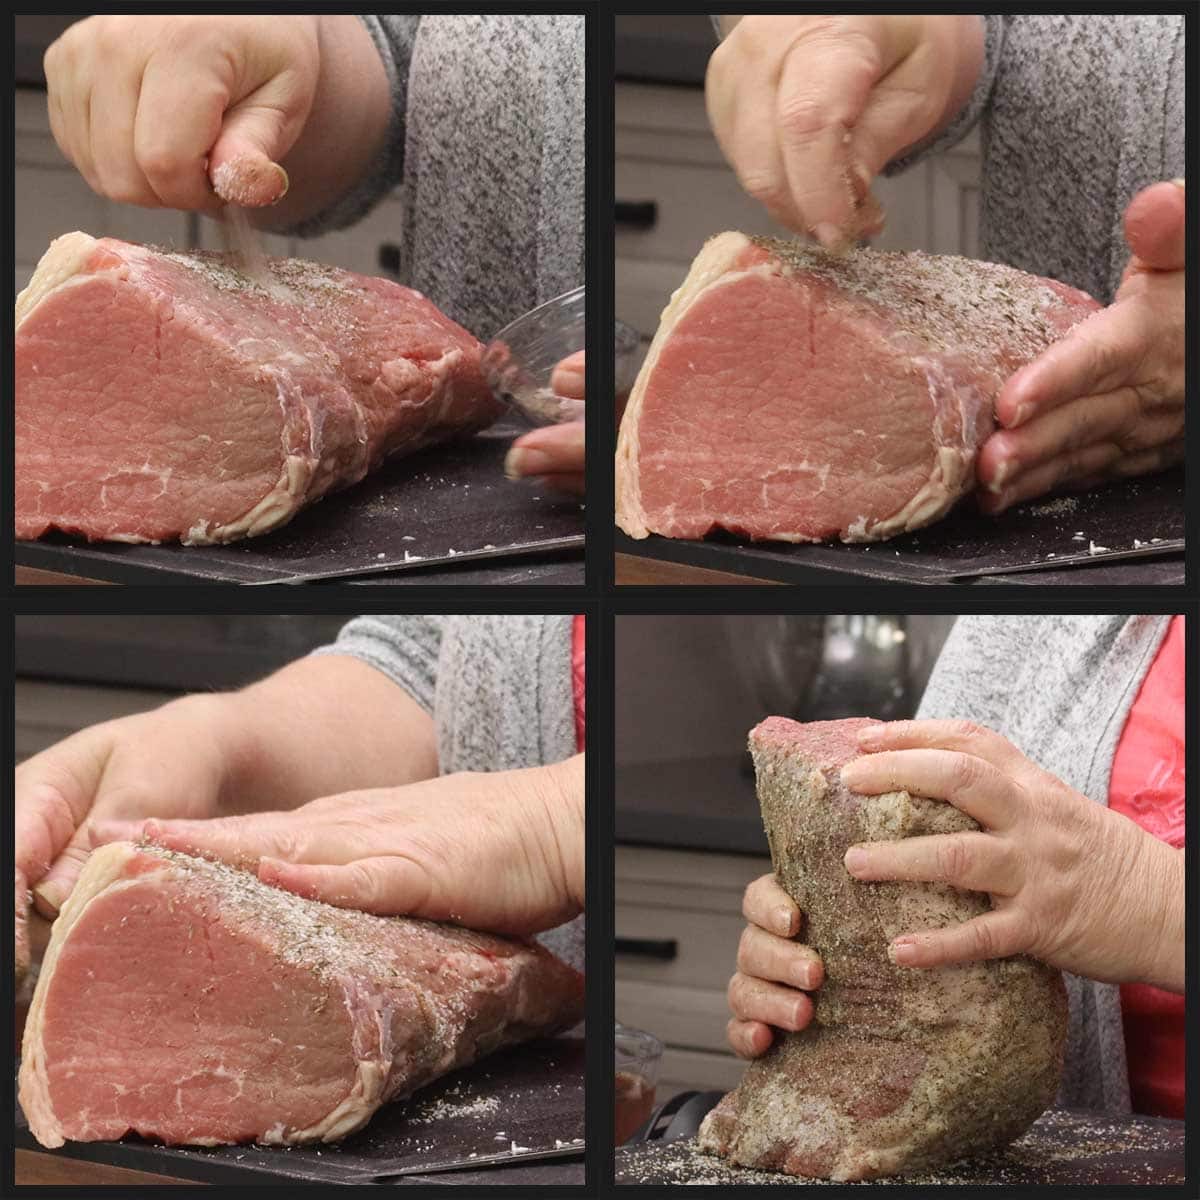
Once the excess fat is trimmed away, mix up your seasoning rub. I used salt, black pepper, and thyme. When creating your signature blend of spices, remember that not all salt is interchangeable. Table salt is very fine grains and, by weight, is the same as any other salt. Meaning, if the recipe calls for 10 grams of salt, then you can use 10 grams of kosher salt, sea salt, or table salt.
However, if the recipe calls for 1 teaspoon of sea or kosher salt, you don't want to use 1 teaspoon of table salt because your seasoning blend will be too salty.
The reason for this is the size of the grains of salt. Sea salt and Kosher salt are slightly larger grains and they fill up a measuring spoon differently than the smaller grains of table salt. My rule of thumb is to decrease the salt by 25% when using table salt instead of a sea or kosher salt.
Once your seasonings are mixed together, give them a taste. It should taste slightly salty with a good balance of flavor. If it is too salty, add some more of the other spices. If it is too peppery, add some salt and other spices. If it is heavy on one spice, like garlic, increase the other spices to balance it out.
Rub the spices all over the eye of round roast. This can be done 2 days in advance, with the roast then wrapped in plastic wrap and refrigerated until ready to cook.
I do recommend seasoning at least a few hours before cooking. However, I always forget and, if you are like me, then simply season it and let it sit at room temperature for about an hour before cooking.
If you can't wait an hour and you need to cook it right away, you absolutely can. In some recipes, it is important that meat come close to room temperature for the cooking time to be accurate. However, this recipe calls for such a long pressure cooking time, it won't matter.
Preparing the Onions, Garlic & Mushrooms
I used 3 whole onions in this recipe and cut them into thick strips about ½-¾" thick. Depending on how you want to serve the onions, you can either slice them or quarter them. The long cooking time will make the onions very soft and they are used more for flavor than anything else.
After cooking down the 3 onions, I ended up with maybe 1 cup of onions that weren't totally disintegrated by cooking. These are perfect to add into the gravy or pile on top of a French Onion Beef Sandwich!
You can slice the mushrooms into thick slices or keep them whole or quarter or halve them. No matter how you prepare the mushrooms, they hold up great under pressure!
I used one bulb of garlic, but kept the cloves whole. The more surface area of the garlic, the stronger the flavor. Keeping them whole adds a gently garlic flavor that is not overwhelming. Simply peel the outer paper off of the cloves and throw them in the. pot.
Searing the Roast
Searing the eye of round is important for a couple of reasons. First, it starts to create the outer crust and keeps those seasonings in place during the pressure cooking time. Secondly, and more importantly, searing causes the Maillard reaction to occur and this chemical reaction creates browning and increases flavor and aroma.
If you are using your Ninja Foodi or Instant Pot to sear the meat in, allow the pot to heat up for about 5-7 minutes on high sear/sauté, then add in 2-3 Tablespoons of olive oil. If you are using a stainless steel pot instead of a ceramic coated one that comes with the Ninja Foodi, you may want to decrease your temperature to medium-high.
Stainless steel conducts heat differently than the ceramic coated pot and high heat may cause the oil to smoke.
Once the oil is hot, but not smoking, place the eye of round roast with the fatty side down to sear first. Sear over high or medium-high heat for 5-7 minutes. Then flip and sear the other sides for 2-3 minutes each.
This is a good time to cut up the vegetables if you haven't done it prior.

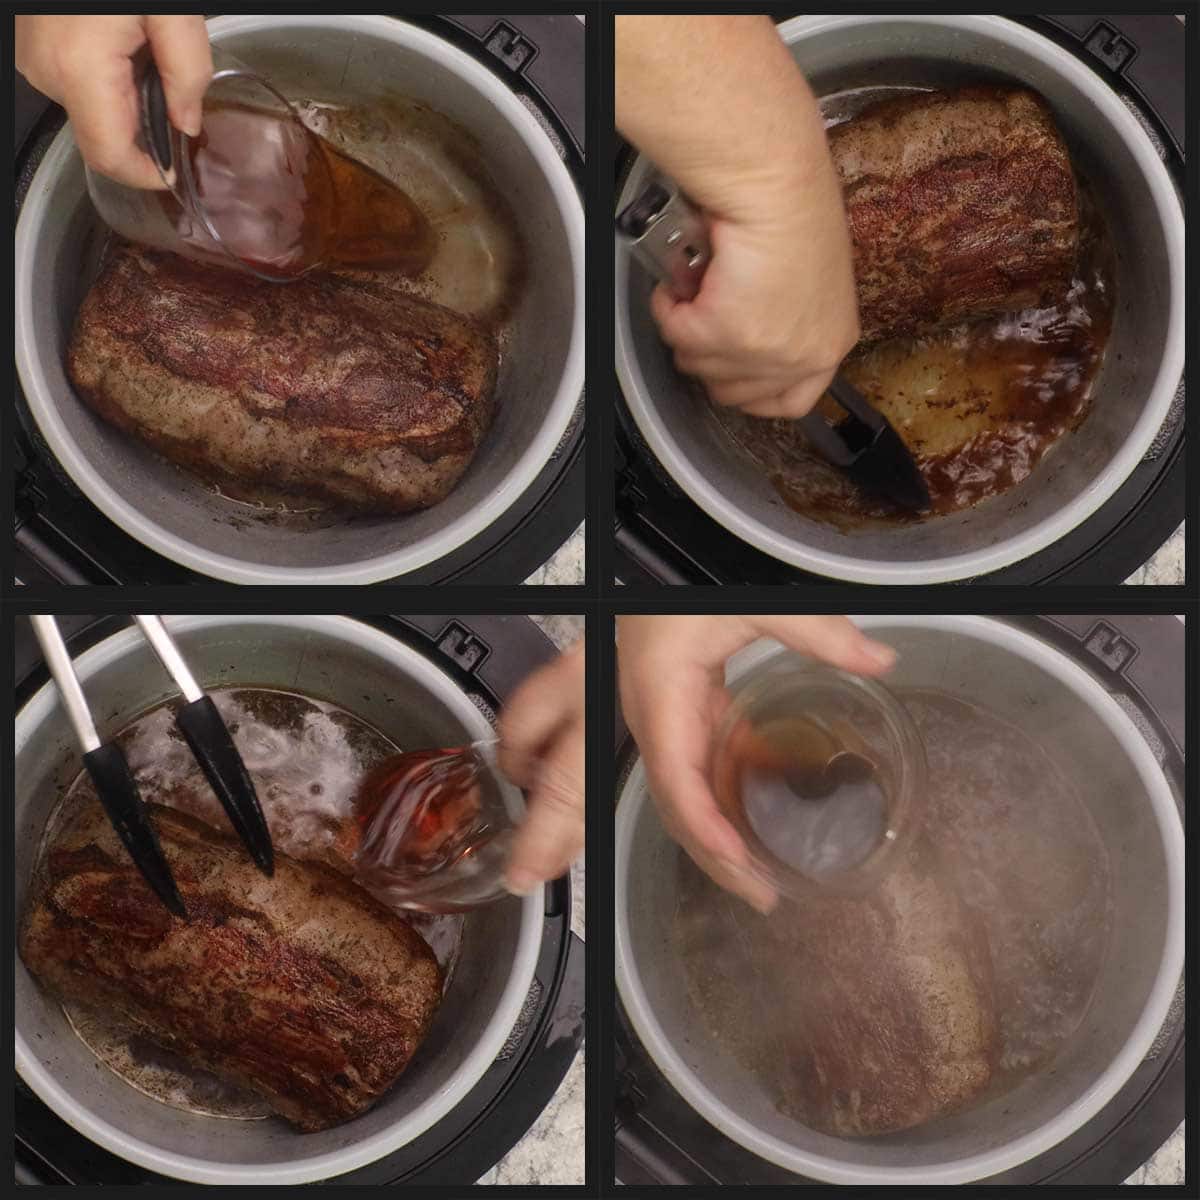
Deglazing the Pot
Once the meat has been seared, it's important to deglaze the pot before pressure cooking. Not only do we need the liquid to build the pressure, you definitely want to get those browned bits off the bottom and into the liquid.
The browned bits on the bottom are called fond and they are so full of flavor that you definitely want them in the au jus.
Keep the heat on high or medium-high to deglaze the pot. Pour in the beef broth and immediately start to scrape the bottom of the pot. Remember to use a utensil that is safe for the ceramic coated pot if that is what you are using.
Not only is deglazing important for flavor, it also prevents the burn/water notice from occurring. One of the most common reasons for getting the burn/water notice on your electric pressure cooker is from stuck on food that starts to burn while pressure cooking from the high heat and then triggers the temperature sensor that the pot is too hot and shuts down with the warning of "water or burn."
Deglazing the pot is very fast and should only take 1 minute or so. If you take too long, you can evaporate the thin liquid liquid and have problems going under pressure. So, if you need to, turn the pot off until you are finished scraping the bottom.
Once the scraping is done, add in the vinegar and Worcestershire sauce, if using, and stir.
Pressure Cooking the Eye of Round Roast
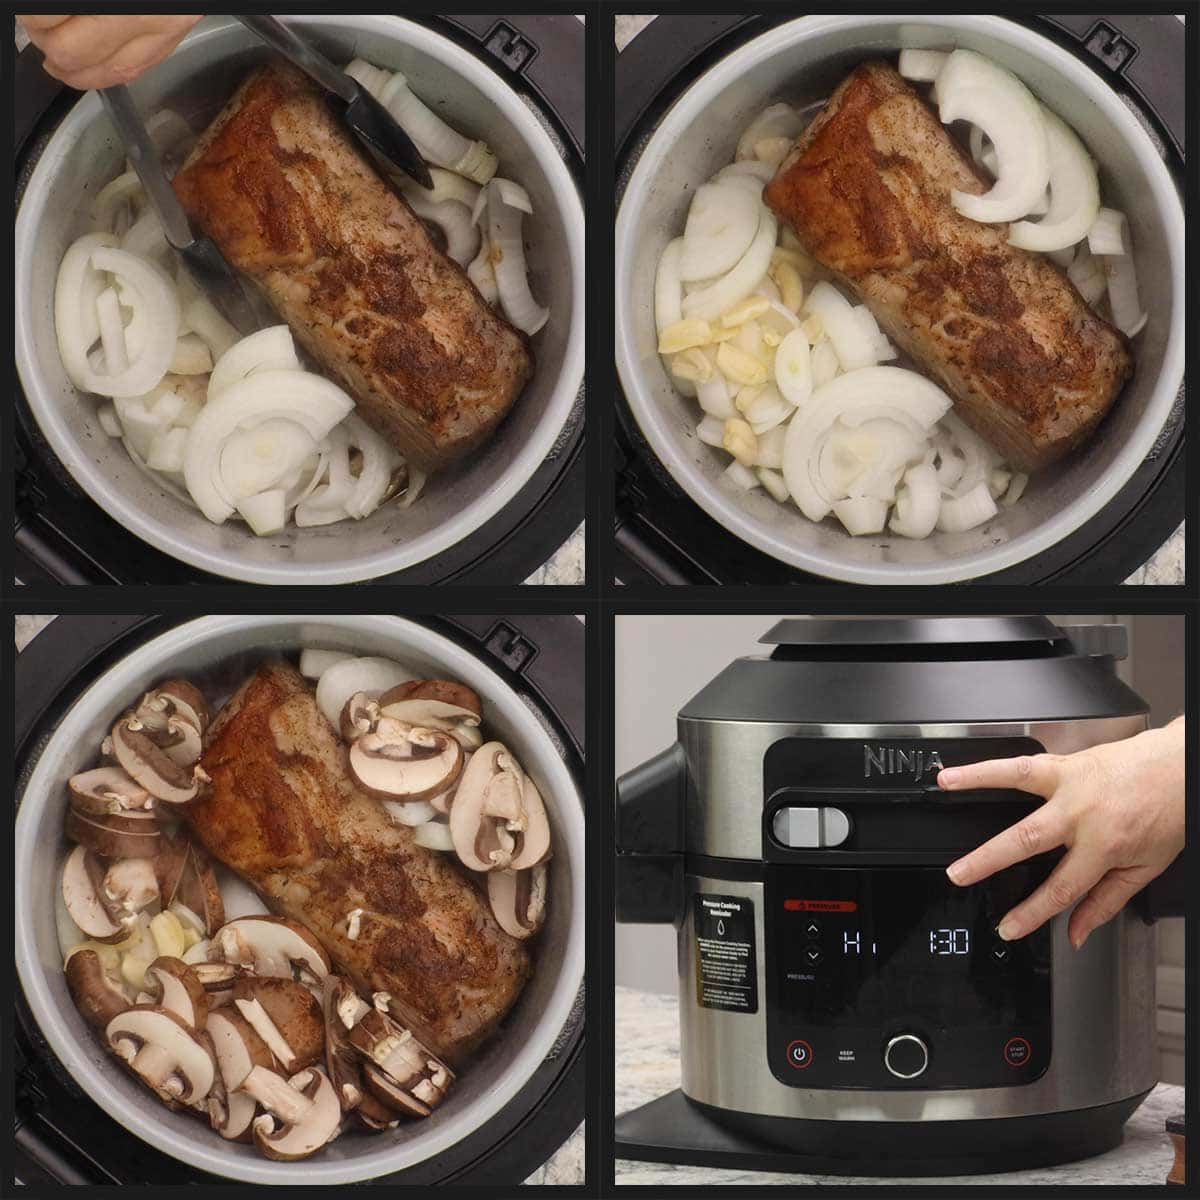
Try to have the fat cap facing up when pressure cooking, this just makes it easier when you go to air fry/air crisp afterwards.
My roast wanted to tip over, so I used the onions as kind of a guard on either side. Add the onions, mushrooms, garlic to the pot.
Put the pressure lid on and turn the valve to seal. On the OL series of Ninja Foodi, you will want your slider all the way to the left and the valve will float in between where it says "vent" and "seal." You also need to hit start/stop on the OL series when switching from sear/sauté to pressure cooking.
Select high pressure and set the time for 90 minutes. Press start. It will take about 8-10 minutes for the pot to come to pressure. Maybe even less since the liquid is already hot.
Once the time is up, allow the pot to naturally release its pressure. This means, do nothing until the pin drops and it's safe to open the pot. It takes 20-30 minutes for a full natural release with this recipe.
If your roast has turned on its side, turn it back over so the fat cap is facing up for air frying/air crisping.
Air Frying or Air Crisping the Eye of Round
With the Ninja Foodi or Instant Pot with Crisping lid, lower the crisping lid. No need to remove the liquid.
Air Crisp or Air Fry on 400℉/200℃ for 10-20 minutes. I know that is a big time spread, but it really depends on how thick your fat cap is. It will take 10 minutes for the crust to form, but after that it is up to you how long you air fry for.
I stopped at 12 minutes and, honestly, I could have gone another 5 minutes at least.
If you made this in your Instant Pot or electric pressure cooker and don't have a crisping lid. Preheat the oven on broil and remove the roast and set it in a heat safe dish. Add some of the juices to cover the bottom about 2". This will produce some steam and keep the sides of the meat moist while you broil the top.
The time it takes to broil and crisp the fat depends on how thick it is. If your fat cap is thicker than ¼", you may want to skip broiling and roast on 425℉/220℃ until the fat on top is rendered and nicely brown and crisp.

Making Gravy from the Juices
There are several different ways you can go about making a gravy with the juices.
The easiest is to combine 2-3 Tablespoons of cornstarch with 1 Tablespoon of water and add it to the juices. Heat until simmering and then reduce the heat and stir until it thickens. This only takes a few minutes and is super easy to do right in the Ninja Foodi or Instant Pot. However, your gravy will be glossy looking and not the traditional flour gravy.
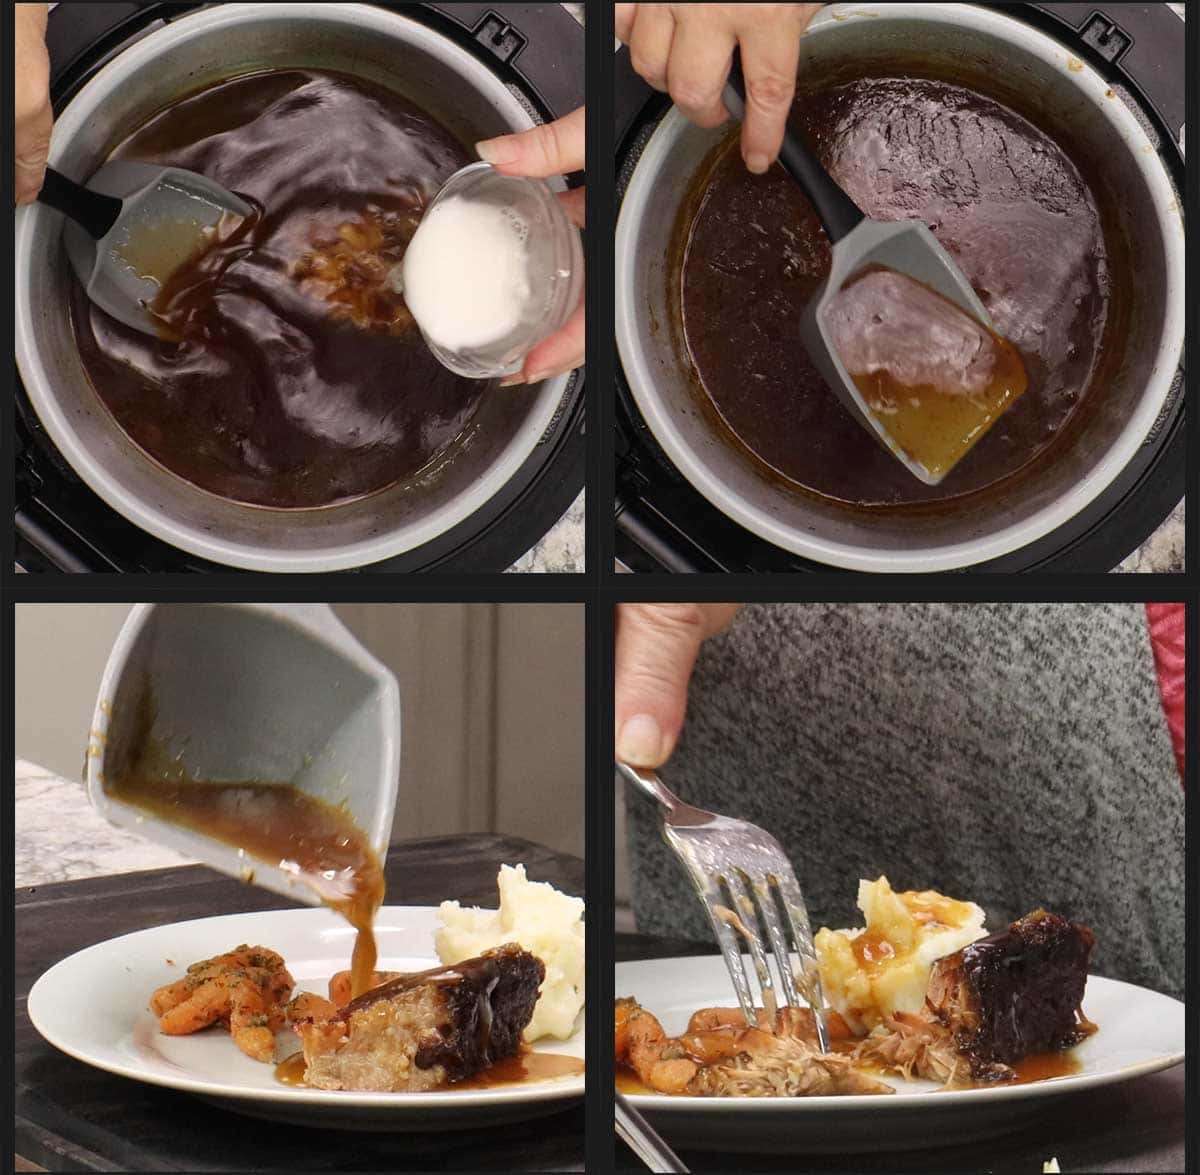
To make a flour gravy, you can either remove the liquid from the inner pot or just use a pot on the stove. Make a roux with equal parts flour and fat. You can use the fat in the juices, but it can be kind of hard to separate it unless it's cold, so I just use butter.
For every cup of thin liquid, I would use 1 Tablespoon of flour and 1 Tablespoon of butter for a medium thickness gravy. Use more for a thicker gravy. If your gravy is too thick, you can thin it out with the extra juices.
You can also use water and flour and shake it in a jar until a slurry forms and then pour it into the juices. Make sure to cook over low heat for about 10-15 minutes to cook the flour taste out and to allow it to thicken. Use the same ratio of flour as if making a roux-based gravy and add twice as much water.
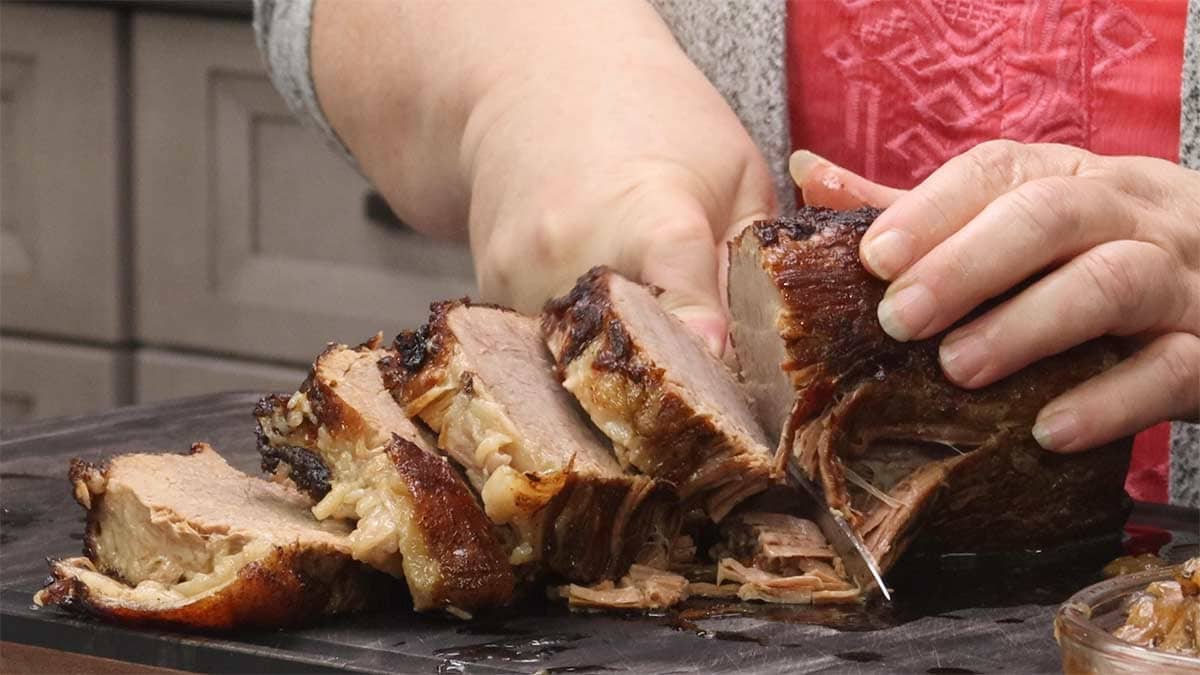
Slice and Serve
Perhaps one of the best things about this cut of beef is the grain is always going long ways and there isn't any guessing as to how to cut it!
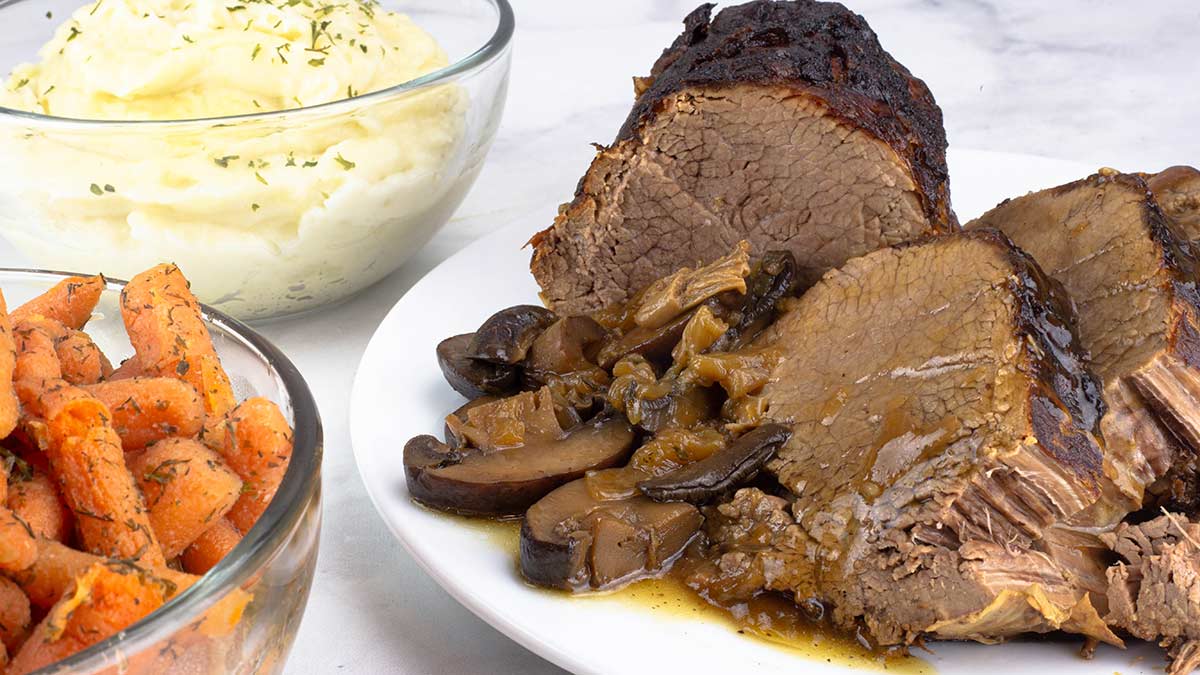
Simply slice thick slices from end to end and it will be perfect.
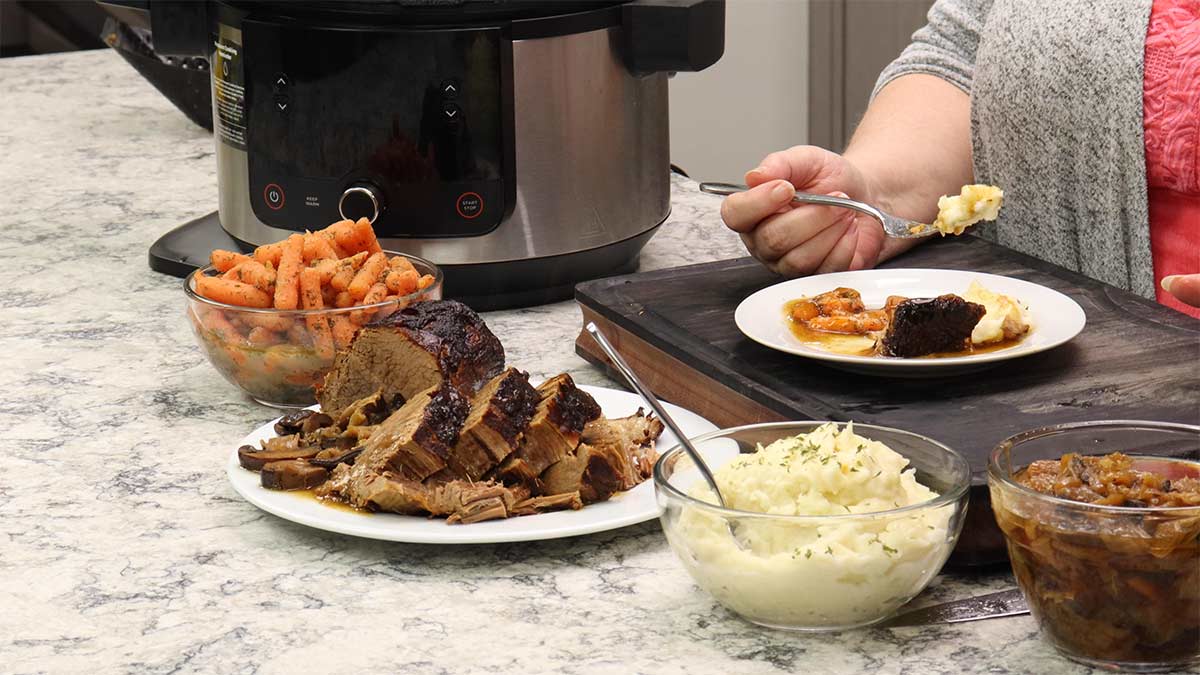
Put the mushrooms and onions around the roast and serve the au jus or gravy on the side. Don't forget the side dishes! My favorite are listed below.
Using an Eye of Round Roast for Meal Prep
The eye of round roast is simply perfect for food prep, especially if you are in a household of just 2 people like I am.
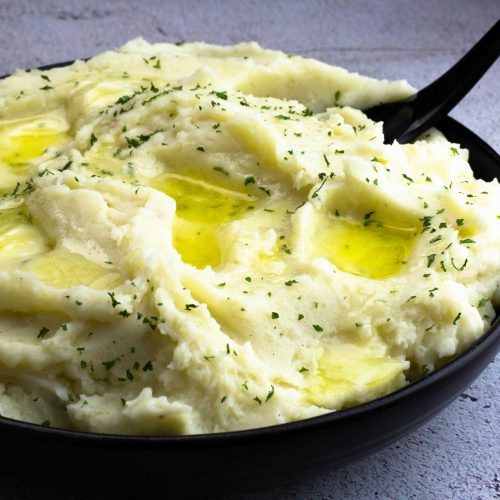
While eating the leftover eye of round roast with some delicious sides like mashed potatoes and magic carrots is always wonderful day 2, I'm pretty much done after that and want something different.
Two of my most favorite ways to use up the leftover eye of round is to make shredded beef tacos and French onion dip sandwiches. Directions for both are below.
Some other ideas to turn your leftovers into completely different meals are:
- Make a quick and easy vegetable beef soup. Use the juices from cooking the roast, with the onions and mushrooms and throw in some frozen veggies along with chunks of the eye of round roast. Add in some pasta, rice or barley if desired and simmer until everything is cooked through.
- Beef Pot Pie is another great option. Make a roux with flour and butter, add in the juices from the roast and heat until thickened or simply use the leftover gravy if you made some. Add in the beef and whatever vegetables you want. If using potatoes, make sure they are already cooked. Place the gravy and beef mixture into any heat safe bowl and cover with a pie crust cut to fit. Add some slits in the top to release the steam and bake at 400℉/200℃ until the crust is golden brown.
- Beef Enchiladas. Use this recipe for Enchiladas and substitute the beef for the chicken and make sure to season the beef with your favorite Mexican seasoning.
- Taco Soup. Instead of using ground beef, use the shredded eye of round in this recipe: Taco Soup in the Pressure Cooker
Shredded Beef Taco Instructions
This is, by far, Jeff's favorite type of taco and the leftover eye of round roast works perfectly!
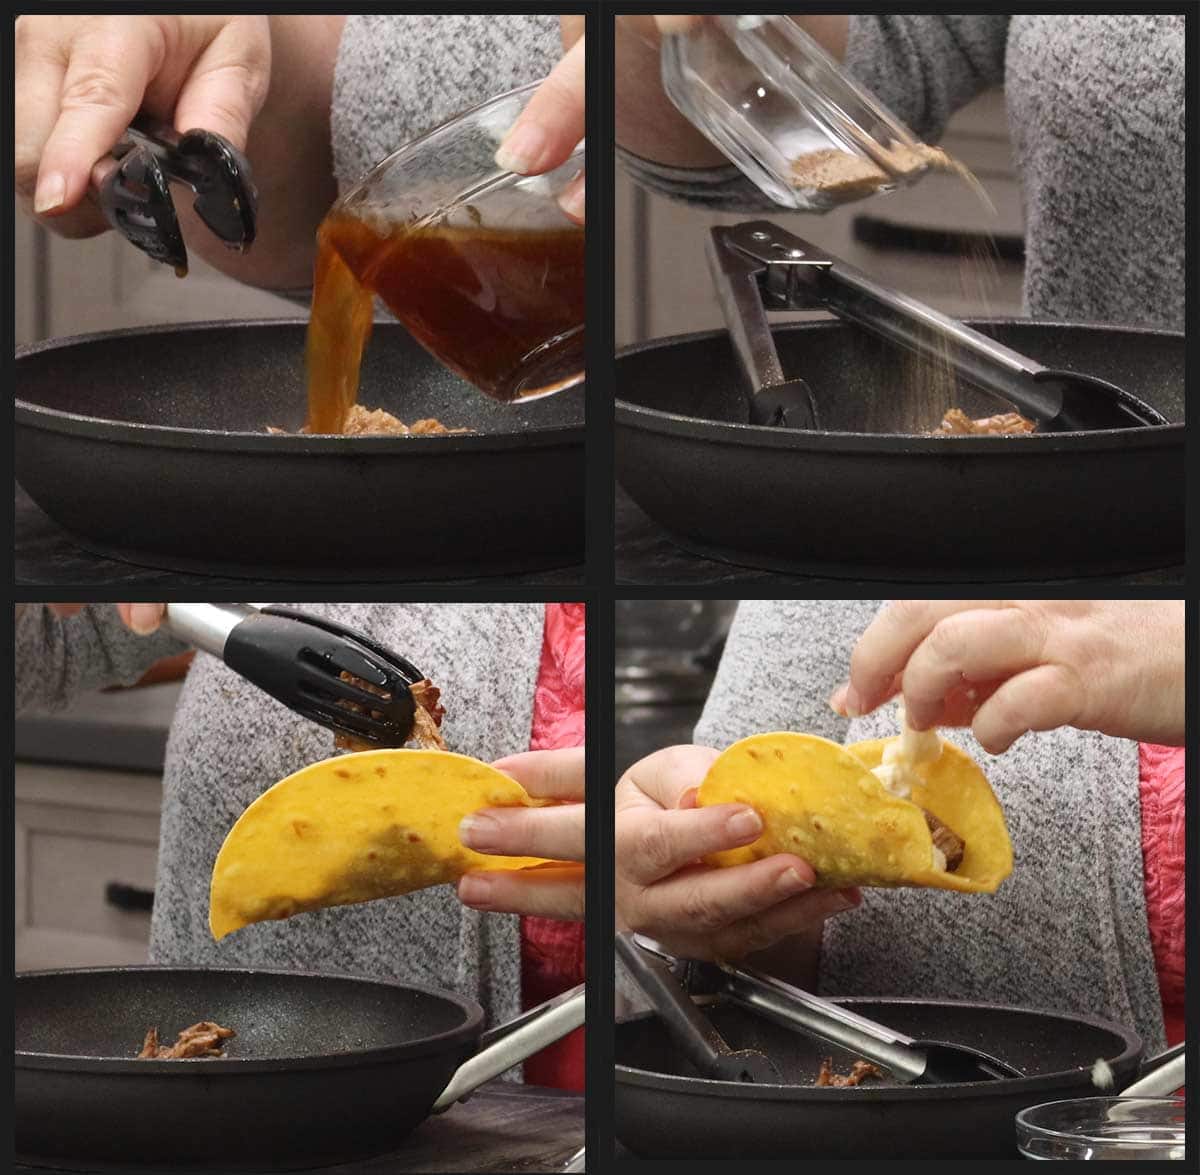
Simply shred however much of the leftover eye of round you want to use to make tacos. Add it to a skillet and add about 1 Tablespoon of the au jus from cooking the roast for every ¼ cup of shredded beef. Add your favorite taco seasoning, about ½ teaspoon per ¼ cup of shredded beef. Heat over medium heat until warmed through.
Taste and adjust seasonings as needed. Put the filling in your taco shell and top with your favorite taco toppings. I like to lightly fry a corn tortilla and top with fresh cilantro, cotija cheese, and chopped onions with a squeeze of lime to finish it off.
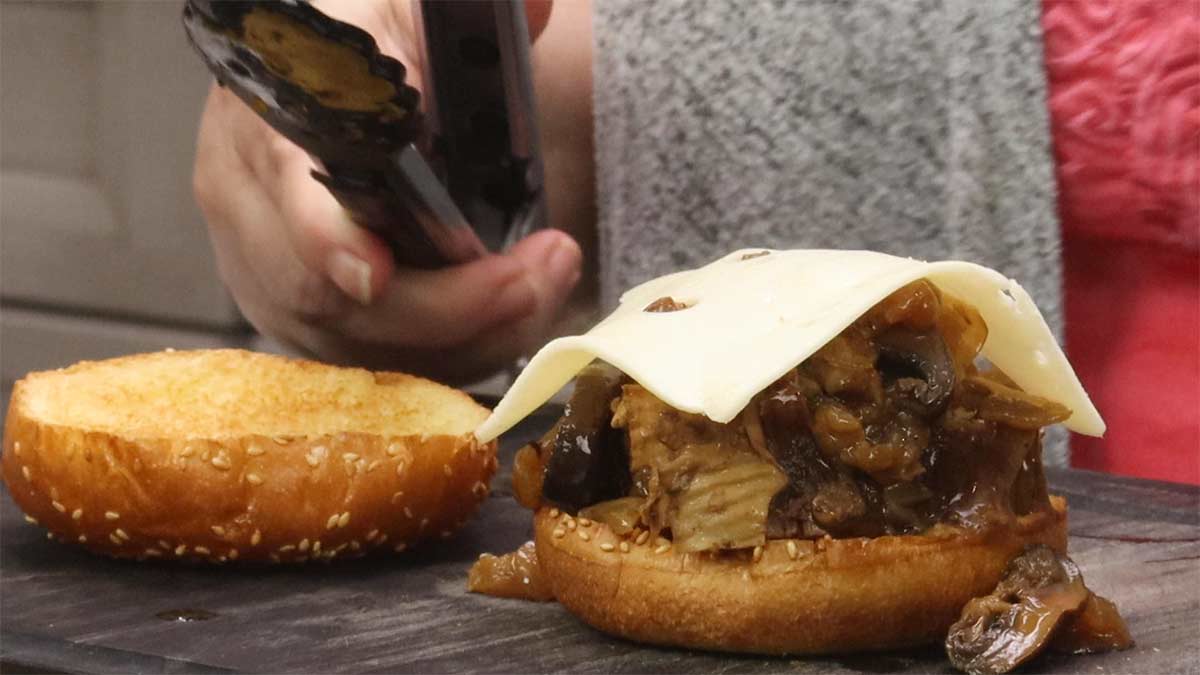
French Onion Dip Sandwich Instructions
Lightly toast a sandwich bun. I like to use a brioche bun. Place a thick slice of the leftover eye of round (already warmed up) on the bottom bun. Top with a generous helping of the mushrooms and onions (already warmed up). Add a slice of Swiss cheese and melt the cheese under the broiler and top with the top bun.
Serve the sandwich with a side of au jus. Enjoy!
Frequently Asked Questions
Absolutely! Just let it cool completely before freezing to avoid ice crystals from forming. Then portion out the number of servings you wan including some of the gravy or au jus. Place into a freezer-safe container or zip lock freezer bag. Get as much air out as you can and freeze. Or, use a vacuum sealer with vacuum-sealed bags. It will stay good for up to 6 months when packaged properly.
The eye of round comes from the hindquarters of the cow and is a heavily worked muscle, which means it is very lean and can be tough when not cooked properly.
The best way to get a fork tender roast is to pressure cook the eye of round like in this recipe. However, you can also cook it to medium rare as long as you slice it very thin against the grain.
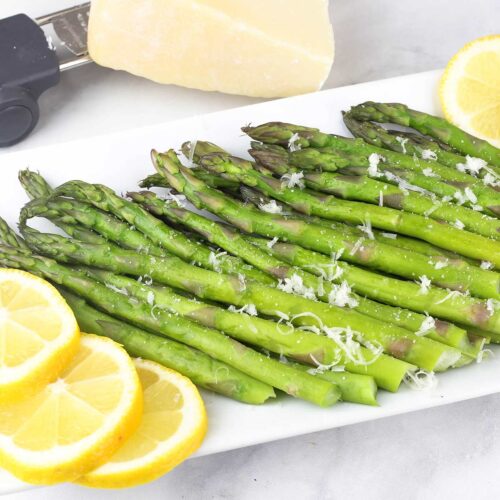
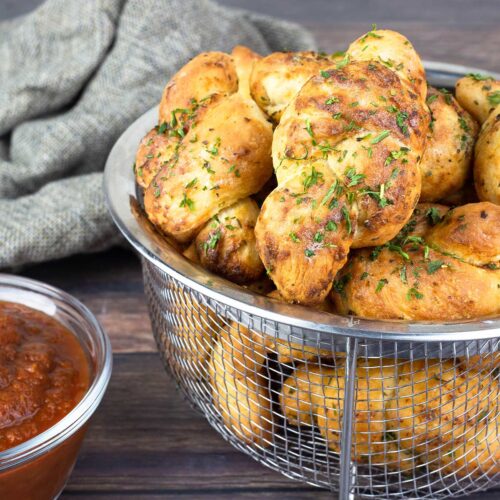
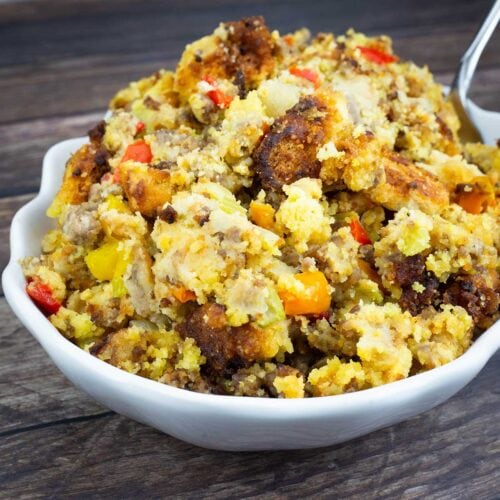
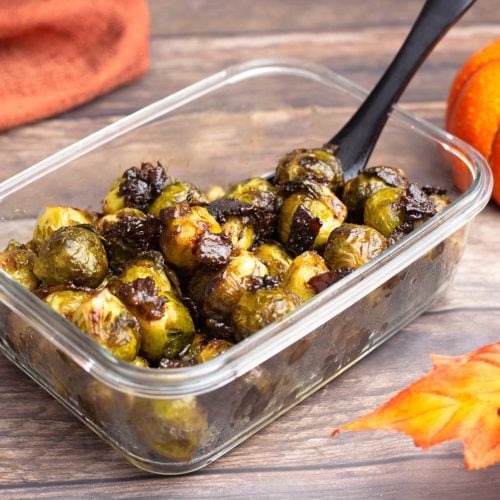
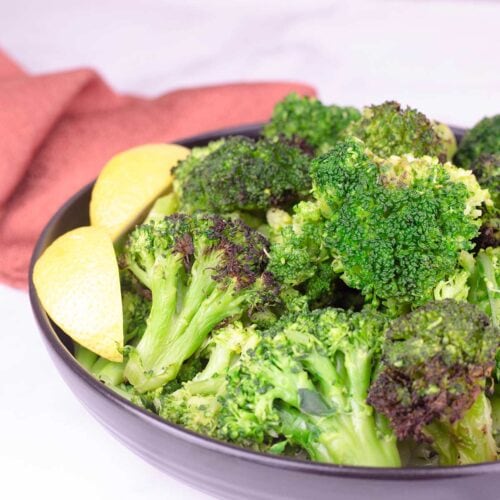
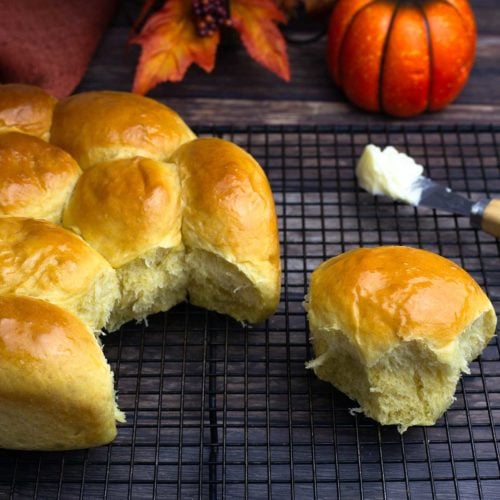
Best Side Dishes to Serve with Eye of Round Roast
An eye of round roast is perfect for a Sunday dinner or even a special occasion and is just as delicious as more expensive cuts of beef. When served with the perfect side dishes you will have a meal everyone raves about!
Because the eye of round takes so long to pressure cook for fork-tender results, I recommend making the side dishes separately instead of adding the traditional carrots and potatoes to the roast.
Here are some amazing sides that will go perfectly with your eye of round roast!

Tender & Juicy Eye of Round Roast Recipe
Equipment
- Electric Pressure Cooker
Ingredients
Seasoning Blend
- 2 teaspoons fine grind sea salt or kosher salt
- 1 teaspoon black pepper
- 1 teaspoon dried thyme leaves
Eye of Round Roast
- 2-3 Tablespoons olive oil
- 4 pound eye of round roast
- ¾ cup beef broth
- 1 Tablespoon red wine vinegar optional
- 1 Tablespoon Worcestershire sauce optional
- 3 medium sweet onions
- 16 ounces mushrooms white button or baby portobello
- 1 bulb garlic about 12-14 cloves, peeled and left whole
Would you like to save this recipe?
Instructions
- Peel the garlic cloves. Slice the onions into thick strips about ½" thick. Slice the mushrooms into thick strips about ½" thick.3 medium sweet onions, 1 bulb garlic, 16 ounces mushrooms
- Trim the eye of round of any excess fat. You want about ¼" fat cap on one side. Combine the seasonings and rub all over the roast.2 teaspoons fine grind sea salt or kosher salt, 1 teaspoon black pepper, 4 pound eye of round roast, 1 teaspoon dried thyme leaves
- Turn the Ninja Foodi or Instant Pot on high sear/sauté and heat the pot for a few minutes. Add in the olive oil and heat until very hot, but not smoking. If you are using a stainless steel pot, reduce the heat to medium-high.2-3 Tablespoons olive oil
- Once the oil is hot, sear the roast on all sides. I like to sear the fat cap side first and plan on this taking about 7 minutes. The remaining sides will only take 2-3 minutes per side.
- Deglaze the pot with the beef broth and scrape the bottom to remove the browned bits (fond). Add in the vinegar and Worcestershire sauce if using.¾ cup beef broth, 1 Tablespoon red wine vinegar, 1 Tablespoon Worcestershire sauce
- Add in the sliced onions, mushrooms, and peeled garlic. Try to have the roast nestled in with the vegetables so the fat cap is exposed.
- Place the pressure lid on and turn the valve to seal. Select high pressure for 90 minutes. When the time is up, allow the pot to naturally release its pressure. When the pin drops, open the lid.
- No need to remove the liquid. Make sure the fat cap is facing up and close the air fryer lid. Air Fry on 400°F/200°C for 10-20 minutes or until the fat is rendered and crispy.
- Remove the roast and let rest on a cutting board. Remove the onions and mushrooms and place in a bowl if you want to make gravy with the juices. Make sure to reserve some of the juices for reheating if you think there will leftovers.
- Slice the roast into thick slices and serve with the mushrooms and onions on the side. If you skipped the gravy, put the au jus in a cup on the side for dipping!
Notes
Nutrition
About the Recipe Author, Louise Long
Louise is a full-time recipe creator and food blogger @ The Salted Pepper. She has over 30 years of experience with cooking and recipe development. She owned a restaurant for several years and was a full-time RN until retiring to blog full-time.

She published her first cookbook in the Fall of 2018 and is very interested in writing several more.
Louise is also the creator of an online Ninja Foodi Pressure Cooking Course with over 100 instructional step-by-step videos. People absolutely rave about the course and all the value they have received from it.
Louise has several very active Facebook groups that help people with the basics of cooking and learning more about the appliances they love.
Ninja Foodi Pressure Cooker & Air Crisper 101
Ninja Woodfire Outdoor Grill & Smoker
Louise is also a YouTube creator and you can find most of her recipes in video format on The Salted Pepper YouTube channel.
She is very responsive to messages and eager to help in any way she can. Get more Information about Louise & contact information
I WOULD LOVE TO SEE WHAT YOU ARE COOKING UP IN YOUR KITCHEN! TAG ME @THESALTEDPEPPER ON YOUR FAVORITE SOCIAL MEDIA PLATFORM WHEN YOU MAKE A DISH!
BE SURE TO FOLLOW THE SALTED PEPPER RIGHT HERE ⇓⇓⇓⇓⇓
Barb says
First time using my Instant Pot to cook meat. Did as instructed. I did cook potatoes and carrots at the end and made the gravy. The meat was tender and moist!! Will do again with a less than tender cut of beef. TY
Louise Long says
I'm so glad to hear it!
Louise Long says
I'm so glad you liked it!
Robin says
Love this recipe!
Great how I can adjust things and make the flavours my own. You answered so many questions in your detailed article.
Thank you!
Louise says
Thank you so much!
Jeff says
Do you need to adjust the 90 minute pressure cook time for for a smaller roast? Is there a rule of thumb time per pound?
Louise says
There really isn't a rule of thumb of time per pound because it isn't just the weight that determines cooking time, it is the shape of the roast. Roasts larger in diameter require longer cooking times because of the way heat transfer works. Eye of round average 3-4" in diameter and unless yours is much smaller in diameter I would keep the same cooking time. Usually when eye of round roasts weigh less, it's because of shorter length and not major differences in diameter.