

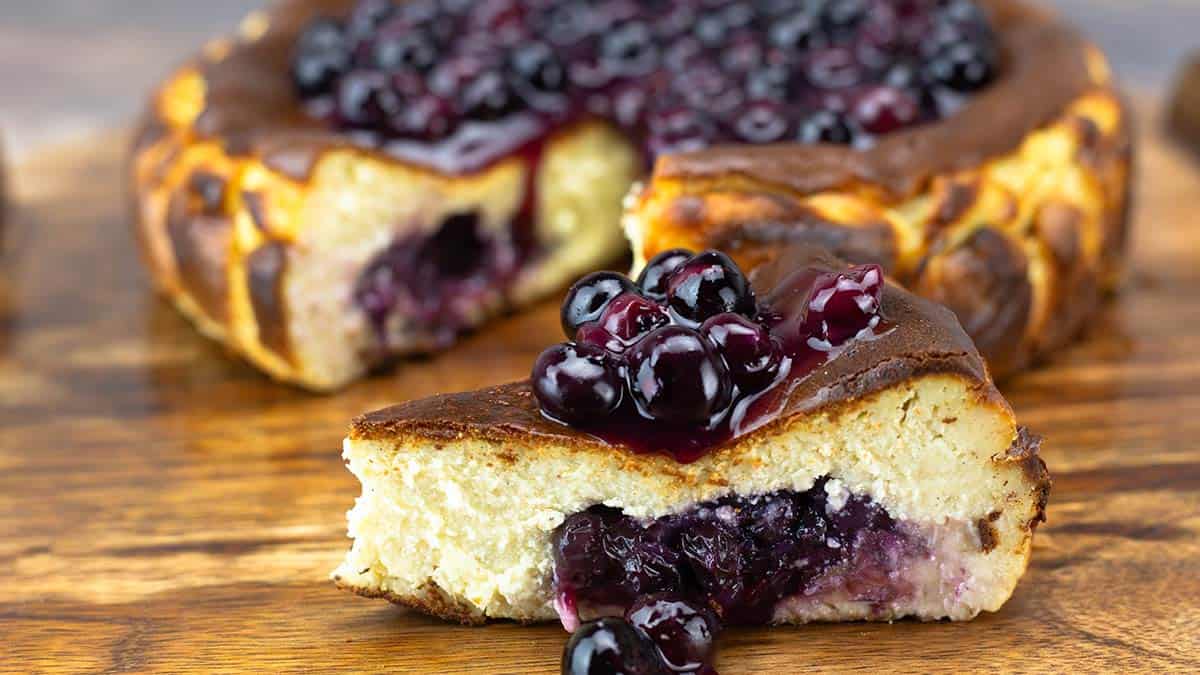
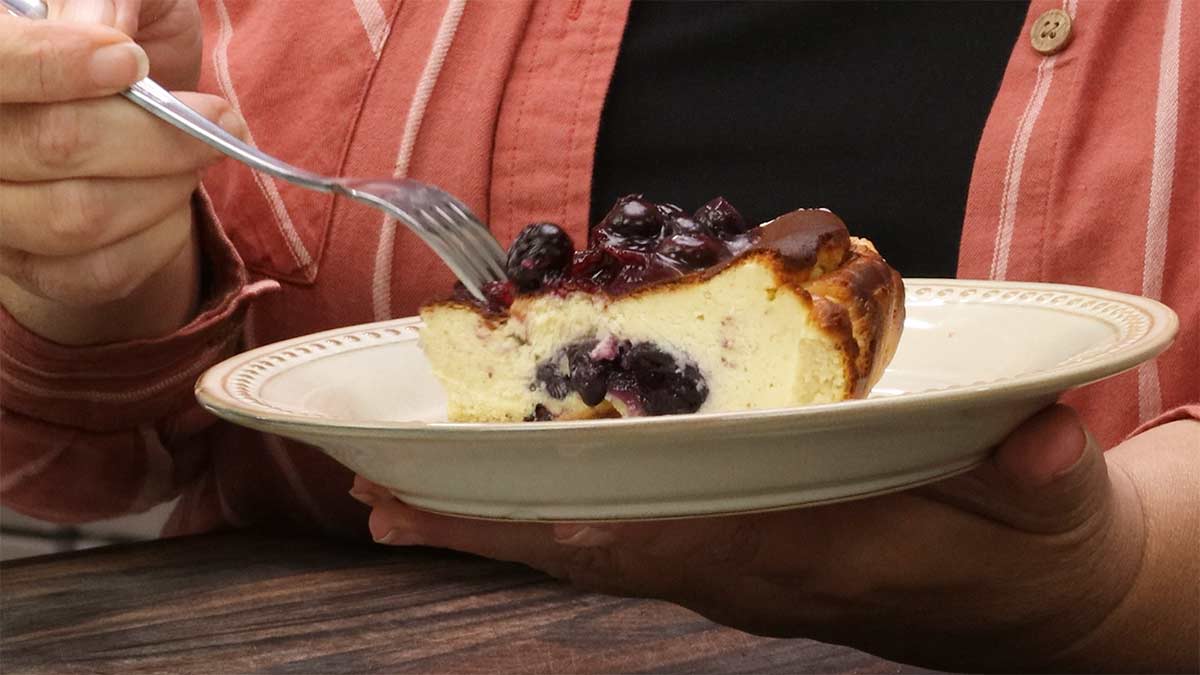
Blueberry Basque Cheesecake is a crustless cheesecake that is baked at high temperatures which results in a deep brown top and edges. It's simply stunning and this browning gives the cheesecake a whole other dimension of flavor.
Then we add even more beauty and flavor with a homemade blueberry pie filling!
When you want to impress your friends and family without a lot of fussing, this is one of the easiest cheesecake recipes you can make!
Would you like to save this recipe?
Basque cheesecake is also called burnt cheesecake by some; however, it is absolutely not burnt and the flavors are simply amazing!
This type of cheesecake originated in the Basque region of France and it is a super easy cheesecake to make.
Suggested Kitchen Tools for Basque Cheesecake
One the advantages to make a Basque-style cheesecake versus a regular cheesecake is you don't need a special springform pan.
This recipe was developed using an (affiliate link)8" Fat Daddio push bottom springform pan, but any 8" cake pan with straight sides will work just fine.
You can even make this type of cheesecake in a square or rectangular pan if desired. This recipe should work fine with a pan that is 8x8 or 8x10.
- 8" cake pan with straight sides (not tapered like a pie pan)
- Stand Mixer or Electric Hand Mixer
- Parchment Paper
- Cooling Rack
Ingredients & Substitutions
Blueberries
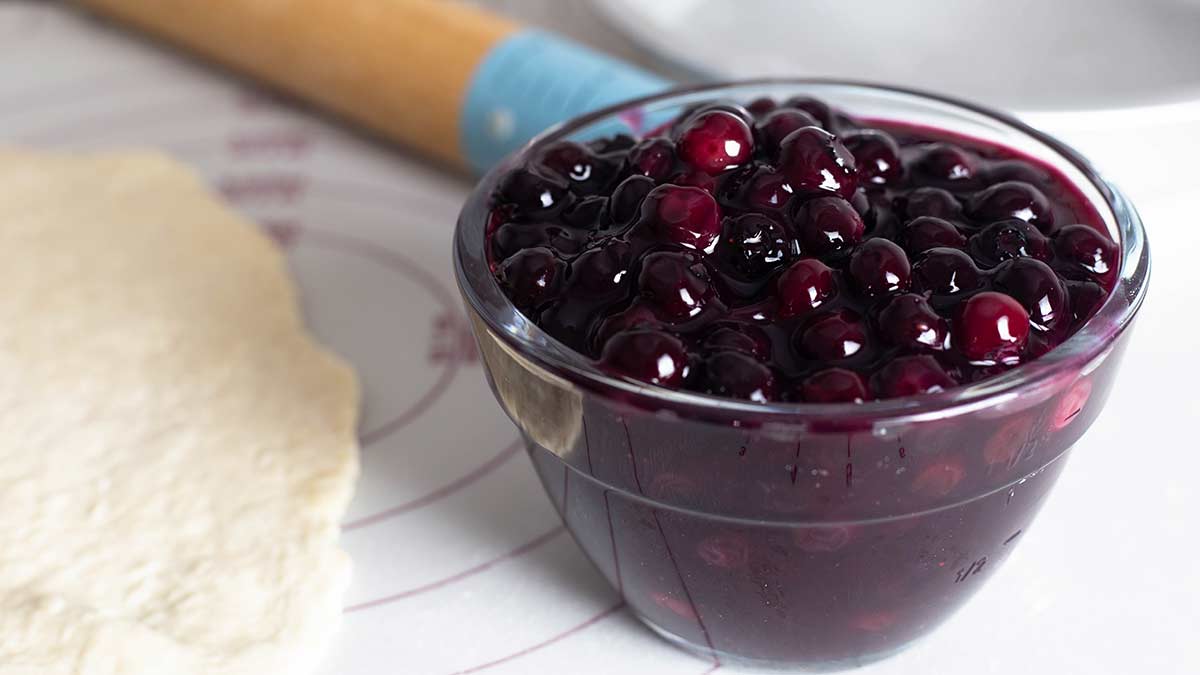
I use a homemade blueberry pie filling in this recipe and it is outstanding! You can use a canned pie filling instead, but you may want to add some fresh blueberries to it.
I do not recommend using fresh blueberries in the cheesecake itself because they will release too much of their juices and the cheesecake may not set up correctly.
You absolutely can use fresh blueberries on top of the cheesecake if you didn't want to use the blueberry filling.
You will need between 2-3 cups of pie filling for this recipe.
You can also switch up the fruit and use a cherry pie filling or any other type of fruit pie filling you like.
You can also omit the blueberries and make a plain Basque Cheesecake.
Cream Cheese
I recommend using full fat cream cheese for this recipe and make sure it is room temperature before making the batter.
Cream cheese in the US has about a 33% fat content and less than 55% moisture. This varies by country and Cream Cheese in the UK is often labeled "soft white cheese," and has a higher fat content.
While I have not tested the recipe with a higher fat cream cheese, I think it will work just fine in this recipe!
Sugar, Eggs, & Cream
Sugar: Granulated white sugar is used in this recipe and that is what I recommend using. If you want to use a finer sugar like powdered sugar be sure to weigh it and not go by volume measurements because they are different.
While I have not tested the recipe with brown sugar, I have read that it can be used in place of white sugar if desired.
In baking, sugar does more than just sweeten, it plays a part in the chemistry of the combination of ingredients. That being said, I do think you can use a sugar substitute that is 1:1 for sugar, like Swerve. The texture of the cheesecake may be slightly different, but it will still be delicious!
Eggs: The eggs are important because they give structure and rise to the cheesecake. I don't recommend substituting them in this recipe. If you cannot have eggs, I would look for specific recipe that uses an egg substitute.
Heavy Cream: I have tested the recipe with half and half and milk and it doesn't give the same texture as heavy cream, so I do not recommend substituting.
Flour
Flour may seem like a strange ingredient in cheesecake, I know I have never used it in any of my traditional cheesecake recipes, but it is needed in this one for structure and to get the fluffy and creamy filling.
Some people use cornstarch in place of the flour with great success. So, if you are gluten free, give cornstarch a try instead of the flour. You would use 3 Tablespoons of cornstarch.
How to Make Blueberry Basque Cheesecake
This recipe is perfect for beginner bakers because you don't have to worry about a water bath or preventing cracks on top of the cheesecake. This cheesecake is rustic with an old-world look to it that is impressive and still a very easy recipe.
Mise En Place (Prep for Recipe)
The first thing is to make the blueberry pie filling and allow enough time to let it cool at least to room temperature. I recommend making it either the day before you make the cheesecake or at least 4 hours before.
The recipe for the blueberry pie filling is here ➡︎ How to make blueberry pie filling
You also want to bring your cream cheese out of the refrigerator at least 2 hours prior to making the cheesecake.
Preparing the Pan
To prepare the 8" cake or springform pan, measure out enough parchment paper to fill the cake pan and extend over the edges by about 2" or so.
Crumble the parchement paper and then begin to line the cake pan with it. Do not worry about it being wrinkled and please don't waste time trying to make it perfect.
The only thing you do want to avoid is large creases where the parchment folds over itself and creates an area for the cheesecake batter to flow into.
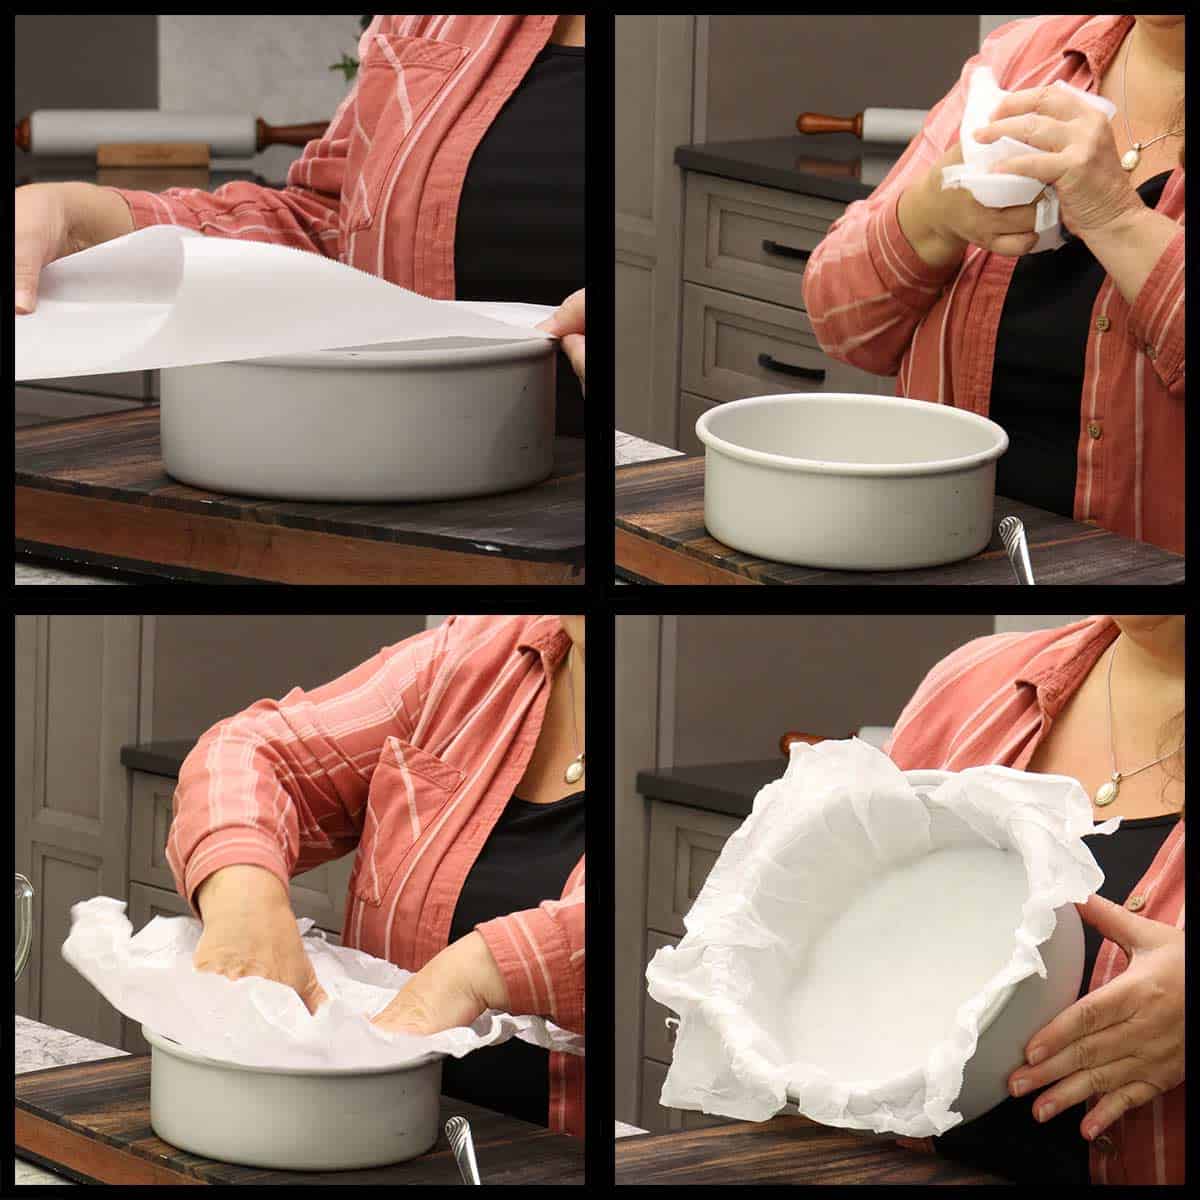
Once the parchment is covering the bottom and sides of the pan, fold the excess edges over the cake pan. These come in handy for removing the cheesecake if you aren't using a springform pan.
Set the pan aside.
Making the Batter
Preheat your oven to 425℉/220℃ and set one of the oven racks in the middle of the oven.
You can use a stand mixer with the paddle attachment or an electric mixer with the beaters and a large bowl to make the batter.
Quick Tip
Make sure your cream cheese has had enough time to come to room temperature before making the batter. You only want to mix this batter on low speed and having room temp cream cheese will result in a smoother batter.
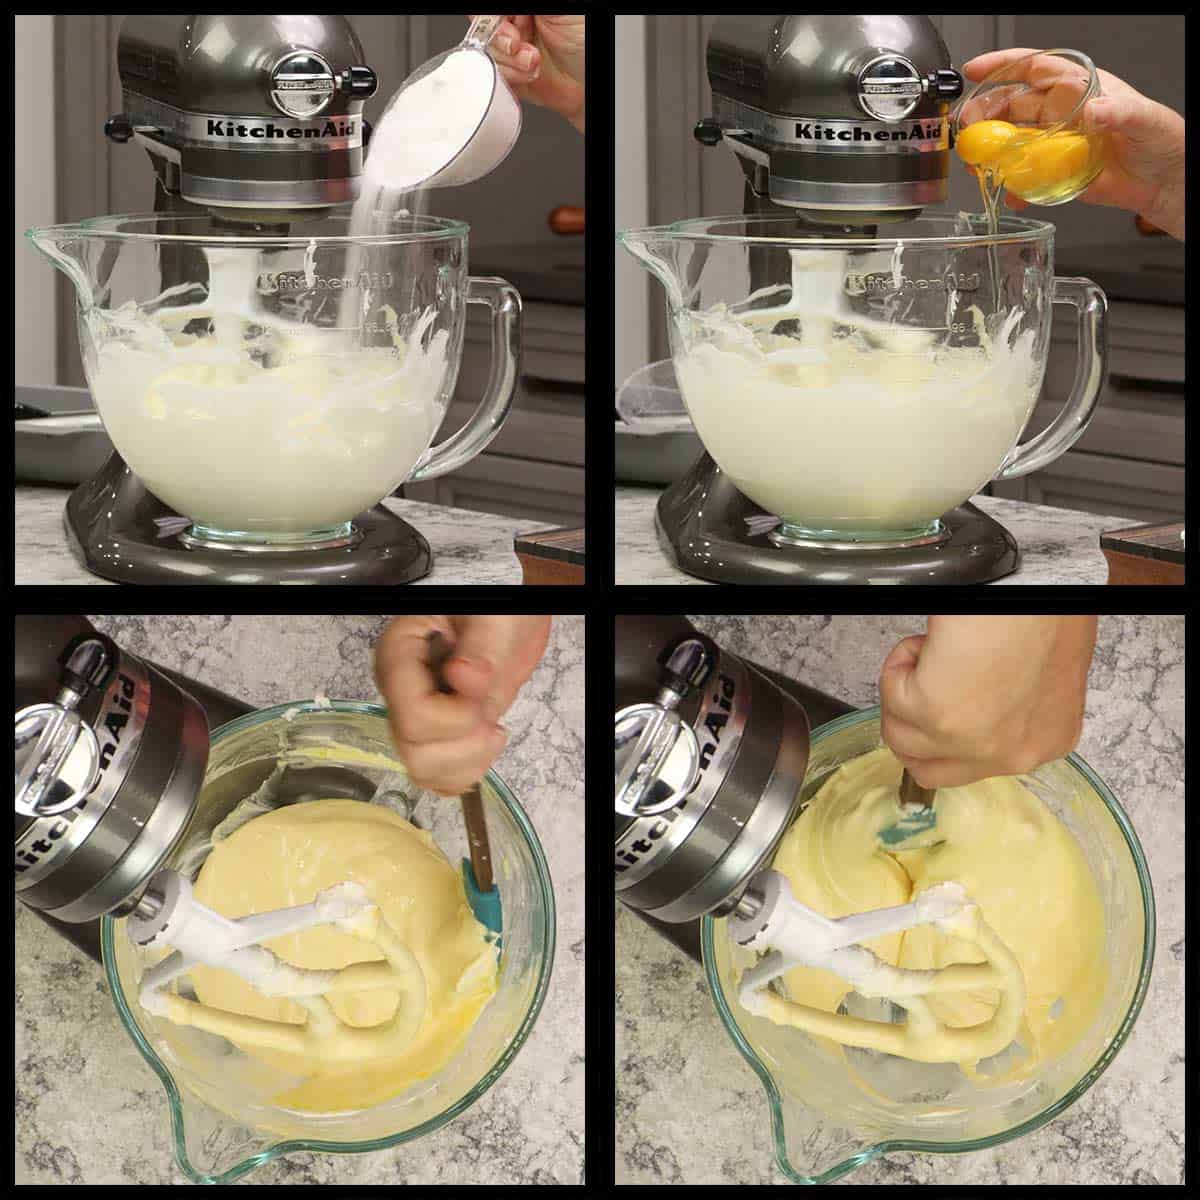
Add the cream cheese to the bowl of your stand mixer or large bowl and mix on LOW speed (I use the stir speed on my KitchenAid mixer) until it is smooth and free of any large lumps.
The cream cheese will clump around the paddle and on the edge of the bowl, so scrape the sides of the bowl and the paddle as often as you need to and mix on low speed ONLY.
You do not want to whip air into the cream cheese as this will drastically affect the results. I know this because I've done this! 😂
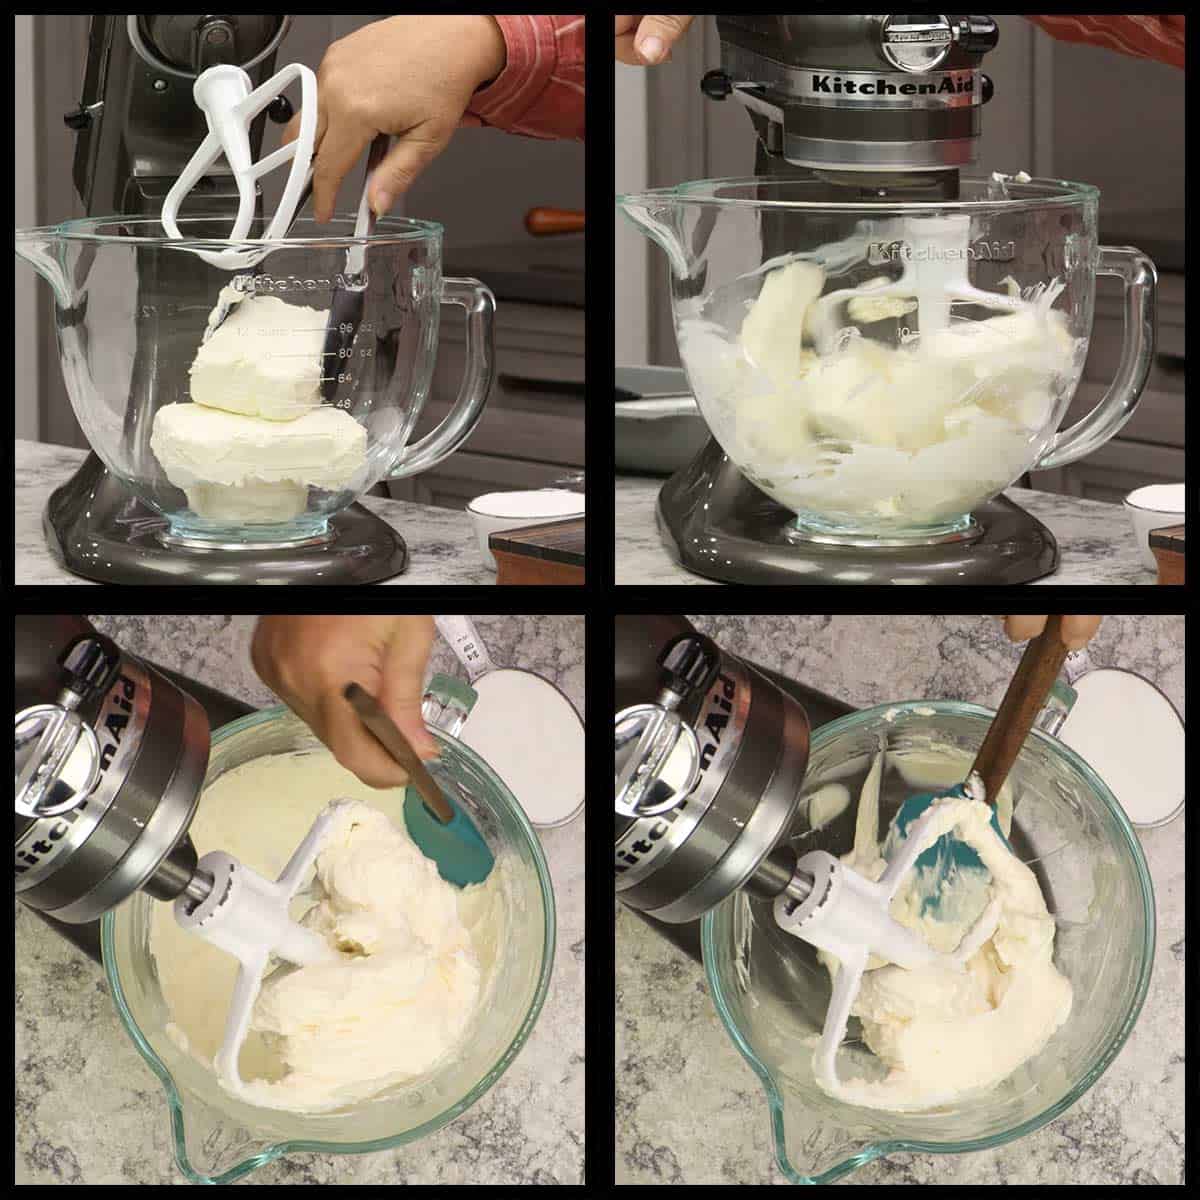
Once the cream cheese is as smooth as you can get it (small lumps are fine), stream in the sugar with the mixer on LOW (stir) speed.
Once the sugar has been incorporated into the cream cheese, add one egg at time with the mixer on LOW speed.
Scrape down the sides of the bowl after all the eggs are incorporated and mix on low until the batter is nice and smooth. A few small clumps are fine, but you don't want a lot of large clumps/lumps in the batter.
Add in the salt, flour, and vanilla. You can use either vanilla paste or vanilla extract and the amounts are the same (1 Tablespoon). Personally, I love the look of the vanilla beans in the batter and I always have some of my homemade vanilla paste to use.
Continue to mix on LOW speed until everything is incorporated and then scrape the sides of the bowl again.
Quick Tip
Some people like to mix the flour with the cream and add it in that way. You can do that if you prefer.
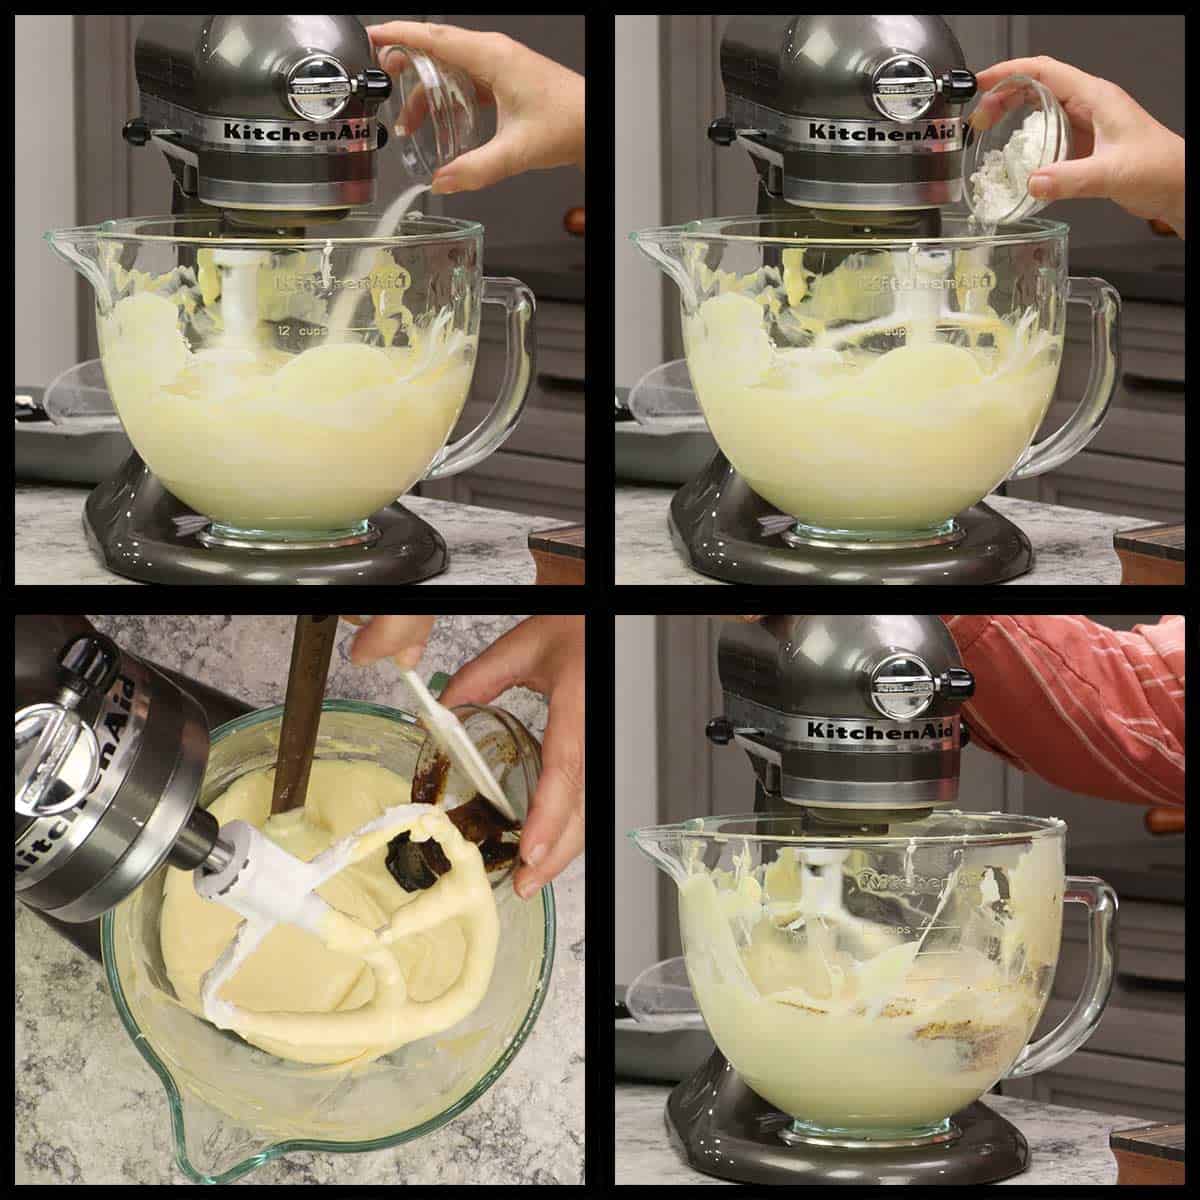
With the mixer on LOW speed, add in the heavy cream and mix until incorporated. The batter should be just a little thicker than pancake batter, but not much.
It is definitely looser than a traditional style cheesecake.
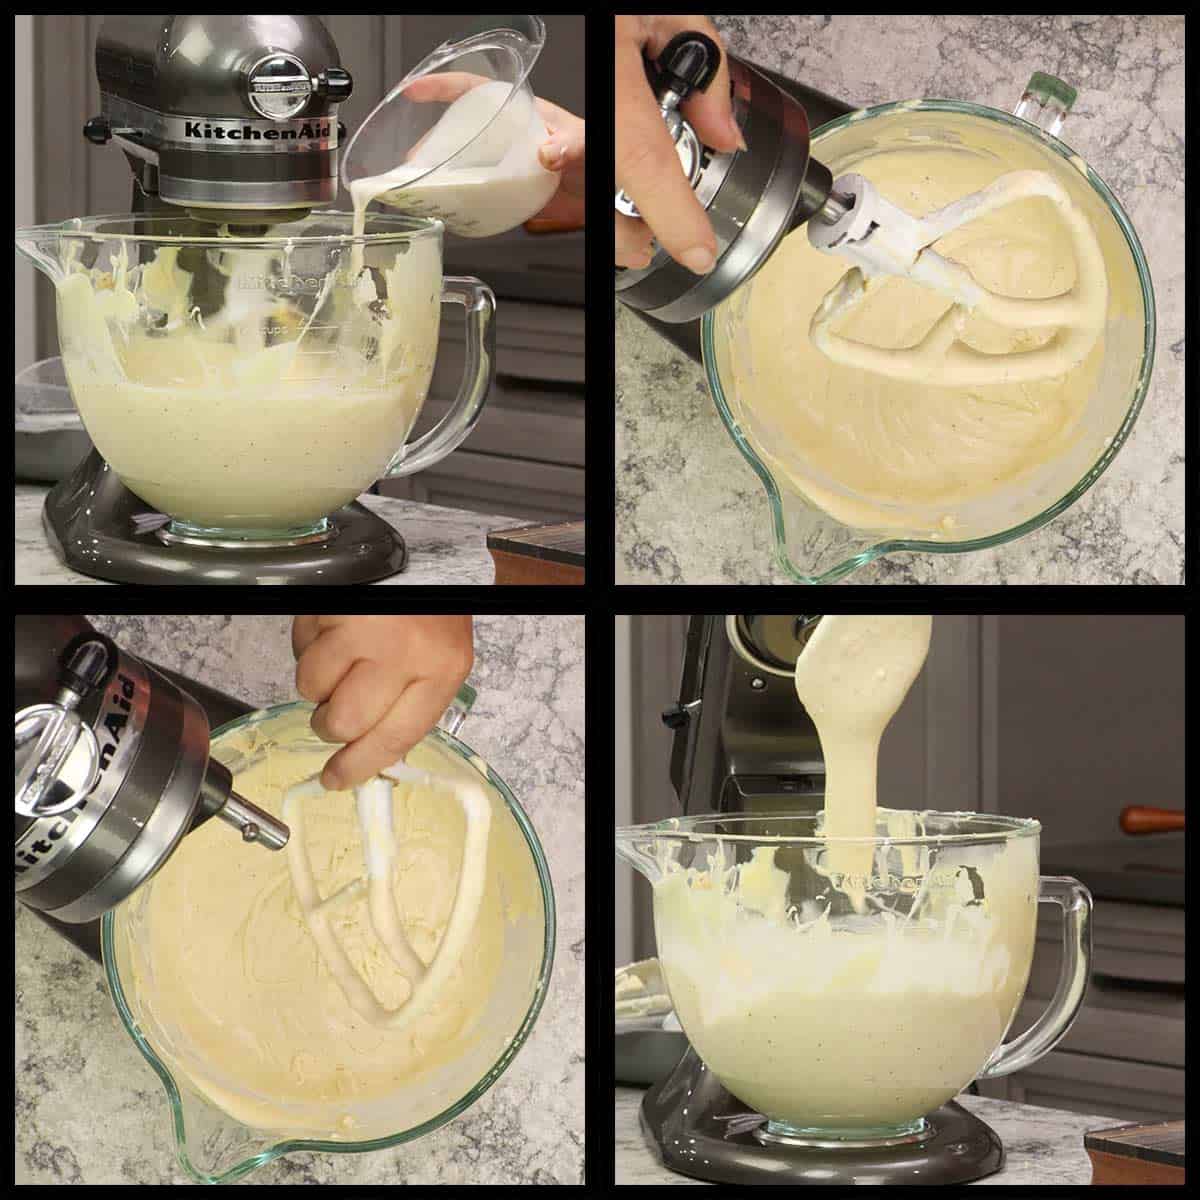
You should have about 4 cups of batter; and the easiest way I found to layer the blueberry filling with the cheesecake batter is to add about 3 cups or ⅔ of the batter to the prepared pan and then scoop the blueberry pie filling on top.
This results in the blueberries sinking just enough to be in the middle of the cheesecake.
I don't usually measure the amount of blueberry filling, but it is about 1 cup that goes into the cheesecake.
I scoop the filling onto the batter in a circle about 3" from the sides of the pan and leave the middle open as well. This is so the blueberries don't go to the edge of the cheesecake or the very middle which can interfere with slicing and serving.
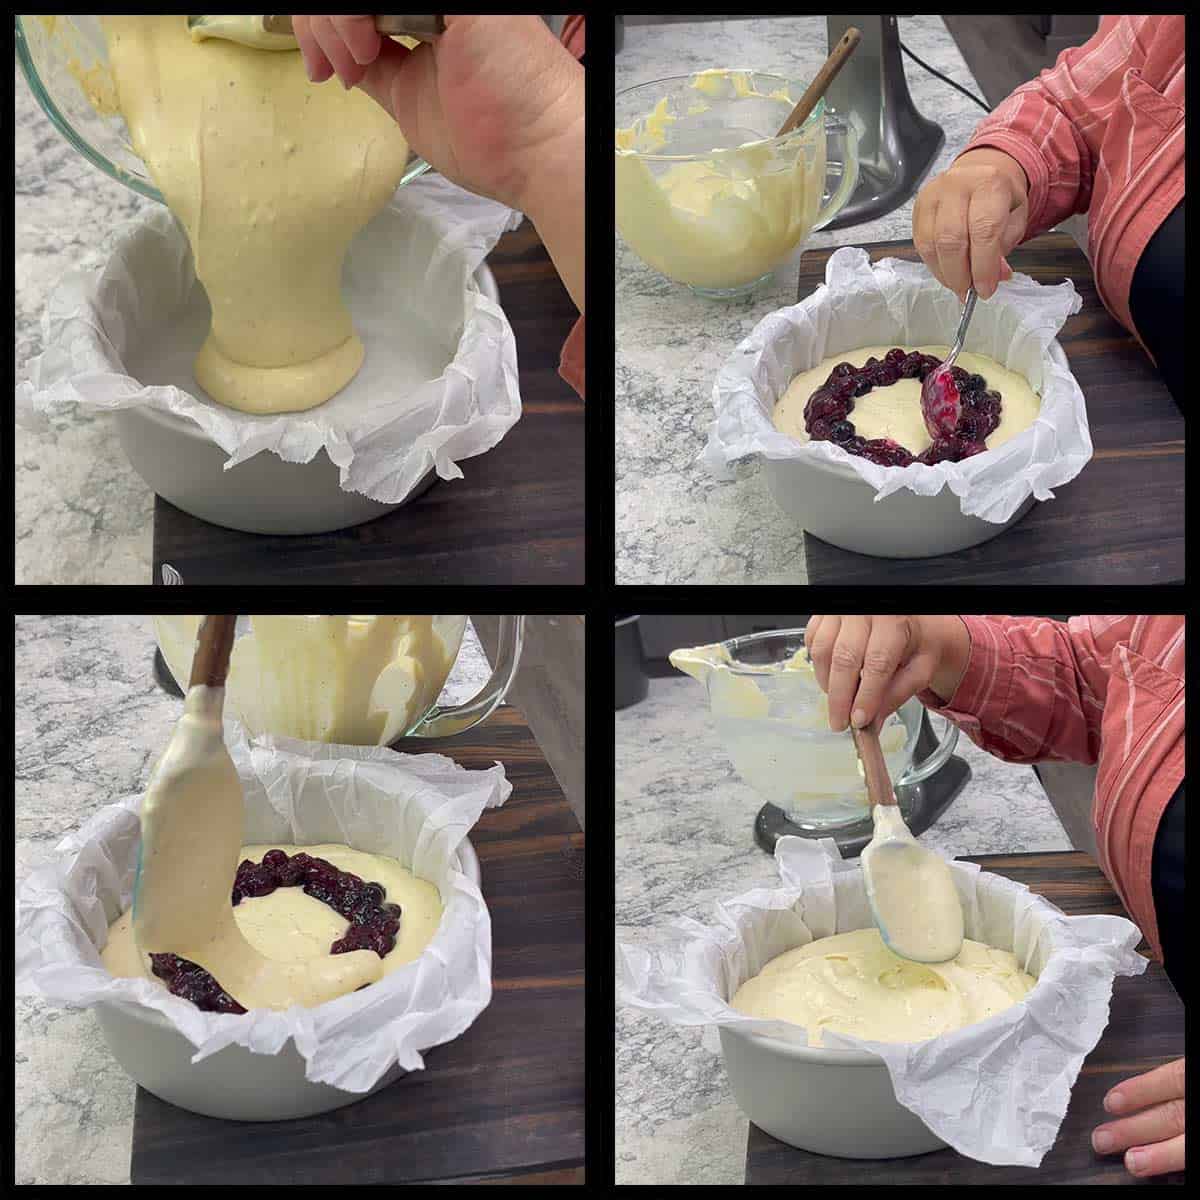
Spoon the remaining batter over the blueberries and then smooth out the top. You don't want to pour the remaining filling over the blueberries because that can cause them to sink too much.
Baking the Basque Cheesecake
Make sure your oven has been preheated to 425℉/220℃ and one of the oven racks is positioned so the cheesecake sits in the middle of the oven.
Every oven is different in the way it heats and bakes, so use my temperatures and timings only as guides, and pay attention to how the cheesecake is looking.
Within about 15-20 minutes you should start to see a little browning on top. If you don't, increase your oven temp 15-25°.
By 30 minutes, the entire top of the cheesecake should be a golden brown color.
At around the 35 minute mark, you should start to see some browning on the edges.
After 40 minutes on 425℉/220℃, I turn off the oven and let the cheesecake sit in the oven with the door open for another 5 minutes. This is what I found worked best for my oven. Yours may be different.
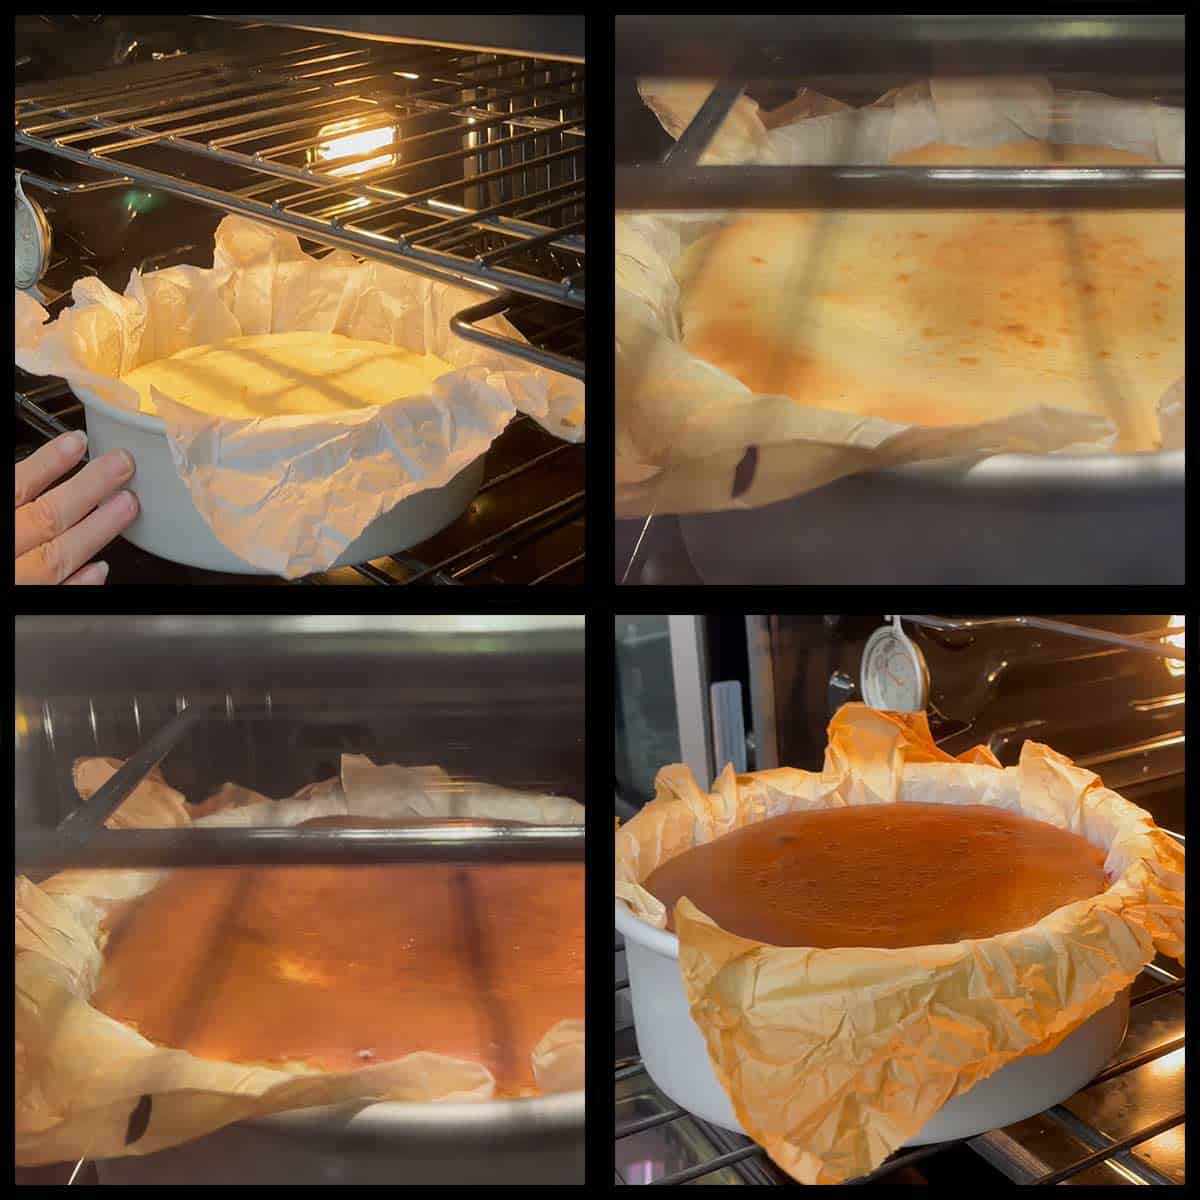
The cheesecake is done when it is a deep brown color and the center still jiggles when you move the pan.

Remove the cheesecake from the oven and cool on a cooling rack for 30-60 minutes.
Quick Tip
It is completely normal and expected for the center to sink some when cooling.
Once cool enough, refrigerate uncovered in the pan (don't try to remove the cheesecake from the pan) for at least 6 hours or until completely chilled.
Serving the Basque Cheesecake
Remove the cheesecake from the pan once it has chilled for at least 6 hours.
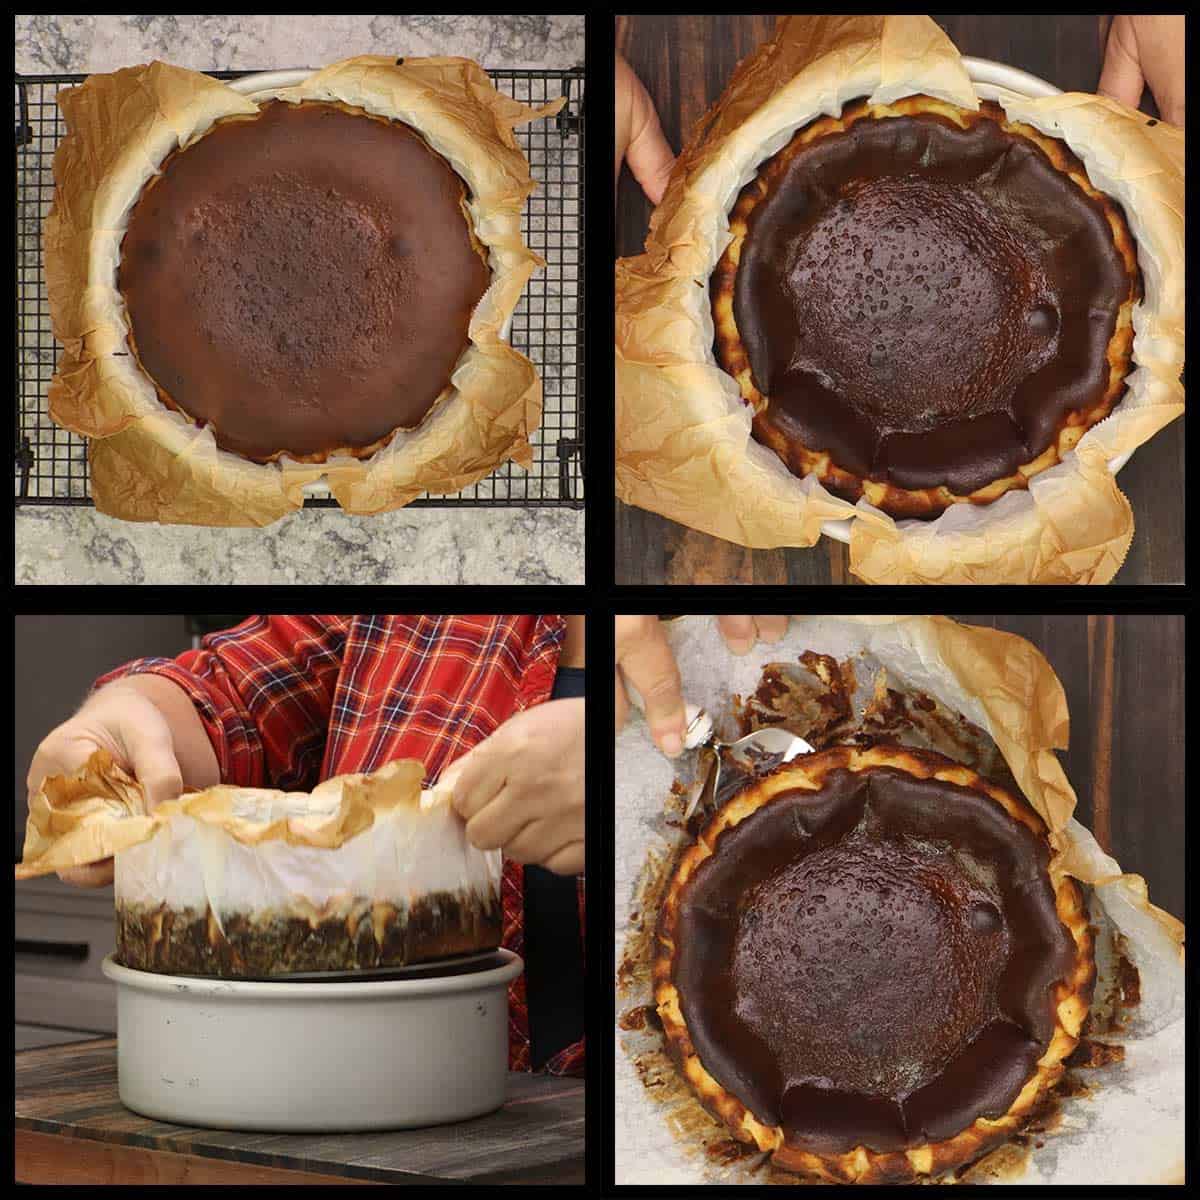
You can choose to serve it with the parchment paper under it or remove it.
Heat the remaining blueberry pie filling over low heat or microwave for 30-60 seconds. Add a little water if needed.
Top the cheesecake with the blueberry pie filling. If you want really clean edges, wipe the knife with a paper towel before making each slice.

Slice and Serve!
Storage Instructions
How to Store Leftover Blueberry Basque Cheesecake
Refrigeration
You can refrigerate the leftovers by wrapping the slices or pie with plastic wrap to protect it from drying out OR place it back in the pan you baked it in and cover it with plastic wrap or aluminum foil.
The cheesecake will stay good in the refrigerator for 3-5 days.
Freezer
While the cheesecake can be frozen, the texture is going to be different when it thaws. For that reason I do not recommend freezing this Basque cheesecake.
However, if you want to freeze it and it is already cut in slices, freeze the slices on a parchment lined pan and then you can put the slices into an airtight freezer bag.
Frequently Asked Questions
Yes, just omit the blueberry filling and bake it exactly the same as stated in the recipe.
Yes, in fact I tested the recipe in a 6" pan at first. You will need to reduce the ingredients by ⅓ for a 6" pan and the baking time may reduce to 30 minutes.
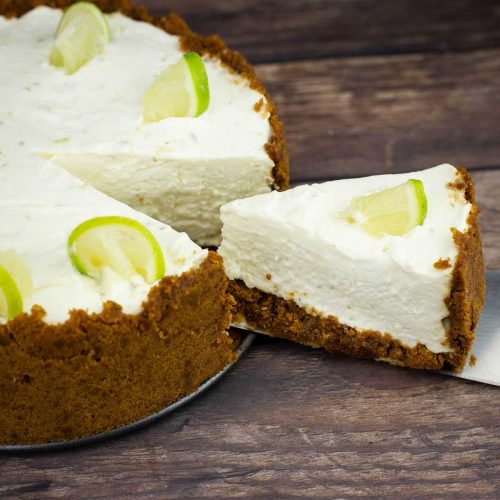
More Cheesecake Recipes!
These cheesecake recipes are very easy to make and taste amazing!


Blueberry Basque Cheesecake Recipe
Ingredients
- 3 8 ounce packages Cream Cheese full fat
- ¾ cup granulated white sugar
- 3 Large eggs ¾ cup
- ½ teaspoon fine grind sea salt
- 3 Tablespoons all purpose flour
- 1 Tablespoon vanilla paste or vanilla extract
- ¾ cup heavy whipping cream
- 3 cups blueberry pie filling
Would you like to save this recipe?
Instructions
Prep for Recipe
- Make homemade blueberry pie filling. Recipe is linked in the ingredient list and is available on The Salted Pepper website. This should be made at least 4 hours prior to making the cheesecake so it has time to cool.3 cups blueberry pie filling
- Remove the cream cheese from the refrigerator and let it come to room temperature. This should be done at least 2 hours prior to making the cheesecake.
- Preheat the oven to 425℉/220℃
- Measure out enough parchment paper to line an 8" cake pan or springform pan and extend over the sides about 2". Crumple the parchment and place it into the pan. Don't worry about it being perfect, just smooth out any large creases. The written recipe article goes into more detail on this.
Cheesecake Batter
- Add the room temperature cream cheese to the bowl of a stand mixer or if you are using a hand mixer, a large bowl. Mix on low speed until smooth, scraping the paddle and bowl as needed.3 8 ounce packages Cream Cheese
- Stream in the sugar with the mixer on low speed.¾ cup granulated white sugar
- Once the sugar is incorporated, add one egg at a time with the mixer running on low speed. Once the first egg is incorporated into the batter, add the second and then the third. scrape down the sides of the bowl and the paddle and mix on low until the batter is very smooth. Small lumps are okay.3 Large eggs
- With the mixer still on low speed, add in the salt, flour, and vanilla paste or extract.½ teaspoon fine grind sea salt, 3 Tablespoons all purpose flour, 1 Tablespoon vanilla paste
- Scrape down the sides of the bowl again and with the mixer on LOW speed, add in the cream. The final cheesecake batter should be just a little thicker than pancake batter. You should have about 4 cups of cheesecake batter.¾ cup heavy whipping cream
Baking the Cheesecake
- Pour 3 cups of the cheesecake batter into the prepared 8" pan. Spoon about 1 cup of the blueberry pie filling on top of the batter in a circle, starting 3" from the edge and leaving the center open.
- Spoon the remaining cup of cheesecake batter on top of the blueberries and gently smooth it out.
- Place the cheesecake on the middle rack in a preheated 425℉/220℃ oven and bake for 40 minutes. You should start to see browning on the top of the cheesecake 15-20 minutes into the baking time. If you don't, turn the oven temp up. When the 40 minutes are up, the top should be a deep brown color, but not black. If at anytime you think the top is getting too dark, turn the oven temperature down. Turn the oven off after 40 minutes and leave the door open, but keep the cheesecake in the oven another 5 minutes. The cheesecake is done when the top is dark brown and the edges are brown, but the center is still very jiggly.
- Remove the cheesecake and let it cool for about 1 hour on a cooling rack. Refrigerate uncovered and in the pan for at least 6 hours. The cheesecake sets as it cools. It is also normal for it to sink in the middle.
Slicing & Serving
- Once the cheesecake is fully chilled, remove it from the pan and fold back the parchment on the sides. Top the cheesecake with 1-2 cups of the blueberry pie filling.
- Slice & Serve!
Notes
Nutrition
About the Recipe Author, Louise Long
Louise is a full-time recipe creator and food blogger @ The Salted Pepper. She has over 30 years of experience with cooking and recipe development. She owned a restaurant for several years and was a full-time RN until retiring to blog full-time.

She published her first cookbook in the Fall of 2018 and is very interested in writing several more.
Louise is also the creator of an online Ninja Foodi Pressure Cooking Course with over 100 instructional step-by-step videos. People absolutely rave about the course and all the value they have received from it.
Louise has several very active Facebook groups that help people with the basics of cooking and learning more about the appliances they love.
Ninja Foodi Pressure Cooker & Air Crisper 101
Ninja Woodfire Outdoor Grill & Smoker
Louise is also a YouTube creator and you can find most of her recipes in video format on The Salted Pepper YouTube channel.
She is very responsive to messages and eager to help in any way she can. Get more Information about Louise & contact information
I WOULD LOVE TO SEE WHAT YOU ARE COOKING UP IN YOUR KITCHEN! TAG ME @THESALTEDPEPPER ON YOUR FAVORITE SOCIAL MEDIA PLATFORM WHEN YOU MAKE A DISH!
BE SURE TO FOLLOW THE SALTED PEPPER RIGHT HERE ⇓⇓⇓⇓⇓
Leave a Reply