
- Electric Pressure Cooker
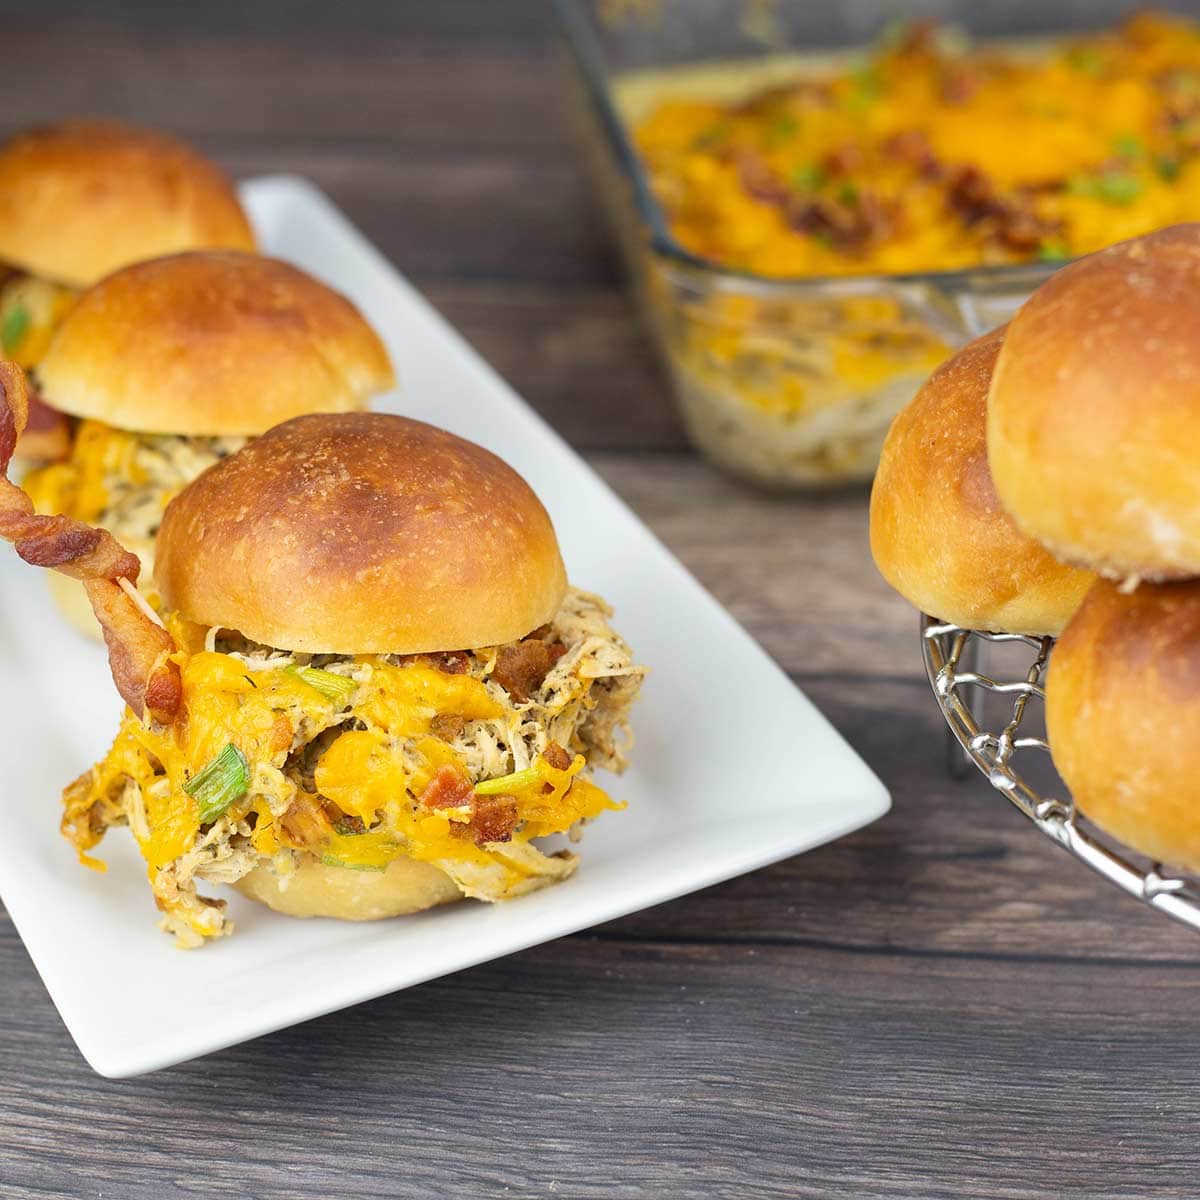
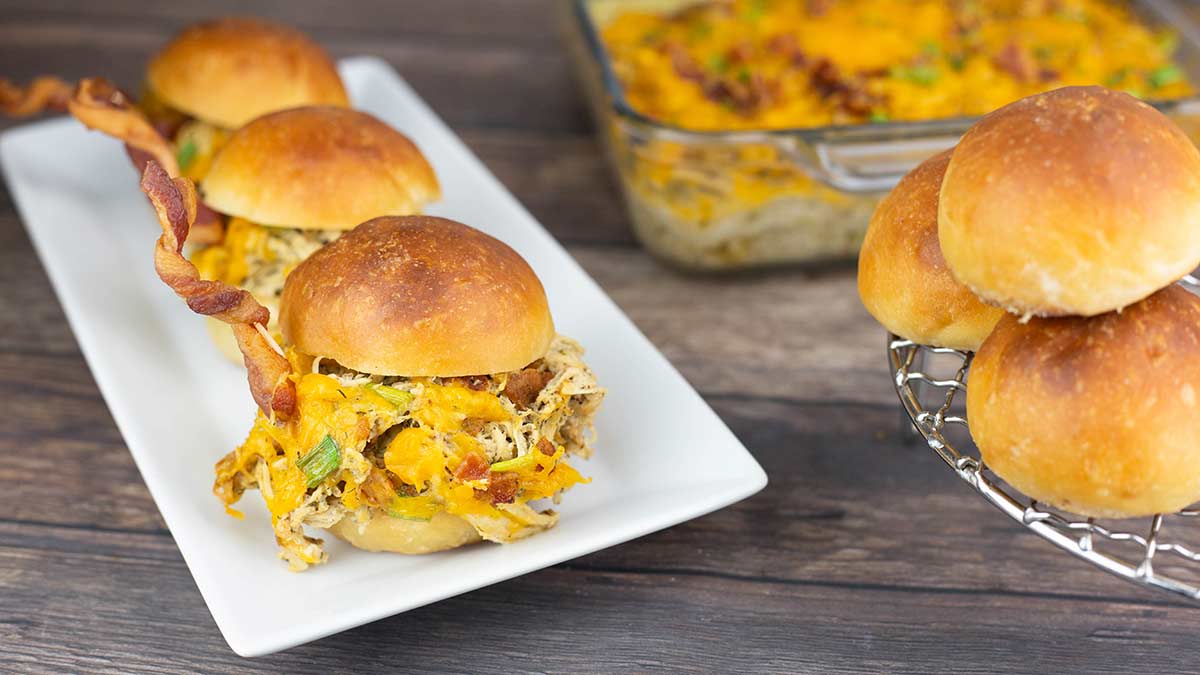
These chicken bacon ranch sliders are so incredibly easy to make and perfect for an easy dinner or a party! The ingredients are simple and they are always a huge hit with everybody!
You can assemble the little sandwiches ahead of time and serve them cold or keep the mixture warm for a hot sandwich. If you want to skip the bun and keep things low carb, I'll give several different options in this article, so keep on reading!
The chicken bacon ranch mixture can be served hot or cold which makes it super versatile.
Would you like to save this recipe?
These delicious mini sandwiches are ready in under 30 minutes and you can make the chicken mixture up to 2 days ahead of time and refrigerate it or freeze it if you want to store it for longer. It reheats beautifully, so you can get ready for your next party months ahead of time!
I promise you, you will love these! Perfectly cooked, tender and juicy chicken, mixed in a ranch butter sauce with crispy bacon, topped with melted cheese, and piled high on a slider bun. Oh yes, sign me up!
Ingredients & Substitutions
Chicken
I like to use chicken breast in this recipe, but chicken thighs work just as well. I use my Ninja Foodi Pressure Cooker & Air Crisper to cook the chicken breasts and they are tender, juicy, and shreddable. If you have an electric pressure cooker, I do recommend using it for this recipe, but if you don't I will give other cooking suggestions for the chicken.
This recipe is also perfect for using leftover chicken, like rotisserie chicken or any kind of cooked chicken; just add the seasonings, melted butter, and sour cream.
You could also use turkey breast or any kind of pork instead of chicken and they will be delicious!
Bacon
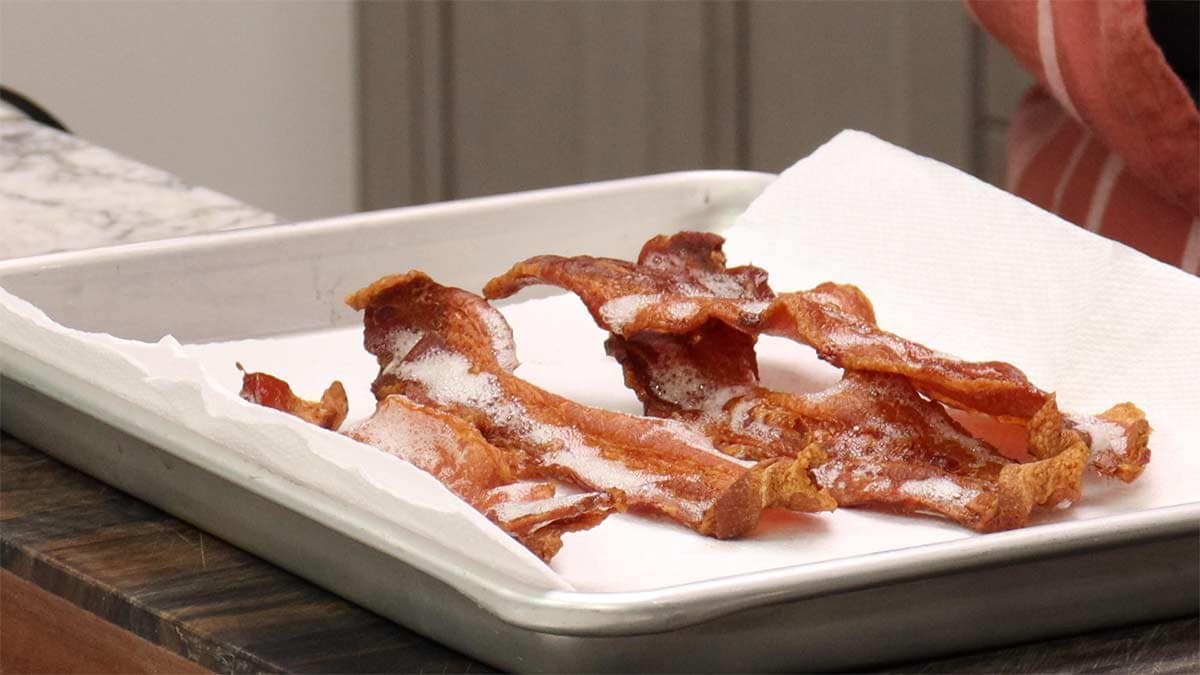
You can use any kind of bacon that you like. I recommend using fresh bacon and cooking it until it's crisp so you can add the bacon crumbles to the chicken. However, a shortcut would be to use bacon bits or the crumbled bacon that comes in a bag.
My favorite bacon to use is Applewood Smoked Thick-Cut Bacon and most recently I've been getting it from ALDI and I'm really liking their brand.
On the off chance that you don't like bacon, simply skip it! While it definitely adds flavor and texture, the other ingredients are delicious with or without bacon.
Cheese
You can use any kind of cheese that you like. My preference is a sharp cheddar and I get it already shredded in a bag for this recipe.
I would recommend sticking with cheddar, but provolone, mozzarella, and even Swiss are some other choices. If you like things a little spicy, try using pepper jack cheese!
You can also skip the cheese if you like.
Seasonings & More
While the 3 main ingredients are the chicken, bacon, and cheese, the supporting cast of ingredients is where the magic happens. With the exception of having an allergy to any of the ingredients, I really hope you follow the recipe as written the first time you make it. It is simply magical.
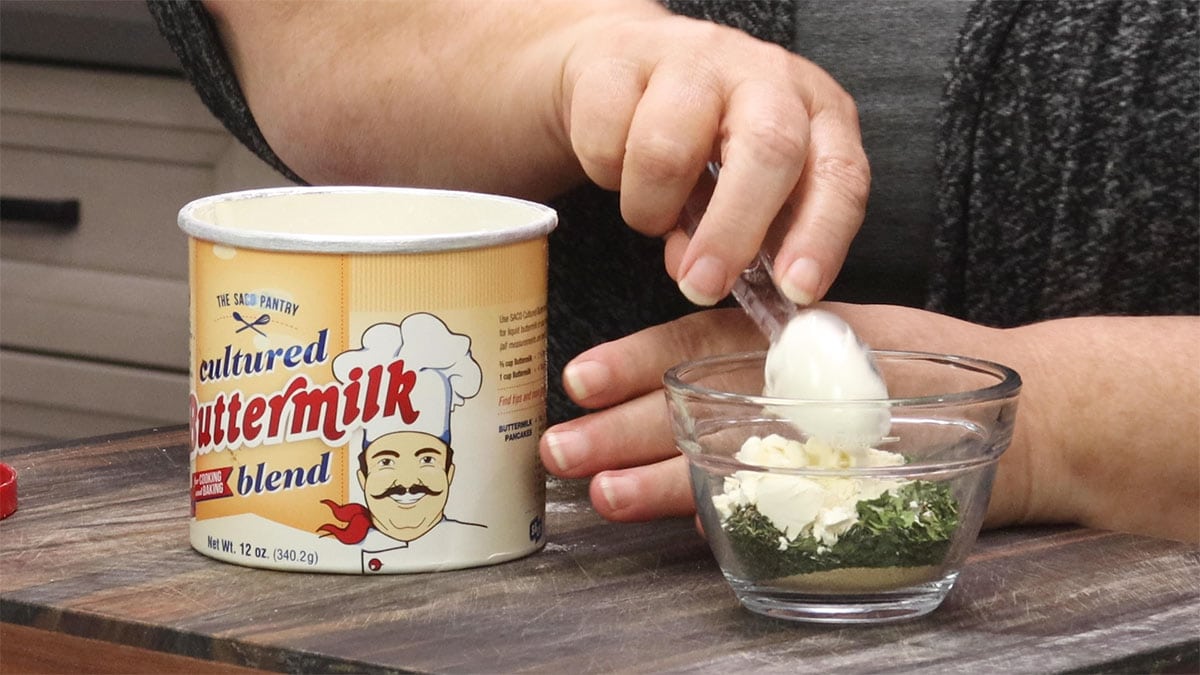
Buttermilk and Sour Cream
I tried a few different combinations and found that dried buttermilk with sour cream gave the BEST flavor and accompanied the spices perfectly. You can find dried buttermilk at Walmart usually, or it can be ordered from Amazon here: (affiliate link)Dried Buttermilk
One of the other combinations that I tried (and was very good, just not quite as good as the sour cream) was dried buttermilk and heavy cream.
You could also substitute Ranch dressing from a bottle, if you prefer. If you want to use ranch seasoning, see below.
Also, check the recommendations I make for various cooking techniques, because sometimes you will need to modify the ingredients slightly.
Seasonings
The blend of seasonings I use in this recipe is very similar to what is used in a ranch seasoning blend; however, the prepared ranch seasoning blend is saltier and tangier.
If you have dried dill, onion powder, garlic powder, parsley, salt, and pepper on hand, I really hope you'll try my blend of seasonings.
It is perfectly fine to use the packets of ranch seasoning instead of the dried buttermilk and the seasonings, though. I would recommend starting with 1 packet of ranch seasoning and then add more to taste. It could take 2 or more packets to adequately flavor the chicken filling.
Liquid
I use water in this recipe, but chicken broth or stock would be fine, as well. If you are using a different cooking technique than in the recipe, please follow the recommendations I give, because the liquid types and amounts do change a bit based on the cooking method.
My cooking preference for the chicken is to pressure cook it with the seasoning blend, dried buttermilk, and the bare minimum of liquid. This method is pretty much hands-off, and then I simply add the remaining ingredients to my pressure cooker to finish the chicken mixture that goes on the slider buns.
I realize that a lot of people are going to question that I only use ¼ cup of water in this recipe, but it works. Now, if you have an electric pressure cooker larger than a 6.5 qt, I would add 2 extra Tablespoons of water because the larger sizes will use up more liquid when coming to pressure.
Now, how I can pressure cook with just ¼ cup of water without getting the burn notice or water notice? The butter melts and the chicken gives off liquid during the cooking process. In fact, at the end of pressure cooking, there is quite a bit of liquid in the pot. So, please don't be tempted to add more water or you will end up with a very wet mixture and your seasonings will be off if you strain it before serving.
Just follow the instructions below for pressure cooking and everything will be fine.
How to Make Chicken Bacon Ranch Sliders
Let me start off by saying, the method I used certainly isn't the only method that will work. It is just the most hands-off while being relatively quick. If you don't have a pressure cooker, or prefer not to use it, you can cook your chicken any way you like.
Just make sure it's shreddable, which means cooking it past 165℉/74℃. Chicken breasts should reach about 200℉/93℃ for easy shredding. I will give my suggestions below for a few different ways you can cook the chicken.
Prep for the recipe
Thankfully, this recipe has very little prep.
Simply cook your bacon using any method that you like. You want the bacon to be crispy and crumbly. My favorite method is using my Ninja Foodi OL series with SmartLid and using steam & crisp. It might sound unusual to cook the bacon starting with steam and finishing with air frying, but it works amazingly well! Here is my recipe for steam & crisped bacon: Ninja Foodi Bacon
Once the bacon is cooked, place it on paper towels and set it to the side for later. If you are using a slower cooking method, like slow cook, for this recipe, then you will want to refrigerate the bacon or wait until the chicken is almost done to make the bacon.
If you need to refrigerate the bacon, crumble it up first and place it in an airtight container.
Next, mix up the spice blend with the buttermilk and set aside.
Unlike many recipes, you want your butter cold for this recipe, so keep it in the fridge until you are ready to use it.
Chop up the green onions for garnish.
If you aren't using pre-shredded cheese, finely shred 1 ½ cups of the sharp cheddar cheese or whatever cheese you choose to use.
Pressure Cooking the Chicken Mixture
I definitely recommend using this method for cooking the chicken ranch mixture and please don't worry about the chicken becoming tough or rubbery. The chicken is in the bottom of the pot with the liquid and it cooks perfectly for shredded chicken. You can even cook the chicken breasts from frozen, if you like; just add 5 minutes of pressure cook time.
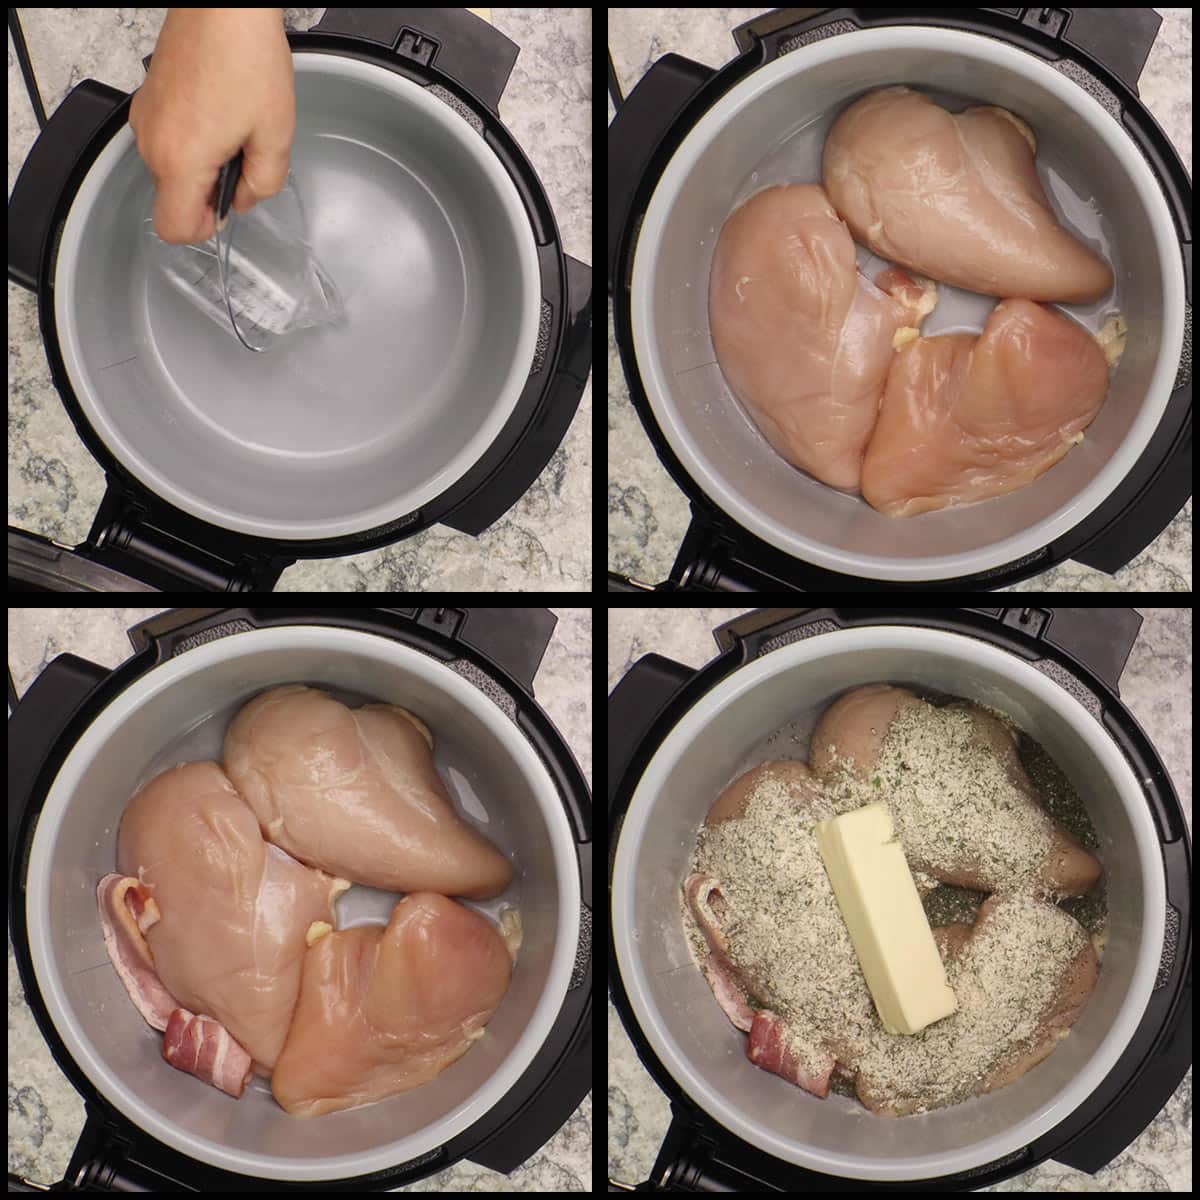
Add ¼ cup of water* to the inner pot of your Ninja Foodi or pressure cooker. Place the chicken breasts in the bottom of the inner pot of your Instant Pot or Ninja Foodi (any electric pressure cooker will work just fine).
Put 1 piece of raw bacon into the pot with the chicken.
* If you are using a pressure cooker larger than a 6.5qt OR using a stainless steel pot, add 2 extra Tablespoons of water. The larger-size pressure cookers use up a little more water when they come to pressure.
Spoon the spice and dry buttermilk mixture over the top of the chicken breasts. Try not to let too much get down in the water because you don't want the water to thicken with the spices.
Place the ½ cup of cold butter on top.
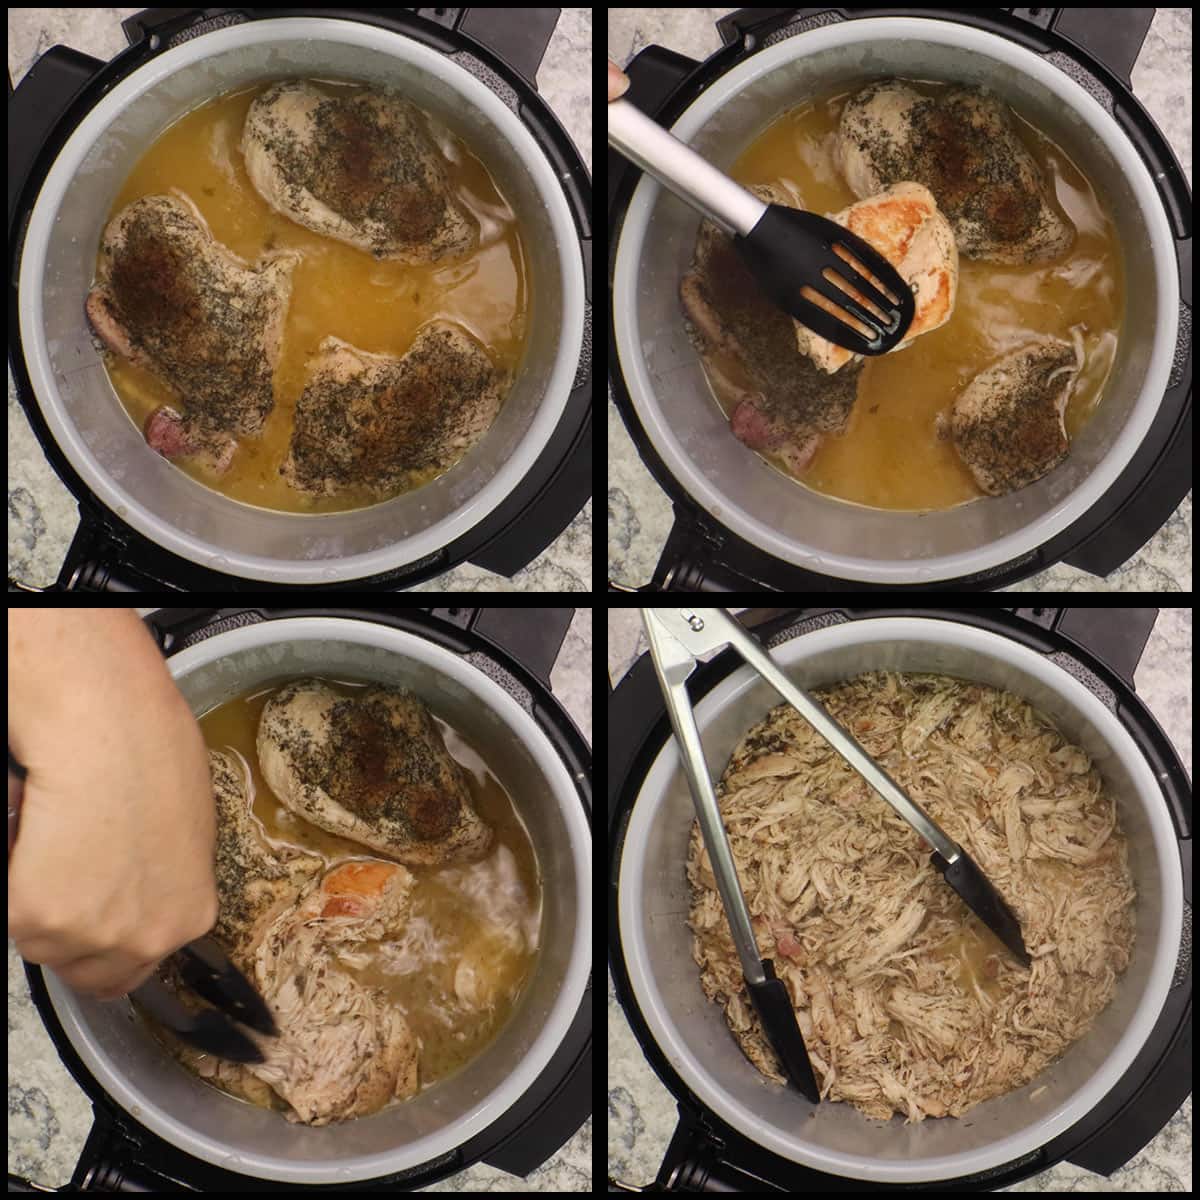
Close the lid, and make sure the valve is in the sealed position. Set the pressure cooker to high pressure for 20 minutes (25 minutes if your chicken is frozen). The pressure cooking time is based on the size of the chicken breasts, not the number of them. My chicken breasts averaged about 13 ounces each and they took 20 minutes, if your chicken breasts are smaller, you can decrease the time, if you like. For 8-ounce chicken breasts, 15 minutes with a full natural release should be fine.
Once the chicken is done cooking, let the pressure cooker naturally release until the pin drops on its own. This is known as a full natural release and in this recipe it takes about 15-20 minutes.
When the pin drops, open the lid and don't cry. Yes, it looks terrible right now. The seasonings are globbed on top of the chicken and there is so much liquid, you are probably second-guessing yourself and thinking you will be serving soup. I assure you, it's going to be fine!
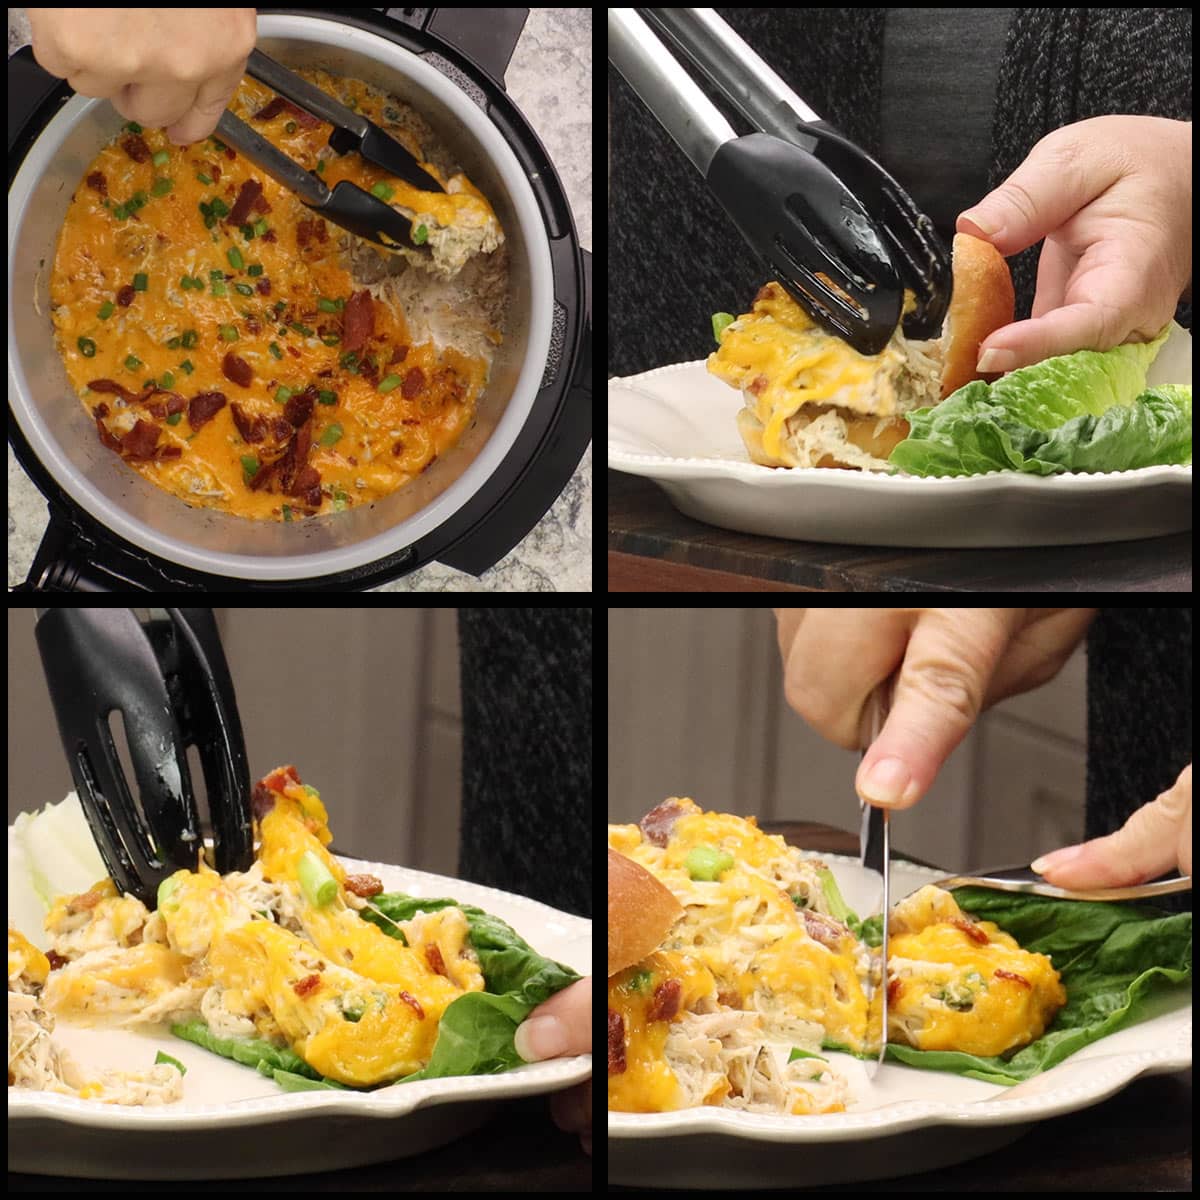
Take some tongs and start shredding up the chicken and mixing everything together.
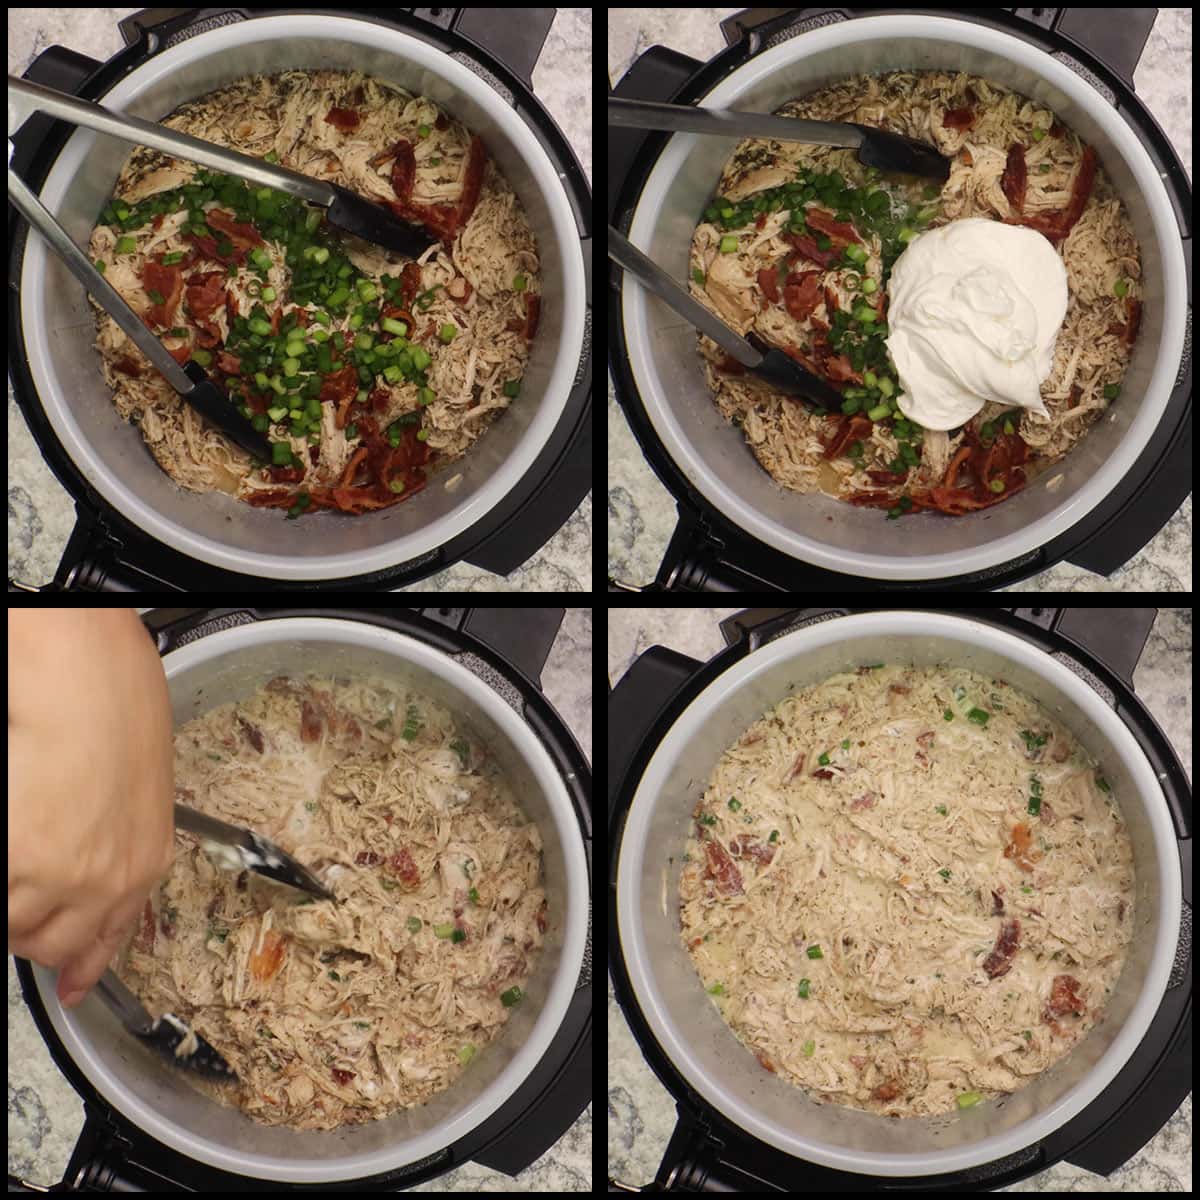
Add in ¾ of the crumbled bacon, and ¾ of the chopped green onions, reserve just a few Tablespoons of each for the very top. Add in the sour cream and mix together.
If you want to transfer the chicken bacon ranch mixture to a casserole dish to take to a gathering, do that now.
Mix the remaining bacon and green onions with the shredded cheese (I forgot to do this and just layered the cheese, bacon, and green onions on top. Spread the cheese all over the top of the chicken. Either close the lid to the pressure cooker and let it sit for 5 minutes to melt the cheese or place foil over your casserole dish to melt the cheese.
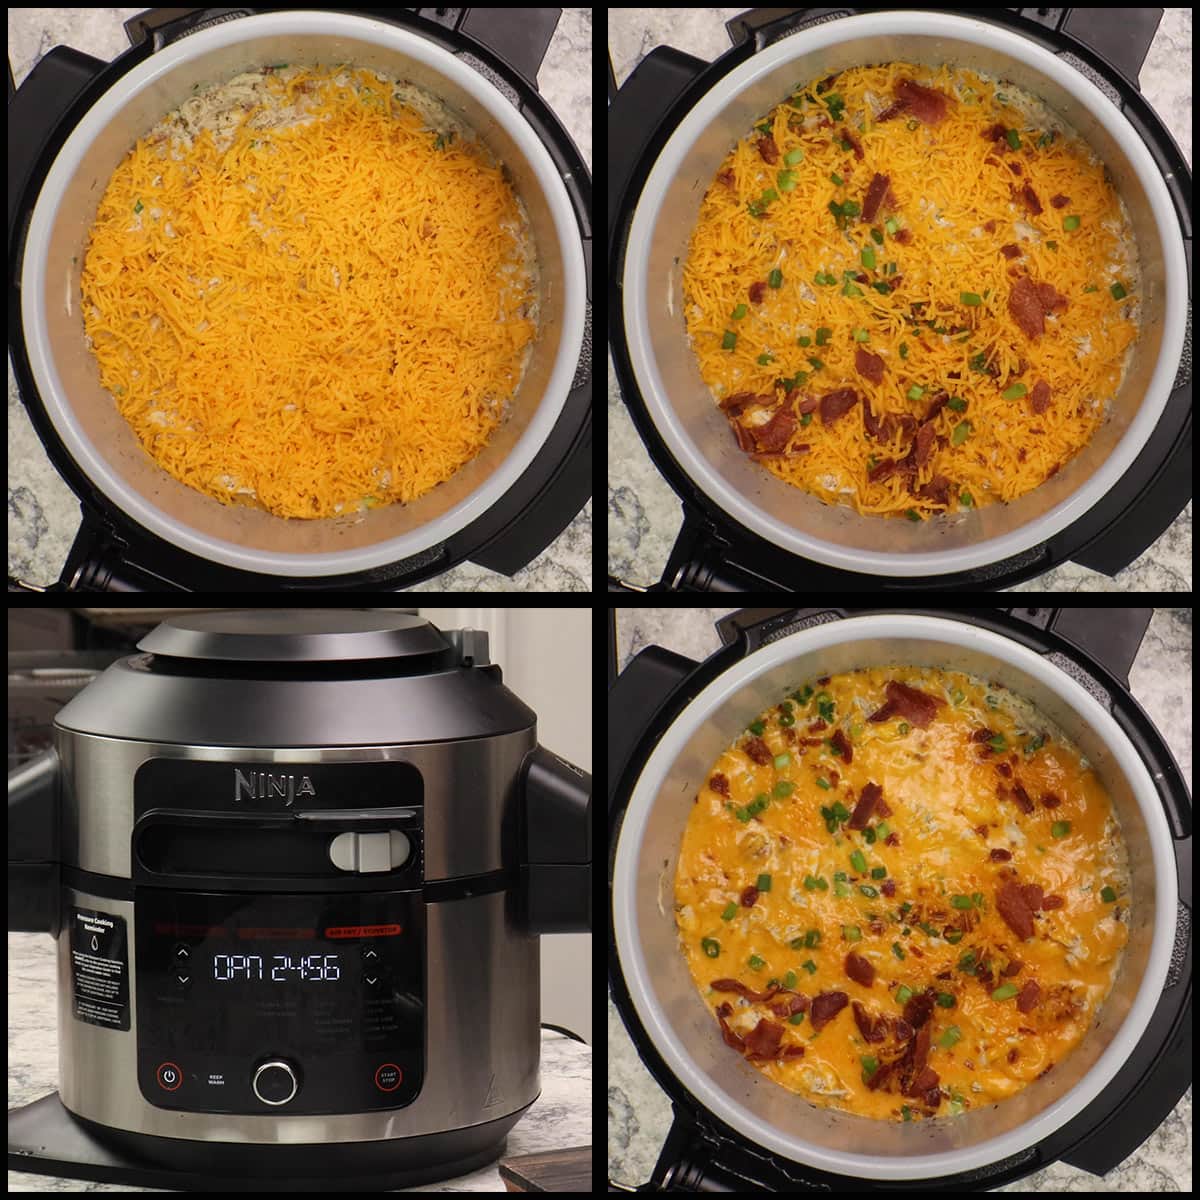
You don't want the cheese to be brown, just melted so it mixes with the chicken as you serve it. If you need to keep it warm in the oven, make sure it's covered and use the lowest oven temp.
In the Ninja Foodi Pressure Cooker & Air Crisper, use the keep warm function to keep the filling hot until you are ready to serve it.
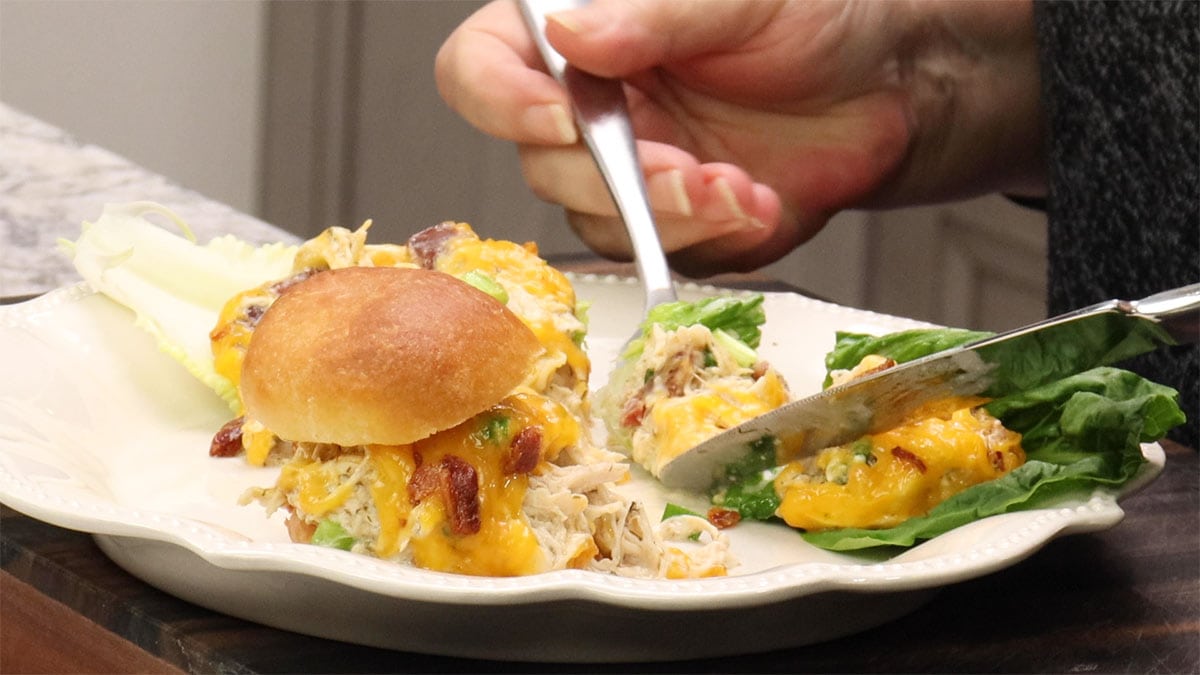
Now, the BEST part! Place about 2 ounces of the chicken bacon ranch filling on the bottom half of the slider bun and put the top of the bun down or place the filling on a lettuce leaf.
Take a bite and jump up and down with joy because it tastes amazing!
These chicken bacon sliders are so good, the whole family is going to love them and so will your guests!
Slow Cooker or Stovetop Instructions
There are so many different ways to make this recipe and you can even use leftover chicken and just mix it with the sour cream and seasonings. You could bake the chicken breasts, sous vide the chicken breasts, or boil the chicken breasts. The important thing is that they are cooked long enough to be shreddable. This usually means taking the temperature of the chicken up to about 200℉/93℃. For this reason, I recommend using a moist cooking environment versus a dry cooking environment if you need to cook the chicken.
If you aren't going to use pressure cook, then I recommend slow cooker followed by stovetop.
Slow Cooker Chicken Bacon Ranch Sliders
The instructions for slow cooking the chicken is going to be the same as pressure cooking, it will just take longer.
Place ¼ cup of water in the slow cooker. Add in the chicken breasts, raw bacon slice, and the seasonings.
Close the lid and slow cook on high for about 2-3 hours or low for 4-5 hours. The time may vary depending on your slow cooker, so keep an eye on it after it has cooked for about 2 hours. As soon as the chicken is easily shredded with a fork or tongs, it's done.
Shred the chicken right in the slow cooker using two forks or tongs. Add in ¾ of the crumbled bacon, ¾ of the chopped green onions, and the cup of sour cream. Mix together well.
Combine the shredded cheese with the remaining bacon and green onions. Spread the cheese over the top of the chicken mixture. Close the slow cooker lid and after about 5 minutes the cheese should be melted.
You can keep the mixture in the crockpot on low or keep warm until you are ready to serve the chicken bacon ranch sliders. Keep an eye on the mixture if you leave it on low, it will start to get dry after a few hours. If this happens, mix in some milk or sour cream.
Place about 2 ounces of the chicken mixture on each slider bun. Enjoy!
Stovetop Chicken Bacon Ranch Sliders
The easiest way to make this recipe using the stove is going to be to simmer the chicken breasts in a pot of water for about 30-45 minutes.
Fill a pot with 4-6 cups of water. Add salt to the water and place the chicken breasts in the pot. Bring the water to a boil and, once it starts boiling, reduce the heat until the water is holding at a simmer. Cover and cook until the chicken is very tender.
Remove from the water and place in a bowl or a casserole dish. Keep the cooking liquid in case you need to add it to the chicken mixture. Shred the chicken with two forks. Add in the seasoning, ¾ of the crumbled bacon, ¾ of the chopped green onions, and sour cream. Mix together.
If the mixture is too dry, add in some of the cooking liquid. I recommend doing this even if the mixture is perfect if you are going to be keeping it warm for more than 1 hour. You probably only need to add in about ½ cup.
Mix the remaining bacon and green onions with the shredded cheese. Spread the cheese over the top and cover the bowl or casserole dish with plastic wrap or foil. Let sit for a few minutes to melt the cheese. Or, you can place the dish into the oven on very low heat until the cheese melts.
Place about 2 ounces of the chicken mixture onto a slider bun and enjoy!
Other Ways to Serve Shredded Chicken with Bacon Ranch Butter Sauce
Because I test my recipes so many times, I ended up with A LOT of the shredded chicken mixture and didn't always want to eat it as a slider.
So, Jeff and I started putting the hot mixture on a romaine lettuce leaf and eating it as a low-carb wrap. It was delicious.
I was taking some out of the container to reheat and snuck a forkful while it was still cold and squealed in delight, because it was so good! My husband, Jeff, does not like cold food when it's meant to be eaten hot, but I convinced him to try it and he loved it cold! It's like a really good shredded chicken salad that is bursting with flavor!
This opened up so many various ways to serve it to friends and family that the possibilities are pretty much endless. Here are some ideas for the shredded chicken mixture if you didn't want to serve sliders.
- Lettuce Wrap: using any kind of lettuce you like, spread some cold or hot shredded chicken with bacon mixture on the lettuce and eat it as a wrap.
- Pinwheel Sandwiches: This might be my favorite way other than the sliders. Spread some cold shredded chicken mixture over a flour tortilla and roll it up. Slice it into 1" slices and serve as a snack, for lunch, or put them on a party platter.
- Hot or Cold Dip: It's great served as a hot or cold dip with your favorite crackers or crusty bread.
- Stuffed Potato: Bake up a potato and remove the top and some of the potato. Fill it with the shredded ranch chicken mixture and top with cheese. Bake in the oven until bubbly for a delicious twice-baked potato.
- Potato Skins: using leftover baked potatoes, spread the mixture onto the potato skins and top with cheese. Bake in an oven until bubbly and then top with crumbled bacon and green onions.
- Buffalo chicken sliders: Add some hot sauce to the chicken mixture and instantly turn these into a buffalo chicken slider!
Please let me know if you try one of these suggestions or if you come up with another serving idea!
Frequently Asked Questions
Absolutely! Let the chicken mixture cool completely then place it in an airtight container or freezer bag and freeze it for up to 3 months.
When reheating, you may need to add a little water or milk to get it to be nice and creamy.
I recommend reheating it with gentle heat, like a slow cooker on low or in the oven covered with foil on a low temp until it is heated through.
Yes, you can make as much or as little of the chicken mixture as you want to. When pressure cooking, you don't want to decrease the liquid amount if you hare cutting the recipe in half. You will need the ¼ cup as the very minimum. If you are doubling the recipe, you don't have to increase the liquid amount either. ¼ cup will be fine and the chicken will give off plenty of liquid to keep the pot under pressure.
Other Great Recipes for Entertaining!
I really think of these bacon ranch chicken sliders as party food. Maybe because they are appetizer size or maybe because you can make enough for a crowd very easily.
So, if you are looking for easy ideas for your next get-together, here are some of my favorite recipes. All of these recipes will go great with your chicken bacon ranch sliders!
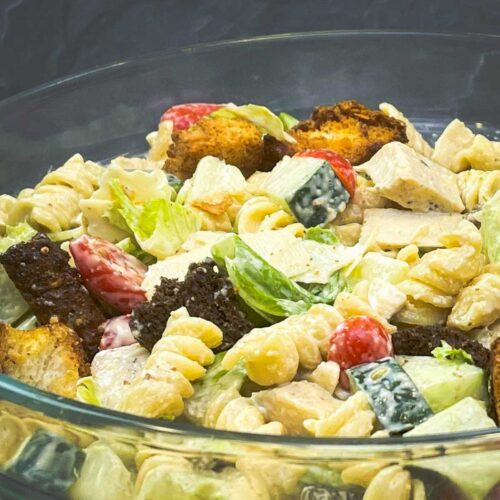
- Ceasar Pasta Salad
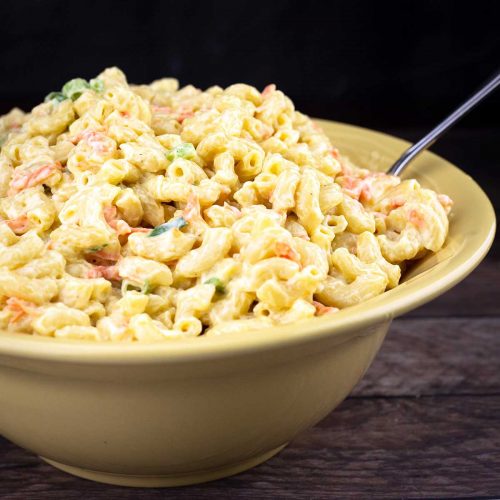
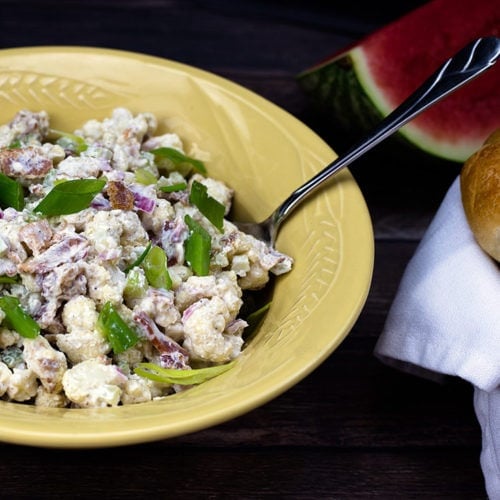
- Hawaiian Macaroni Salad (Stovetop or Pressure Cooker)
- Pressure Cooker Baked Beans in the Ninja Foodi
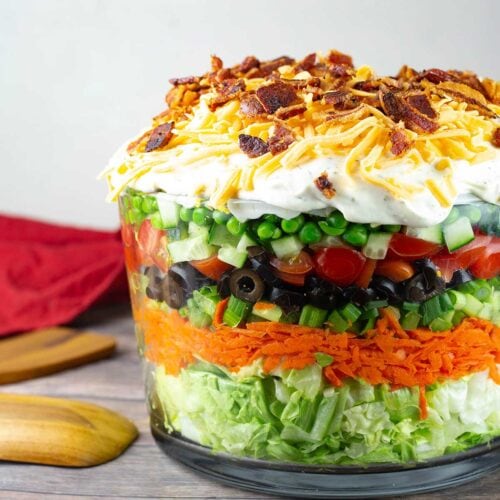
- Overnight Layered Salad
- Roasted Cauliflower Salad in the Ninja Foodi
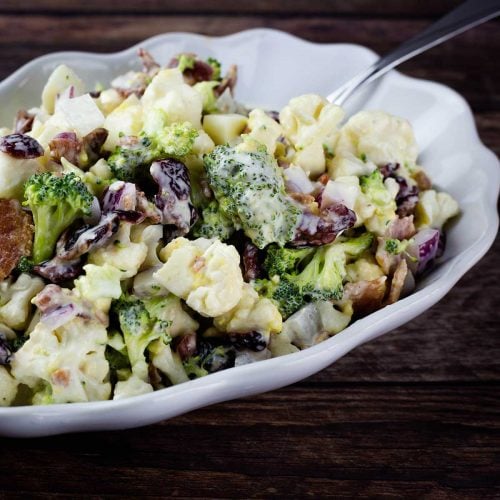
- Low Carb Broccoli & Cauliflower Salad
- Ninja Foodi Pulled Pork ~ Pressure Cooked & Air Crisped
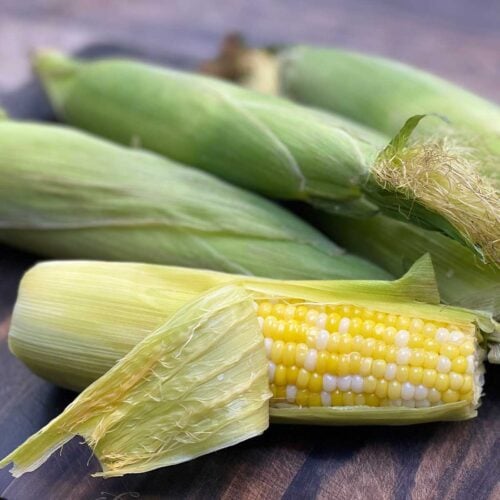
- Pressure Cooker Corn on the Cob


Chicken Bacon Ranch Sliders Recipe
Equipment
- Electric Pressure Cooker
Ingredients
- ¼ cup water plus 2 Tablespoons if using an 8-10 qt Electric Pressure Cooker
- 2½ pounds chicken breast boneless, skinless
- 1 slice thick-cut applewood smoked bacon uncooked
- ½ cup butter cold
- 1 cup sour cream
- 6 slices thick-cut applewood smoked bacon cooked crispy for crumbling
- 1 bunch green onions chopped. I use the green and white part.
- 1½ cups shredded sharp cheddar cheese
Spice Blend
- 2 Tablespoons buttermilk powder
- 1 Tablespoon dried parsley
- 1 Tablespoon dried dill
- 2 teaspoons onion powder
- 2 teaspoons garlic powder
- 1 teaspoon fine grind sea salt
- ½ teaspoon black pepper
- 40 slider buns or Kings Hawaiian rolls
Would you like to save this recipe?
Instructions
- Cook 6 pieces of bacon so they are crispy. I use this method: Steam & Crisp Bacon. Set the cooked bacon on paper towels to cool. Once it has cooled, crumble it up and set it aside for later.6 slices thick-cut applewood smoked bacon
- Mix up the spice blend in a small bowl and set to the side.2 Tablespoons buttermilk powder, 1 Tablespoon dried parsley, 1 Tablespoon dried dill, 2 teaspoons onion powder, 2 teaspoons garlic powder, 1 teaspoon fine grind sea salt, ½ teaspoon black pepper
- Add the water to the inner pot and lay the chicken breasts in the bottom of the pot. Add the raw slice of bacon¼ cup water, 2½ pounds chicken breast, 1 slice thick-cut applewood smoked bacon
- Sprinkle the seasoning blend on top of the chicken breasts. Try to get it mostly on the chicken and not on the bottom of the pot. Place the cold butter on top.½ cup butter
- Put the pressure lid on and make sure the valve is to the sealed position. Select pressure cook on high and set the time for 20 minutes (if the chicken breasts are frozen, set the time to 25 minutes). When the time is up, allow the pot to naturally release the pressure. This means, do nothing until the pin drops on its own.
- Once the pin has dropped, turn the valve to vent to release any steam still in the pot and open the lid. Don't worry that there is a lot of liquid in the pot right now.
- You can remove the cooked bacon that was cooked with the chicken or break it up when you shred the chicken, which is what I usually do. Use silicone-tipped tongs to shred the chicken right in the inner pot.
- Add in the sour cream, ¾ of the crumbled bacon, and ¾ of the chopped green onions. Mix everything together in the inner pot. In a medium size bowl, mix the shredded cheese with the remaining crumbled bacon and green onions. Spread the cheese on top and close the lid of the pressure cooker. You do not need to turn it on. Let it sit for 5 minutes and the cheese will melt.6 slices thick-cut applewood smoked bacon, 1 bunch green onions, 1½ cups shredded sharp cheddar cheese, 1 cup sour cream
- Fill each slider bun with about 2 ounces of the chicken bacon ranch fllling and serve. Enjoy!
Nutrition
About the Recipe Author, Louise Long
Louise is a full-time recipe creator and food blogger @ The Salted Pepper. She has over 30 years of experience with cooking and recipe development. She owned a restaurant for several years and was a full-time RN until retiring to blog full-time.

She published her first cookbook in the Fall of 2018 and is very interested in writing several more.
Louise is also the creator of an online Ninja Foodi Pressure Cooking Course with over 100 instructional step-by-step videos. People absolutely rave about the course and all the value they have received from it.
Louise has several very active Facebook groups that help people with the basics of cooking and learning more about the appliances they love.
Ninja Foodi Pressure Cooker & Air Crisper 101
Ninja Woodfire Outdoor Grill & Smoker
Louise is also a YouTube creator and you can find most of her recipes in video format on The Salted Pepper YouTube channel.
She is very responsive to messages and eager to help in any way she can. Get more Information about Louise & contact information
I WOULD LOVE TO SEE WHAT YOU ARE COOKING UP IN YOUR KITCHEN! TAG ME @THESALTEDPEPPER ON YOUR FAVORITE SOCIAL MEDIA PLATFORM WHEN YOU MAKE A DISH!
BE SURE TO FOLLOW THE SALTED PEPPER RIGHT HERE ⇓⇓⇓⇓⇓
Jack says
Hi there!
Where I’m from, you can’t get buttermilk powder and I was wondering if there is a substitute for it or if you could leave it out altogether?
Thanks!
Louise says
In the ingredients and substitutions section, I talk about that. I would just leave it out. I made the recipe without it originally and it's delicious without it.
Steve says
Hi Louise
Would you be able to substitute the buttermilk with normal full cream milk powder ?
Thanks