
If you want perfectly cooked corn on the cob with the least amount of work, this corn on the cob recipe is for you! It doesn't matter what brand of electric pressure cooker you have, this recipe will work just fine. I used the Ninja Foodi Pressure Cooker & Air Crisper for this recipe, but the Instant Pot will work perfectly fine.
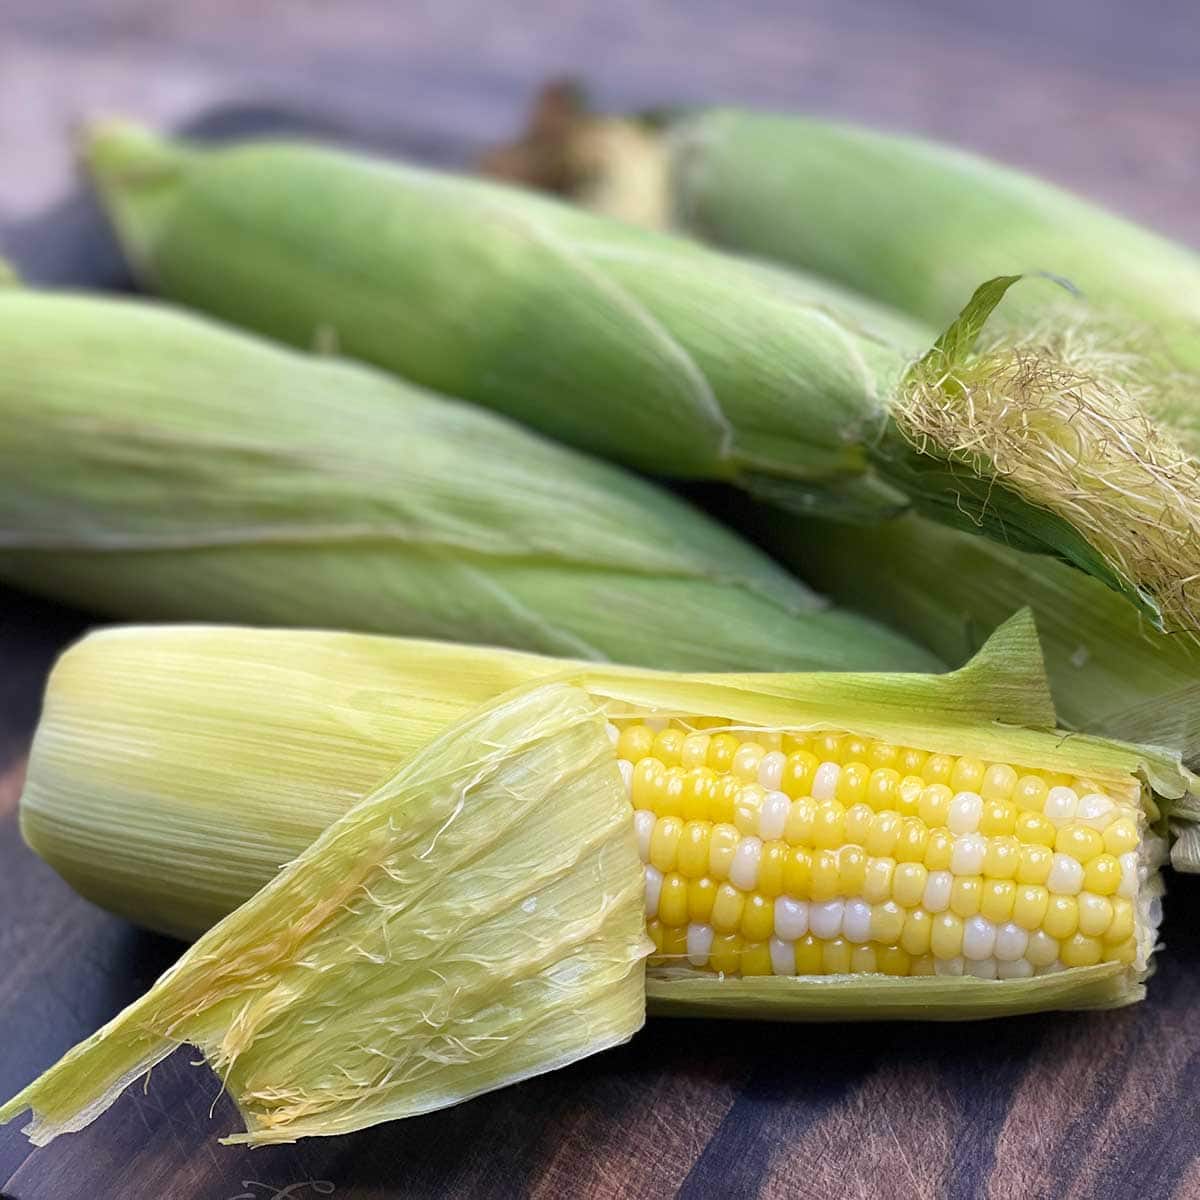
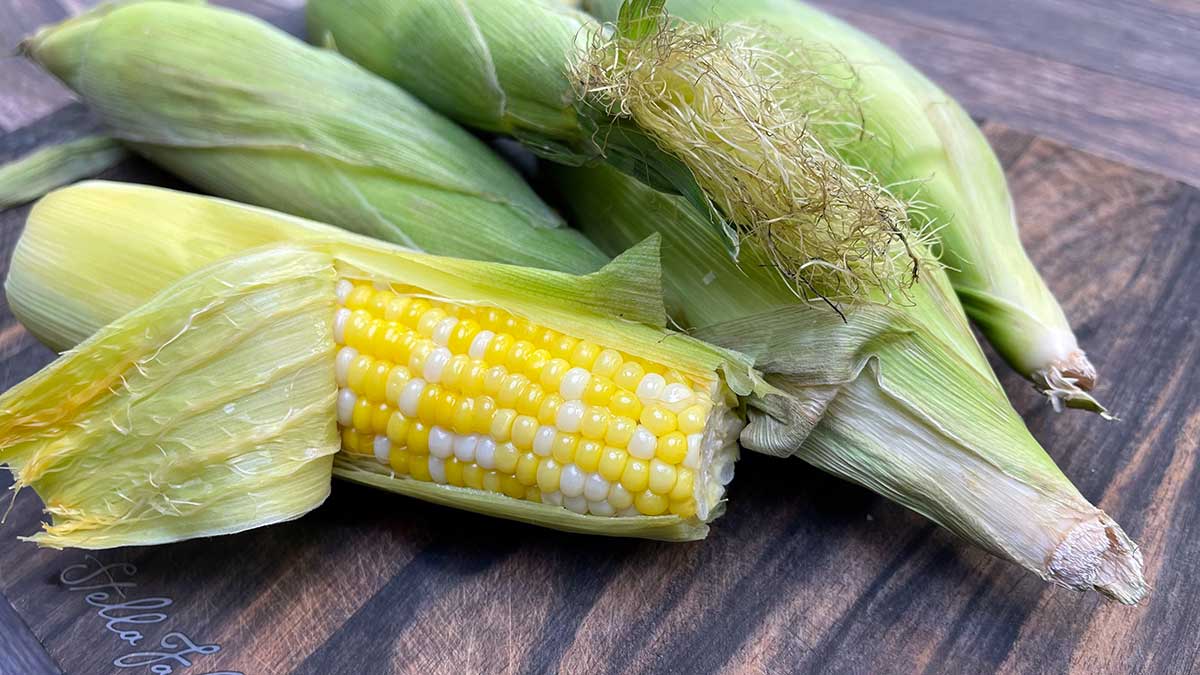
I gave up husking corn before cooking a long time ago! I don't like the corn silk getting all over the place and it's always hard to get it out of the rows of corn. Pressure cooking in the husk is the easiest way to avoid all of that. You can absolutely use this same method and cook the unhusked corn in a large pot on your stove top, but I like the convenience of pressure cooking it. Once cooked, you peel back the husk and all the silk comes right with it! Easy Peasy!
Would you like to save this recipe?
Pressure cooking is, by far, my favorite way of cooking corn on the cob. Even if I want to grill it to make Mexican Street Corn, I still prefer to pressure cook first to soften the kernels. I don't always cook it for the entire 4 minutes, though. If I want to use the corn in another dish and not just eat it with salt, black pepper, and a little butter right off the cob, I decrease the pc time to 2 minutes. There is so much you can do with pressure cooker corn. Fresh corn makes the perfect side dish at a cookout and by leaving it in the husks, it stays hot a lot longer.
If you are looking for some other side dishes using corn, here are some that I have made. Using fresh corn instead of canned or frozen only makes the recipe that much better! Enjoy!

Frequently Asked Questions
Not usually, but sometimes. Each ear of corn will cook at approximately the same time, however when you add more volume to your pressure cooker, you do increase the time to pressure and this time is cook time. So, if you are cooking 1-6 ears of corn, you wouldn't need to change the time. For larger amounts, like 7-10 ears of corn, you may want to consider decreasing your pressure cook time down by 1 minute.
The only limitations to how many ears you can cook is how much corn you can fit and that depends on the size of your pressure cooker.
Frozen Corn on the Cob is usually husked already, but you can still pressure cook it to thaw and cook the corn. Some frozen corn on the cob has also been blanched prior to freezing. Because of these factors, I recommend a slightly different method for pressure cooking corn on the cob from frozen. The first thing I would do is elevate the corn on a rack or trivet so it isn't sitting in the water. Because the husk has been removed, the corn kernels can absorb too much water and become kind of mushy when cooked from frozen. I don't know anyone who likes soggy corn!
Your time to pressure will be longer when cooking from frozen, so I would suggest pressure cooking frozen corn on the cob with 1 cup of water on high pressure for 4 minutes with a 5-minute delayed release.
Absolutely! There are a few ways to do this, but I think pressure cooking in the husk is the easiest way. Because you will be freezing the corn and then either reheating it or using it in recipes, you don't need to cook the corn completely. Usually, prior to freezing corn it is blanched, which means it is put in hot boiling water for just a minute or two and then put in a cold ice bath to stop the cooking process. We can achieve those same results using our electric pressure cooker. Simply place 2 cups of water in the inner pot and lay the corn (ends cut off) into the pot and pressure cook on high for 2 minutes. Immediately release the pressure and remove the corn. Place the corn in a large pot of ice water for about 5 minutes. Husk and allow to air dry. Once dry, you can place the ears of corn into freezer bags or an airtight container or you can place the ears on a parchment lined tray and freeze overnight. Once the ears are frozen, wrap each on in plastic wrap and then put into a freezer-safe bag.
You can also blanch, cool, and then cut the kernels off of the corn cobs if you only want to freeze the kernels. You definitely want the corn to be dry before freezing in most instances.
How to Pick out the Best Tender Sweet Corn
No matter what cooking method you use, starting with fresh sweet corn is the most important part. While there are some things you can do, like put sugar in the water when you boil corn, to increase the sweetness, nothing beats the taste of sweet summer corn. The best time to buy fresh corn is from June through early August in most of the United States and the best place is from the back of pickup truck along the roadside or at a Farmer's market. Nothing beats locally grown fresh corn.
Unfortunately, a lot of grocery stores sell corn that isn't exactly the freshest or the sweetest. So, here are some tips for picking the best corn.
- You want to pick corn with a nice green husk that have not started to dry up.
- The silk that extends past the corn husk should be soft and not feel dry. It's okay if it is darker in color, but should feel almost sticky and not brittle.
- Bigger isn't always better when it comes to corn. I look for ears of corn that are about 7-8" in length and have kernels that are about the size of pencil eraser.
Some grocery stores allow you to husk your corn right there and provide a trash can. I LOVE when they allow this because it makes it easy to check the corn kernels themselves, however, please don't husk the corn and then leave it. Once husked, it really dries out quickly. What I do is pick the corn based on the husk, silk, and feel, then I husk one ear to see how the kernels are. I've also been known to pull a kernel out and taste it for sweetness. If all checks out, I pick out the rest of the corn I need based on the same criteria and I leave it in the husk. If it isn't ripe enough, I still buy the one that I husked and I'll cook it in sugar or use it in something else.
Whether you get all yellow kernels, all white kernels, or a mixture is simply a personal preference and of course based on what the store has. I've purchased white sweet corn (without seeing the kernels) and got home and it was yellow as can be. Most of the time, where I live anyway, the kernels seem to be a combination of white and yellow. Personally, I think white corn is sweeter as long as the kernels are small, but my mom thinks the yellow corn is sweeter and likes bigger kernels. It's all about what you like when it comes to color and size of the kernels.
Boiling Corn on the Cob in the Husk
I started cooking corn in the husk way before I bought a pressure cooker, so you absolutely don't need a pressure cooker to do it this way. You can even make the corn right in the microwave, although that is my least favorite way because I've had inconsistent results.
To boil in the husk, fill a large pot about halfway with water. You want a big enough pot with enough water to completely cover the corn.
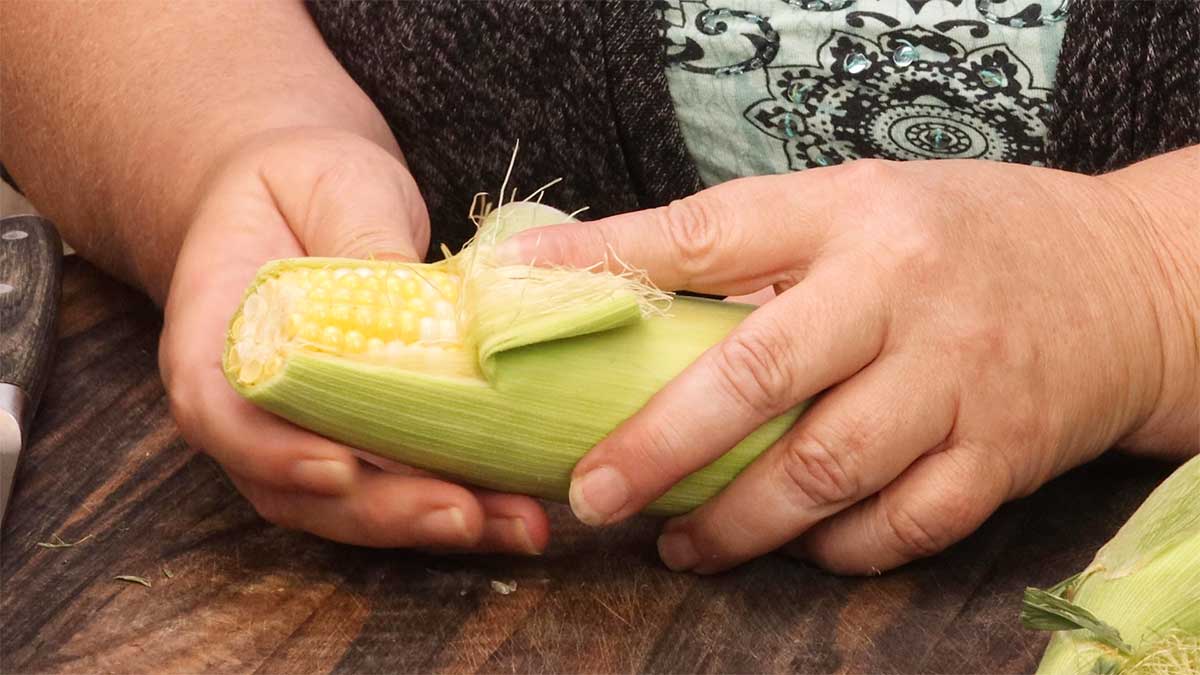
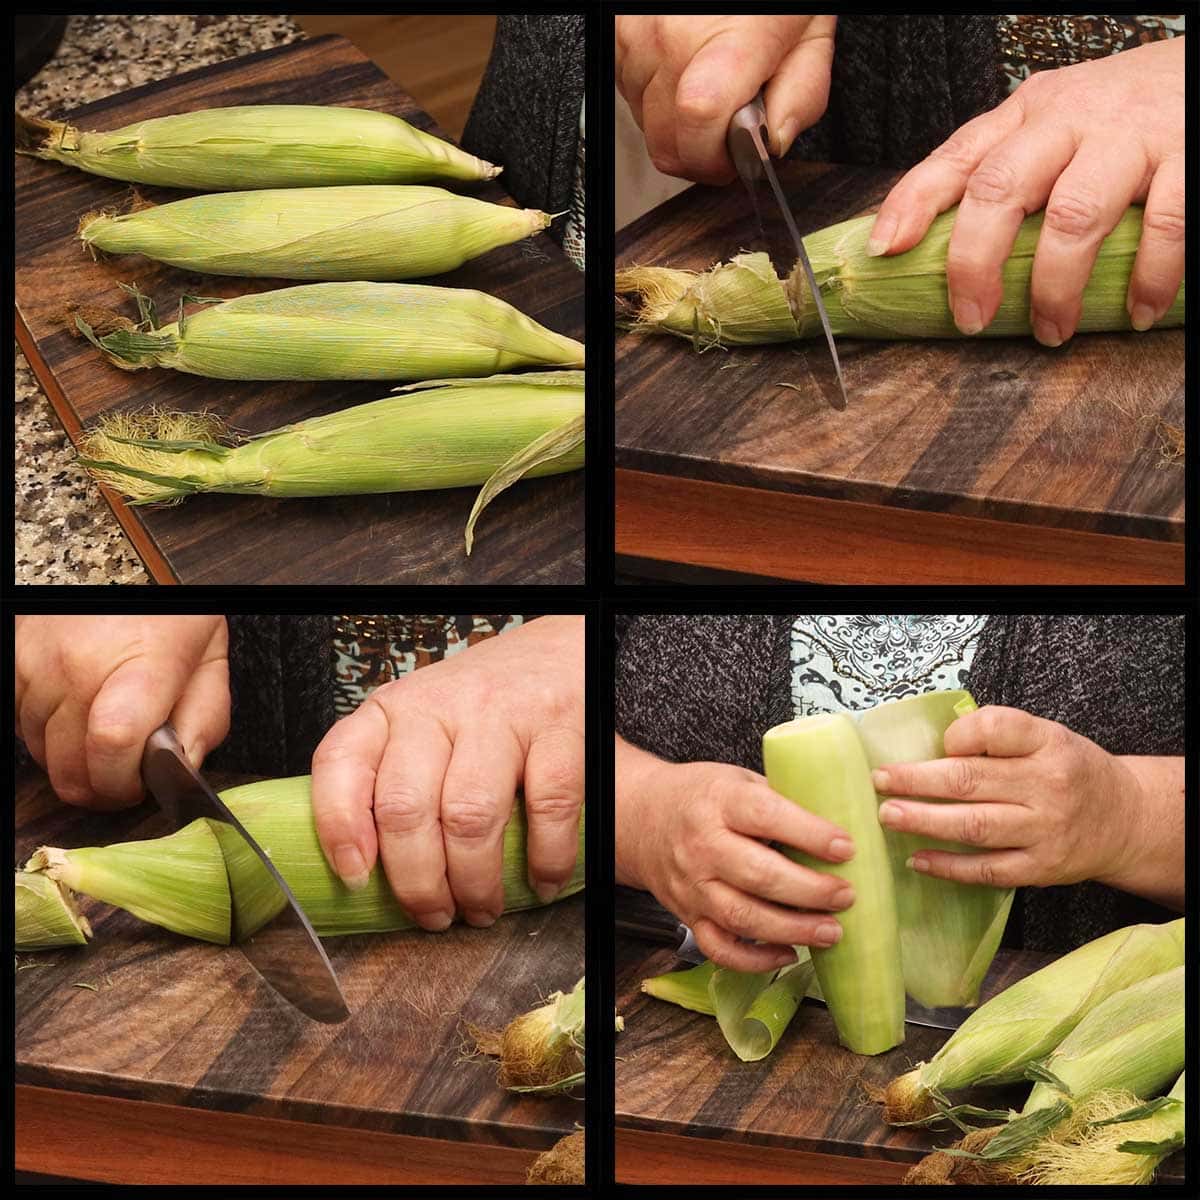
Cut the tops and bottoms off of the corn and remove 2-3 layers of the husk.
When the water is boiling, add the ears of corn. Bring the pot back up to a boil and cook for about 15-20 minutes. You can cover the pot if you like, but watch for boil overs.
When the corn kernels are as soft as you like them, remove the corn from the boiling water and allow to cool slightly before shucking and serving.
How to Pressure Cook Corn on the Cob in the Husk
Prep
The only prep is to cut off both ends of the corn and remove 2-3 layers of the husk. Remove a few layers of the husk allows the corn to cook a little faster and more evenly in my opinion, but it isn't absolutely necessary.
You can even skip cutting off the ends, but I find it makes it easier to peel the husk off after cooking and it fits better in the pressure cooker.
If you want to have smaller pieces of corn, you can cut the corn in half or in thirds. The cook time will be the same.
Pressure Cooking
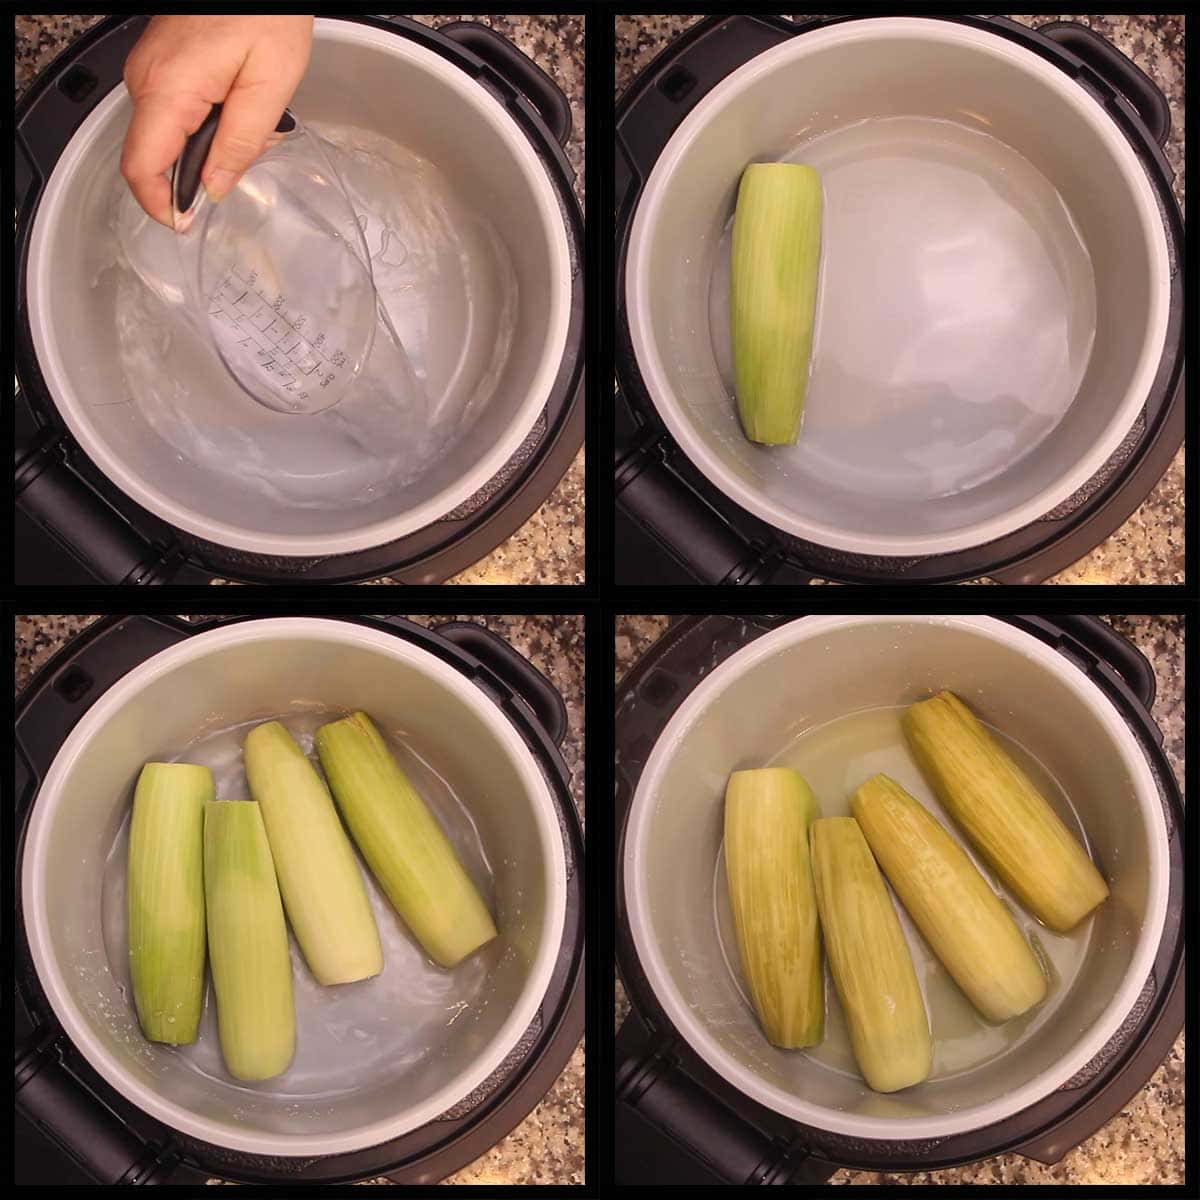
Place 2 cups of water into the inner pot. Place the ears of corn on the bottom of the pot. It is perfectly fine if they are stacked. You can cook as many ears of corn as will fit in your pressure cooker. The time to pressure will be longer if you are cooking more than 6 ears, so you may want to decrease your PC time to 3 minutes IF you like firm corn kernels.
Put the pressure lid on and make sure the valve is in the sealed position. Pressure cook on high for 4 minutes. When the time is up, immediately release the pressure. When the pin drops, open the lid and use tongs to remove the ears of corn.
If you aren't serving the corn right away, leave the ears in the pot with the lid on and keep the keep warm function on. They will be nice and hot when you are ready for them. You can also remove the corn and husk it and then return the ears of corn to the pot and add in some butter and seasonings and leave the keep warm on. You can drain the pressure cooking liquid or leave it in the pot.
Serving
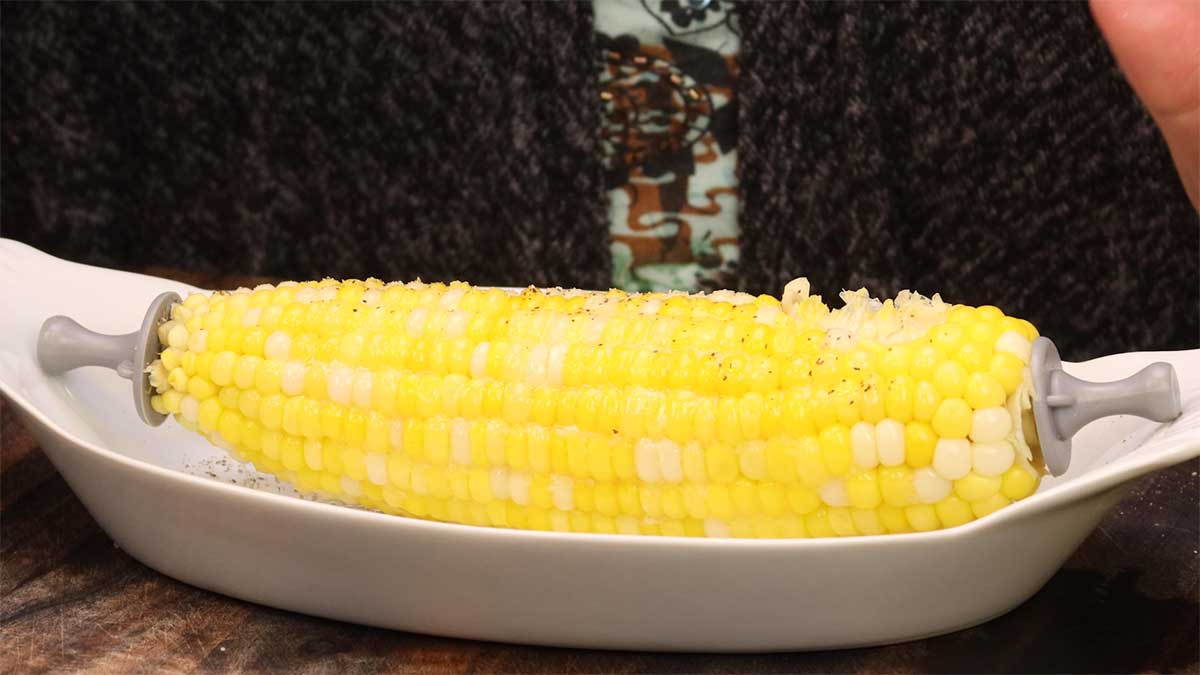
I like to serve the corn right in the husks and remove them just before eating. This keeps the corn warm. However, you can husk them and place them in a serving dish if you prefer.
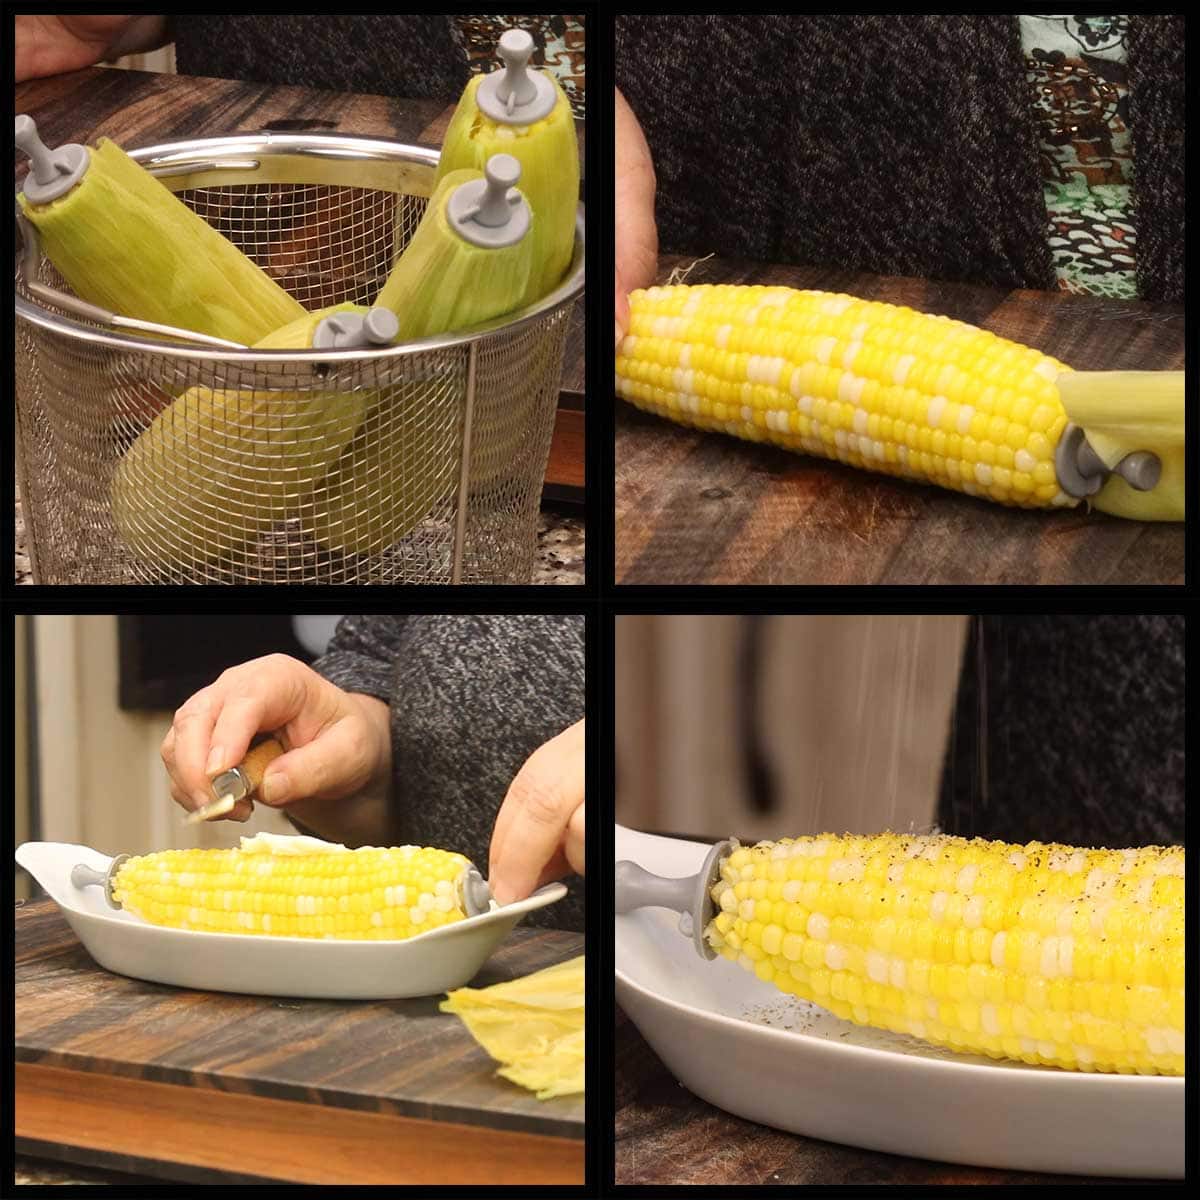
Add butter or any seasonings that you like. Enjoy!

Pressure Cooker Corn on the Cob
Equipment
- Pressure Cooker
Ingredients
- 4 ears corn on the cob
- 2 cups water
- ¼ cup butter optional
- salt and pepper to taste optional
Would you like to save this recipe?
Instructions
- Cut the tops and bottoms off of each ear of corn and remove 2-3 layers of the husk.
- Place 2 cups of water in the inner pot of the Ninja Foodi or the Instant Pot. Place the corn on the bottom of the pot. It is fine if it is stacked. Put the pressure lid on and turn the valve to the sealed position. Set the pressure on high for 4 minutes. When the time is up, immediately release the pressure.
- Once the pin drops, remove the lid. Remove the corn with tongs and place the ears onto your serving tray. If you aren't serving right away, cover with foil to keep in the heat.
- Peel back the husks and dress the corn with butter, salt, and pepper. Enjoy!
Notes
Nutrition
About the Recipe Author, Louise Long
Louise is a full-time recipe creator and food blogger @ The Salted Pepper. She has over 30 years of experience with cooking and recipe development. She owned a restaurant for several years and was a full-time RN until retiring to blog full-time.

She published her first cookbook in the Fall of 2018 and is very interested in writing several more.
Louise is also the creator of an online Ninja Foodi Pressure Cooking Course with over 100 instructional step-by-step videos. People absolutely rave about the course and all the value they have received from it.
Louise has several very active Facebook groups that help people with the basics of cooking and learning more about the appliances they love.
Ninja Foodi Pressure Cooker & Air Crisper 101
Ninja Woodfire Outdoor Grill & Smoker
Louise is also a YouTube creator and you can find most of her recipes in video format on The Salted Pepper YouTube channel.
She is very responsive to messages and eager to help in any way she can. Get more Information about Louise & contact information
I WOULD LOVE TO SEE WHAT YOU ARE COOKING UP IN YOUR KITCHEN! TAG ME @THESALTEDPEPPER ON YOUR FAVORITE SOCIAL MEDIA PLATFORM WHEN YOU MAKE A DISH!
BE SURE TO FOLLOW THE SALTED PEPPER RIGHT HERE ⇓⇓⇓⇓⇓
Leisa says
Few things in the kitchen are more indispensable than a pressure cooker. I've cooked corn on the cobb many ways, but had the thought of "why not pressure cook" , and here I found you.
I used my 10 qt Kuhn Rikon with the inset basket. Stood my corn on their ends. 4 minutes of pressure, instant release, and perfection. With husks on, once cooked, the silk peels easily away. Thank you for sharing this.
Louise says
I'm so glad you enjoyed the corn!
Dianne says
I made this exactly as you said and it was perfect! The husks and silk came off so easily and the corn was not too firm, not too soft, it was perfect!
Louise says
YAY!
Kevin says
Everybody loved it. Easy and fast. Add the "I can't believe it's not butter" in the spray bottle, line moves right along. We put 11 ears in our 8qt IP standing up on a trivet. Thank you. I love you.
Louise says
Thank you so much!
MaryBeth Mosher says
Love this way of making corn! Simple & yummy
Will never boil it again.
Enjoy "The Salted Pepper" so much!!
Your honesty about all things is refreshing.
Recipes are yummy😋
Take Care!!
Louise says
Thank you so much! Honesty is one of the most important attributes of a person to me, without it, we have nothing. I'm so glad you are enjoying the recipes.
John says
I did 5 min of pressure on fresh frozen Corning the cob . It came out sooooo mushy, it was barely edible. If I were to try again I would go 2-3 minutes max.
Louise says
Did you have it in the water or on the rack? Was your corn in the husk or out? I would keep frozen corn out of the liquid as stated in the post and my suggested PC time was 4 minutes. I am very interested in hearing more details because if you elevated the frozen corn and did it like I suggested with the exception of increasing the PC time by 1 minute, then I will have to do a few more experiments and adjust my suggestions as indicated. Thanks for the feedback!