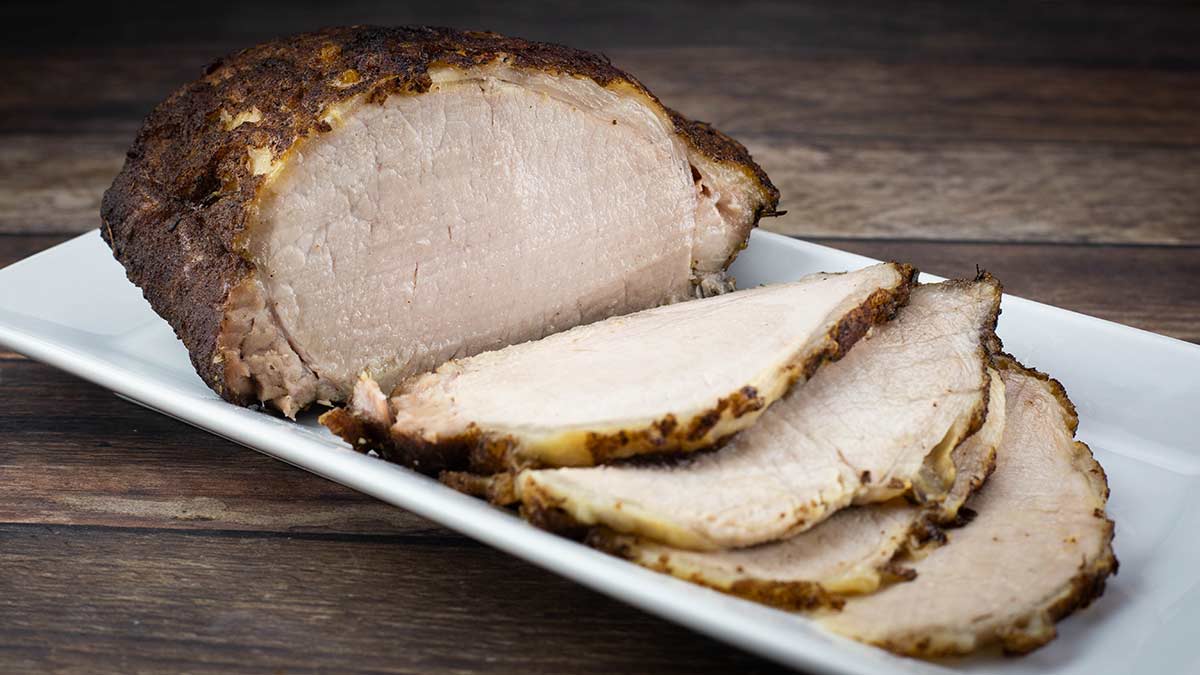
Using your Ninja Foodi to cook a pork roast is a great option and there are so many different ways you can do it. You can make a delicious air fryer pork roast simply by using the air crisp/air fry function only.
You can slow cook it and then use air crisp/ air fry to crisp up the top. You can also use bake/roast or sous vide.
There is no right or wrong function to use; however, I found that making a pork roast in the Ninja Foodi by combining pressure cooking with air frying results in a tender and juicy pork loin with a crispy top!
Would you like to save this recipe?
When you want a tender pork roast that is full of flavor and perfectly cooked, this method will be your go-to! The beauty of pressure cooking before air frying is we can keep the pork super moist while cooking it partially and then finish the cooking process with air frying.
This flavorful pork roast is ready in under an hour and is mostly hands-off cooking, which I love!
This method of cooking is known as Tendercrisp and it is what the Ninja Foodi Pressure Cooker & Air Crisper is known for. However, you don't have to have the Ninja Foodi to make this recipe. You can use any pressure cooker with or without a crisping lid. If your pressure cooker doesn't have a crisping lid, you will use the oven to finish cooking and crisping up the fat on top of the pork roast.
Ingredients & Substitutions
Pork Roast
A pork roast can be made from many different cuts of pork and they can be bone-in or boneless. This recipe is for a boneless pork center loin. While you can use this same method for other cuts of pork, they may require a shorter or longer cook time.
Starting out, the Pork Loin is a primal cut of pork that is further cut down into different cuts, like: pork sirloin roasts or chops; pork tenderloin; pork ribs; and pork center loin chops or roasts.
Here are some common cuts of pork used for roasted pork and the differences to keep in mind if you want to substitute them for the boneless pork loin.
Boneless Pork Loin Roast
This is the cut of pork I use in this recipe. It is a lean and tender cut of pork without any marbling or visible connective tissue. When picking out a pork loin boneless roast, look for one that is uniform in shape with a nice even fat cap covering one side. Depending on where the loin roast is cut, the look of the meat can vary. I like to get the center cut, which isn't necessarily the most flavorful cut, but it cooks evenly and slices beautifully. So, if you want to make a sliceable pork roast this is a great choice.
I used a pork roast that was about 2.5 pounds and about 2½ -3" in diameter. The weight and shape does make a difference in the cooking time. If your roast is closer to 4" in diameter it is going to take longer to cook than one that is 3" even if it is the same weight.
Pork Tenderloin
This is a much smaller cut of pork that averages about 1 pound in weight and would only need about 3-5 minutes of pressure cooking, followed by a short air crisp to brown the outside. There isn't a fat cap on a pork tenderloin, but we can use sauces and glazes to create a caramelization on the outside with a short air fry time. While you can definitely pressure cook a pork tenderloin, it is just as easy to grill it or air fry it. An air fryer pork tenderloin will take about 15 minutes, but you want to cook it to temperature and not time for the best results. Please see the section below that goes over carryover cooking in various sizes of meat so you can pull your tenderloin at the right temperature.
Here is a recipe for grilled pork tenderloin that I did in the Ninja Foodi Grill: Grilled Pork Tenderloin
Slow Cooking is another option for a really tender pork tenderloin and here is my recipe: Slow Cooker Pork Tenderloin with a Peach Bourbon Sauce
Pork Shoulder or Pork Butt
Pork shoulder roast is also known by the name picnic roast and pork butt is often called Boston butt. The names can be misleading because these cuts do not come from the butt end of the pig, they come from the shoulder area.
Pork shoulder and pork butt are often used interchangeably, but there is a difference. The pork shoulder comes from lower on the pig and usually you will see some skin on it and although it can be boneless, I usually see it sold with the bone in. The pork butt is higher up on the pig and can be boneless or bone-in.
The shoulder is a heavily worked muscle and while you can certainly use it to make roast pork, this cut requires a much longer pressure cooking time to break down the connective tissues and usually by the time it's tender enough to eat, it's falling apart and not exactly sliceable.
These cuts do great using the TenderCrisp method of pressure cooking and then air crisping or air frying or cooking low and slow in an oven or smoker.
If you want to cook a pork butt or shoulder, I recommend using this recipe: Ninja Foodi Pulled Pork ~ Pressure Cooked & Air Crisped
Pork Leg
There are few things better than a roasted pork leg, but here in the US they can be kind of hard to find. In the US, you will see the pork leg cured and fully cooked. We call it ham. If you are able to pick up a fresh ham or pork leg that has not been cured and isn't fully cooked, you can make a delicious roasted pork with crispy crackling!
The cooking time would be very different, though; and, since I have not been able to find one where I live, I would suggest looking up a recipe that is specifically for a Roasted Pork Leg.
Seasoning Blend
You can use any kind of seasoning that you like on your pork loin roast. I would pick a seasoning blend that goes along with the theme of the entire meal. For example, if I'm making a pork roast to serve with gravy and mashed potatoes and apple sauce, I like to use a little cinnamon and brown sugar in the rub I use. If I'm going to pair it with potato salad and roasted green beans, I might choose a bbq style rub and instead of gravy use a homemade bbq sauce.
If I wanted to turn my pork roast into pork sandwiches or Cuban wraps, I would choose a rub that has some chili powder and a little spice. Spicy sweet is a great option for roasted pork that will be used in Cuban sandwiches.
If you aren't sure about spices, use simple salt and black pepper and you can't go wrong.
Cooking Liquid
The cooking liquid you choose is completely up to you, but I would stick to water, unless you are making gravy with the juices.
Because the pork roast is raised above the liquid, the liquid will not infuse enough flavor into the meat to be noticeable.
If you are planning on making a gravy with the juices, then you can use any kind of broth or stock that you want or you can add some aromatics to the water to create your own pork broth. Pick ingredients to go into the water that complement the dry rub of the meat so that when you make the gravy it all goes together perfectly.
For example, I might use some apples, a cinnamon stick, and brown sugar in the water if I wanted an apple cinnamon gravy (which is delicious, I've done it).
I didn't make gravy with the liquid because I was using the pork for sandwiches, so I used plain water.
What is Carryover Cooking and Why is it Important?
For the best results when cooking meat, it is really important to understand carryover cooking and how it affects the final temperature of food.
Carryover cooking refers to the period of time after the food is removed from the direct heat source, but still continues to cook. This period of time can vary based on the size and shape of the food. While I am only going to address carryover cooking of meat, carryover cooking occurs in every food we remove from a heat source (an oven, pressure cooker, slow cooker, stove burner, etc.).
You may have heard to let your meat rest for 5-10 minutes before cutting. This is so the juices of the meat redistribute into the meat fibers instead of running all over the cutting board. During this resting period, our food still continues to cook from heat transfer.
During this resting period, residual heat is transferred from the hottest part of the meat to the coldest part of the meat until it reaches equilibrium, meaning the meat is the same temperature throughout. Then, the temperature will start dropping as your food cools off.
Understanding how carryover cooking affects the internal temperature of food is the key to serving perfectly cooked meats, especially lean meats like certain cuts of pork and chicken which tend to dry out and become tough if they are the slightest bit overcooked.
The first important thing to know is that different sizes and shapes of meat will have different degrees of carryover cooking. Things like steaks, chicken pieces and pork chops will rise in temperature about 5-10 degrees over a 10-minute period of time. While larger roasts and whole chickens will rise in temperature about 15-20 degrees over the same 10-minute rest period.
More heat is lost through the surface of a steak before it has the chance to raise the internal temperature as much as with a larger cut of meat that is round and has less surface area compared to total mass.
Why is this important? Because it can drastically affect your serving temperatures and understanding the concept of carryover cooking will allow you to make informed decisions about when to pull your meat from the direct heat and allow it to rest.
In this recipe for pork loin, I pull the roast when the internal temperature reached 130℉ because I knew it would rise in temperature to 145℉ over a 10-15 minute rest period. By doing this, I avoided overcooked, dry, and tough pork.
If I were making pork chops, with a larger surface area compared to total mass, I would have pulled the pork at about 135℉ or 140℉ and let it rise in temperature to 145℉ as it rested.
So, when you are cooking meat to temperature, always take into account carryover cooking and remove the meat prior to it reaching the perfect serving temperature so you don't end up overcooking it while it sits on your cutting board.
A safe rule of thumb is to remove flatter cuts like steaks, chops, and chicken pieces about 5 degrees before it hits your optimal serving temperature, and for larger roasts 10 degrees before it hits your optimal serving temperature.
How to Make a Pork Loin Roast in the Ninja Foodi
Making the pork loin roast in your Ninja Foodi is very easy! You do want to start out with a thawed 2-3 pound pork loin roast. I really don't recommend cooking lean pork roasts from frozen because they tend to become overcooked on the outside by the time the inside is cooked properly.
I also recommend bringing the pork roast out of the refrigerator at least 30 minutes before cooking. This takes the chill off of it and it cooks more evenly, however, with pressure cooking, it isn't as important as with other cooking methods.
Prep for Recipe
In a small bowl, combine your seasoning blend. You can use simple salt and pepper or mix together any spices you like to create your own rub or you can use the rub I have in the recipe card below.
Try to season your pork roast at least 2 hours before cooking, but they can be seasoned up to 24-48 hours ahead of time. I never remember to do this, so I usually season just before cooking. If you can, try to season ahead of time, it does make a difference in the flavor.
Pressure Cooking
Add 1 cup of liquid to the inner pot of the Ninja Foodi. I used water because I wasn't making gravy with the juices. If you want to make gravy, use a broth of some sort or plain water with some aromatics like thyme or rosemary along with onion, garlic, celery, and carrots. This will give you a flavorful base to make gravy with.
Place the reversible rack in the low position into the Ninja Foodi inner pot. You could also use the air fryer basket or any trivet that elevates the pork above the liquid. If you are air frying after pressure cooking, make sure the pork roast is not too close to the heating element when you close the crisping lid.
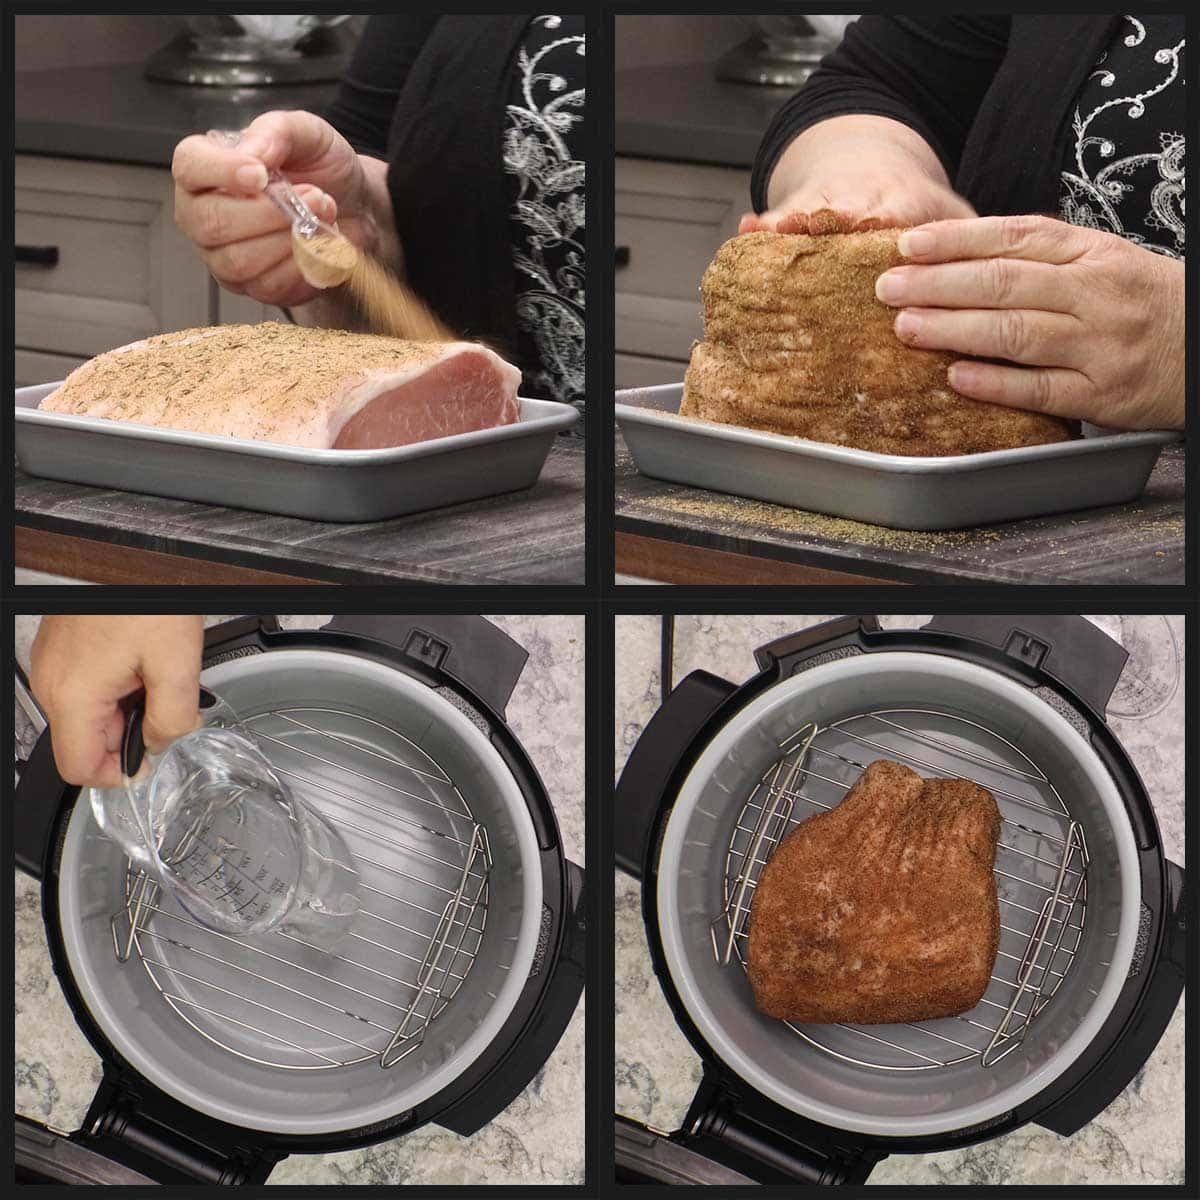
Place the seasoned pork roast on the rack/basket with the fat cap facing up. Set the pressure to high and set the time based on the size and shape of your roast. Here are my suggestions.
- 1-2 pounds with a diameter of 3-4": set high pressure for 10 minutes
- 2-3 pounds with a diameter of 3-4": set high pressure for 15 minutes
- 3-4 pounds with a diameter of 3-4": set high pressure for 18 minutes
If the diameter of your pork loin roast is 4-6", increase the pressure cooking time by 3 minutes. Remember, it is always better to undercook than overcook.
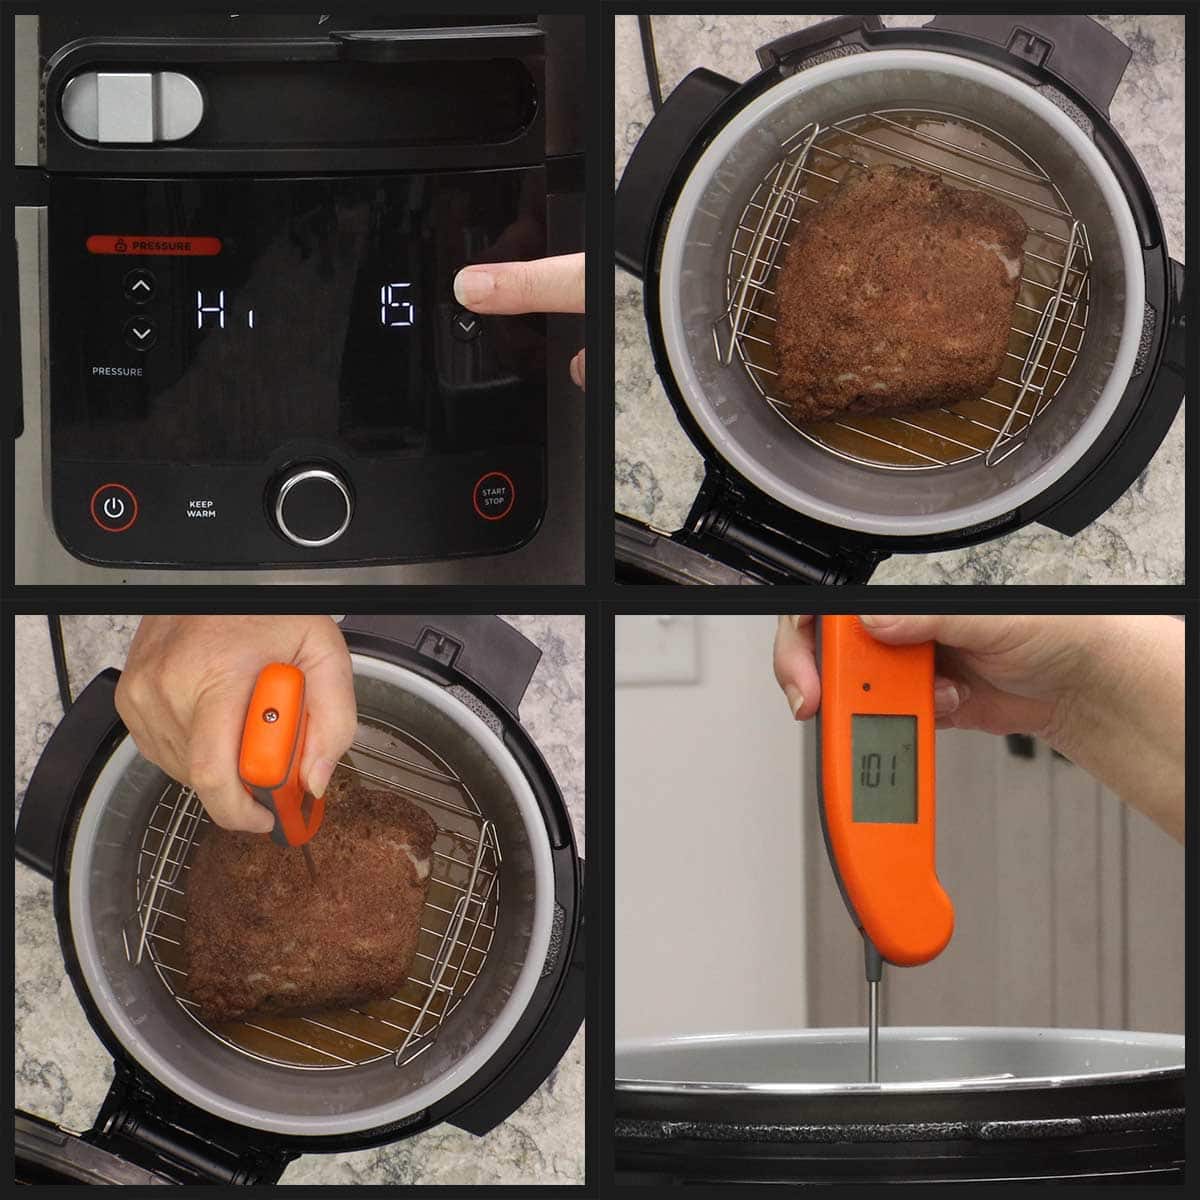
Once the time is up, allow the pot to naturally release its pressure for 10 minutes prior to opening the lid. The pin may drop before the 10 minutes is up but don't open the lid until 10 minutes is up. The pork is still cooking during this time and the full 10 minutes is needed.
After pressure cooking, take the internal temperature of the pork at the very center using your (affiliate link)instant-read thermometer. The temperature should be between 100-110℉/38-43℃.
If it is lower or higher, you will adjust your air frying time, so no worries! If it is reading 135-140℉/57-60℃, then you will want to skip air frying and remove the roast to let it rest for 10 minutes. You can preheat the Ninja Foodi on broil/grill for a full 10 minutes and pop the roast under the broiler for 3-5 minutes to dry out the fat cap and get a tad bit of crisping. This short time will not overcook the pork and you do not need to let the pork rest again as long as the internal temperature is reading 145℉/63℃.
Air Frying/Air Crisping
Once the pressure cook time is up and you have your baseline internal temperature, close the crisping lid and set the function to air fry/ air crisp and the temperature to 400℉/200℃. Set the time for 20 minutes.
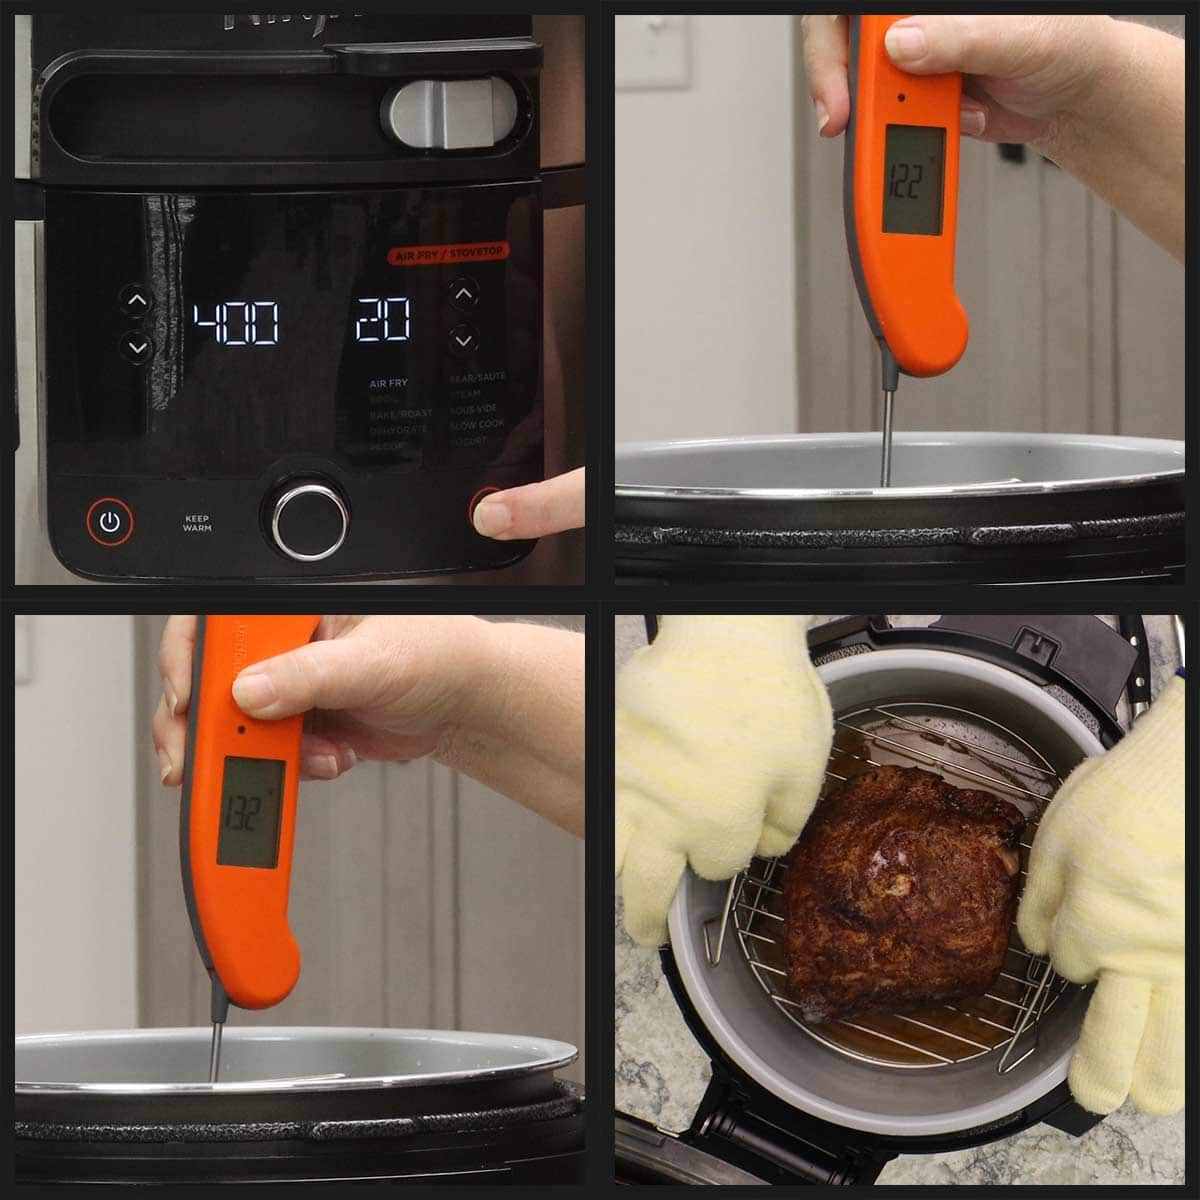
You are going to air fry until the pork roast reaches between 130-135℉/55-57℃. Check an internal temperature every 5-10 minutes. When checking the temperature, make sure the meat thermometer is in the thickest part, which will be the coldest part of the meat (which will be the center). I do this by going a little past the center and pulling up on the thermometer until I get the lowest reading.
If you don't have a crisping lid on your pressure cooker, you can absolutely transfer the roast to your air fryer or oven to finish cooking it.
Once the pork has reached between 130-135℉/55-57℃, turn the Foodi off and remove the pork. Let it rest on the rack on a cutting board for 10-15 minutes. I usually leave the thermometer in the pork during the resting period to ensure it has reached an internal temp of 145℉/63℃.
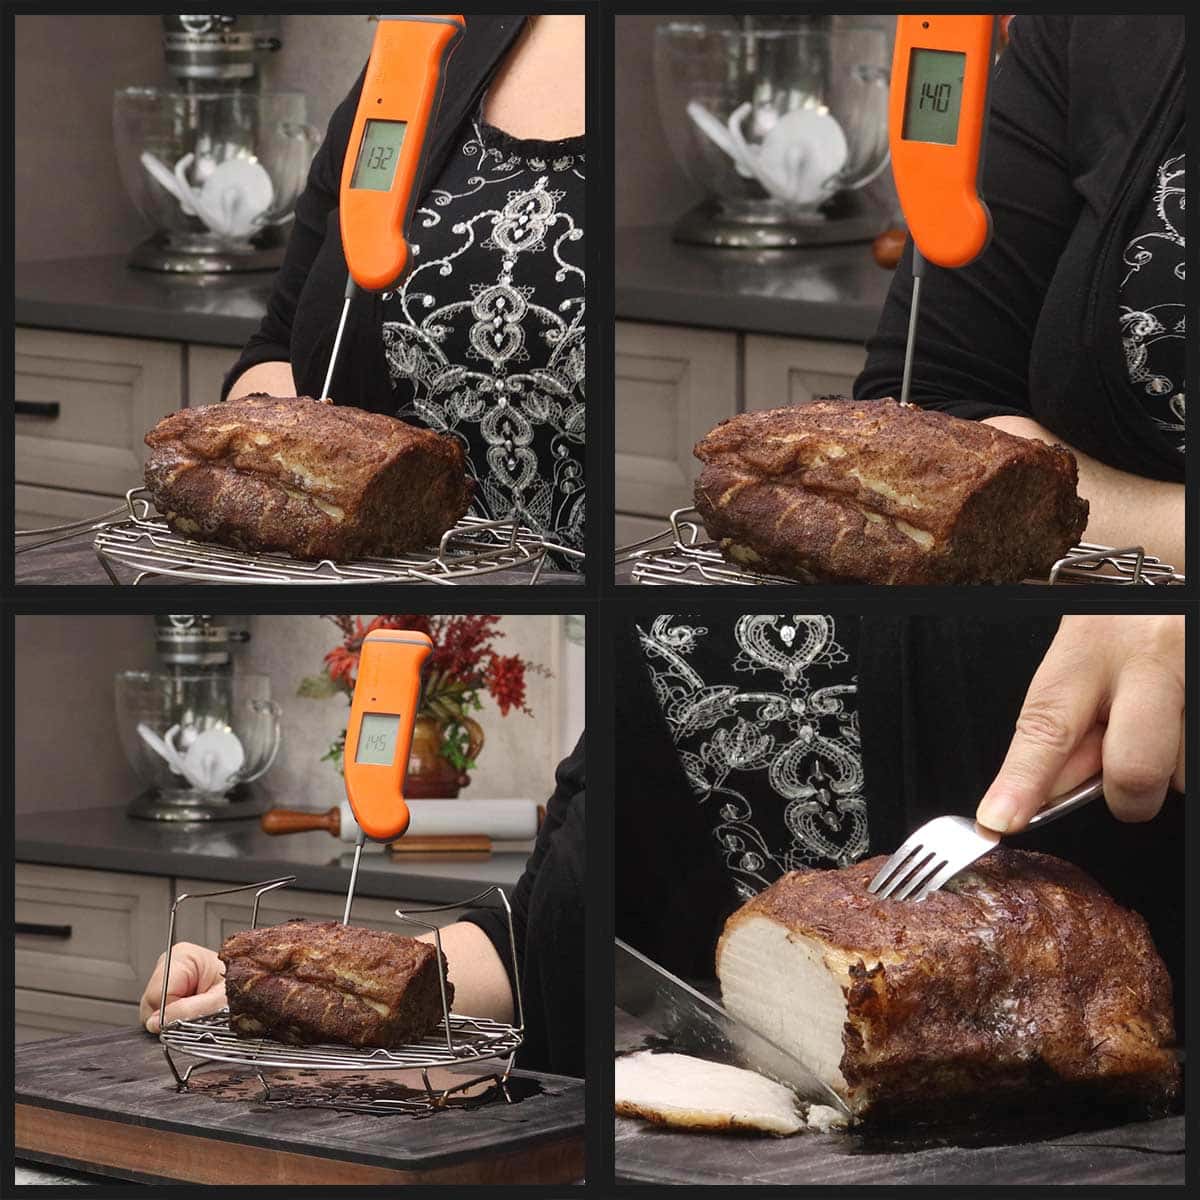
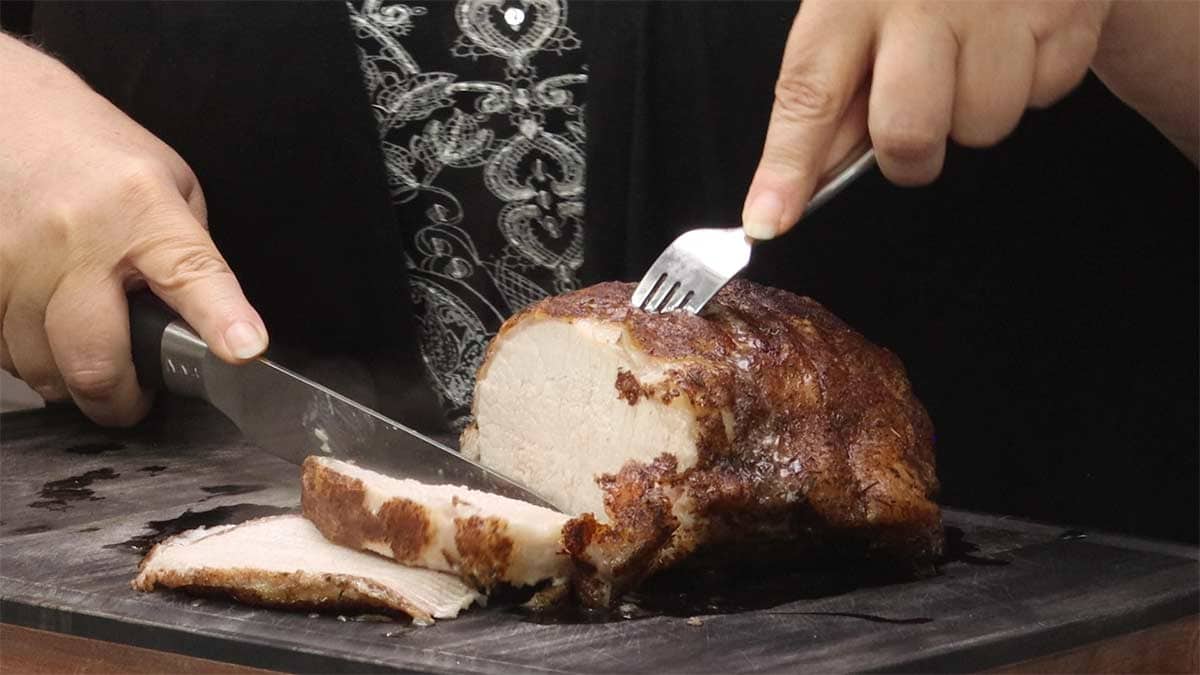
Using a sharp knife, slice the pork into thin or thick slices, either way it will be tender, juicy, and delicious. Serve & Enjoy your Ninja Foodi Pork Roast!
Have leftovers? I always have leftover pork roast and my favorite thing to do with it is slice it really thin and make Cuban Wraps! Here is my recipe: Cuban-Style Crispy Sandwich Wraps
Frequently Asked Questions
The secret to a really moist pork roast, especially when it is a leaner cut like the center loin is not to overcook it and allow it to rest for 10-15 minutes before cutting and serving.
Always remember to allow for carryover cooking and pull your pork roast when it reaches about 135℉/57℃. It will rise in temperature at least 10 degrees while it is resting and once it hits 145℉/63℃ it is the perfect serving temperature.
Perfectly cooked pork will have the slightest pink blush to the meat.
The pork tenderloin and the pork loin both come from the primal loin cut, but they are not the same cut of meat.
A pork tenderloin is a very lean and tender cut that is about 12" long and 2-3" in diameter. They usually weigh about 1-1½ pounds. Pork tenderloins do not have a fat cap on them.
A pork loin is a much larger cut, weighing in at 7-10 lbs. They can be 18-24" long and are usually about 4-6" in diameter and usually have a nice fat cap on one side. Often times you will see the whole pork loin cut into 3-4 pound sections in grocery stores.
What to Serve with Pork Roast
Pork is such a versatile meat that it goes with just about any kind of side dish that you like. It can be paired with hot or cold side dishes ranging from a salad to a sweet potato casserole and anything in between.
I really can't think of one side dish that doesn't pair well with pork, so pick your favorites!
- Ninja Foodi Mashed Potatoes
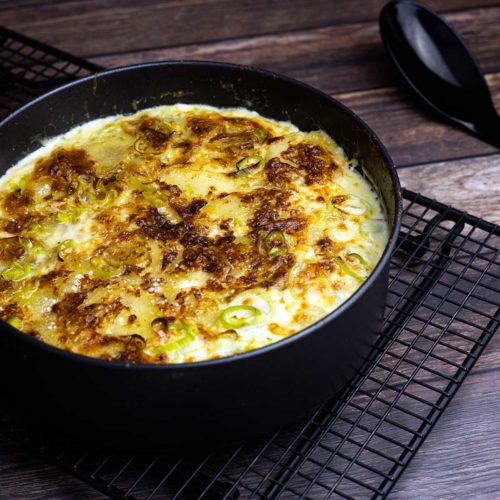
- Scalloped Potatoes in the Ninja Foodi
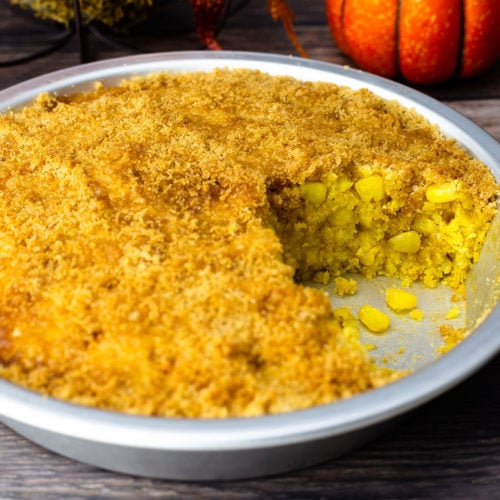
- Sweet & Sassy Corn Pudding in the Ninja Foodi
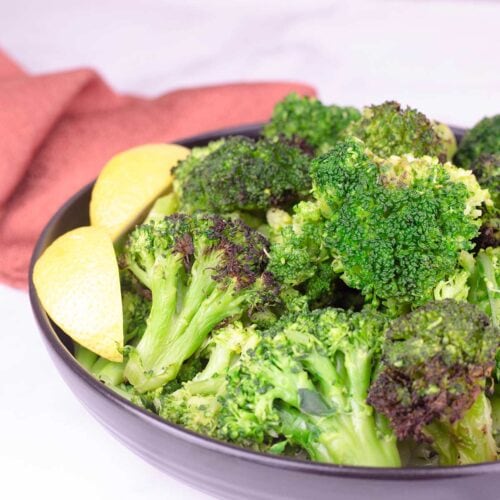
- Ninja Foodi Steam & Crisped Broccoli
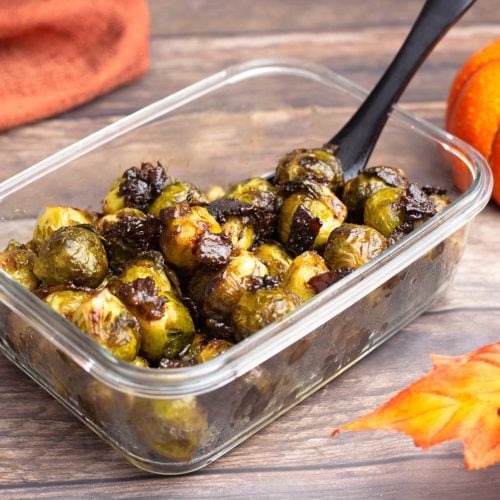
- Candied Brussels Sprouts
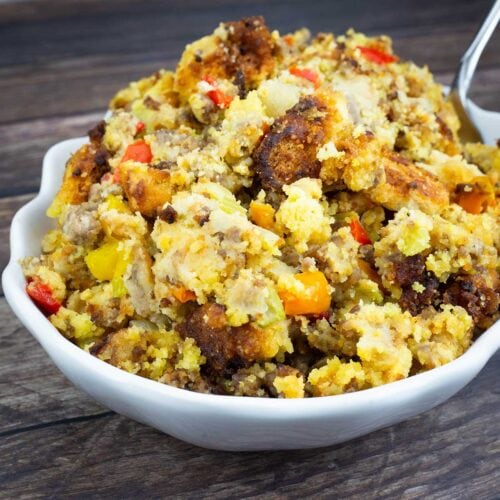
- Cornbread & Sausage Stuffing
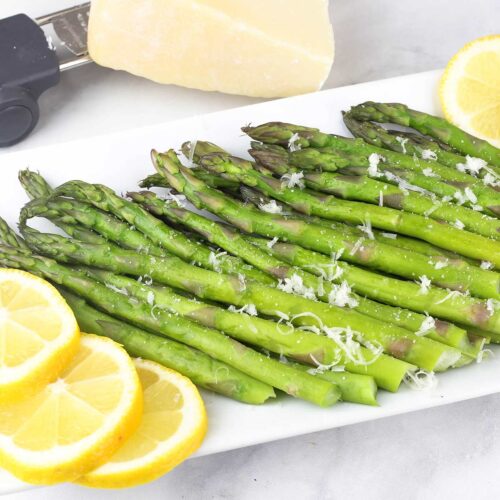
- Ninja Foodi Asparagus (Two Cooking Methods)
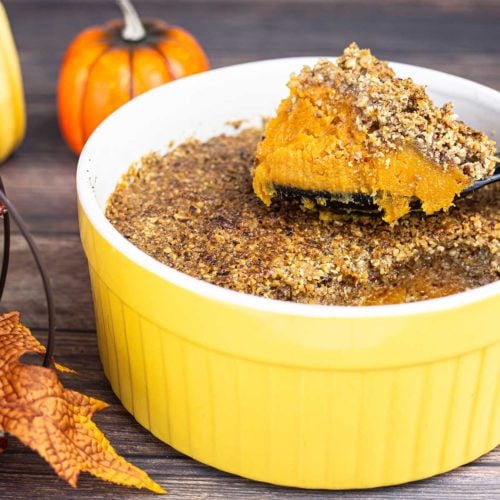
- Sweet Potato Casserole with a Toasted Pecan Topping (Ninja Foodi or Pressure Cooker recipe)
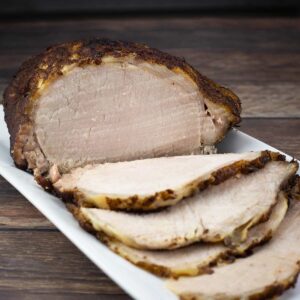
Ninja Foodi Pork Roast Recipe
Equipment
- Ninja Foodi Pressure Cooker and Air Crisper
Ingredients
- 2-3 pound pork loin roast
- 1 cup water broth or any other thin liquid is also fine, especially if you plan to make gravy with juices
Seasoning Blend
- 1 Tablespoon brown sugar optional
- 1½ teaspoons fine grind sea salt
- 1 teaspoon black pepper
- 1 teaspoon dried thyme leaves
- ½ teaspoon garlic powder
- ½ teaspoon onion powder
- ½ teaspoon ground cinnamon
Would you like to save this recipe?
Instructions
- Mix the seasoning blend in a small bowl and rub it all over the pork roast. This can be done right before cooking or up to 48 hours prior to cooking.
- Pour 1 cup of water into the inner pot of the Ninja Foodi. Place the pork roast on the reversible rack in the low position and lower the rack into the inner pot.
- Put the pressure lid on and turn the valve to seal. Set the pressure on high for 15 minutes and press start. See notes below for timing recommendations based on size of pork roast.
- When the time is up, allow the pot to naturally release the pressure for a full 10 minutes. The pin may drop before the 10 minutes is up, but don't open the lid until the 10-minute mark.
- Remove the pressure lid and check the internal temp of the pork roast. It should be between 100-110℉/38-43℃. If it is higher or lower, please do not worry, you can air crisp to the perfect temperature.
- Close the crisping lid and select the air crisp/air fry function and set the temperature to 400℉/200℃ and the time for 20 minutes. You do not need to empty the liquid before air frying.
- Check an internal temperature after about 5-10 minutes and continue air frying until the internal temperature in the very center of the pork roast reads between 130-135℉/54-57℃.
- Remove the roast and let it sit on the rack or on your cutting board for 10-15 minutes. During this time, the temperature will rise up to the perfect serving temperature of 145℉.
- Slice and Serve!
Notes
- 1-2 pounds with a diameter of 3-4": set high pressure for 10 minutes
- 2-3 pounds with a diameter of 3-4": set high pressure for 15 minutes
- 3-4 pounds with a diameter of 3-4": set high pressure for 18 minutes
Nutrition
About the Recipe Author, Louise Long
Louise is a full-time recipe creator and food blogger @ The Salted Pepper. She has over 30 years of experience with cooking and recipe development. She owned a restaurant for several years and was a full-time RN until retiring to blog full-time.

She published her first cookbook in the Fall of 2018 and is very interested in writing several more.
Louise is also the creator of an online Ninja Foodi Pressure Cooking Course with over 100 instructional step-by-step videos. People absolutely rave about the course and all the value they have received from it.
Louise has several very active Facebook groups that help people with the basics of cooking and learning more about the appliances they love.
Ninja Foodi Pressure Cooker & Air Crisper 101
Ninja Woodfire Outdoor Grill & Smoker
Louise is also a YouTube creator and you can find most of her recipes in video format on The Salted Pepper YouTube channel.
She is very responsive to messages and eager to help in any way she can. Get more Information about Louise & contact information
I WOULD LOVE TO SEE WHAT YOU ARE COOKING UP IN YOUR KITCHEN! TAG ME @THESALTEDPEPPER ON YOUR FAVORITE SOCIAL MEDIA PLATFORM WHEN YOU MAKE A DISH!
BE SURE TO FOLLOW THE SALTED PEPPER RIGHT HERE ⇓⇓⇓⇓⇓


Linda McLaughlin
Merry Christmas Louise,
I made this last night for Christmas dinner and it was SO DELICIOUS!!! I wanted to let you know that I actually pressure cooked it the night before just using a salt, pepper, and garlic powder rub. I pressure cooked just as your recipe stated and the internal temp was at 130 degrees. I didn’t want to air crisp it until Christmas Day so I let it cool for 30 minutes before putting in the refrigerator. I used chicken stock as I wanted to make gravy. I left the roast on the reversible rack in the pot with the liquid and covered it then put it in the refrigerator. The next day I took it out to air crisp it. I let the roast warm up 30 minutes and then air crisped it at 400 about 5 minutes and then turned it down to 360 degrees. At that time, I brushed on a mixture of olive oil, minced garlic, chopped rosemary, and sea salt. Let it go for about 25 minutes until it reached 130 degrees as you stated for carry over cooking or resting. It was perfect on the temp you stated. The crust was amazing as was the juiciness of the pork roast. INCREDIBLE!!! So it can be done over 2 days!!!
Now I can’t wait to try your apple cornbread with the left over roast. I will let you know! Thank you so much for all your wonderful recipes!!! They are SO DELICIOUS!!!
Linda McLaughlin
Louise
I'm so glad you enjoyed it! I love that you were able to make it the day before and finish it the day of serving! Happy New Year!