

Making homemade yogurt is easy, and making cold start yogurt is even easier! It's thick, creamy, and delicious!
Would you like to save this recipe?
The fun part is getting creative with various flavors and toppings! You can make your yogurt taste any way you want, and I'll go over the flavors I've tried and love!
This post may contain affiliate links. If you make a purchase after clicking a link, I may earn a small commission. As an Amazon Associate, I earn from qualifying purchases.
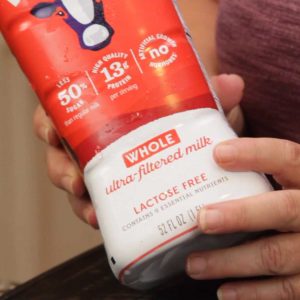
This recipe requires the use of an ultra-pasteurized milk, like Fairlife, which is a little more expensive than regular milk, but important to use when making cold start yogurt.
What is Cold Start Yogurt?
When using regular pasteurized milk, you heat it up to at least 180℉/82℃ and then cool it back down to 110℉/43℃ before adding the starter.
With cold start yogurt, you don't have to heat the milk because it is ultra-pasteurized. Hence, the name, cold start yogurt.
Your time is cut down by about an hour or so and people find it much easier than worrying about boiling the milk and making sure it's cooled properly before adding the culture.
This has been popular in the Instant Pot world for many years, but you don't need a yogurt function or a special yogurt maker to do it. All you need is a way to hold the temperature at the ideal temperature for the incubation (also called fermentation) process and the Ninja Foodi Indoor Grill does a great job!
You can also use the Ninja Foodi Pressure Cooker & Air Crisper if you have the dehydration function and I'll go over those instructions in the article.
I've made yogurt using the yogurt button on my 5 qt Ninja Foodi and, honestly, I like using the dehydration method better. My yogurt has always turned out thicker.
Why Can't I use Regular Milk for Cold Start Yogurt?
The pasteurization and packaging processes are different in the regular pasteurized milk you buy at the store and the brands that are labeled Ultra-Pasteurized.
Raw milk from a cow can have bacteria in it, so before it is bottled up and sent to the stores, it goes through pasteurization. This process is done by heating the milk up to a minimum of 161℉/71.6℃ for a minimum of 15 seconds OR heating the milk to 145℉/62.7℃ for a minimum of 30 minutes.
Both of these temperatures and times will kill the majority of bacteria that might be present in raw milk, but some might still survive. Don't worry, the bacteria that survive the pasteurization process aren't the kind that will cause illness or disease, but they can spoil the milk. Spoiled milk will not make good yogurt.
The ultra-pasteurization process heats the milk to a much higher temperature: 280℉/137.8℃ for 2 seconds. This higher heat kills virtually all of the bacteria AND ultra-pasteurized milk is also packaged in "almost" sterile conditions which prevents recontamination during the packaging.
Regular pasteurized milk is packaged under clean conditions and recontamination can occur during the packaging process. Again, don't worry. You will know if you got spoiled milk and, honestly, it's more likely due to a refrigeration issue during its stay at the store then it is contamination during packaging.
If there are bacteria in the regular pasteurized milk, they can compete with the live cultures (also bacteria) that need to multiply in order to produce yogurt.
Can I Make Yogurt in the Ninja Foodi Indoor Grill with Regular Milk?
Yes, you can. You just have to heat it to 180-182℉/82-83℃ and then let it cool down to 110℉/43℃ before adding in the yogurt starter.
The heating of the milk does a few things to the milk that is beneficial when making yogurt. It kills off any bacteria that might be present that could compete with the good bacteria that we introduce via the live yogurt cultures and it also denatures the proteins in milk so it doesn't turn into curds.
You can actually do that in the grill, but it takes forever and isn't worth the time, in my opinion. I first started testing my yogurt in the grill that way and it took several hours for the milk to reach the correct temp.
If, you don't have any other way of heating the milk, then here is how I did it. Pour in ½ gallon of whole milk and cover with foil. Turn the roast function on to the highest setting and monitor the temp until it reaches the 180-182℉/82-83℃ and then remove the foil and let it cool to 110℉/43℃
If my memory serves me correctly, it took 90-120 minutes for ½ gallon and close to 4 hours for a gallon. That is when I changed course and decided to try a cold start yogurt instead. That is simply too long, in my opinion!
You can also heat the milk up on the stove or, if you have the Ninja Foodi PC & AC without the dehydration function, you can use that to heat the milk.
Just make sure you allow enough time for the heated milk to cool down to around 110℉/43℃ or you could kill the starter and end up with liquidy warm milk. Before checking the temp, make sure to stir really well so any pockets of warmer milk are mixed for the most accurate temperature.
How Does Milk Become Yogurt?
Yogurt is fermented milk and the fermentation process happens when the bacteria (live cultures) turn the lactose in the milk into lactic acid.
It might be strange to think about bacteria in our yogurt, but these are the good bacteria that are beneficial to us.
What Temperatures are Best for the Incubation Period of Yogurt?
The ideal temperature for incubation of the milk with the starter is between 108-112℉/42-44℃. This is where the bacteria in the culture will be the most active and multiply the fastest.
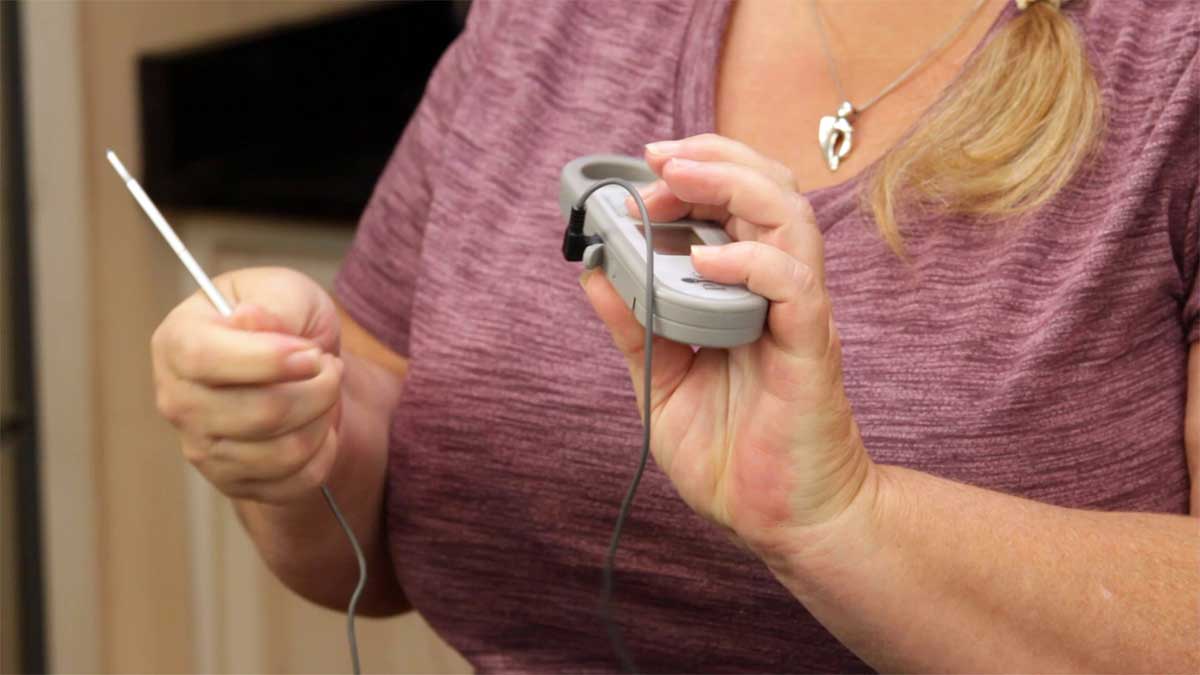
This is why I monitor the temperature using a probe thermometer that sits in the milk and I check on it several times during the incubation period. I don't worry that much if drops a little below 108℉/42℃, but if I saw it getting much hotter than 112℉/44℃ I would decrease the dehydration temp to 135℉/57℃.
The (affiliate link)thermometer I use is from Pampered Chef and it works as an Instant Read and a probe thermometer. I have compared the accuracy to my (affiliate link)Thermapen MK4 and it is accurate.
I've read that the yogurt culture will be inhibited if the temp drops below 108℉/42℃, but that has not been my experience, at all. In fact, several times when I checked the temp it was sitting around 103℉/39℃ and I ended up with perfect yogurt.
So, don't worry too much about a slightly lower temp, but definitely make sure it doesn't go above 115℉. I've read that the temperature that kills the bacteria that creates the yogurt is actually around 129℉/54℃, but, during my test batches for this yogurt and the recipe I have for Homemade Yogurt in the Ninja Foodi Pressure Cooker & Air Crisper, I found that if I let the temp get hotter than 120℉/49℃, I ended up with much thinner yogurt or something that resembled curdled milk.
Frequently Asked Questions
Yes, but the process is different. I haven't tried either yet, but it is my understanding that for almond milk yogurt, you first have to make the almond milk yourself. The store-bought almond milk has too many preservatives. My best suggestion is to find a yogurt recipe that uses the type of alternative milk you want to use and follow that.
The Fairlife milk I used comes in 52 ounce bottles, which is slightly less than a half gallon. I haven't tried the cold start yogurt in the grill with two bottles of Fairlife, but I'm pretty sure you could do it. I would definitely keep an eye on the temp and you might have to increase the dehydration temp a little because of the extra volume.
That depends on if you want to strain it for Greek yogurt or keep it on the thinner side like a regular yogurt. I got 3½ cups of very thick Greek Yogurt from one 52 ounce bottle, so I would think you would get 4-5 cups of regular yogurt from one 52 ounce container of Fairlife.
About 2 weeks. Remember to take out enough of your homemade yogurt and freeze it for your next starter!
Tips for Making Homemade Yogurt
While making yogurt (especially cold start yogurt) is very easy, things can go wrong. I've made tons of batches of yogurt over the years and, every once in a while, I end up with soup or a curdled mess.
In fact, just the other day, I started to make yogurt with the yogurt function on the Ninja Foodi Pressure Cooker and I put the milk in, hit the yogurt button and the screen read, "boil." When it had cooled down and I opened the lid to add my starter, it was a curdled mess. I had a batch of ricotta cheese. How did that happen?
I honestly don't know, but I'm thinking there might have been an acidic residue in the inner pot or possibly on the underside of the lid. Something changed the PH of the milk to have it separate like that during the heating phase.
- Before you start to make yogurt, make sure everything is clean and well-rinsed. We want to create an environment where only the bacteria needed for making yogurt thrive and not the other kind that can spoil the yogurt.
- Use fresh milk when making yogurt. Opened, older milk, can have bacteria in it which could make for some not-so-great tasting yogurt.
- Use a fresh (or frozen) yogurt starter. As yogurt sits in your fridge, the active live cultures deteriorate and you might have issues with your milk turning into yogurt.
- Allow the starter to come to room temp or thaw if frozen.
- I wouldn't use 2% or Fat Free ultra-pasteurized milk. I've tried it and it didn't work out. I ended up with warm milk.
- Add flavorings and sweeteners after the yogurt has incubated for the best results.*
*People do add sweetened condensed milk to cold start yogurt and seem to have good results. I did not, but I was making the boiled method and I may have overheated the milk. I have read that honey and other sweeteners have impacted the results. I simply add them at the end.
Troubleshooting Homemade Yogurt
Making yogurt is easy, but sometimes things go wrong. Even seasoned yogurt makers know that not every batch is going to turn out correctly.
Here are some common issues that people encounter.
After 8 hours of incubation time, my yogurt is still milk.
There are a few things that can cause that, but most common is poor temperature regulation or a starter that was compromised in some way.
If you add the starter before the milk (if using the boiling technique) has cooled enough, you can kill the starter and you will have warm milk.
If the temperature of the milk got too hot during the incubation/fermentation process, that can also kill the active live cultures and you will end up with either warm milk or sometimes you will see some curdling where the yogurt cultures were starting to multiply, but were stopped due to high heat.
Unfortunately, there isn't anything you can do except strain the milk and see how much yogurt was acutally made.
My yogurt smells funny.
Throw it out. Yogurt should not have any off-putting odor. If it does, then it is probably due to an overgrowth of the "bad" bacteria that causes milk to spoil and the only thing you can do is throw it out.
After the 8 hour incubation time, my yogurt isn't set, it's clumpy.
You can try to incubate longer and see if if it sets. It could be because the active live cultures you started with were weakened and it's going to take longer.
If, after 10 hours there is no change, then I would strain the yogurt and stir it to blend any clumps. If the clumps are hard and don't become creamy after stirring, then the temp might have been too high and killed the culture during the incubation period.
My yogurt is set, but is too sour.
The longer the incubation time, the more sour the yogurt becomes. I made a batch one time that was simply too sour to eat. It wasn't even tasty enough to use as sour cream.
For a very mild yogurt, incubate about 6 hours. Your yogurt will be runnier, but you can strain it to get it thicker.
I have found that 8 hours is the sweet spot for how I like my yogurt. It's thick, completely set, but not sour.
If you like sour yogurt, then incubate for 10-12 hours.
I set the dehydration temp at 150℉/65℃ and the thermometer is reading too high or too low when I check my yogurt temp.
What I'm learning is that not all of the Ninja Foodi appliances heat the same. In my Ninja Foodi Pressure Cooker, the right temp for me (boil method) was 180℉/82℃, but it might be less for your appliance.
The first time you make yogurt, temp it every hour and see what it's doing. If it is too hot (greater than 110℉/43℃), turn the dehydration temp down a step. If it is not hot enough (less than 100℉/38℃), turn the dehydration temp up a step.
Keep in mind, it can take 1-2 hours for the yogurt to reach the desired temp, so I wouldn't worry about too low of a temp in the first couple of hours.
How to make Cold Start Yogurt in the Ninja Foodi Pressure Cooker
Even though I made my Cold Start Yogurt in the Ninja Foodi Indoor Grill, you can make it in the Ninja Foodi Pressure Cooker using either the yogurt function or the dehydration function without any issues.
There are different models of the Ninja Foodi Pressure Cooker that have the yogurt function. Some have a combination button for slow cook and yogurt and the newest model has a separate button for yogurt.
If you have the combination slow cook/yogurt button, you will want to press it twice and the screen will read, "Ygrt." Then, press the temperature arrow down and it will say, "FEr." That is the fermentation stage. Add in your ultra-pasteurized milk and yogurt culture, stir together and hit start. Make sure your pressure lid is on and vented.
If you have the model that has a separate yogurt button, press the yogurt function and then the temperature arrow down and it will say, "FMNT." Pour in the ultra-pasteurized milk, the yogurt culture and whisk to combine. Hit start and your yogurt will begin the fermenting process.
You can also control the time of the fermentation on either model by pressing the time button after selecting yogurt.
If you want to use the dehydration function, simply pour in your ultra-pasteurized milk and starter, stir. Cover with foil and put the crisping lid down. Set the dehydration temperature for 150℉/65℃ and the time for 6-8 hours.
With the boil method, I set the temp to 180℉/82℃ because the milk is thicker and it takes more heat to get the desired temp of the milk. When using the cold start method with ultra-pasteurized milk, I would set the temp to 150℉/65℃ and check it after a couple hours. Make adjustments in the temperature based on what the temperature of the milk is.
How to Make Cold Start Yogurt in the Ninja Foodi Grill
The process of making yogurt is the same in the grill as it is in the Ninja Foodi Pressure Cooker using the dehydration function.
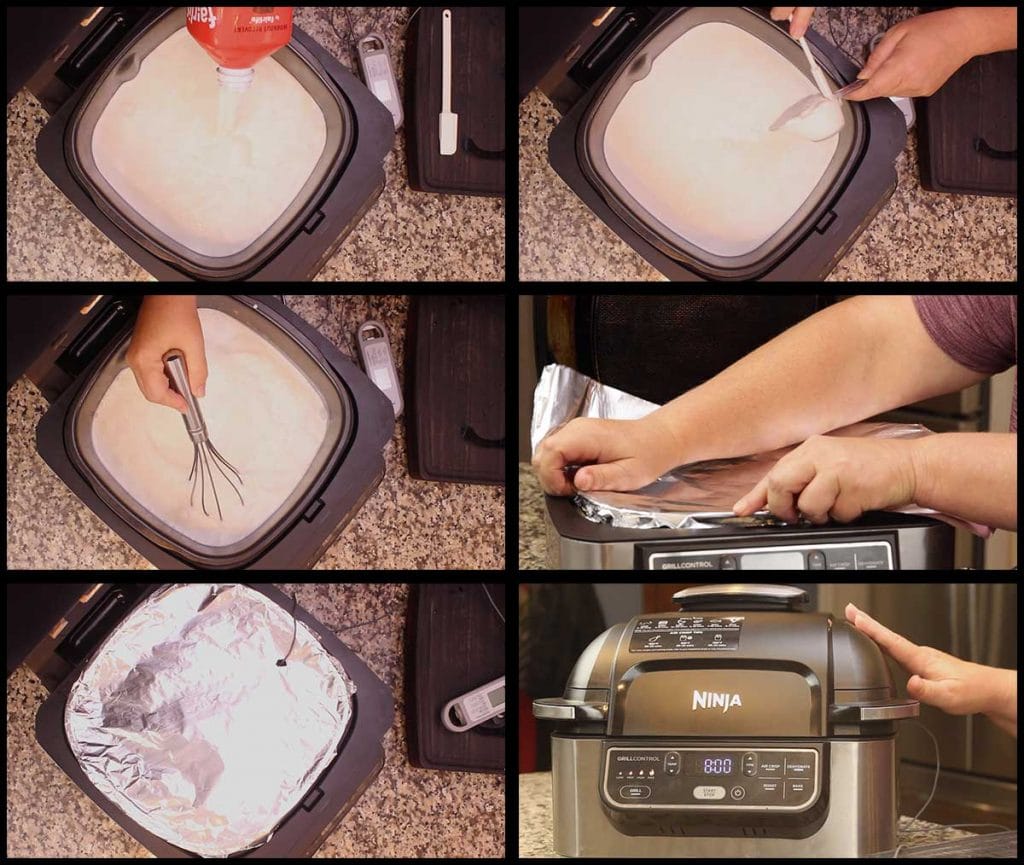
Make sure the liner pan is clean and free of any residue. Pour in the 52oz of ultra-pasteurized milk. If you container of milk is a little larger, that is fine. You can probably even make a gallon of ultra-pasteurized milk at once, but I haven't tested the recipe that way. You might need to increase the dehydration temperature a bit.
Stir in ¼ cup of the yogurt culture. This should be plain Greek yogurt for best results. I always save the culture from the previous batch of yogurt to make the next back. The easiest way to do this is to freeze it in ice cube trays and then pop the frozen yogurt into a plastic bag until you want to make your next batch. Do this when the yogurt is first made because as it sits in your fridge, the active live cultures do deteriorate.
Cover with foil. This is to prevent the fan from blowing air onto the top of your yogurt which will create a skin. Put the temperature probe through the foil if using a probe thermometer.
Close the lid and select the dehydration function and set the temp to 150℉/65℃ and the time for 8 hours. Remember, you can decrease the time to 6 hours for a thinner and milder tasting yogurt.
That is it. Now, it's time to let the grill do the work. I do suggest to check the temp from time to time, especially if it is the first time you are making yogurt in the grill.
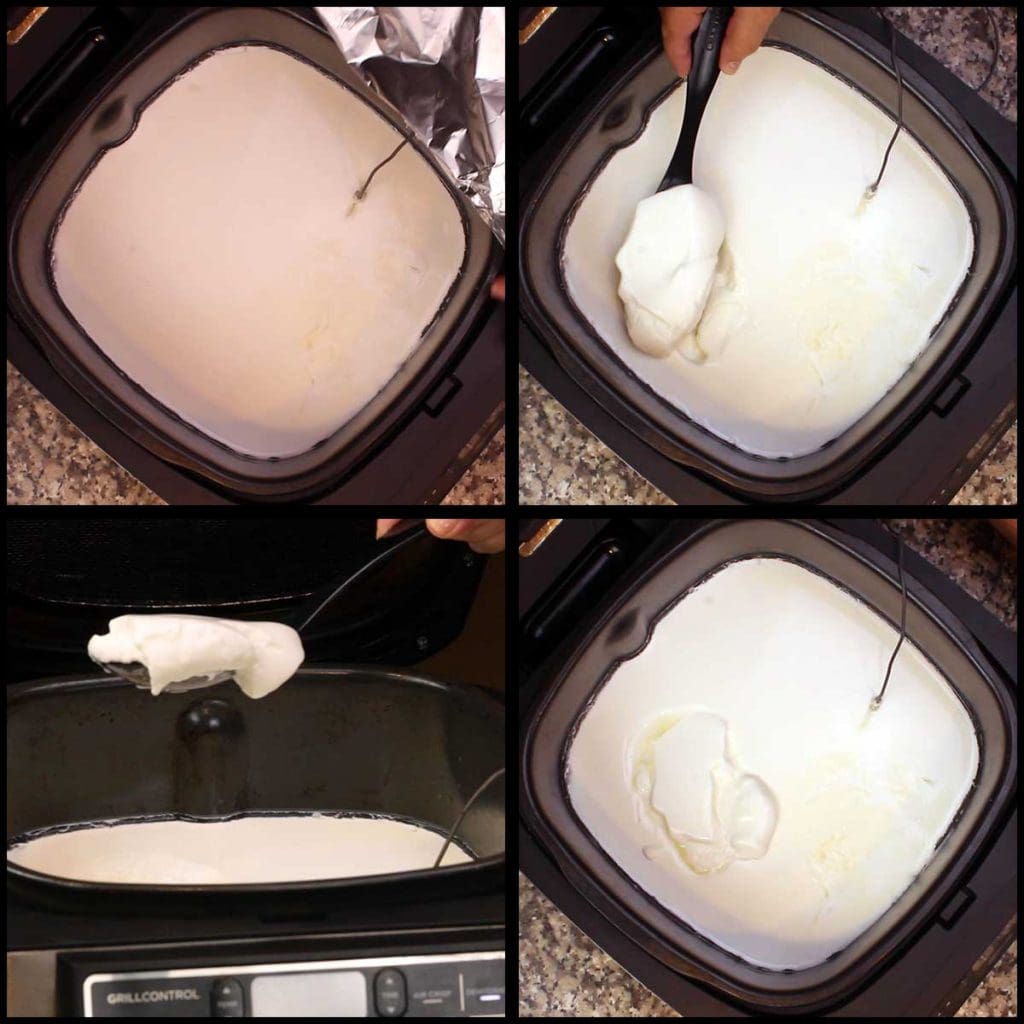
After the incubation period, remove the foil and you should see a nice shiny top with set yogurt. If you don't, refer to the troubleshooting area above in the article.
I recommend refrigerating the yogurt (covered) for several hours or overnight. This will firm it up more, but you can see below that the yogurt is very thick already. I personally wouldn't eat it warm, but you can if you want to.
The clear liquid you see is called the whey and don't worry if it looks separated, we take care of that after it's chilled.
After chilling the yogurt, you might notice that the top has some wrinkly looking places. This is just a skin that formed, no worries. I remove it with a fork the best I can. The skin won't hurt you, but it does give a lumpy texture when mixed into the smooth yogurt underneath.
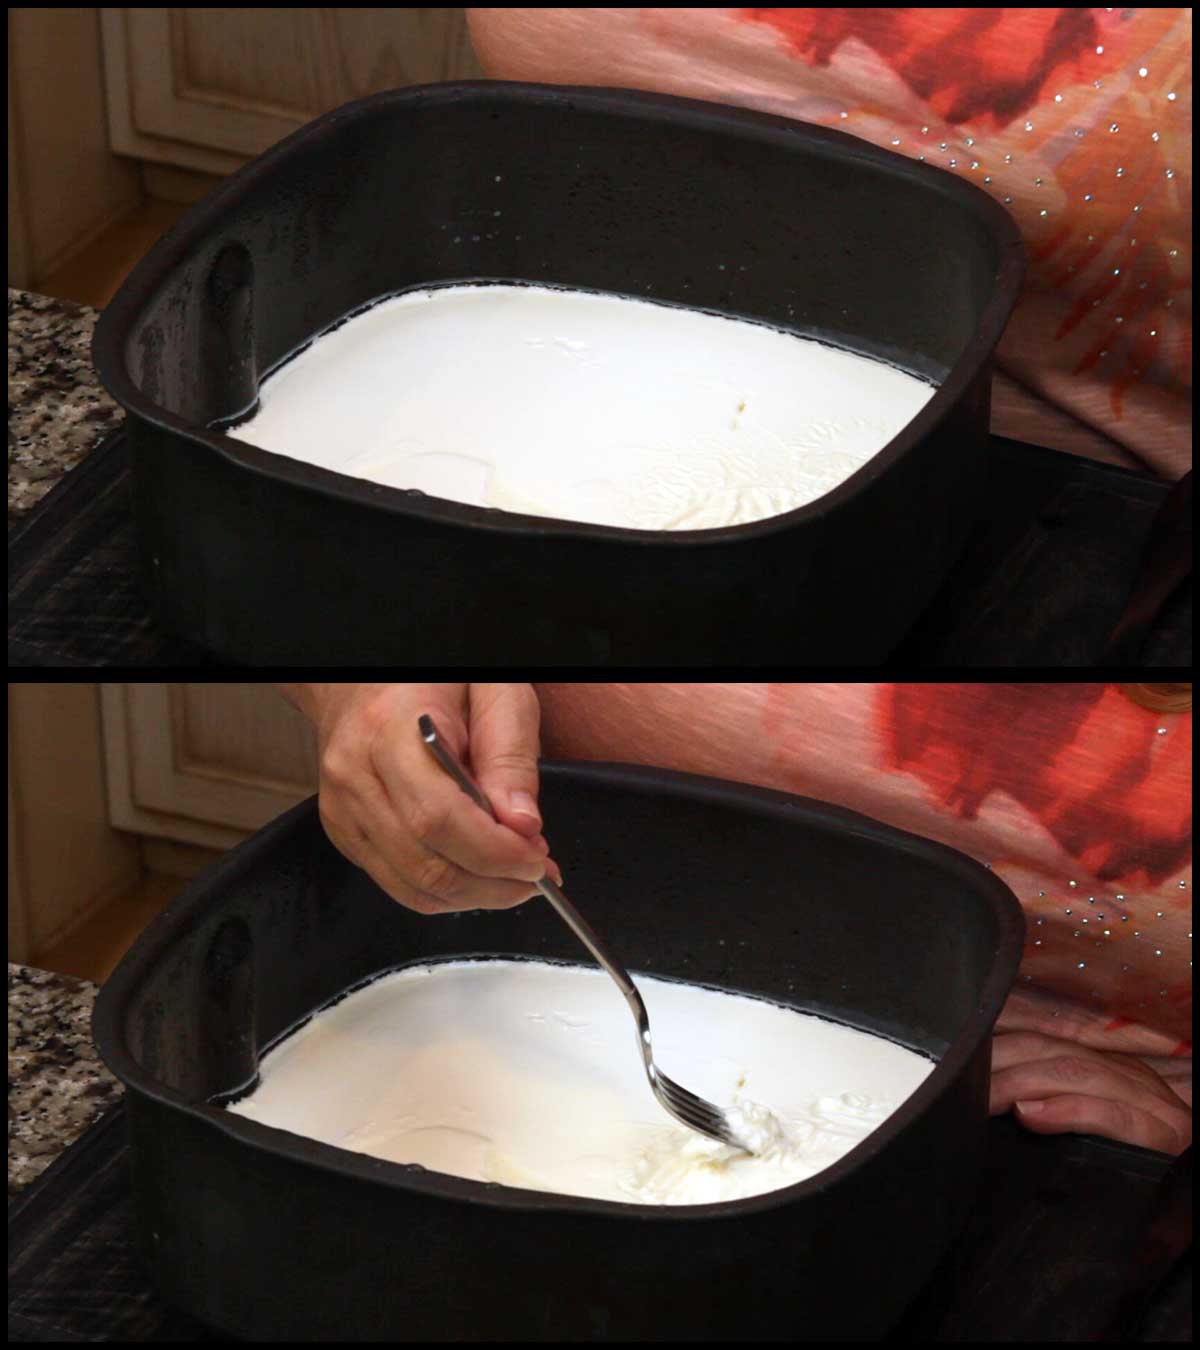
Now, you can either stir it all up and use it as is or strain it for Greek yogurt.
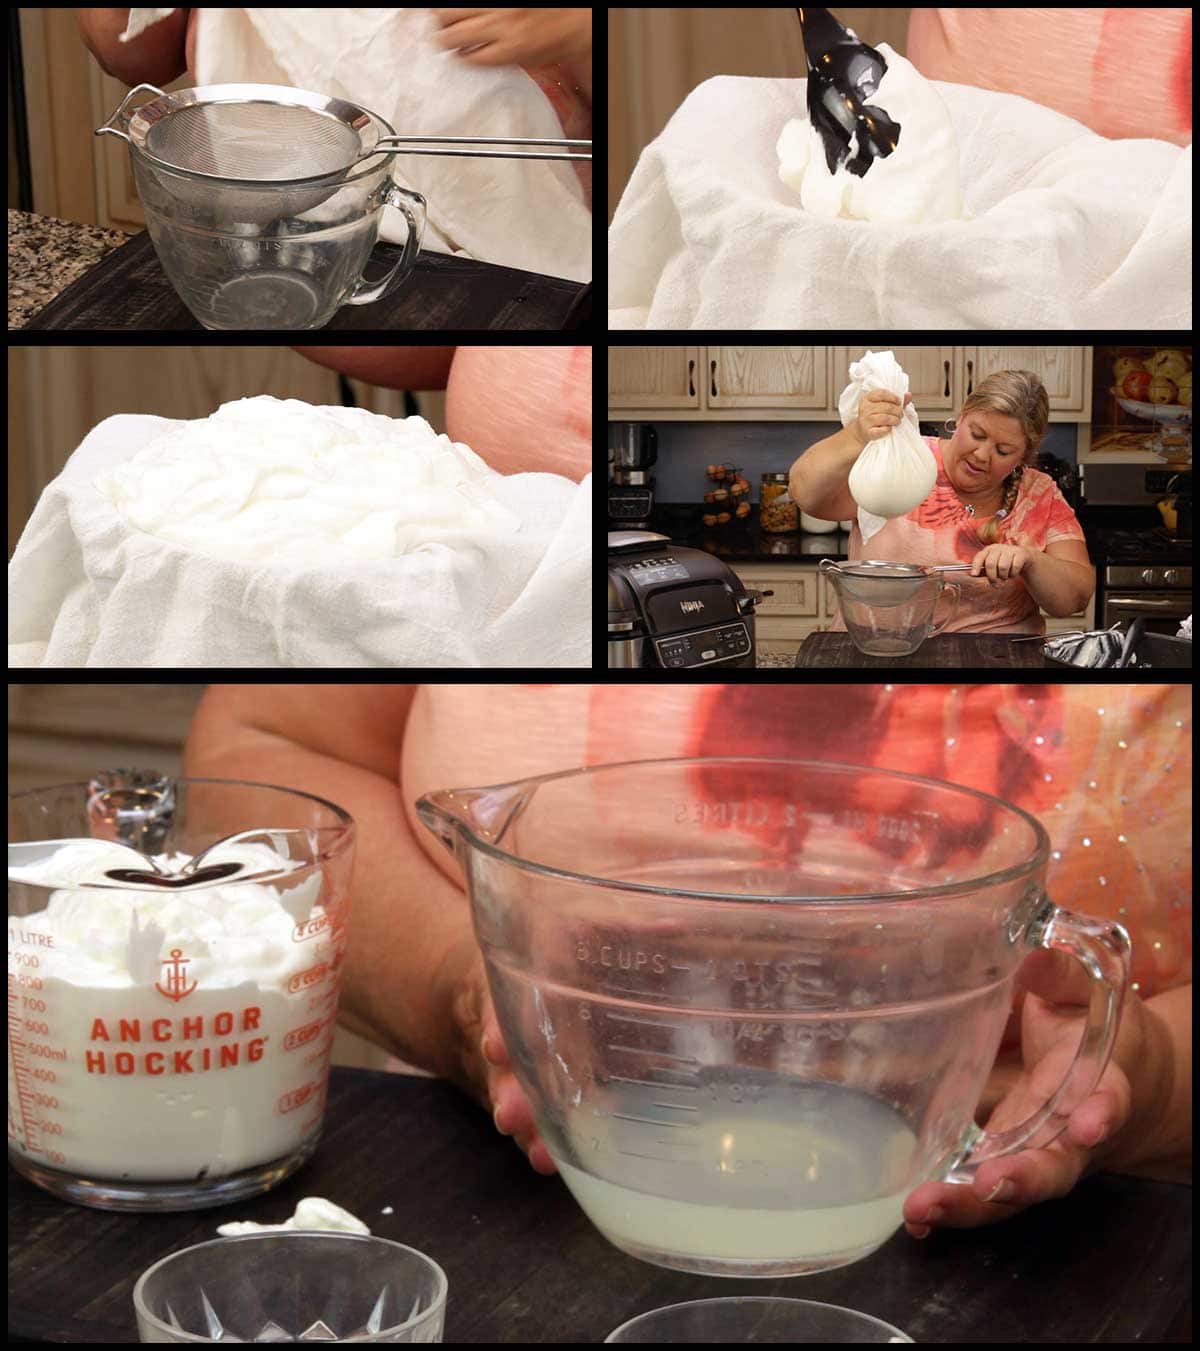
I prefer a really thick yogurt, so I strain it. The easiest way I found is by using a flour sack lining a fine mesh strainer.
If you don't have any flour sacks, I really suggest them! They are my go-to kitchen towel for everything. I have some for straining yogurt, some for drying dishes and my hands, and when they are stained and worn, they are great cleaning rags!
You can pick them up at your local Sam's Club or right here on Amazon: (affiliate link)Flour Sacks.
I also use a (affiliate link)fine mesh strainer over a bowl. The bowl collects the whey which I freeze and use in breads instead of water.
The amount of time you strain the yogurt is up to how thick you want it to be. Mine only took about 30 minutes until it was very thick, so I strained it right on the counter. If straining longer than 1 hour, strain in the refrigerator.
I didn't hold the flour sack up the whole time, just rest it in the strainer and let it be. I ended up with 3.5 cups of very thick yogurt and 1 cup of whey.
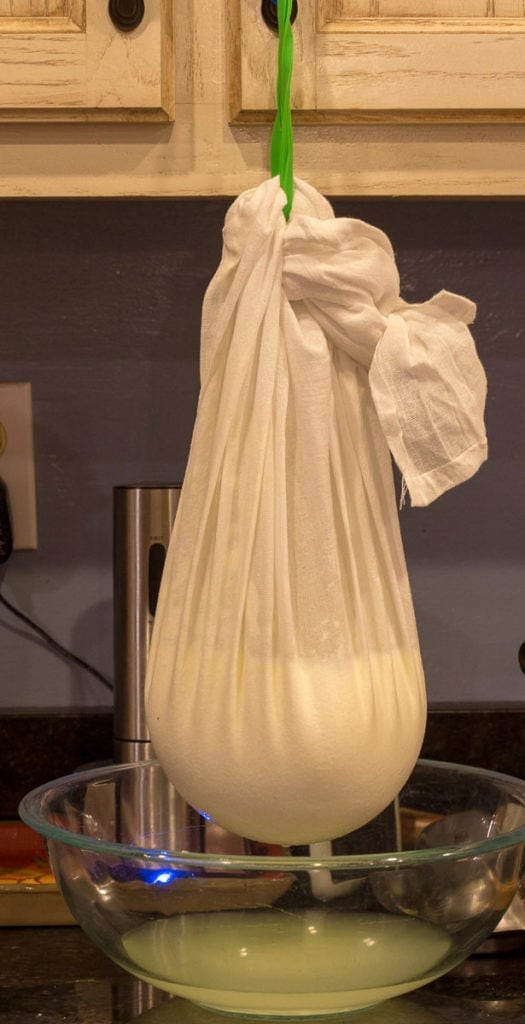
Sometimes I will skip the fine mesh strainer and hang the flour sack from a cabinet door to strain it faster. The gravity really speeds up the process. I didn't have to that in this batch because it was already so thick.
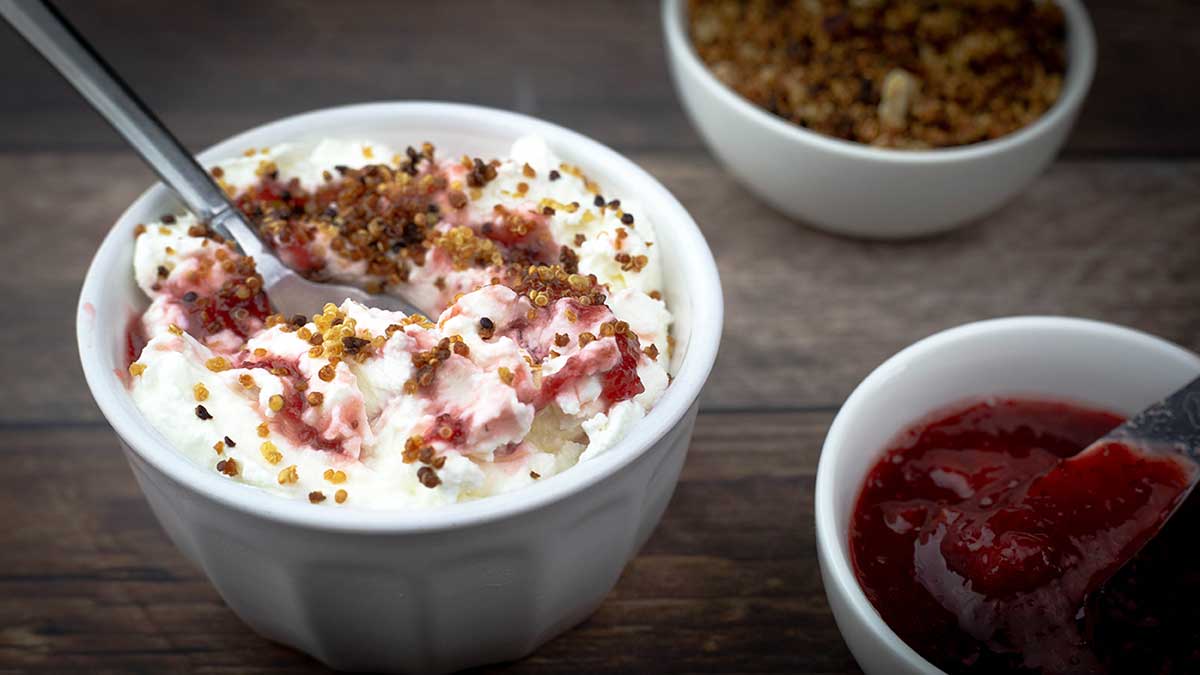
Now that you have your yogurt chilled and strained. It's time for the fun part! Flavors and Toppings! Don't get me wrong, this yogurt is delicious right now. I like it without anything added, no sweetener or anything.
However, it's so much fun to create new yogurt flavors and I've tried out a few that I will share.
How do I Sweeten and Flavor My Homemade Yogurt?
One of the reasons I like to strain my yogurt is so it is really thick and if I add any liquid ingredients to flavor or sweeten it, the yogurt doesn't become runny.
You can add any type of sugar or artificial sugar to the yogurt, just keep in mind that undissolved crystals will be a little gritty. To avoid this, you can put the sugar in a little water and heat it up some. Stir to create a VERY concentrated simple syrup to mix into your yogurt. Use the least amount of water needed so your yogurt doesn't become runny.
I tested out (affiliate link)Swerve granules and they are so fine, I didn't notice any grittiness in the yogurt.
If you are using liquid sweeteners, like honey or maple syrup, use the least amount possible to avoid runny yogurt. I prefer to drizzle those on top as I serve it instead of sweetening the whole batch.
Some of my favorite yogurt flavors are cherry and key lime. Jeff loves strawberry. So, we experimented with these flavors and they were all fantastic.
I've also mixed in my homemade Apple Butter into the yogurt and it was delicious!
Here are some of my suggestions for adding flavor and sweetness to your yogurt.
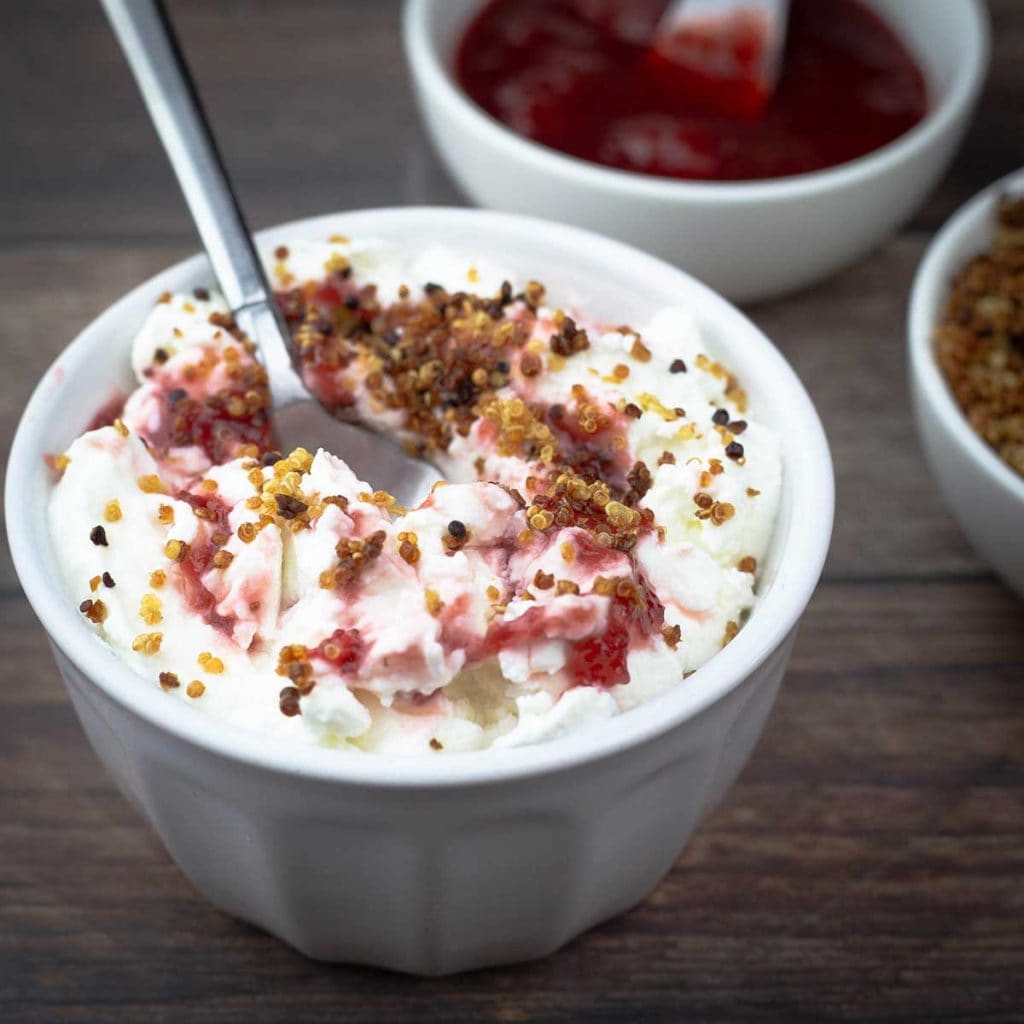
Strawberry Yogurt: Mix in some strawberry preserves. Not only does this sweeten the yogurt, it gives that yummy strawberry flavor. I use my homemade strawberry preserves that I make from frozen strawberries. Here is the recipe: Strawberry preserves. I used about 1 teaspoon for a ¼ cup of yogurt.
Key Lime Yogurt: I tried this flavor with Swerve and used about 1 teaspoon of the sweetener and 3-4 drops of a (affiliate link)Key Lime Oil that I buy from Amazon. I think it could have used a little more of the oil, but it was delicious. I have a very small bottle of the concentrated oil, but they do sell bigger bottles on Amazon if you want to buy a larger amount.
Cherry Yogurt: I suggest using a sour cherry instead of a maraschino cherry to make the cherry yogurt because the maraschino cherries won't give the flavor of a cherry yogurt. I used morello cherries in a jar, but I think a cherry pie filling would work as well. I also added about ½ teaspoon of white sugar and a little bit of the cherry juice. That doesn't quite do it though, you need to bump up of the flavor of the yogurt itself and this cherry bakery emulsion worked perfectly!
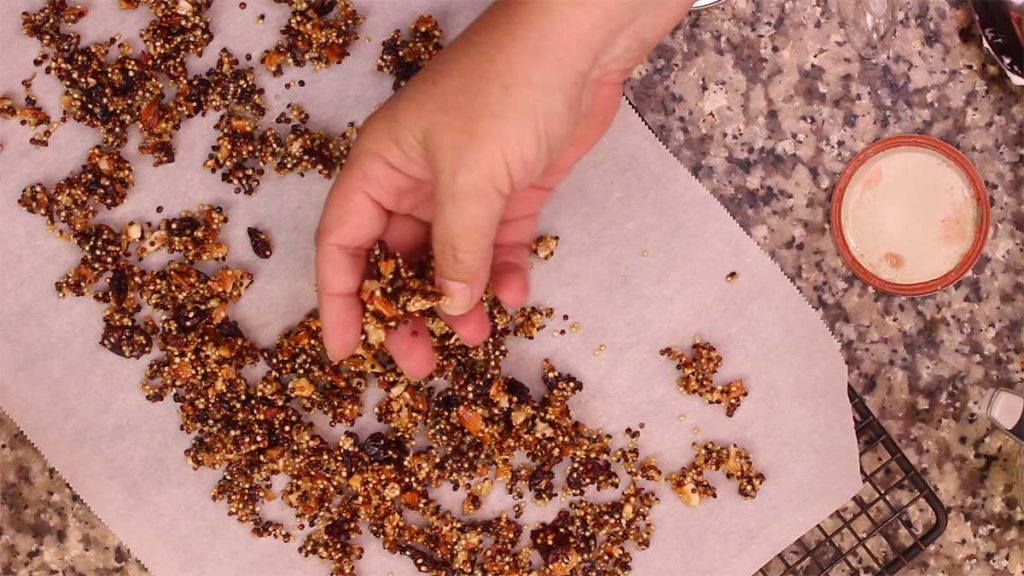
I also love crunch on my yogurt! I used to use grape nuts cereal, but now I make my own quinoa crumble. I'll be writing up the formal recipe soon, but for now you can find it in the description of the YouTube Video for Cold Start Yogurt.
There are tons of other bakery emulsions and flavored oils on Amazon to choose from, so get creative and have fun with various flavors and toppings for your homemade yogurt!
I used a combination of strawberry preserves and the quinoa crumble in this one!
Cold Start Yogurt in the Ninja Foodi Grill
Equipment
- (affiliate link)Ninja Foodi Indoor Grill
Ingredients
- 52 ounces ultra-pasteurized milk
- ¼ cup Greek yogurt
Would you like to save this recipe?
Instructions
- Make sure the liner pan is very clean. Pour in the ultra-pasteurized milk and add the Greek yogurt starter. Mix together. Cover with foil and set the dehydration temp on the grill to 150°F/65°C and the time for 8 hours.
- Use a probe thermometer to monitor the temperature periodically during the incubation period or use an instant read thermometer. See the written article for more information on this. The temp should be between 105 and 115°F/40-46°C. It will take 1-2 hours for it to reach that temp.
- After the incubation time, refrigerate for several hours or until cold.
- You can serve the yogurt now or strain it for Greek yogurt. See post for details.
- Add your flavorings and toppings, serve, and enjoy!
Nutrition
About the Recipe Author, Louise Long
Louise is a full-time recipe creator and food blogger @ The Salted Pepper. She has over 30 years of experience with cooking and recipe development. She owned a restaurant for several years and was a full-time RN until retiring to blog full-time.

She published her first cookbook in the Fall of 2018 and is very interested in writing several more.
Louise is also the creator of an online Ninja Foodi Pressure Cooking Course with over 100 instructional step-by-step videos. People absolutely rave about the course and all the value they have received from it.
Louise has several very active Facebook groups that help people with the basics of cooking and learning more about the appliances they love.
Ninja Foodi Pressure Cooker & Air Crisper 101
Ninja Woodfire Outdoor Grill & Smoker
Louise is also a YouTube creator and you can find most of her recipes in video format on The Salted Pepper YouTube channel.
She is very responsive to messages and eager to help in any way she can. Get more Information about Louise & contact information
I WOULD LOVE TO SEE WHAT YOU ARE COOKING UP IN YOUR KITCHEN! TAG ME @THESALTEDPEPPER ON YOUR FAVORITE SOCIAL MEDIA PLATFORM WHEN YOU MAKE A DISH!
BE SURE TO FOLLOW THE SALTED PEPPER RIGHT HERE ⇓⇓⇓⇓⇓
Jessie says
I've tried this recipe twice and used a digital thermometer and followed every part of the instructions. Each time the yogurt wasn't yogurt just milk.
Louise says
Which Ninja Foodi appliance are you using? The only reasons I can think that the fermentation failed is a malfunction of the appliance or the culture was killed by high heat in some way. I'm happy to help you troubleshoot if you want to email me at louise @ the saltedpepper.com
Adele Cobb Aiken says
I just purchased the ninja foodi possible cooker pro. I want to make cold start yogurt but I don’t have a yogurt or fermentation button How can I do it?
Louise says
I have been working on the easiest way to do this in the Possible Cooker, but have not perfected it yet. I have used the sous vide function with the milk in the pot and I ran into some issues with it not thickening up like it should. I did have success with using sous vide and putting the milk and starter mixture (blended well) into canning jars and fermenting that way, so you can try that. As soon as I find the easiest way, I will definitely post a recipe.
Starla Gerber says
I have just started my yogurt with the starter stirred in, and unknowingly after I hit the yogurt button, it went to boil, when I checked the temp, it was at 131 degrees., figuring I had already ruined it, decided to continue the boil phase.. perhaps killing the starter.... my question is, can I add new starter when it has reached the cool down phase before fermenting stage? It seemed to me if I add new starter at that phase it could still be saved. Appreciate any input.
Louise says
Yes, that should work. Just make sure it cools down to below 115F, whisk in the starter, and then start the fermentation phase.