It's magical how just a few ingredients can come together and turn into a fresh loaf of bread and now, when you make Homemade Bread in the Ninja Foodi, it takes half the time!

The Benefits of Making Homemade Bread
One of the biggest benefits of making homemade bread is you know exactly what is going into the bread; you control the ingredients! I absolutely love that.
It also costs a lot less! Have you seen the prices of bread lately? Some of them are over $4.00 a loaf. You can make your own bread for under $1.00!
Homemade bread tastes better! I know, I know... this is debatable. There are some crazy good Artisan breads out there, but there is just something about the flavor of bread you make yourself that is simply divine!
Would you like to save this recipe?
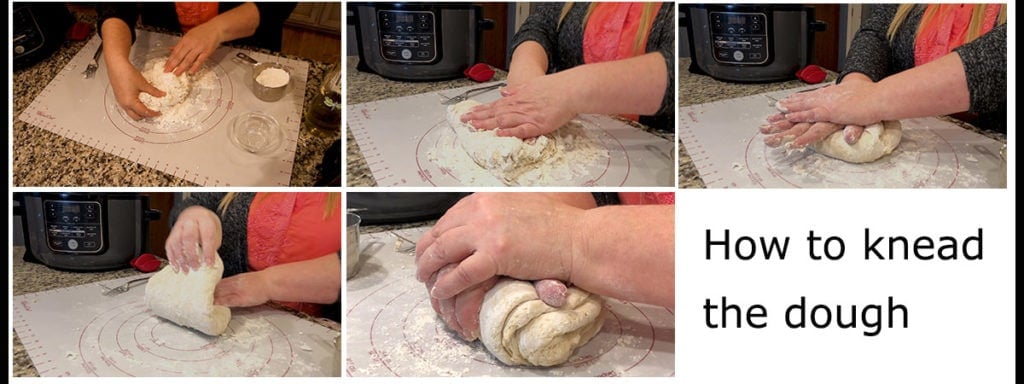
Making homemade bread is therapeutic. It is. I promise. Especially when you knead the dough yourself like we are going to do in this recipe. The turning and pressing of a dough ball is a great way to relax your mind and really feel the dough you are working with. It's amazing how it turns from a rough looking dough ball into a beautiful smooth ball of dough, and then you serve it for dinner. Nothing better in my book.
The Benefits of Making Homemade Bread in the Ninja Foodi
It's super easy! Except for mixing and kneading, everything is done right in the Ninja Foodi. This takes the intimidation factor right out of making homemade bread. Even if you have never made bread before, you can follow and be successful with this recipe.
If you are already a bread making genius, you can save a ton of time by making homemade bread in the Ninja Foodi!
No guess work. When making homemade bread in the Ninja Foodi, you are able to set the functions and the time and you do not have to guess about time or temperatures. Everything is controlled for you right in the Ninja Foodi. I love it and you will too!
Humidity and temperatures won't matter. Because we are proofing the homemade bread in the Ninja Foodi, your bread rise won't be affected if it is cold or hot and humid in your kitchen. You can make the same loaf of bread on the sunniest day and the rainiest.
It's pretty much fail-proof for all of these reasons and it's also fun! Get the kids involved, they will love it. I do recommend an adult get the bread out when it is finished baking because the inner pot of the Ninja Foodi will be hot and we don't want any accidental burns.
What you'll need to make Homemade Bread in the Ninja Foodi
- Flour
- Instant or Active Dry Yeast
- Sugar (this is optional)
- Salt (I use fine grind sea salt)
- Water
- A clean towel
- Cutting Board or Pastry Mat
- Ninja Foodi
Tips for making Homemade Bread in the Ninja Foodi
Take your time and enjoy the process. Even though we are cutting the bread making time basically in half, there is still a time investment. Get the most out of it by letting your hands and arms do the work kneading while your mind gets a few minutes of relaxation. There is nothing too technical or difficult about making bread, the ingredients will do what they do and your only job is to assist them.
Allow enough time for cooling. No one wants to cut into their freshly made loaf of bread more than I do... but, we must wait. The cooking continues after the bread is removed from the Ninja Foodi and if you cut into it right away, you disturb that process and can end up with an underdone and gummy bread. It's the hardest part for sure, but important. If you absolutely cannot wait 20-30 minutes for it to cool, then don't cut the bread with a knife, rip it with your hands.
Refrigerate or Freeze left over bread. Unlike store-bought bread, there aren't any preservatives in the bread you make at home. While this is a great thing for our bodies, it does allow for quick and unwanted mold growth. Also make sure to allow the bread to cool completely before wrapping and freezing or steam will form and, after freezing, you will end up with ice crystals on your bread. This is also a good idea before refrigerating too. Any moisture formed by steam will make your crust soggy in the fridge.
How to Proof Bread without the Dehydration Function
You do not need any special equipment to proof bread, simply putting it in an oiled bowl with a damp towel covering it and letting it sit on the counter away from drafts is just fine.
It usually takes about an hour or so to proof bread on the counter, unless your kitchen is very warm or very cold. If it's very warm, it will take less time and if it's very cold, it will take longer.
The most important thing is not the time it takes, but that it doubles in size. This creates the nice texture of your bread.
I like to use the dehydration function on the Ninja Foodi for a perfectly controlled environment to proof bread in half the time it takes on the counter, but don't worry if you don't have that function.
Not all of the Ninja Foodi models have the dehydration function, but you can still proof your bread in half the time using the bake roast function.
After you have your dough mixed up and before you begin to knead it, put the TenderCrisp lid down and select bake/roast on 250°F/121°C for 5 minutes. Once the time is done, leave the lid closed while you knead the bread. Waiting about 5 minutes before putting the bread in to the Foodi will give the pot time to cool down some. If the pot is still really hot, let it sit with the lid open for a few minutes. You should be able to touch the bottom without it burning you. If it is too hot, you can start to cook the bread and/or kill the yeast.
After you knead your bread and form the ball, drizzle about 1 tablespoon of olive oil in the inner pot and place the dough ball in the inner pot. Oil the top of the bread and cover with a damp towel. Close the TenderCrisp lid and leave the Foodi OFF. Let the residual heat proof your bread. This usually takes about 30-40 minutes.
Okay, let's get to it! Let's make a beautiful loaf of homemade bread in the Ninja Foodi!
The first thing you want to do is gather your ingredients. This is called mise en place or "everything in place." This can really help keep a recipe moving along and also gets you familiar with the ingredients needed. I can't tell you how many times I've started to make a recipe just to realize I'm out of an important ingredient.
Now, let's proof that yeast. Add 2 ¼ teaspoon of active dry yeast and 2 teaspoon of sugar to about a 1 Tablespoon of warm water. You want the temp of your water to be between 105° F and 110° F. Anything hotter than 115º F will kill the yeast. If you have a thermometer, you can use that. If you don't, use the finger test. You should be able to put your finger in the warm water and leave it there, if you feel the need to pull it out, your water is too hot. It should feel like warm bath water. We proof the yeast to make sure it is still active and going to allow our bread to rise. The yeast eats the sugar and produces CO2 which form bubbles. This lets us know the yeast is alive and active. If no bubbles form after 10 minutes your water could have been too hot or you need to replace your yeast. This is also called blooming the yeast.
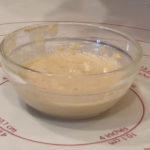
Proofing the yeast should take about 5 minutes. *If you are using instant yeast, you can skip the proofing and add the dry yeast to the flour directly.
Combine the flour with the salt and add in the proofed yeast. Use a fork or plastic scraper to combine and slowly add in the rest of the warm water, mixing as you go. You should end up with a very loose mixture.
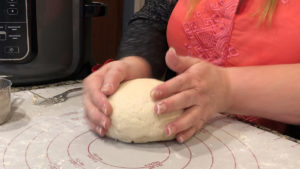
Turn the mixture out onto a floured surface and begin to knead. I love to use my pastry mat from pampered chef, but a cutting board or clean counter top will work as well. You will want to knead the dough, bringing in more of the loose flour as you go, for about 10-15 minutes or until the dough is smooth and not tacky. When you pull on the dough, it will stretch a bit.
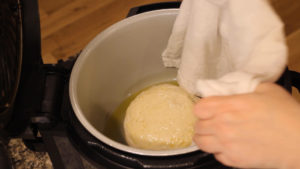
Add about 1 Tablespoon of olive oil to the bottom of inner pot of the Ninja Foodi. Form a ball with your dough, roll the ball in the olive oil. Set the dehydration function to 105º F and cover with a clean, damp kitchen. Allow to rise for 30 minutes in the Ninja Foodi.
Remove the dough from the Ninja Foodi and punch it down. The dough should now be very smooth and stretchy. Form into a round and place it back into the inner pot of the Ninja Food. Again set the dehydration mode to 105° F, cover with the damp towel and let it rise again for 30 minutes.
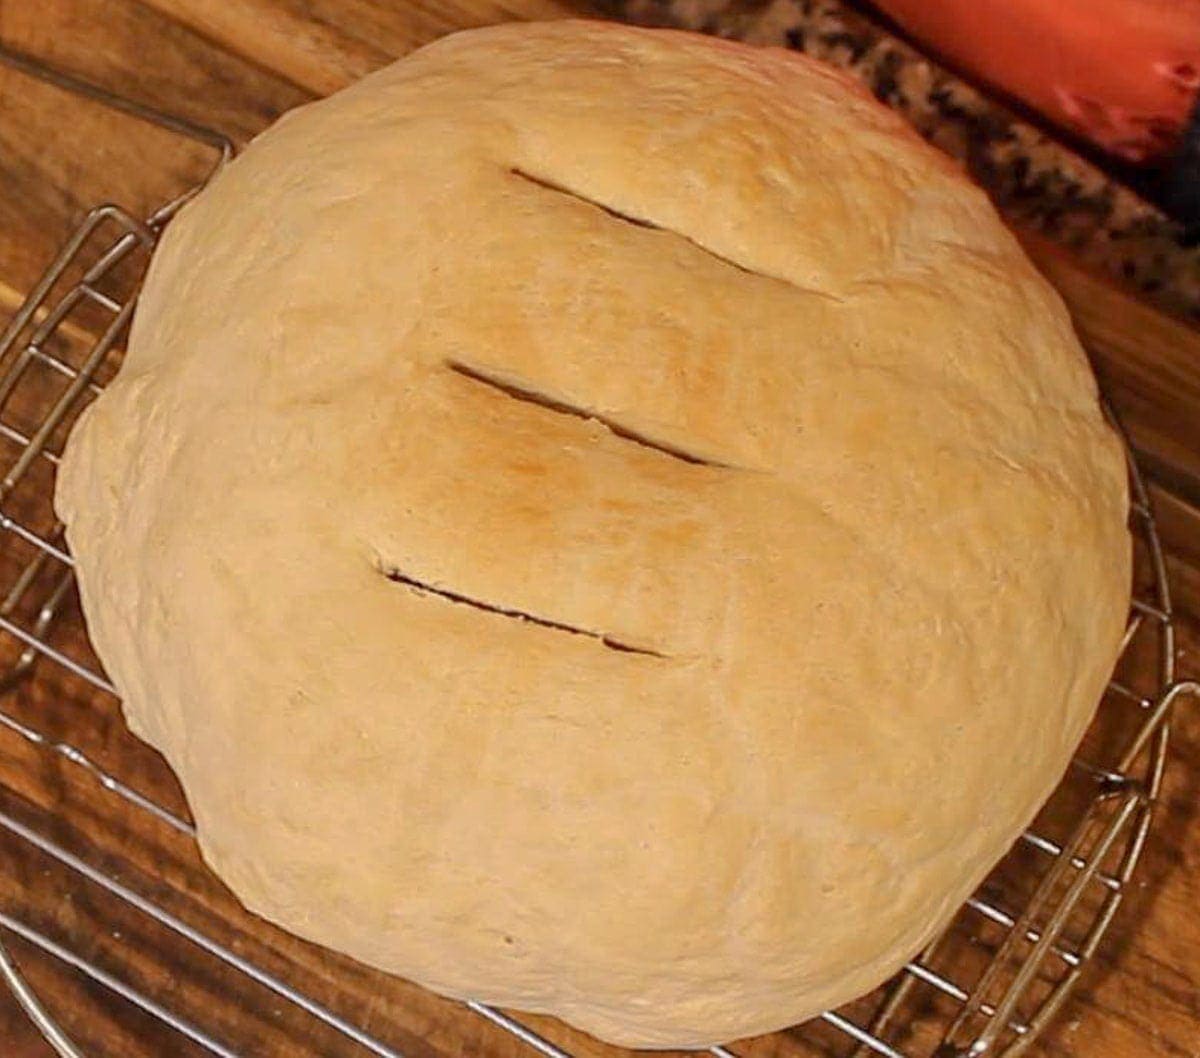
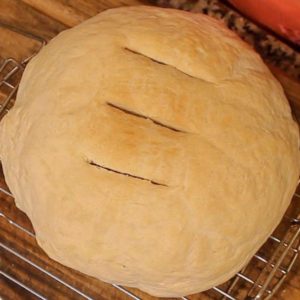
Remove the damp towel. Make a few slits in the top of the bread in any design you'd like. You want to these slits to be about 1 inch deep and the sharper the instrument you use, the better. I don't recommend using scissors because it compresses the bread too much. You can even buy special scoring tool called a bread lame for making these cuts for under $10.00. Scoring the bread will allow for expansion during baking and controls the direction in which it expands.
Set the Bake/ Roast function to 325° F and the time for 30 minutes. Remove bread after the time is up and cool on a wire rack at least 20 minutes before cutting. I know, this stinks! We all want to dive right in, don't we? This step is important because the bread is still cooking on the inside and if we interrupt this process you can end up with gummy and underdone bread. Let it cool, guys. If you insist on diving right in, don't cut the bread with a knife, pull it apart with your hands.
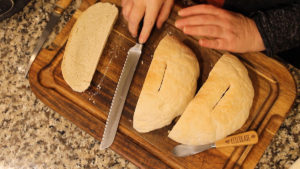
Once the bread has cooled, you can cut it and slather it with your favorite toppings
Congratulations! You just made Homemade Bread in the Ninja Foodi
Watch me make the bread from start to finish; here is the YouTube video: Homemade Bread in the Ninja Foodi
If you want to learn more about your Ninja Foodi and a review of its features, check out this article on How to Use the Ninja Foodi
Homemade Bread in the Ninja Foodi
Ingredients
Would you like to save this recipe?
Instructions
- Put one tablespoon of warm water (heated between 105° F and 110° F) in a small bowl, add sugar and yeast. Stir and allow to sit until bubbles form and it becomes frothy, this takes about 5 minutes.
- Combine 3 cups of flour and salt in a medium size mixing bowl. Add bloomed yeast mixture. Stir to combine. Slowly add warm water, stirring as you go.
- Turn the loose dough mixture out on a floured surface. Begin to knead, bringing in the loose flour with each turn. Please see post or video for further instructions. Knead for about 15 minutes or until dough becomes non-tacky and smooth.
- Add 1 Tablespoon of Olive oil to the inner pot of the Ninja Foodi. Coat the top of the dough ball with olive oil and turn over into the inner pot. Cover with damp towel and set the dehydration mode to 105° F for 30 minutes.
- Remove dough and punch down. Reform into the shape of the bread round you want and return to the Ninja Foodi's inner pot. Cover with damp towel and set the dehydration mode to 105° F for 30 minutes.
- Remove the towel and score top of dough loaf with an X or three straight lines. Go about 1 inch into the dough using a sharp knife. Set the Bake function to 325° F and bake for 30 minutes.
- Remove bread and cool on a wire rack for about 30 minutes or an hour before cutting. Serve and Enjoy!
Nutrition
Ninja Foodi One-Pot Meals
Nothing goes better with Bread than a one-pot meal, and you can make them right in the Ninja Foodi.


About the Recipe Author, Louise Long
Louise is a full-time recipe creator and food blogger @ The Salted Pepper. She has over 30 years of experience with cooking and recipe development. She owned a restaurant for several years and was a full-time RN until retiring to blog full-time.

She published her first cookbook in the Fall of 2018 and is very interested in writing several more.
Louise is also the creator of an online Ninja Foodi Pressure Cooking Course with over 100 instructional step-by-step videos. People absolutely rave about the course and all the value they have received from it.
Louise has several very active Facebook groups that help people with the basics of cooking and learning more about the appliances they love.
Ninja Foodi Pressure Cooker & Air Crisper 101
Ninja Woodfire Outdoor Grill & Smoker
Louise is also a YouTube creator and you can find most of her recipes in video format on The Salted Pepper YouTube channel.
She is very responsive to messages and eager to help in any way she can. Get more Information about Louise & contact information
I WOULD LOVE TO SEE WHAT YOU ARE COOKING UP IN YOUR KITCHEN! TAG ME @THESALTEDPEPPER ON YOUR FAVORITE SOCIAL MEDIA PLATFORM WHEN YOU MAKE A DISH!
BE SURE TO FOLLOW THE SALTED PEPPER RIGHT HERE ⇓⇓⇓⇓⇓
Jeni says
Tried this recipe & about to make another loaf. It disappeared quickly! I did try the wet towel & the bread was stuck to it so I just used plastic wrap on the 2nd half. Perhaps I didn't wet it enough? No issues with mine sticking to the pot like another commenter had. Thank you for the recipe. Do you have one for wheat bread? Can I substitute all-purpose flour for wheat or wheat pastry instead?
Louise says
I'm glad you enjoyed it! Th towel probably dried out with the fan if you used the dehydrate function, but if plastic wrap allowed it to rise enough for you that is perfect. You can use whole wheat flour for part of the all purpose flour, but you will need more liquid and longer rising times so it isn't too dense. I would start with replacing a third of the total flour with whole wheat flour and see how you like it and then increase to 50% next time. There is a balance and if you use all whole wheat you can end up with a very dense loaf.
Mindy says
I just came across your video, great kneading technique.
I don't have a dehydration mode, what otherwise should I do and also does the recipe change if I use 1:1 gluten free flour?
Louise says
Do you have a proof function? If so use that and if not you can leave the dough at room temp and it will proof just fine. Make sure the bowl is lightly covered. As far as the 1:1 gluten free flour, I have not used it before so I can't say how it will turn out but if they say it works in bread recipes then it should be okay. I do think they make one that is specifically for bread if I'm not mistaken.
Debra Miller says
My first attempt at making bread followed your recipe and seems to be turning out right Brand new ninja foodie impossible and there is no way I can get temp to 325 Not an option!
Louise says
The Ninja Foodi Possible Cooker Pro is a completely different appliance than the one used in this recipe and while you can bake bread in the Possible Pro, it is done differently and the instructions for this recipe will not work.
Barb says
I just made this bread. First off, If I were to make it again I would use parchment paper and not oil. It stuck. After the first proofing it stuck and add more oil. It stuck again. Threw out the two cloths I use for each proofing that stuck. Yes it was well oiled and turned over. Again I would cover with parchment paper then the damp cloth.I always bake my bread in bread loaf pans lined with parchment paper. I wish I did it with this bread from the get go then a damp cloth. I haven't tried it yet.
I do like some of the recipes I've tried and make them often.
Louise says
I'm sorry that happened to you!
Emily A Mettler says
Could you make a cinnamon raisin loaf with this same method (using only the Ninja Foodie?
Louise says
It's a completely different bread and process to make cinnamon raisin bread and while it is possible to make in the Foodi, you would have to have a loaf pan that fits and play around with baking times. However, you can make a delicious soda bread which is similar (and you could add cinnamon) and I do have a recipe for that in the Foodi: https://thesaltedpepper.com/irish-soda-bread/