Homemade Banana Bread is one of those breads that are so easy to make IF you have a great recipe! This is a great recipe and the one I've been working on perfecting my entire adult life!
That isn't a joke either! My mom makes the best homemade banana bread, my mother-in-law makes the best homemade banana bread, and I always made sawdust. I even followed their recipes, so I never could understand why mine never turned out. Then I just started doing my own thing and not following a recipe at all.
I had a lot of failures, a whole lot of failures. Then, one day, it happened. I made the perfect banana bread and I'm beyond excited to share the recipe with you. This recipe has gotten 5 star reviews from everyone who tries it and I know you are going to love it.
This post may contain affiliate links. If you make a purchase after clicking a link, I may earn a small commission. As an Amazon Associate, I earn from qualifying purchases.
I made a version of this recipe when I owned an assisted living facility and the residents there devoured it and said it was the best. I wrote up the recipe for a Banana Bread Swirl Cake many moons ago, so forgive me if it isn't as well-written as the ones today, but here it is: Banana Bread Cream Cheese Swirl Cake
A few months ago, I decided to adapt the recipe to the Ninja Foodi and, after numerous failed attempts, I did it! I wanted to add a nut component, but in a different way, so I added a praline topping. It turned out perfect. I hope you enjoy this one!
Tips for Making Homemade Banana Bread
Use VERY Ripe bananas. I can't stress this enough because it will make the difference between an okay banana bread and an over-the-top-delicious, everyone raves about it, banana bread.
When I say ripe, I don't mean a few dark spots on the peel. I mean the entire peel is black. Literally, so black and soft that the juices smell a little fermented. I know this might sound disgusting, but it's the one thing that determines how much your homemade banana bread will taste like banana.
You just can't fake this flavor with banana extract, I've tried. Trust me, I've tried. It's not the same flavor.
The best way to ripen bananas, is naturally. Just let them sit on the counter until they start to darken, then put them (leave the peel on) in a bowl in the fridge for 1-2 weeks. You want to make sure they are in a bowl or a container of some kind because, as they ripen, they do produce some juice and you don't want that all over your fridge. I also use the juices in the bread.
If they ripen before you want to use them, just throw them into a sealable bag (peel and all) and freeze them until you want to use them and then let them come to room temp before adding to the batter.
You can speed up this process (although I've never done it), by baking at a low temp. This article goes over the steps for that, but note that you want to use the oven method, not the paper bag method for making homemade banana bread. How to ripen bananas faster.
Sift your flour. I know, what a pain. It makes a difference, though; it really does. I don't bother with those hand-held sifters anymore because they were the reason I hated sifting flour. What a pain to clean. Now, I just use a (affiliate link)fine mesh sieve and it works great, plus it's also great for rinsing rice!
That's all I can think of right now, homemade banana bread is really easy to make.
Can I make this banana bread in a regular oven or in the Ninja Foodi Digital Air Fry Oven?
Yes, I'm sure you can. I have not tested the recipe out in anything other than the Ninja Foodi Pressure Cooker & Air Crisper, so these temps and times are only suggestions based on experience. Always keep an eye on your food when making something for the first time and adjust bake times and temps as needed for the best results.
Standard Oven Instructions: Preheat your oven to 325° F. Cover the (affiliate link)flower pan with foil or a silicone cover if using a convection oven. If not, you can leave uncovered. Bake at 325° F for 20-25 minutes. Then, if it's covered, uncover it. If it's not covered, cover it if the top is getting too brown. Continue to cook at 325º F for another 5-10 minutes. You can also lower the temp if you think it's getting too done. The best way to check for doneness is with a thermometer. You want a temp to be around 190-200° F.
Ninja Foodi Air Fry Oven: This oven is simply amazing and I will test this recipe out in it soon so I can give exact instructions, but for now here is my best guess. Set the oven to bake and the temperature to 325° F. Once preheated, which takes less than 60 seconds, put the covered flower pan on the tray, not directly on the rack. Bake for 20 minutes and check it. If the top is getting too brown even while covered, drop the heat down to 300° F. If it doesn't look like it's cooking enough, increase the heat to 350° F and uncover. *I'm basing this off of a recent post in our wonderful Facebook group for the oven; thanks Melanie! I love when everyone shares their experiences with a new appliance. It really helps us all learn so much faster! If you want to join that group, here is the link: Ninja Foodi Digital Air Fry Oven Tips & Recipes.
What type of Pan can I use to make this recipe?
I've only tested the recipe in the (affiliate link)flower pan, but you should be able to make it any pan as long as you make a few adjustments.
This is the first recipe I've done in the flower pan and I love it! Truth be told, I was worried cakes and bread would stick in the flour design, but everything released just fine. It also looks so small, but shockingly enough you can get 12 slices of homemade banana bread from it. Now, they aren't mammoth slices, but they are a perfect portion that weighs in at under 200 calories. I'm digging that!
Here are my suggestions for various pans, please keep in mind that these are only suggestions. The best way to ensure a good outcome is by keeping an eye on your homemade banana bread and adjusting time and temperature accordingly.
The best way to do this is not by eye or even a cake tester, but but measuring the temperature of the bread in 3 places. While I really want a top of the line ThermoWorks thermometer, I just can't justify the cost right now. A girl can dream though and, who knows, I might get one because they are considered the gold standard. In the meantime, I am using a ThermoPro that I got on Amazon for around $20.00. You can find the thermometer I use right (affiliate link)HERE.
You want your bread temperature to be between 190° F and 200° F. I suggest checking it after 20-25 minutes and then every 5 minutes after than until it's done.
6" Fat Daddio Pan: You should be able to make this banana bread in this pan without many changes. Because there is not a center core to this pan, you might need to bake a little longer on the 250° F temp OR you can use a (affiliate link)heating core. Many bakers use these to help the center of their cakes get done without burning the edges. I'll discuss that in the next section on baking tips.
7" Springform Pan: If you want to try this recipe in a 7" springform pan, I would not put the praline on the bottom because there is no need to flip the bread over. Instead bake covered at 275° F for about 20-25 minutes, uncover and reduce heat to 250° F for about 10 minutes. Temp the bread and if it is at least 185° F, add the praline topping and bake at 250° F for another 5 minutes. If it is under 185° F, bake without topping until it reaches that temp and then add the praline and bake another 5 minutes.
Loaf pan: Based on some feedback I recently received, I do not want to make any recommendations for this type of pan until I am able to test it myself. If you alter the recipe and use a loaf pan, I'd love to hear your experiences!
Please, please, please with a cherry on top, let me know if you make this homemade banana bread in any other pan! I would love to update this post with actual results instead of guesswork, so leave a comment or send me an email: louise@thesaltedpepper.com
Baking Tips for the Ninja Foodi
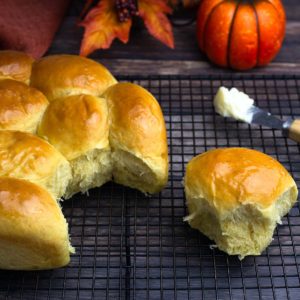
I really need to write an entire post on this topic because based on what I hear, it is one of the more frustrating things for people. When I say baking tips, I am strictly referring to baked goods, like this recipe for banana bread, my zucchini recipe, brownies, cakes, cornbreads, and even my Homemade Sweet Potato Rolls.
First off, lower your temp! The Ninja Foodi is like a small convection oven and, when you cook with a convection oven, you should decrease your temperatures by 25 degrees. However, we often need to go lower than that so we cook the middle without overcooking the top, sides, and bottom. I suggest at least lowering your temp by 50 degrees to start. Remember, you can always adjust your heat once you see how your baked goods are cooking.
Pan color matters! The darker the pan, the faster it is going to cook. Sounds great, right? Not necessarily. It really depends on what you are cooking. Do you want dark edges? I used a darker pan in my roll recipe because I did want the edges brown, but I wouldn't necessarily want my cake edges brown, so I would choose a lighter color pan. You can adjust for a darker color pan by decreasing your heat. So, if you only have a dark colored pan and want to make a recipe, drop the heat by an additional 10-25 degrees. If the recipe calls for a dark pan and you only have a light colored pan, you may want to increase your heat towards the end of the baking process.
Pan materials matter! There are all kinds of materials that are made into baking pans and they matter a lot more than you might think. All cooking occurs through transfer of heat. Some pans transfer heat better and more evenly than others. Silicone has become very popular in baking, but it does not conduct heat as well as aluminum or even glass. So, when baking in silicone, you may have to increase the heat some and/or cook longer.
If you've watched any of my YouTube videos, you have heard me talking about thick-walled pans, like the Fat Daddio products. I absolutely love them! They are made out of hard anodized aluminum and are probably the best and most even conductor of heat that I've found.
Glass is the middle ground and I usually don't make changes in temps at first, when baking in glass. I do watch the time and sometimes will drop the temperature.
Pan size matters! You can't take a recipe that was designed for a 6" round pan and put it in an 8" round pan. Well, you can, but you have to make adjustments. Either make 1 ½ of the recipe and cook according the the directions OR if making the recipe as written, you will need to decrease your baking time because the depth in the pan will be significantly reduced.
In reverse, if you have a recipe that calls for an 8" x 2" round pan and you want to use a 6 or 7" x 3" round pan, you have to make adjustments in time and temp to account for the increased depth. I usually lower my temperature by 25 degrees and increase my baking time by 15%-20%.
There are a few things you can use to help with baking in the Ninja Foodi and one of them is to use a bundt pan or the flower pan like I used in this homemade banana bread recipe. The center core of a bundt pan conducts heat to the middle of the cake or bread and allows it cook more evenly.
A lot of people have trouble with the outside of their baked goods being perfect and the center being raw. The bundt style pans help with this. They aren't an absolute necessity though. Often times just doing a better job at managing temperature and time is all you need to do.
You can also pick up heating cores. Heating cores act the same way as the center of a bundt style pan does, but they are removed and you don't have a hollow center to your baked goods. They are also very inexpensive, so I encourage you grab a set next time you order from Amazon. You can find the ones I use right (affiliate link)HERE.
To use heating cores, you simply lay them on the bottom of your pan and pour in your batter. The pan conducts heat to the heating core and it travels up the rod and transfers heat to your batter. You can use 1 or multiple in a baking pan. For 6" pans, I usually just use one. In 8" pans, I use three equally spaced.
When your baked good is done and you flip it out onto a cooling rack, you just remove the heating cores. The hole is so small no one will ever be the wiser!
You can also use a metal biscuit cutter, but they are not as convenient.
How do I convert traditional oven recipes to the Ninja Foodi?
This is the million dollar question and, if I had a simple formula, I would most definitely share it with you! The truth is, it's not a one size fits all type of thing. There are variables to consider, like the ones I mentioned above, when choosing baking times and temps.
The rule of thumb though, is to decrease the temp by at least 50 degrees for baked goods in the beginning. This is hot enough for the baked good to get a good rise from whatever leavening agent is being used, but not so hot that the outside gets too done before the inside cooks.
From there it is about paying attention to what you are baking and how it is cooking. If the outside looks like it is getting done too fast, lower the heat some. If it not getting done enough, increase the heat some, but don't do this too soon or the middle won't cook before the outside browns.
I usually only go up on the heat when I know that the middle is at least 85-90% done. I measure this with a thermometer and use a benchmark of about 200 degrees F as my goal temperature for most baked goods to be done. So, between 170° and 180° is when I feel comfortable increasing the heat to get the top browned up.
As far as timing goes, some baked goods will cook quicker in the Foodi and some might take longer than in a traditional oven. This depends on the type of pan used and the depth of the batter. Increased depth means increased cook time to get the center done.
For more information on baking, click HERE: Tips & Tricks for Baking in the Ninja Foodi
How to make Homemade Banana Bread in the Ninja Foodi Pressure Cooker & Air Crisper
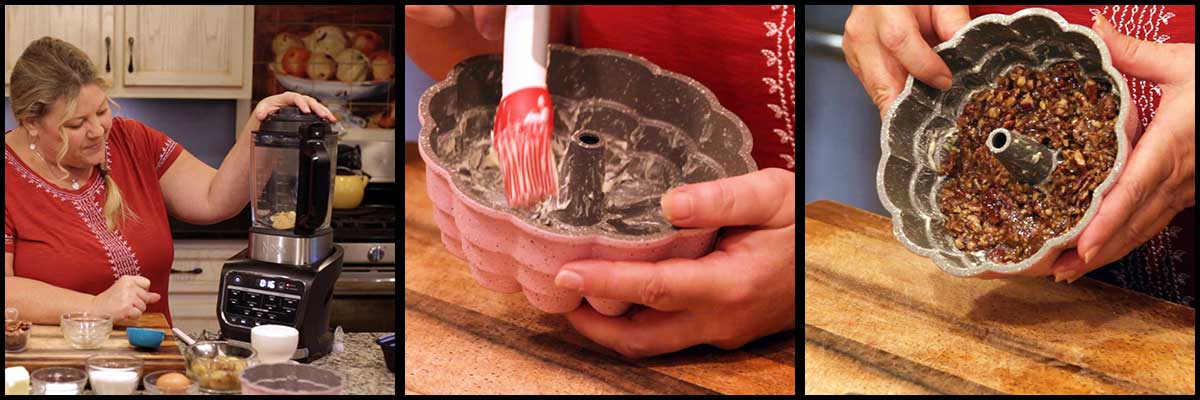
Make the pecan praline in the (affiliate link)Hot Cold Blender or in the Ninja Foodi or even on the stove. If making on the stove or in the Ninja Foodi, make sure to crush the nuts up before adding them and add the vanilla at the end.
Preheat the Ninja Foodi to 275° F for at least 10 minutes. I usually just let it go for 15 because by that time, I'm done mixing up the batter and finishing the praline.
Butter the pan you are using. I love to use my (affiliate link)Silicone Pastry brush for this, but you can use wax paper or anything else that will get the job done.
When the praline is done, spoon it into the pan. It's kind of hard to pour without getting it in the center, so a spoon or scoop works best for me.
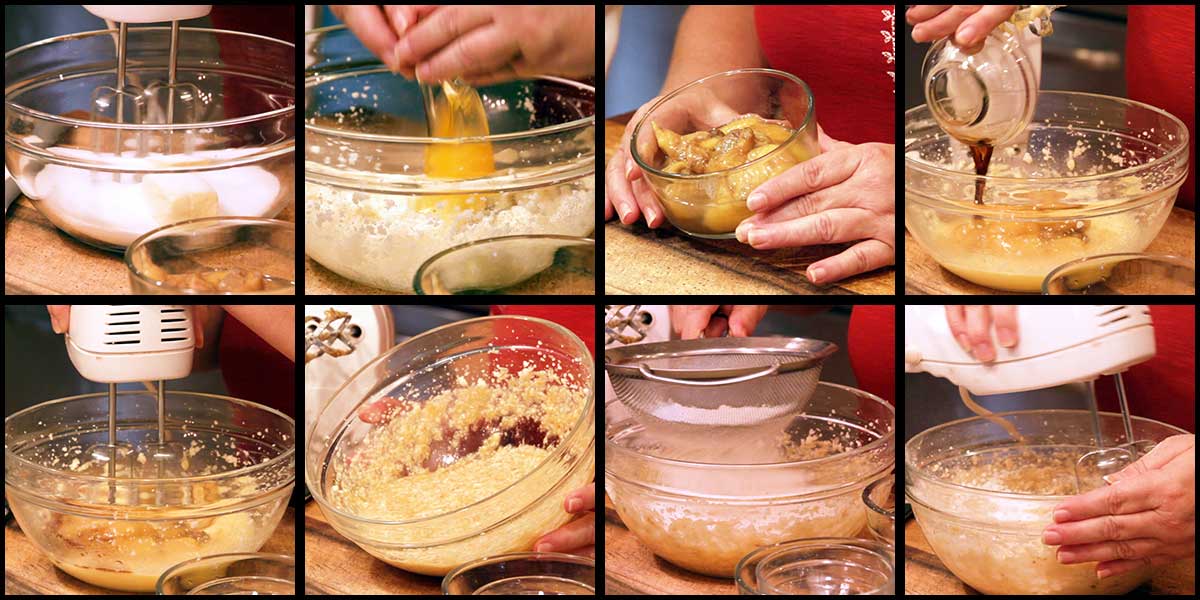
The batter for homemade banana bread is super easy to mix up. You will need a medium size mixing bowl and a hand mixer. You can do this in a stand mixer as well.
Combine room temperature butter with the sugar and blend on medium speed until combined and creamed. Because of the low volume, you won't get a really fluffy and creamy mixture, but that is okay.
Add in egg and blend until incorporated. Add bananas (with juice) and the vanilla extract. Blend on medium speed and don't freak out when the batter starts to look weird. That is completely normal and once we get the flour in, everything will smooth out beautifully.
Add salt and sift in half of the flour and mix on low speed just until incorporated. Sift in remaining flour and mix on low until incorporated. Add baking powder and mix just until incorporated. You don't want to do this ahead of time because baking powder starts to work right when it's combined with wet ingredients, so do this last part right before you are going to fill your pan. In my video on YouTube, I let it sit too long and you can really see how mine was puffy. It worked out fine, but it's good practice to add the baking powder with the other dry ingredients just before using the batter.
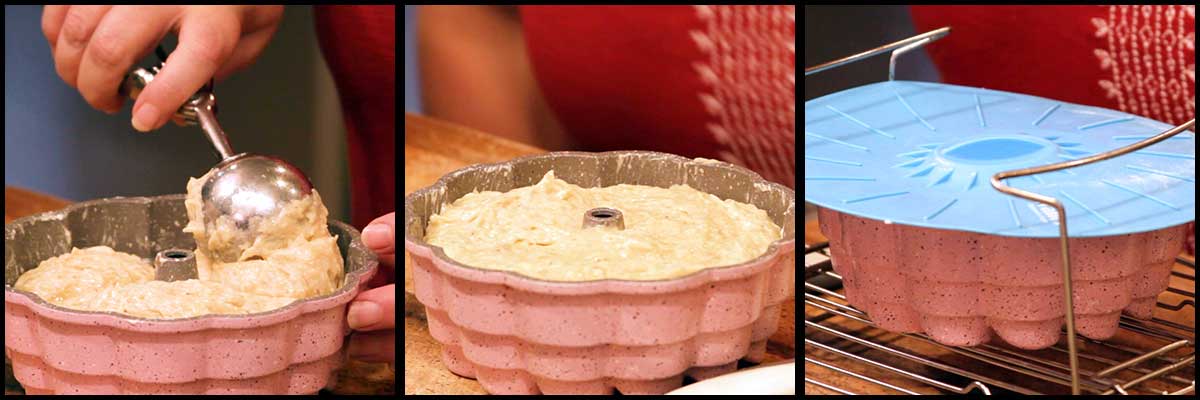
Scoop the batter into your pan. I like to use my medium or (affiliate link)large scoop from Pampered Chef, but a spoon works, too! You only want to fill your pan about ⅔ of the way full. Depending on what size pan you are using , you may not use all the batter. I ended up using almost all of it, though.
Cover with a (affiliate link)silicone cover or foil and place on the rack in the low position. Be careful when lowering the rack into the preheated Foodi, the pan tends to slide on the rack. Bake, covered, for 25 minutes (time may vary depending on your pan) and then uncover and check a temp if desired. Leave uncovered and decrease the heat to 250° F for an additional 15 minutes or until a cake tester comes out clean or the temp reaches 190-200° F.
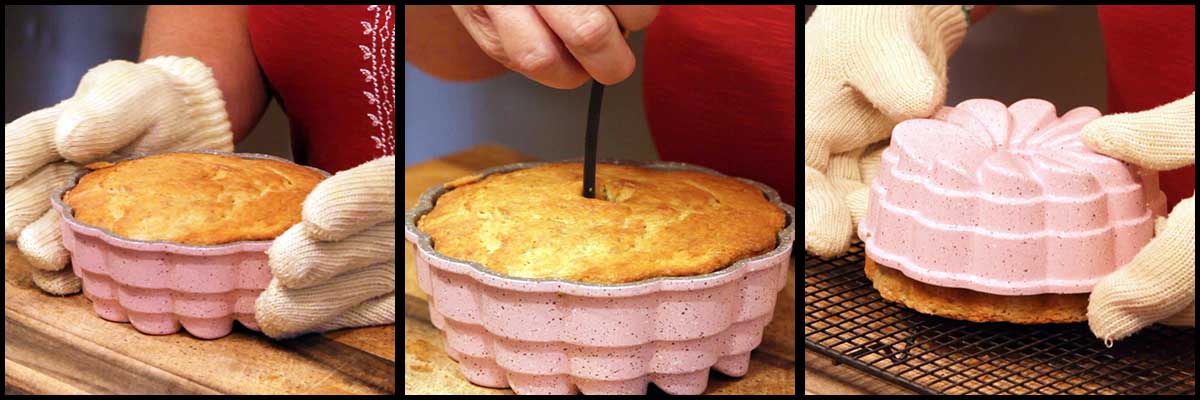
Allow to cool for about 5 minutes and make sure the center is not covered with banana bread. If it is, just push it away from the middle and make sure it's not sticking to the center. Turn the bread over onto a cooling rack. Okay, now this is very IMPORTANT. Cross your fingers and send good wishes to the cake gods. Nothing is ever guaranteed and there is a chance your banana bread will stick. I find this little ritual to work about 99% of the time! I made the recipe 4 times and mine didn't stick once, so I think you'll be good to go!
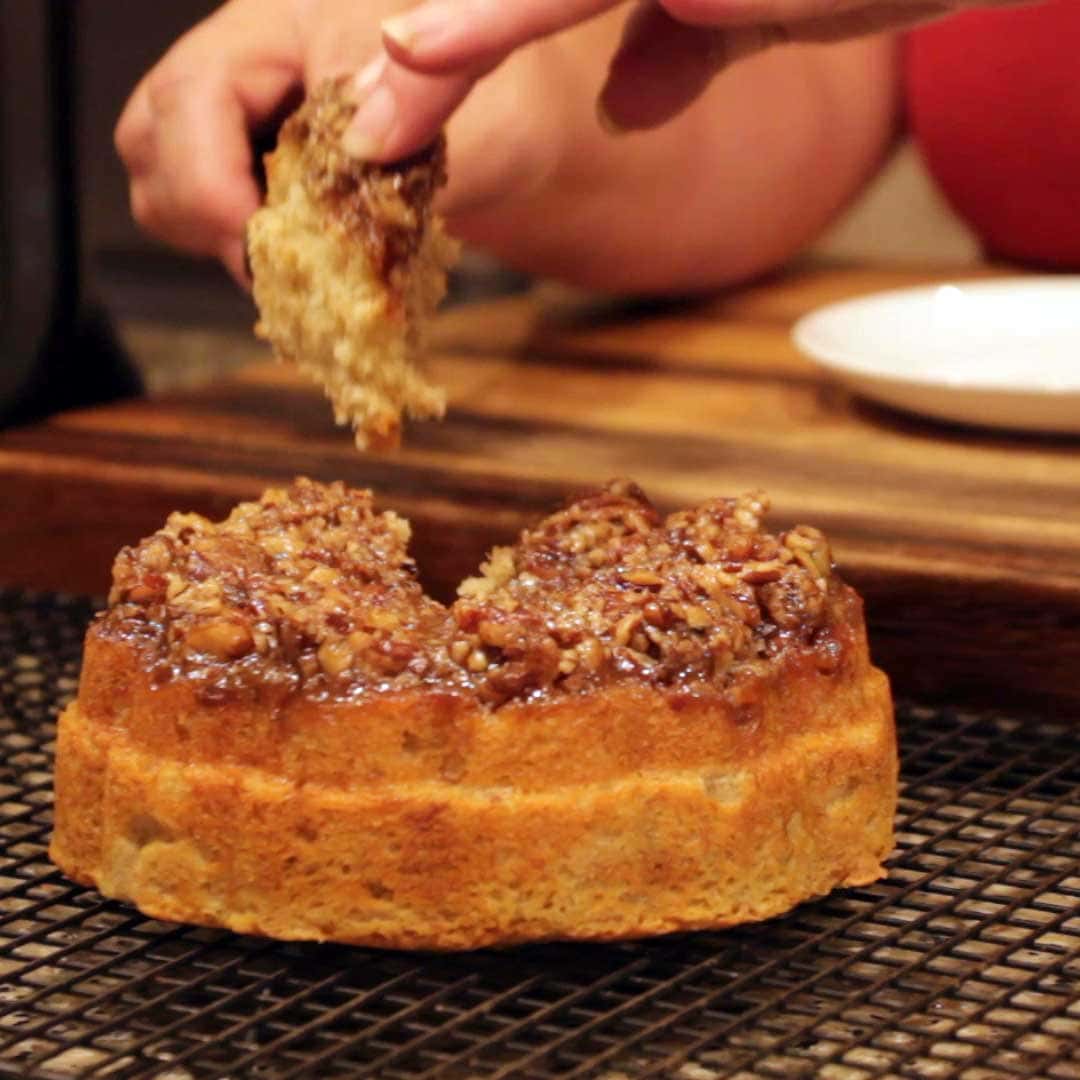
Gently lift the pan off of the homemade banana bread. Jump up and down a few times and pat yourself on the back, EVEN if it stuck a little, because you know.... it won't matter. Looks mean nothing, it's all about the flavor! Allow the bread to cool another 10-15 minutes and serve!
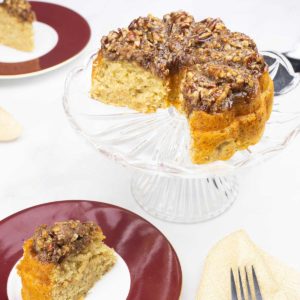
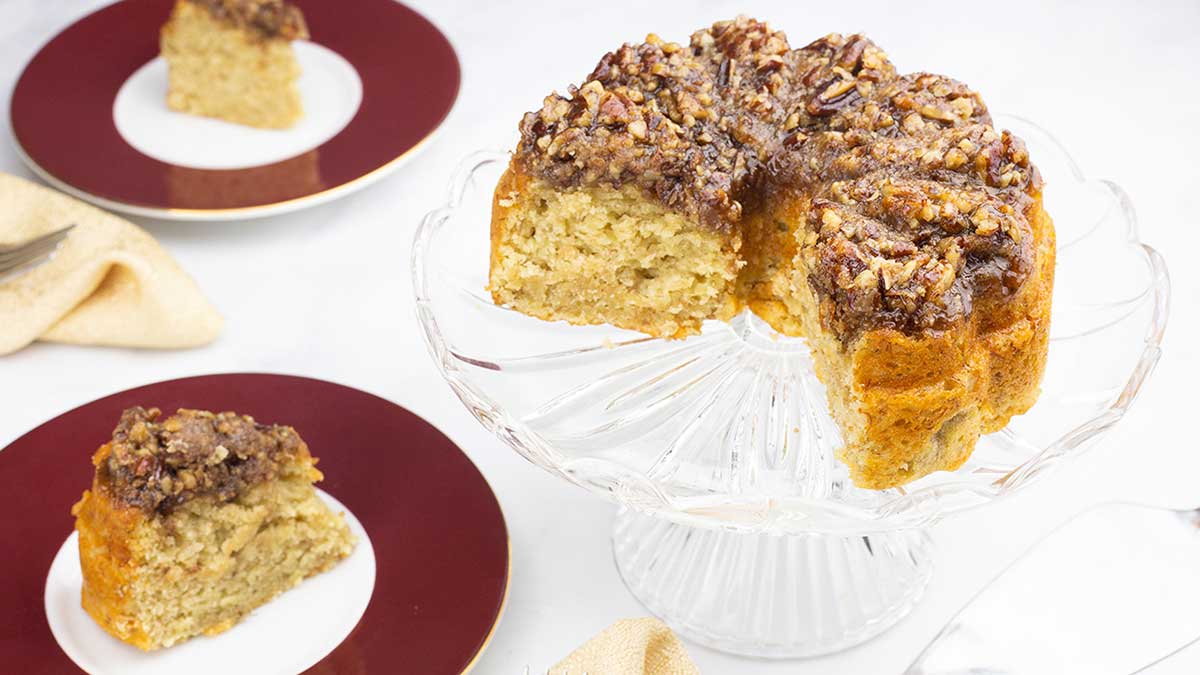
Homemade Banana Bread with Praline Topping
Equipment
Ingredients
Praline Topping
- 1 tablespoon Butter
- ¼ cup brown sugar
- 1 teaspoon vanilla
- ½ cup pecans
Banana Bread Batter
- ¼ cup butter
- ½ cup white sugar
- 1 large egg
- 1 teaspoon vanilla extract
- 3 bananas very ripe
- ¼ teaspoon sea salt fine grind
- 1 cup flour all purpose, sifted
- 2 teaspoon baking powder
Instructions
Praline Topping
- In the Ninja Foodi Hot Cold Blender, combine butter, brown sugar, and vanilla. Select the cook mode on high and let the butter and brown sugar melt. This takes a few minutes. Add pecans and pulse a few times. Scrape down the sides so the mixture is in the well. Continue to cook while you make the batter. OR
- In a saucepan or the inner pot of the Ninja Foodi, add butter, brown sugar and bring to a boil. Crush the pecans and add them to the boiling mixture. Reduce the heat and let cook about 2-3 minutes. Add the vanilla and stir. Turn the heat off.
- Prepare your pan by brushing it with butter or pan grease.
- Spoon the praline mixture into the bottom of your pan.
Banana Bread
- Preheat the Ninja Foodi on Bake Roast to 275°F for at least 10 minutes.
- Combine room temperature butter and sugar in a medium size mixing bowl. Use a hand mixer to cream butter and sugar together. Start out on a low speed and increase to a high speed for about 45 seconds.
- Add egg to butter and sugar mixture and blend with hand mixer. Add bananas and vanilla extract. Using a hand mixer, blend until combined. The batter will look kind of separated right now, that is normal.
- Add in salt. Sift half of the flour into the mixing bowl. Blend just until combined with hand mixer. Sift the remaining flour and blend just until combined with hand mixer.
- Add the baking powder and blend until incorporated with the hand mixer.
- Pour the batter into the pan on top of the praline mixture and cover the pan with foil or a silicone cover (I brush the underside with a little butter to prevent sticking). Place on the reversible rack in the low position and lower into the Ninja Foodi.
- Bake at 275° F for 25 minutes. Remove the cover. Reduce the temperature to 250° F and continue to bake for 12-15 minutes. The best way to check for doneness is by using a thermometer. Aim for a temperature between 190°F-200°F.
- Remove and allow to cool 5 minutes. Using a cake tester or other utensil, push any banana bread that has covered the center away to make sure it's not sticking. Flip onto a cooling rack and let it cool an additional 10-15 minutes. You don't want to allow it to cool completely in the pan or the praline might stick.
- Serve & Enjoy!
Nutrition
ABOUT THE RECIPE AUTHOR, LOUISE LONG

Louise is a full-time recipe creator and food blogger @ The Salted Pepper. She has over 30 years of experience with cooking and recipe development. She owned a restaurant for several years and was a full-time RN until retiring to blog full-time.
Louise has several very active Facebook groups that help people with the basics of cooking and getting the most out of the Ninja Foodi.
Ninja Foodi Fresh & Healthy Meals
Seeing the need for easy, delicious, and high quality recipes, she is focusing all of her efforts creating recipes specifically for the Ninja Foodi. Her recipes are easy for the home cook to follow and provide step-by-step instructions.
Louise is also a YouTube creator and you can find most of her recipes in video format on The Salted Pepper YouTube channel.
She is very responsive to messages and eager to help in any way she can.

Sue Horrell
My 6.5 qt ninja foodie does not have a Steam/Crisp setting. Is there a work around? I love banana bread and this recipe sounds delicious. Thanks. Sue
Louise
This recipe uses the bake setting, which all models of the Ninja Foodi have so you shouldn't have any problems as long as you have the right size/style of pan. I hope you enjoy the recipe!
Rosa Terrell
I was looking for the link for your pan. Amazon has it but I wanted you to get the credit for me buying it.
Louise
I appreciate that so much! Here is my affiliate link for the pan: https://amzn.to/3oS5779
Cynthia L
This link for the pan doesn't work.. please advise..
Thanks,
Cyn
Louise
Unfortunately I don't have a solution yet. I'll have to remake the recipe now that the company has stopped making the pan. Sorry, it's very frustrating!
Katie
I want to make this Banana bread as it sounds wonderful and my hubby LOVES banana bread. Any way, I ordered the flower pan linked in the recipe. Got it yesterday and i t is the 3 qt pan. So before trying the recipe, I was just wondering if this is the right pan for the amount of recipe and time? Don't want tp mess this up. Thanks for your help.
Joyce
Thank you so much for this recipe. I made it like a small cake in an aluminum pan. It did take a little longer but I baked it until it sprang back in the center. The flavor was great and I will make this again. You have empowered me to use my Ninja for something more.
Louise
I'm so glad to hear that!
Lee Ann M Kaplan
I'm currently making this in a regular sized blue bundt pan. I missed the spot where it said to cover the pan.. but my bread is coming along nicely- at the 20 minute mark the top was done as are the sides and bottom, but the middle was not done at all. I put it on for another 10 minutes and decreased temp by 25. Will update when fully cooked!
Louise
Keep me posted!