
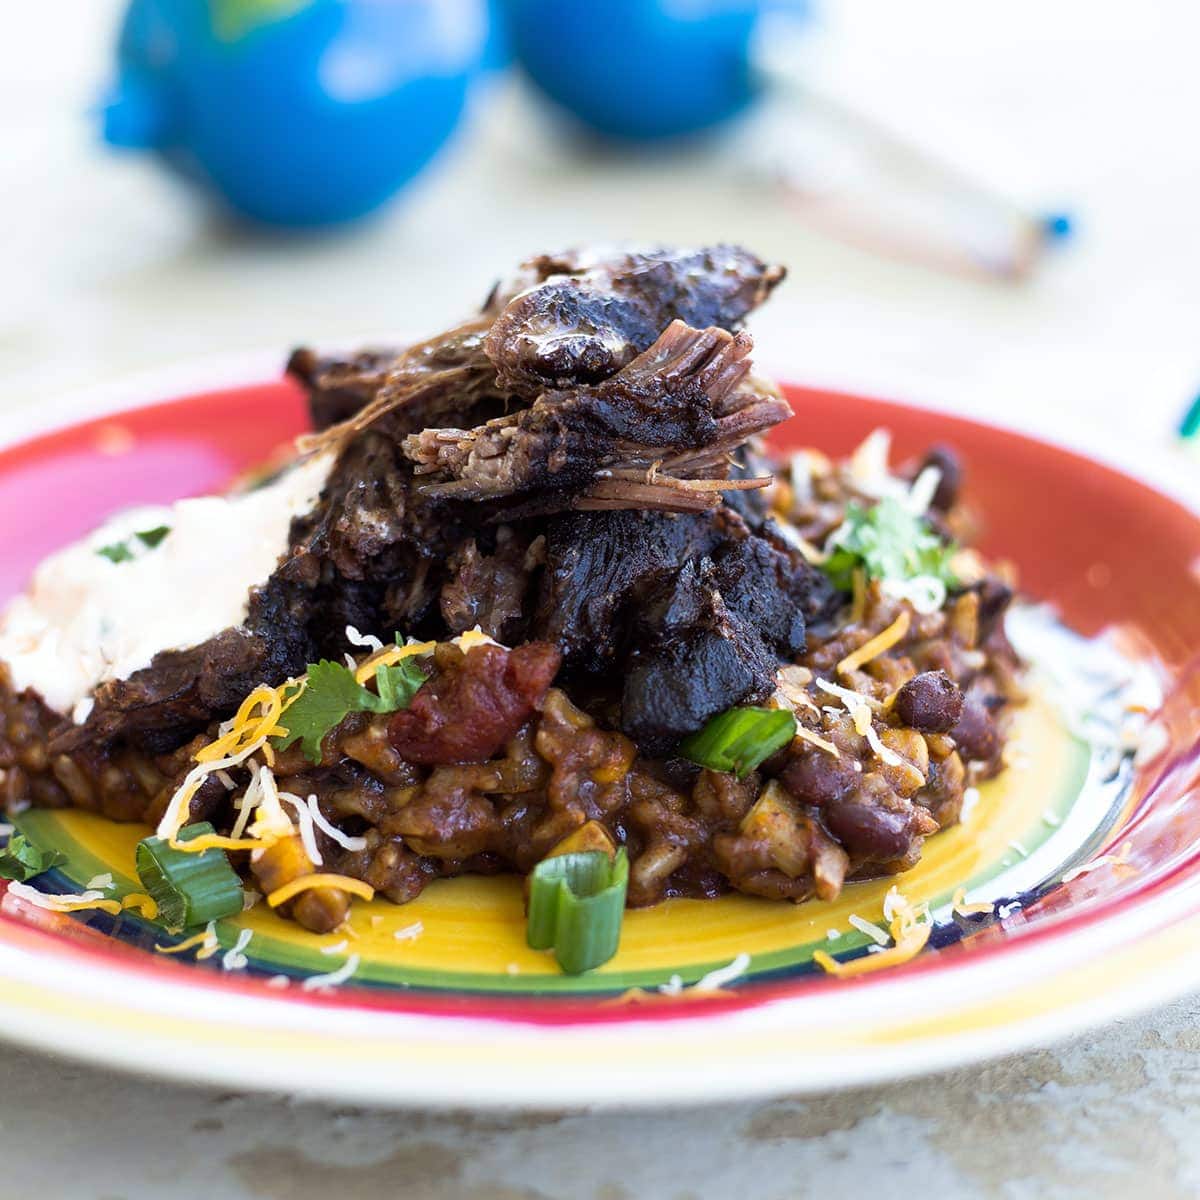
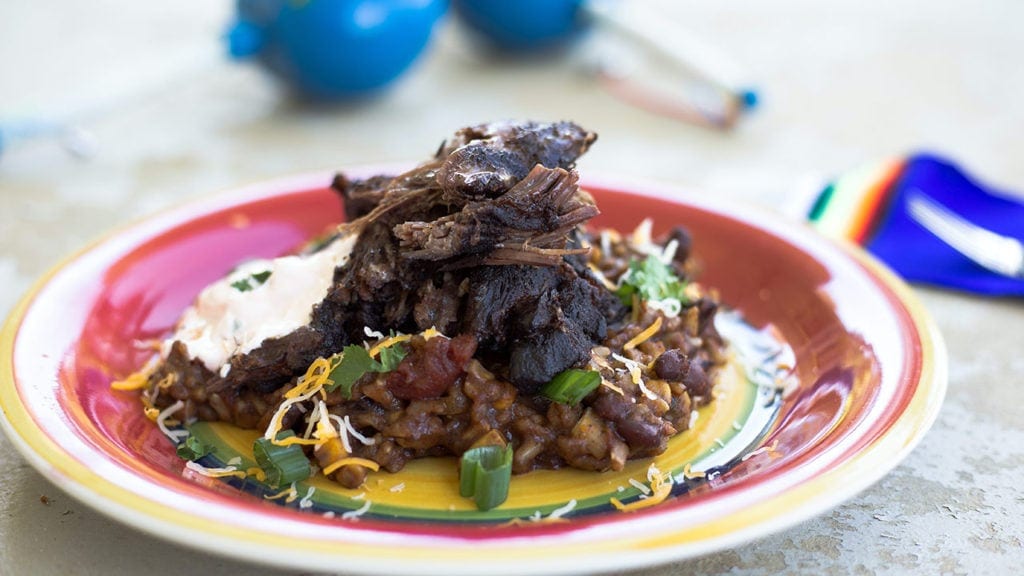
 Mexican Pot Roast in the Ninja Foodi is so easy to make and tastes delicious! It's a great twist on a classic one-pot meal!
I like traditional pot roast, I really do. The sad fact is, I've never made a truly delicious traditional pot roast! It's always lacking something, either the flavor is not quite there or the the texture is not quite right. I've under cooked and over cooked pot roast. I've under seasoned and over seasoned pot roast. I've eaten wonderful pot roasts, but they weren't made by me... until now!
This Mexican Pot Roast is absolutely PERFECT in every way! The seasonings are spot on, the texture of the chuck roast is like butter. It is seriously perfect! Now that I have the technique down, I'll bet you'll be seeing more pot roast recipes for the Ninja Foodi coming your way!
This post may contain affiliate links. If you make a purchase after clicking a link, I may earn a small commission at no additional charge to you.
What cut of meat should I use for a Pot Roast?
This is a great question and the cut of meat does matter! A LOT! 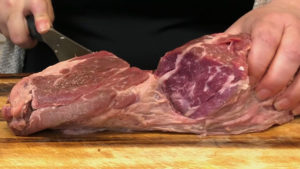
There are so many different cuts of beef in the grocery store and it can be very confusing! I see a lot of comments on Facebook in various cooking groups about pot roast failures. Usually this is because the wrong cooking method was used for a cut of beef. Of course personal preference also plays a big part in picking the right cut of meat and I'm going to go over three popular cuts that people use for pot roast and hopefully help you pick the cut that will work best for you!
Chuck Roast: This is the cut I recommend for making Mexican Pot Roast or really any pot roast. The chuck roast is cut from the shoulder area and tends to be a tough cut of meat, and fatty. This would not be great for steaks, but it is great for pot roast! The chuck roast can handle the high heat of a pressure cooker and does not dry out because of the fat that is marbled throughout the meat.
Chuck Roast is best cooked in a wet cooking environment for a long time. It can take 3-4 hours of braising in the oven and 8 hours in a slow cooker to break down the connective tissue which results in a tender roast. Thankfully, we have the Ninja Foodi or pressure cooker and we can cut this time down to 30 minutes with a little kitchen hack I'm going to show you.
Rump Roast: The rump roast is cut from the back end of the cow and is a very hard-worked muscle, resulting in a very tough and lean cut of beef. The rump roast is often chosen for pot roasts because the longer you cook it, the more tender it becomes. This works perfectly for making a pot roast in a slow cooker, but doesn't always work out so great when using a pressure cooker.
The slow cooker, does just that... it slow cooks the meat at a low temp for a very long time. This can tenderize even the toughest cuts of meat. While in theory, the pressure cooker can do the same thing, there is one problem. If you release the pressure too soon, all the moisture is sucked right out of the meat, leaving it dry and stringy. Not pleasant, in my opinion.
You can successfully make a rump roast in the Ninja Foodi, but you will have to cook it for a very long time and let the pressure release naturally. If you want to read more about pressure cooking, you can find a lot of great information in this article: Pressure Cooking 101.
Round Roast: Round roasts consist of several different cuts (Top Round, Eye of Round, Bottom Round) and are cut from the rear end of the cow just below the rump roast. This type of roast is also very lean and tough.
I find the best way to prepare a top or bottom round is to cook it at a high (dry) heat for a short period of time, followed by a low temp to cook the inside. This roast is best served sliced very thin and is a popular cut for pit beef sandwiches.
I have not made a round roast in a pressure cooker or slow cooker, I think they are better cooked in a drier environment. I found out recently that the corned beef you buy at the deli is a top round that is brined and not brisket.
If you want to learn more about the various cuts of meat, this article has a great graphic and basic descriptions; Understanding the different cuts of beef.
10 Ideas for Leftovers!
 I don't mind eating leftovers, but I always like to switch them up enough so I feel like I'm eating something different! Here are my top 10 ideas for leftover Mexican pot roast. I'll warn you though, there might not be leftovers.
- Burritos: The leftover meat with the rice and beans makes a perfect stuffing for a burrito. You can get timing and instructions on rolling a burrito in my recipe for Breakfast Burritos.
- Tacos: The left over pot roast shreds beautifully for tacos; soft or hard shell! Delicious!
- Mexican breakfast hash: Saute some diced potatoes with onions and when ¾ of the way cooked, add in the shredded pot roast with some hot sauce. Yummy!
- Mexican Beef Rice Bowl: Mix the rice, beans, pot roast together and make a dinner bowl. Quick & Easy!
- Taco Salad: Top your favorite salad ingredients with the shredded pot roast, add some cheese and sour cream. Guacamole would be great too! The perfect lunch.
- Mexican Omelet: Use the shredded meat, beans, and rice to stuff your omelette. Don't forget to add some salsa on top!
- Mexican Tortilla Soup: Add the shredded beef to my Vegetable Bean Soup (recipe coming soon) and you'll have a Mexican flavored soup! Don't forget the tortilla chips!
- Nachos: Put your favorite nacho toppings on tortilla chips and add the shredded beef. YUM!
- Flautas: Simply roll the beef, beans, and rice into flour tortillas and AC in the Ninja Foodi. Quick and Delicous!
- Mexican Dip: Finely chop the beef and add to Queso to serve with tortilla chips. Great for an appetizer!
How to make Mexican Pot Roast in the Ninja Foodi
This recipe is so easy! There is hardly any prep and the Ninja Foodi does all the work! My kind of recipe for sure.
The first thing you want to do is take your meat out of the refrigerator and let it come to room temp, this takes about an hour. You don't want to leave your chuck roast out of the fridge longer than 2 hours or bacteria may start to grow.
The second thing is to prepare your seasoning blend. Combine 2 teaspoon sea salt, 4 teaspoon cumin, 2 teaspoon smoked paprika, 1 teaspoon garlic powder, and 1 teaspoon of ground chipotle. Of course, if you don't want your Mexican Pot Roast spicy, leave out the chipotle pepper. Researve 1 ½ Tablespoons for the rice and bean mixture and the rest will be used on the chuck roast.
Measure out your rice and beans and give them a quick rinse using a fine sieve strainer or colander.
Turn on the Ninja Foodi on High sauté and add 2-3 Tablespoons of olive oil. You want a light coating over the entire pot.
This is the kitchen hack that decreases the cook time of your chuck roast in half! Cut the chuck roast into 4 equal pieces and liberally season with the Mexican seasoning. Don't forget to reserve 1 ½ Tablespoons for the rice and bean mixture.
By cutting the meat into 4 chunks, you are reducing the density of the meat and therefore the cooking time is much less because the heat produced by the steam doesn't have to penetrate the meat as far to cook it.
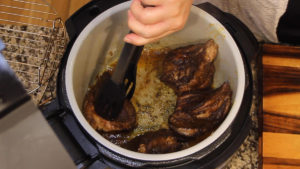 When the Ninja Food is really hot, add your chunks of chuck roast and let them sit without flipping for about 3 minutes. Repeat for each side and the ends.
While the meat is searing, peel your carrot and chop up your onion (if using). I dice about ½ cup of onion to add to the rice and cut a large onion or 2 small onions into wedges to cook with the Mexican pot roast.
Remove the seared meat from the Ninja Foodi, but leave the sear/sauté on. Pour in 2 cups of beef 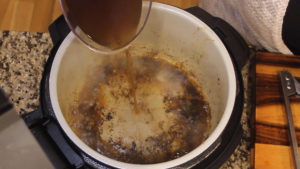 broth into the hot pan to deglaze it and remove any stuck-on food. I like to use my scoop & spread to gently scrape the bottom of the Foodi, but you can use anything that is safe for non stick surfaces.
*If you want your rice and beans to be drier at the end, decrease the beef broth to 1 ¼- 1 ½ cups. I found that even though the rice and beans were a bit liquidy at first, they quickly absorbed the liquid and were much better for reheating.
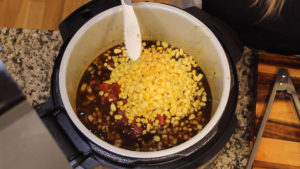 Add in the rice and beans along with remaining 1 ½ tablespoon of Mexican seasoning. Add 2 cups of frozen corn and 14.5 oz can of fire roasted tomatoes. Stir to combine.
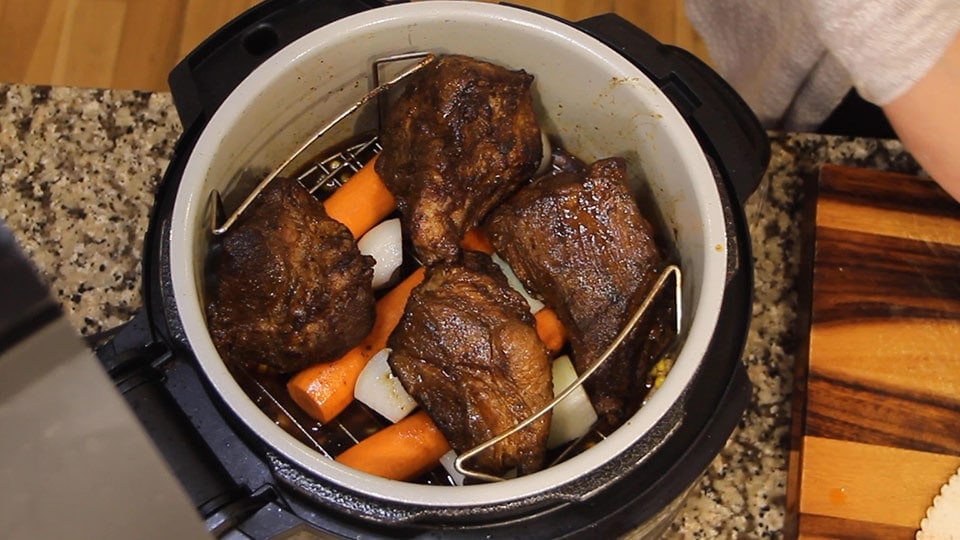
Place the rack on the low position over the rice & bean mixture. Put the carrots and onions on the rack and place the meat chunks on top. Set the Ninja Foodi to high pressure for 30 minutes. Make sure to put the valve to seal.
When the 30 minutes is up, allow to natural release for 20 minutes. This gives the rice and beans time to absorb the liquid and prevents the roast from drying out.
Chop up ½ cup cilantro, and 2 green onion stalks.
Remove the rack with the pot roast and veggies. Let the meat sit for 10 minutes before serving.
Stir the cilantro, and green onions into the rice and beans. Close the TenderCrisp lid on the beans and rice to allow them to continue absorbing the liquid and to keep them warm.
Optional toppings and "gravy" for Mexican Pot Roast
I always like to add a few special touches and I LOVE sauces, so I whipped up a very simple sour cream sauce to go with the Mexican pot roast.
Combine ½ cup of sour cream with 2 tablespoon of your favorite hot sauce ( I love Cholula ) and ¼ cup of chopped cilantro. You can also add some lime zest and juice. It's delicious!
I also like spice, so I added a few sliced jalapeno to the top of my pot roast.
You dress it up however you like and I know you are going to LOVE it like I do!

Mexican Pot Roast in the Ninja Foodi
Ingredients
- 3 tablespoon Olive Oil
- 2 ½ lbs chuck roast
- 2 cups beef broth
- ¾ cup brown rice rinsed
- ¾ cup black beans dry
- 14.5 ounces fire roasted tomatoes
- 2 cups corn frozen, optional
- 1 lb carrots optional
- 2 large onion sweet or vidalia
- 1 cup cilantro chopped
- 2 green onions white and green part
Seasoning Blend
- 4 teaspoon ground cumin
- 2 teaspoon sea salt
- 2 teaspoon smoked paprika
- 1 teaspoon garlic powder
- 1 teaspoon ground chipotle optional
Sour Cream Gravy
- 1 cup sour cream optional
- 4 tablespoon Cholula
- ½ cup cilantro chopped
Optional Toppings
- 1 jalepeno pepper optional
- Green onions
- grated cheese
Would you like to save this recipe?
Instructions
- Bring your chuck roast to room temp. Mix up the seasoning blend and remove 1 ½ Tbsp. Heat the Ninja Foodi on Sear Saute on HIgh. Add 2-3 tablespoon of Olive Oil.
- Measure out your rice and beans and give them a quick rinse using a fine sieve strainer or colander.
- Cut the chuck roast into 4 equal pieces and liberally season with the Mexican seasoning.
- When the Ninja Food is really hot, add your chunks of chuck roast and let them sit without flipping for about 3 minutes. Repeat for each side and the ends.
- While the meat is searing, peel your carrot and chop up your onion (if using). I dice about ½ cup of onion to add to the rice and cut a large onion or 2 small onions into wedges to cook with the Mexican pot roast.
- Remove the seared meat from the Ninja Foodi, but leave the sear saute on. Pour in 2 cups of beef broth into the hot pan to deglaze it and remove any stuck on food.
- Add in the rice and beans along with remaining 1 ½ tablespoon of Mexican seasoning. Add 2 cups of frozen corn and 14.5 oz can of fire roasted tomatoes. Stir to combine.
- Place the rack on the low position over the rice & bean mixture. Put the carrots and onions on the rack and place the meat chunks on top. Set the Ninja Foodi to high pressure for 30 minutes. Make sure to put the valve to seal. Natural release for 20 minutes, then manually release the remaining pressure.
- Remove the rack with the pot roast and veggies. Let the meat sit for 10 minutes before serving. Chop up ½ cup cilantro, and 2 green onion stalks and stir into rice mixture. Close the TenderCrisp lid.
- Combine ½ cup of sour cream with 2 tablespoon of your favorite hot sauce ( I love Cholula ) and ¼ cup of chopped cilantro to make the Mexican "Gravy". Serve with desired toppings and Enjoy!
Caitlin says
I made this meal over the weekend. It was my first time using my new ninja foodi, and .... oh my goodness.
Everything about this recipe is so wildly delicious. The beef was fork tender, and the beans & rice mixture was the best I’ve ever eaten. I have never had pot roast with Mexican flavor, but this has officially made our dinner rotation.
After 10 minutes of eating dinner with my husband, where we only stopped shoving food in our face to express our pleasure with the meal, my husband made me promise that I will make this again and again. I followed the recipe exactly, minus the green onions, that I personally dislike. But if I were serving for company, I’d definitely have them as an option. Leftovers today were heavenly. YUM, thank you so much for this amazing recipe & fantastic instructions!!!
Louise says
I'm so glad you enjoyed it!
Sandi says
So we tried this last night. The chuck roast was a little dry, maybe because it was just slightly smaller than 2 1/2 lbs? I might try it a little less time next time? I definitely seared it on all sides. However, the rice/bean mixture was fantastic!! Just used some of the leftovers over my eggs and my husband's leftover breakfast casserole. It was delicious! You know the 2nd day is always tastier when having some spices! The thickness is perfect and understand why it needed to be 'soupier'. It thickened up quickly and like I said, perfect today! My question is that we would like to make a double batch of the rice/bean mixture only (NO MEAT) and freeze some. Can you please give me advice on how much liquid & spices to use as the bulk of the spices were for the meat? I understand because there won't be meat juices that will effect the liquid amount. Also, how long should I PC & NR this? Thank you for this recipe. It definitely is a keeper!!
Louise says
That is a great question. I would probably use 3 1/2 cups of broth for a double batch of just the rice and beans. Same cook time. As far as seasonings go, I would probably add the entire spice blend recipe to the double batch. If that seems like too much, you can always season afterwards, too.
Sandi Del Rosario says
Thanks Louise! I will definitely try this and let you know what I ended up using and how it turned out! You are awesome!
Sandi says
I finally just made the double batch of just the rice/beans based on your recommendations. Came out perfect! Thank you! Now to make the Mexican Shredded Chicken and use both of these recipes for some awesome burritos or just eat it in a bowl!
sylvia says
Surprise, surprise. I only had a rump roast and when I checked my bagged (in my seal meal bag) black beans and saw they were date 4/15...Oh no. Using a rump roast at only 30 minutes of pressure cooking! Well, I was giving this recipe a 30% chance of turning out fork tender roast and tender black beans. Oh my gosh. Turned out perfect. I omitted the carrots. Pretty everything else followed to the tee...My husband loves Mexican food. He will be very happy with tonights dinner!
Thank you,
Louise says
That is wonderful! I'm so glad the rump roast worked!
Sarah says
Incredible. I've made a thousand pot roast recipes, and probably more Mexican dishes, and this is by far the easiest and most versatile. I made it with wild rice and dry black beans, used sun-dried tomatoes and omitted the corn (by accident). Also played with different chile powders My family is really picky but everyone loved this.
Louise says
I am so glad you enjoyed it!
Charla D Carr says
I just made this for the second time. I followed recipe exactly except I didn't use the corn. So good both times!!!
Louise says
That is so awesome! Thank you for taking the time to rate and comment on my recipe. I appreciate it so much!