Pure heaven! That's what these Ninja Foodi Chocolate Cake Bites are... seriously decadent!
They are super easy to make and naturally gluten free. You have to try these simple little bites of perfection. You will thank me! And Tyler Florence... you have to thank him too!
This recipe for Ninja Foodi Chocolate Cake Bites was adapted from Tyler Florence's recipe for Cracked Earth Flourless Chocolate Cake that I have been making for years. There are a few techniques that need to be implemented in this recipe, but don't worry, they are easy! You can watch the full video of me making them on YouTube: Ninja Foodi Chocolate Cake Bites.
This post may contain affiliate links. If you make a purchase after clicking a link, I may earn a small commission. Thank you for your support!
What is Flourless Chocolate Cake?
This recipe for Ninja Foodi Chocolate Cake Bites is a flourless chocolate cake batter that uses egg yolks and egg whites to aerate the chocolate and provide volume and lift to the cake.
It is completely normal for a flourless chocolate cake to "fall" when removed from the oven or in this case the Ninja Foodi. Sometimes these cakes are referred to as "fallen cakes."
In this recipe, the eggs are separated before beating and incorporating into the melted chocolate. This allows for an airier texture that reminds me of a really good chocolate mousse meets a super fudgy brownie. Delicious for sure!
What type of chocolate should I use?
Since chocolate is the main ingredient in this dessert and I recommend using as good of a quality as you can find/afford. I certainly am not a chocolate connoisseur by any means, and I know there are some really great and quite pricey chocolates out there. I almost always use Ghirardelli chocolate and find that it works beautifully in this recipe for Ninja Foodi Chocolate Cake Bites.
I recommend using dark chocolate (60% cacao) in this recipe for a deep chocolate flavor, but you can use semi-sweet or even milk chocolate if you prefer.
I find the combination of dark chocolate and the sugar in this recipe results in the perfect amount of sweetness. Keep in mind that the cake bites will be sweeter if you choose semi-sweet or milk chocolate.
Can I use a different pan for cooking these Ninja Foodi Chocolate Bites?
Of course! The cooking time will be different based on the type of pan you use and I do recommend using a spring form pan if you aren't using an egg bite silicone tray.
I have not tested this recipe using a cake pan, so I can only estimate the cooking time. I would suggest starting out with a high pressure cooking time of 10 minutes with a natural release of 10 minutes. If you make this recipe using a spring form pan, please let me know your cooking time and results!
Do I need special equipment to make Ninja Foodi Chocolate Cake Bites?
Except for the Ninja Foodi, you can make this dessert with a few bowls and a fork or a whisk, but it will be easier and faster with a hand mixer. I also recommend using a silicone egg bite tray, but you can use any container that is approved for pressure cooking.
If using a regular cake pan (not a spring form), you might have a bit of trouble removing the slices of cake and I suggest using pan grease to make it easier. I use a recipe from Gretchen's Bakery and had a link to it, but she has removed all of the content from her blog. It's a very simple recipe, so I will provide the ingredients and instructions here:
- ½ cup Vegetable Oil
- 1 cup All Purpose Flour
- 1 cup shortening (like Crisco)
Add all the ingredients to the bowl of a stand mixer and use the paddle attachment to beat until smooth. Use room temp and you can leave it out for several days, but then refrigerate it. Store it in a sealed container in the refrigerator for 2-3 months and you can freeze it for up to 1 year.
Tips for melting chocolate
I used the Ninja Foodi on the steam function to act as a double boiler to melt the chocolate for this recipe and it worked great! Make sure to add just enough water to create steam without the water touching the glass bowl or container you are using to melt the chocolate in.
Chocolate can be very temperamental, especially when overheated. Keep an eye on it and when the chocolate is about ¾ of the way melted you can remove it and stir allow the heat from the melted chocolate to melt the remaining chocolate.
You can use the microwave if you prefer to melt the chocolate. Heat in short bursts of no more than 15 seconds and make sure to stir before heating again. It is very easy to overheat your chocolate in the microwave and once dark chocolate has gone over 115 degrees F, it seizes up and is very hard to work with.
If your chocolate becomes too hot and is difficult to work with, you can try to salvage it by adding in a bit of butter.
You can also heat your chocolate on the stove using a double boiler, but I found the Ninja Foodi worked great as a double boiler.
Ready to make these delicious Ninja Foodi Chocolate Cake Bites?
Let's get to it!
First let's get the chocolate melting. Add 3 cups of water to the inner pot of the Ninja Foodi and place the rack on the low position. Turn the Sear/Sauté function on high.
Add 6 oz of chocolate chips and butter to heat resistant pan or bowl, I used a cake pan from Fat Daddio that I love to use in the Ninja Foodi. Place bowl on the rack of the Ninja Foodi and allow the steam to gently melt the chocolate.
While the chocolate is melting, separate 3 eggs putting the whites in a medium size bowl and the yolks in another medium size bowl. Keep in mind that the egg yolks will double in volume and the egg whites will quadruple in volume, so choose bowls that will accommodate this increase in volume.
Add the ¼ cup of sugar to the egg yolks. Either by and or with a hand mixer, whip the yolks until they double in volume and become pale yellow. 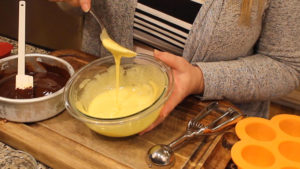
When the chocolate is ¾ of the way melted, remove the pan or bowl from the Ninja Foodi and stir to allow the residual heat to melt the rest of the chocolate. Set to the side to cool and whip the egg whites.
Using a hand mixer or a whisk, whisk the egg whites until they form stiff peaks. 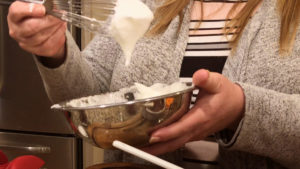
Temper the egg yolks with the melted chocolate by adding a small amount of egg yolks to the melted chocolate. Stir to combine. Add remaining egg yolks to the melted chocolate and stir to combine.
Gently fold in the egg whites about ⅓ at a time until incorporated.
Lightly grease egg bite molds with pan grease. I have been using this recipe from Gretchen's Bakery for pan grease for years and I highly recommend it! You can make up a batch and store it in the fridge for a few weeks or even in the freezer. Nothing will stick, it's incredible! I also have found that this silicone basting brush from Pampered Chef is wonderful for greasing pans and also brushing oil onto foods when using the Ninja Foodi. I use mine all the time as you might notice in my YouTube Ninja Foodi videos!
Add chocolate mixture into each well and cover with aluminium foil. You want to cover the mold or cake pan with foil so 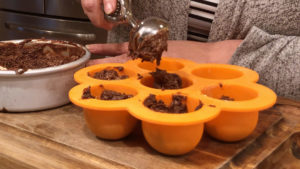
Place egg bite mold onto the rack in the low position and pressure cook on high for 6 minutes and allow to natural release 4 minutes and then release the remaining pressure and remove the egg bite mold.
Allow to cool in the mold for a few minutes. You can also run a butter knife around the edges, but I prefer to use this cake tester from Pampered Chef. It is also great for cleaning food from the Air Crisp lid!
Turn the mold over and gently push the chocolate cake bites out onto a clean surface. Allow to cool while you make the raspberry sauce.
Optional steps:
Dump the water from the Ninja Foodi and add raspberries and ¼ cup sugar to the inner pot. Turn the Ninja Foodi on high sauté and sauté the raspberries/sugar until the raspberries begin to break down and release their juices. Cook for a few minutes until the sauce begins to bubble and thicken.
Using a fine sieve strainer, strain the seeds from the sauce and discard. Allow the sauce to cool slightly.
Melt remaining 4 ounces of chocolate if you want to coat your cake bites with chocolate. Place chocolate cake bites on a sheet of parchment paper (easy clean up) and spoon-melted chocolate over the top of each cake bite, allowing the chocolate to run over the edges. You can reuse the excess chocolate by scooping it off of the parchment before it cools.
Combine heavy cream and powdered sugar and whip until it becomes thick. You can do this by hand or with a hand mixer.
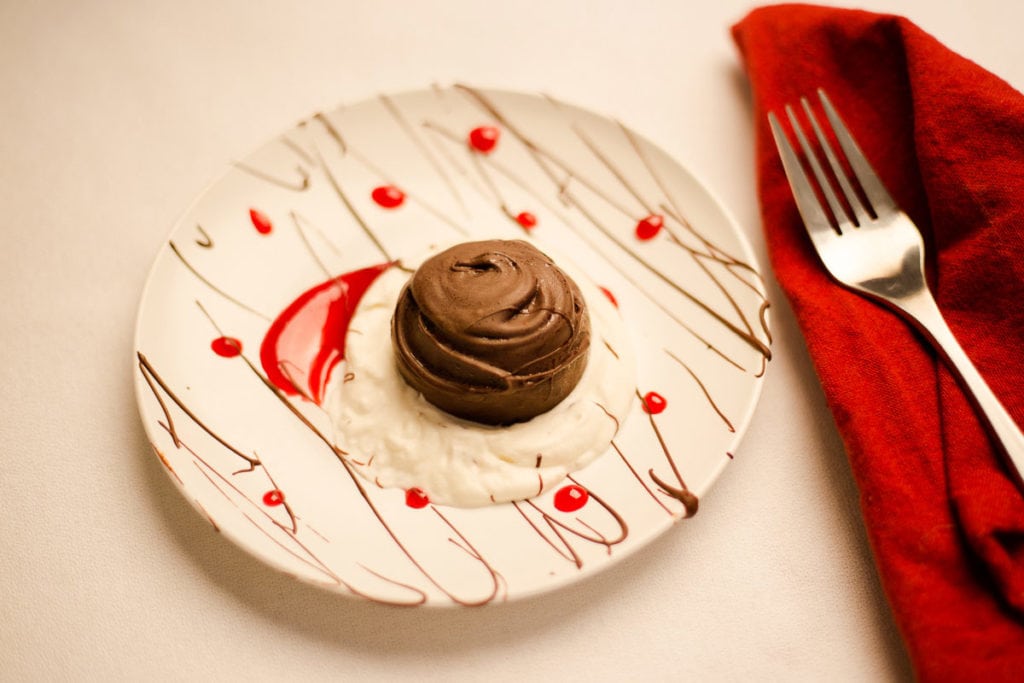
To assemble your Ninja Foodi Chocolate Cake Bites put some raspberry sauce on your plate along with some whip cream. Coat the chocolate bites with melted chocolate, if desired, and allow to cool. Place chocolate cake bite on top of whipped cream. Drizzle with additional chocolate if desired. Serve and Enjoy!
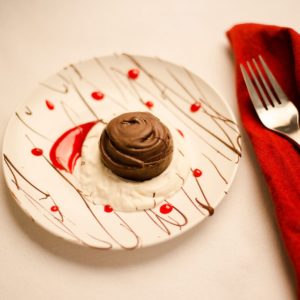
Ninja Foodi Chocolate Cake Bites
Ingredients
- 6 ounces dark Chocolate plus more for chocolate coating if desired
- ⅓ cup butter salted
- 3 large eggs
- ¼ cup sugar
Raspberry Sauce
- ½ cup raspberries fresh or frozen
- ¼ cup sugar
Whipping Cream
- 1 cup heavy whipping cream
- 2 tsp powdered sugar
Would you like to save this recipe?
Instructions
- Add 3 cups of water to the inner pot of the Ninja Foodi and place the rack on the low position. Turn the Sear/Saute function on high.
- Add 6 oz of chocolate chips and butter to heat resistant pan or bowl. Place bowl on the rack of the Ninja Foodi and allow the steam to gently melt the chocolate.
- While the chocolate is melting, separate 3 eggs putting the whites in a medium size bowl and the yolks in another medium size bowl.
- Add sugar to egg yolks and either by and or with a hand mixer, whip the yolks until they double in volume and become pale yellow. See post for more details.
- When the chocolate is ¾ of the way, remove from the Ninja Foodi and stir to allow the residual heat to melt the rest of the chocolate. Set to the side to cool and whip the egg whites.
- Using a hand mixer or by hand, whisk the egg whites until they form stiff peaks. See post for more details.
- Temper the egg yolks with the melted chocolate by adding a small amount of egg yolks to the melted chocolate. Stir to combine. Add remaining egg yolks to the melted chocolate and stir to combine.
- Gently fold in the egg whites about ⅓ at a time until incorporated.
- Lightly grease egg bite molds with pan grease. See post for details. Add chocolate mixture into each well and cover with aluminium foil.
- Place egg bite mold on to the rack in the high position and pressure cook on high for 6 minutes and allow to natural release 4 minutes and then release the remaining pressure and remove the egg bite mold.
- Allow to cool for a few minutes and then turn the mold over and gently push the chocolate cake bites out onto a clean surface. Allow to cool while you make the raspberry sauce.
Raspberry Sauce
- Dump the water from the Ninja Foodi and add raspberries and ¼ cup sugar to the inner pot. Turn the Ninja Foodi on high saute and saute the raspberries/sugar until the raspberries begin to break down and release their juices. Cook for a few minutes until the sauce begins to bubble and thicken.
- Using a fine sieve strainer, strain the seeds from the sauce and discard. Melt remaining 4 ounces of chocolate if you want to coat your cake bites with chocolate.
Whipping Cream
- Combine heavy cream and powdered sugar and whip until it becomes thick. You can do this by hand or with a hand mixer.
Assembly
- Put some raspberry sauce on your plate along with some whip cream. Coat the chocolate bites with melted chocolate if desired and allow to cool. Place chocolate cake bite on top of whipped cream. Drizzle with additional chocolate if desired. Serve and Enjoy!
Notes
Nutrition
I HOPE YOU LOVE THIS RECIPE AS MUCH AS I DO AND I’D LOVE TO HEAR FROM YOU! MAKE SURE TO COMMENT IN THE SECTION BELOW OR TAG @THESALTEDPEPPER WITH YOUR PICTURES!
ARE YOU LOOKING FOR MORE NINJA FOODI RECIPES? I’VE GOT THEM! HERE ARE A FEW OF MY FAVORITES.











Barb
Oh my!!!! I made these for Valentine's Day and they were beyond wonderful!!! My husband was so impressed!!! They were fun to make and your directions were perfect. I did have to pressure cook them an additional 2 minutes because they weren't completely done. But I filled mine all the way up so that's probably why. I also loved the mixture to keep them from sticking. I spread some on the foil to keep it fr sticking since mine were full. Definitely will make these again!!! Thank you!!!!
Louise
I'm so glad you enjoyed them! They are one of my favorites!