
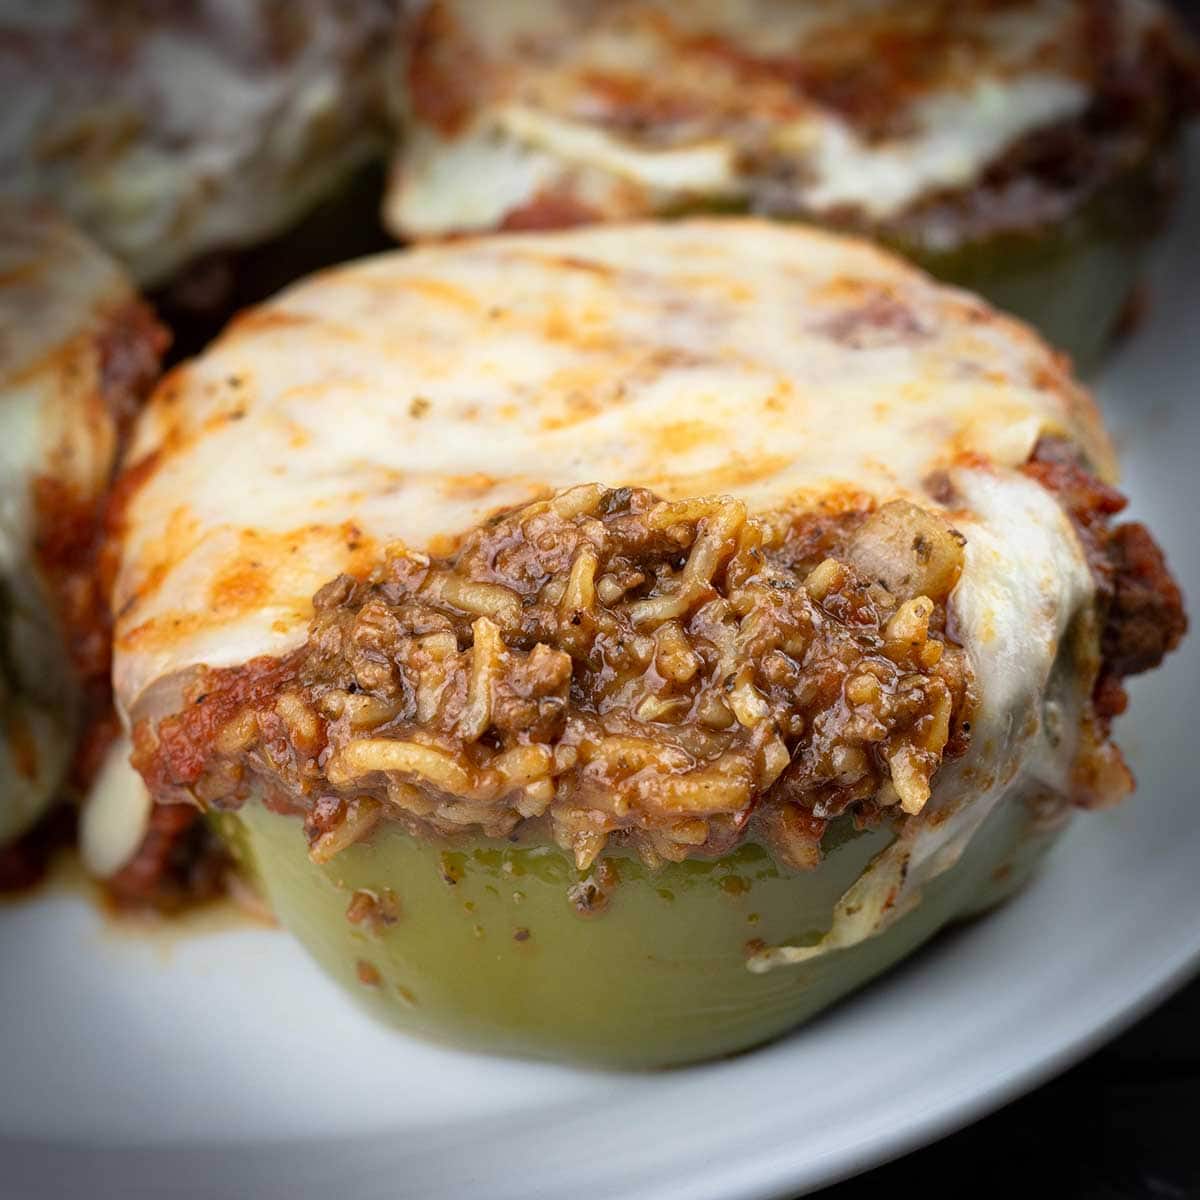
Getting the perfect texture and flavor in stuffed peppers can be a little challenging, but with this technique and the help of the Ninja Foodi Pressure Cooker & Air Crisper, your stuffed peppers will be perfect every time!
Would you like to save this recipe?
If you have tried pressure cooking stuffed peppers, you may have run into issues with the peppers being overcooked, at least that was my experience when trying to create a stuffed pepper recipe that cooked the filling at the same time as the peppers. I've been working on this recipe for over a year and just couldn't get it consistent with using the pressure cooking function, so I switched to steam and it's like magic!
Not only can I get the mixture perfectly cooked in just a few minutes, the peppers turned out perfectly! When you want a quick and delicious dinner, give this one a try! It's a great weeknight meal.
Need More Quick & Easy Ninja Foodi Recipes that are Perfect for Weeknight Meals?
Check out these delicious and super easy recipes that are ready in under an hour!
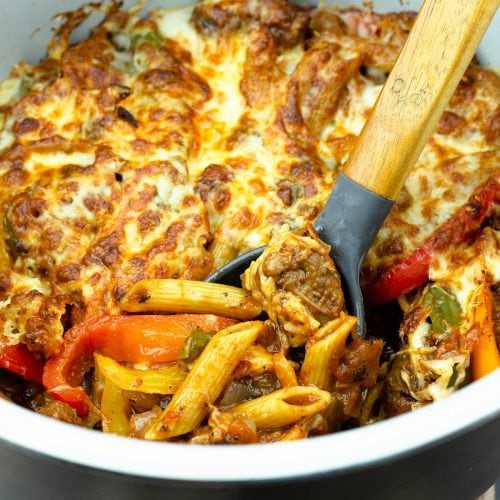
- One-Pot Sausage Peppers & Pasta ~ Pressure Cooker Recipe
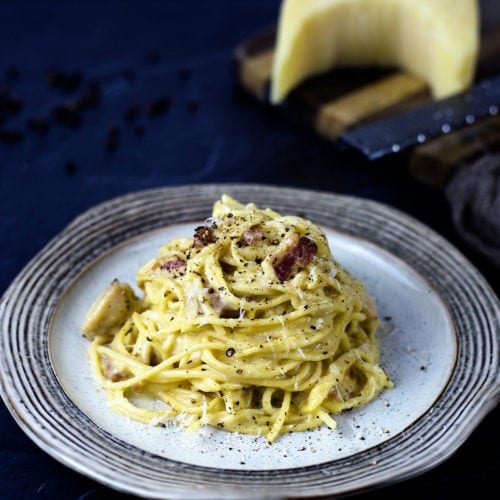
- Quick & Easy Chicken Carbonara ~ Ninja Foodi or Pressure Cooker Recipe
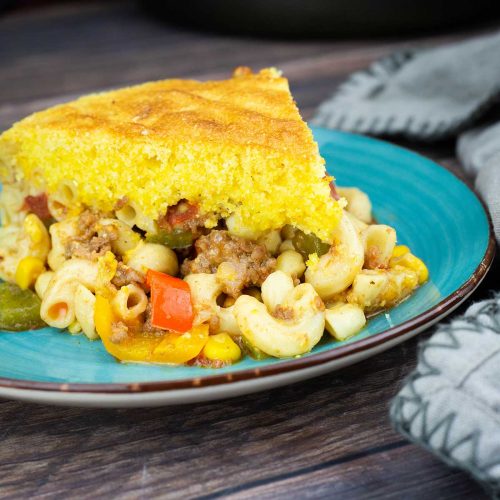
- Southwestern Goulash with a Cornbread Topping
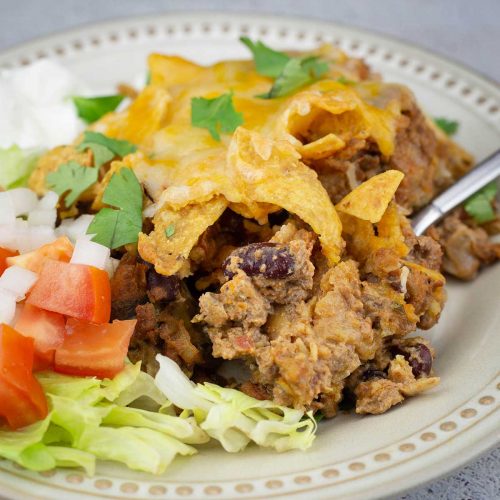
- Walking Taco Casserole
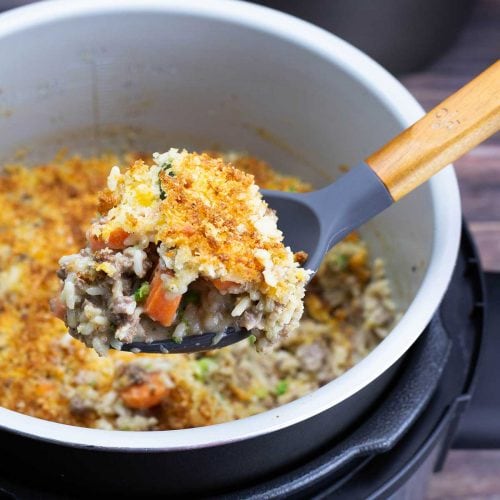
- Cheesy Ground Beef & Rice Casserole ~ Pressure Cooker Recipe
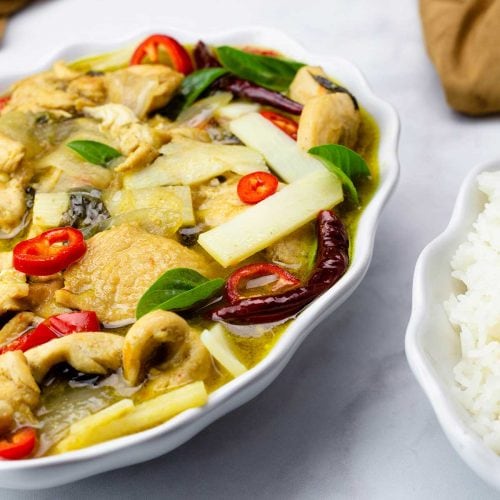
- Green Curry Chicken with Rice ~ One-Pot Meal in the Ninja Foodi
- Easy Gumbo Recipe in the Ninja Foodi / Pressure Cooker
- Easy Shrimp Scampi in the Ninja Foodi
Frequently Asked Questions
Absolutely! I have frozen several batches of these stuffed peppers and they reheat just fine. The peppers will give off more liquid after they are frozen and the texture is slightly different, but they are still good!
I reheat from frozen and either use the steam function or the slow cook function on the Ninja Foodi. To protect the peppers from overcooking when using the steam function, I place them in a pan and cover them with foil. The time they take will depend on the size of the peppers.
Yes, you can, but you will want to make a few changes. Once the peppers and filling are done steaming, remove the peppers and immediately put them in a bowl of ice water to stop the cooking so your peppers don't overcook.
Once they are cool, stuff them with the meat and rice mixture and put them in an airtight container in the refrigerator. I recommend pulling them out of the refrigerator about 30 minutes before baking.
You can reheat them several ways. In the oven, I would use a low temperature around 300℉/150℃ and bake covered until they are warmed through, then add the cheese and broil until brown and bubbly. You can also put them in the Ninja Foodi and bake on 250℉/125℉, covered, until they are warm and then add the cheese and broil. Or, you can use the slow cooker on low to reheat them. I would add a little marinara to the bottom of the slow cooker and slow cook for about an hour or until they are warmed through.
I don't recommend cutting the beef/rice mixture in half because the ingredients are calculated so it takes just long enough to build the steam to cook the peppers. Any changes in the liquid amounts will affect that time and your peppers might be undercooked if you cut the recipe in half. You can cook just one pepper, if you want -- that won't matter, but the filling ingredients should not be cut in half for the best results.
The filling freezes beautifully or it can be turned into different recipes. Skip adding the tomato and try adding some Mexican spices and or salsa and use it to make an air fryer chimichanga or tacos or nachos! By changing the seasonings or adding extra seasonings, you can turn the basic rice/beef mixture into a ton of different things.
It's just Jeff and me here and we split a pepper, so we had leftovers. I froze the peppers and made a quick stuffed pepper soup with some of the leftover peppers. It was amazing!
Ingredients & Substitutions
Peppers
I used green peppers in this recipe, but feel free to use yellow, orange or red peppers. You can also use a combination of colored bell peppers. I would suggest using fresh bell peppers that haven't started to soften or wrinkle, for the best outcome.
Ground Beef
I used 80/20 ground beef in this recipe, but you can use a leaner beef if you want. You can also use a combination of sausage and beef, but make sure to adjust your seasonings since the sausage will already be seasoned. I suggest cutting all the dry seasonings in half, and then, once the meat mixture is cooked, add more to taste.
You can also use ground turkey or chicken or any ground meat in this recipe. I find with turkey and chicken you need to add a little more moisture and seasonings. You can add a touch more beef stock or more Worcestershire sauce, maybe 1-2 Tablespoons.
Rice
I used uncooked white rice in this recipe, not instant or parboiled (although, I think parboiled would be fine). You can use basmati or jasmine rice if you prefer and you shouldn't have to make any changes to the recipe.
You can use leftover rice, but you would have to change the recipe. Since the rice is already cooked, it won't absorb the liquid used in the recipe. You would have to do the recipe in two steps. Omit the beef stock and make the mixture by browning the ground beef, onions, garlic, and seasonings until the meat is fully cooked. Then add in the cooked rice and the marinara sauce, stir and remove from the pot. Add 1 cup of liquid to the inner pot, peppers on the rack, and steam for 4-6 minutes or until the peppers are done to your liking. Remove the peppers and stuff them with the mixture and then proceed with the recipe.
You should also be able to use quinoa in this recipe without any changes, but I haven't tried it that way. Let me know if you try it!
If you wanted to use brown rice, you will need to make some changes because brown rice takes longer to cook and your peppers would overcook if you tried to cook them together. What I suggest for brown rice is to cook it as you normally do. Use the sear/sauté to brown the ground beef, add in the seasonings, garlic, Worcestershire sauce, onion, balsamic vinegar and sauté until the meat is fully cooked. Add in the cooked brown rice and marinara and stir. Heat on medium-high heat until warmed through and the mixture is the consistency you like. Remove the mixture and place it in a bowl. Add one cup of water to the inner pot and steam the peppers on the rack for 4-6 minutes. Then proceed with stuffing the peppers and broiling the cheese on top.
Marinara Sauce
I used my homemade marinara sauce, but you can use your favorite marinara or spaghetti sauce. If you wanted to use plain tomato sauce, that is fine, but you might want to adjust your seasonings to taste after adding it. You can also use diced tomatoes or skip the tomato all together. The meat and rice mixture is delicious without it!
Garlic, Onion, & Seasonings
When it comes to seasonings, they are always customizable to what you like. Feel free to omit, add more, or change anything to best suit you. It will not affect the recipe, with the exception of the Worcestershire sauce and the balsamic vinegar. If you omit or change either of those, make sure to adjust your total liquid accordingly. For example, if you use the Worcestershire sauce, but not the vinegar, then add 2 Tbsps of extra beef stock to make up for it. The liquid amounts in the recipe are calculated so you get the right consistency in your filling. It shouldn't be too wet or too dry.
If you like a little spice, try adding some red pepper flakes!
Cheese
The cheese is completely optional and you can skip the broil stage of the recipe if you don't want to use it. If you do want to use it you can use any type of cheese you like. I used a combination of mozzarella cheese and an Italian blend in the video recipe and slices of provolone in one of my test batches and cheddar cheese in another test batch. All were delicious.
Some other ideas for cheeses would be pepper jack cheese for a little kick or a smoked gouda would be great!
Can I make this recipe in my Instant Pot or Electric Pressure Cooker?
If you have a model of Instant Pot or Electric Pressure Cooker that has a true steam function, then yes. You would follow the recipe as written. A true steam function will be when you use the steam function and the pressure release valve is set to VENT. Most IP's require you to seal the valve during the steaming process. This essentially means you are pressure cooking.
In my experiences with trying to use the pressure cooking function on the Ninja Foodi, I could never get the rice cooked perfectly without undercooking or overcooking the peppers.
I'm not saying it can't be done, but I never figured out the perfect timing.
What I would suggest trying is following the recipe as written and steaming for only 2 minutes with quick release of the pressure. If the peppers are done to your liking, but the rice isn't done, use the sear/sauté to finish cooking the rice. If the rice is done, but the peppers aren't, remove the mixture and add 1 cup of water and steam the peppers for another minute or so.
Please let me know if you try it and how it worked best for you and I can update the post with your timings.
Can I Make this Recipe Stovetop?
I have not tested the recipe that way, but it should be fairly easy to convert. If you have a large pot with a steaming rack, then start your rice/beef mixture off the same way. Add in an extra ¼ cup of beef stock (to allow for extra evaporation) for a total of 1½ cups and then turn the heat to a simmer. Place the peppers on the steaming rack and cover with a lid. Simmer until the rice is cooked through and the peppers are done to your liking. If the rice mixture is done before your peppers are as soft as you like, you can remove the mixture and add some water and continue to steam the peppers or stuff the peppers and bake on a low setting in the oven (covered) until the peppers are your desired doneness.
You can also use your favorite method of cooking stuffed peppers and use the same ingredients as I do for the filling.
Adjustments for Different Sizes of the Ninja Foodi
There are three sizes of the Ninja Foodi, the 5qt, 6.5qt, and the 8qt. You can make this recipe in all three sizes, but there are some modifications that should be made, based on size.
If you have the 6.5qt Ninja Foodi, follow the instructions as written. The one thing I have noticed about the older model (two-tone grey/black exterior) versus the newer stainless steel exterior models is the pin pops up and stays up in the newer models more often than it does in the older models when using the steam function.
I tested the recipe in the newer model and based my steam times on that model. If you have an older model and your pin doesn't pop up during the steam time, I would wait 1-2 minutes AFTER the countdown stops to remove the lid. This will allow the peppers to finish cooking and account for the time it takes for the pin to drop on the newer models.
For the 8qt model, I would add 1-2 additional Tablespoons of beef stock to account for the increased volume of steam that needs to build in the larger Foodi. I would also cut the steam time back to 4 minutes the first time you make the recipe. Because there is more volume in the 8qt, the time it takes to build the steam and start the countdown may be longer and you don't want to overcook the peppers.
The 5 qt model is a little tricker because it doesn't come with a rack or a way to raise the peppers above the mixture. This doesn't mean you can't make the recipe, but the easiest way will be to do it in two steps.
First, make the filling as instructed in the recipe and I don't think you need to make any changes to the recipe or liquid amounts. Remove the filling and set aside.
Add 1 cup of warm or hot (not boiling) water to the inner pot and put your prepared peppers in the basket and steam for 5-6 minutes. Then stuff the peppers and proceed with the recipe using the basket for broiling.
If you have a rack that fits in the 5qt, you can try to do it all at once IF you have enough clearance for the peppers. Please let me know if you try it using the 5qt and how it works for you!
Tips for Making Ninja Foodi Stuffed Peppers
No matter how many times a recipe is tested, things can still happen when you go to make it at home. I don't want you to panic and I definitely don't want you to waste food, so here are a few tips so you have a great outcome!
- Make sure you don't let the filling boil in the pot for too long before adding the peppers and getting the lid on to steam. If the beef stock is too hot when you go under steam, you will build the steam too fast and your peppers will not be cooked properly.
- Take your peppers out of the refrigerator at least 30 minutes before making the recipe. Cold peppers will take longer to cook, so having them room temp will allow them to cook in the 5-minute steam time.
- Don't panic if your rice isn't cooked all the way, but your peppers are. I haven't had this happen, but it could happen. Simply remove the peppers and look at the rice/meat mixture. If there is a good amount of liquid left, then use the sear/sauté to simmer until the liquid is absorbed and the rice is cooked. If there isn't any liquid left, but the rice is hard, add about ¼ cup of beef stock and simmer until the rice is done. Add more liquid, in small increments if needed.
- Don't panic if your peppers aren't cooked like you like them, but the rice/beef mixture is. Simply remove the mixture from the pot and add 1 cup of HOT water and go back under steam for 1 minute. You can go back under the steam function for 1 minute at a time using the same water until the peppers are done to your liking.
How to Make Stuffed Peppers in the Ninja Foodi
This is one of my favorite recipes. Not only is it bursting with flavor, it's ready in a matter of minutes! Because it's ready in just minutes, I really recommend to have all your prep done ahead of time (which is hardly any to begin with) AND have all your ingredients measured out before you start.
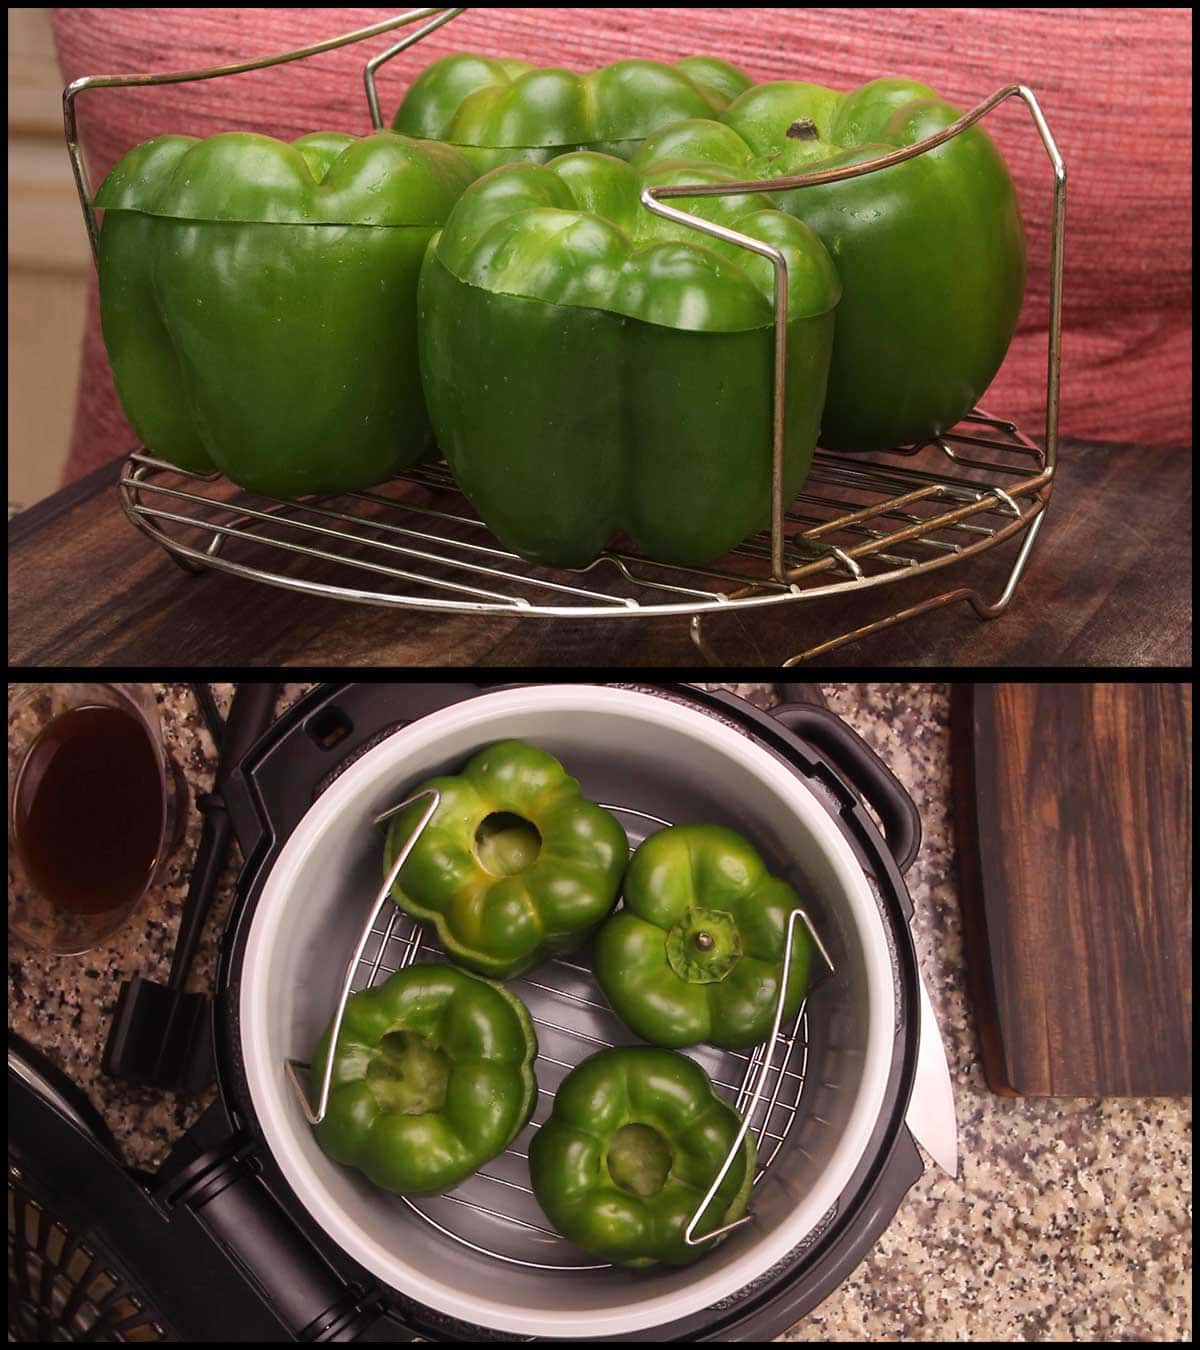
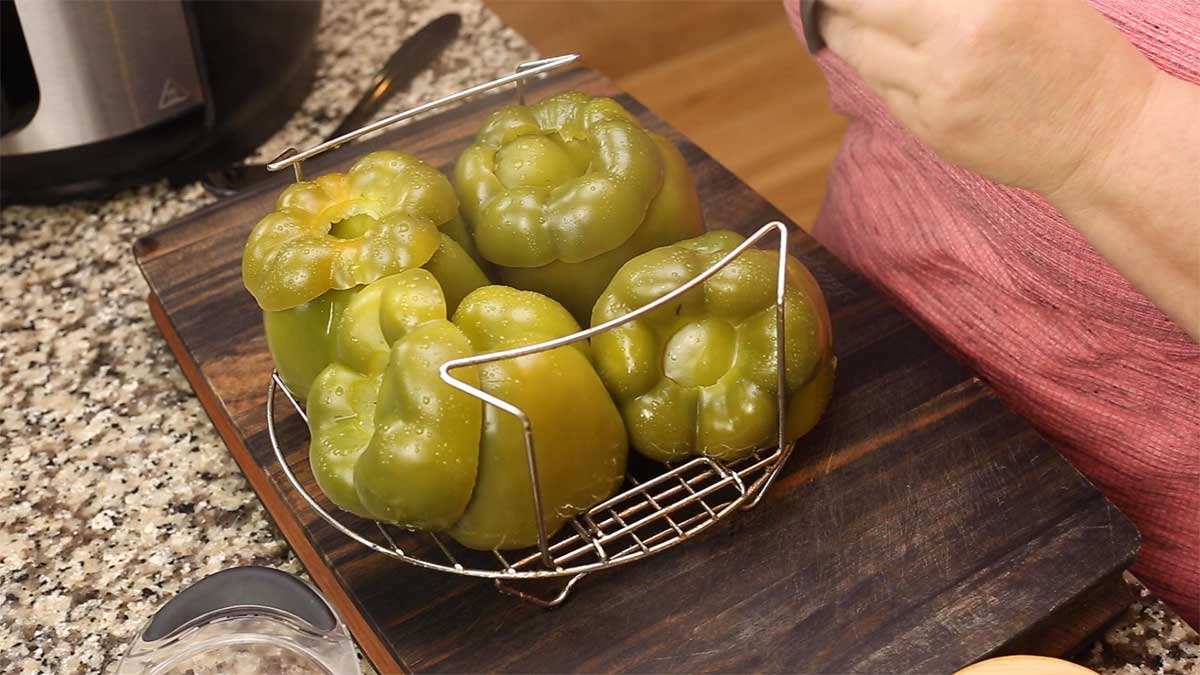
The first thing I do is make sure my peppers will fit on the rack and in the Foodi. You can use up to 6 small peppers or 4 large peppers and they will usually fit just fine on the reversible rack. If you have a different rack, definitely test them out to make sure they fit.
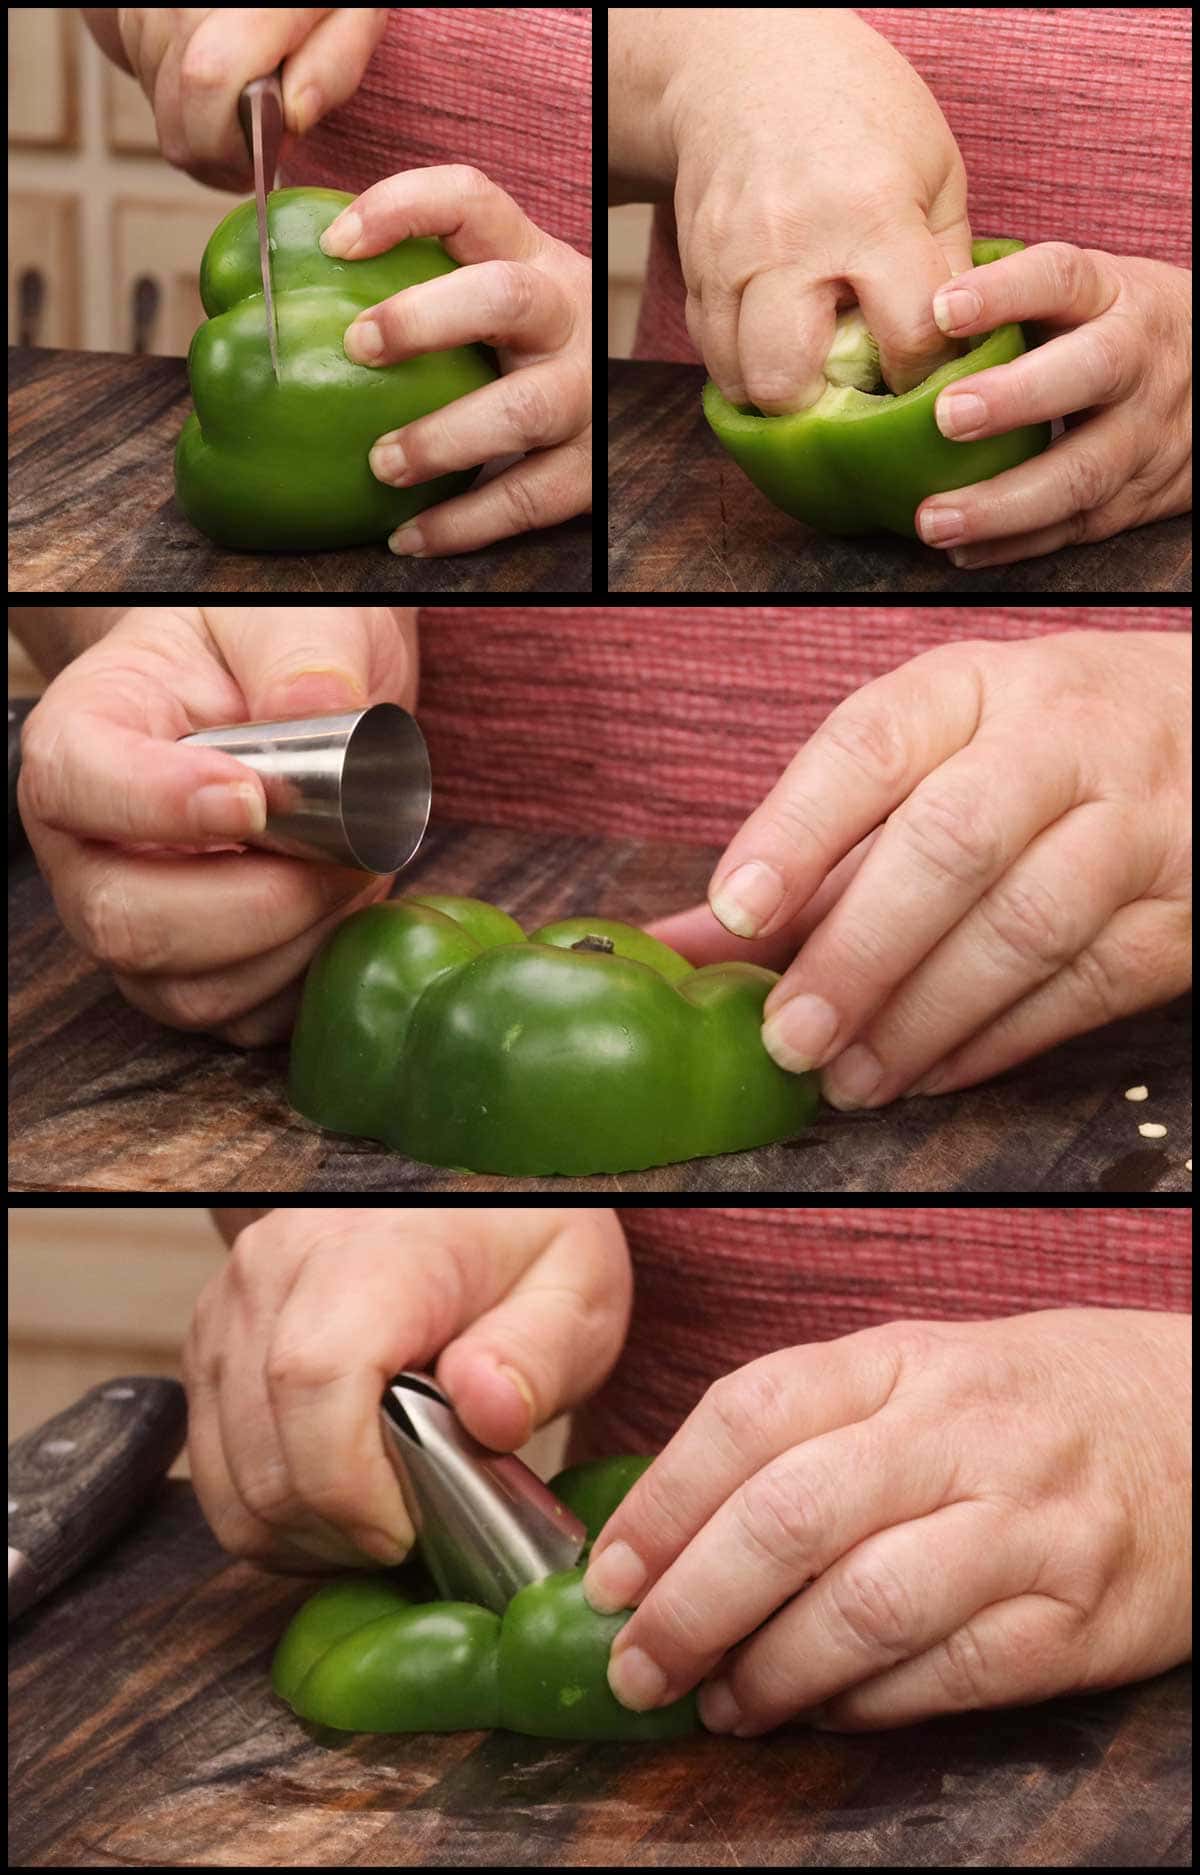
I also like to make sure the peppers sit flat on the rack. If yours aren't sitting flat, you can shave off a tiny bit of the bottom like shown in the picture below. Make sure you don't remove too much or you will end up with a hole in the bottom of your pepper and the mixture might leak out.

I finish the pepper prep by cutting the top off of the pepper just about ¼" below where the indent of the side of the pepper starts. Then I clean the seeds and white ribs from the inside of the pepper.
I remove the center stem with a large decorating tip or a small biscuit cutter. It makes it super easy to just remove the stem and leave most of the pepper top. You can also use a paring knife. I also clean out the top of the pepper.
Once the peppers are prepped, place them upside down on the rack (so they don't fill with liquid during the steaming process), place the cut off tops on top of the bottom of the pepper that is facing up and set aside. Do this now, don't wait until the mixture is ready to go under steam because everything moves quite fast from here on.
Mince the garlic and chop the onion into about ¼" dice and set aside.
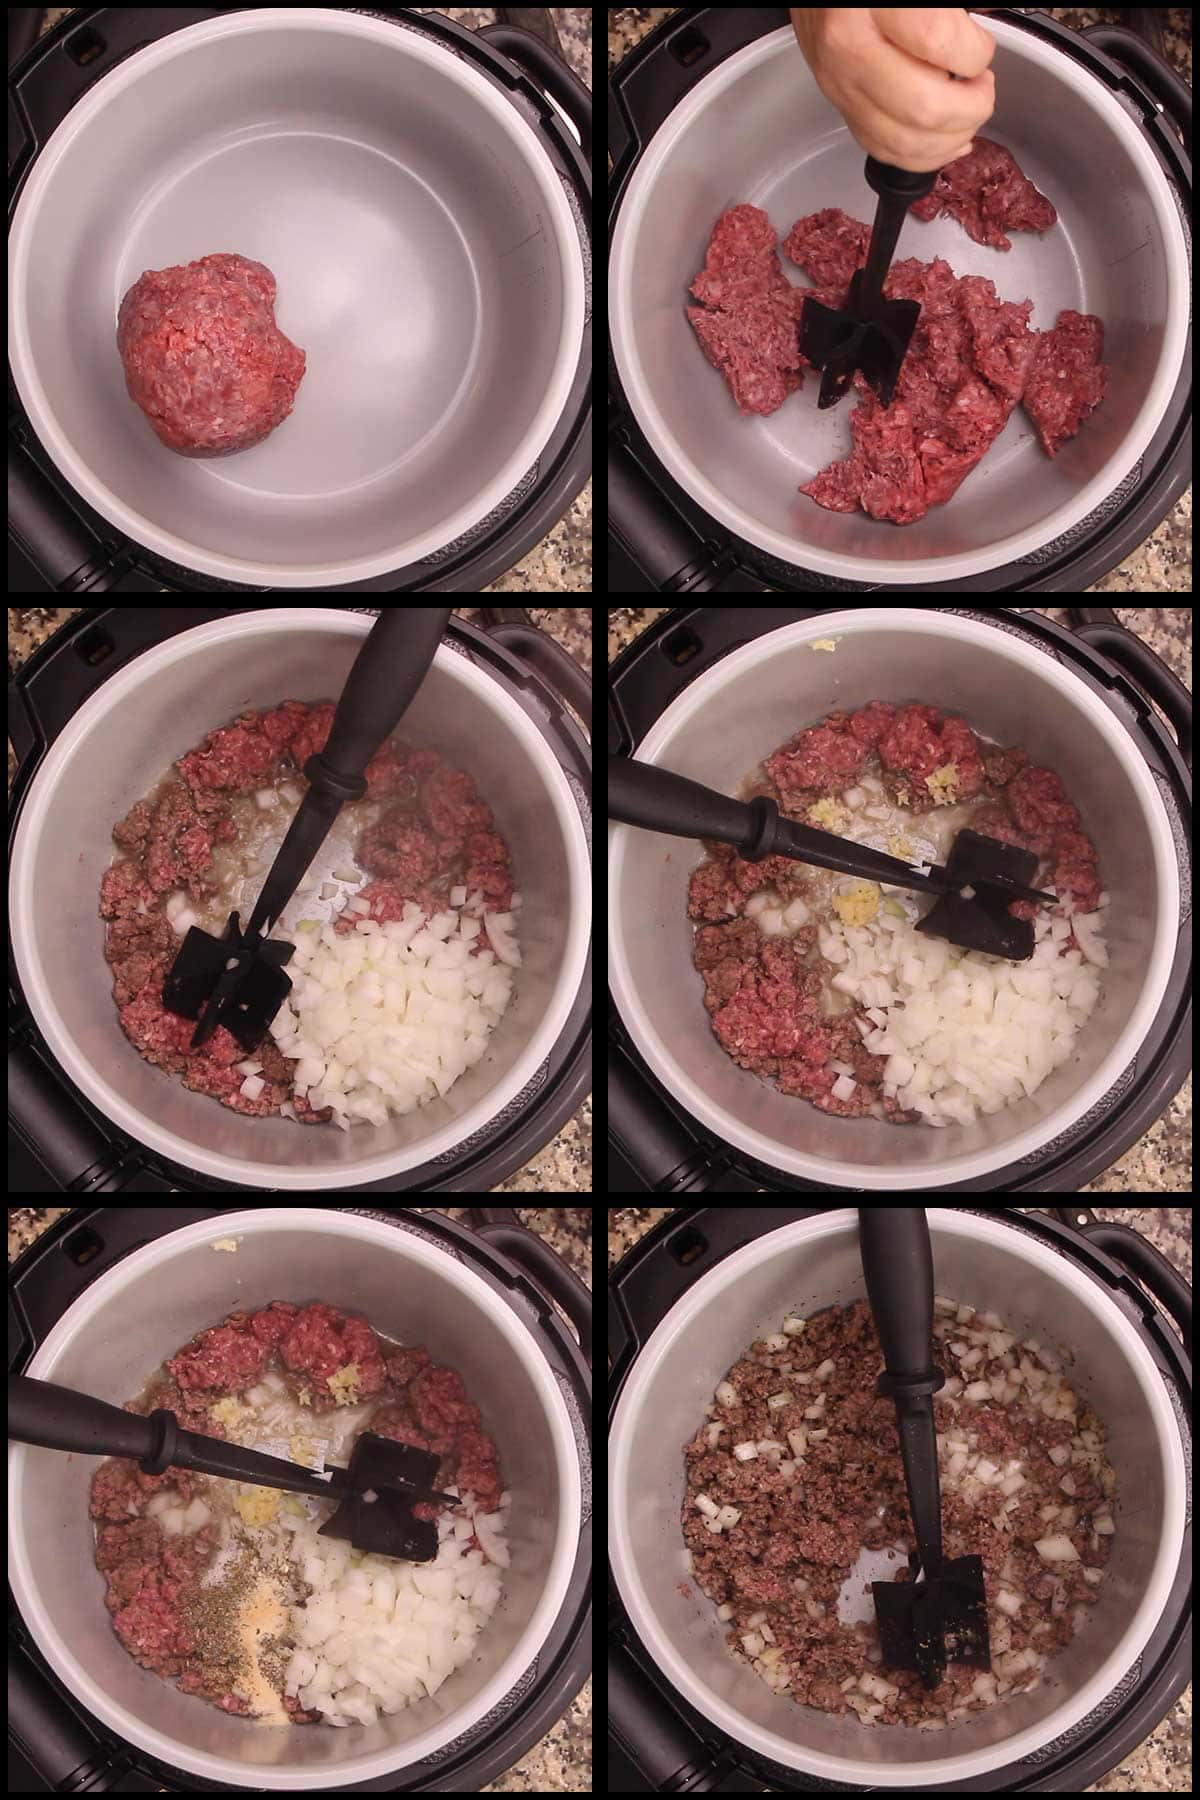
Turn the sear/sauté on high and when the inner pot is hot, add the ground beef. If you are using a leaner meat, you may want to add a little oil. Once the ground beef starts to brown, break it up into small pieces and add the onion, garlic, and seasonings. I like to use my Mix 'n Chop for this, but a wooden spoon works great as well.
Continue to sauté the beef, onions, garlic until the beef is cooked about 50-75% of the way. This takes about 5 minutes or so.
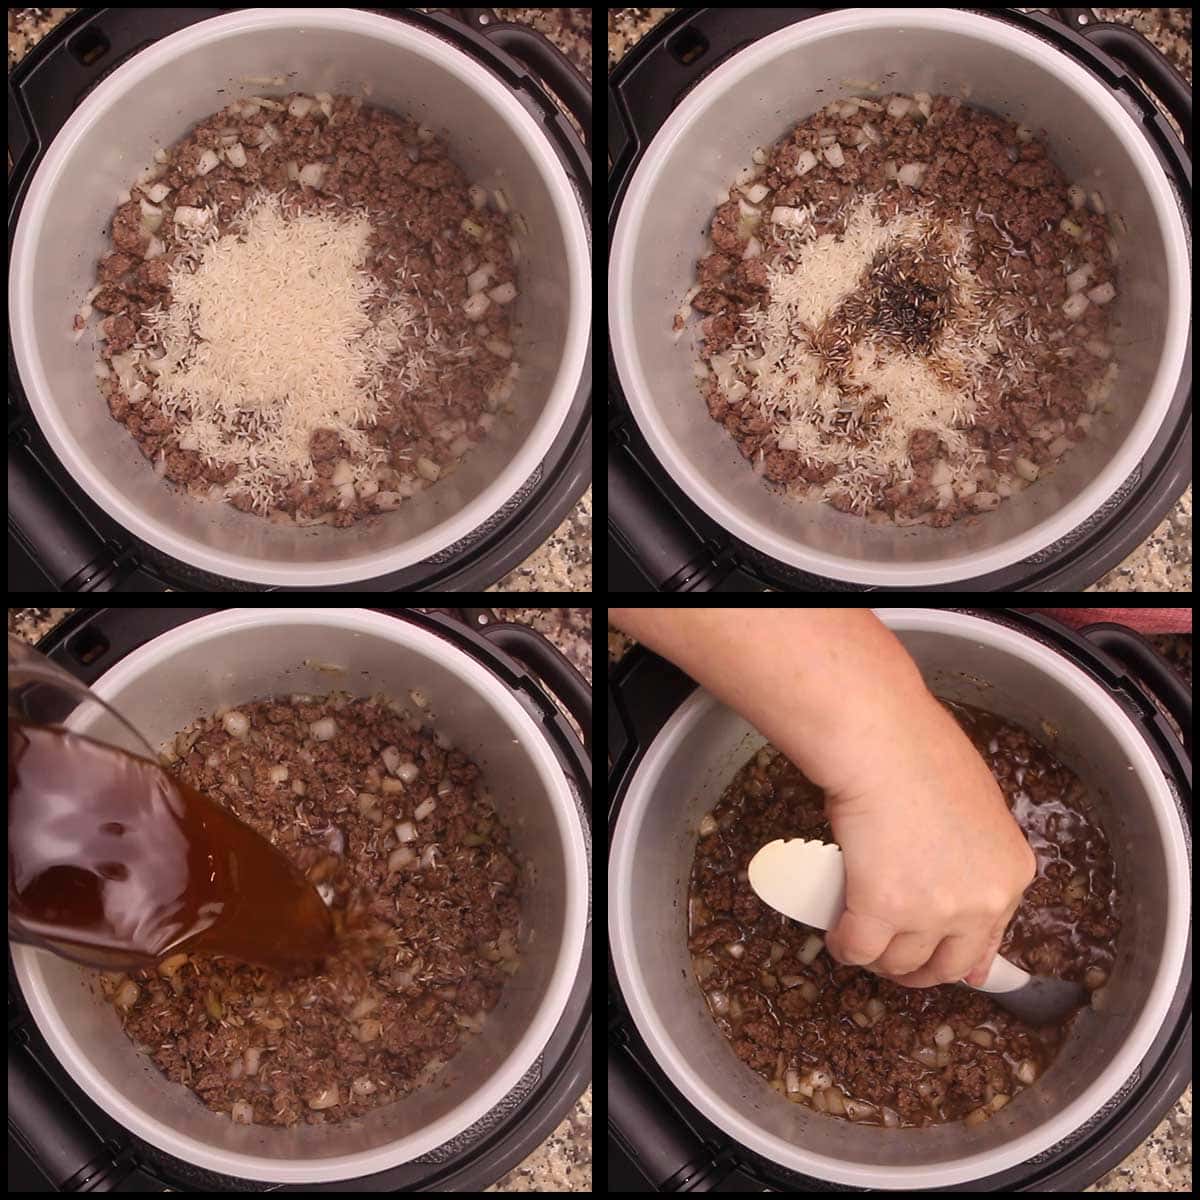
Add in the rice, Worcheshire sauce, balsamic vinegar and stir. Deglaze the pot with the beef stock and scrape the bottom to make sure nothing is stuck on the bottom.
Immediately place the rack with the peppers in the Ninja Foodi above the beef/rice mixture and put on the pressure lid. Turn the pressure valve to "VENT" and select the steam function for 5 minutes. This timing has worked perfectly every time and results in a tender pepper that can be cut with a fork. If you like your peppers firmer, then decrease the steam time to 3-4 minutes.

When the time is up, wait for the pin in the back to go down if it is up. If it isn't up, I would wait 1-2 minutes before opening the lid so the peppers are fully cooked. If you like your pepper firmer, remove the lid immediately once the pin goes down.
Remove the rack with the peppers and set aside to cool enough for handling. If you aren't going to stuff and bake your peppers right away, place them in a bowl of ice water to stop the cooking process.
Check the filling to make sure the rice is cooked all the way and there isn't too much liquid left. If for some reason the rice isn't as tender as you like and there is more than 1-2 Tablespoons of liquid left, use the sear/sauté on low and constantly stir while the rice absorbs the remaining liquid or cover the pot and let the filling sit for another 5 minutes.
Add in the marinara sauce and stir. Taste the filling and adjust the seasonings if needed. If you don't want to use the pepper tops, dice them up and add them to the filling.
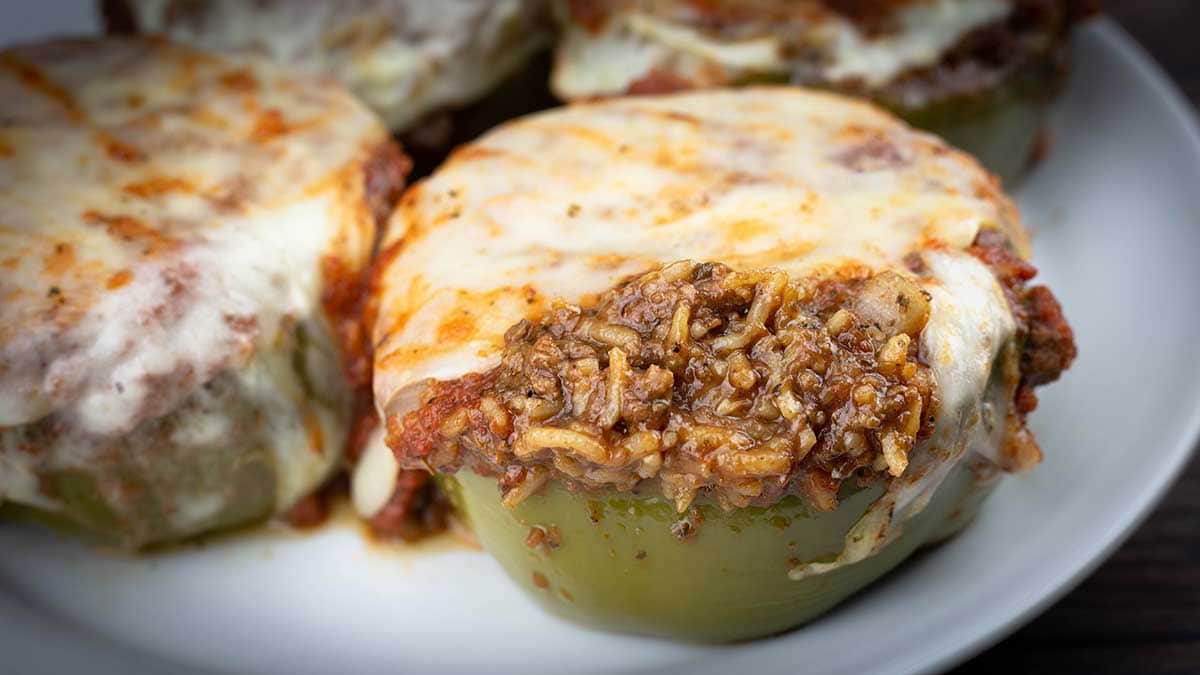
Scoop the filling into the peppers and top with shredded or sliced cheese of choice. Place the pepper top on top, if using. Set the rack back into the Ninja Foodi (no need to clean the pot first) and add some extra marinara on top if desired. Use the crisping lid on broil (grill in the UK) and set the time for 10 minutes. Check the peppers after about 4 minutes and broil until the cheese is melted and starting to brown. This usually takes about 7-8 minutes total.
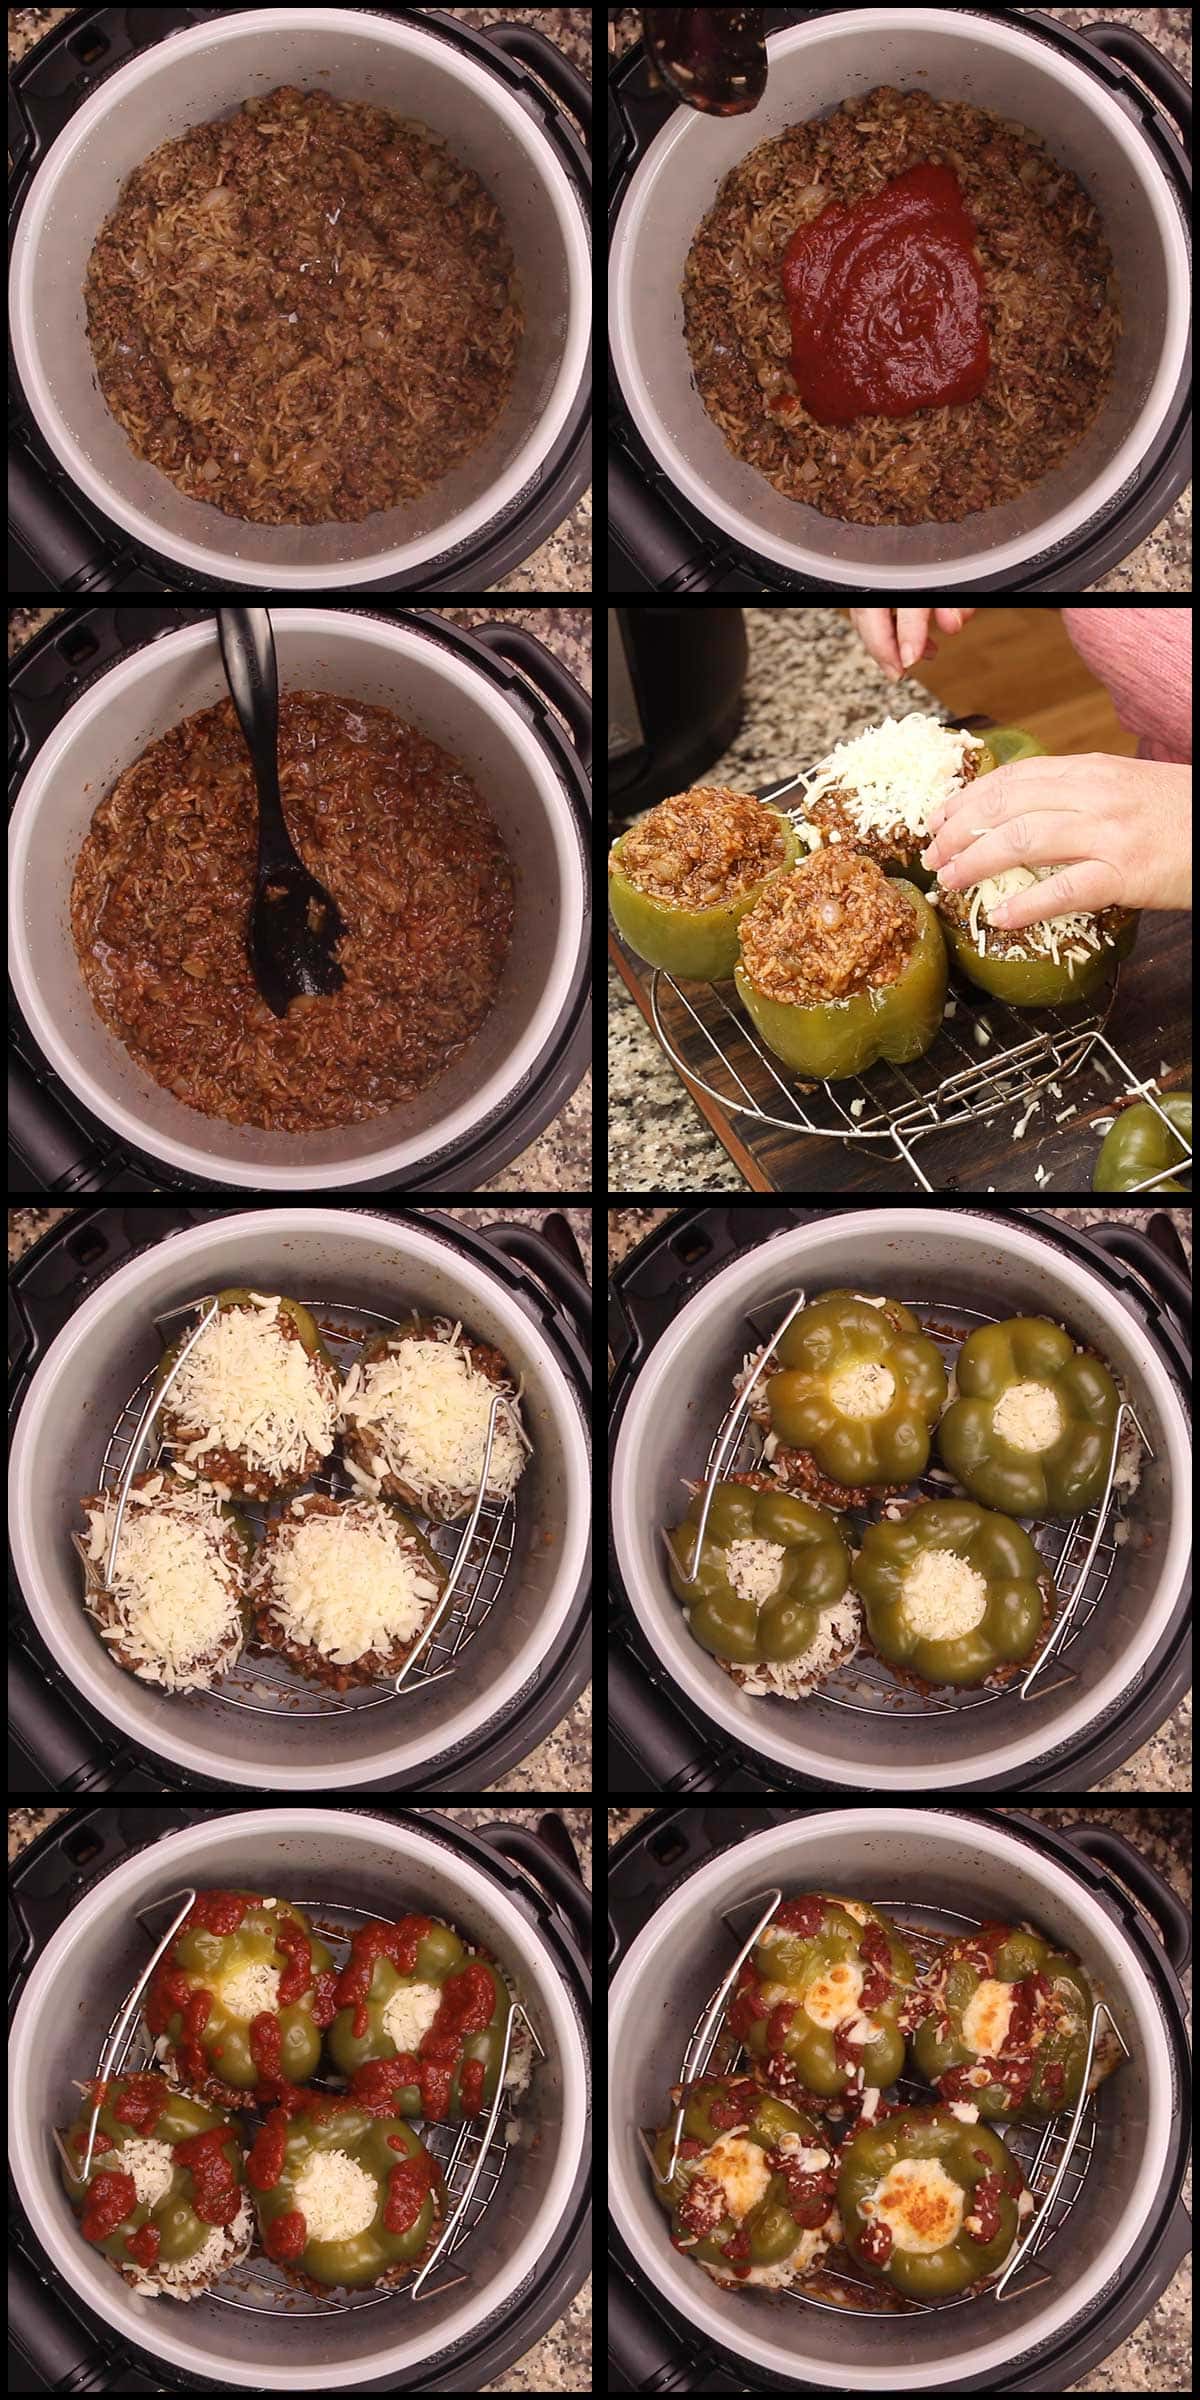
Remove the rack from the Foodi and serve the peppers! Enjoy!


Ninja Foodi Stuffed Peppers
Ingredients
Seasoning Blend
- 1½ teaspoons fine grind sea salt
- 1 teaspoon Italian seasoning
- 1 teaspoon dried basil
- 1 teaspoon garlic powder
- 1 teaspoon onion powder
- ½ teaspoon black pepper
For the Stuffed Peppers
- 4-6 bell peppers
- 1 pound ground beef
- 1 onion about 1 cup diced ¼" dice
- 2 teaspoons minced garlic about 2 large cloves
- ½ cup white rice uncooked
- 3 Tablespoons Worcestershire Sauce
- 2 Tablespoons Balsamic vinegar
- 1¼ cups beef stock
- 1¼ cups homemade marinara or spaghetti sauce (divided in recipe)
- 1 cup shredded cheese of choice
Would you like to save this recipe?
Instructions
- This recipe moves very fast, so I strongly recommend having the peppers and other ingredients prepped and measured out before you start sautéing ground beef. Dice the onion into about ¼" dice. Mince 2-4 garlic cloves until you have about 2 teaspoons. Make sure your peppers will fit on the rack in the low position with enough clearance for the pressure lid to go on. Cut the tops off of the peppers and remove the stems from the middle of the tops. See post for tips if needed. Place the peppers upside down on the rack with the tops resting on the bottom of the pepper to avoid liquid from collecting in the pepper during the steam time.
- Turn the Ninja Foodi on and select the sear/sauté function on high. Add the ground beef and break it up into small pieces. Once the ground beef starts to brown, add the diced onion, minced garlic, and the seasoning blend. Stir and continue to sauté until the ground beef is 50-75% cooked and broken up into small pieces for the filling. This takes about 5 minutes.
- Add the uncooked rice, Worcestershire sauce, balsamic vinegar and stir to combine. Deglaze the pot with 1¼ cups of beef stock and make sure to scrape the bottom of the pot to remove anything that may be stuck on the bottom.
- Place the rack in the low position with the peppers into the pot over the meat/rice mixture and put on the pressure lid. Turn the pressure valve to VENT and select the steam function for 5 minutes.
- When the time is up and the pin has dropped, immediately open the lid and remove the rack with the peppers. Set the peppers aside to cool so you can handle them.
- Make sure the rice is cooked the way you like it and that there isn't too much liquid left. If you need to cook the rice longer, use the sear/sauté function on low or put the pressure lid back on and let it sit for 5-10 minutes. Add 1 cup of marinara or spaghetti sauce and stir. Taste and adjust seasonings as needed.
- Fill the peppers with the meat/rice mixture and top with shredded cheese if using. Place the tops back on the peppers and lower the rack back into the Ninja Foodi inner pot. No need to clean the pot before this step.
- Pour additional marinara over the peppers if desired and lower the crisping lid. Select broil (grill in the UK) for 10 minutes. Check the peppers after about 4 minutes to see how the cheese is doing. Continue to broil until the cheese is melted and beginning to brown. This usually takes about 7-8 minutes, but keep an eye on it.
- Remove the rack with the peppers from the Foodi and Serve. Enjoy!
Notes
Nutrition
About the Recipe Author, Louise Long
Louise is a full-time recipe creator and food blogger @ The Salted Pepper. She has over 30 years of experience with cooking and recipe development. She owned a restaurant for several years and was a full-time RN until retiring to blog full-time.

She published her first cookbook in the Fall of 2018 and is very interested in writing several more.
Louise is also the creator of an online Ninja Foodi Pressure Cooking Course with over 100 instructional step-by-step videos. People absolutely rave about the course and all the value they have received from it.
Louise has several very active Facebook groups that help people with the basics of cooking and learning more about the appliances they love.
Ninja Foodi Pressure Cooker & Air Crisper 101
Ninja Woodfire Outdoor Grill & Smoker
Louise is also a YouTube creator and you can find most of her recipes in video format on The Salted Pepper YouTube channel.
She is very responsive to messages and eager to help in any way she can. Get more Information about Louise & contact information
I WOULD LOVE TO SEE WHAT YOU ARE COOKING UP IN YOUR KITCHEN! TAG ME @THESALTEDPEPPER ON YOUR FAVORITE SOCIAL MEDIA PLATFORM WHEN YOU MAKE A DISH!
BE SURE TO FOLLOW THE SALTED PEPPER RIGHT HERE ⇓⇓⇓⇓⇓
Linda Clouse says
I used the two lid model.
Louise says
That is the one I used, so I really don't have an answer for why your steam time wasn't long enough.
Linda says
Made these stuffed green peppers for the first time yesterday and I have to say they were the best I have prepared in my life and I've been cooking a long time. Only problem I had was with the 5 minute steam time indicated (I followed the recipe exactly). I use an 8 qt. Ninja Foodi Deluxe Tendercrisp Pressure Cooker. When the 5 minute steam time was complete there was too much liquid remaining, the bell peppers were blanched but not close to being ready to stuff, and the rice was not ready. I continued to steam everything another 10 minutes (checking at 8 minutes) and the additional 10 minutes did the trick. So, in my particular model of appliance a steam time of 15 minutes was perfect. Thanks for the wonderful recipe. It will be in the monthly rotation of meals from now on at my house.
Louise says
Thanks for the feedback about timing! Were you using a two lid 8 qt or the one lid? I'm glad you got it to work and enjoyed the recipe!
Jim says
Hi, out of curiosity did you wait until the pin dropped after the 5 mins was up?
Traci Daniel says
I used ground Italian sausage and it was great. Also layered mozzarella in peppers. Very good, thanks!
Louise says
I'm glad you enjoyed it!
Dara says
Another delicious recipe! Thank you, Louise, you are saving my university student life once again.
Louise says
YAY! I'm so glad you enjoyed it!