
- Ninja Foodi or Instant Pot pressure cooker
- Shallow tray or dish (for the seasoned flour)
- Cutting board and knife
- Measuring Cups and Spoons
- Silicone spatula or wooden spoon
- Cheese grater
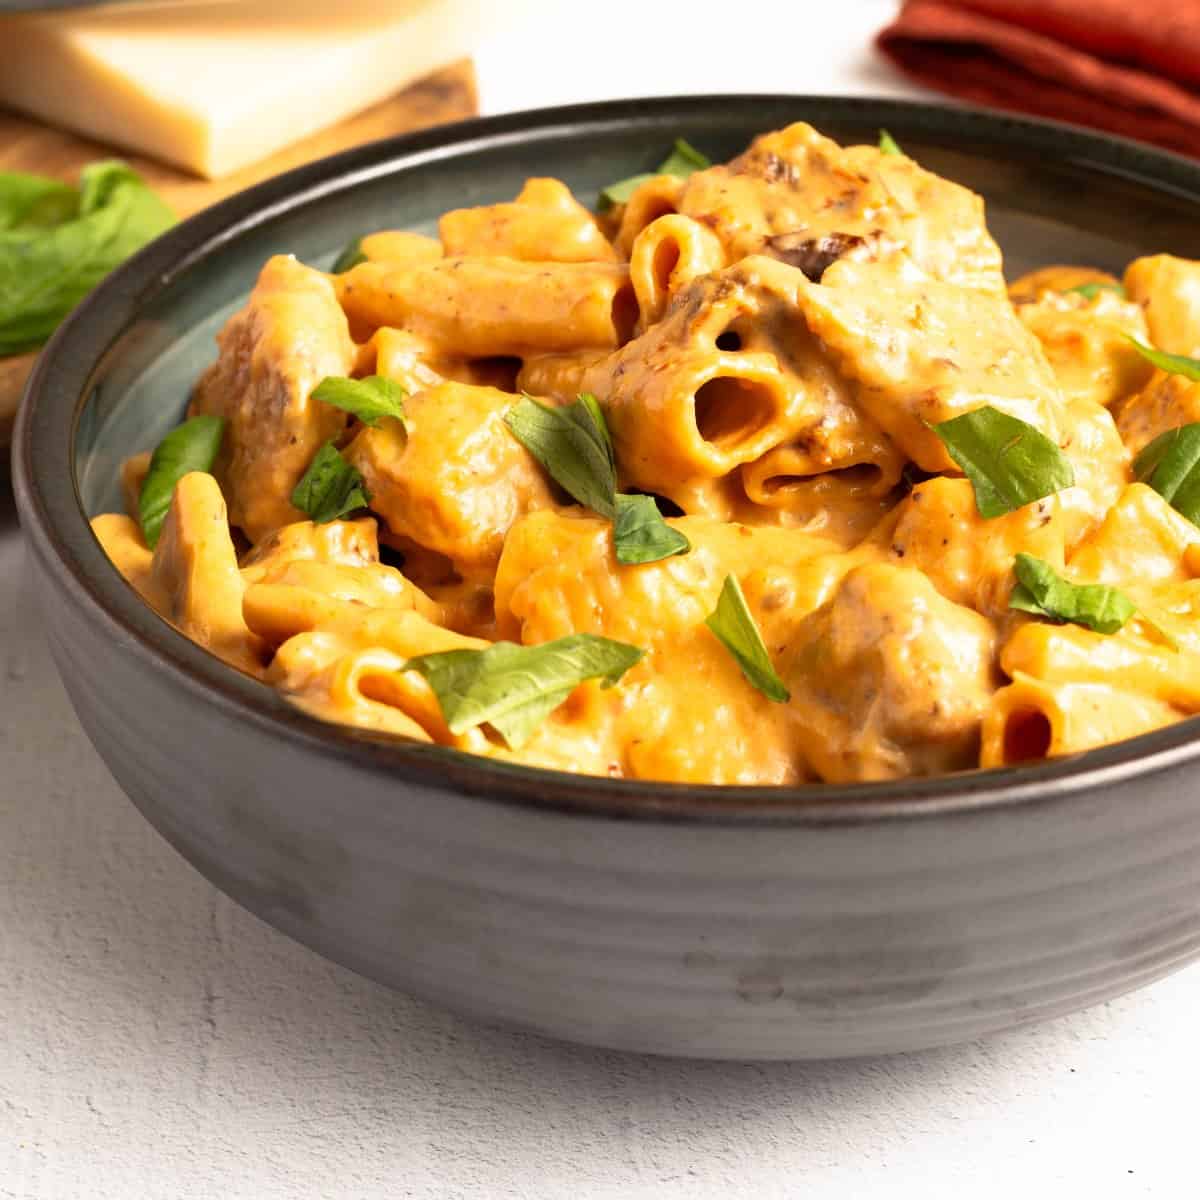
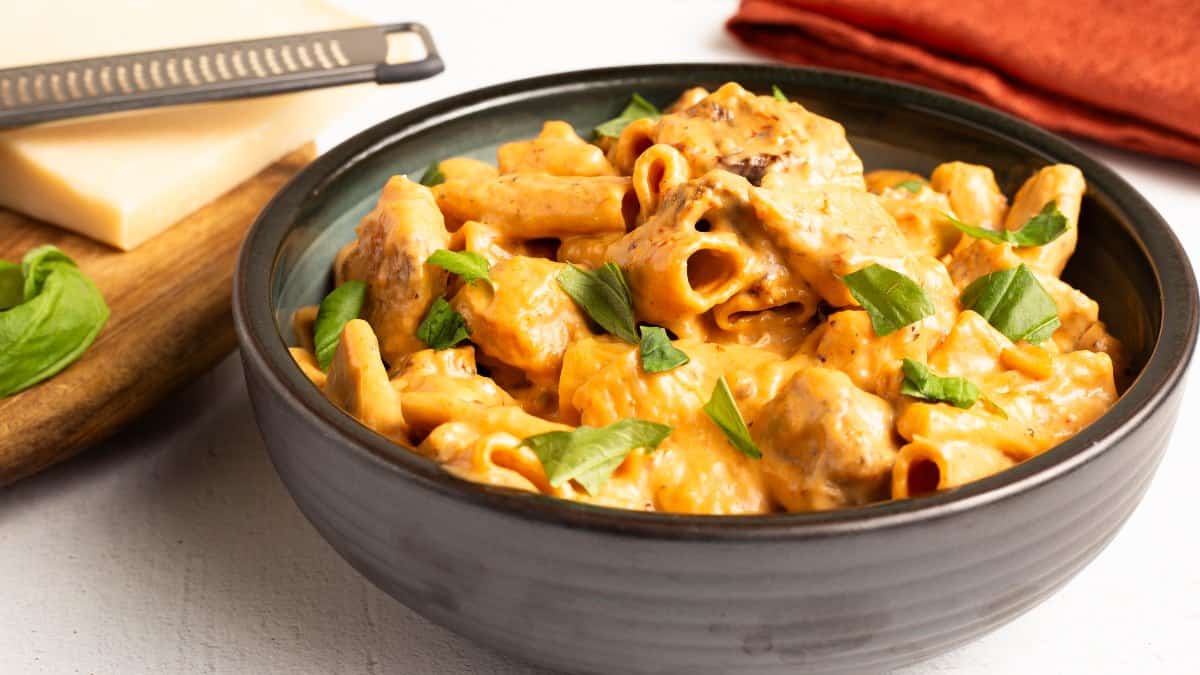
If you have heard everyone raving about Marry Me Chicken but have never made it yourself, this is the recipe to start with. This One-Pot Marry Me Chicken is made entirely in the Ninja Foodi or Instant Pot pressure cooker, and it turns tender chicken, rigatoni, and a creamy sun-dried tomato sauce into one delicious weeknight dinner. It is my lighter twist on the classic, and it comes together in a single pot with just 3 minutes of pressure cook time.
The traditional version of this dish can be very rich, so I put a Louise twist on it to balance everything out. A splash of dry sherry brightens the creamy sauce, sun-dried tomatoes bring a gentle sweetness, and a little red pepper flake keeps it all in balance. The chicken is cut into cubes and cooked right along with the pasta, so you get a complete, comforting meal without a sink full of dishes.
Would you like to save this recipe?
I have tested this one to get the pasta perfectly al dente and the chicken tender and juicy, and the secret is all in the technique. Once you see how easy it is to build the whole dish in one pot, this creamy chicken pasta is going to earn a permanent spot in your busy weeknight dinner rotation. Let me show you exactly how to make it.
Suggested Kitchen Tools for Marry Me Chicken
- Ninja Foodi or Instant Pot pressure cooker
- Cutting board and sharp knife
- Shallow tray or dish (for tossing the chicken in the seasoned flour)
- Measuring cups and spoons
- Silicone spatula or wooden spoon (for deglazing and stirring)
- Cheese grater
Ingredients & Substitutions
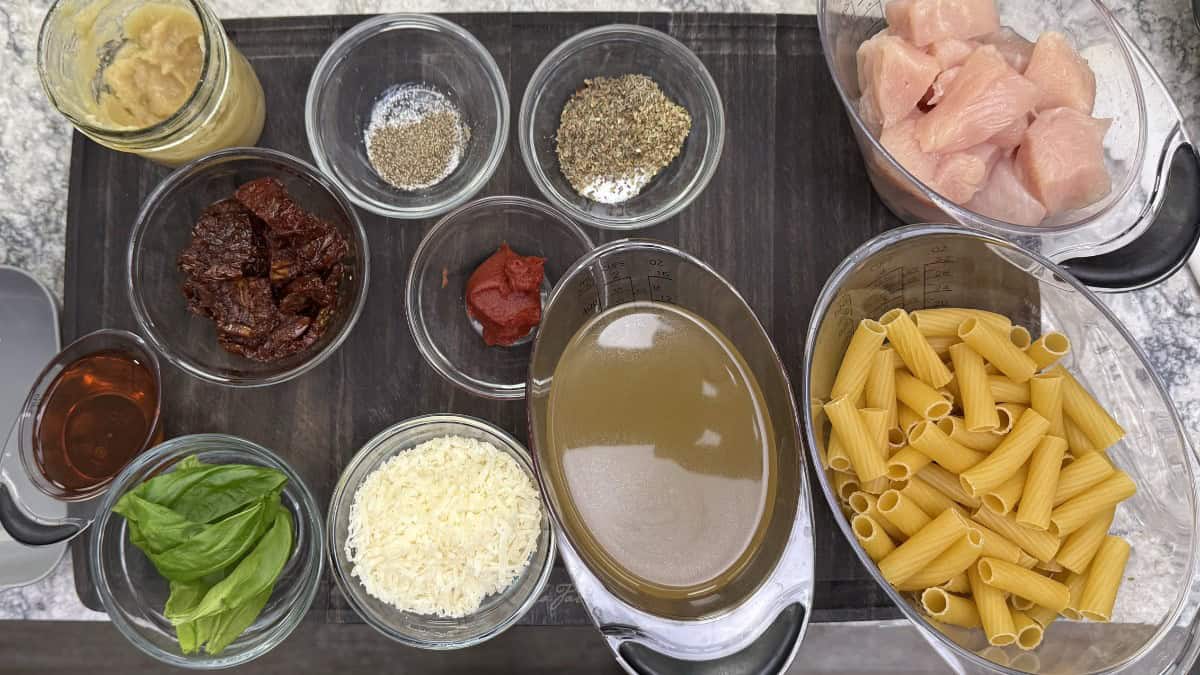
This creamy Marry Me Chicken uses simple ingredients that come together into a rich, restaurant-worthy sauce. Let's take a closer look at each one.
Chicken Breast
Used in Recipe: One pound of boneless, skinless chicken breast, cut into 1½-inch cubes and seasoned with ¼ teaspoon each of salt and pepper.
What it Does: The chicken is the star of the dish. Cutting it into evenly sized cubes lets it cook through in the short pressure cook time without drying out, and seasoning it directly gives it flavor from the inside out.
Substitutions: Boneless, skinless chicken thighs can be used for an even more forgiving, juicy result. Keep the cube size the same so everything cooks evenly.
Seasoned Flour and Italian Seasonings
Used in Recipe: A quarter cup of all-purpose flour seasoned with ½ teaspoon fine-grind sea salt, ¼ teaspoon red pepper flakes, 1 teaspoon dried basil, ½ teaspoon dried oregano, and ¼ teaspoon dried thyme leaves.
What it Does: Tossing the chicken in the seasoned flour adds an Italian seasoning flavor and helps the finished sauce turn out a little thicker. The red pepper flakes are not spicy here, they simply balance the sweetness of the sun-dried tomatoes.
Substitutions: The flour coating is completely optional and the dish cooks fine without it. Use thyme leaves rather than ground thyme, which is much stronger, and leave out the red pepper flakes if you prefer no heat at all.
Sun-Dried Tomatoes and Reserved Oil
Used in Recipe: Three ounces of sun-dried tomatoes, drained and chopped (about ½ cup), plus 2 tablespoons of the oil reserved from the jar for searing.
What it Does: Sun-dried tomatoes are what set Marry Me Chicken apart from any other creamy pasta. Their gentle sweetness balances the rich cream sauce, and using their flavorful oil to sear the chicken means none of that flavor goes to waste.
Substitutions: Use an 8-ounce jar of sun-dried tomatoes packed in oil, which is enough for two batches. If you only have dry-packed sun-dried tomatoes, use olive oil for searing and rehydrate the tomatoes in a little warm water first.
Onion, Tomato Paste, and Garlic
Used in Recipe: One sweet onion in a ¼-inch dice (about 6 ounces or 1 cup), 1 tablespoon of tomato paste, and 2 tablespoons of garlic paste.
What it Does: The onion and garlic build the savory base of the sauce, while a little tomato paste adds a pop of concentrated tomato flavor that rounds everything out.
Substitutions: I use my own homemade garlic paste made from cooked garlic, which is milder. If you are using raw garlic paste, about 1 tablespoon is plenty, or use 2 to 3 teaspoons of minced garlic. Roasted or smashed garlic also work beautifully for a different flavor. If you have not made your own roasted garlic before, my Ninja Foodi Roasted Garlic recipe walks you through it start to finish and you will always have a jar ready for creamy pasta dishes like this one.
Dry Sherry, Chicken Stock, and Rigatoni
Used in Recipe: A quarter cup of dry sherry for deglazing, 1½ cups of chicken stock or broth, and 3 cups (8 ounces) of rigatoni.
What it Does: The sherry is my favorite twist here. It brightens and balances the rich cream sauce, the same way we use it back home in Maryland to balance our cream of crab soup. The stock cooks the pasta right in the pot so it soaks up all that flavor.
Substitutions: If you would rather not cook with wine, skip the sherry and use an extra ¼ cup of chicken stock. Penne works in place of rigatoni. If you are using a stainless steel insert or an 8-quart pot, use 1¾ cups of stock to account for extra evaporation.
Heavy Cream, Parmesan, and Fresh Basil
Used in Recipe: One cup of heavy cream, 2 ounces of grated Parmesan cheese (about ½ cup), and fresh basil for garnish.
What it Does: The cream and Parmesan come together at the end to create that signature creamy sauce, and the Parmesan adds the salty finish the dish needs. Fresh basil brings both flavor and a pop of color to a dish that can otherwise look a little muted.
Substitutions: Use ½ cup of cream for a lighter, less saucy version. Grana Padano can stand in for Parmesan. If you use a milder, less salty cheese, you may want to add a small pinch of salt at the end. Tear the basil rather than chopping it to keep it vibrant and fresh looking.
How to Make Marry Me Chicken in the Pressure Cooker
From start to finish, this one-pot dinner takes about 10 minutes of prep and cooks in just a few minutes under pressure, plus the time for the pot to come to pressure and a short natural release. Here is everything you need to know.
Season the Chicken and Coat It in Flour
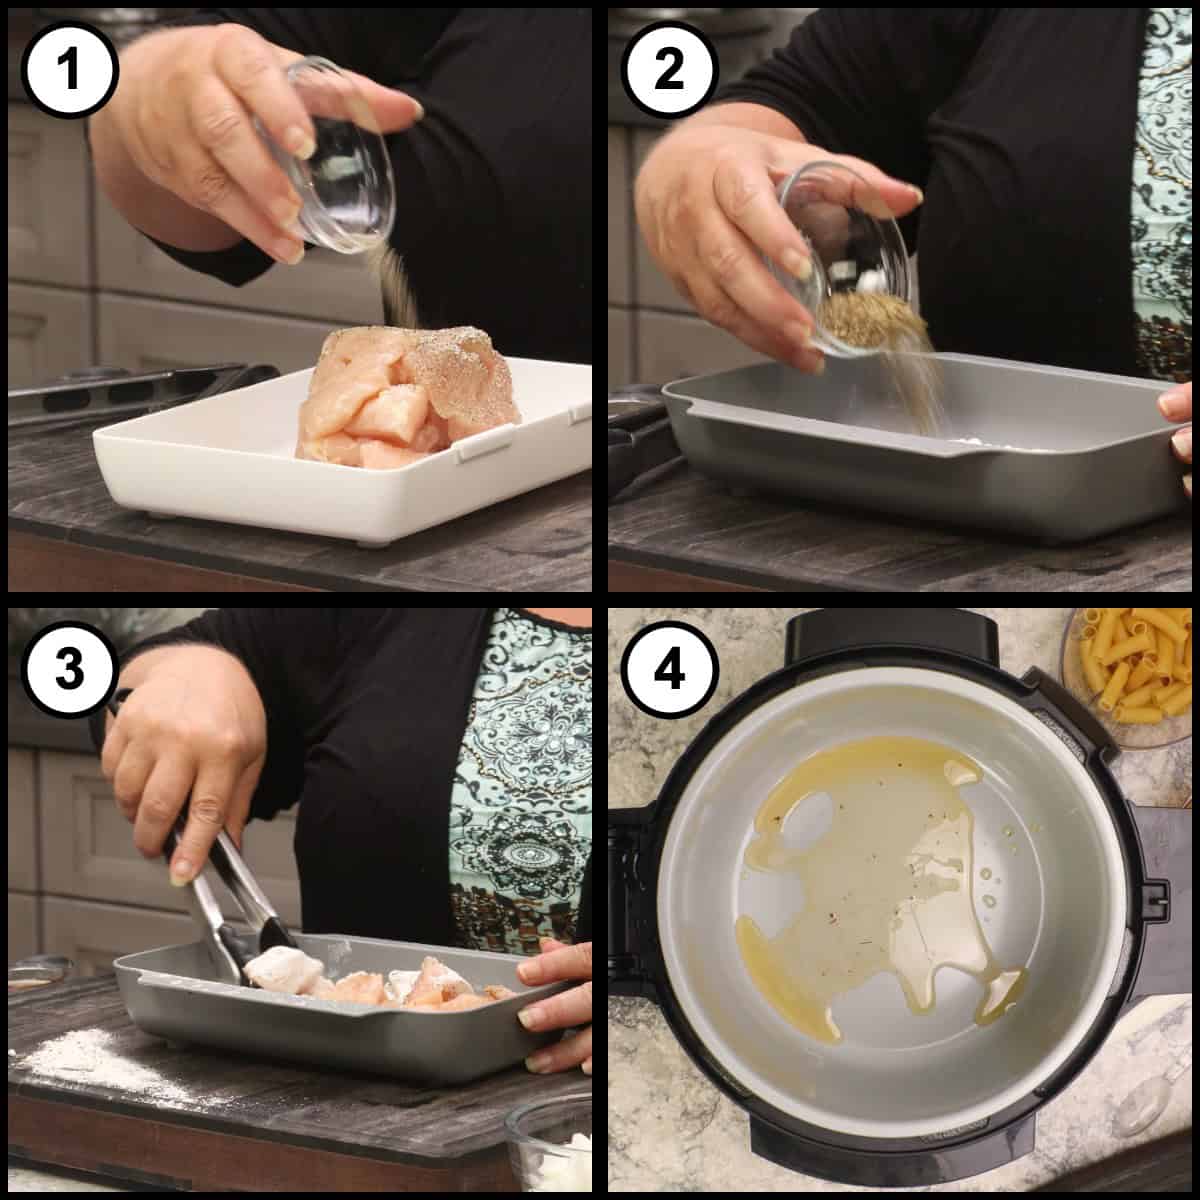
- Cut 1 pound of chicken breast into 1½-inch cubes and season with ¼ teaspoon salt and ¼ teaspoon pepper.
- In a shallow tray, stir together ¼ cup flour, ½ teaspoon sea salt, ¼ teaspoon red pepper flakes, 1 teaspoon dried basil, ½ teaspoon oregano, and ¼ teaspoon thyme leaves.
- Drain the sun-dried tomatoes and reserve the oil. Chop 3 ounces of the tomatoes and measure 2 tablespoons of the oil.
- Dice 1 sweet onion into a ¼-inch dice and measure the tomato paste and garlic paste.
- Measure the sherry, chicken stock, rigatoni, heavy cream, and grated Parmesan. Tear a little fresh basil for serving.
Toss the seasoned chicken cubes in the seasoned flour until lightly coated, discarding any excess flour.
Sear the Chicken and Add the Onion
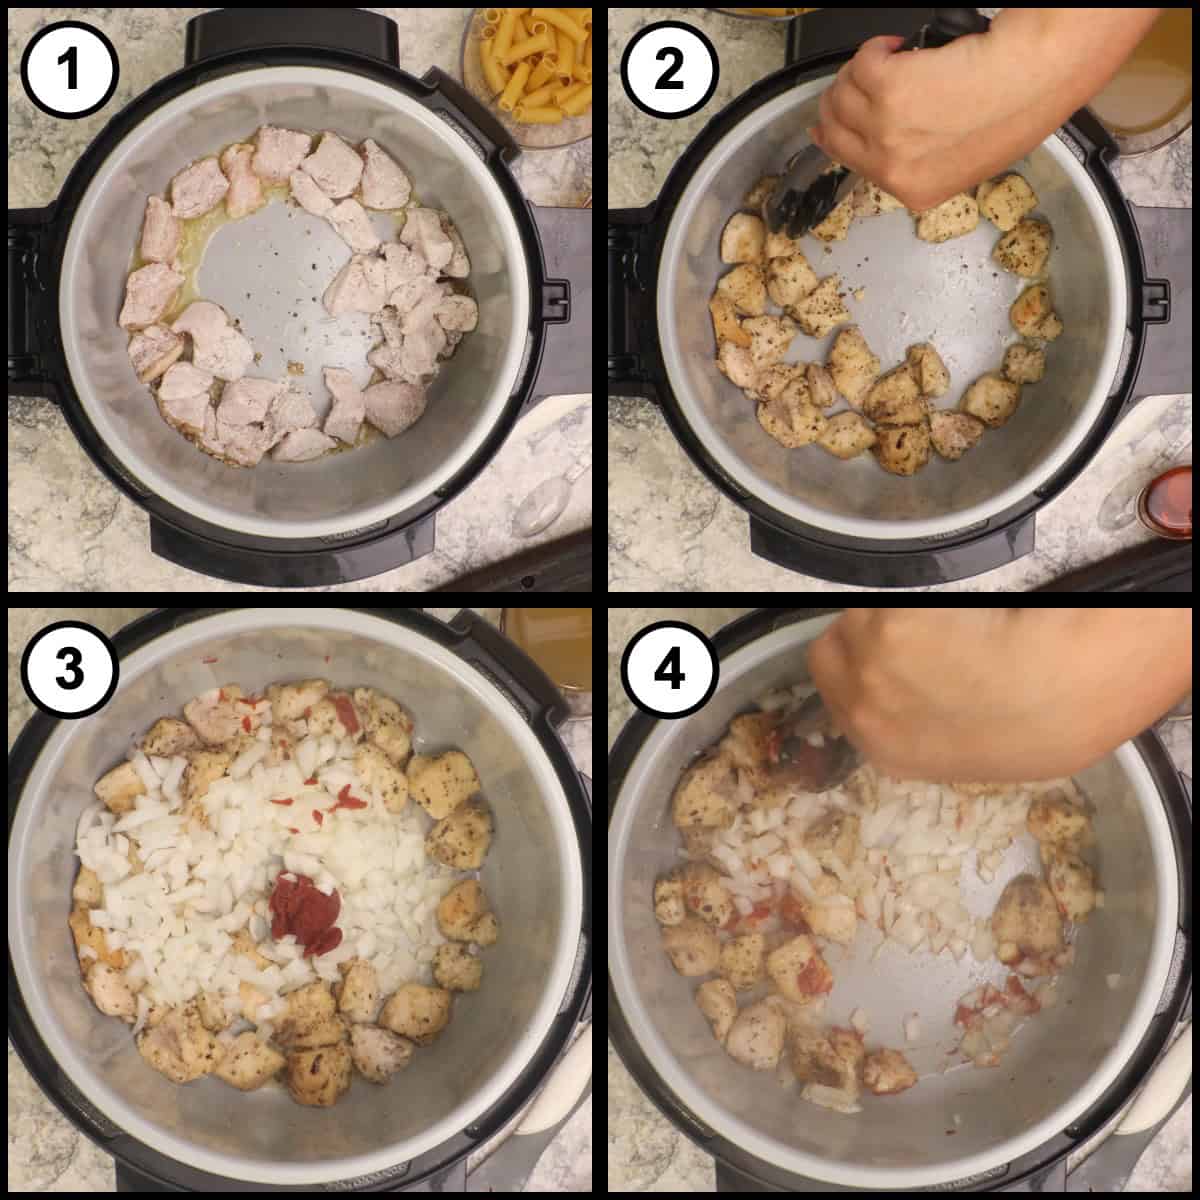
Set the pressure cooker to high Sear/Sauté and add 2 tablespoons of the reserved sun-dried tomato oil to heat. Lay the chicken around the edges of the pot, right over the oil rather than in the center where the flour can stick and scorch. Sear for about 2 minutes, then flip. The chicken does not need to cook all the way through here, it finishes under pressure. Add the diced onion and 1 tablespoon of tomato paste and sauté for about a minute.
Add the Garlic and Deglaze with Sherry
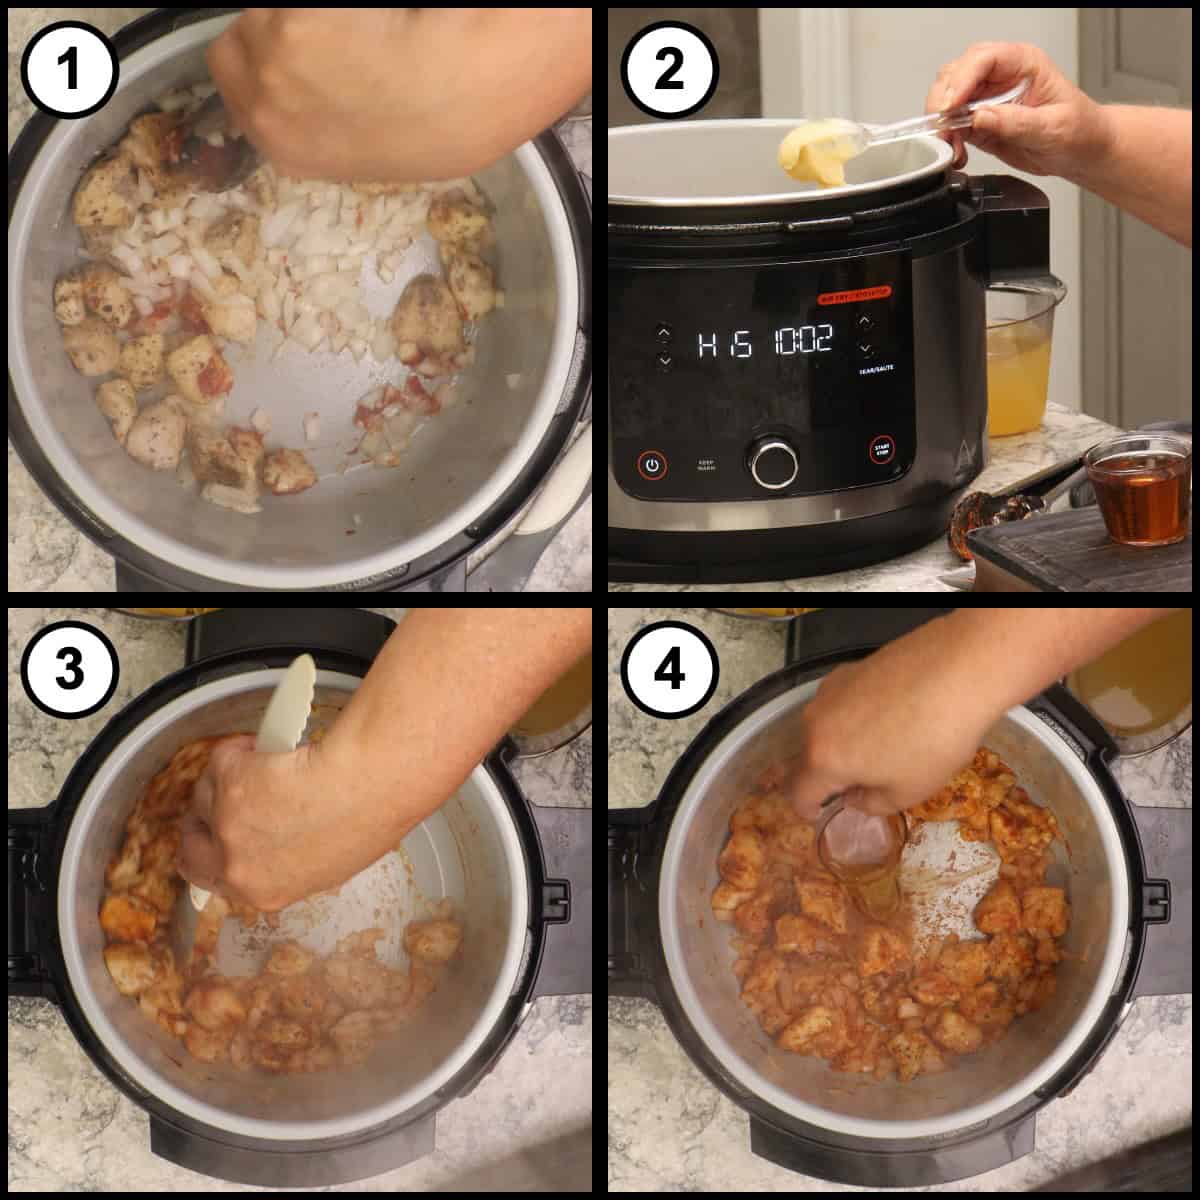
Stir in 2 tablespoons of garlic paste. Deglaze the pot with ¼ cup of dry sherry, using your spatula to scrape up every dark bit stuck to the bottom. This step is important, because those browned bits are full of flavor but can trigger a burn notice if they stay stuck to the pot.
Quick Tip
Always scrape the bottom of the pot completely clean when you deglaze. Those dark, flavorful bits are not burnt, but if any stay stuck to the bottom they can cause the pot to give you a burn notice once it tries to come to pressure.
Add the Chicken Stock and Pasta
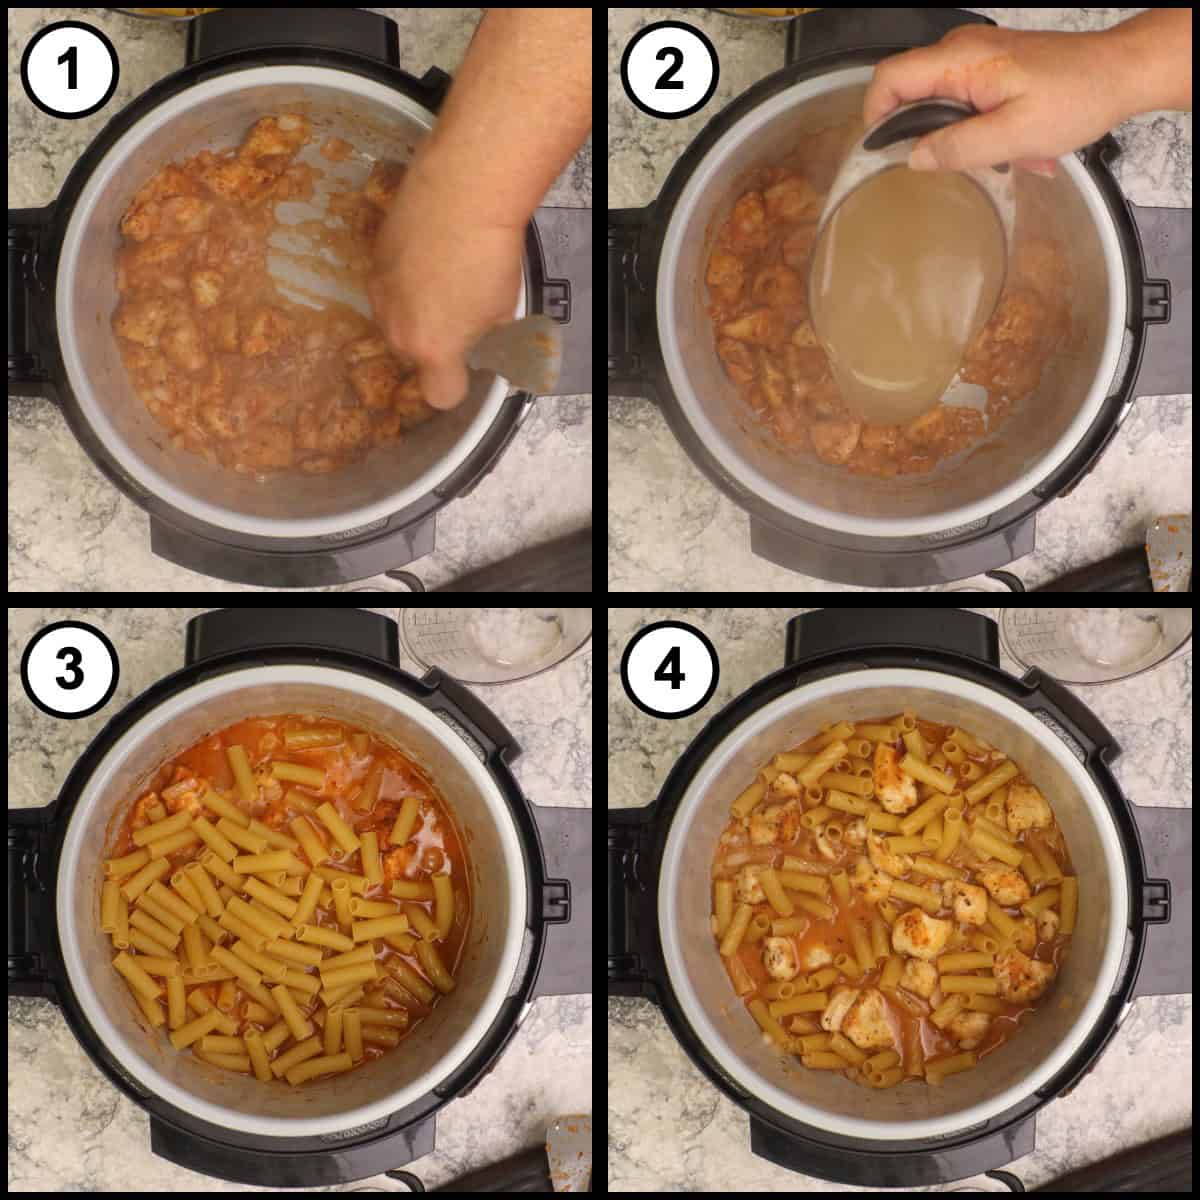
Pour in 1½ cups of chicken stock (use 1¾ cups for a stainless steel insert or an 8-quart pot). Add 3 cups of rigatoni and stir. Make sure the pasta is mostly submerged, poking it down as needed.
Add the Sun-Dried Tomatoes and Pressure Cook
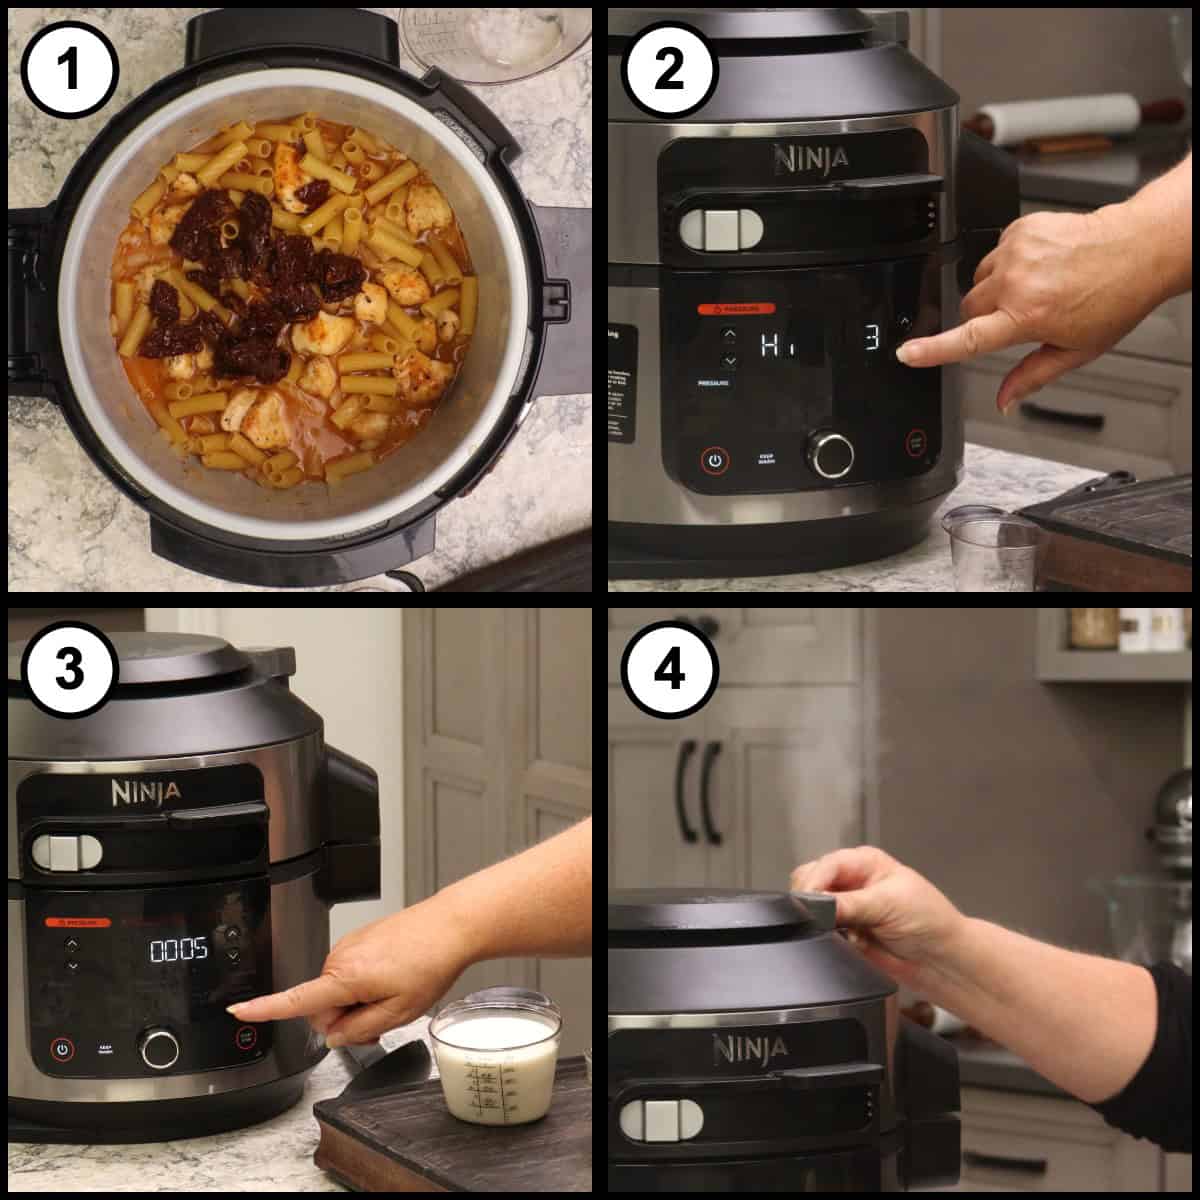
Scatter the chopped sun-dried tomatoes over the top. Cancel Sear/Sauté, lock the lid, and set the valve to sealed. Pressure cook on High for 3 minutes. The pot will take 5 to 8 minutes to come to pressure.
Quick Tip
For serving right away, use 3 minutes of pressure cook time with a 5-minute natural release. If you know the dish will sit on Keep Warm for longer than 30 minutes before serving, use 2 minutes with an immediate release instead so the pasta does not overcook while it waits.
Release the Pressure and Add the Cream
When the 3 minutes is up, let the pot natural release for 5 minutes, then release any remaining pressure and open the lid away from you. Give everything a stir. There will be very little liquid left, which is exactly what we want so the cream can create the sauce. Add ½ cup of heavy cream and stir.
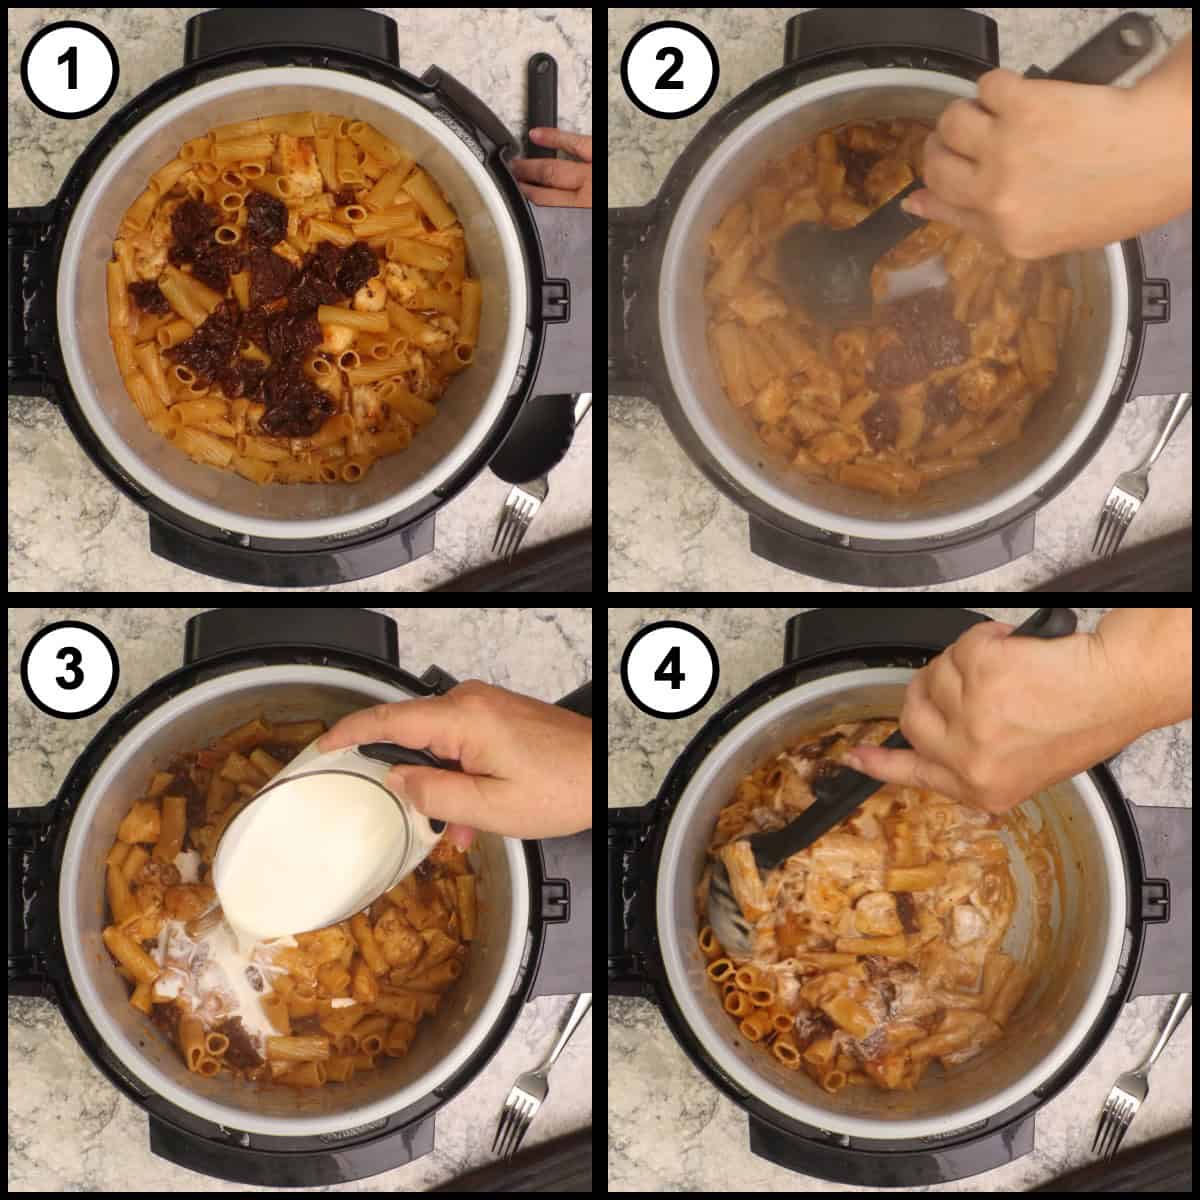
Stir in the Parmesan and the Rest of the Cream
Add half of the Parmesan and stir. Add the remaining cheese, followed by the rest of the cream, and stir until the sauce is smooth and creamy.
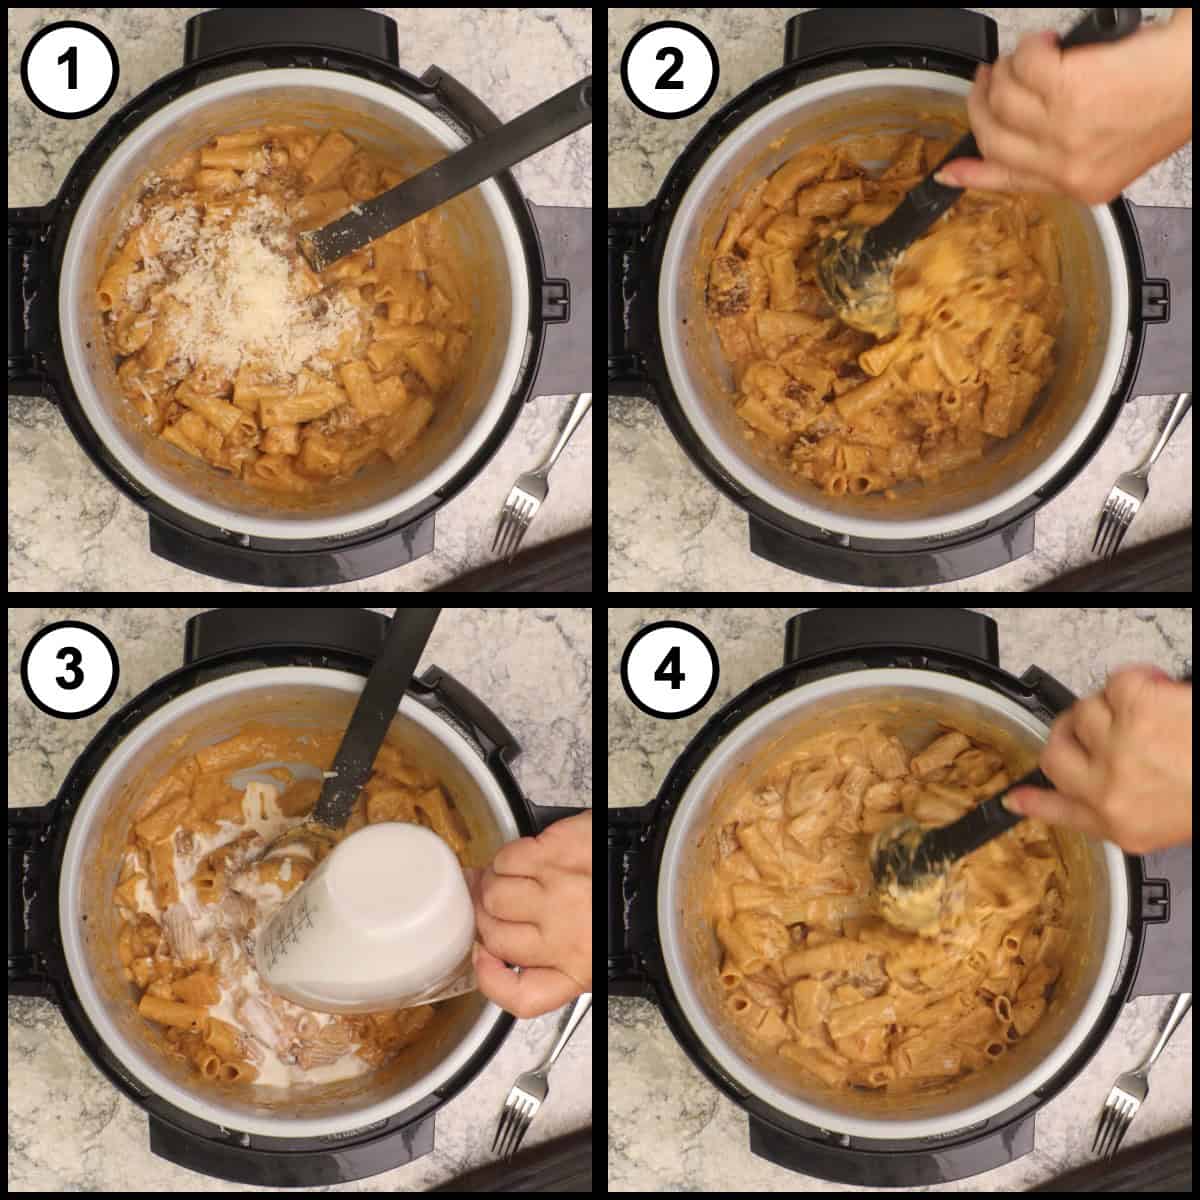
Garnish and Serve
Plate the pasta and garnish each serving with torn fresh basil and a little freshly cracked black pepper.
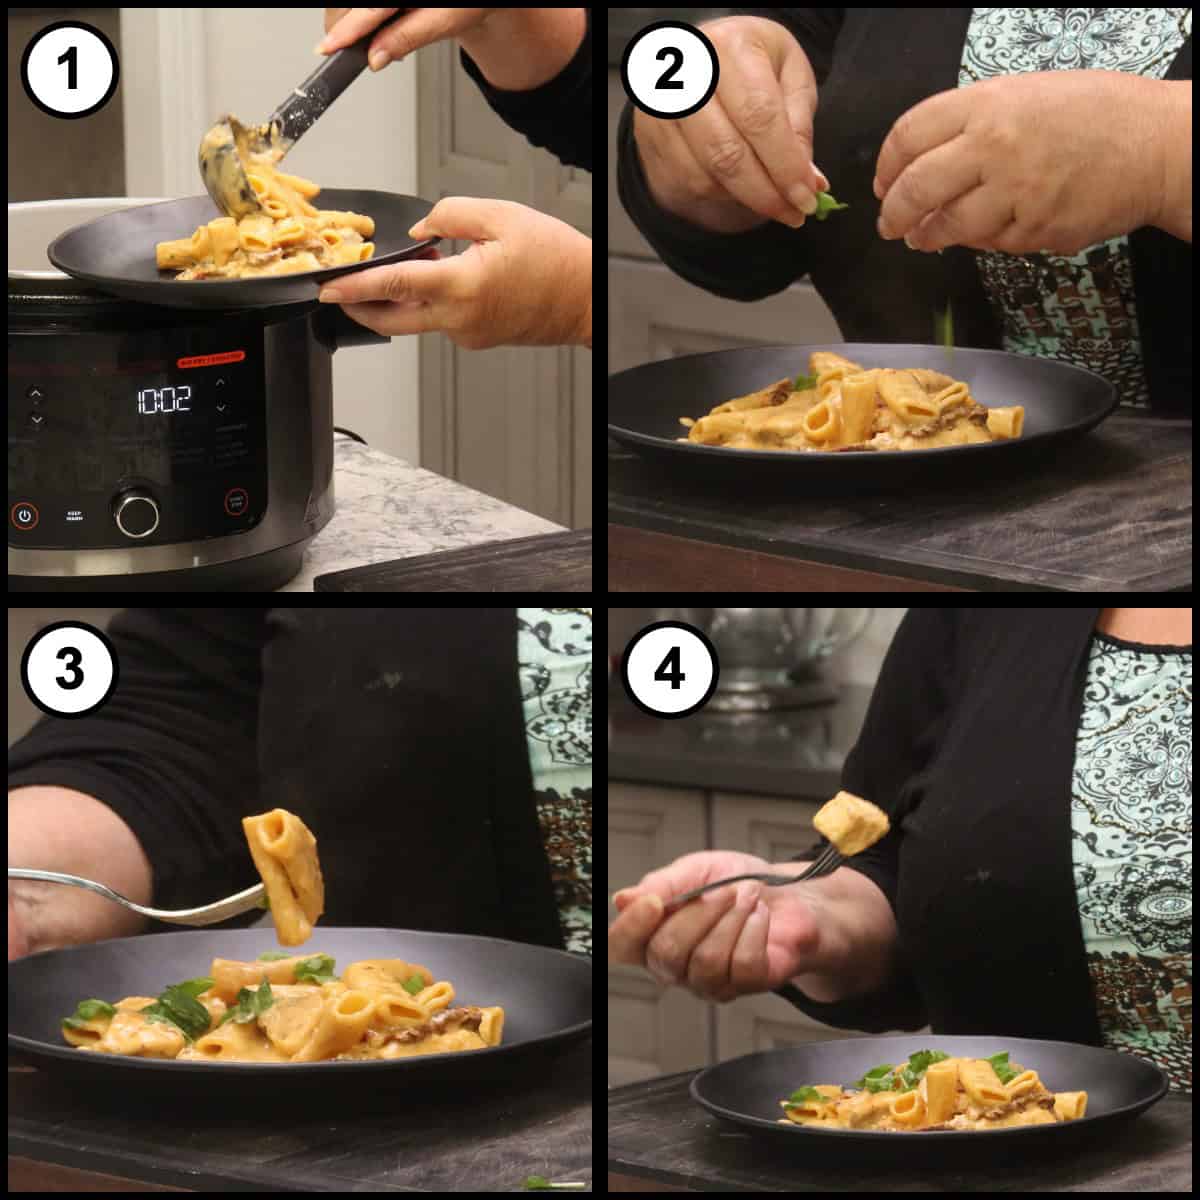
Alternate Cooking Instructions
- Instant Pot or other electric pressure cooker: Use the Sauté function to sear the chicken and build the sauce base exactly as written, then pressure cook on High for 3 minutes with a 5-minute natural release. The steps are identical to the Ninja Foodi.
- Stainless steel insert: If your pot has a stainless steel insert instead of a nonstick pot, use 1¾ cups of chicken stock instead of 1½ cups, since stainless steel tends to have a little more evaporation as the pot comes to pressure.
- 8-quart pressure cooker: A larger 8-quart Ninja Foodi or Instant Pot also benefits from the extra ¼ cup of stock (1¾ cups total) to make sure there is enough liquid to come to pressure and cook the pasta.
- Stovetop: Sear the floured chicken in a large skillet in the reserved oil, then build the sauce and add the stock and pasta. Simmer, covered, stirring often, until the pasta is al dente and the chicken is cooked through, you will need more stock or broth. Stir in the cream and Parmesan at the end.
Storage & Reheating Instructions
How to Store Leftover Marry Me Chicken
Let the dish cool before storing so the sauce can set up a bit.
- Refrigerator: Store leftovers in an airtight container in the refrigerator for up to 3 days.
- Freezer: Freezing is not recommended for this dish. Cream sauces can separate when thawed and the pasta tends to soften too much.
Quick Tip
The pasta keeps absorbing liquid as it sits, so leftovers can look a little dry. When you reheat, stir in a splash of chicken stock or cream to bring the sauce right back to that creamy, saucy consistency.
How to Reheat Marry Me Chicken
- Stovetop: Warm gently in a saucepan over medium-low heat, stirring in a splash of chicken stock or cream to loosen the sauce.
- Microwave: Heat individual portions in short bursts, stirring between each, and add a little liquid if the sauce has thickened too much.
Frequently Asked Questions
Traditional Marry Me Chicken is made with thin chicken cutlets that are floured and pan-seared. In the pressure cooker we use a very short cook time so the pasta does not overcook, and that is not long enough to cook whole cutlets through without drying them out. Cutting the chicken into 1½-inch cubes lets it cook perfectly in the same short time, and it stays juicy and tender.
No, the flour coating is completely optional. I like to do it because it seasons the chicken and leaves the finished sauce just a little bit thicker. The dish has no trouble coming to pressure with the flour, but you can skip it if you prefer and the recipe will still turn out delicious.
Yes. The dry sherry brightens and balances the rich cream sauce, but it is optional. If you would rather not cook with wine, simply use an extra ¼ cup of chicken stock in its place. You will still get a creamy, flavorful sauce.
The 5-minute natural release does two important things. It finishes cooking the pasta gently, and it protects the chicken from losing too much moisture too quickly. I have tested this recipe with an immediate release and with the natural release, and the short natural release really does help keep the chicken tender.
Yes, but adjust the timing. If you know the dish will sit on Keep Warm for longer than 30 minutes before serving, use 2 minutes of pressure cook time with an immediate release. The residual heat will finish the pasta while it waits. If you use the full 3 minutes and then hold it a long time, the pasta can overcook.
It depends on how saucy you like it. A full cup of heavy cream gives a nice balance of sauciness, but ½ cup works well too if you want to lighten it up. You can also thin the sauce with a splash or two of chicken stock instead of using the full cup of cream.
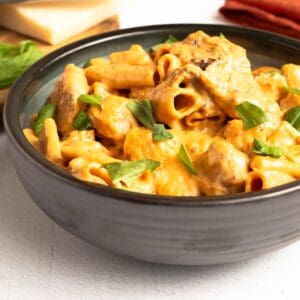
One-Pot Marry Me Chicken (Pressure Cooker)
Equipment
- Ninja Foodi or Instant Pot pressure cooker
- Shallow tray or dish (for the seasoned flour)
- Cutting board and knife
- Measuring Cups and Spoons
- Silicone spatula or wooden spoon
- Cheese grater
Ingredients
Seasoned Flour
- ¼ cup all-purpose flour the coating step is optional but gives a slightly thicker sauce
- ½ teaspoon fine-grind sea salt or kosher salt
- ¼ teaspoon dried thyme leaves use thyme leaves, not ground thyme
- ½ teaspoon dried oregano
- 1 teaspoon dried basil
- ¼ teaspoon red pepper flakes optional; balances the sweetness of the sun-dried tomatoes without adding much heat
- 1 lb boneless, skinless chicken breast, cut into 1½-inch cubes about 2 medium breasts
- ¼ teaspoon black pepper seasoned directly on the chicken
- ¼ teaspoon fine sea salt seasoned directly on the chicken
Main Ingredients
- 2 tablespoon oil reserved from the sun-dried tomato jar or olive oil
- 1 sweet onion, ¼-inch dice about 6 ounces by weight or 1 cup by volume
- 1 tablespoon tomato paste
- 2 tablespoon garlic paste Louise uses homemade garlic paste made from cooked garlic, which is milder
- ¼ cup dry sherry optional; substitute an extra ¼ cup chicken stock
- 1½ cups chicken stock or broth use 1¾ cups if using a stainless steel insert or an 8-quart pot
- 3 cups rigatoni 8 ounces; penne can be substituted
- 3 oz sun-dried tomatoes, drained and chopped about ½ cup; from an 8-ounce jar packed in oil, reserve the oil for searing
- 1 cup heavy cream ½ cup can be used for a lighter, less saucy dish
- 2 oz Parmesan cheese, grated about ½ cup finely shredded
- fresh basil, for garnish torn, not chopped, to keep it vibrant
Would you like to save this recipe?
Instructions
- Cut 1 pound of boneless, skinless chicken breast into 1½-inch cubes. Place the cubes in a tray or a bag and season directly with ¼ teaspoon of salt and ¼ teaspoon of black pepper. Set aside. You can also do this step the day before and refrigerate the chicken to season it a little more deeply.1 lb boneless, skinless chicken breast, cut into 1½-inch cubes, ¼ tsp black pepper, ¼ tsp fine sea salt, ¼ tsp red pepper flakes
- In a shallow tray or dish, combine ¼ cup of all-purpose flour with ½ teaspoon fine-grind sea salt, ¼ teaspoon red pepper flakes, 1 teaspoon dried basil, ½ teaspoon dried oregano, and ¼ teaspoon dried thyme leaves. Stir to blend the seasonings evenly through the flour.¼ cup all-purpose flour, ½ tsp fine-grind sea salt, ¼ tsp dried thyme leaves, ½ tsp dried oregano, 1 tsp dried basil
- Set your Ninja Foodi or Instant Pot to high Sear/Sauté and press start. Add 2 tablespoons of the reserved oil from the sun-dried tomato jar and let it heat while you coat the chicken.2 tbsp oil reserved from the sun-dried tomato jar
- Toss the seasoned chicken cubes in the seasoned flour until each piece is lightly coated. Discard any excess flour left in the tray.
- Once the pot is hot, lay the chicken in a single layer around the edges of the pot, right over the oil rather than in the center where the flour can stick and burn. Sear for about 2 minutes, then flip the pieces. The chicken does not need to be cooked through, it finishes under pressure.
- Add the diced sweet onion, then add 1 tablespoon of tomato paste. Sauté for about 1 minute, stirring, to bring out that pop of tomato flavor.1 sweet onion, ¼-inch dice, 1 tbsp tomato paste
- Add 2 tablespoons of garlic paste and stir it in. If you are using raw garlic paste, about 1 tablespoon is plenty, or use 2 to 3 teaspoons of minced garlic.2 tbsp garlic paste
- Deglaze the pot with ¼ cup of dry sherry, scraping up all of the dark bits from the bottom with a tool so they do not trigger a burn notice later. If you are not using sherry, use an extra ¼ cup of chicken stock instead.¼ cup dry sherry
- Pour in 1½ cups of chicken stock or broth (use 1¾ cups if you are cooking in a stainless steel insert or an 8-quart pot). Add 3 cups (8 ounces) of rigatoni and give it a stir. Scatter 3 ounces of chopped sun-dried tomatoes over the top. Make sure the pasta is mostly submerged, poking it down if needed.1½ cups chicken stock or broth, 3 cups rigatoni, 3 oz sun-dried tomatoes, drained and chopped
- Cancel Sear/Sauté. Place the lid on and move the valve to the sealed position. Pressure cook on High for 3 minutes. The pot will take between 5 and 8 minutes to come to pressure.
- When the 3 minutes of pressure cooking is up, let the pot natural release for 5 minutes, then release any remaining pressure. The natural release finishes cooking the pasta and helps keep the chicken tender. Open the lid away from you, as it will be steamy.
- Give everything a stir. There will be very little liquid left, which is exactly what we want so the cream can create the sauce. Add ½ cup of heavy cream and stir. Add half of the Parmesan and stir, then add the remaining cheese, followed by the rest of the cream. Stir until you have a smooth, creamy sauce. The cheese will thicken the sauce as it goes in.1 cup heavy cream, 2 oz Parmesan cheese, grated
- Plate the pasta and garnish each serving with torn fresh basil. Add a little freshly cracked black pepper if you like. Serve right away.fresh basil, for garnish
Notes
• Cut the chicken into 1½-inch cubes and keep them a similar size. This size is essential because the dish uses a very short pressure cook time and even cubes cook evenly.
• You can season the chicken with the salt and pepper the day before and keep it in a bag in the refrigerator. The salt works its way into the chicken and flavors it a little more deeply, though same-day seasoning is still delicious.
• When you drain the sun-dried tomatoes, reserve the oil. You will use 2 tablespoons of it to sear the chicken, and any leftover oil is wonderful for dipping crusty bread. COOKING TIPS
• Sear the chicken around the edges of the pot near the oil, not in the center. Chicken placed in the middle can let the flour stick and scorch.
• Scrape up every dark bit from the bottom of the pot as you deglaze. Those browned bits are full of flavor, but if they stay stuck they can trigger a burn notice.
• If you are using a stainless steel insert or an 8-quart pot, add an extra ¼ cup of chicken stock. Those pots have a little more evaporation as the dish comes to pressure.
• For serving right away, use 3 minutes of pressure cook time with a 5-minute natural release. If you know the dish will sit on Keep Warm for longer than 30 minutes, use 2 minutes with an immediate release instead so the pasta does not overcook. NUTRITIONAL DISCLAIMER
Nutritional information provided is an estimate based on typical ingredient values and standard portion sizes. Actual nutritional content may vary significantly depending on specific brands used, ingredient substitutions, preparation methods, portion sizes, and individual cooking techniques. For precise nutritional information tailored to your specific ingredients and preparation, please consult with a registered dietitian or use laboratory analysis. This information should not be used for medical nutrition therapy or to manage medical conditions without professional guidance.
Nutrition
Variations
- Use chicken thighs: Swap the chicken breast for boneless, skinless thighs for an even juicier, more forgiving result. Keep the cubes the same size.
- Change the pasta: Penne works just as well as rigatoni. Stick with a short, sturdy pasta shape that holds up to pressure cooking.
- Adjust the garlic: Use roasted garlic (a whole bulb) or smashed garlic (half to a whole bulb) in place of the garlic paste for a different depth of garlic flavor.
- Dial the heat up or down: Leave out the red pepper flakes for no heat, or add a little extra if you like a gentle kick.
- Lighten it up: Use ½ cup of heavy cream instead of a full cup, and thin the sauce with a splash of chicken stock if needed.
For another one-pot pressure cooker chicken pasta with a completely different personality, my One Pot Chicken Riggies uses cherry peppers and a tangy tomato-cream sauce.
One-Pot Pasta Dinners for Busy Weeknights
Busy weeknights call for dinners that cook in one pot and clean up just as fast. Here are a few more one-pot pasta dinners from The Salted Pepper that come together with very little fuss and always disappear from the table.
About the Recipe Author, Louise Long
Louise is a full-time recipe creator and food blogger @ The Salted Pepper. She has over 30 years of experience with cooking and recipe development. She owned a restaurant for several years and was a full-time RN until retiring to blog full-time.

She published her first cookbook in the Fall of 2018 and is very interested in writing several more.
Louise is also the creator of an online Ninja Foodi Pressure Cooking Course with over 100 instructional step-by-step videos. People absolutely rave about the course and all the value they have received from it.
Louise has several very active Facebook groups that help people with the basics of cooking and learning more about the appliances they love.
Ninja Foodi Pressure Cooker & Air Crisper 101
Ninja Woodfire Outdoor Grill & Smoker
Louise is also a YouTube creator and you can find most of her recipes in video format on The Salted Pepper YouTube channel.
She is very responsive to messages and eager to help in any way she can. Get more Information about Louise & contact information
I WOULD LOVE TO SEE WHAT YOU ARE COOKING UP IN YOUR KITCHEN! TAG ME @THESALTEDPEPPER ON YOUR FAVORITE SOCIAL MEDIA PLATFORM WHEN YOU MAKE A DISH!
BE SURE TO FOLLOW THE SALTED PEPPER RIGHT HERE ⇓⇓⇓⇓⇓
Erin says
This was easy to make and it was so tasty. I loved it!
Louise says
I"m so glad to hear that!
Tracey says
Could you make this with gluten-free pasta? Asking for a friend (truly. Thinking of making this for a party and one of my friends needs GF). Thank you!
Louise says
I have not pressure cooked gluten free pasta before, so I don't know the timing or how the pasta would hold up. My suggestion is to make the pasta according to the package directions on the stove and make the chicken and sauce separately and the easiest way to do that is on the stove or in the Foodi using sear/sauté. If you need specific instructions, email me and I'll send them. Louise@thesaltedpepper.com
John says
I tried this last nite and it was really great
Louise says
I'm so glad you liked it!
Silvia says
I don't like it, I love it. it's so creamy and super delicious. I was looking for something new to cook and stumbled on this, if you haven't tried it, you really need to, it will be added to all my favorite dishes.
young lady, you never disappoint.