
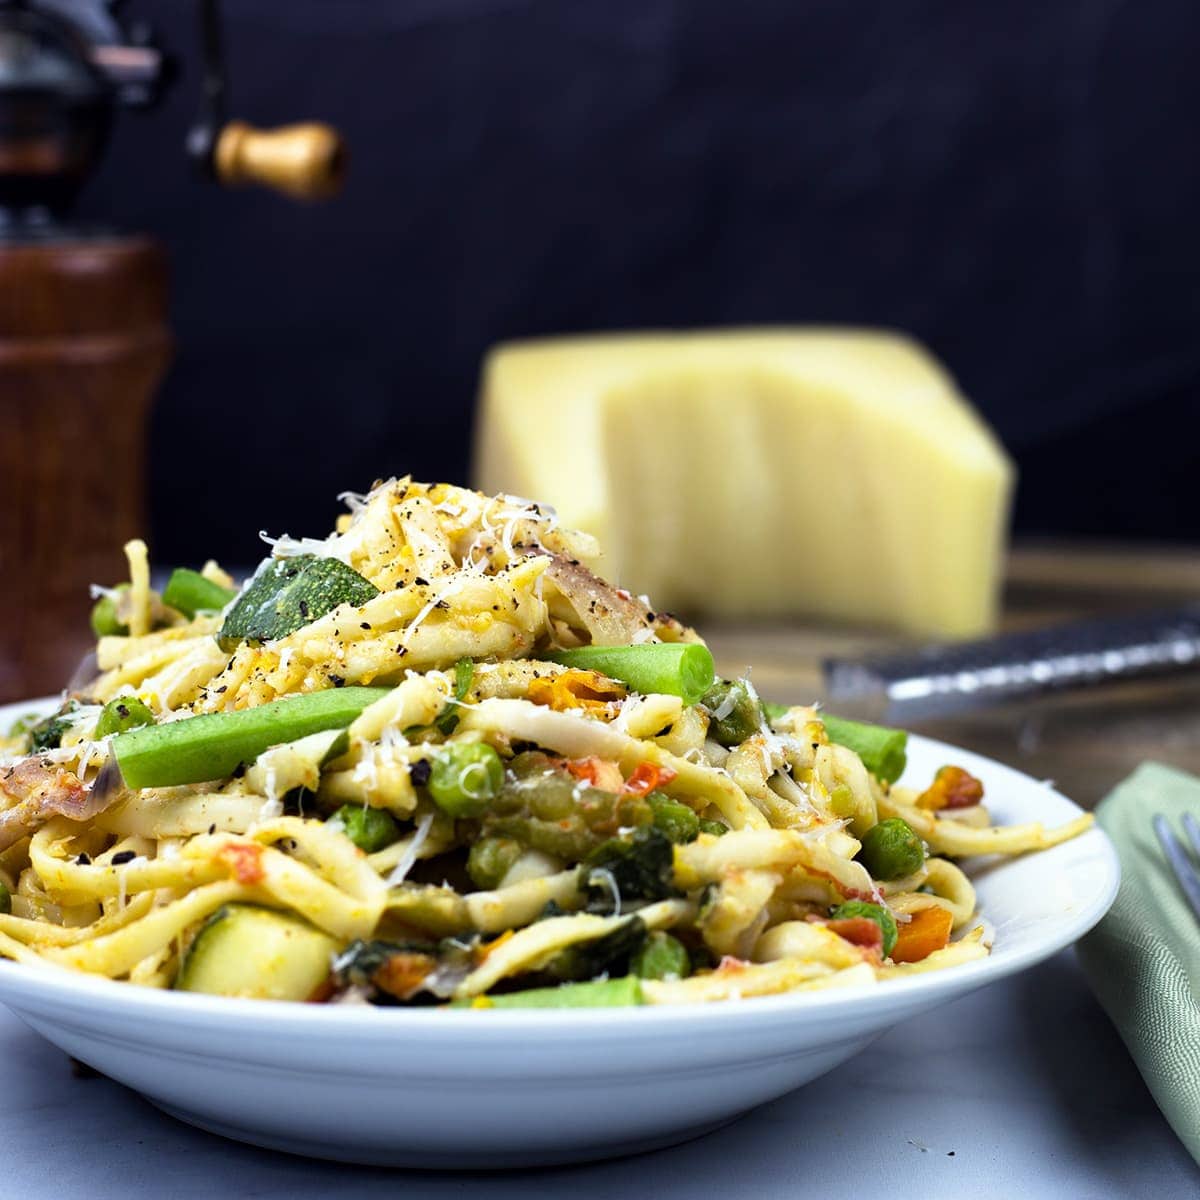
Nothing says EASY like a One-Pot Pasta Primavera! The Ninja Foodi makes this recipe even easier; just chop, dump, and cook.
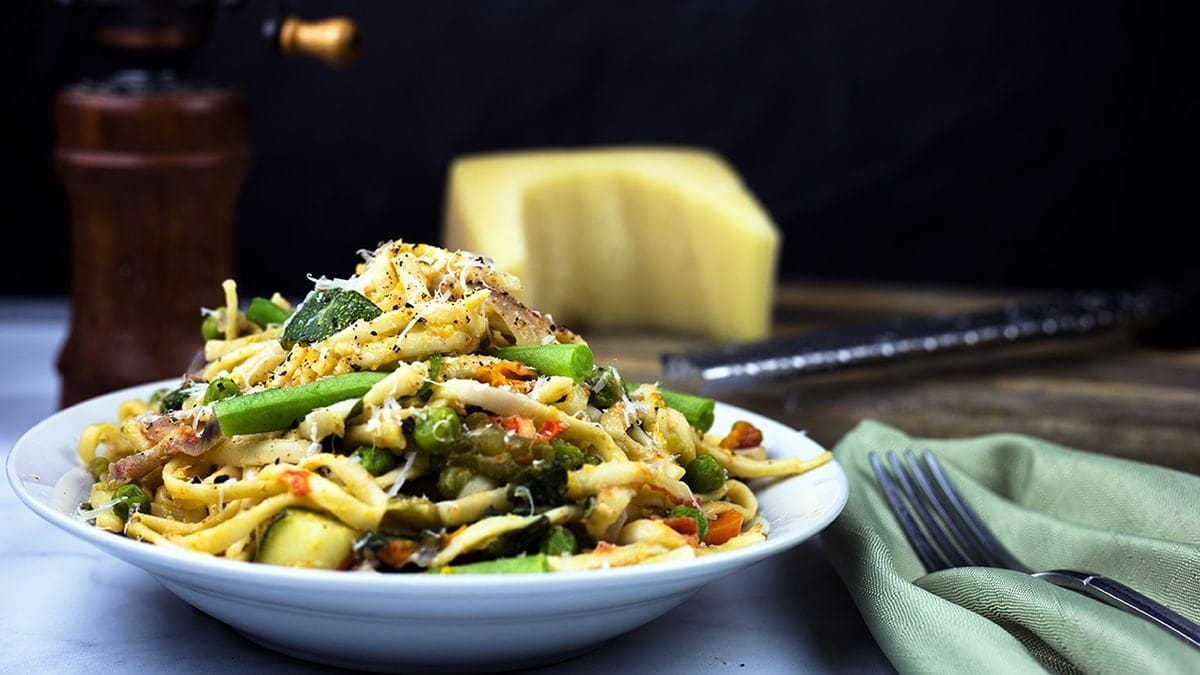
When I think of Spring and Summer, I think fresh veggies! Whether they are coming from my garden or the grocery store, I always seem to have too many and I hate the thought of them going bad. This One-Pot Pasta Primavera is the answer to using up those fresh veggies!
This post may contain affiliate links. If you make a purchase after clicking a link, I may earn a small commission. As an Amazon Affiliate, I earn from qualifying purchases.
You can use the Ninja Foodi or any pressure cooker to make this One-Pot Pasta Primavera and it couldn't be simpler! This truly is a dump and cook recipe and it is fully customizable to what you have on hand. Simply chop up some veggies, add pasta, thin liquid and dinner is done in less than 30 minutes!
What is in Pasta Primavera?

Would you like to save this recipe?
The Italian word primavera translates to English as "first spring." So Pasta Primavera is simply pasta with spring vegetables like asparagus, spinach, and peas. But don't worry if you don't like peas, what you put in this recipe for One-Pot Pasta Primavera is completely up to you and what you have in the fridge.
Many recipes call for cream in their Pasta Primavera and you can certainly add it in. I chose to go a simpler route with this recipe and leave the cream out. If you love a a creamy pasta but don't want to add cream, check out this recipe for Pasta Carbonara! It's delicious and creamy without using cream. Seriously, it is wonderful!
I have seen recipes that include all kinds of vegetables in their Pasta Primavera. Broccoli, peas, green beans, squash, zucchini, carrots, spinach, peppers... you name it and you can add it. You just want to make sure that the vegetable will cook in 3 minutes of pressure cooking without becoming over cooked. SEE MY BIG MISTAKE BELOW!
This can be accomplished in several ways and I will go over some tips for adding in various vegetables in the next section.
Tips on when to add your vegetables in this One-Pot Pasta Primavera Recipe
Deciding when to add the vegetables in this dish is pretty simple. If they are fast cooking, like spinach, you will want to wait until after the pressure cooking time to add them in. If they are best eaten raw, add them in at the end too. Of course, like with any rule, there are exceptions!
I do add in the tomatoes in the beginning because as they cook, they reduce down, create more liquid for the pasta, and help to develop the flavor in the sauce. You know I'm all about flavor! Next time I make this, I'm going to reserve about ½ the tomatoes and put them in after the PC time, so they add that fresh tomato flavor too. Tomatoes are incredible in so many ways.
Zucchini and squash are also fairly fast cooking vegetables and I prefer them with a texture, so I add in ½ before the PC time and ½ after.
Spinach or any leafy green should always be added in after the PC time or they will disintegrate into nothing with a PC time of 3 minutes.
Green beans, carrots, and onions can withstand the 3 minutes of PC time. If you want a bit of texture to the onions, reserve some to add in a the end. Green onions would be a great addition at the end of pressure cooking, too!
If you have a specific vegetable you want to add and you aren't sure when to add it, leave me a comment and I'll be happy to help!
How should I cut the vegetables for One-Pot Pasta Primavera?
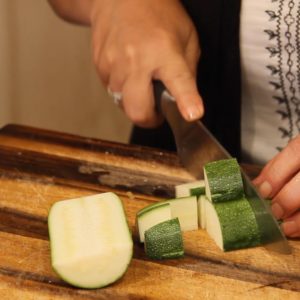
This is a great question and a fairly important one. You want the vegetables cut in large chunks. You can see exactly how I cut the vegetables in this YouTube video: One-Pot Pasta Primavera ~ Ninja Foodi Recipe.
My rule of thumb is to cut the vegetables in about 1 ½" chunks and I also cut them about the same size. The only exception would be with vegetables that take longer to cook, like carrots or other root vegetables. You would want them cut in ½" chunks or slices so they cook in the same time as the other vegetables.
Why Doubling a Recipe doesn't always work out!

I get questions all the time about doubling a recipe in the Ninja Foodi. Some are fine to double, like this recipe for Asian Pulled Pork. Others, don't work out so well and I found that out on camera!
Before I film a new recipe video for YouTube, I triple test my recipe to make sure it can be duplicated easily by you. When filming the video for One-Pot Pasta Primavera, I made a split-second decision to double the recipe. I did this because so many people like to cook a whole box of pasta at a time and I had tons of fresh veggies to use up.
I thought about it, made a few adjustments and went for it. Honestly, it was almost a disaster! I recovered in the end by decreasing my cooking and pressure release time and the dish was delicious, but the vegetables were overcooked and here is why.
Time to Pressure MATTERS! A LOT. Let me take you through my thought process when deciding how to double, my already tested and delicious recipe for One-Pot Pasta Primavera, so you can apply these principles when you want to double a recipe. These principles are referring to pressure cooking recipes.
If you have read my article on Pressure Cooking 101, you know there are several things you should think about when pressure cooking a dish. If you haven't read it yet, I really recommend you take a few minutes and read it. I learned so much when doing research for it.
The liquid. When doubling a recipe, you have to think about the liquid. It isn't as simple as just doubling the liquid or you might end up with a soupy mess.
The first think to consider is; am I cooking with something that absorbs liquid? The next consideration is; am I cooking with something that gives off liquid. Or both, which is the most likely case when cooking a one pot meal.
Some common foods that absorb liquid are: pasta, beans, rice, oats, quinoa, and (to a certain degree) potatoes. When doubling a recipe that is using liquid-absorbing foods, you will need to increase the liquid amount... but how much?
That depends on what else is in the pot. If you are cooking liquid-absorbing foods by themselves, then it is probably a good rule of thumb to double the amount of liquid. If you are cooking liquid-absorbing foods with liquid-producing foods then this takes a bit more thought.
Some common foods that give off liquid when pressure cooking are: meats (especially fatty cuts), vegetables that contain a high water content (non-root vegetables), and many fruits. When cooking solely with liquid producing foods it is not usually necessary to double the liquid even when you have a combination of liquid absorbing foods and liquid producing foods.
When cooking liquid-producing foods by themselves, I would keep the liquid amount the same or even reduce it by ¼ if the foods have a very high liquid content. *Remember you do need at least ½ cup of thin liquid to build pressure in the Ninja Foodi.
When cooking liquid-producing foods with liquid-absorbing foods, it is a balance issue. What do you have more of?
If you have more liquid-absorbing food in the pot than you do liquid-producing, then you will need to increase your thin liquid by 50% to 75% depending on the amount of each.
If you have more liquid producing food in the pot than you do liquid absorbing, then 25% to 50% more thin liquid is probably okay.
*Keep in mind these guidelines only apply when all the food is in the inner pot. Pot in Pot (PIP) cooking is totally different.
What I did to double this recipe for One-Pot Pasta Primavera.
I knew I had more liquid-absorbing food in the form of linguine than I did liquid-producing food in the form of vegetables. Even though I doubled both the linguine and the vegetables, the linguine will absorb twice as much liquid as the extra vegetables would give off.
So, I went with increasing the liquid amount by 50% and I think that did okay. Next time, I might go to 60 or 75% increase in thin liquid, but that isn't what almost ruined dinner... this was!
TIME TO PRESSURE MATTERS!
This was my big mistake. I didn't take into account that I had filled my Ninja Foodi almost to capacity which makes a big difference in the time it takes to come to pressure.
While the Ninja Foodi or any pressure cooker is building pressure it is producing heat and cooking the food. Keeping this in mind when doubling a recipe is critical to a good outcome, especially when cooking foods that can overcook quickly like pasta, rice, and vegetables.
This happened! So, I'm filming the video for this delicious One-Pot Pasta Primavera and I think I know what I'm doing. I go through everything in my mind for doubling the recipe and I decided to go for it. No testing, just do it!

I did understand that the time to pressure would be longer, but I never imagined it would be three times as long! In the video, I had to estimate the time to pressure at about 15-18 minutes because I didn't actually time it. With the help of my husband/videographer/producer, we were able to figure out that the time to pressure was more like 28 minutes!
That's three times as long as the original recipe took to come to pressure! That's a big deal. That could ruin your dinner in a blink of an eye.
When do you make adjustments in time while under pressure?
The average time to pressure in the Ninja Foodi seems to fall between 8 minutes and 10 minutes. I've seen the Ninja Foodi come to pressure as quick as 5 minutes and take 30+ minutes.
The average of 8-10 minutes is what we can assume the recipe was written around, unless it is otherwise noted. I am starting to list my time to pressure in the recipe so you have a point of reference.
These are just a few guidelines that I use and I always encourage you to use your judgement based on what you are cooking.
If the pot takes between 10-15 minutes to build pressure & start the count down, I wouldn't adjust anything.
If the pot takes longer than 15 minutes to start the countdown and the cooking time is 10 minutes or longer, I wouldn't make any adjustments. With that long of a cooking time the extra few minutes won't matter.

It's when the cooking time is 9 minutes or less that I would begin to think about decreasing time if the pot takes longer than 15 minutes to come to pressure. But how much time adjustment?
If the pot still wasn't up to pressure and starting the countdown at minute 15, I would decrease the cook time by 1 minute per every 3 minutes of original cook time and keep the natural release the same.
If it takes 16-20 minutes to come to pressure and start the countdown, I would still decrease by 1 minute per every 3 minutes of original cook time and also decrease the natural release time by 1 minute per every 3 minutes of natural release time. So, if the original cook time was 6 minutes, I would take that down to 4 minutes.
If it takes 21-29 minutes to come to pressure and start the countdown, I can pretty much assume that most of the cooking is done and I would decrease the cook time by 2 minutes for every 3 minutes of original time and 1 minute for every 3 minutes of natural release.
I always try to air on the side of under-cooking something rather than overcooking it because I can always cook it longer, but I can't un-cook it. As always, if you have any questions please leave it in the comment section and I will get back to you. Okay enough of the lessons, let's get to cooking!
How to Make One-Pot Pasta Primavera
This one is so easy, I'm not going to spend a huge amount of time going over the steps.
Step One:
Add in water and Minor's vegetable base to the inner pot of the Ninja Foodi.
In this recipe, I call for Minor's vegetable base to be mixed with water for the thin liquid. I love the taste of Minor's products and this vegetable one really packs a lot of flavor, I've also used it in my Pressure Cooker Vegetable Soup. You can use chicken stock or vegetable stock instead, but you may need to increase the salt a bit.
Step Two:
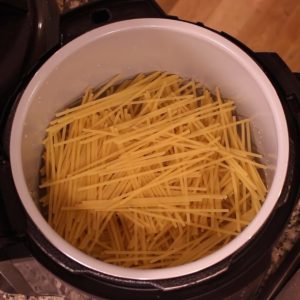
Layer the noodles in the inner pot of the Ninja Foodi.
When making this recipe or any other pasta recipe that calls for spaghetti, angel hair, fettuccine or linguine noodles you will want to break them in half or use the trick in this video for Chicken Carbonara to stack the noodles in a rack to leave them whole.
If you are breaking them in half, which is kind of a must in this recipe because of all the veggies going on top, you want to criss cross them in layers like shown in this picture.
Step Three:
Add your cut up vegetables, except spinach or peas, to the inner pot on top of the noodles. Add in roasted garlic and ½ teaspoon sea salt. Put the pressure lid on and set the time for 3 minutes of high pressure. When the time is up, natural release for 2 minutes and then immediately release the remaining pressure.
You should try to cut the vegetables about the same size for even cooking. There are a few exceptions, like carrots that take longer to cook. I cut the carrots into ½" slices and the other vegetables were 1 ½" chunks.
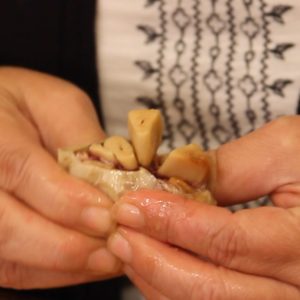
Cut the top off of the garlic bulb and drizzle with olive oil, wrap in foil. Put it on the Ninja Foodi rack on the low setting and set the bake to 325° F for 35 minutes.
Step Four:
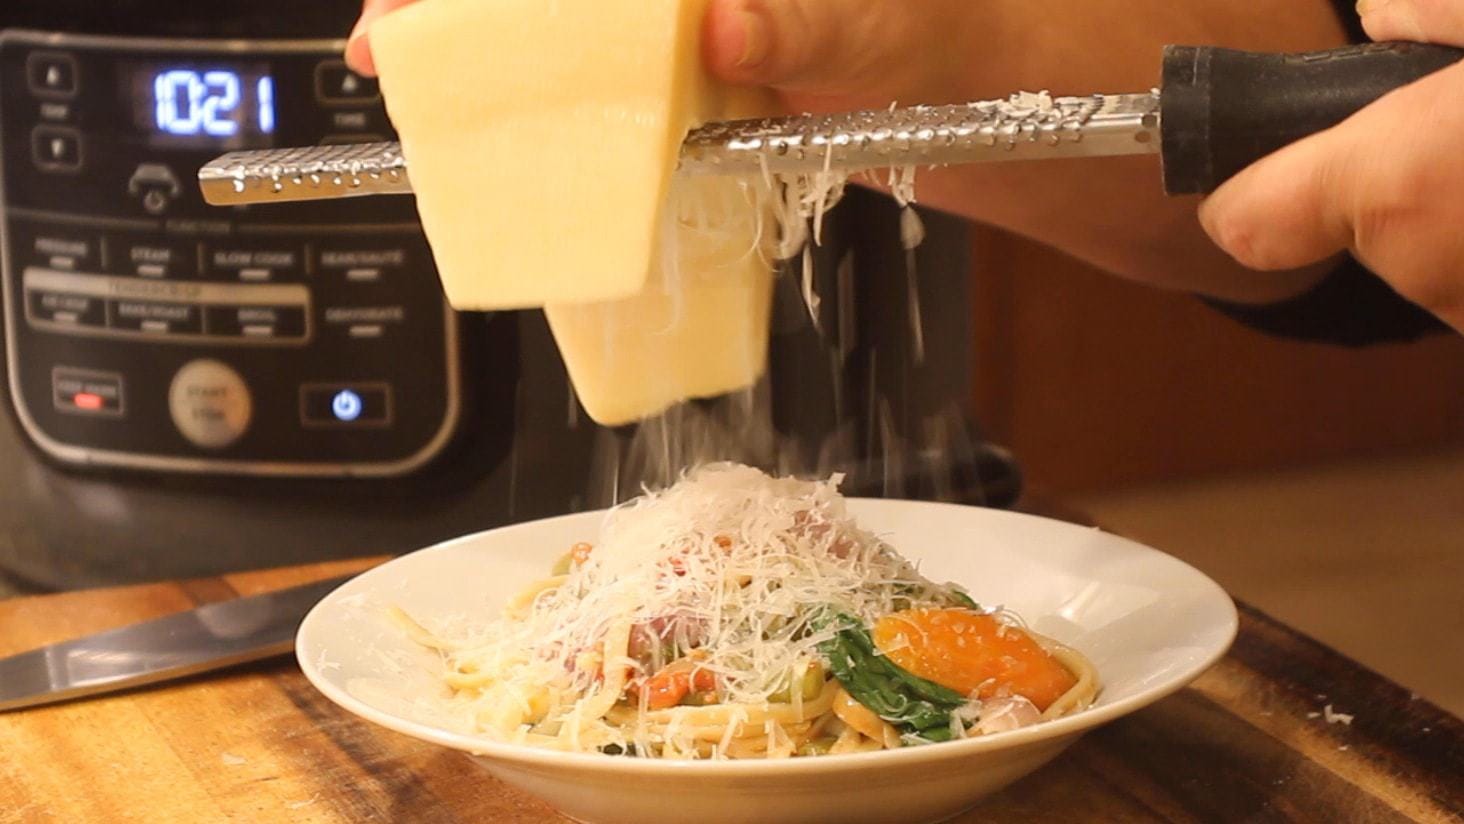
Stir in the spinach and the peas and close the Tendercrisp lid for 5 minutes. Place a tablespoon of butter in the bottom of a bowl and scoop out some pasta primavera. The warmth from the pasta will melt the butter and make the perfect sauce! Top with grated Parmesan and freshly ground black pepper or even some red pepper flakes for a kick. Serve and Enjoy!
One-Pot Pasta Primavera ~ Ninja Foodi Recipe
Ingredients
- 2 cups water
- ½ tablespoon vegetable base
- 8 ounces linguine
- 1 red onion chopped in large chunks
- 1 cup Green Beans cut in half
- 1 cup cherry tomatoes cut in half
- 1 cup orange pepper 1 ½" chunks
- ½ teaspoon sea salt
- 1 bulb roasted garlic see post for details
- 1 cup spinach see post for various vegetable choices
- ½ cup peas
- 3 ounces Parmesan Cheese about 1 cup grated
- 4 tablespoon butter (salted) optional, but delicious!
- freshly cracked black pepper or red pepper flakes
Would you like to save this recipe?
Instructions
- Chop the pepper and onions into 1 ½" chunks, slice the cherry tomatoes in ½ and cut the green beans in half.
- Place 2 cups of water in the inner pot. Add vegetable base.
- Place the onion chunks in the bottom of the inner pot. This will create a little barrier so the pasta noodles don't stick to the bottom.
- Break the linguine noodles in half and layer them a handful at a time in a criss cross fashion. See video below for details.
- Add the salt, roasted garlic and the cut up vegetables on top, except for the spinach and peas. They will be added after the pressure cooking time is completed.
- Put the pressure lid on and make sure the vent is to seal. Set the Ninja Foodi on high pressure for 3 minutes. When the time is up, allow the Ninja Foodi to natural release for 2 minutes and then manually release the remaining pressure
- Add the fresh spinach and peas and stir the noodles and the vegetables around so the spinach and peas are incorporated into the pasta. Close the TenderCrisp lid (leave the Foodi off) and let sit for 5 minutes to give the spinach time to wilt a bit.
- Place 1 tablespoon of salted butter in the bottom of a bowl and place the pasta primavera on top. Add grated Parmesan Cheese and fresh cracked black pepper or red pepper flakes. Serve & Enjoy!
Notes
Nutrition
About the Recipe Author, Louise Long
Louise is a full-time recipe creator and food blogger @ The Salted Pepper. She has over 30 years of experience with cooking and recipe development. She owned a restaurant for several years and was a full-time RN until retiring to blog full-time.

She published her first cookbook in the Fall of 2018 and is very interested in writing several more.
Louise is also the creator of an online Ninja Foodi Pressure Cooking Course with over 100 instructional step-by-step videos. People absolutely rave about the course and all the value they have received from it.
Louise has several very active Facebook groups that help people with the basics of cooking and learning more about the appliances they love.
Ninja Foodi Pressure Cooker & Air Crisper 101
Ninja Woodfire Outdoor Grill & Smoker
Louise is also a YouTube creator and you can find most of her recipes in video format on The Salted Pepper YouTube channel.
She is very responsive to messages and eager to help in any way she can. Get more Information about Louise & contact information
I WOULD LOVE TO SEE WHAT YOU ARE COOKING UP IN YOUR KITCHEN! TAG ME @THESALTEDPEPPER ON YOUR FAVORITE SOCIAL MEDIA PLATFORM WHEN YOU MAKE A DISH!
BE SURE TO FOLLOW THE SALTED PEPPER RIGHT HERE ⇓⇓⇓⇓⇓
Tess says
You talk about the garlic and how to roast it but I am not seeing anywhere in the instructions where it is added to the dish.
Louise says
Thank you, I have added it to the recipe card. It is in the written directions in the post as well. I appreciate you letting me know!
Juli says
Thank you for all of your recipes! We just got a 8qt Foodi a few weeks ago- we are truck drivers who are trying to eat healthier and stay out of the truck stops. Your website comes up CONSISTENTLY when I’m looking for dinner ideas. 🙂
Louise says
I hope you enjoy the dinners!
Craig says
That pasta gonna clump every time.
Louise says
If you had clumping maybe the pasta wasn't spread out and fanned enough. Tossing it around with tongs after cooking will also loosen it up.
Debbie says
Yum- cant wait to try this with all my garden squashes. Thanks for explaining about the times too. Very important to know. My Ninja doesn't seem to quick release as fast as yours. Am I doing it wrong? I have to hold it on vent with a wooden spoon and it still takes a while. Thanks Debbie
Nita Poindexter says
Love your recipes. I have the 6.5 foodi. Are your recipes for the 6.5 or the 8?
Nita
Louise says
Thank you so much! All of my recipes are made in the 6.5 qt. They will work in both sizes though.