
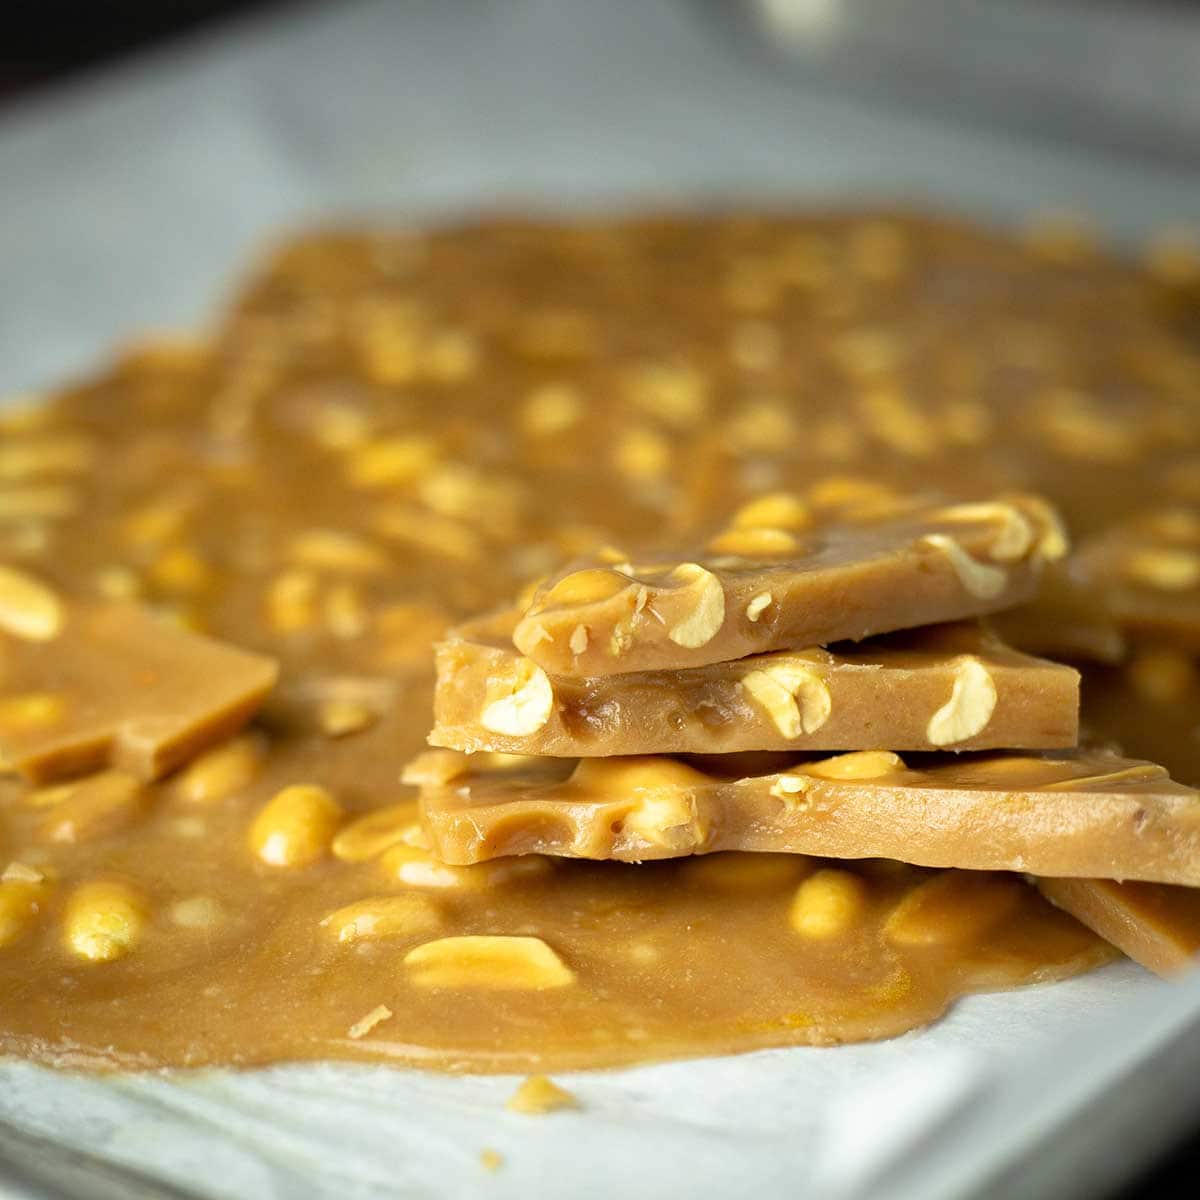
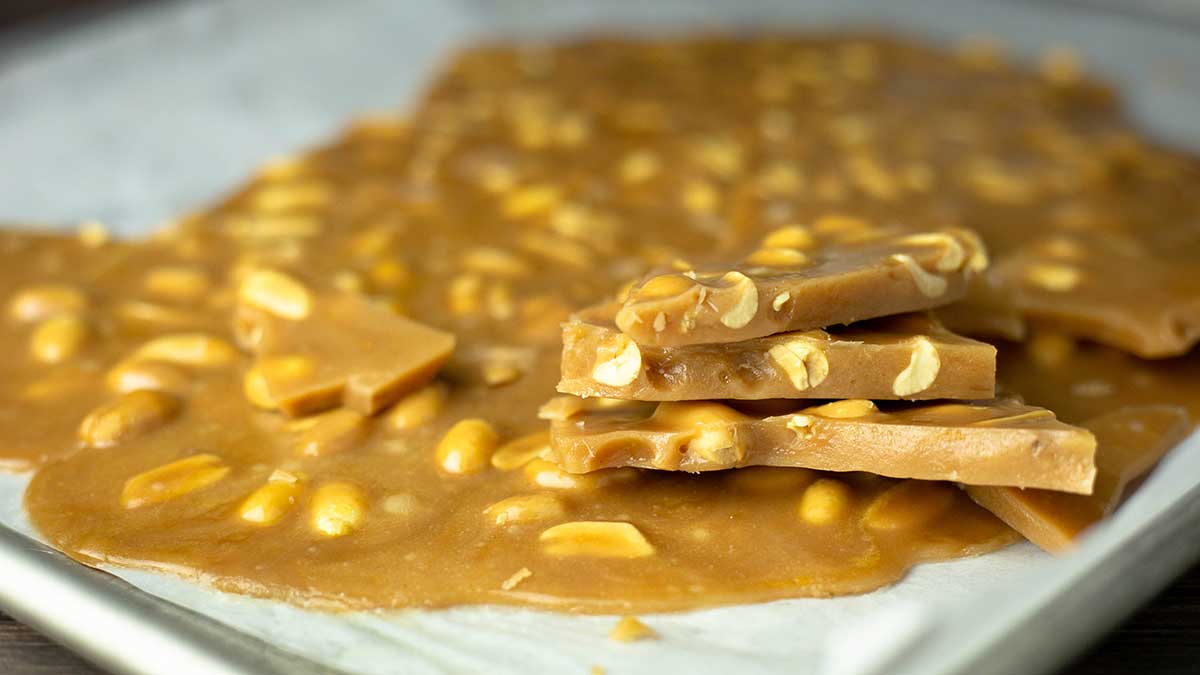
Delicious Peanut Brittle can be made right in the Ninja Foodi or any deep pot on the stove. It only takes a few minutes to whip up a batch and it's ready for eating in under 30 minutes!
Would you like to save this recipe?
I love using the inner pot of the Ninja Foodi for making candy because it is deep and the temperature regulation is very predictable. Both of these things are important when making Peanut Brittle.
This post may contain affiliate links. If you make a purchase after clicking a link, I may earn a small commission. As an Amazon Associate, I earn from qualifying purchases.
Of course, you don't have to use the Ninja Foodi. You can certainly use a heavy bottom pot on the stove and it will work just fine!
You don't even have to make peanut brittle, you can make cashew brittle or any other kind of nut brittle you like! The technique is exactly the same.
Tips for Making Peanut Brittle
- The best time to make peanut brittle is when the humidity is low. If the humidity in your house is high, it can cause the brittle to be sticky.
- Use a quality thermometer because the temperature is very important when making peanut brittle. I love the (affiliate link)Thermapen Mk4!
- Don't walk away while it's cooking. I takes just a few minutes for the mixture to reach 300℉/149℃ and it can burn very easily if you aren't paying close attention.
- Have all of your ingredients measured out and ready to go before you turn the pot on. I can't even tell you how many batches of candy I've ruined over the years because I didn't do this. Then, I'm scrambling to find an ingredient and while I'm doing that, the candy is burning.
- Stay calm and don't rush. I find if I rush, that's when I make mistakes.
Can I make a Double Batch?
I really don't recommend doubling candy recipes because too many things can go wrong once you start doubling ingredients. In this recipe, I would be concerned that the bottom would scorch before it reached 300℉ if there was double the amount in there.
This recipe is the perfect amount for 1 half sheet tray, which are 18"x13" and it would be hard to pour out half of the mixture onto one tray and then the other half onto a second tray before the brittle starts to cool down too much.
However, I make multiple batches, usually. One right after the other one. It's just a fast process. It only takes a few minutes to make.
Can I use Different Nuts?
Yes, of course. My favorite is cashew brittle! You don't need to make any changes to the recipe ingredients or amounts, except the nuts.
When using cashews, you might want to break them up a little because they are bigger than peanuts OR if you want to keep them whole, just increase the amount so that all the brittle has cashews in it. I think I used 2 cups of cashews in my last batch.
Pecan, almond, walnut, or even macadamia nuts can all be used to make brittle. I've even seen pistachio brittle before. Or you can combine a few different types of nuts and have a blended brittle.
Do I Need a Thermometer for this Recipe?
Yes and no. It is possible to make peanut brittle without a thermometer, but a thermometer makes it so much easier!
As sugar cooks, it goes through different stages. In candy making they are referred to as thread, soft ball, firm ball, hard ball, soft crack, hard crack and then caramel.
You can test the stages with a cup of cold water and drop some of the sugar mixture into the cup and determine which stage it is at.
For this recipe, we want it to reach hard crack stage. This happens when the temperature reaches 300-310℉/149-154℃.
So, if you don't have a thermometer and still want to make peanut brittle, you can, it's just not as easy, in my opinion.
Once your mixture has been boiling for about 5 minutes or so, start checking the stage of it. Dip a wooden spoon into the mixture and then let a drop drip off of the spoon and into the cold cup of water.
If it forms a soft or firm ball of sugar, it isn't ready. If it forms a thread that snaps in two cleanly and easily, it's at the hard crack stage and you can turn off the heat.
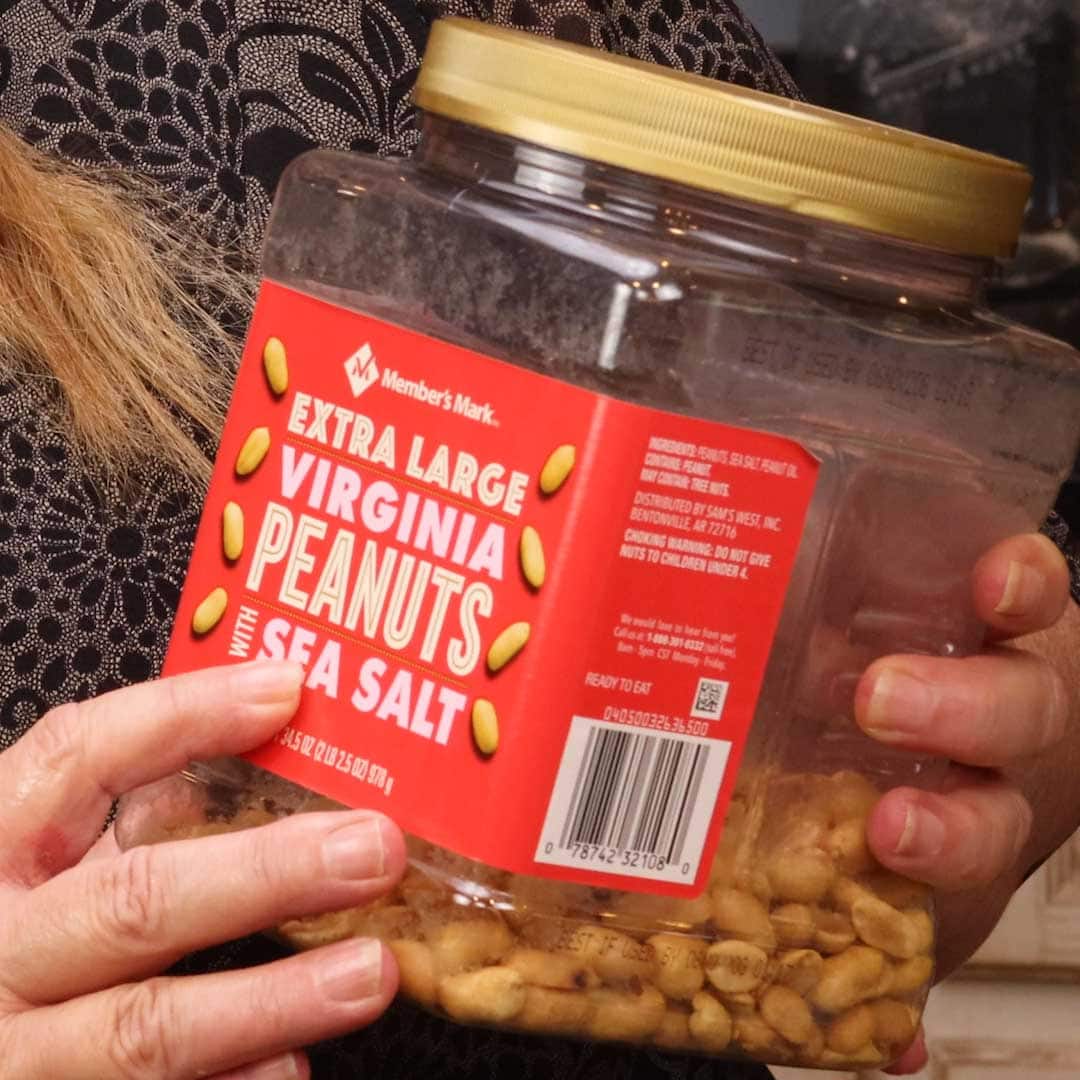
What are the Best Peanuts to Use in Peanut Brittle?
This is a widely debated topic. I've seen recipes using all kinds of peanuts and I'm sure they work just fine. Use what you have or you can find.
My mom always used raw peanuts for her peanut brittle, but they can be hard to find, so I switched to Virginia peanuts without skins.
If you want to use raw peanuts, the process is a little different for making peanut brittle. You heat until the mixture reaches about 245℉/118℃ and then you add the raw peanuts and bring the mixture up to 300℉/149℃ to cook the peanuts.
Peanuts can burn, though, so I never liked using raw. Instead, I use Virginia Peanuts that are lightly salted and without skins. They work perfectly.
While you can use roasted peanuts, I really think the flavor is better with the Virginia peanuts.
How to Make Peanut Brittle in the Ninja Foodi
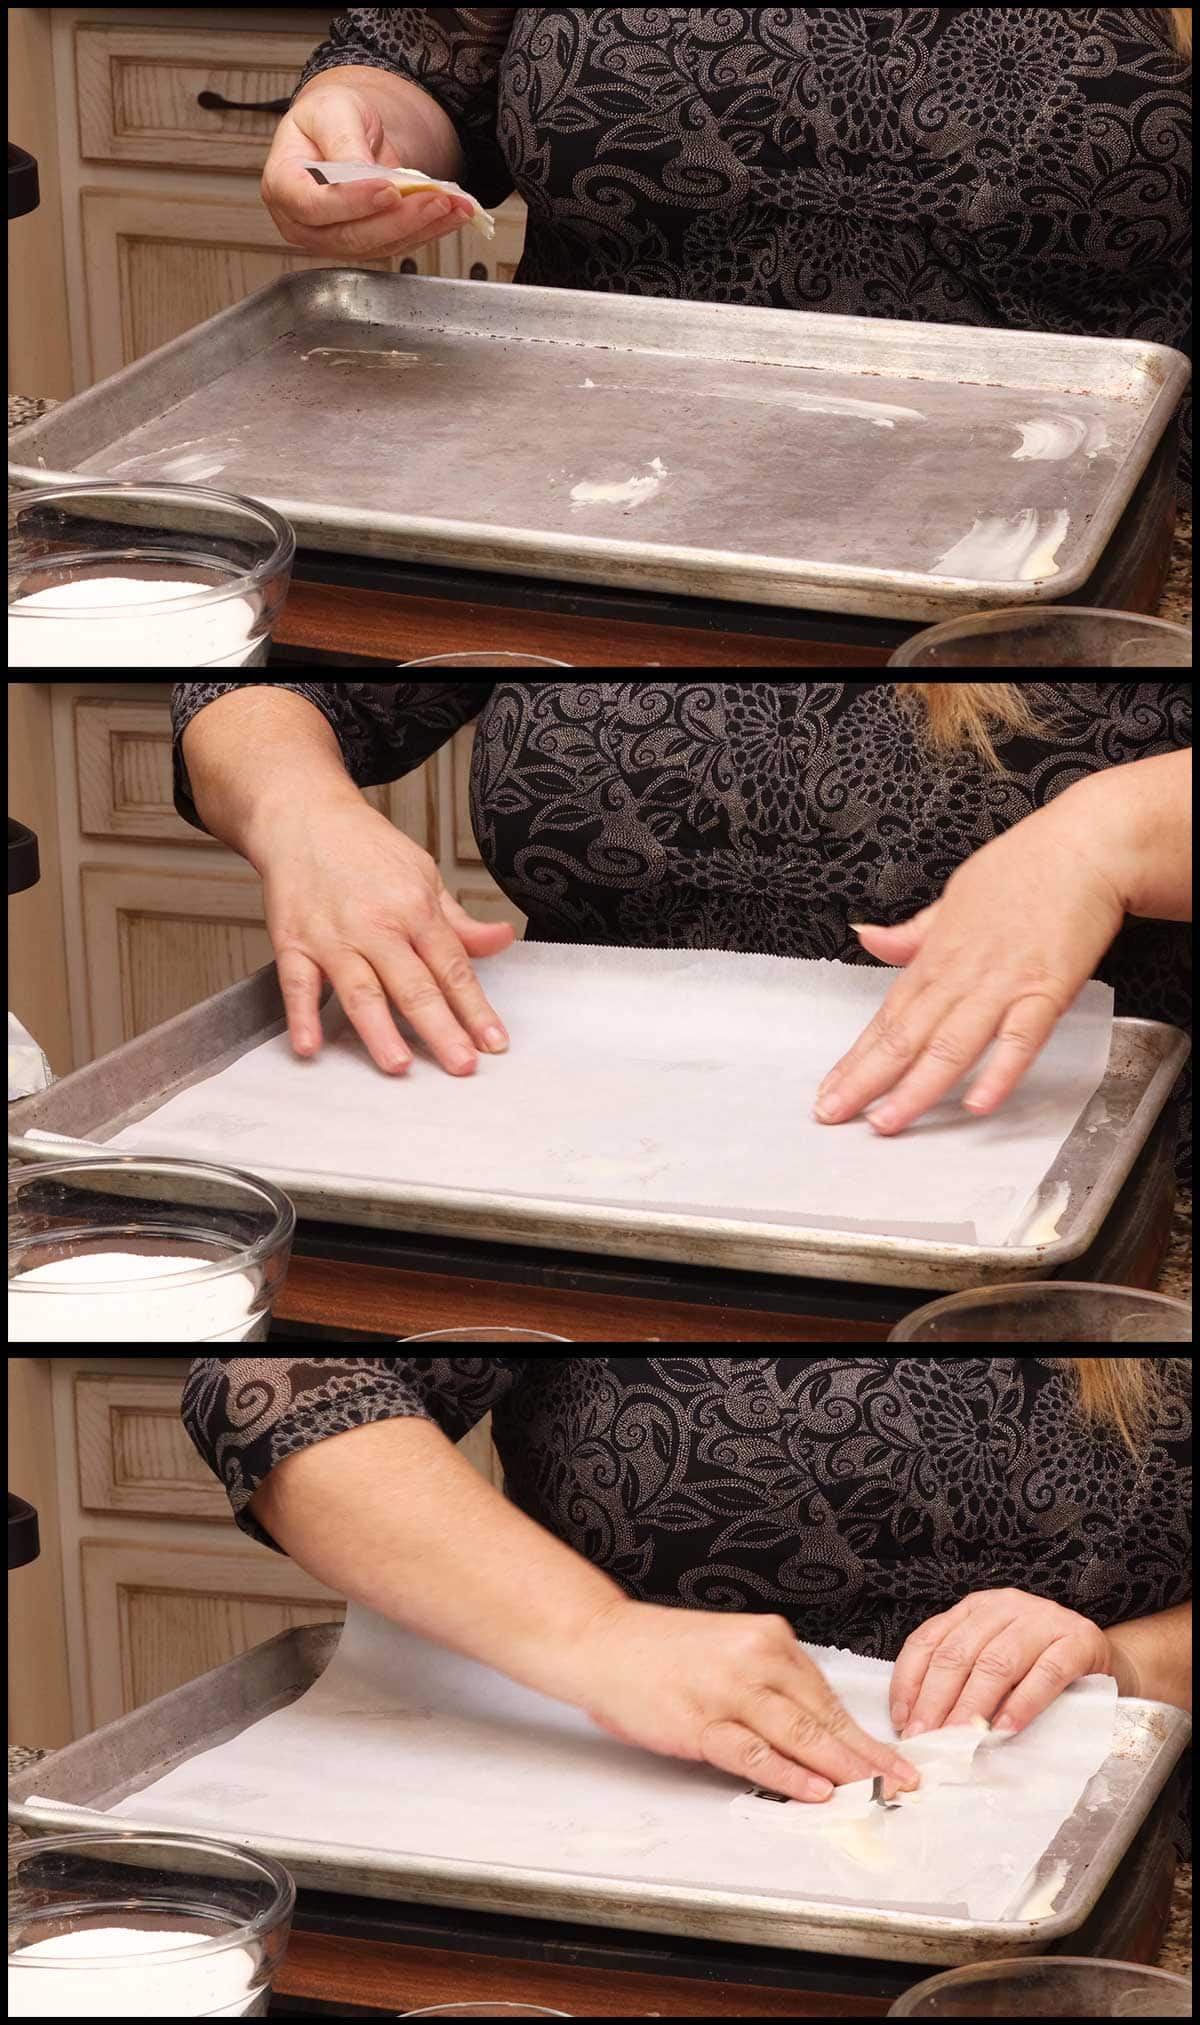
The most important thing when making peanut brittle or any quick cooking candy is having your ingredients all measured out and the pan prepared. The sugar mixture heats up quickly and you need to be ready with your pan.
Prep a half pan by spreading a little butter on it, especially in the corners and in the middle. Then cover the pan with parchment paper and butter the parchment paper. This will prevent the peanut brittle from sticking.
Set the pan aside and measure out all of your ingredients. Put the butter, sugar, salt, and corn syrup into the inner pot of the Ninja Foodi and turn the sear/sauté on high.

Stir with a wooden spoon or a high-heat-rated spatula until the butter and sugar is melted. If you see your butter separating, don't freak out. It. happened to me on one batch and I gently stirred and heated until it was incorporated into the sugar mixture.
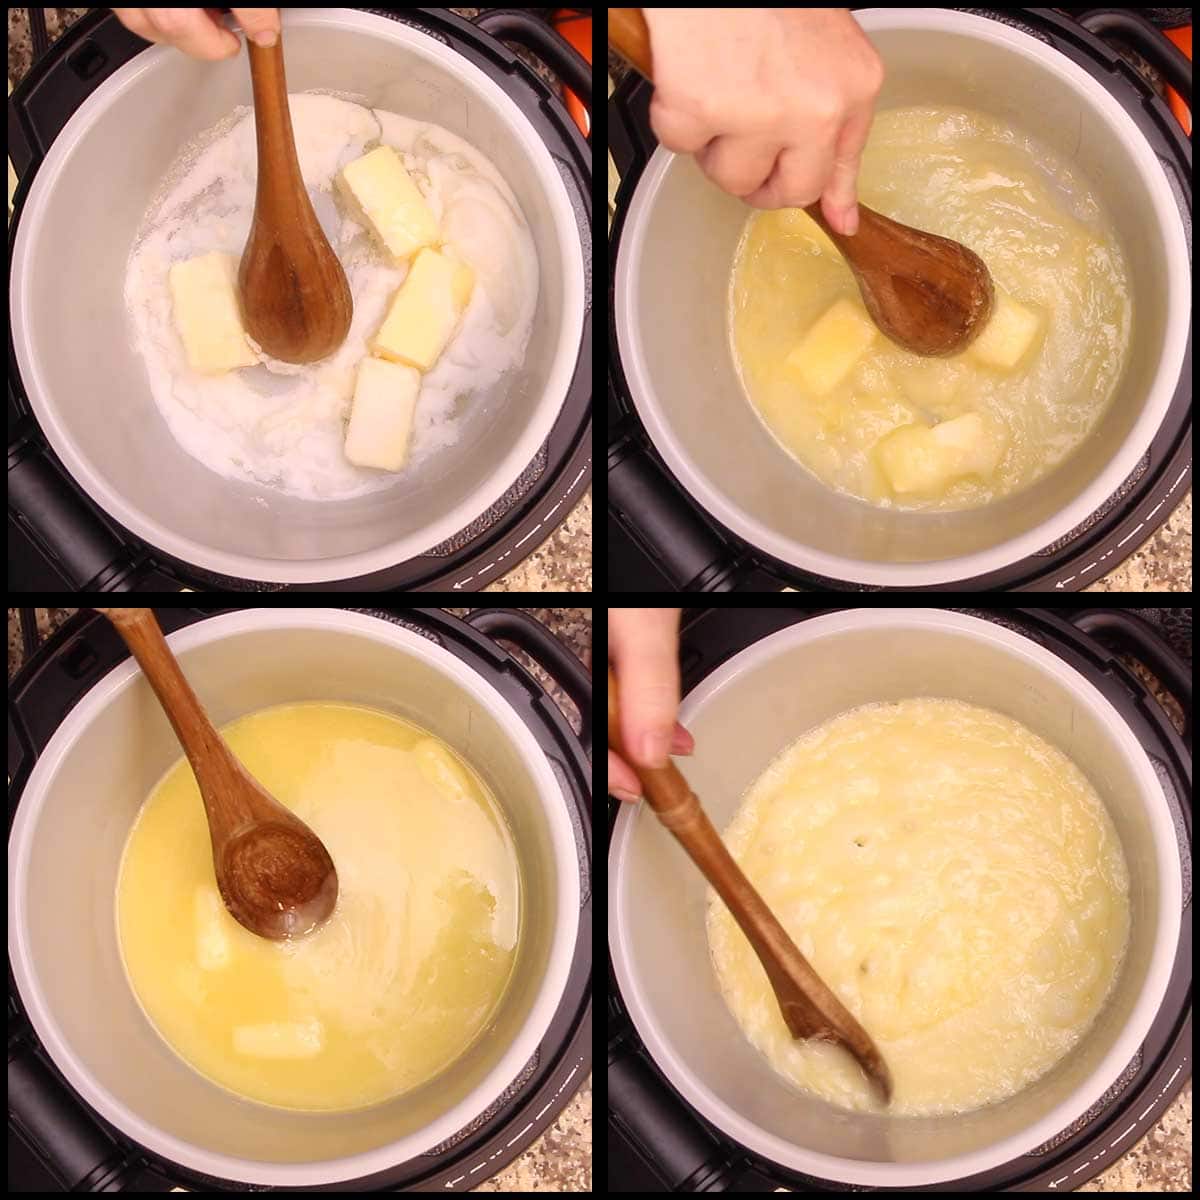
Once the mixture is fully melted, it will begin to boil. You don't need to stir while the mixture is heating up to hard crack stage or 300℉/149℃. It will take about 5-10 minutes for the sugar mixture to reach the correct temperature.
If you start to smell any burning of the sugar, turn the heat down. It is expected and normal for the mixture to deepen in color, so don't be alarmed by that.
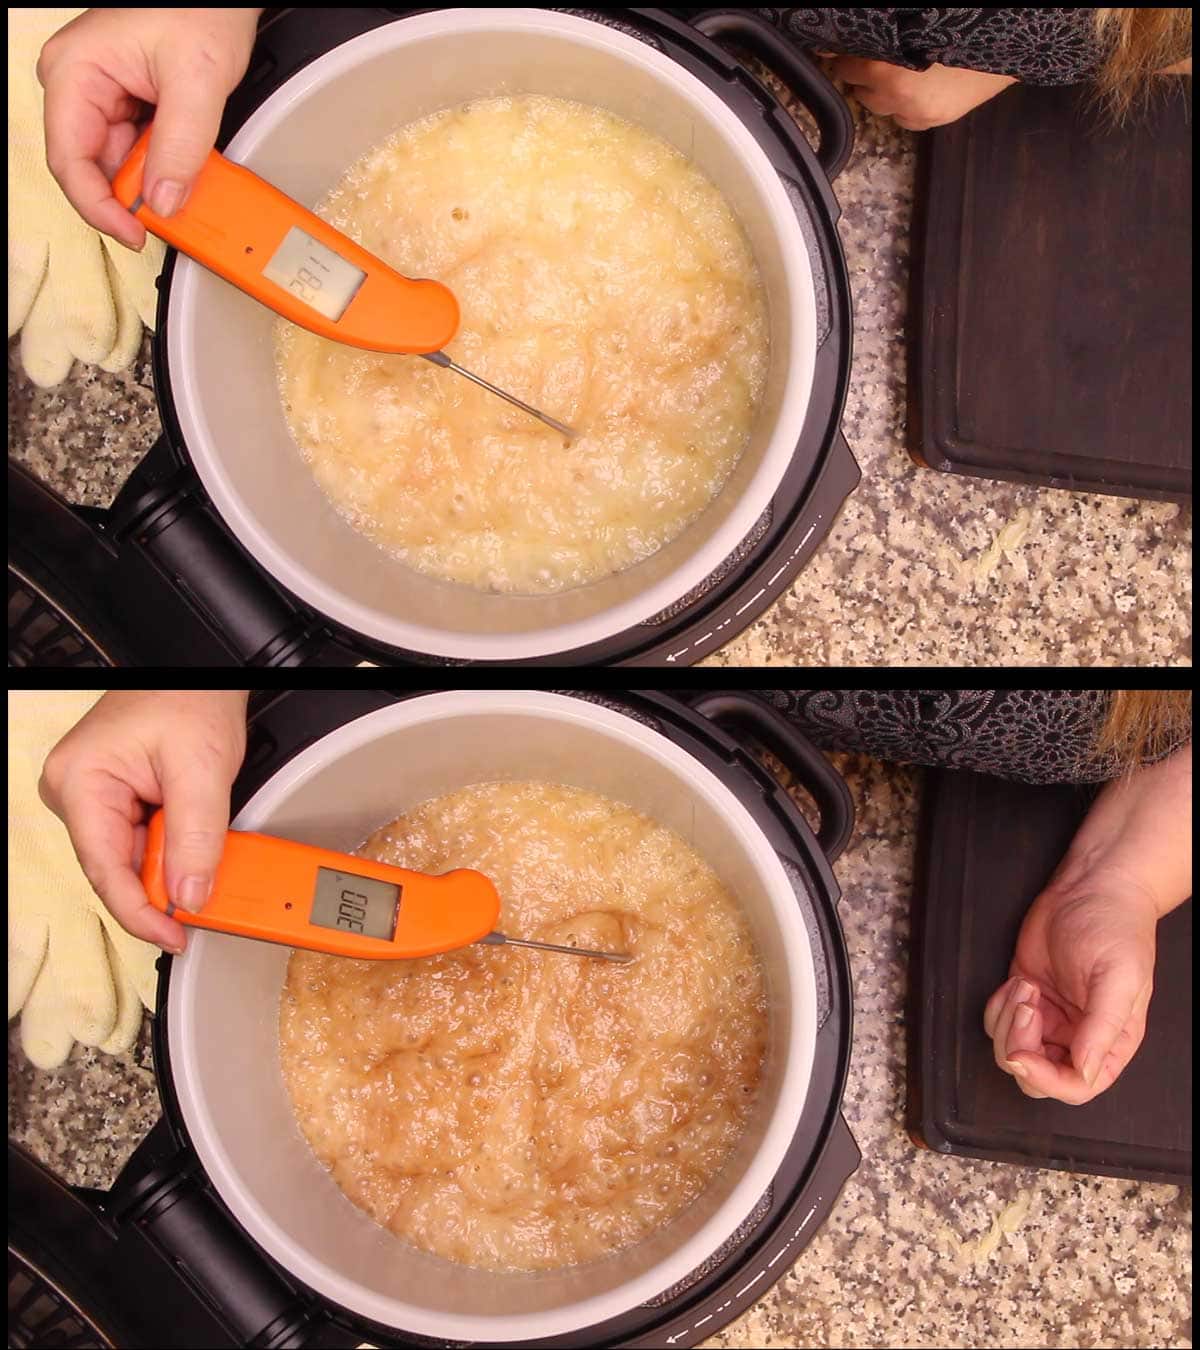
I usually stand over the mixture and use (affiliate link)my thermometer to check the temperature the entire time in different areas. It moves very fast and can burn easily, so keep a close eye on it.
When the mixture hits 300℉/149℃ in several spots, turn the heat off. You want to measure the temperature midway down, not on the bottom or the temp will read higher. If you turn the heat off too soon and the mixture doesn't get to 300℉/149℃ the peanut brittle will be chewy instead of brittle. It's still delicious, though!
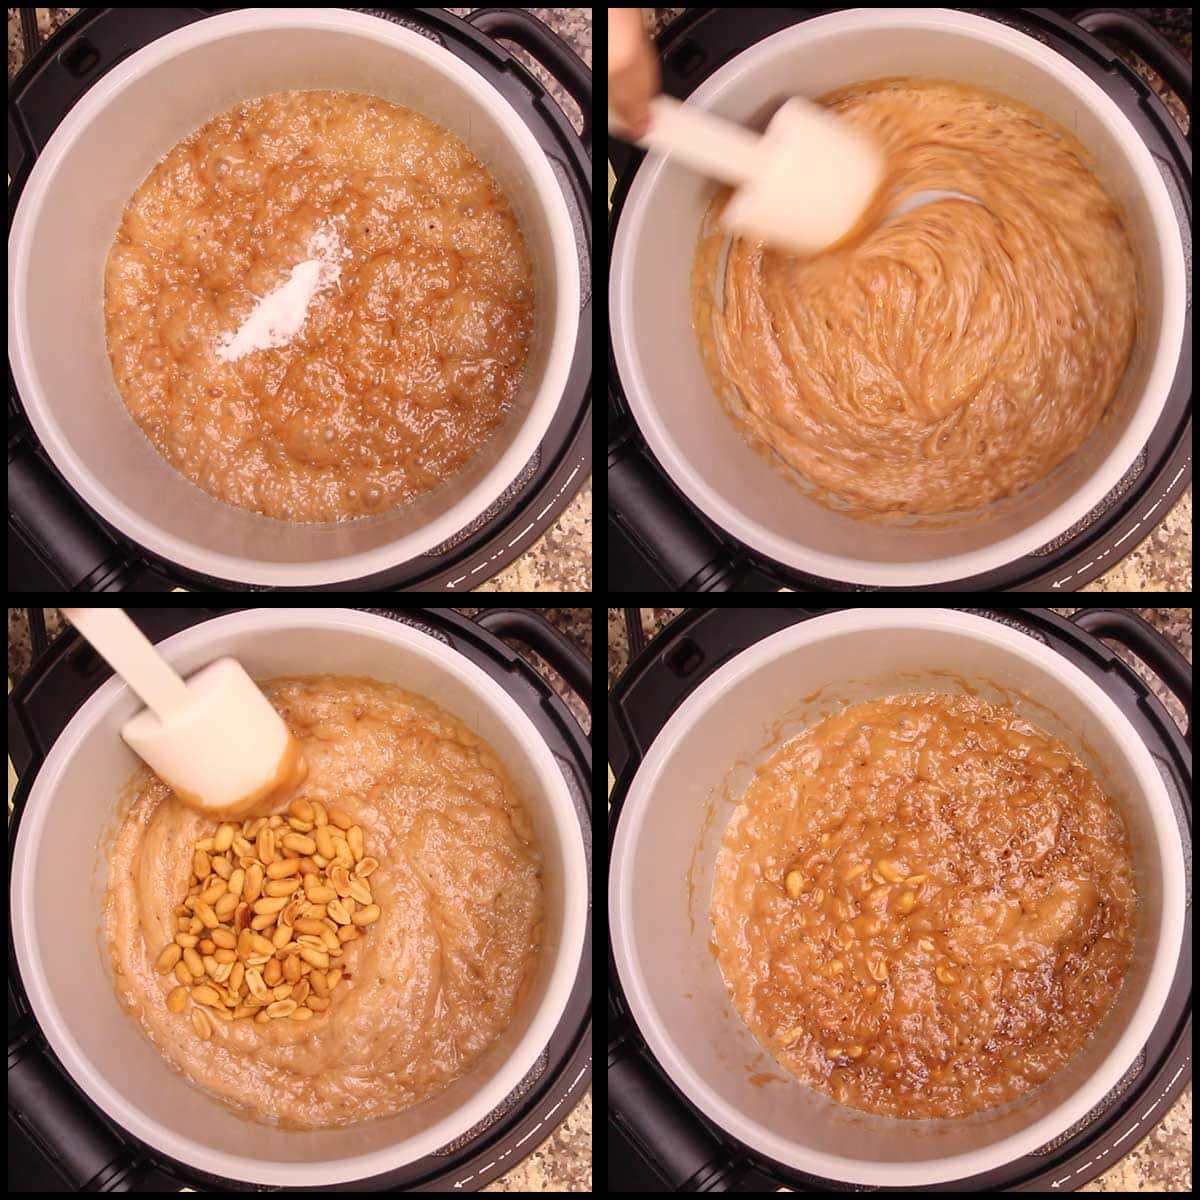
Immediately after you turn the heat off, add the baking soda and stir. The mixture will bubble up. This is adding air to the sugar mixture and it's what gives peanut brittle it's texture and makes it easy to bite into.
Next add the peanuts and stir, followed by the vanilla. Stir to incorporate the vanilla.
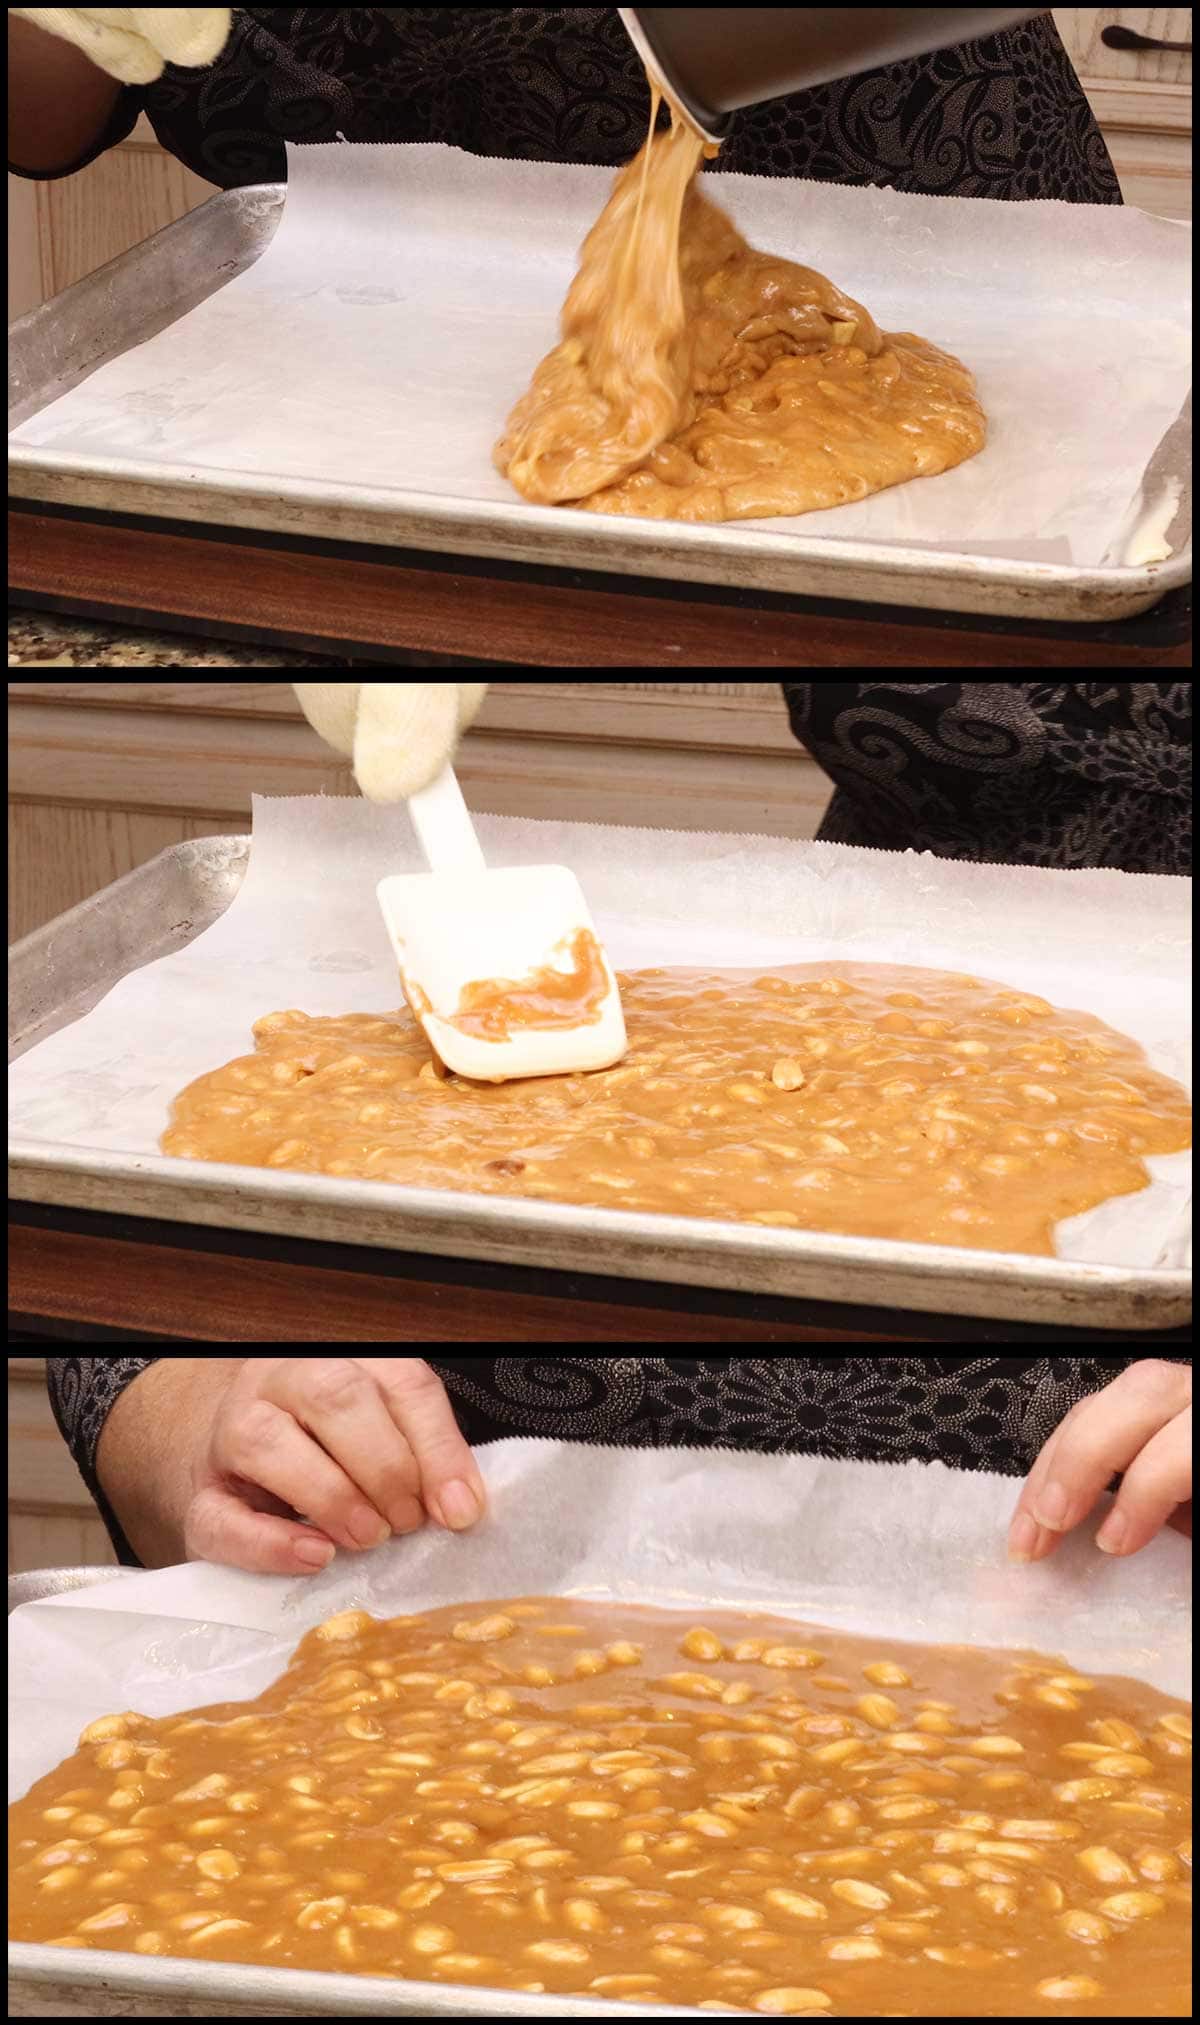
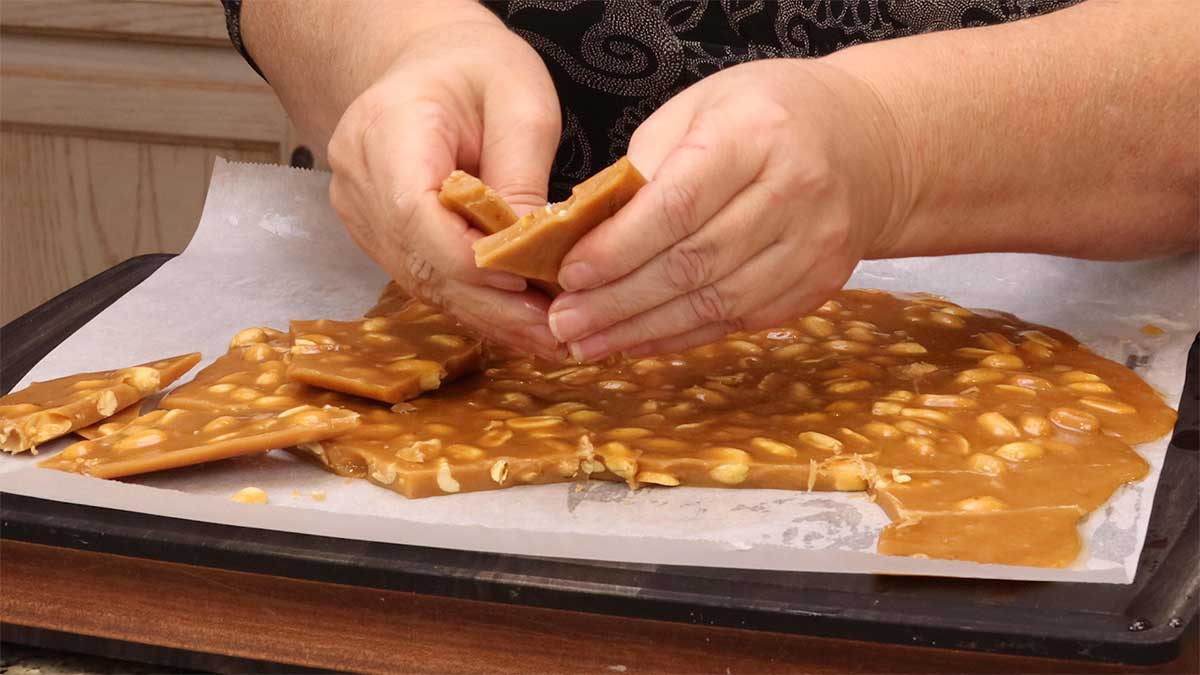
Use heat protection gloves to grab the pot and pour the peanut brittle out onto the prepared parchment lined and buttered tray. Let it spread out. You can use your wooden spoon to help it along, but you really don't need to.
Let the peanut brittle set up on the counter for at least 15 minutes. When it is firm and easily cracked, it is ready. While you can certainly taste it now, I do recommend letting it set for several hours to make sure it is completely cool before placing in containers or any steam will create condensation and your peanut brittle could become tacky.
Break the peanut brittle up into desired size pieces and enjoy!

Peanut Brittle
Ingredients
- 1¼ cups white sugar
- 1 cup butter salted or unsalted
- ¼ cup light corn syrup
- ½ teaspoon fine grind sea salt
- 2 teaspoon vanilla extract
- ½ teaspoon baking soda
- 1 cup Virginia peanuts without skins
Would you like to save this recipe?
Instructions
- Line a large sheet pan with parchment paper and lightly butter the parchment paper.
- Add the sugar, butter, salt and the light corn syrup to the inner pot of the Ninja Foodi or a deep pot on the stove. Turn the sear/sauté on high on the Foodi and use medium high on the stove. Stir the mixture until the sugar has dissolved and the butter has melted. Once that has happened, stop stirring.
- Let the sugar mixture come to a boil and when it reaches 300°F/149°C, turn the Ninja Foodi or the stove off. It is important that you reach the 300℉/149℃ for the candy to set up correctly. Lower temperatures will result in a chewy brittle.
- Add in the vanilla extract, baking soda, and peanuts and stir to combine. Immediately pour the mixture out onto the parchment lined pan. Pour the brittle in the middle and it will spread out on it's own.
- Let the peanut brittle sit on the counter for about 15 minutes to cool. When it is cool enough to handle, you can break it into pieces. Serve & Enjoy!
Nutrition
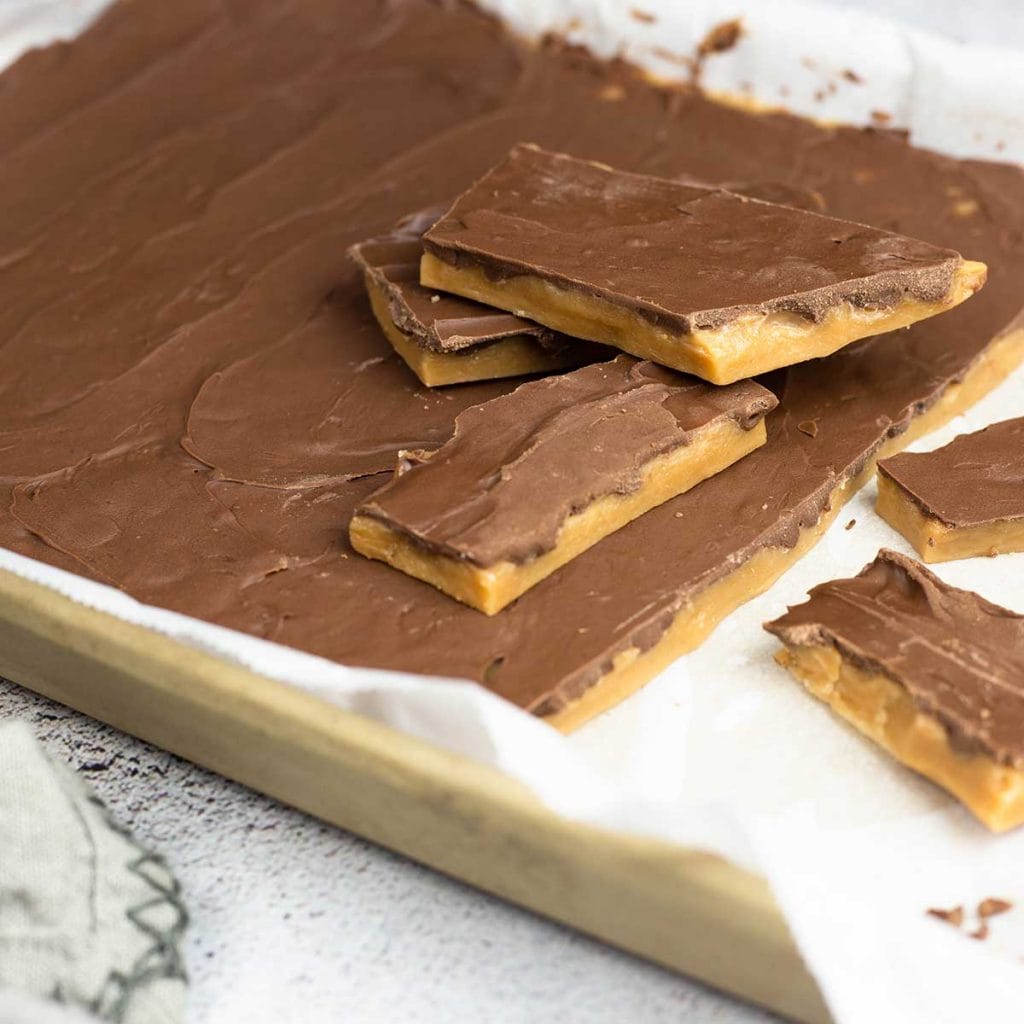
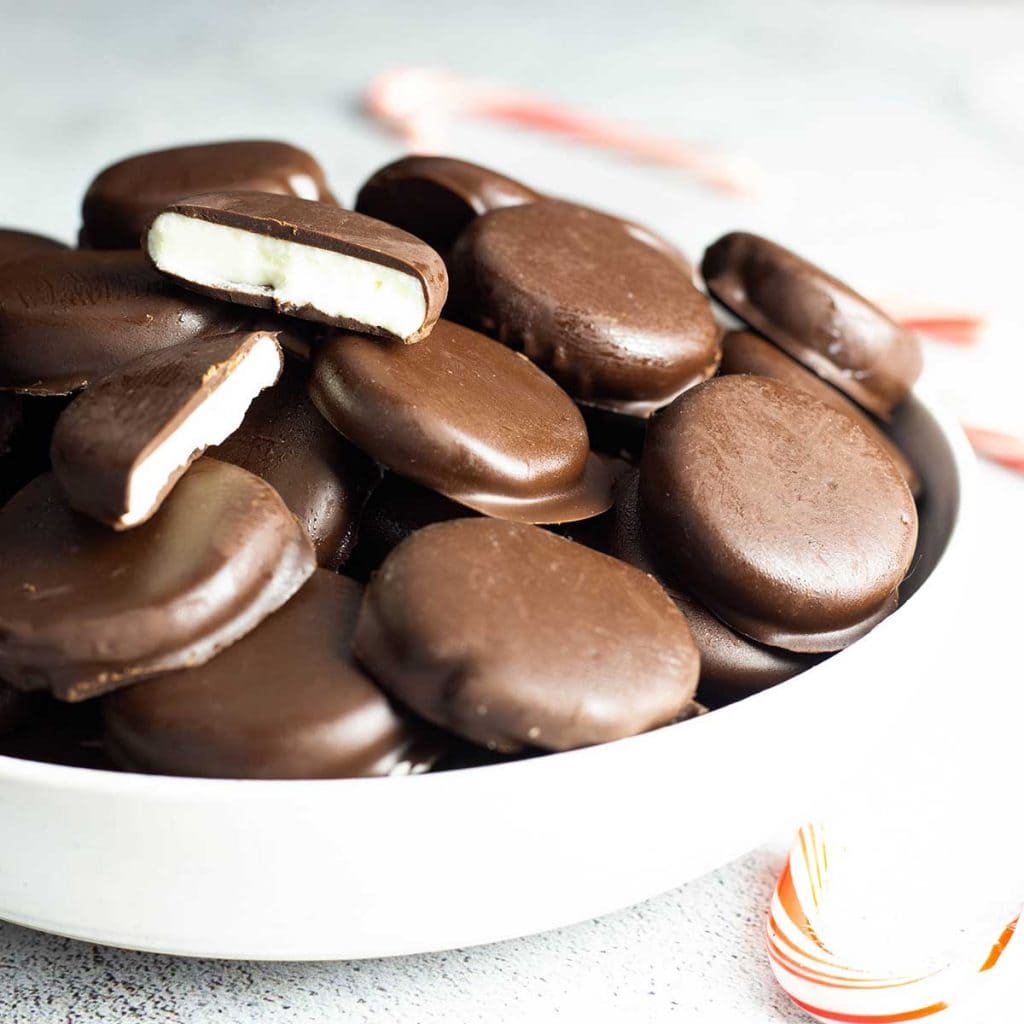
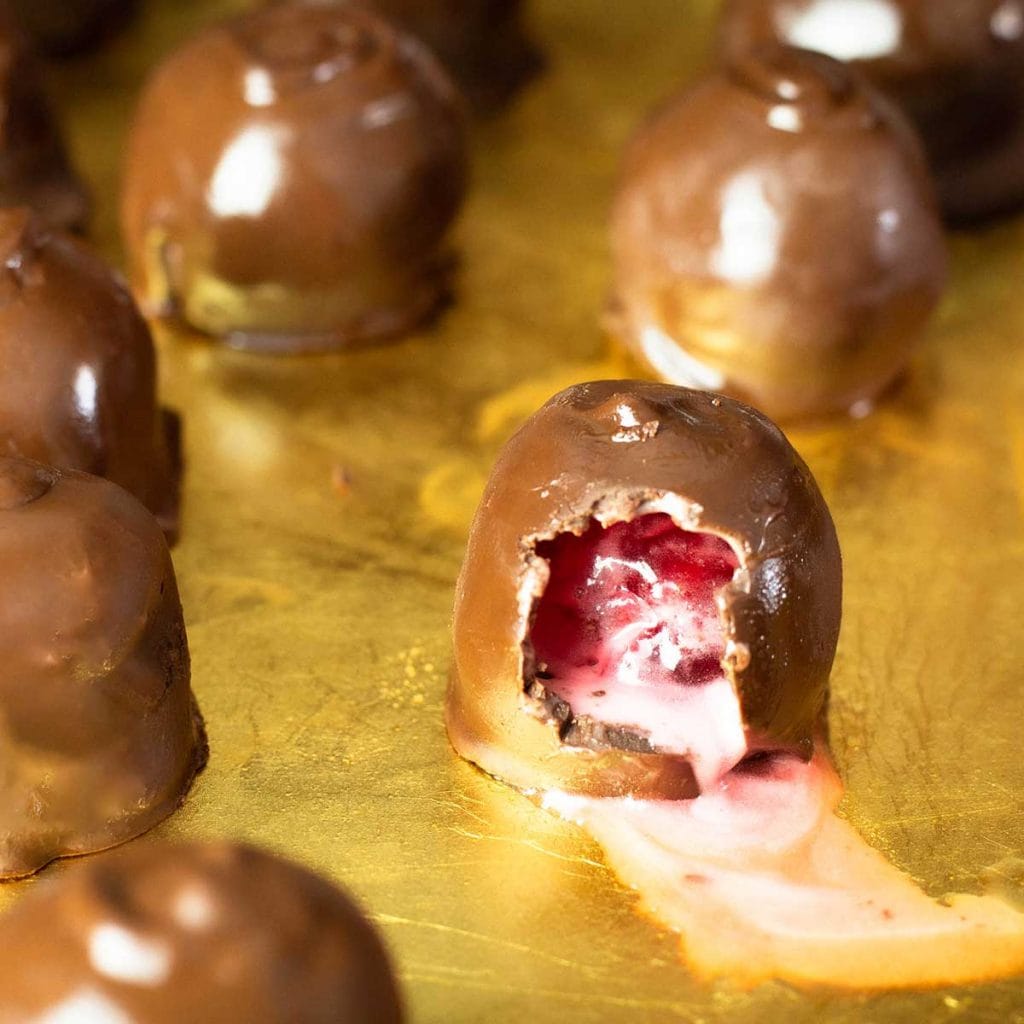
I hope you love this recipe! Here are some other candy recipes you might be interested in!

Homemade Toffee Peppermint Patties Chocolate Covered Cherries
Enjoy!
About the Recipe Author, Louise Long
Louise is a full-time recipe creator and food blogger @ The Salted Pepper. She has over 30 years of experience with cooking and recipe development. She owned a restaurant for several years and was a full-time RN until retiring to blog full-time.

She published her first cookbook in the Fall of 2018 and is very interested in writing several more.
Louise is also the creator of an online Ninja Foodi Pressure Cooking Course with over 100 instructional step-by-step videos. People absolutely rave about the course and all the value they have received from it.
Louise has several very active Facebook groups that help people with the basics of cooking and learning more about the appliances they love.
Ninja Foodi Pressure Cooker & Air Crisper 101
Ninja Woodfire Outdoor Grill & Smoker
Louise is also a YouTube creator and you can find most of her recipes in video format on The Salted Pepper YouTube channel.
She is very responsive to messages and eager to help in any way she can. Get more Information about Louise & contact information
I WOULD LOVE TO SEE WHAT YOU ARE COOKING UP IN YOUR KITCHEN! TAG ME @THESALTEDPEPPER ON YOUR FAVORITE SOCIAL MEDIA PLATFORM WHEN YOU MAKE A DISH!
BE SURE TO FOLLOW THE SALTED PEPPER RIGHT HERE ⇓⇓⇓⇓⇓
Cynthia says
Hi Louise!
I'm really wanting to try this recipe for my husband but he likes raw peanuts. Would there be any changes to the recipe using raw?
Thanks
Cynthia
Louise says
My mom always made it with raw peanuts and it can be a little trickier. You usually put the raw peanuts into the sugar mixture and they cook as the sugar comes up to temp. From what I understand, the peanuts can burn, which is why I said it's a little trickier. You can do it though. I would look up a recipe for using raw peanuts and see when they add them in.
John says
This is the best Peanut Brittle I’ve tasted in a long time. So easy to do and her step by step video hells to make sure your doing it right. Make sure you have a good thermometer.
Louise says
I'm so glad you enjoyed it!
SHARON R BARRETT says
I have never made peanut brittle before the first time it came out perfect. Unfortunately have dish sitting on desk and I am into the Brittle all the time. This recipe is so simple and easy to make, It was fun to make, Louise is a great instructor.
Louise says
I'm so glad you are enjoying the peanut brittle! Try the toffee one day, it's so good and I think you'll love it!