
You only need one ingredient to make Ghee: unsalted butter. There are several different methods for making homemade ghee, but the easiest one is using your slow cooker! You simply set it and walk away.
Would you like to save this recipe?
The process for making ghee is straightforward and most people heat the butter on the stove on a low heat until the milk solids separate from the fat and begin to brown. The issue I've always had is regulating the temperature on the stove.
Everything starts out fine, but after 10 minutes or so I find myself getting distracted or trying to multi-task and, before I know it, the Ghee is ruined because the milk solids have begun to burn which imparts a horrible taste into the liquid butter fat.
Sound familiar? Or perhaps you haven't made your own Ghee because you know you don't like to babysit your food as it cooks. I totally get that! There is nothing worse than babysitting food as it cooks. That's one of the reasons I love cooking with the Ninja Foodi Pressure Cooker & Air Crisper so much. I no longer have to stand over a pot on the stove while dinner cooks. In fact, I used my Ninja Foodi on the slow cook mode to make this Ghee recipe and the results were amazing! You can use any slow cooker, but you may have to adjust your temperature and timing depending on how it cooks and what kind of inner pot or insert it uses.
After purchasing Ghee for making homemade naan bread and realizing that it costs twice as much as butter, I was on a mission to create a foolproof way to make Ghee that doesn't require babysitting! I started out trying to pressure cook butter in mason jars, but no matter how long I pressure cooked, I just couldn't get the nutty flavor that is found in Ghee. I ended up with amazingly easy-to-make clarified butter, but not Ghee.
Then, I had an idea. Can I use the slow cooker function on the Ninja Foodi to make Ghee? So, I gave it a go and was blown away by how easy it is compared to making it on the stovetop. It's almost completely hands-off and foolproof, YAY!
What is the Difference Between Ghee & Clarified Butter
The difference between clarified butter and Ghee is the flavor and the time it takes to make it. Clarified butter is made by heating regular butter (can be salted or unsalted) over low to medium heat until the milk solids begin to foam and rise to the top. Then the white foam is skimmed off of the top leaving behind just the butter fat that is yellow in color and tastes like concentrated butter. Ghee, on the other hand is usually made from unsalted butter that is brought to a boil and then the heat is reduced until the butter is simmering. As the butter fat begins to separate from the milk proteins, they will first rise to the top just like when making clarified butter and then begin to sink to the bottom of the pot where they begin to brown. It is the browning of the milk solids that imparts the nutty flavor in Ghee. It's part of a reaction called the Maillard reaction.
Clarified butter is great to use for dipping seafood like lobster, shrimp, crab, and snow crab legs. It's also great for sautéing vegetables and, because it has a higher smoke point than butter, you won't burn the butter! Clarified butter is also great on popcorn! You can pretty much use it any time you would use melted butter.
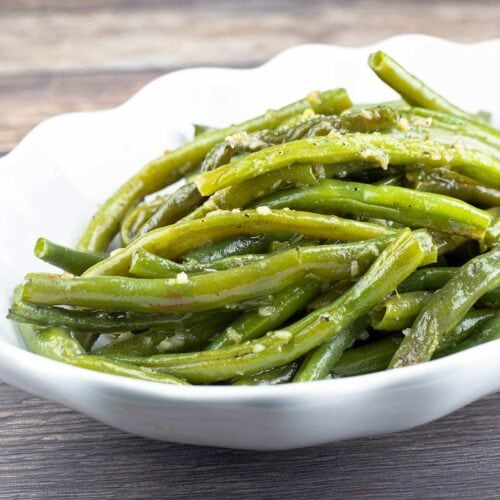
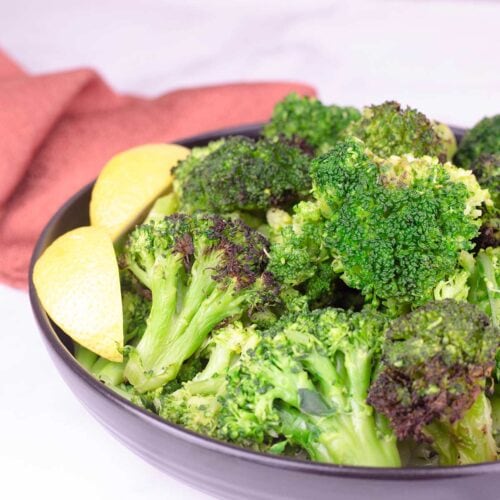
Ghee is often used in Indian cooking, but it can also be used anytime you would want to use clarified butter and boost the flavor with a little nuttiness. If you haven't tried ghee on steamed vegetables, you simply have to. It's one of the most delicious things I've ever tasted! Ghee also has a higher smoke point than regular butter and is great to use for sautéing. I recently used it to caramelize onions for French Onion Pasta and it worked great and the onions had a wonderful flavor.
Ghee and Clarified Butter can be stored in an airtight container at room temperature for 9 months and even longer or you can store them in the refrigerator. Both will solidify some, but won't harden completely, making either perfect for making grilled cheese sandwiches!
Use either Ghee or clarified butter in any type of high-heat cooking, so instead of grabbing the cooking oils, grab the ghee!
What Type of Butter is Best for Making Ghee?
As with most things in cooking, the better the quality of ingredients, the better the outcome. This is certainly true when making Ghee, but you can make amazing ghee with less expensive store-brand butter and that is what I recommend, at least the first few times you make it.
First of all, if you have never had ghee before there is no reason to spend $10 on a pound of butter to try it out. Buy whatever butter is on sale, BUT make sure it is unsalted butter. This is very important and will greatly affect the flavor of the ghee. When I first tested this recipe all I had was salted butter and so that is what I used. The ghee browned nicely and I was able to strain it. While it was nutty and delicious, it was too salty. During the process of making ghee, the water is removed from the butter due to evaporation, but the salt amount stays the same, hence salty ghee. If salted butter is all you have, you can absolutely use it, but I think you will find that you enjoy the ghee better when it is made from unsalted butter.
Many people use Kerry Gold butter which is an Irish butter that comes from grass-fed cows and has a higher fat content than most American butter. The big question is if it is really worth the increased cost. For me, it isn't and I make my ghee with cheap butter. However, it may be worth it to you, so I would suggest making a few batches of homemade ghee with different butters and see which you like the most.
Tips for Making Ghee
- Make sure your slow cooker lid is vented. Part of the process of turning butter into ghee is evaporation and you need the water to be able to evaporate. Most slow cookers do have a little hole in the lid, but if yours does not then either keep the lid off and cover the top with a paper towel or dish cloth that will let the water evaporate or place a spoon between the top of the slow cooker insert and lid to vent it. When using your Instant Pot or Ninja Foodi with 2 lids, make sure the valve is vented to let the steam escape or leave the pressure lid off.
- When at all possible, use a ceramic insert in your slow cooker, Instant Pot, or Ninja Foodi. The stainless steel inserts do conduct heat a little differently and you will want to check on the ghee every few hours as it cooks to make sure it is not getting hot enough to burn the milk solids.
- Each slow cooker may cook a little differently, some hotter and faster than others. This recipe was tested in the Ninja Foodi Pressure Cooker & Air Crisper and the Ninja Speedi using slow cook and both worked exactly the same, but I still encourage everyone to check on the ghee at least every 2 hours the first time you make it.
How to Make Slow Cooker Ghee
Besides the butter and slow cooker, you will also want to have the following supplies.
- Fine Mesh Strainer
- Something to line the strainer with. I use a flour sack, but a few layers of cheesecloth or a coffee filter will also work.
- Heatproof glass jars for storage.
It doesn't matter if the butter is cold or room temperature.
Place the butter into the inner pot of the slow cooker. I used the (affiliate link)Ninja Foodi OL501 with SmartLid, but any slow cooker should work just fine. Set the temperature to high and the time to 8 hours and hit start.
You can either slow cook the ghee with the lid off of the slow cooker or make sure it is vented so the steam can be released.
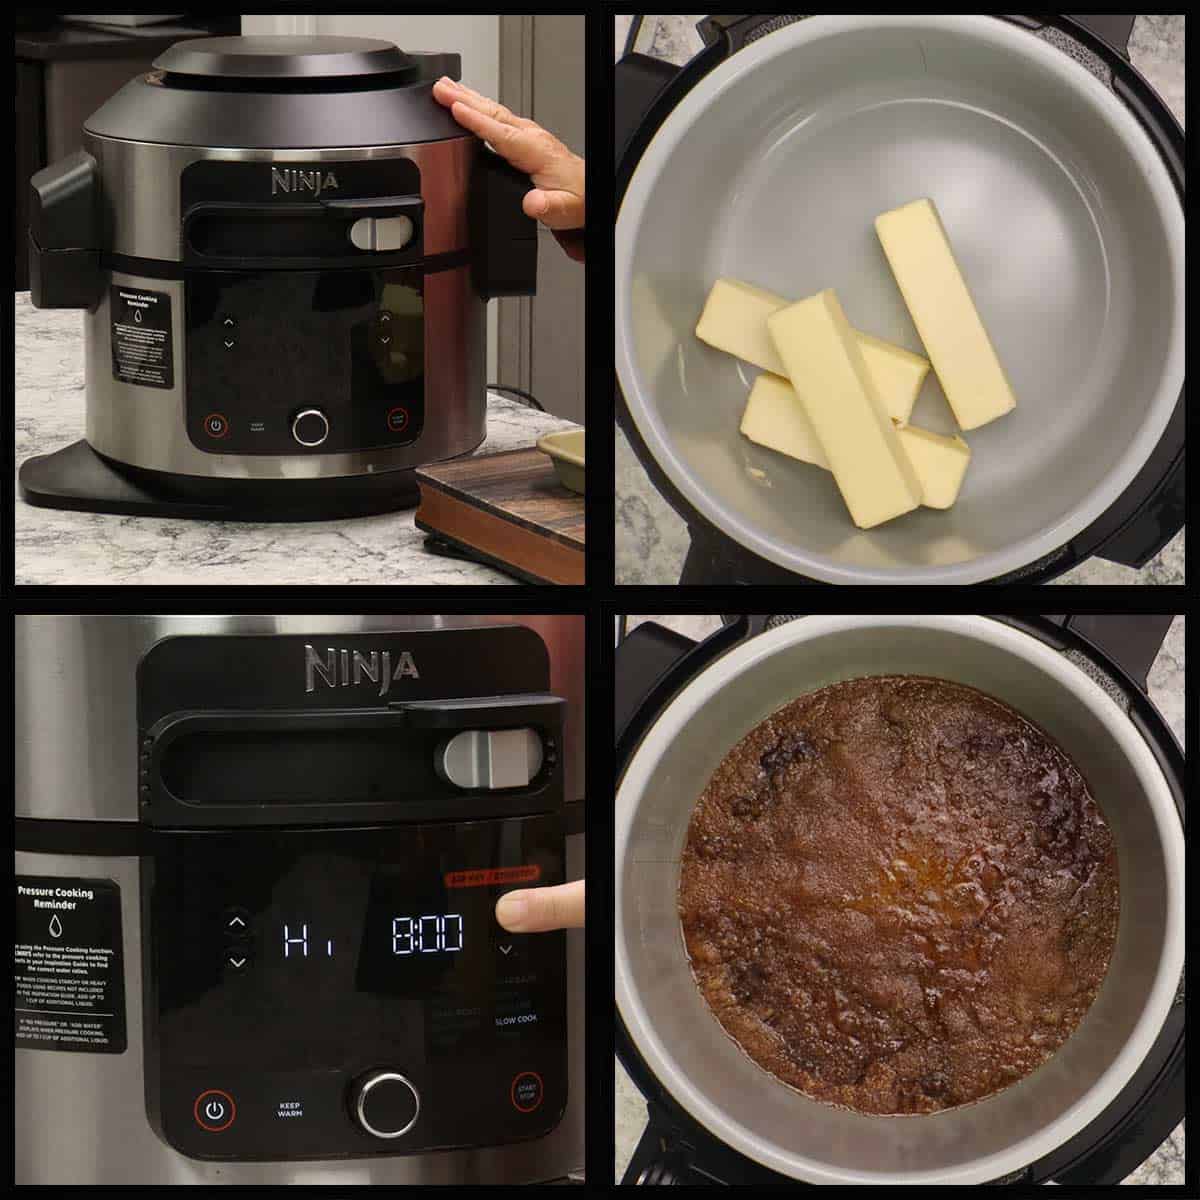
The picture above is after 8 hours on high slow cook and 1 hour of keep warm. It looks super dark, but it was absolutely PERFECT! The flavor of the ghee was outstanding with the perfect balance of nuttiness.
However, you may not want to slow-cook your ghee for the full 8 hours, especially if you want the nutty flavor to be very mild. I checked on the status of this batch after 4 hours, 6 hours, and 8 hours and here are the differences.
- At 4 hours of high slow cook, the butter fat had separated from the milk solids and the color of the liquid was yellow. It can be removed and strained at this point, but there wasn't any nutty aroma or flavor and I would consider this timing good for clarified butter more than ghee.
- At 6 hours of high slow cook, the liquid was turning a deeper golden color and I could smell the nutty aroma. You can strain at this point and have ghee, but it will be mild in the nutty flavor.
- At 8 hours of high slow cook, honestly, it looks burnt, but it isn't! This is the timing I like the best and the result is a delicious and flavorful ghee.
Once the ghee is cooked to the point that you want it, turn the slow cooker off and strain the liquid from the milk solids.
I like to use a piece of a flour sack because none of the milk particles get through it. I use flour sacks for so many things in the kitchen. They make great hand towels, yogurt strainers, and ghee strainers. You can find them here on Amazon: (affiliate link)Flour Sacks
You can also use a few layers of cheesecloth, a coffee filter, and I've even used a paper towel when in a pinch. The paper towels is my least favorite because it absorbs so much of the ghee.
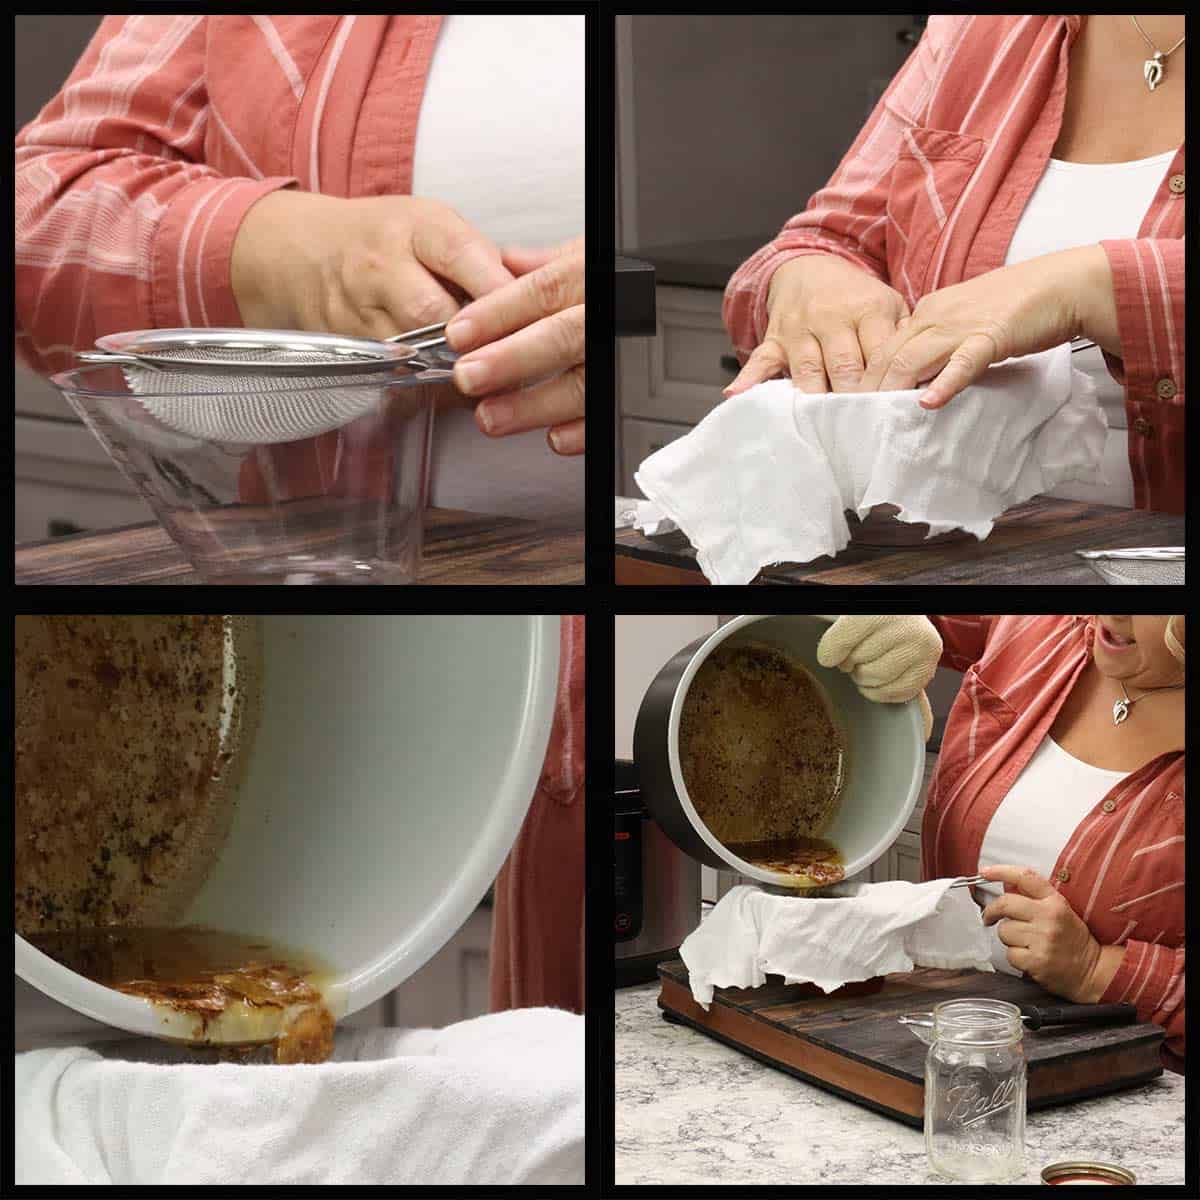
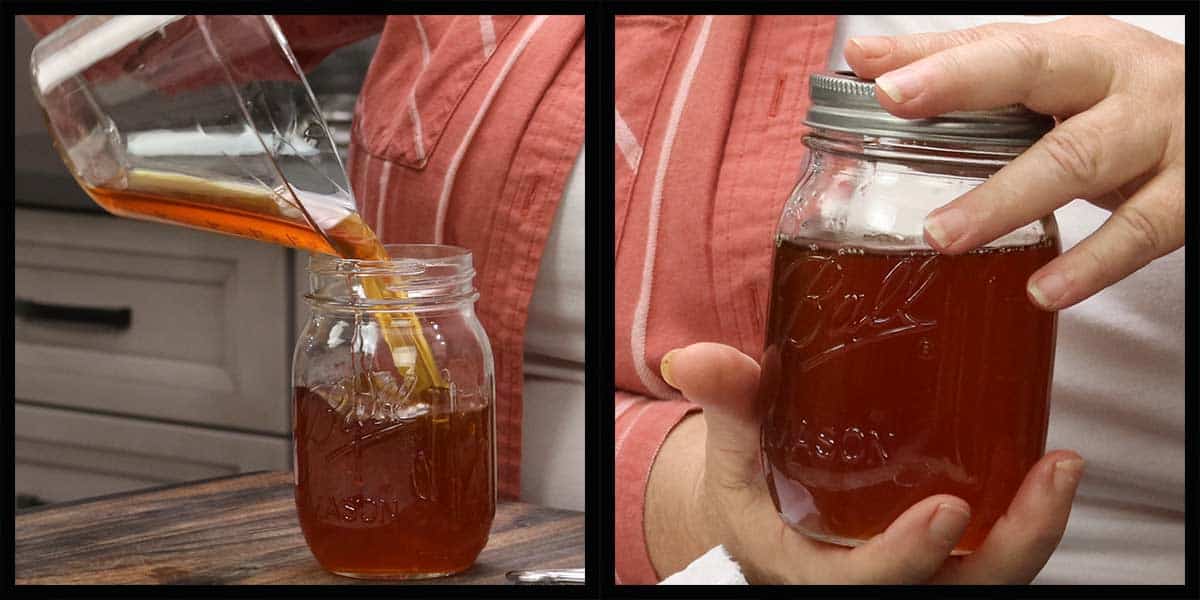
You can either strain the ghee directly into the jar you are storing it in or strain it into a measuring cup with a pour spout and then transfer it into the jar like I did.
You can use your ghee right away or leave it on the counter or in the fridge until you are ready to use it.
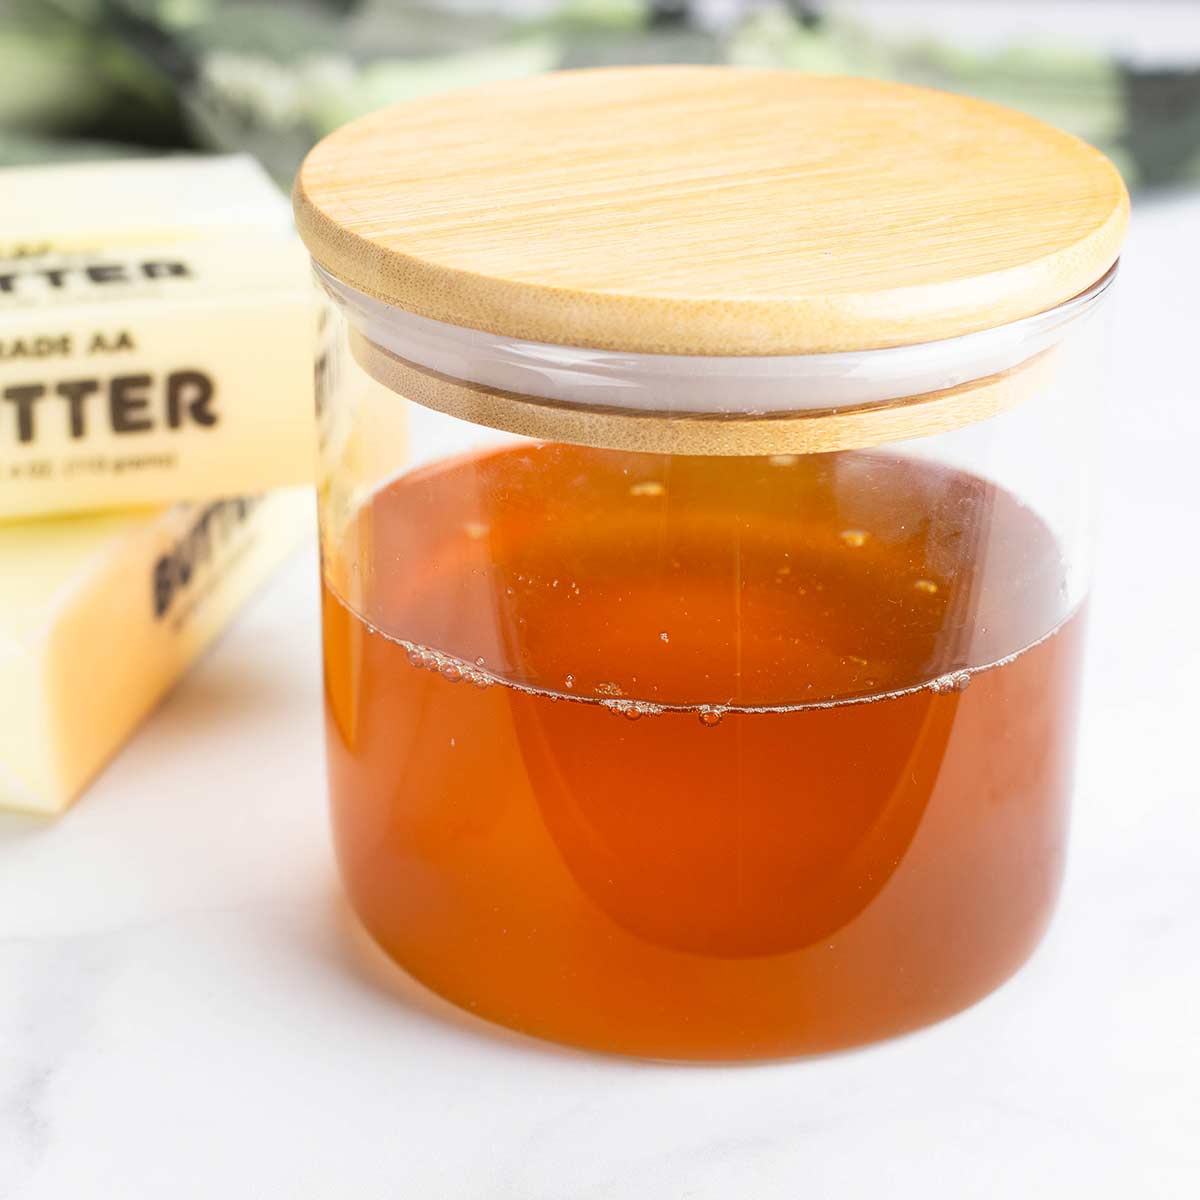
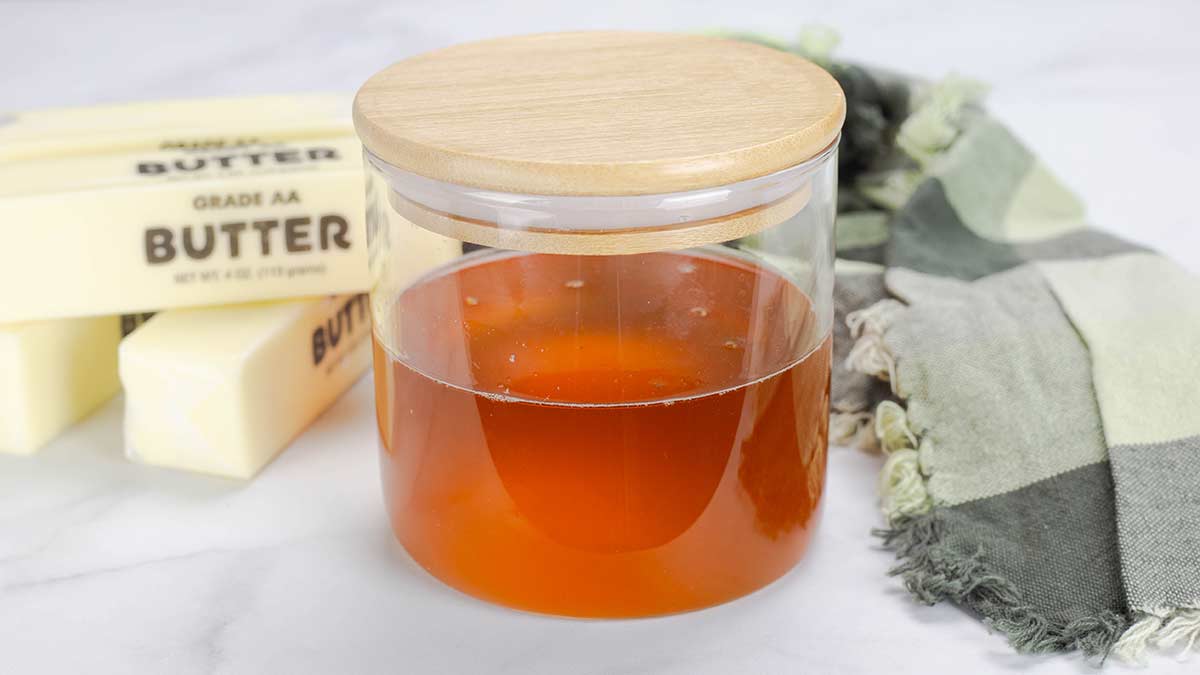
Now, what might surprise you is how much the ghee color changes as it cools! You might be thinking, that doesn't look like any ghee I've bought, it's too dark. Well, that's what I thought when I made the first batch and then it cooled and lightened up so much it was shocking!
Below is a picture of two batches of ghee using the SAME slow cooker method and both were cooked for 8 hours on high. The one that is soft, but not liquid was actually left on keep warm for another 7 hours and the liquid was just as dark as the batch that is still liquid.
This is normal! It has happened with every batch I've made. As it cools, it not only lightens in color, but it becomes a little grainy in texture. These things are nothing to be concerned about and are perfectly normal.
Enjoy your ghee!

Frequently Asked Questions
Absolutely! Just let it cool completely before freezing to avoid ice crystals from forming. Freeze it in an airtight container or freezer bag. It will stay good in the freezer for at least 1 year.
Depending on the size of your slow cooker, you can use several pounds of butter at one time to make ghee. The cook time will remain the same even though the volume is greater.
If you want to make a small batch of ghee, I recommend using at least 1 cup of butter to ensure that the entire bottom of the slow cooker is covered with butter for even cooking. You may find that your ghee is done quicker if you don't use a full pound of butter.
No, you don't. Because the milk solids and water are removed from the butter what's left is pure fat and it is shelf stable when stored in an airtight container. Bacteria requires water to multiply and therefore won't grow in ghee, just like it doesn't grow in olive oil or other types of cooking oil and fat.
You can safely leave ghee at room temperature for 6 months or more as long as it has been cooked and strained properly. If you see any solid particles in the ghee after straining, you will want to strain it again.
If you aren't sure, you can always refrigerate it.
Use your ghee in these recipes!
Now that you have made homemade ghee, I know you can't wait to use it. Here are some recipes where you can easily replace the butter with ghee in a 1:1 ratio and enjoy the flavor of your ghee.


Slow Cooker Ghee Recipe
Equipment
- Slow Cooker
Ingredients
- 1 pound unsalted butter
Would you like to save this recipe?
Instructions
- Place the butter in the inner pot of the slow cooker. Put the lid on, but make sure it is vented to release the steam as the butter cooks.1 pound unsalted butter
- Set the timer for 6-8 hours on high. 6 hours will produce ghee that has a mild nutty flavor, but leave it for 8 hours and the nuttiness is outstanding.
- When the time is up, you should see an amber colored liquid with dark particles of milk fat settled on the bottom and sometimes the top of the liquid. The aroma should be sweet and nutty.
- Place the strainer over a clean heatproof container or jar and line the strainer with the flour sack, cheesecloth, or a coffee filter. Pour the cooked butter through the strainer so the clear amber colored ghee goes into the glass jar and the milk fats are left in the strainer. Put the lid on the jar of ghee.
- Allow the ghee to cool and discard the milk solids. Once the ghee has cooled, you will see it thicken up and lighten in color. This is completely normal. Store the ghee at room tempurature or in the refrigerator.
Notes
- Make sure your slow cooker lid is vented. Part of the process of turning butter into ghee is evaporation and you need the water to be able to evaporate. Most slow cookers do have a little hole in the lid, but if yours does not then either keep the lid off and cover the top with a paper towel or dish cloth that will let the water evaporate or place a spoon between the top of the slow cooker insert and lid to vent it. When using your Instant Pot or Ninja Foodi with 2 lids, make sure the valve is vented to let the steam escape or leave the pressure lid off.
- When at all possible, use a ceramic insert in your slow cooker, Instant Pot, or Ninja Foodi. The stainless steel inserts do conduct heat a little differently and you will want to check on the ghee every few hours as it cooks to make sure it is not getting hot enough to burn the milk solids.
- Each slow cooker may cook a little differently, some hotter and faster than others. This recipe was tested in the Ninja Foodi Pressure Cooker & Air Crisper and the Ninja Speedi using slow cook and both worked exactly the same, but I still encourage everyone to check on the ghee at least every 2 hours the first time you make it.
Nutrition
About the Recipe Author, Louise Long
Louise is a full-time recipe creator and food blogger @ The Salted Pepper. She has over 30 years of experience with cooking and recipe development. She owned a restaurant for several years and was a full-time RN until retiring to blog full-time.

She published her first cookbook in the Fall of 2018 and is very interested in writing several more.
Louise is also the creator of an online Ninja Foodi Pressure Cooking Course with over 100 instructional step-by-step videos. People absolutely rave about the course and all the value they have received from it.
Louise has several very active Facebook groups that help people with the basics of cooking and learning more about the appliances they love.
Ninja Foodi Pressure Cooker & Air Crisper 101
Ninja Woodfire Outdoor Grill & Smoker
Louise is also a YouTube creator and you can find most of her recipes in video format on The Salted Pepper YouTube channel.
She is very responsive to messages and eager to help in any way she can. Get more Information about Louise & contact information
I WOULD LOVE TO SEE WHAT YOU ARE COOKING UP IN YOUR KITCHEN! TAG ME @THESALTEDPEPPER ON YOUR FAVORITE SOCIAL MEDIA PLATFORM WHEN YOU MAKE A DISH!
BE SURE TO FOLLOW THE SALTED PEPPER RIGHT HERE ⇓⇓⇓⇓⇓
Catherine says
Hello, my ghee is completely black right after I took it off the crockpot after 8 hours. Will it change color and is it still good? What did I do wrong? It looks burnt.
Louise says
What type of crock pot do you have? Black is definitely not normal and sounds like the milk solids may have burned. I would strain it and see what the liquid tastes like, but if it tastes burnt then I'm afraid it is ruined. I have never experienced that and I've made tons of batches in my slow cooker, but different brands do cook differently unfortunately. Also, what type of butter did you use? In my experience that hasn't made a difference, but it is something to consider.
Catherine says
I have the original CrockPot. In the morning the color had changed to a grayish one, I tasted it and it was okay, being the first time I am not sure how it is supposed to taste, other than the one I have bought at the store, it felt kind of similar. used unsalted butter, the stop and shop brand. 2 lbs.
Tejiyas says
The history of what is now popularly known as ghee (a Hindi word) goes back
a long ways wherever societies kept domesticated cows for milk. More often
than not, it seems from exploring various histories they would make yoghurt,
then one way or other extract the butter fat. The Traditional method in India
where the lavish use of ghee is almost a measure of wealth, was this way
and it is called desi ghee. The yoghurt was made and left to sour a bit
then churned often kept in a pot into which a large bladed paddle at the
end of a rod was dipped into the pot (often of clay) and then with two ropes
pulling back and forth rotated thus effectively churning the yoghurt and
voila the fats cluster on the paddle and are scooped off.
The crema dela crema of desi ghee was cooked very very slowly on
a flame about 110 F or there about, often with cow dung ball as a
fuel with charcoal, cow dung can burn very slowly when properly formed
into these slabs. Not gross, actually fragrant and proved antiseptic.
I personally have made ghess this way and kept it slow cooking for 24 hours.
The whole house and environs smell like roasting heaven and the taste, the
taste, one drop on top of quality rice turns that into a feast for a king>
Louise says
Very interesting, thank you for sharing!
Nan says
I just tried this in a 3-quart Instant Pot with the stainless liner (not ceramic) and I don't think it actually finished after 8 hours. The 3-quart does use less energy than the bigger IP's and probably doesn't get as hot. I had to strain several times -- coffee filter, cheesecloth (several layers) and still got solids in the finished product. Will use it quickly so not a problem, but definitely not a good solution for long-term storage. Will try the Ninja Foodi next time.