

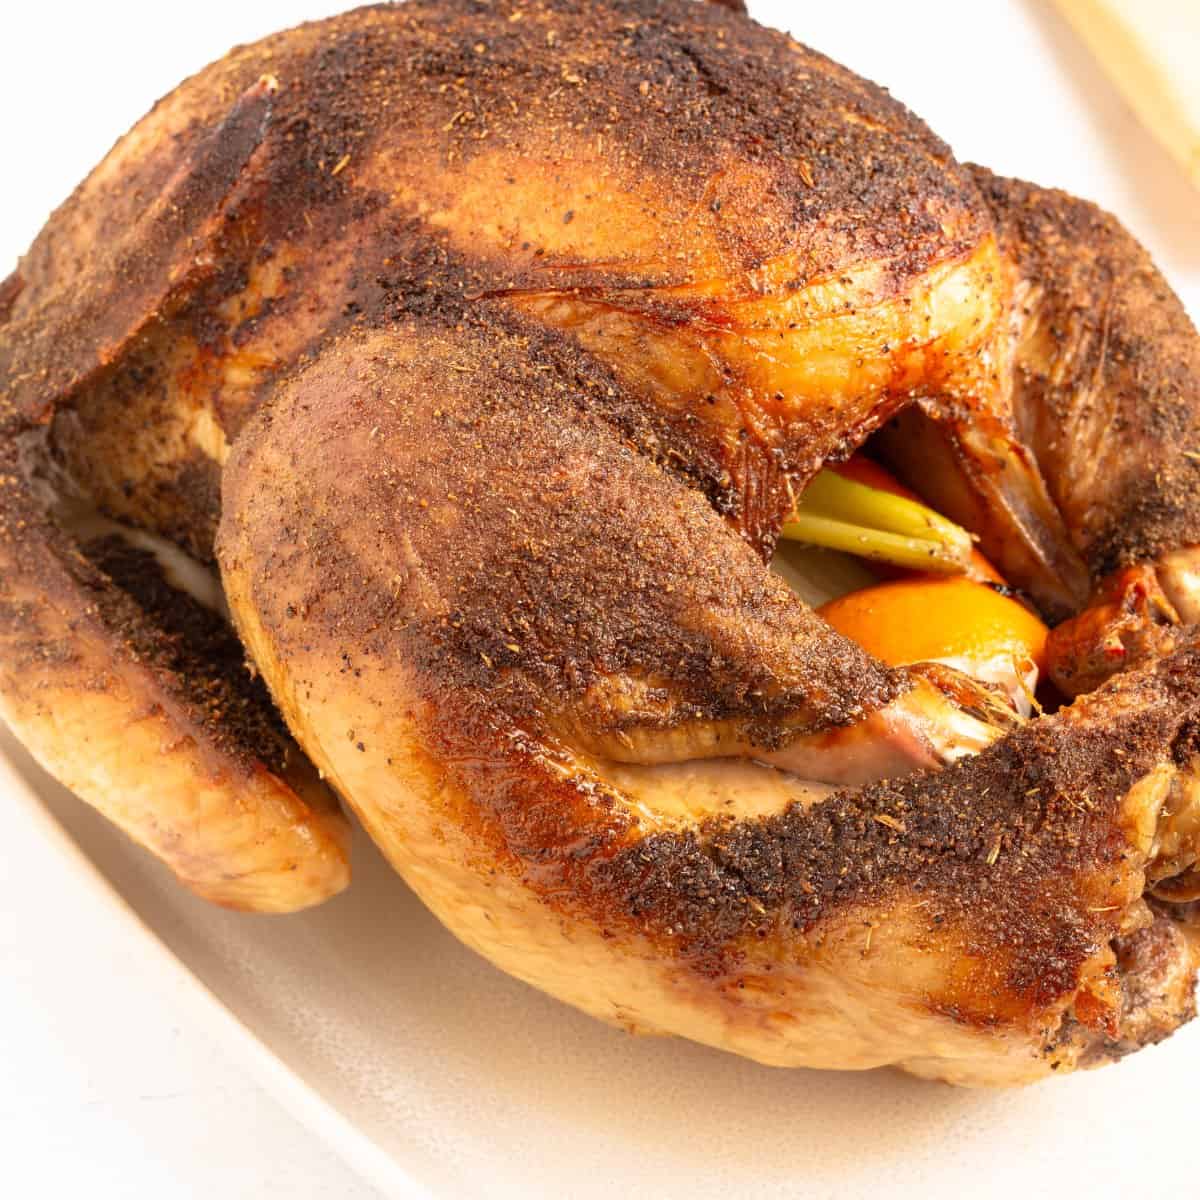
This slow roasted turkey happened pretty much by accident. One year I was making a very large turkey, probably 25 pounds or larger, and I decided to put it in the oven at night at a low temperature, around 225 degrees (I might have even gone down to 200). Then I fell asleep. I didn't mean to! When I woke up I was sure my turkey was ruined, but it turned out to be the best turkey I had ever made. It was perfect.
So this year I set out to get that same result on purpose, without staying up all night. That year I had used a wet brine, and I wanted to know if an easier dry brine would give me the same delicious, flavorful turkey. Based on this year's test turkeys (this one is number 4), it does. You don't have to cook it overnight, it doesn't take 8 hours, and there's no butter slathered all over it before it goes in. The turkey roasts low and slow at 225℉/107℃ for about 5 hours, guided by a probe in the thigh, and the melted butter only goes on at the very end to crisp the skin.
A few small things make a big difference here. I grind the rosemary and celery seed in my spice blend so the rosemary doesn't burn and turn bitter, I use granulated garlic instead of garlic powder for the same reason, and I add 2 cups of water to the pan so you still have plenty of drippings for homemade gravy. Trust me, once you see how juicy the breast and the dark meat both turn out, you're going to love this one.
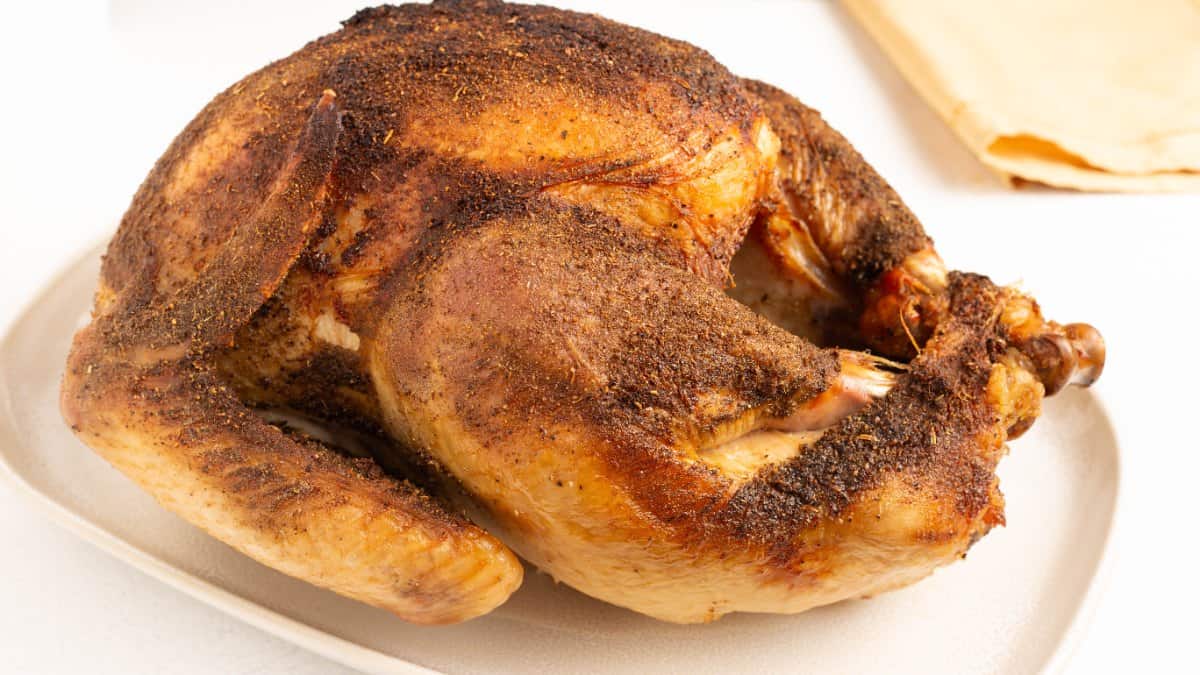
Suggested Kitchen Tools for Slow Roasted Turkey
- Roasting pan with a rack (to keep the turkey elevated while it dry brines and roasts)
- Rimmed tray (for seasoning the turkey in the sink)
- Mortar and pestle or spice grinder (for the rosemary and celery seed)
- Small bowl for mixing the spice blend
- Leave-in probe thermometer
- Instant-read thermometer (optional, for spot checks)
- Oven thermometer
- Basting brush
- Carving board and a sharp carving knife
- Serving platter
Ingredients & Substitutions
This slow roasted turkey is all about the seasoning and the technique, so the ingredient list is simple. Let's take a closer look at each part.
Whole Turkey
Used in Recipe: One whole turkey. Mine was about 18 pounds. Take out the neck, the gizzards and whatever else is packed inside, and save them in a bag in the refrigerator.
What it Does: The turkey is the star, and cooking it at a low temperature means it loses less moisture as it roasts. That gives you the best texture and the juiciest meat. The neck and giblets go under the rack on roasting day to flavor the drippings for the gravy.
Substitutions: Any size whole turkey works with this method. For a turkey larger than 18 pounds, you may want to start the oven at 250℉/121℃ instead of 225℉/107℃. You'll still get great results; it's still low and slow.
Salt and Pepper for the Dry Brine
Used in Recipe: ½ tablespoon of salt and ½ tablespoon of pepper for the cavity, then about 1 tablespoon of fine grain sea salt or kosher salt sprinkled over the outside of the turkey.
What it Does: Salt is the thing that penetrates. It absorbs through the skin and seasons the meat, and the other seasonings don't. That's why the salt goes on first, as its own layer, because it takes a while to get through the skin.
Substitutions: Use either a fine grain sea salt or a kosher salt. If you're using table salt, cut the amount back a little.
Cavity Aromatics
Used in Recipe: A carrot, an onion, a head of garlic, celery, one navel orange cut into quarters, and 1 or 2 bay leaves.
What it Does: The aromatics perfume the meat a little bit, but more importantly they season the drippings that become your gravy. I like to tie the aromatics in with the spice blend I'm using, and the orange goes perfectly with the coriander in this one. You don't need to peel the garlic, but do cut it so the cloves are exposed. That gives you the best garlic flavor.
Substitutions: Every year I change up my aromatics to match the rub, so feel free to do the same. Just keep them in the same family as the spices you're using.
Magic Spice Blend
Used in Recipe: 1 teaspoon celery seed, ½ teaspoon fennel seed, ½ teaspoon rosemary leaves, 1 teaspoon granulated garlic, 2 teaspoons onion powder, 2 teaspoons ground coriander, 1½ teaspoons ground thyme, 2 teaspoons coarse black pepper, ½ teaspoon nutmeg, 1 teaspoon ground marjoram, 1 tablespoon brown sugar and 1½ tablespoons sea salt or kosher salt.
What it Does: This blend has the traditional poultry seasonings plus a few things that make it really delicious. Coriander brings a little citrus note, and fennel brings a hint of sweetness. I promise it doesn't taste like licorice on the turkey; it just makes you go, hmm, what is that? The brown sugar balances everything out and helps darken the skin. The salt in the rub stays on top and seasons the skin.
Substitutions: Use granulated garlic, not garlic powder. Garlic powder tends to burn and gives you a bitter taste. A lot of people like to add paprika for color. I don't, because I like the turkey to look really well browned, but you absolutely can.
Water in the Pan
Used in Recipe: 2 cups of water poured into the bottom of the roasting pan.
What it Does: It creates a little steam, but not much at this low temperature. The most important thing it does is add volume to the juices. Because the turkey loses less moisture at a low temperature, you'd otherwise have less drippings for your gravy.
Substitutions: Turkey broth or chicken broth works just as well if you already have some.
Butter for Crisping the Skin
Used in Recipe: ½ cup of melted butter, brushed over the turkey right before it goes back in the oven to crisp.
What it Does: The skin actually dries out with this low cooking and gets a little crunchy on its own. The butter browns it up even better.
Substitutions: A spritz of oil works too. The oil or butter you choose makes a difference in how hot you can crisp the skin without burning it. I use butter at 400℉/200℃.
How to Make Slow Roasted Turkey
From start to finish, this slow roasted turkey takes about 30 minutes of hands-on prep, a 24 to 48 hour dry brine in the refrigerator, and about 5 hours in the oven. Here is everything you need to know.
Remove the Giblets, Then Salt the Cavity and the Skin
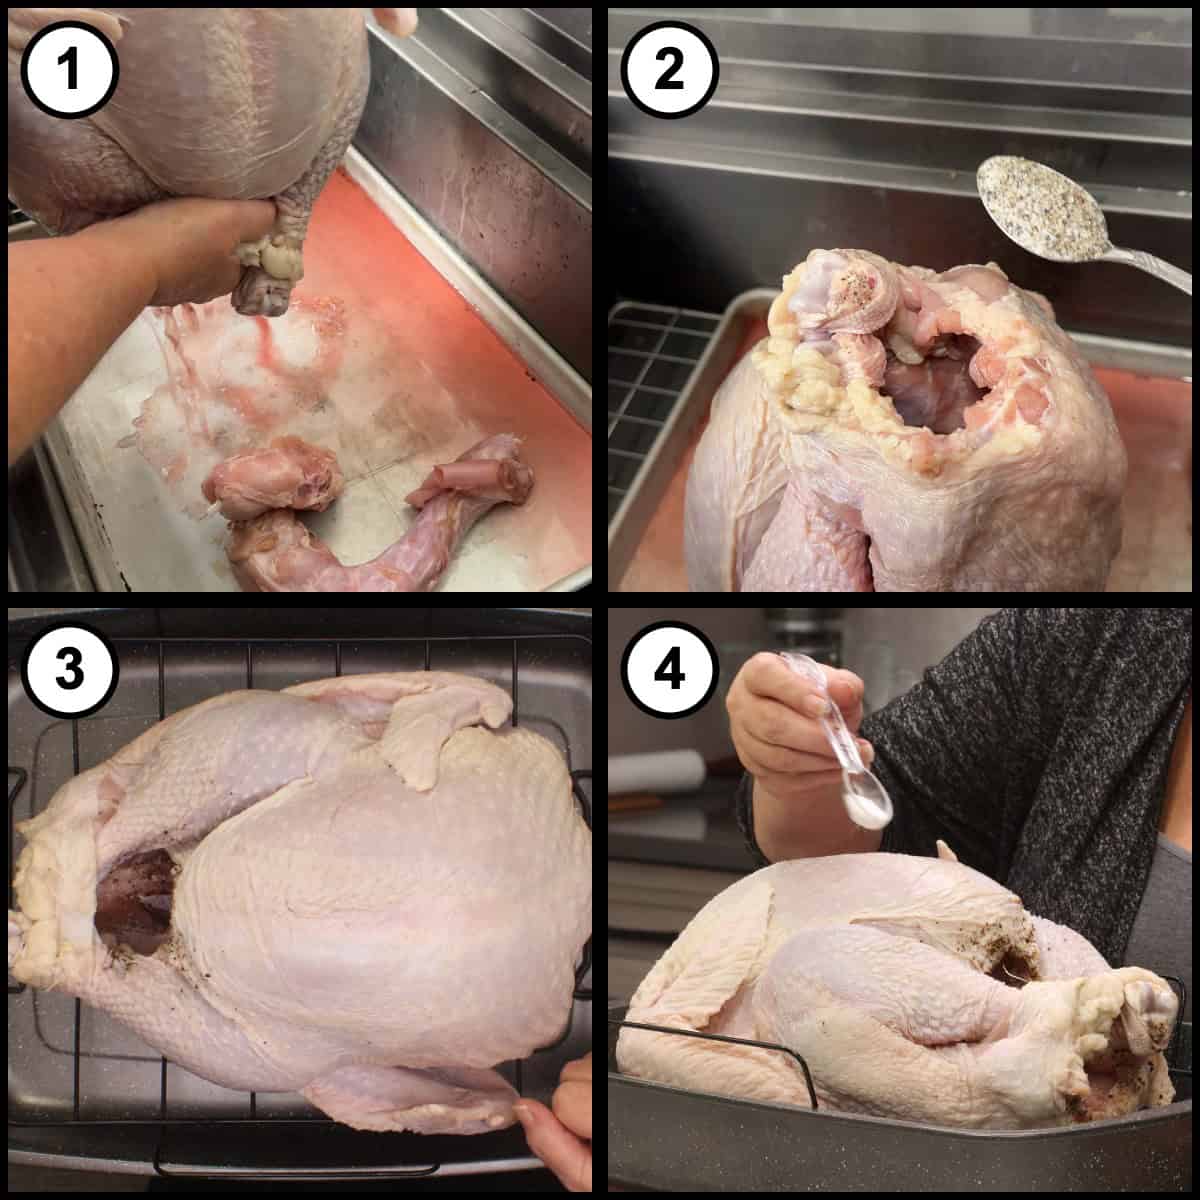
Remove the neck, gizzards and anything else packed inside the turkey. Put them in a bag and refrigerate them, because they go under the rack on roasting day to flavor the drippings for the gravy. Rinse your turkey or not, whatever you prefer; it's perfectly fine either way. I set mine on a tray in the sink. Season the inside of the cavity with ½ tablespoon of salt and ½ tablespoon of pepper.
Sprinkle a light coating of fine grain sea salt or kosher salt over the top of the turkey, about ½ tablespoon, and lightly coat the skin. Lift the turkey to sprinkle the sides, using about a tablespoon of salt in all. You can flip it over and season the underside if you like. I don't usually worry about that. If your turkey has a flap of skin around the opening or a plastic piece holding the legs together, keep those on while it roasts. They keep the shape of a beautiful turkey for your table.
Quick Tip
Don't pat the skin dry. Leave it a little damp so it stays tacky. If the skin is too dry, the spice rub won't stick, and if yours has dried out, spritz it with a little water.
Stuff the Cavity and Season with the Spice Blend
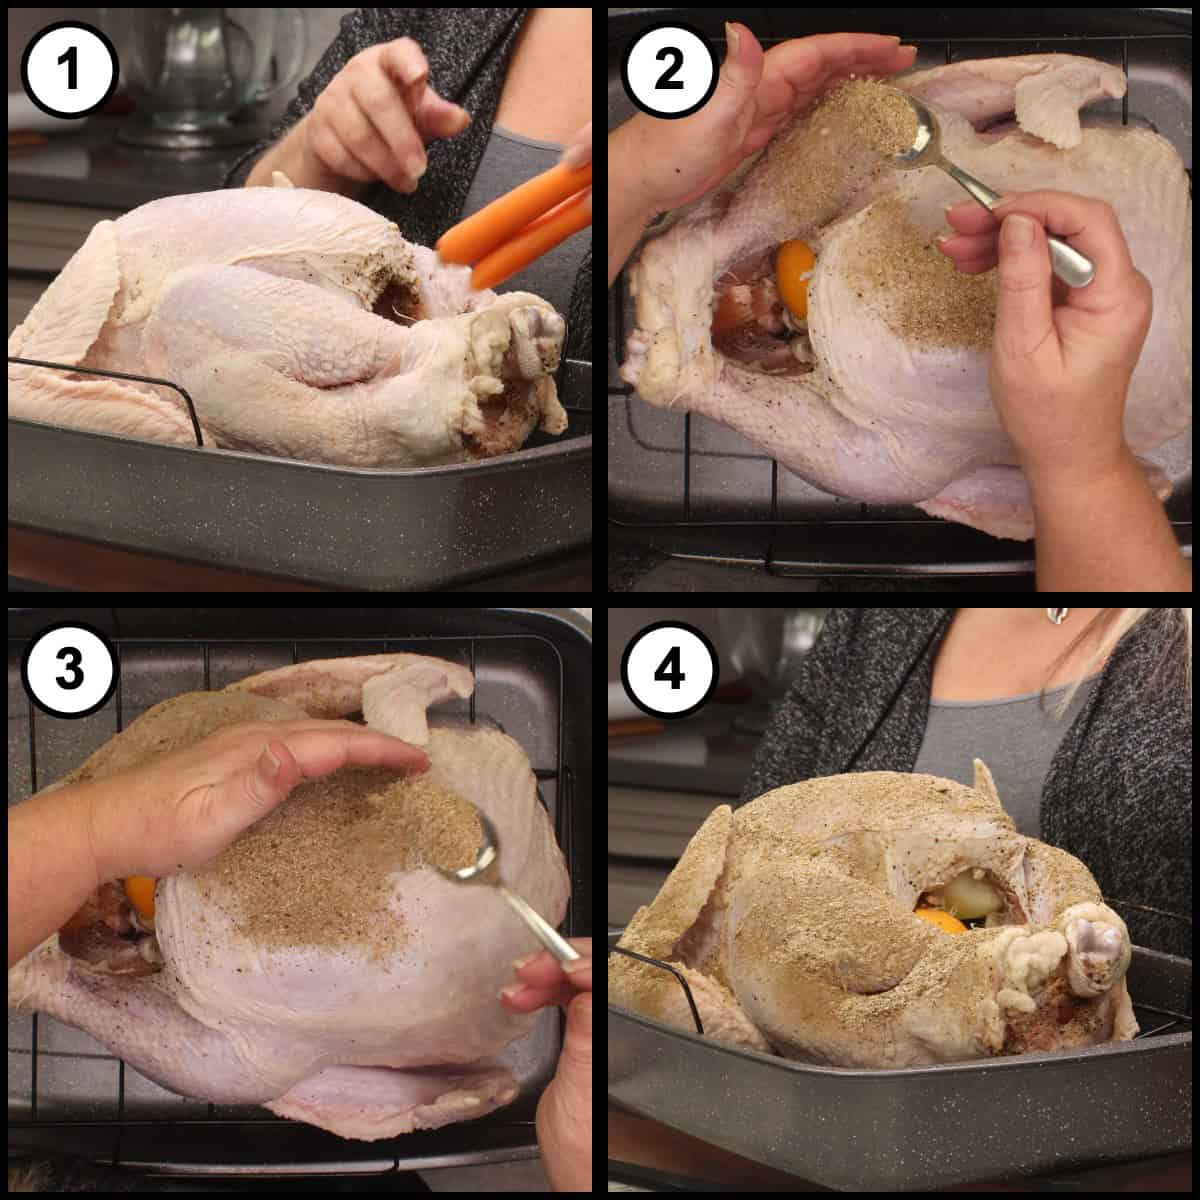
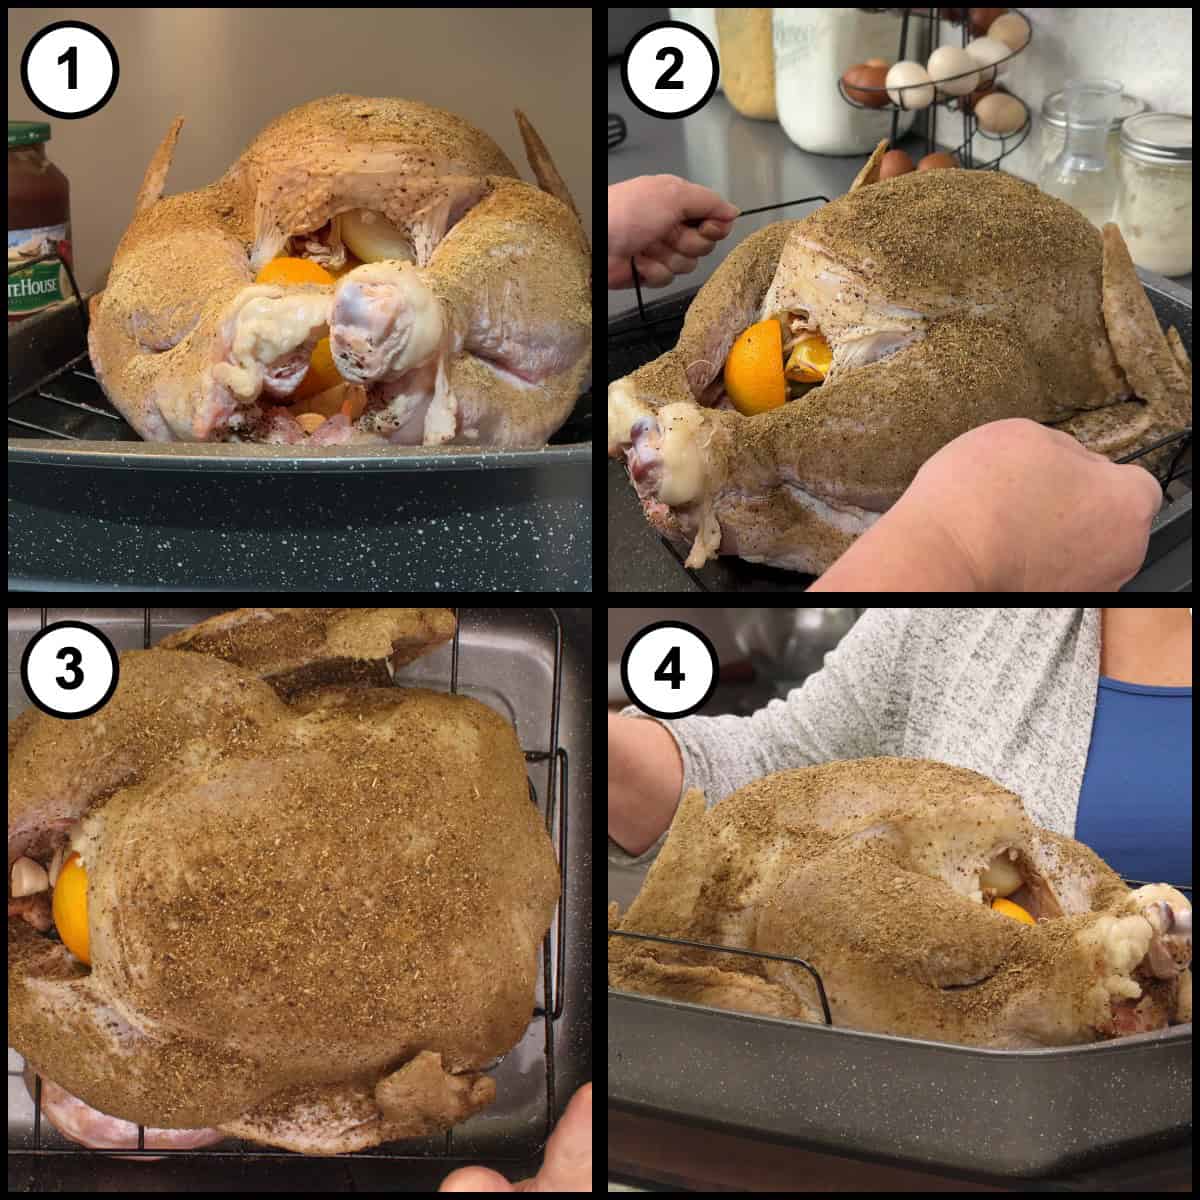
Stuff the cavity with the carrot, the onion, the celery and a head of garlic cut so the cloves are exposed, along with 3 of the orange quarters. Tuck 1 or 2 bay leaves in, one on each side, and set the last orange quarter right at the front.
When I first started with this rub, I didn't crush my rosemary. When I roasted the turkey to crisp the skin, I tasted something a little bitter. Those little rosemary pieces, which look like little pine needles, had burnt, and it threw the whole thing off. I almost scratched the rub altogether. Instead, I put the celery seed and the rosemary into a mortar and pestle and ground them up fine, and that way the rosemary doesn't burn. A spice grinder works too. Then stir the ground rosemary and celery seed together with the fennel seed, granulated garlic, onion powder, coriander, thyme, coarse black pepper, nutmeg, marjoram, brown sugar and salt.
Set the turkey on a rack in your roasting pan. However you dry brine, you want the turkey elevated so the juices don't sit against the bottom of the skin. Sprinkle the spice blend over the turkey exactly the way you did the salt, then gently pat it in. Turn the turkey and do the other side. This makes quite a bit of rub, and I used all of it on my 18 pound turkey.
I don't use a binder. Salt will not dissolve in fat, so an oil or mayonnaise binder keeps it from getting through the skin, and putting one on now would just rub the salt off. And when you see salt in the rub, you might think it's going to be too salty. It's not. The first layer of salt dissolves into the meat, and the rub stays on top seasoning the skin.
Refrigerate the turkey, uncovered, on its rack for 24 to 48 hours. I usually go at least 24 hours.
After the Dry Brine, Rinse the Pan and Tuck in the Neck and Giblets
Because I seasoned the turkey right over the roasting pan, I lift out the rack and rinse the pan before roasting. Otherwise the drippings would be so seasoned and salty that the gravy would be ruined. Put the rack and turkey back, and tuck the neck and giblets underneath. Depending on your rack, that might take a little finagling.
You might take your turkey out of the refrigerator and notice it looks a little blue. That is perfectly normal. Don't worry about it.
Add the Water, Insert the Probe and Roast at 225℉
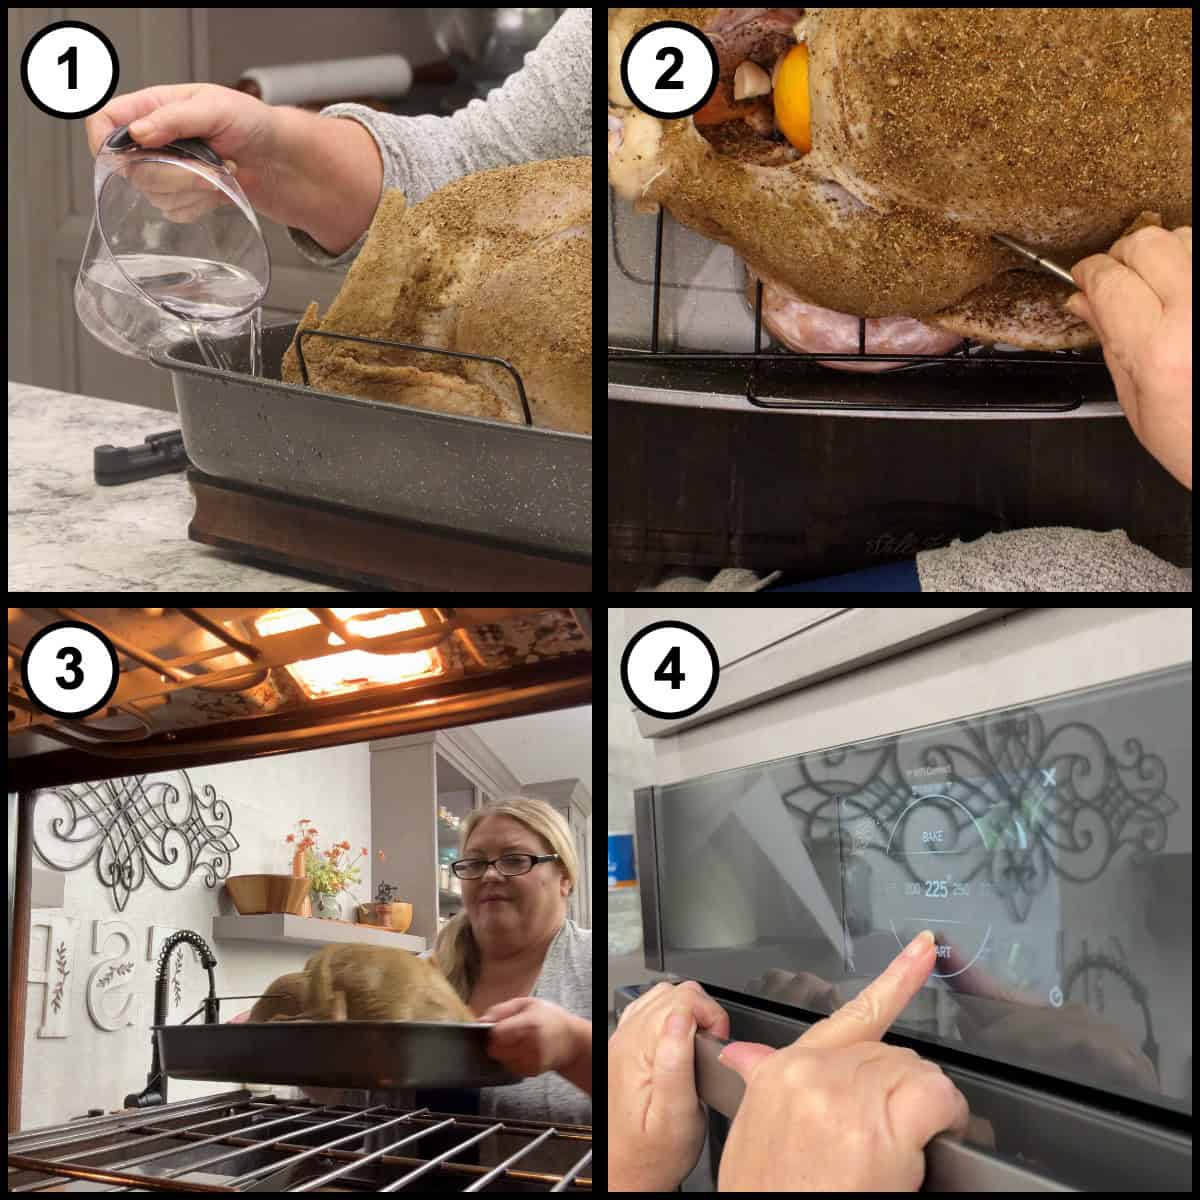
Add 2 cups of water to the bottom of the pan. Insert a probe thermometer into the thickest part of the thigh, right between the thigh and the leg, without hitting the bone. Hitting the bone will throw off your temperatures. My turkey came straight out of the refrigerator at just under 40℉/4℃; if you let yours sit out for an hour or so first, it will start a little higher. Roast the turkey at 225℉/107℃.
Here's the one food safety rule to know whenever you roast meat at a low temperature: the turkey needs to reach 140℉/60℃, which is out of the danger zone, within 4 hours. I set a timer for 4 hours but check it at about 3. If your turkey is still down around 120-125℉/49-52℃ at 3 hours, raise the oven to 250℉/121℃ until it reaches 140℉/60℃, then bring the temperature back down. If your turkey is larger than 18 pounds, you may want to start at 250℉/121℃.
Keep roasting until the thigh reaches 165℉/74℃. The total time is not exact. Expect somewhere around 4 to 5 hours, though they've surprised me in the past. It depends on the size of the turkey, its starting temperature and sometimes just the turkey itself. My 18½ pound turkey took 3½ hours to reach 140℉/60℃ and 5 hours 15 minutes in total at 225℉/107℃. There's no basting along the way, and you won't get much carryover heat when it comes out, so you don't have to worry about it climbing from 165℉ up to 175℉.
Quick Tip
Put an oven thermometer in your oven to make sure it runs at the set temperature. If your oven runs a little hot or a little low, you'll want to know that for this low temperature technique.
Brush with Butter and Crisp the Skin
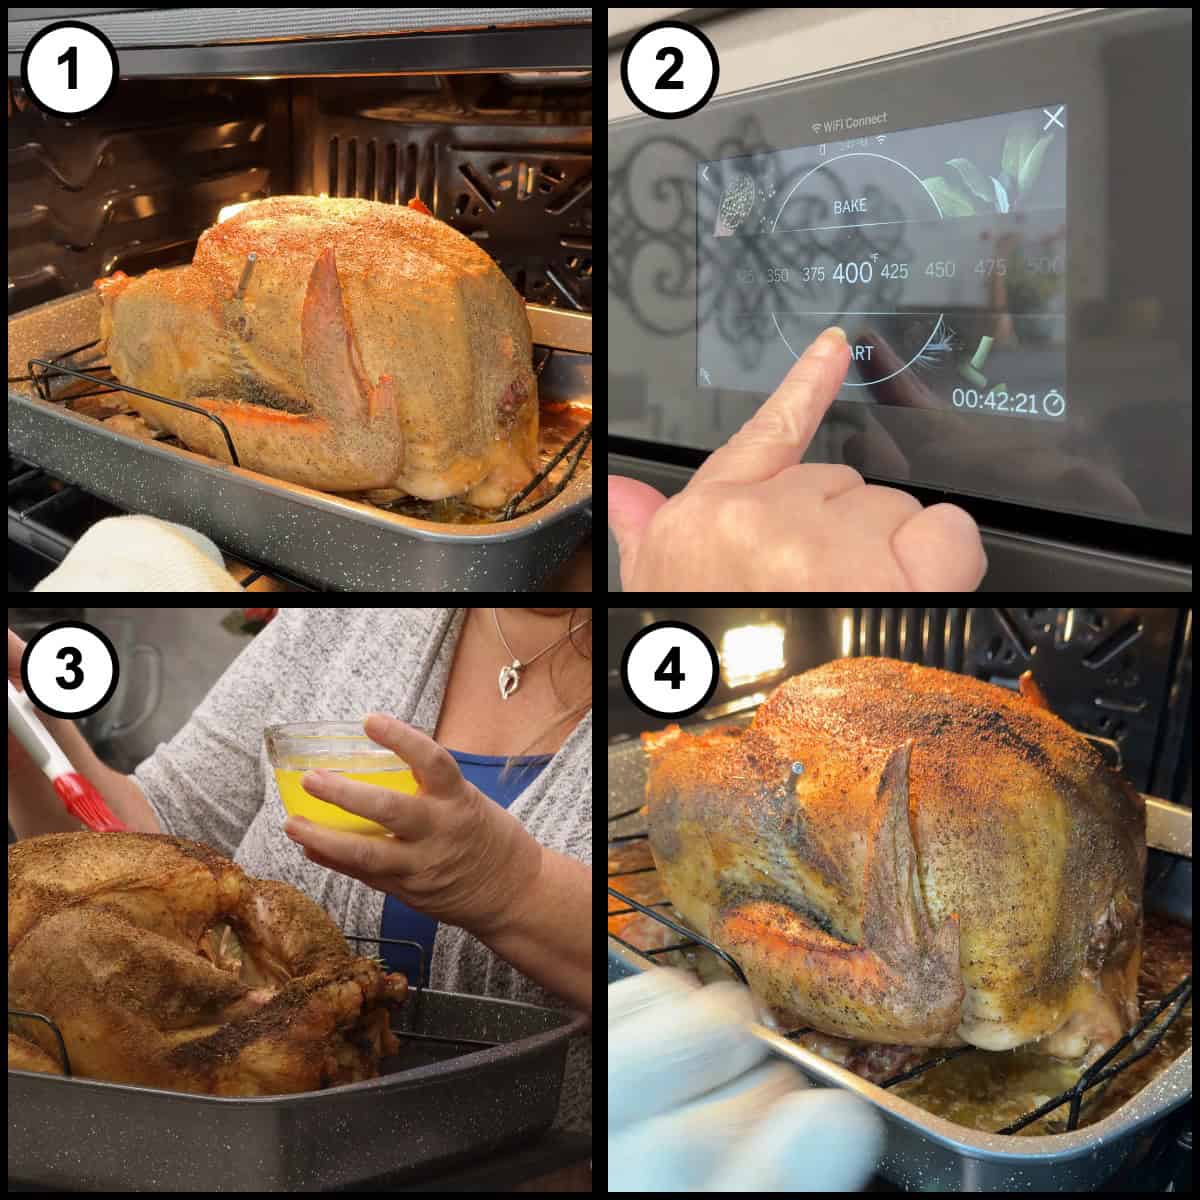
Here's the cool thing about this recipe: the turkey can sit at room temperature for an hour and a half or so while you get your sides in the oven to heat up. Just keep an eye on the temperature and make sure it doesn't drop below 140℉/60℃. Preheat the oven to 400℉/200℃ and brush the turkey with ½ cup of melted butter. About 15 minutes before you're ready to serve, put it back in the oven and crisp the skin, watching so it doesn't burn. If you don't want to put it back in the oven, you don't really have to.
Rest the Turkey, Remove the Aromatics and Loosen the Drippings
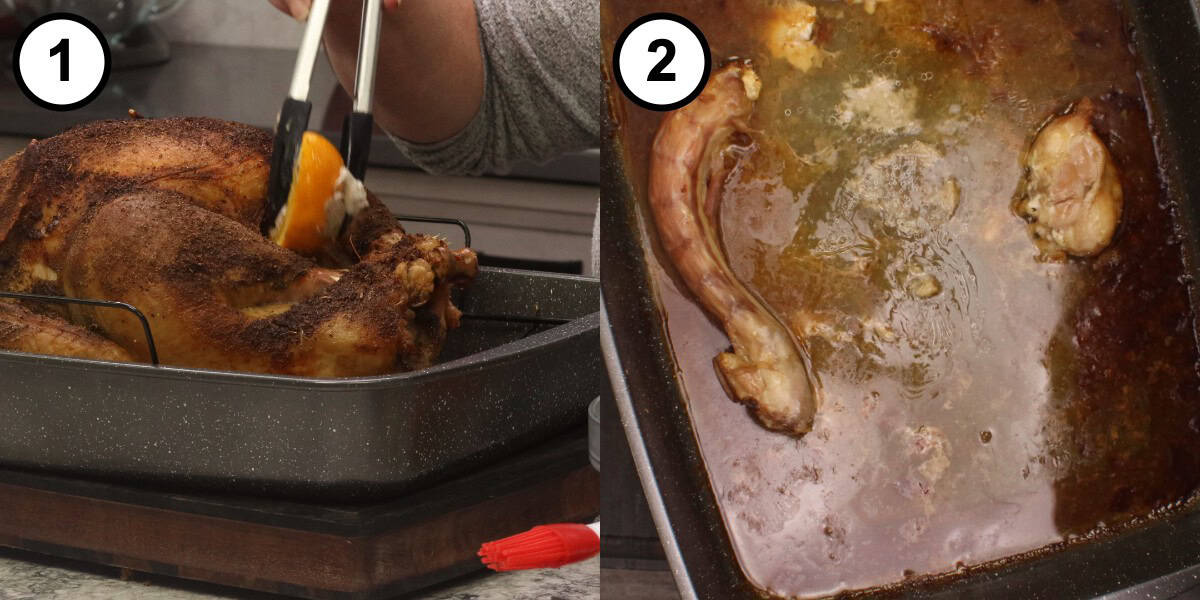
Let the turkey rest for 10 to 15 minutes before you carve it. While it rests, take the aromatics out of the cavity. Add about ½ cup of water to the roasting pan and loosen all the good browned bits from the sides into the drippings for your gravy.
Strain the Drippings and Get Ready to Carve
My mom used to make her gravy right in a heavy roasting pan on the stove, sprinkling her flour over the top, and she made the best gravy. I like to make mine in a little more controlled way, so I don't make it right in the roasting pan. If you'd like an easy way to turn those drippings into a smooth gravy, my Blender Gravy in the Ninja Foodi Hot Cold Blender is a delicious option.
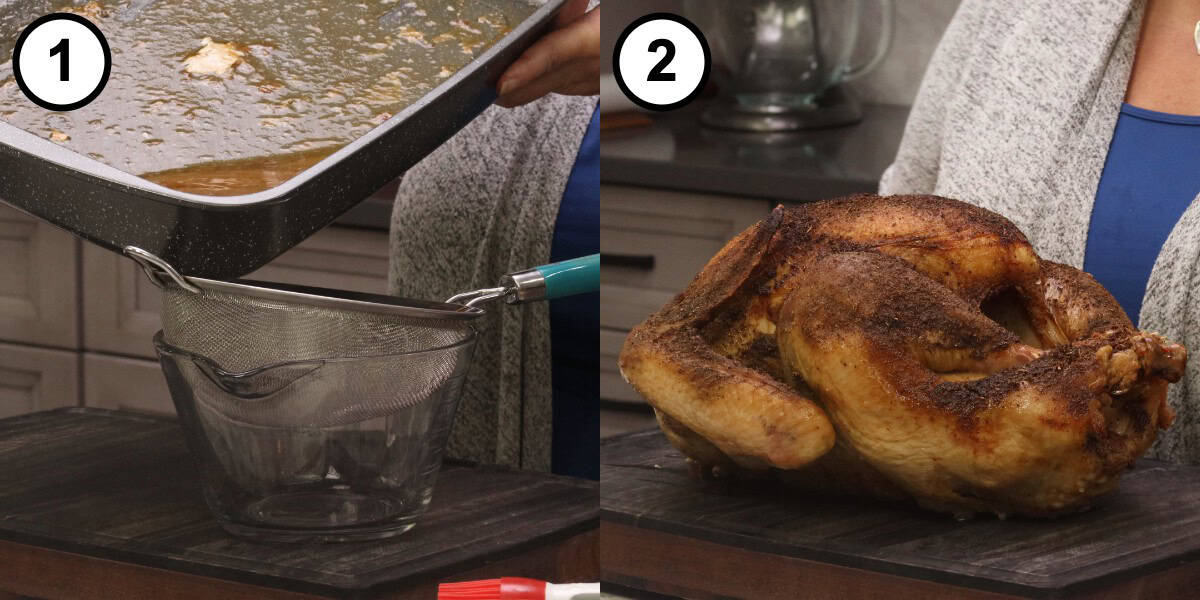
Pour the pan drippings through a mesh strainer into a bowl so they're ready for your gravy, then move the turkey to a carving board.
Carve the Turkey
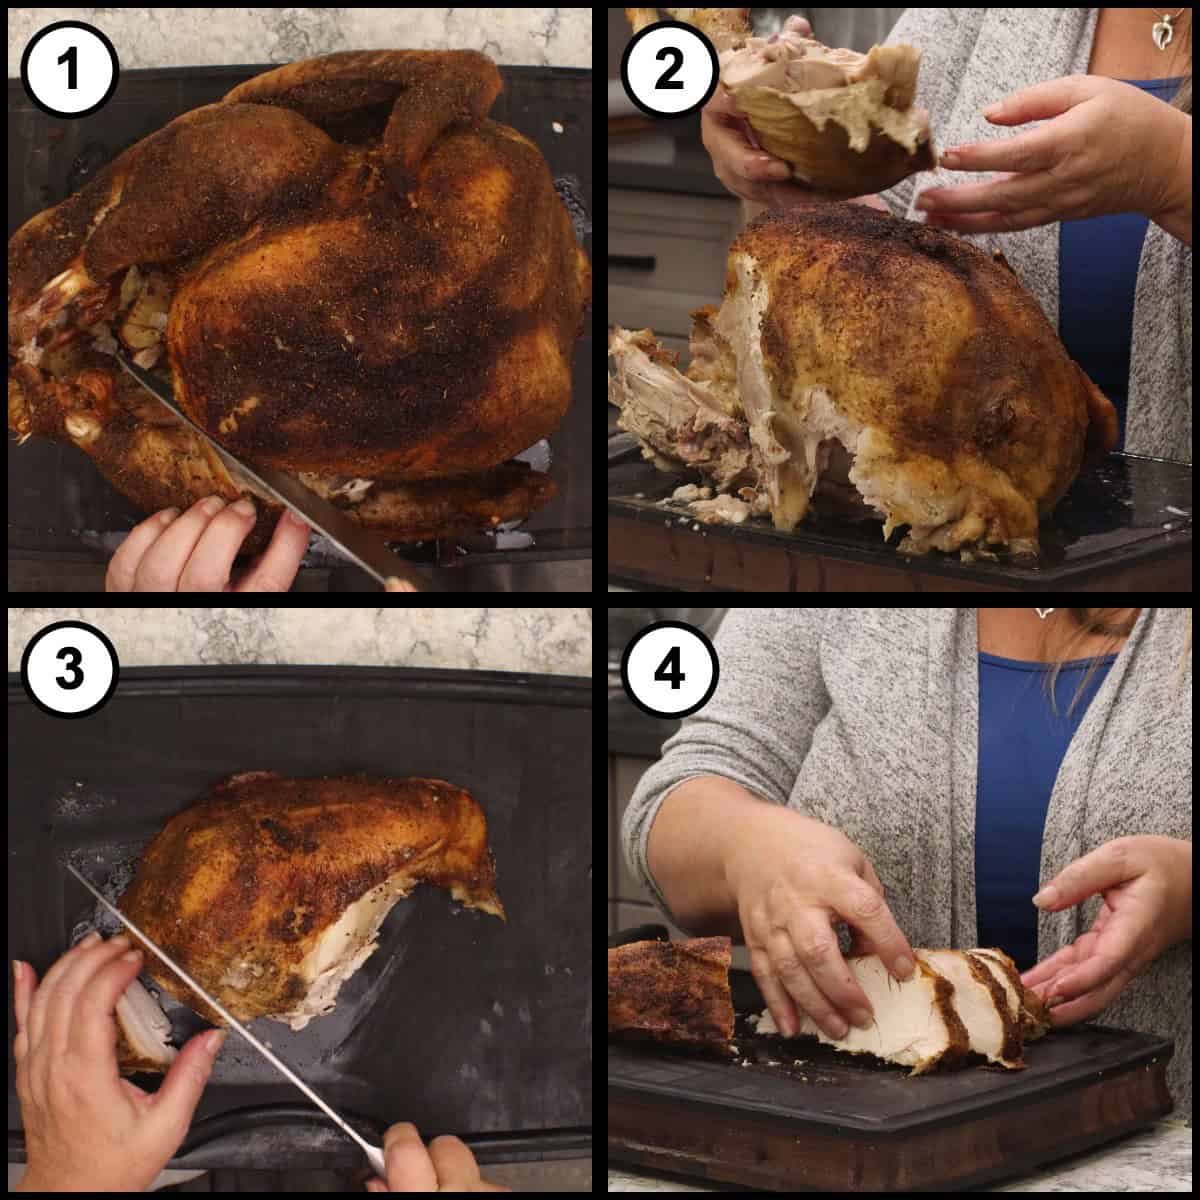
Cut off the legs, then remove each breast half from the bone and slice the breast meat.
If you see a little pink in the dark meat when you carve, don't be alarmed. It's not blood. It's called myoglobin, it's perfectly normal, and it's what makes dark meat dark.
Slow Roasted Turkey
Equipment
- Roasting pan with a rack
Ingredients
Turkey and Dry Brine
- 1 whole turkey about 18 pounds; neck and giblets removed and saved in a bag in the refrigerator
- ½ tablespoon fine grain sea salt or kosher salt for the cavity; use a little less if using table salt
- ½ tablespoon black pepper for the cavity
- 1 tablespoon fine grain sea salt or kosher salt for the outside; a light coating, about ½ tablespoon over the top and the rest on the sides; use a little less if using table salt
Cavity Aromatics
- 1 carrot
- 1 onion
- 1 head garlic no need to peel; cut so the cloves are exposed
- 1 stalk celery
- 1 navel orange cut into quarters
- 1 to 2 bay leaves
Magic Spice Blend
- 1 teaspoon celery seed ground fine with the rosemary
- ½ teaspoon fennel seed
- ½ teaspoon rosemary leaves ground fine with the celery seed so it does not burn
- 1 teaspoon granulated garlic not garlic powder
- 2 teaspoon onion powder
- 2 teaspoon ground coriander
- 1½ teaspoon ground thyme
- 2 teaspoon coarse black pepper
- ½ teaspoon nutmeg
- 1 teaspoon ground marjoram
- 1 tablespoon brown sugar
- 1½ tablespoon sea salt or kosher salt
For Roasting
- 2 cups water or turkey or chicken broth
- ½ cup butter melted, for brushing before crisping the skin
Would you like to save this recipe?
Instructions
- Remove the neck, gizzards and anything else packed inside the turkey. Put them in a bag and refrigerate them; they go under the turkey later to flavor the drippings for the gravy. Rinse the turkey or not, whichever you prefer. Set the turkey on a tray in the sink.1 whole turkey
- Season the inside of the cavity with ½ tablespoon of fine grain sea salt or kosher salt and ½ tablespoon of black pepper. If you are using table salt, cut the salt back a little.½ tbsp fine grain sea salt or kosher salt, ½ tbsp black pepper
- Do not pat the skin dry; leave it a little damp so the rub will stick. Sprinkle a light coating of fine grain sea salt or kosher salt over the top of the turkey, about ½ tablespoon, and lightly coat the skin. Lift the turkey and sprinkle the sides, using about 1 tablespoon of salt in all. Seasoning the underside is optional. Leave on any skin flap and the plastic piece that holds the legs together; they keep the turkey in a beautiful shape.1 tbsp fine grain sea salt or kosher salt
- Stuff the cavity with the carrot, onion, garlic (cut so the cloves are exposed) and celery, plus 3 of the orange quarters. Tuck 1 or 2 bay leaves in, one on each side, and set the last orange quarter at the front of the cavity.1 carrot, 1 onion, 1 head garlic, 1 stalk celery, 1 navel orange, 1 to 2 bay leaves
- Make the magic spice blend. Grind the celery seed and rosemary in a mortar and pestle or a spice grinder until fine so the rosemary does not burn and turn bitter. Stir them together with the fennel seed, granulated garlic, onion powder, coriander, thyme, coarse black pepper, nutmeg, marjoram, brown sugar and salt.1 tsp celery seed, ½ tsp fennel seed, ½ tsp rosemary leaves, 1 tsp granulated garlic, 2 tsp onion powder, 2 tsp ground coriander, 1½ tsp ground thyme, 2 tsp coarse black pepper, ½ tsp nutmeg, 1 tsp ground marjoram, 1 tbsp brown sugar, 1½ tbsp sea salt or kosher salt
- Set the turkey on a rack in a roasting pan so the juices do not sit against the skin. Sprinkle the spice blend over the turkey the same way you did the salt, then gently pat it in. If the skin is very dry, spritz it with a little water first. Do not use an oil or mayonnaise binder; salt will not dissolve in fat. Turn the turkey to season the other side, using all of the rub.
- Refrigerate the turkey, uncovered, on the rack for 24 to 48 hours.
- When you are ready to roast, lift out the rack and rinse the roasting pan so no salt or rub is left sitting in it. Return the rack and turkey, and tuck the neck and giblets underneath. Pour 2 cups of water (or turkey or chicken broth) into the bottom of the pan. If the turkey looks a little blue after dry brining, that is perfectly normal.2 cups water
- Insert a probe thermometer into the thickest part of the thigh, between the thigh and the leg, without touching the bone. Place an oven thermometer in the oven to make sure it runs at the set temperature. Roast at 225℉/107℃.
- Check the temperature at about 3 hours. The turkey must reach 140℉/60℃ within 4 hours for food safety. If it is still around 120-125℉/49-52℃ at 3 hours, raise the oven to 250℉/121℃ until it reaches 140℉/60℃, then lower it back to 225℉/107℃. For a turkey larger than 18 pounds, you may want to start at 250℉/121℃.
- Continue roasting until the thigh reaches 165℉/74℃. Expect about 4 to 5 hours or a little longer; an 18½ pound turkey took 3½ hours to reach 140℉/60℃ and 5 hours 15 minutes in total. There is very little carryover heat with this low temperature, so the turkey will not climb much after it comes out.
- Remove the turkey from the oven. It can sit at room temperature for up to about 1½ hours while you heat your sides, as long as it stays above 140℉/60℃. Preheat the oven to 400℉/200℃. Brush the turkey with ½ cup of melted butter.½ cup butter
- About 15 minutes before serving, return the turkey to the oven and crisp the skin, watching so it does not burn.
- Let the turkey rest for 10 to 15 minutes. Remove the aromatics from the cavity. For gravy, add about ½ cup of water to the roasting pan and loosen the browned bits from the sides into the drippings. Carve and serve.
Notes
• The 24 to 48 hour dry brine in the refrigerator is hands-off time and is not included in the total time.
• Leave the skin a little damp. If it is too dry, the spice rub will not stick.
• Season the turkey on its rack over the roasting pan, then rinse the pan out before roasting so the drippings for the gravy are not too salty. COOKING TIPS
• For food safety, the turkey needs to pass 140℉/60℃ within 4 hours. Check it at 3 hours.
• Place the probe in the thickest part of the thigh without touching the bone, which will throw off the reading.
• The total time is not exact. It depends on the size of the turkey, its starting temperature and the turkey itself. NUTRITIONAL DISCLAIMER
Nutritional information provided is an estimate based on typical ingredient values and standard portion sizes. Actual nutritional content may vary significantly depending on specific brands used, ingredient substitutions, preparation methods, portion sizes, and individual cooking techniques. For precise nutritional information tailored to your specific ingredients and preparation, please consult with a registered dietitian or use laboratory analysis. This information should not be used for medical nutrition therapy or to manage medical conditions without professional guidance.
Nutrition
Alternate Cooking Instructions
- Turkeys larger than 18 pounds: Start the oven at 250℉/121℃ instead of 225℉/107℃. It's still low and slow, and you'll still have a lot of moisture in the meat.
- Stalled turkey at 3 hours: If the thigh is still around 120-125℉/49-52℃ at the 3 hour check, raise the oven to 250℉/121℃ until it reaches 140℉/60℃, then lower it back to 225℉/107℃.
- Wet brine instead of dry brine: The turkey that started all of this was wet brined, and it turned out amazing. The dry brine is simply less trouble and gives you the same delicious, flavorful turkey.
- Skip the final crisp: The skin dries out and gets a little crunchy on its own with this low cooking, so the butter and the trip back into the oven are optional.
If you only need a smaller turkey, my Low Roasted Turkey uses the same low temperature idea with a boneless turkey breast in the Ninja Combi.
Storage & Reheating Instructions
How to Store Leftover Slow Roasted Turkey
Carve the leftover turkey off the bone before you store it.
Leftover turkey is perfect in my One-Pot Turkey Tetrazzini, a creamy pasta dinner that comes together in one pot.
- Refrigerator: Store leftover turkey in an airtight container in the refrigerator.
- Bone Broth: Save the carcass and the cavity vegetables for bone broth.
Quick Tip
When you save the cavity aromatics for bone broth, keep everything except the oranges. Don't put the oranges in your bone broth.
How to Reheat Slow Roasted Turkey
- Oven: Place the sliced turkey in a baking dish with a splash of broth or pan drippings, cover with foil, and warm it until it reaches 165℉/74℃.
- Microwave: Place the turkey on a microwave-safe plate, cover it, and heat in short bursts until it reaches 165℉/74℃.
Frequently Asked Questions
Yes. Roast it at 225℉/107℃ until the thigh reaches 165℉/74℃. The one rule is food safety: the turkey needs to reach 140℉/60℃ within 4 hours, so check it at about 3 hours. If it's still around 120-125℉/49-52℃, raise the oven to 250℉/121℃ until it reaches 140℉/60℃, then lower it again.
Expect somewhere around 4 to 5 hours, but the time is not exact. It depends on the size of the turkey, its starting temperature and the turkey itself. My 18½ pound turkey took 3½ hours to reach 140℉/60℃ and 5 hours 15 minutes in total. Go by the thigh temperature, not the clock.
That is perfectly normal after a dry brine. Don't worry about it. The turkey will roast up beautifully browned.
No. Leave the skin a little damp so it stays tacky. If it's too dry, the spice rub won't stick. If your turkey is really dry, spritz it with a little water before you add the rub.
A little pink in the dark meat is not blood. It's called myoglobin, it's perfectly normal, and it's what makes dark meat dark. Go by the thigh temperature of 165℉/74℃.
Not by much. When you roast very low and slow like this, there isn't a whole lot of carryover heat, so you don't have to worry about it going from 165℉ up to 175℉.
Variations
- Broth in the pan: Use turkey broth or chicken broth in place of the 2 cups of water for even more flavor in the drippings.
- Oil instead of butter: Spritz the turkey with a little oil before crisping the skin. The oil you choose makes a difference in how hot you can go without burning it.
- Add paprika: Add paprika to the spice blend if you like the color. I leave it out for a really well-browned turkey, but you absolutely can.
- Change up the aromatics: Every year I change my rub, and I tie the cavity aromatics in with it. Pick aromatics that match whatever spice blend you use.
Sides to Round Out Your Turkey Dinner
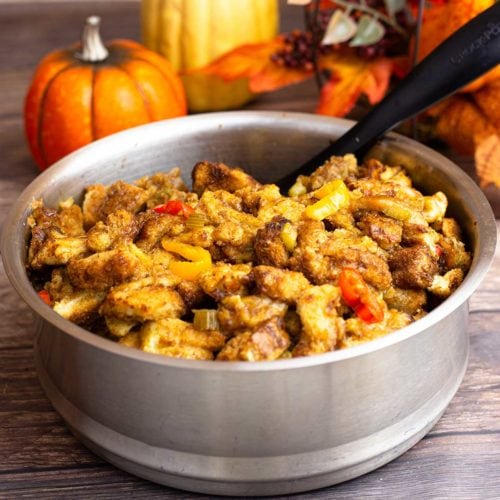
This slow roasted turkey is the centerpiece of the table, and since it can sit for a while before the skin gets crisped, you have plenty of time to get your sides heated up in the oven. Here are a few of my favorite sides from The Salted Pepper to round out your turkey dinner, from creamy mashed potatoes and homemade stuffing to cranberry sauce. They would go perfectly with this turkey!


About the Recipe Author, Louise Long
Louise is a full-time recipe creator and food blogger @ The Salted Pepper. She has over 30 years of experience with cooking and recipe development. She owned a restaurant for several years and was a full-time RN until retiring to blog full-time.

She published her first cookbook in the Fall of 2018 and is very interested in writing several more.
Louise is also the creator of an online Ninja Foodi Pressure Cooking Course with over 100 instructional step-by-step videos. People absolutely rave about the course and all the value they have received from it.
Louise has several very active Facebook groups that help people with the basics of cooking and learning more about the appliances they love.
Ninja Foodi Pressure Cooker & Air Crisper 101
Ninja Woodfire Outdoor Grill & Smoker
Louise is also a YouTube creator and you can find most of her recipes in video format on The Salted Pepper YouTube channel.
She is very responsive to messages and eager to help in any way she can. Get more Information about Louise & contact information
I WOULD LOVE TO SEE WHAT YOU ARE COOKING UP IN YOUR KITCHEN! TAG ME @THESALTEDPEPPER ON YOUR FAVORITE SOCIAL MEDIA PLATFORM WHEN YOU MAKE A DISH!
BE SURE TO FOLLOW THE SALTED PEPPER RIGHT HERE ⇓⇓⇓⇓⇓
Leave a Reply