

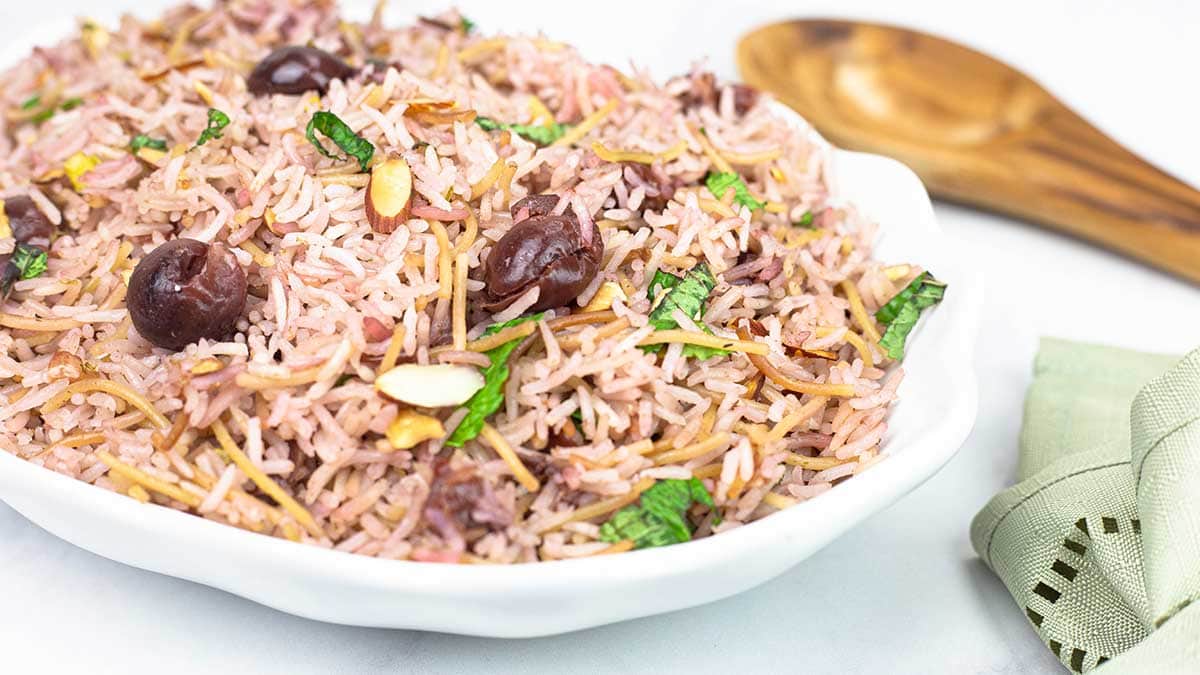
Making rice pilaf in your pressure cooker is so quick and easy and it turns out perfectly! This almond rice pilaf recipe has a delicious and beautiful addition of cherries that makes it extra special, but just as easy!
Would you like to save this recipe?
However, if you aren't a fan of cherries or simply want a different style of rice pilaf, you can certainly use this recipe as a guide for times and liquid amounts and add in your favorite ingredients. I go over some suggestions later in the article. It's a very versatile side dish!
This easy rice pilaf recipe is fancy enough to serve for special occasions and quick enough for an everyday dinner. You can serve it as a side dish or you can make it into a complete meal by adding meat and vegetables to it.
You don't even need an Instant Pot or a Ninja Foodi to make it, you can do it all on the stove!
Frequently Asked Questions
What is Rice Pilaf?
Rice Pilaf is a preparation of rice that is usually cooked with various ingredients that bring flavor into the dish, such as onions & garlic or other aromatics. The main difference between a traditional rice side dish and rice pilaf is how the rice is cooked. While there are different cooking methods for rice pilaf, the end result should be a fluffy rice where you can see the individual grains of rice. There are tons of variations and even different types of rice that you can use to achieve this, but a long grain rice will give the best results.
I have not tested the recipe with double or triple the amount of rice, so I am not sure how it would turn out, but here are a few suggestions. When increasing the ingredient amounts in recipes like this one, keep in mind that the more liquid and ingredients you add, the longer it will take your pressure cooker to build pressure. That time is part of the cook time, so if you wanted to try to double the recipe, I would think about decreasing the pressure cook time to zero minutes with a 15-minute natural release time. I don't think I would try to triple the recipe using the pressure cook function, but you could use sear/sauté to bring the liquid/rice to a boil and then cover with the pot turned off until the rice absorbs the liquid and is dry and fluffy.
Yes, you can use this method for cooking a box of Uncle Ben's, but you want to determine how much rice/pasta is in the box and then decrease the liquid amounts accordingly. Keep in mind, there is little to no evaporation when pressure cooking, so you would not follow the instructions on the back of the box if pressure cooking. Although I don't have a box here to measure, I would estimate that 1 box is probably equivalent to ¼ of this recipe. So, for 1 box, your liquid amounts would be about ½ cup.
Ingredients & Substitutions
Rice & Pasta
I recommend using a long grain rice like Basmati for this recipe, but you can use any long grain white rice and it should work fine. You don't want to use a medium grain or short grain rice because the texture will be totally different.
If you wanted to use a long grain brown rice, your cooking time would be different and you may want to add a little more liquid. I haven't tested the recipe with brown rice, but I would estimate that an extra ¼-½ cup of liquid and an increased cooking time of 10 minutes with a 20-minute natural release should work. Please let me know if you try it that way!
I used Vermicelli pasta in this recipe, but you can use several different types. Regular spaghetti noodles will work, even angel hair is okay. Orzo pasta is another popular type of pasta used in rice pilaf. You can even get the already cut pasta, called Fideo, which is simply cut spaghetti noodles.
Liquid Ingredients
You can use any kind of liquid you want to make your rice pilaf, I chose some cherry juice and water to keep things simple and I just love the pink tinge to the rice from the cherry juice.
If you aren't adding the sour cherries, you can substitute the water and cherry juice for vegetable stock or vegetable broth, chicken stock or chicken broth, or beef stock or beef broth. Keep in mind that when using beef stock, your rice dish will be brownish in color.
You can also use some white wine in combination with another liquid, but I don't think I would use all white wine or the flavor might be too overpowering.
Seasonings and Additions
This is where the fun begins! You can make any kind of rice pilaf you like! I chose toasted almonds, sour cherries, green onions, and mint as my additions. I used simple seasonings; sea salt and roasted coriander which paired perfectly with the tart flavors of the cherries.
Sour Cherries: These cherries can be found in a jar and are often called morello cherries. I can always find them at Aldi. They are very different from maraschino cherries which I wouldn't recommend using. You can use fresh cherries as long as they are pitted. Another option is to make a cranberry almond rice pilaf recipe by substituting the sour cherries for cranberries. Instead of fruit, you can add vegetables like red peppers, onions, garlic, diced mixed vegetables

Almonds: I used sliced almonds and toasted them to bring out the nutty flavor. You can use crushed whole almonds or even slivered almonds, but I do recommend toasting them first it gives the dish so much flavor.
Seasonings: Simply adding a little salt is enough to flavor the rice, but you can get creative with your spices. PIck the spices that will compliment your additions.
Butter: I like toasting the pasta and rice in butter, but if you wanted to keep it dairy-free you can certainly use olive oil or avocado oil instead. The butter does add a delicious flavor, though!
Different Versions of Rice Pilaf
Rice pilaf is one of those recipes where so many different ingredients can be added or omitted to make it a rice pilaf you love. I have a similar recipe called Homemade Rice A Roni and guess what? It's a version of rice pilaf.
For me, rice pilaf only needs 2 ingredients to be a rice pilaf. Rice and Pasta. Other than that, you can play around with the flavors and add-ins all you want. It's a great way to use up leftover vegetables when you don't have quite enough to make another full side dish.
In my garlic and herb rice a roni, I use the steam function instead of pressure cook, but you can do it either way. So, you can use those ingredients with the liquid amounts and cooking times in this recipe and it will turn out wonderfully.
Here is a list of some of my favorite flavor combinations when it comes to Rice Pilaf
- Black olives, feta cheese (added at the end) and toasted almonds (added at the end)
- Sun Dried Tomatoes, roasted garlic, and spinach (added in at the end) topped with freshly grated parmesan.
- Garlic, onion, and frozen mixed vegetables with extra peas added at the end (I love peas)
- Apples, Raisins, with a pinch of cinnamon or cardamom
- Simple rice pilaf with just salt and added lemon zest and toasted pecans at the end.
There are tons of different flavor combinations, so if Almond Rice Pilaf with Cherries isn't quite your thing, try a different combination of flavors that you will love!
How to Make Rice Pilaf on the Stove
The first and most important step is to make sure you have a skillet large enough to hold at least 4 cups. While you can use a pot, the rice will cook better in a skillet.
Toast the almonds in the skillet over medium or medium high heat. Remove from the skillet and let them cool. They will be added to the rice pilaf later.
Melt 2 tablespoons of butter in the skillet over medium heat and add in the vermicelli that is broken into 1½-2" pieces. When the pasta starts to turn a golden color, add in the rice and seasonings. Stir.
Turn the heat up to high and add in the cherry juice and water, stir and add in the whole cherries and green onions. It's important to note that you will need more liquid when cooking on the stove then when pressure cooking due to evaporation. Increase the liquid to 1 cup cherry juice and 1¾ cups water. Bring the contents of the skillet to a boil, and then reduce the heat to low and allow to simmer for 10 minutes uncovered. Turn the heat off and cover the skillet. Allow to sit for about 15 minutes or until the liquid has been absorbed by the rice.
Fluff the rice and, if it is still too wet, you can turn the heat back on low and constantly stir until the water evaporates.
Add in the toasted almonds and the chopped mint. Stir and Serve.
How to Make Almond Rice Pilaf in a Pressure Cooker
Prep
There is very little prep to this dish, which is always nice. You don't even have to rinse your rice! I do recommend having your liquids and cherries measure out and your green onions chopped before you start, but other than that you can prep the rest as you go.
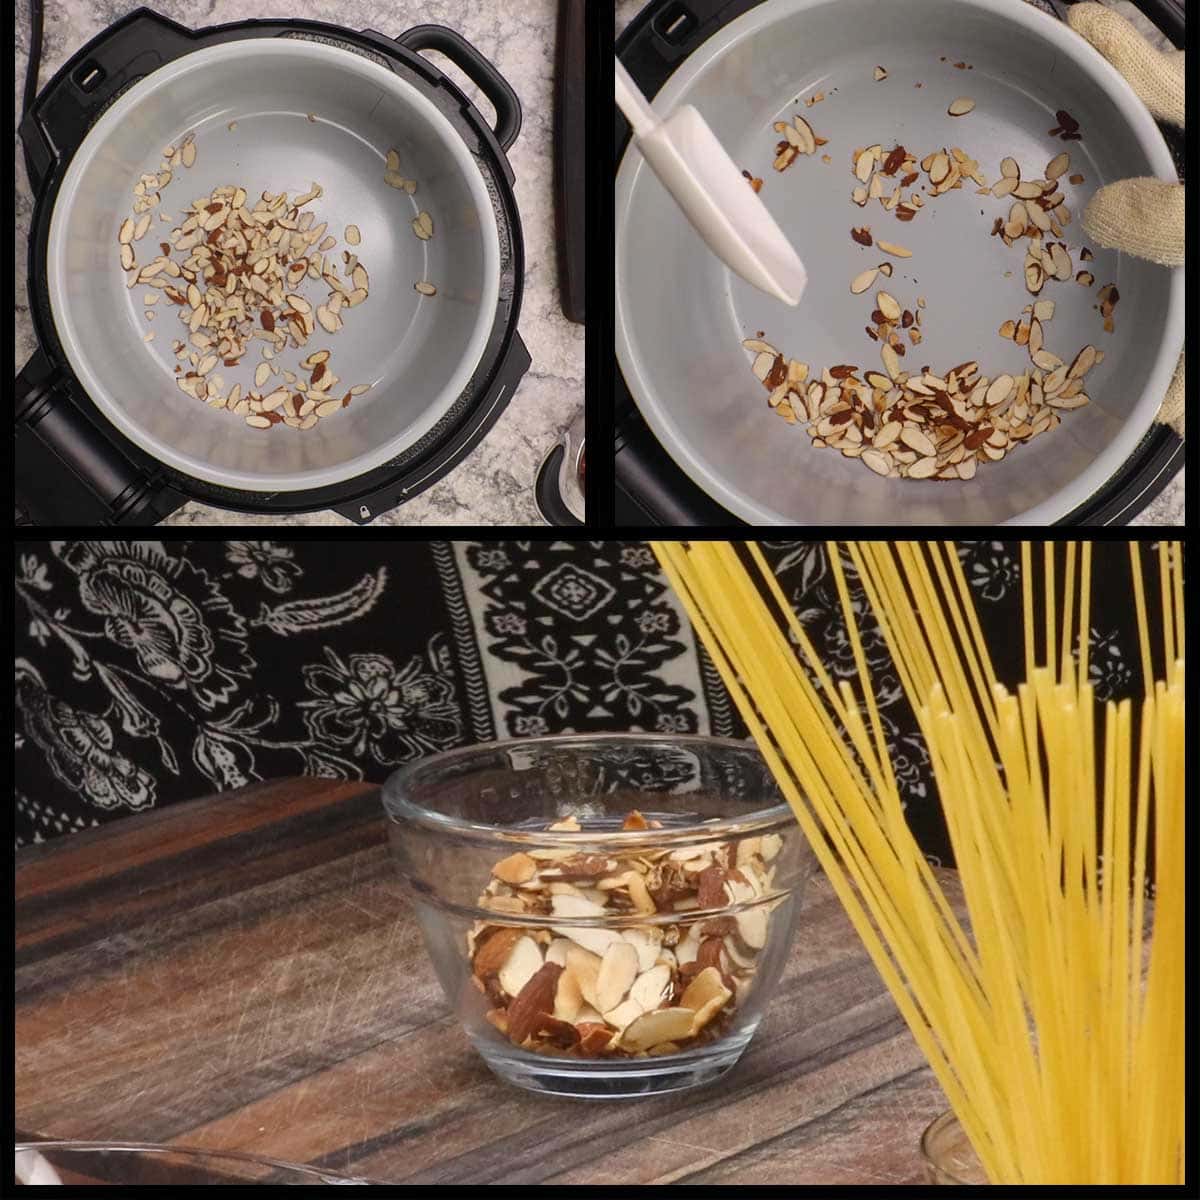
Toasting Almonds
You can choose to toast your almonds in the inner pot of the Ninja Foodi or Instant Pot using sear/sauté on high or do it on the stove in a skillet while the rice is cooking.
To toast the almonds in the Foodi, turn the sear/sauté on high and add in the sliced almonds. Let the pot heat up and spread the almonds in a single layer. They will start to brown on the edges first and when you see that, it's time to stir frequently. This process takes between 5-7 minutes, but most of the time is the pot heating up. Don't walk away because once the almonds start to toast, things move fast and they can go from perfectly done to burnt in a second.
When you start to smell the nutty aroma and the almonds are browning, turn the heat off and transfer them to a bowl for use later.
Sear/Sauté
Turn the sear/sauté on high and add in 2 Tablespoons of butter. As the butter is melting, break the vermicelli into 1½-2" pieces and add to the pot. Once the butter has completely melted, turn the Ninja Foodi down to medium heat and stir.
When the vermicelli is turning a golden color, add in the rice and seasonings. Stir and cook for 1-2 minutes.

Pressure Cook
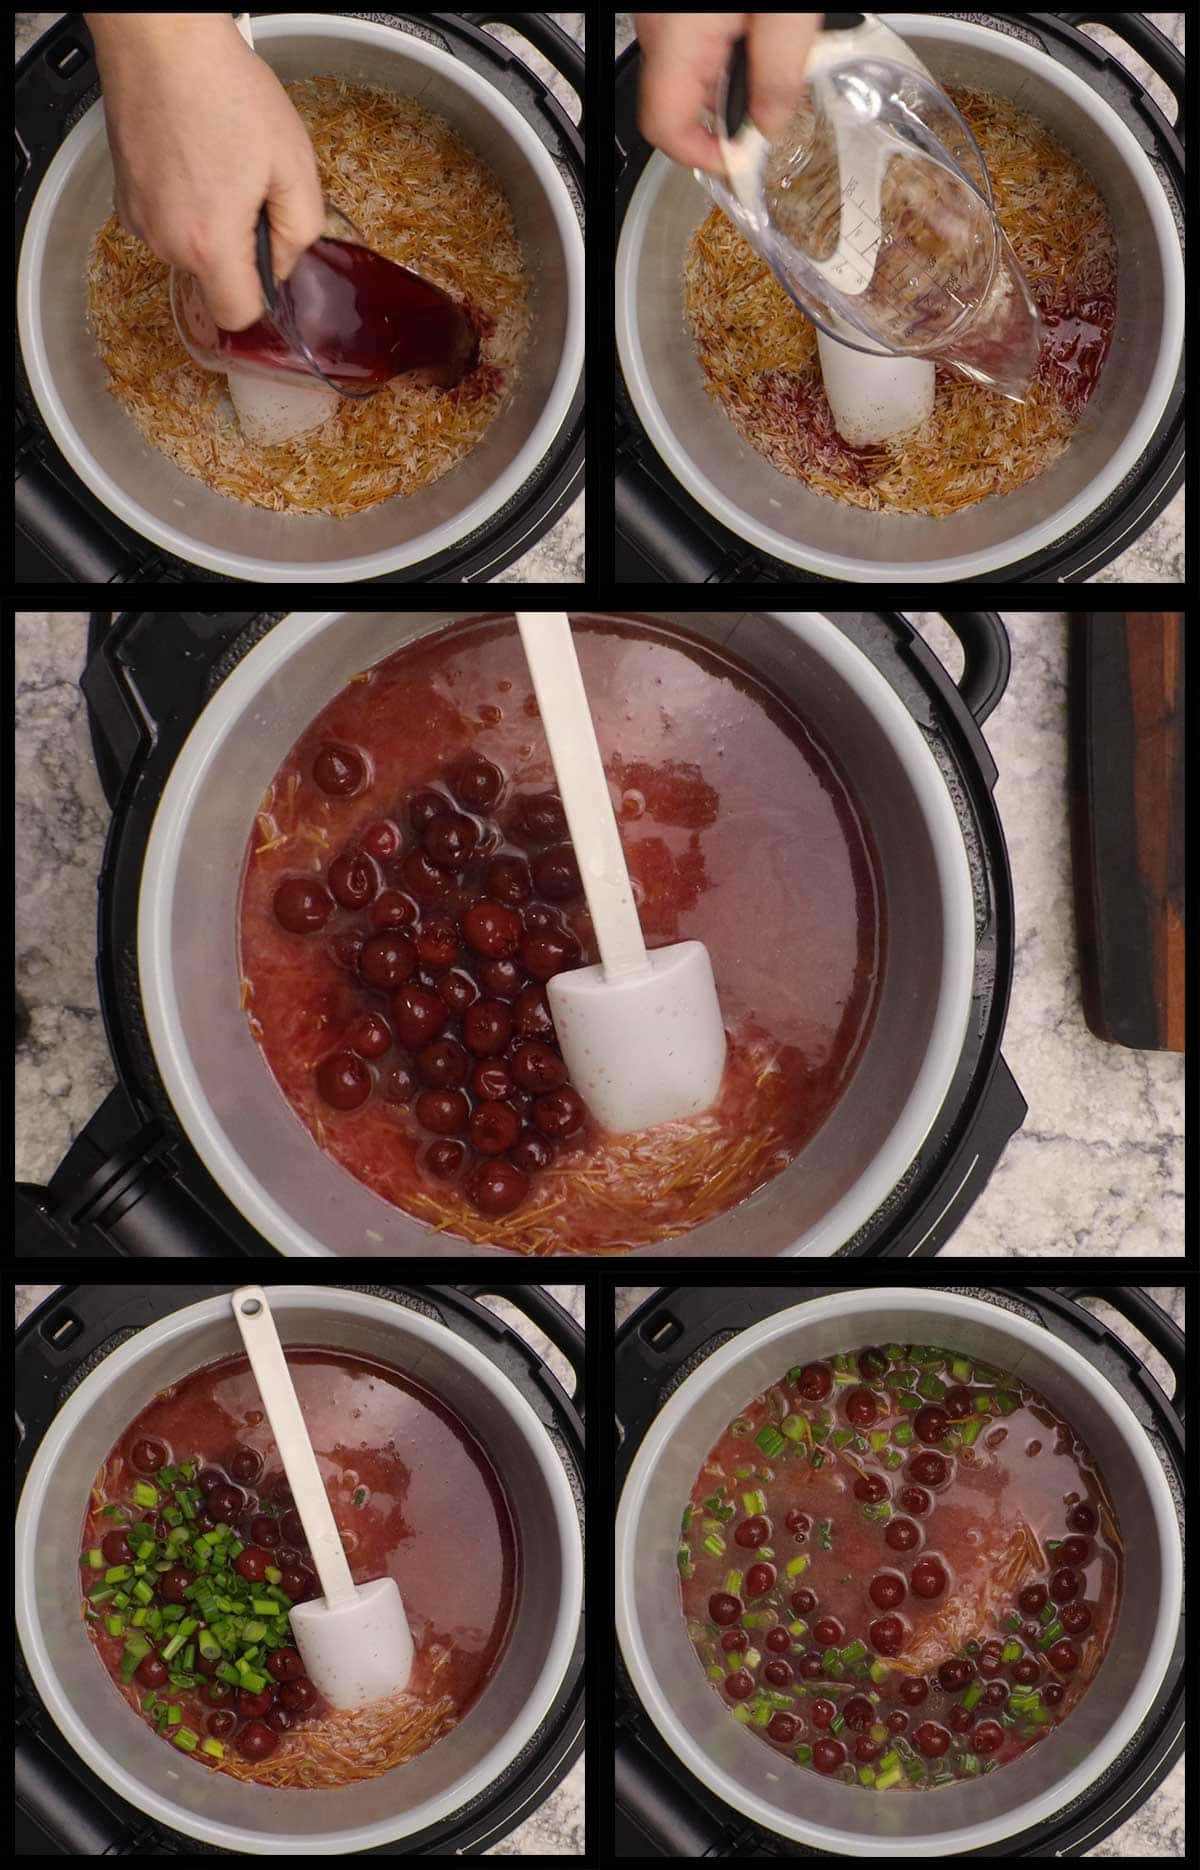
Add in the ½ cup cherry juice and 1¾ cups water and stir. Add in the whole cherries and chopped green onions and stir.
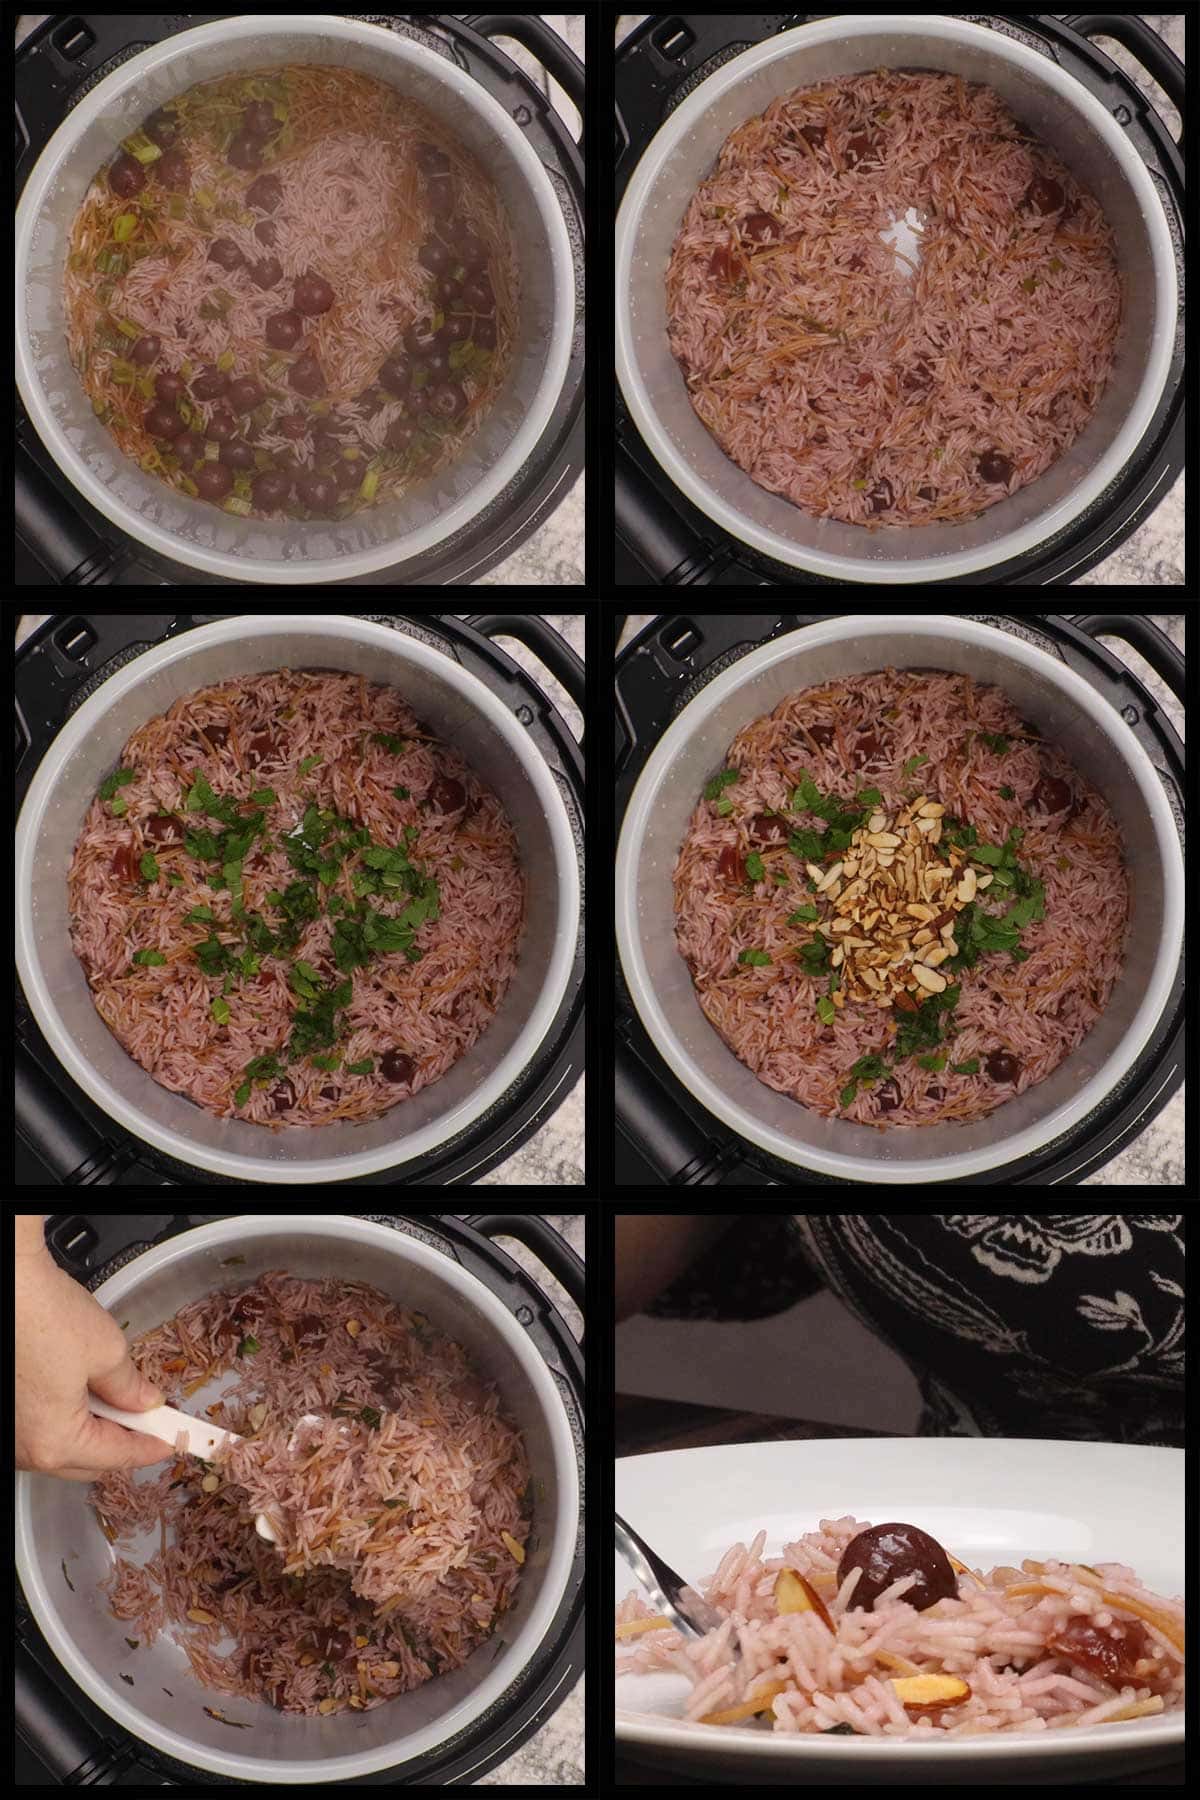
Put the pressure lid on and turn the valve to seal. Set the time to 1 minute and hit start. The pot will take about 5-7 minutes to come to pressure and then pressure cook for 1 minute. When that time is up, it will switch over to the keep warm setting and you do nothing for 13 minutes, so a 13-minute natural release. On occasion, the pin may drop indicating a full natural release is complete before the 13 minutes is up. Don't open the lid for the full 13 minutes. This is the time the rice needs to fully absorb the liquid.
Serving
Once the 13 minutes of natural release is up, open the lid and stir. Leave the keep warm on in case the rice needs to dry a little more. Add in the chopped fresh mint and the toasted almonds.
Taste for seasoning and add extra salt or other spices if desired.
The homemade rice pilaf should be light, fluffy and delicious! It's one of my favorite side dishes, for sure.

I love making side dishes in my Ninja Foodi Pressure Cooker & Air Crisper and here are some of my favorites.


Almond Rice Pilaf Recipe
Ingredients
- ½ cup sliced almonds toasted
- 2 Tablespoons butter salted
- 2 ounces vermicelli
- 1½ cups basmati rice
- 1½ teaspoons fine grind sea salt or kosher salt
- 1 teaspoon ground roasted coriander
- ½ cup cherry juice from jar of sour cherries
- 1¼ cups water
- 1 cup morello cherries (sour cherries)
- 4 green onions chopped
- 2-3 sprigs fresh mint about 1-2 Tablespoons chopped
Would you like to save this recipe?
Instructions
- Toast the almonds either in the inner pot of the Ninja Foodi or a skillet on the stove. Turn the heat to high and add in the almonds, once the pot or pan is hot, stir the almonds frequently until they begin to brown and you smell the nutty aroma. Turn the heat off and put the toasted almonds in a container for later.
Pressure Cooker Instructions
- Add the butter to the inner pot and turn the sear/sauté on high. Break of the vermicelli noodles into pieces about 1½-2" long and add to the pot. Once the butter has melted, turn the temperature down to medium to avoid burning the butter and over toasting the pasta.
- Once all the pasta is in and has turned a nice golden color, add the rice and the seasonings. Stir and let the rice toast for about a minute.
- Add in the cherry juice and water. Stir. Add in the whole cherries and the chopped green onions. Put the pressure lid on turn the valve to seal. Pressure cook for 1 minute. When the time is up, allow the pot to natural release the pressure for 13 minutes. *The pin may drop prior to the 13 minutes, but leave the lid on the entire 13 minutes so the rice fully absorbs the liquid.
- Remove the lid and stir to fluff the rice. Keep the keep warm on to continue to warm the rice and dry it up even more. Taste for seasonings and adjust as needed. Add the chopped mint and toasted almonds.
- Transfer to a serving dish. Serve & Enjoy.
Stovetop Directions
- ***When making this in a skillet or pot on the stove, increase the cherry juice to 1 cup and the water to 1¾ cup***
- Melt the butter in a large skillet or pot over medium heat and break the vermicelli into pieces about 1½-2" long. Add to pot and toast in butter. When the vermicelli is starting to turn a golden color, add in the rice and the seasonings. Stir and toast rice for 1 minute.
- Add in the cherry juice, water, cherries, and green onions. Turn the heat to high and bring to a boil for 1 minute while stirring. Reduce heat to a simmer for about 10 minutes and then turn off the heat and cover. Let sit for 15-20 minutes or until the liquid has been absorbed. Fluff the rice, add in the toasted almonds and chopped mint. Serve and & Enjoy.
Nutrition
About the Recipe Author, Louise Long
Louise is a full-time recipe creator and food blogger @ The Salted Pepper. She has over 30 years of experience with cooking and recipe development. She owned a restaurant for several years and was a full-time RN until retiring to blog full-time.

She published her first cookbook in the Fall of 2018 and is very interested in writing several more.
Louise is also the creator of an online Ninja Foodi Pressure Cooking Course with over 100 instructional step-by-step videos. People absolutely rave about the course and all the value they have received from it.
Louise has several very active Facebook groups that help people with the basics of cooking and learning more about the appliances they love.
Ninja Foodi Pressure Cooker & Air Crisper 101
Ninja Woodfire Outdoor Grill & Smoker
Louise is also a YouTube creator and you can find most of her recipes in video format on The Salted Pepper YouTube channel.
She is very responsive to messages and eager to help in any way she can. Get more Information about Louise & contact information
I WOULD LOVE TO SEE WHAT YOU ARE COOKING UP IN YOUR KITCHEN! TAG ME @THESALTEDPEPPER ON YOUR FAVORITE SOCIAL MEDIA PLATFORM WHEN YOU MAKE A DISH!
BE SURE TO FOLLOW THE SALTED PEPPER RIGHT HERE ⇓⇓⇓⇓⇓
Dixie says
This sounds absolutely amazing! I can’t wait to make it!