You only need 4 ingredients to make these delicious Homemade Peanut Butter Eggs! You probably have the simple ingredients in your pantry and fridge already, and for this recipe, you do not need an egg mold or any special equipment. They are fun to make and you can get creative with add-ins and how you decorate them.
Although peanut butter eggs are most popular in the Spring and especially around Easter, this recipe can serve as the base for any kind of chocolate peanut butter treat. Simply shape them differently and decorate for the holiday or special occasion. Once you try them, I bet they will become one of your favorite treats!
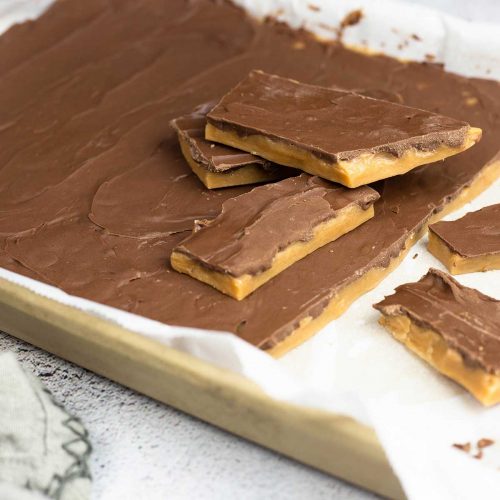
If you love making homemade candy as much as I do, then you'll also love these recipes!
Frequently Asked Questions
When properly stored, homemade peanut butter eggs will last 1-2 weeks at room temperature. You can also freeze them for longer storage and they will stay good for at least 6 months when properly stored. For more details on storing, freezing, and thawing, please see the section below that goes into more detail. No matter if you keep them at room temp, refrigerate or freeze, storing them in an airtight container is key so the eggs aren't exposed to humidity. I'll get into that in detail later in the article, as well.
Surprisingly, no. You can make these peanut butter eggs with things you already have at home. If you wanted to make a different shape, then you could use a cookie cutter, but for the simple egg shape it isn't necessary. You can melt the chocolate in the microwave or make a double boiler out of a pot and a bowl.
Yes, absolutely! You can make as few or as many peanut butter eggs as you want. This recipe makes 18 peanut butter eggs, so if you wanted to make a dozen, then you would cut the ingredients back by 25%. If you wanted to make 24 peanut butter eggs, you would increase the ingredients by 25%. There is always left over chocolate when making 18 eggs, so you don't always have to increase the amount of chocolate if you want to make 24 eggs. I would plan to have more chocolate available and simply add it if needed.
Ingredients & Substitutions
Peanut Butter
I recommend using creamy peanut butter in this recipe, but only because the smooth peanut butter will provide a smoother surface to the eggs. However, I will say that after I added the crushed pretzels to my eggs, I couldn't tell the difference between the ones with or without so the chunks of the pretzels didn't make much of a difference at all. Therefore, crunchy peanut butter should be fine.
You can also use natural peanut butter and adjust the other ingredients so you get the final consistency of the peanut butter filling to be firm enough to form into the egg shape.
Powdered Sugar
The powdered sugar (also called icing sugar) in this recipe is used to sweeten the peanut butter mixture as well as stiffen it. Regular sugar will not work the same. However if you don't have powdered sugar, you can use a high speed blender, you can put regular white granulated sugar into the blender and blend on high speed until it turns into powdered sugar. It usually doubles in size, so process 1 cup of granulated sugar and you will have enough powdered sugar for the recipe.
You can also use a powdered sugar substitute, like Swerve. I haven't made the recipe this way, but it is usually a 1:1 substitution.
If you want to avoid all processed sugars, you can use a natural sweetener or skip it and use peanut powder (crush peanuts into powder with a high speed blender) to thicken the mixture, if needed.
Butter
I use salted butter in the recipe, but if you have unsalted butter that is fine to use. You may want to add a pinch or two of salt to the mixture to bring out all the flavors, but this is certainly optional. If you can't have dairy or don't want to use butter, you can try using a solid oil like coconut oil, but the eggs will have a little coconut flavor.
You can also use cream cheese, but it will also change the flavor and, of course, isn't dairy free.
You can also skip the butter entirely and it won't affect the recipe except for flavor. I find the addition of butter adds an added richness to the eggs and they taste more like Reese's peanut butter eggs than without it, but that is just my opinion.
Chocolate
The flavor of chocolate you use is up to you, dark chocolate, milk chocolate, semi-sweet chocolate, or even white chocolate will work perfectly fine. The secret is getting the right consistency, so the melted chocolate evenly coats the peanut butter eggs.
You can also use a dairy-free dark chocolate mixed with some coconut oil if you want to make these Vegan.
The type of chocolate you use will affect the finished product to a certain point. Tempered chocolate works best for coating candy because it sets up into a shiny, hard shell. One way to temper chocolate is to melt it to a precise temperature and then add some more unmelted chocolate to "seed" it and cool it down. This changes the crystal structure in the chocolate which results in a chocolate coating that has a snap to it and stays firm at room temperature, like a good old Hershey's bar.
Chocolate Chips don't work as well for tempering because they often contain additives that help them hold their shape during baking, BUT I use chocolate chips anyway! I always have them on hand and it's easy and less expensive than buying high-quality chocolate bars. I have great results using chocolate chips because I mix them with melting wafers also called candy melts.
You can certainly use all melting wafers, but they don't have the best chocolate flavor. I find that using 50% chocolate chips and 50% melting wafers gives the chocolate eggs a nice chocolate flavor and the coating stays firm at room temperature. The finished chocolate coating is shiny and you don't have the issues with bloom that causes those greyish white streaks.
I recommend using a good quality chocolate chip and melting wafers, my favorite brand is Ghiradelli.
You can also skip the chocolate coating, if you want, and coat the homemade peanut butter eggs in something else. Crushed pretzels, graham cracker crumbs, even crushed chocolate cookies would be delicious!
Extras
Vanilla Extract: Many recipes will call for vanilla extract and it's perfectly fine to use, but what I found is it didn't add enough flavor to justify the additional sugar that I had to use to make up for the added liquid. So, I skipped it in this recipe. If you want to use it, you can add 1 teaspoon of the vanilla extract and expect to need about 1 extra Tablespoon of powdered sugar.
Pretzels: I love the salty/sweet flavor combination and the first time I had a Reese's Peanut Butter Cup with Pretzels, I fell in love! Not only did the pretzels add a crunch, they added this saltiness to the sweet peanut butter filling that was unbelievably delicious. So, when I started testing this recipe, I knew I wanted to add them in and they are just as good as the store-bought kind! Even better, if you ask me!
Cookies: You could also add some crushed up cookies to give some crunch and bring another flavor into the filling. Oreos would be delicious!
M&M's : Chop them up and fold them into the peanut butter mixture for that added crunch of the candy shell and some chocolate on the inside.
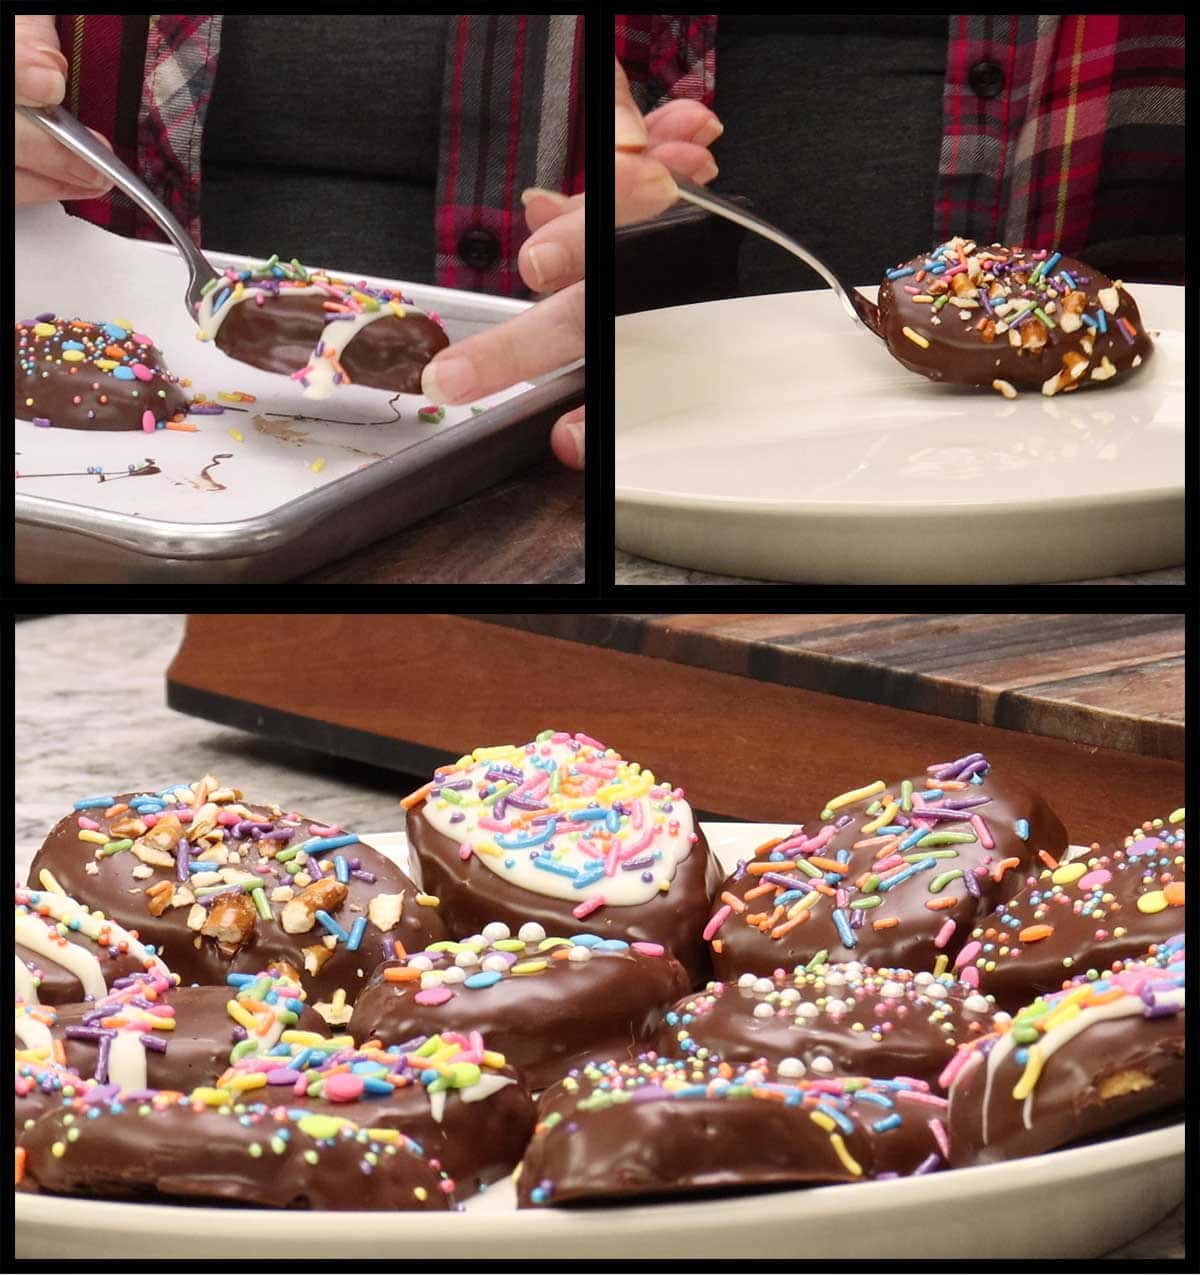
Decorations: You can put anything you want on top of the chocolate as a decoration. Sprinkles, edible confetti, even those beautiful sugar decorations. You can decorate with any color M&M's, crushed candy or pretzels. Use white chocolate as an accent to a dark or milk chocolate egg or a dark chocolate accent on white chocolate.
Variations of Homemade Peanut Butter Eggs
This easy recipe is not just for when you want to make homemade peanut butter Easter eggs, you can use it for all kinds of different types of candy. It's easily turned into homemade peanut butter cups or buckeyes or any shape you want. Here are some ideas and ways to create a special candy for those special occasions.
Buckeyes
Simply roll the peanut butter mixture into balls, place a toothpick in the center and freeze them on parchment lined cookie trays for about 30 minutes. Melt your chocolate and dip the peanut butter balls ¾ of the way up. You want to leave just a little of the peanut butter mixture showing at the top. Place the coated peanut butter balls back on the tray, remove the toothpicks and cover over the hole. Place the tray back in the freezer for another 30 minutes and then place them in a sealable freezer bag or another freezer container. To thaw (which you don't even have to do), follow the instructions in the section that goes over freezing and thawing the peanut butter eggs.
Wedding Favors
I love making edible wedding favors and this recipe would work great for making various cutouts using cookie cutters, like wedding bells or rings or anything that fits the theme of the wedding. To do this, spread the peanut butter mixture out on a sheet pan so it is ¼-½" thick. Make sure the sheet pan is lined with parchment paper or wax paper. Freeze for 30 minutes. Press the cookie cutter into the peanut butter to make the different shapes and remove them. Place the shapes on another parchment lined tray and freeze while you melt the chocolate. Dip the shapes in chocolate just like I did for the eggs and decorate however you like.
You can even write your names in white chocolate or simply put the date. Freeze individually and then you can store them stacked, but I would separate each layer with parchment so they stay in pristine shape until the big day! Follow the instructions for thawing.
Christmas Candy
For Christmastime, I would turn these into little ornaments by rolling the peanut butter filling into a ball shape, dip in chocolate and then use edible glitter to decorate. You can also do the cookie cutter method using Christmas cookie cutters (see above wedding favors).
Birthdays and other Celebrations
There are so many different ways to shape and decorate these treats that it's impossible for me to list them all. Get creative, think about the occasion and have fun.
Peanut Butter Cups
It's easy to make your own peanut butter cups, too! All you need is cupcake liners and a cupcake pan OR, what I like to use, are these (affiliate link)silicone cupcake molds. I bought them on Amazon and, while I don't like to use silicone for baking, I love them for making candy!
To make homemade peanut butter cups using either paper cupcake liners or the silicone ones, you prepare your peanut butter filling and melt the chocolate.
Place some chocolate in the bottom of the cupcake liner and tilt it around so it covers the sides. Sometimes I even use a paint brush (one for candy making) and paint the sides to make sure I get an even layer that is thick enough. Put the tray in the freezer for a few minutes to let the chocolate harden.
Add in the peanut butter filling either with a spoon or a piping bag and smooth it out. Top with chocolate and let it set up. Then gently peel away the paper or pop them out of the silicone molds. I find freezing them to set up the chocolate to work the best.
How to Make Homemade Peanut Butter Eggs
Prep
Make sure the butter is at room temp, this is important for blending, otherwise you might be left with chunks of butter in your candy.
I like to start by lining my trays with parchment and having them ready to go. This recipe makes 18 peanut butter eggs so you will need 3 quarter-size sheet pans or 2 regular-size cookie sheets or half pans.
Peanut Butter Filling
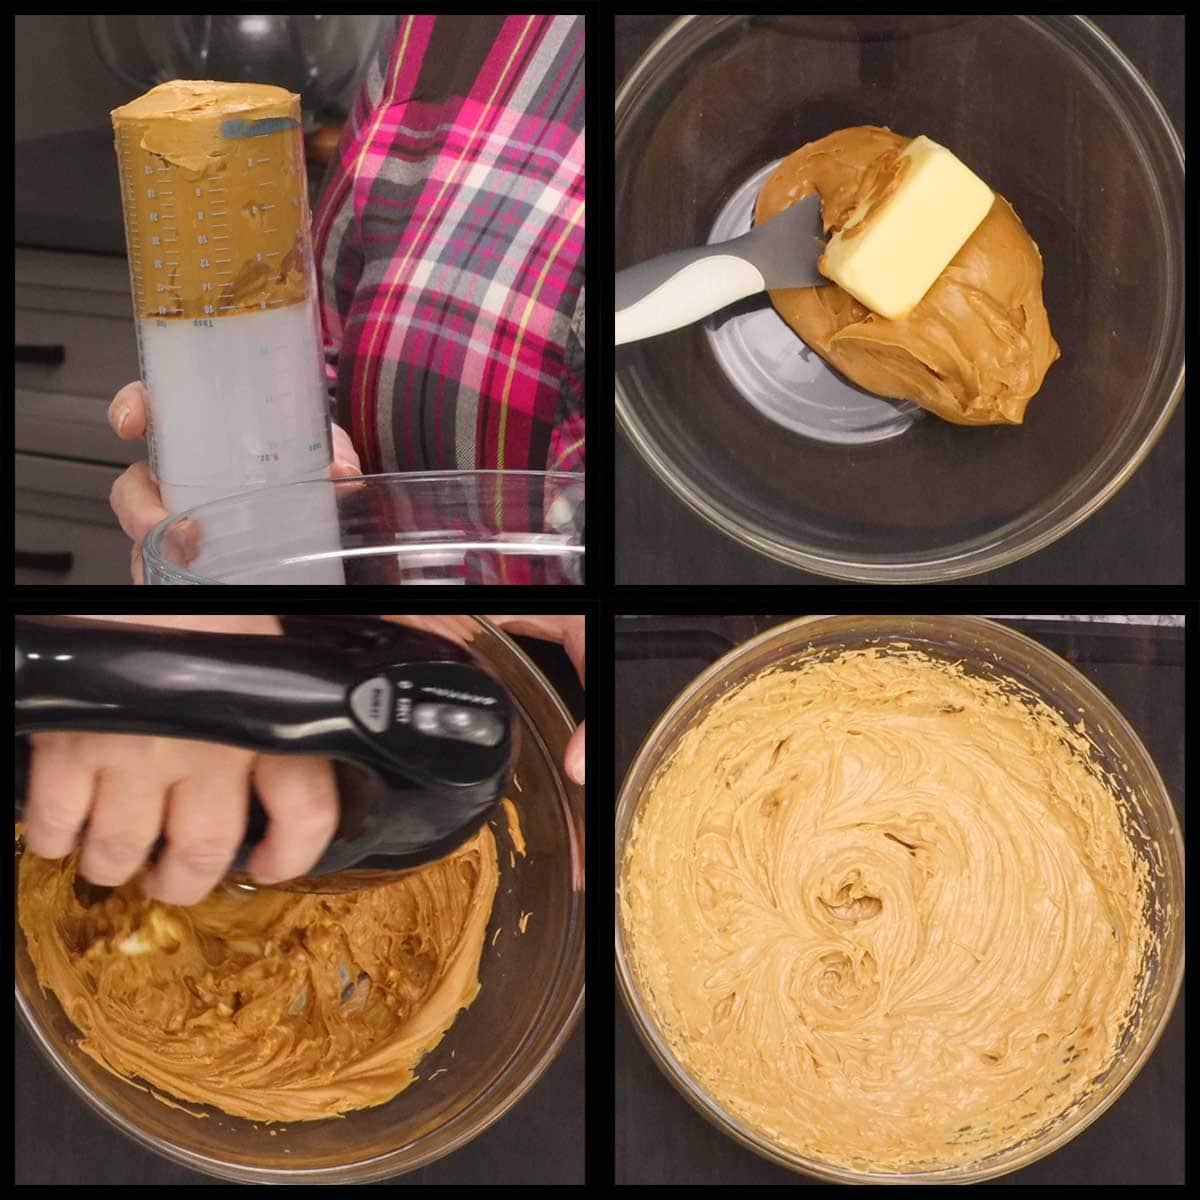
In a medium size mixing bowl, add the peanut butter and room temp butter. Using an electric hand mixer or a stand mixer, mix on medium speed until well combined. The mixture will increase in volume some and become very creamy. Make sure any large clumps of butter are broken up.
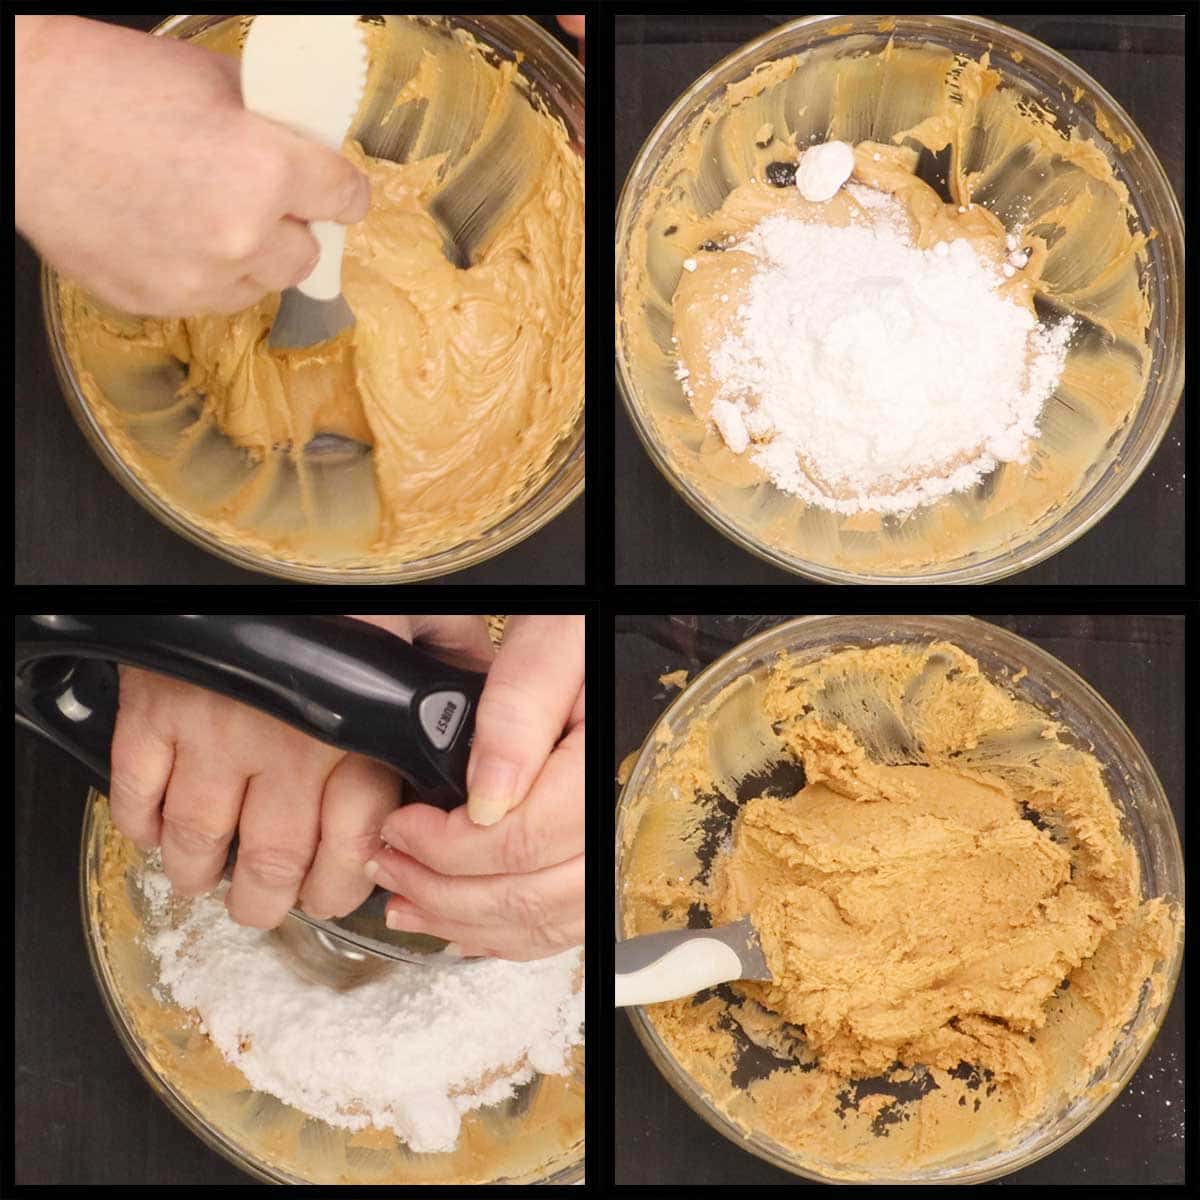
Add in ½ cup of powdered sugar and mix on LOW speed until incorporated. Repeat with another ½ cup. It usually takes between 1¼ and 1½ cups of powdered sugar to achieve the correct consistency. It is the correct consistency when you can touch the peanut butter mixture and it doesn't stick to your finger. You only want to add enough powdered sugar to achieve the correct consistency, otherwise the mixture is too sweet.
Forming and Shaping the Eggs
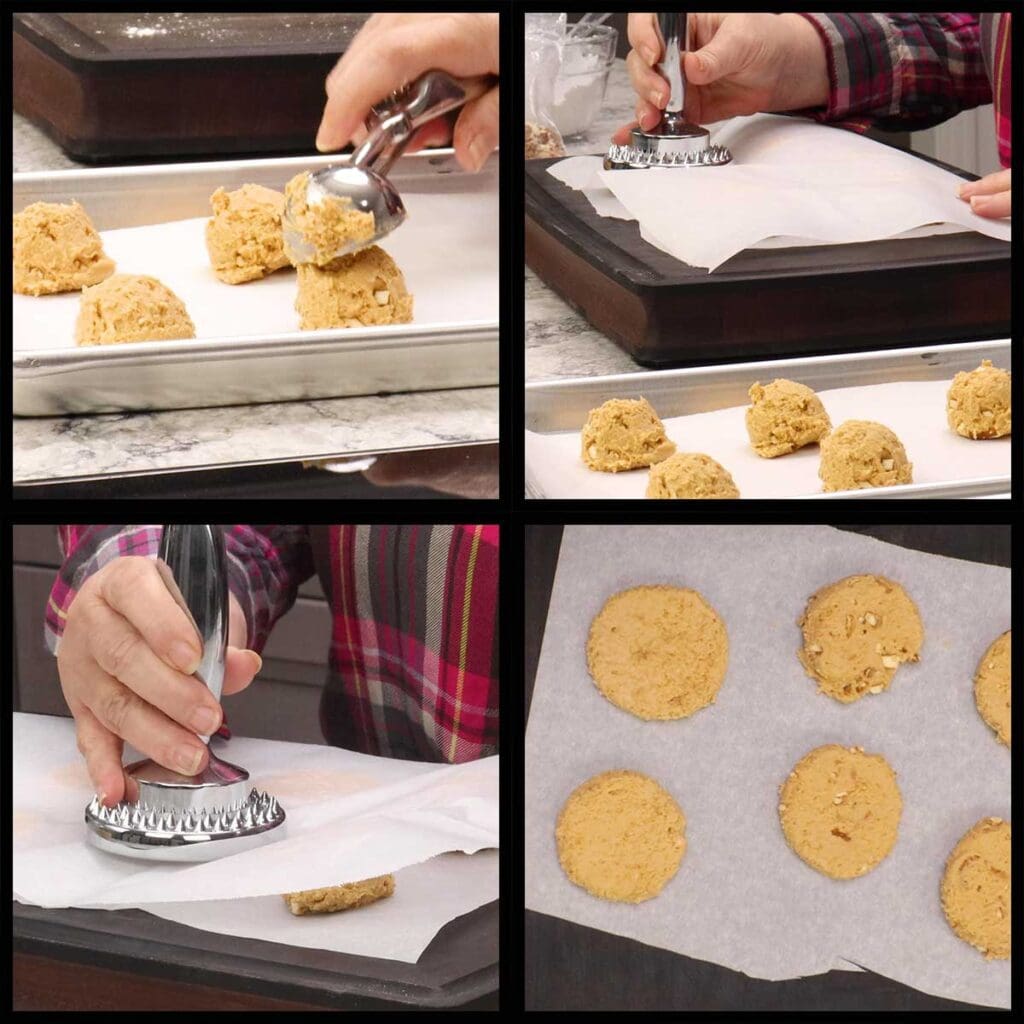
Once your peanut butter mixture is the correct consistency, scoop out about 2 Tablespoons of the mixture and form into a ball. I use my (affiliate link)Medium Pampered Chef Scoop to make this super quick and easy.
Once the peanut butter balls are on the trays, cover with a piece of parchment and press them down into a circle about ¼-½" thick. The thickness is a matter of preference, so either way is fine. I use my (affiliate link)Pampered Chef Meat Tenderizer on the flat side to do this, but you can use the palm of your hand. Place the trays in the refrigerator for about 10 minutes to make the peanut butter mixture firmer and easier to shape.
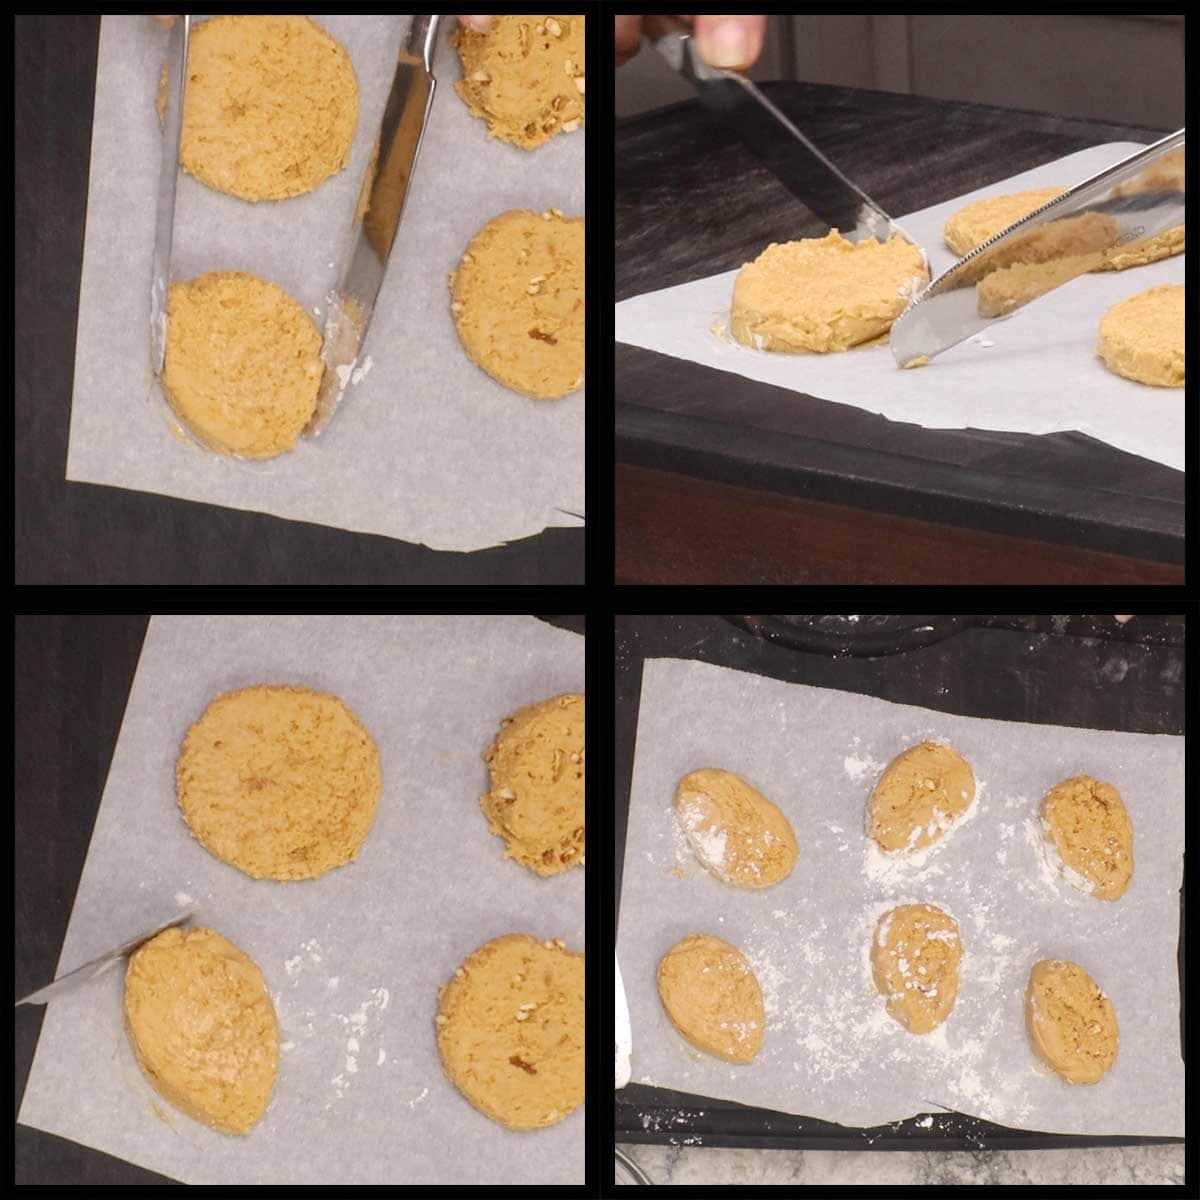
Once the circles are firm, you can shape them into an egg shape. Only work with one tray at a time and leave the rest in the fridge. I use two butter knives dipped in a little powdered sugar, but ,honestly, your fingers work just as well. To create the egg shape, simply run the knife or your finger along the outside of the circle and elongate it until it resembles an egg shape. Place the trays into the freezer for 30 minutes before dipping in chocolate. If you don't have room in your freezer, put them in the refrigerator for 60 minutes.
Melting the Chocolate
Set up the type of double boiler you are going to use or find a glass bowl that is microwave safe and large enough to use for dipping chocolate. Below are three different ways you can melt the chocolate.
- Microwave: My least favorite, but quickest way is to use the microwave. While this is fast and convenient, I've ruined more chocolate than I've successfully melted because I'm too impatient to do it correctly. The best way to melt chocolate in a microwave is in a glass bowl and to microwave in short intervals, stirring after each one. I usually go on full power, but you can reduce to 50% if you want. I recommend no more than 45 seconds at a time for this amount of chocolate and make sure you stir each and every time to even out the heat. The chocolate will be hottest on the bottom and if you don't stir, it will end up overheating and seizing up on you.
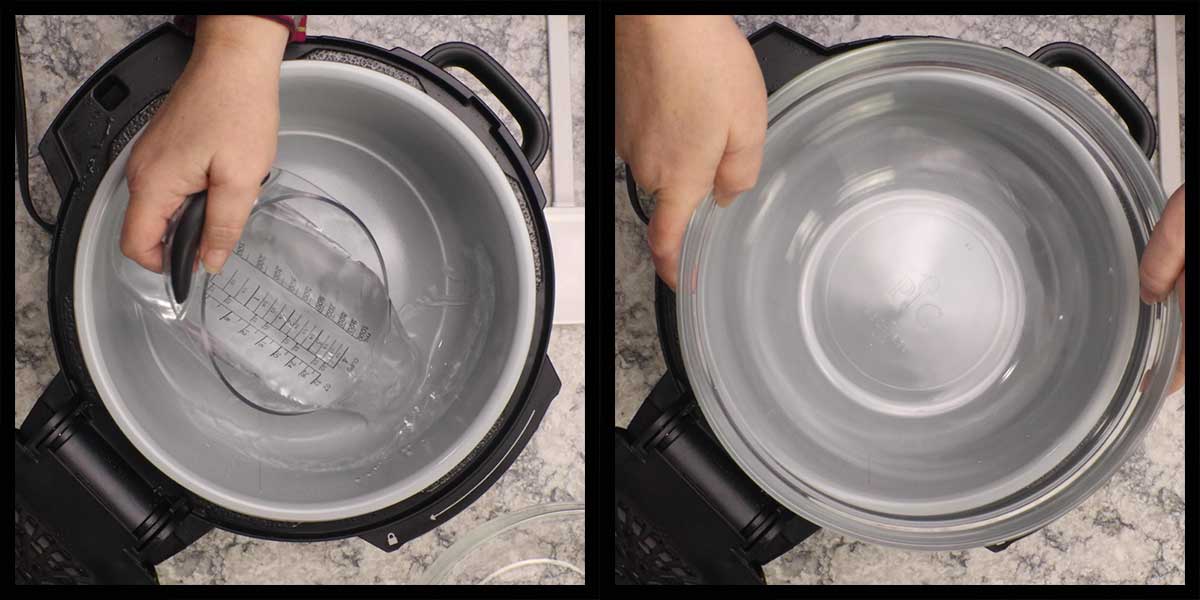
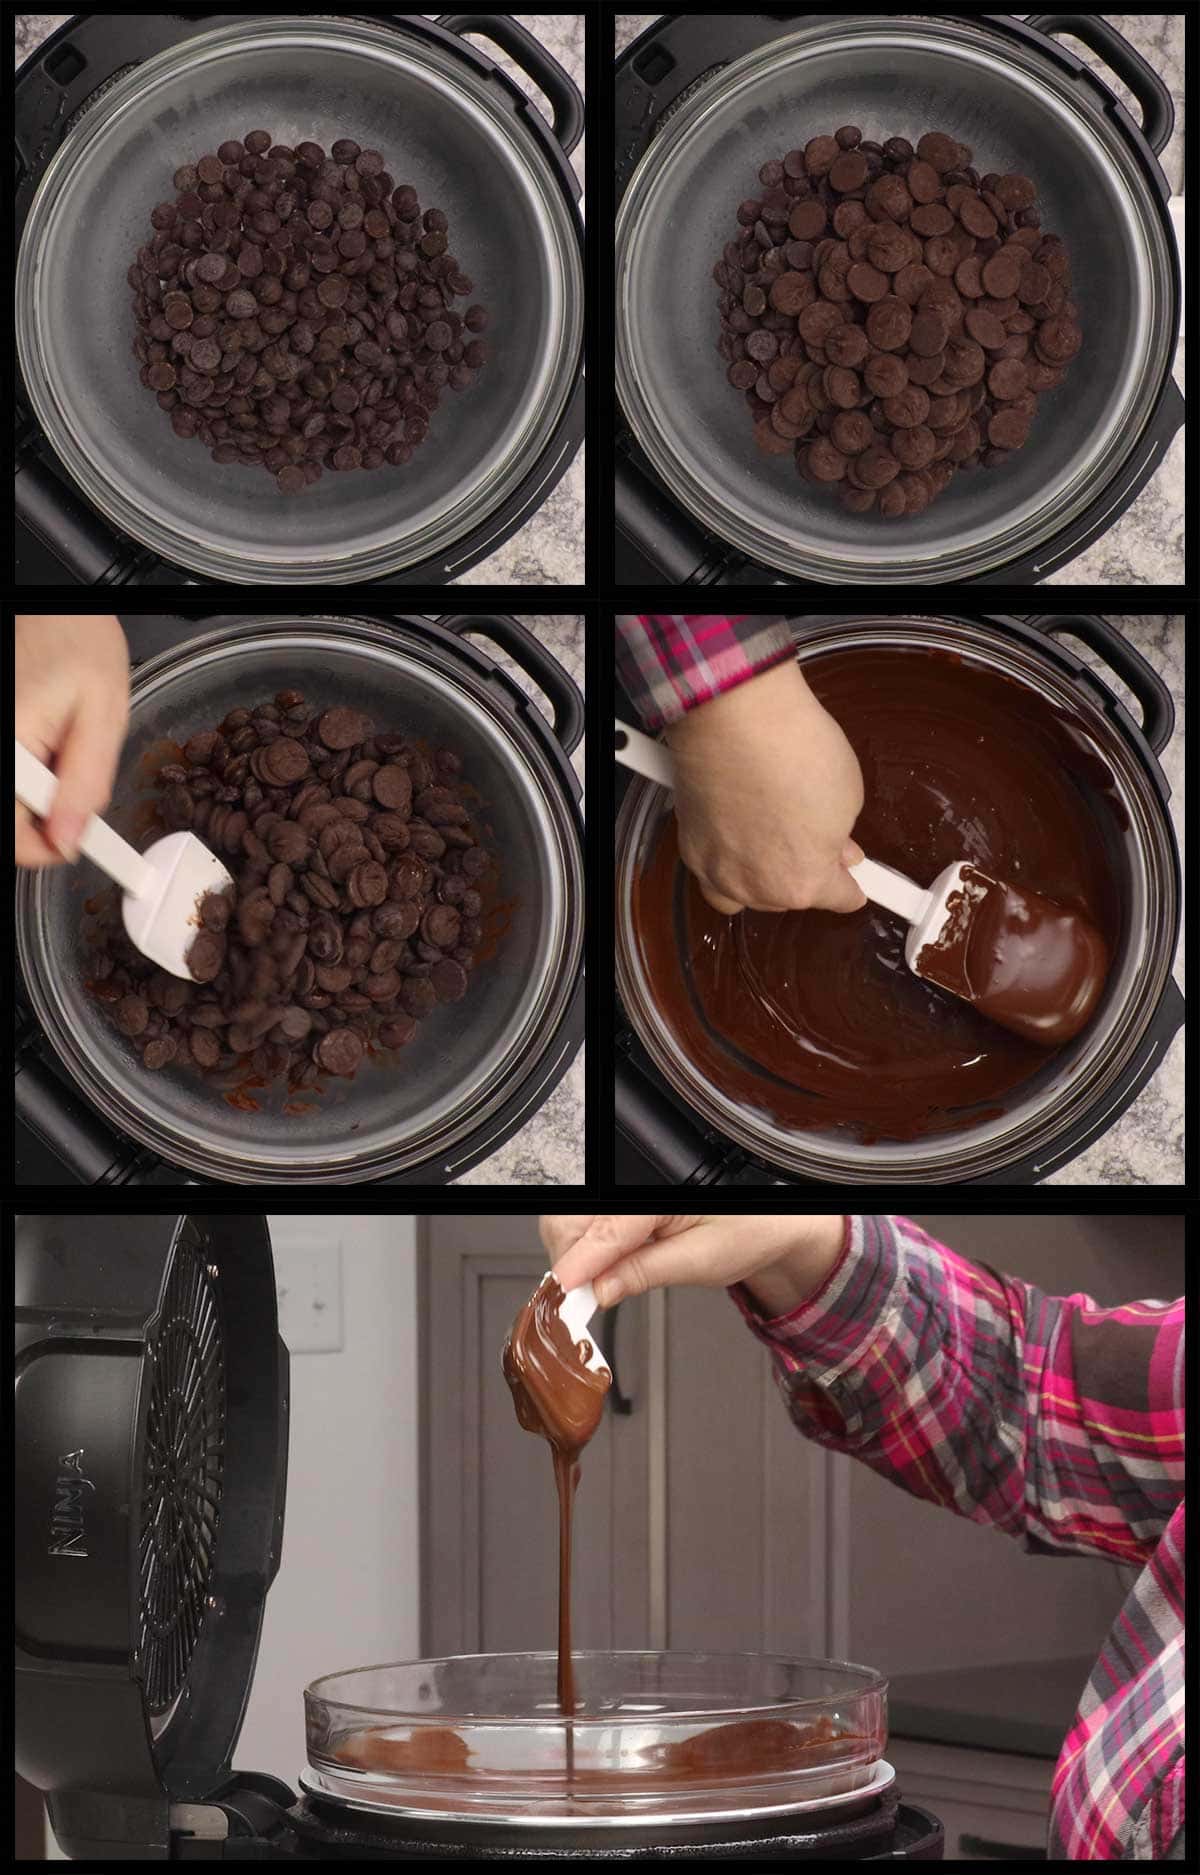
- Ninja Foodi or Instant Pot: My most favorite way is to use the Ninja Foodi (Instant Pots work the same) with a large glass bowl. To do this, first make sure you have a glass bowl that fits on the rim of the inner pot. If you don't, you can use a smaller bowl, but you will have to place it on a rack (as high as you can get it) and wrap some foil to cover the gap between the Foodi pot and your bowl. Then you fill the inner pot to about 2" below the bowl and turn the sear/sauté on high. Put the chocolate in the bowl. Once it starts simmering, turn the heat down to low. Stir occasionally until all the chocolate has melted.
- Double Boiler: Place water in the bottom of the double boiler and the chocolate in the top. Place on the stove and heat the water to a simmer, then turn down to low. Stir the chocolate until it's melted.
Dipping & Decorating the Peanut Butter Eggs
When the chocolate has melted and the peanut butter eggs are very cold, it's time to dip them. I dip the bottoms first, but that is totally optional. I do it this way to prevent the fork scrapes that I often get when dipping candy in chocolate. It also removes the need for actually dipping the eggs fully in the chocolate which softens them and sometimes makes it hard to get a nice coat of chocolate.
Here is a quick video showing the process.
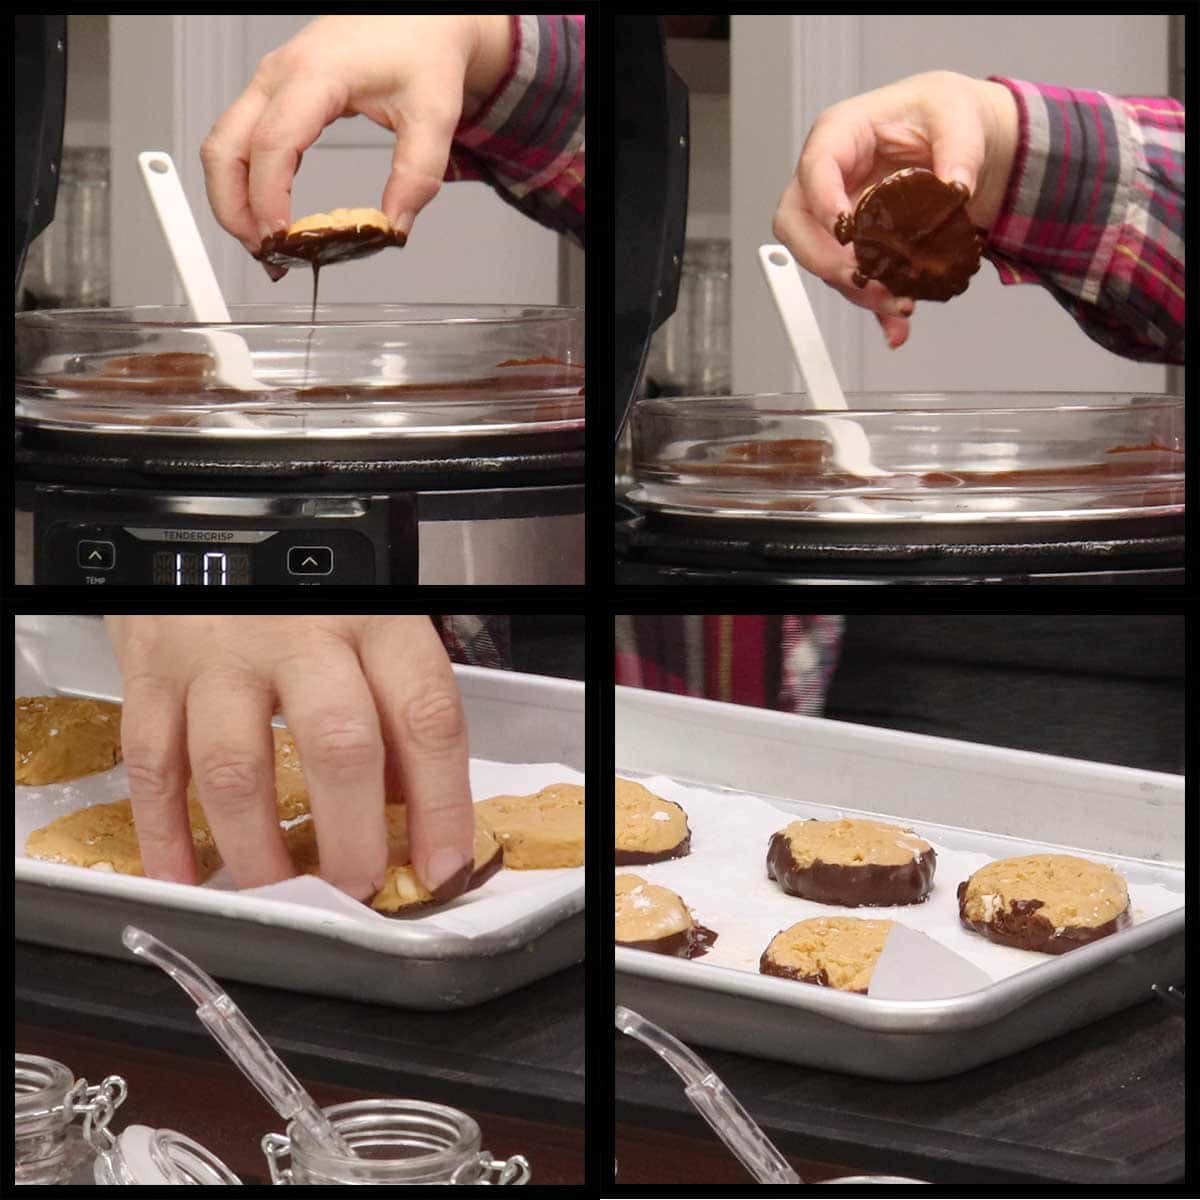
Working with one tray at a time, pick up the egg with your fingers and dip it in the chocolate just so it coats the bottom. Place the eggs back on the parchment lined tray and put them in the fridge while you dip the bottom of the other tray(s).
Use a fresh piece of parchment on the trays for the final dip so you don't end up with powdered sugar all over your beautiful eggs.
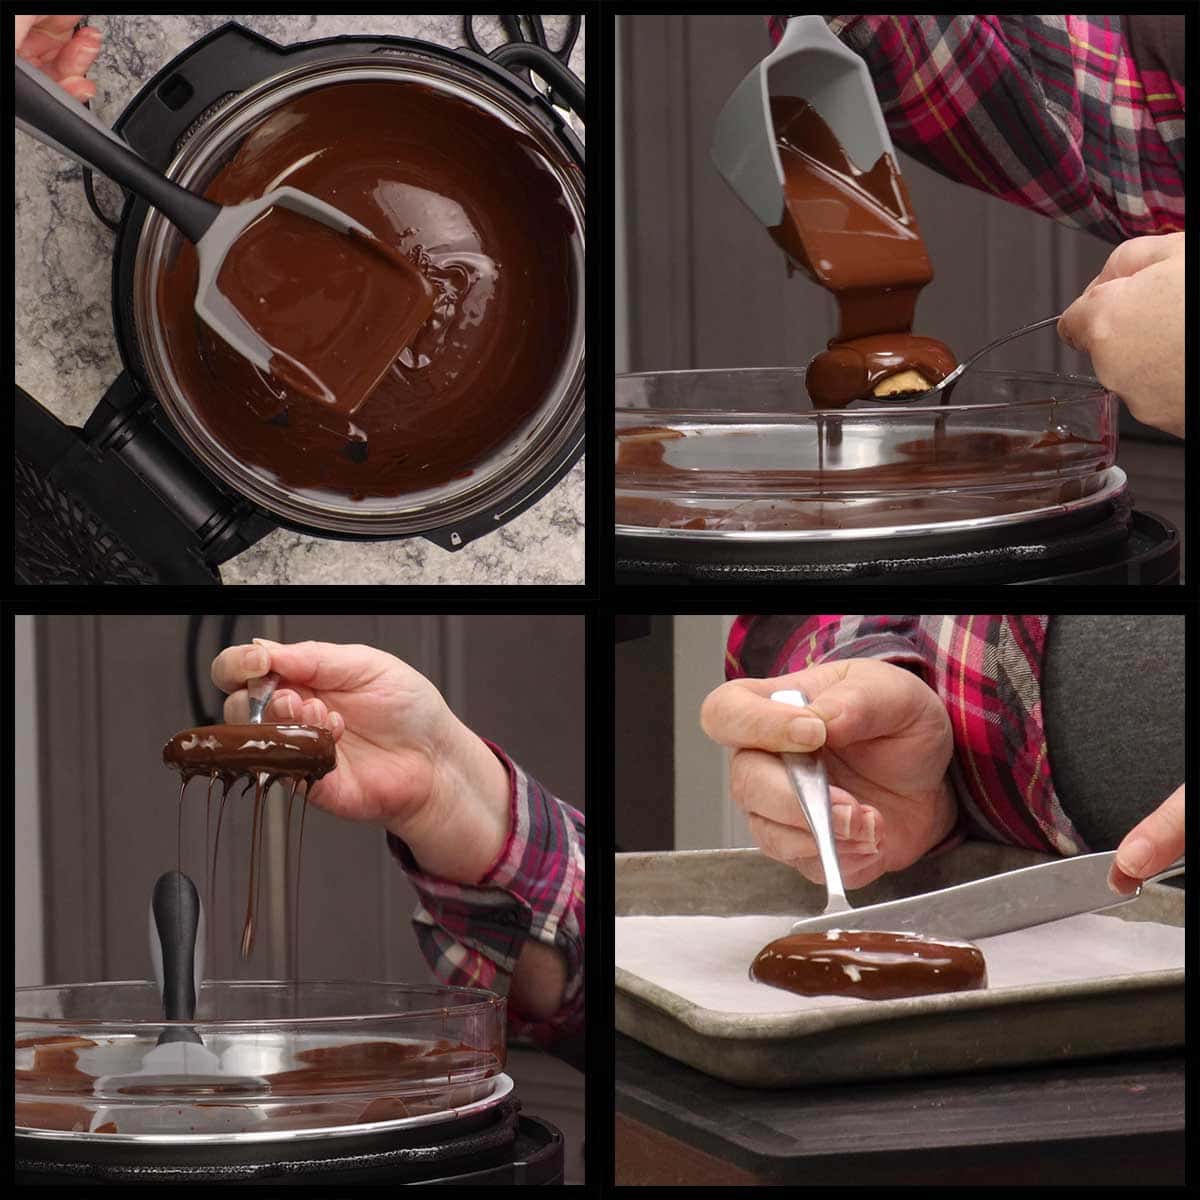
Again, working with one tray at a time, place a bottom-dipped egg on the fork and hold it over the bowl of chocolate. Ladle the chocolate over the top of the peanut butter egg and allow the excess chocolate to drip off.
Gently push the chocolate-covered egg off of the fork with a butter knife. Check to see if any chocolate came off the side where the knife was and if so, just smooth the chocolate over the area.
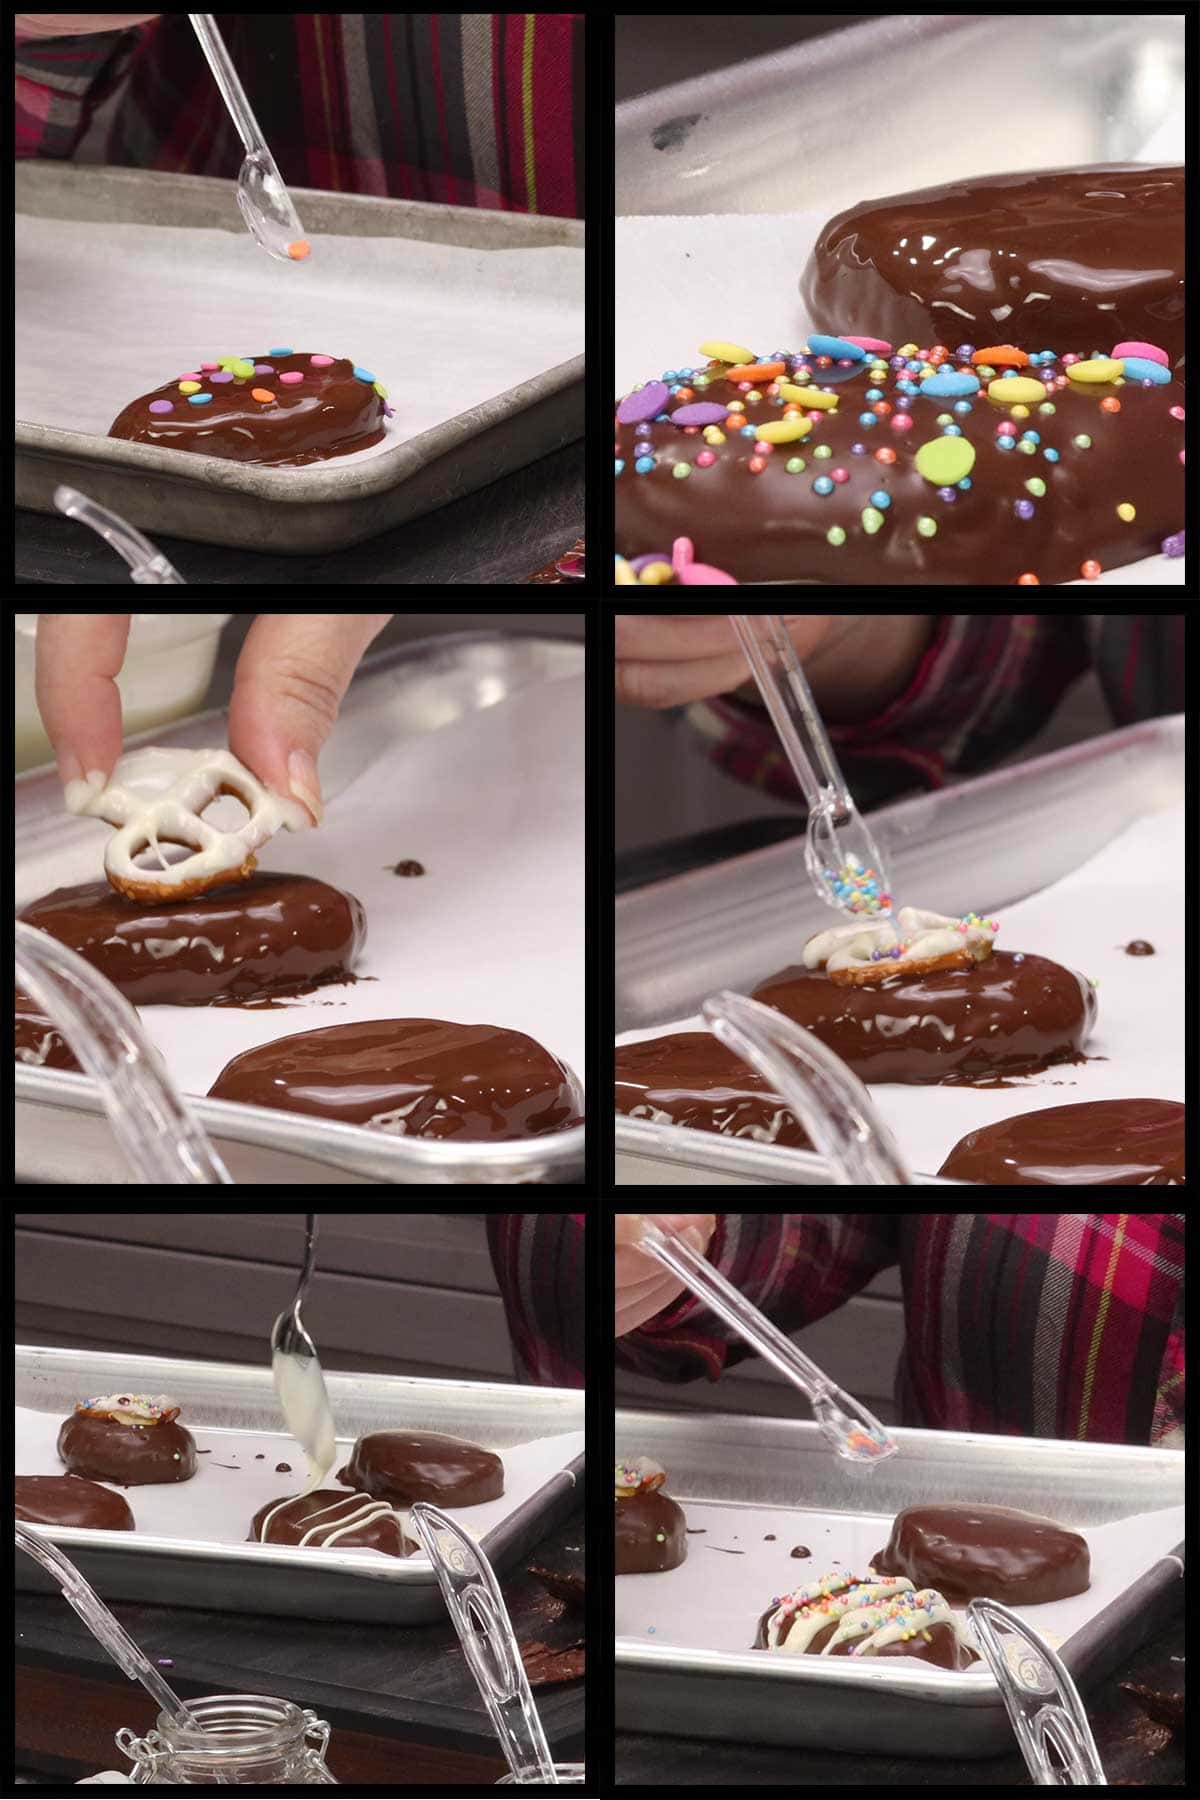
If you are decorating directly onto the chocolate, do that now before the chocolate sets up. Otherwise let the eggs sit on the counter until the chocolate is set or place the tray in the fridge for 10 minutes or so. If you plan to freeze them, you can pop the tray in the freezer right now. See below for full instructions on freezing and storing.
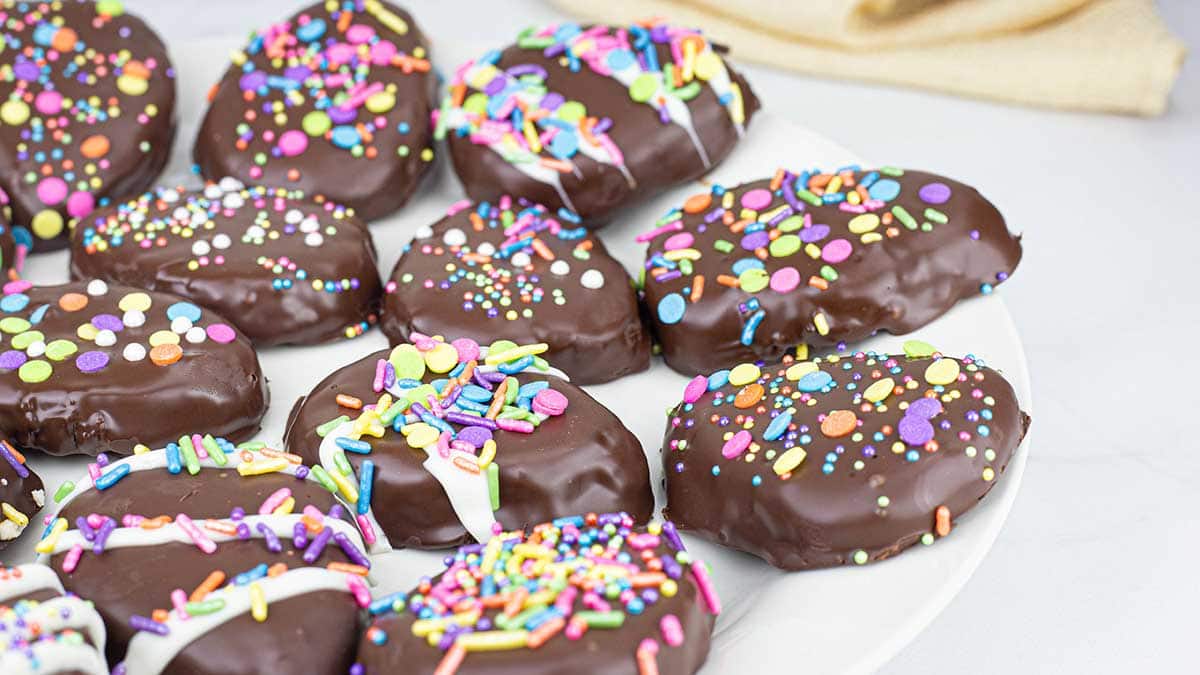
There are tons of ways to decorate your eggs, so get creative and have fun! You can see the different ways I did mine in the above collage.
Once they are decorated, let them sit on the counter to set up for at least one hour if you are planning on serving them right away. If you want to store them for later either at room temp, in the fridge, or in the freezer, refer to the section below that goes over my suggestions.
When ready to serve, place the eggs on a platter. Please take a moment to step back just a minute and admire those beautiful eggs and make sure to grab one for you because there won't be any left!
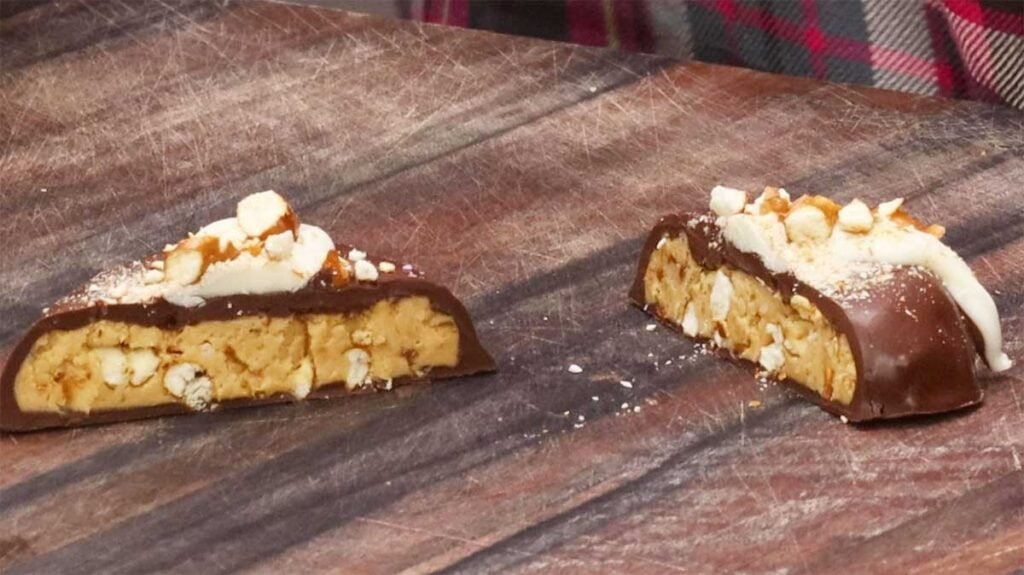
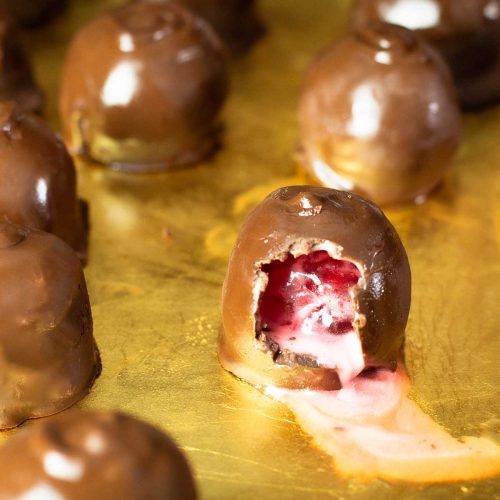
Look at the inside! Obviously that is one with pretzels!
Storing Peanut Butter Eggs
As if this article isn't already long enough, here we go with storage and thawing of your eggs. The reason I take the time to write so much is because I have already made so mistakes over the years, I figure I can at least save you from making the same ones by writing about all the little details! Storage for candy is a big deal, so if you plan on refrigerating or freezing these eggs to serve later, PLEASE READ this section.
Room Temperature Storage
You can store the chocolate covered eggs at room temperature for at least 7-10 days and they will be fine. If you are layering them, place a clean piece of parchment between each layer. They will do fine exposed to the air (unless it's really humid in your house) or in an airtight container, just make sure they are not in direct sunlight or exposed to temperatures above room temp. So, don't place them by the oven or stove or in area that is hot. Avoid humid areas where condensation might form and cause discoloration of the chocolate.
Refrigerator Storage
You can store your peanut butter eggs in the refrigerator several different ways.
From room temp, you can layer them with parchment in between each layer and make sure they are in an airtight bag or container. They will last months in the refrigerator when properly stored.
Another way to store them in the fridge is to place the trays of eggs in the freezer for several hours so each egg freezes individually, then bag them up (no need for layers or parchment) and keep them in the refrigerator until you want one.
If you plan on serving them on a platter from the fridge, take them out several hours or even a day before you plan on serving them and let them sit in the bag or air tight container. This is so the eggs slowly warm up to the temperature in the room. Otherwise, if you sit cold chocolate-covered candy on a platter in a room that is hotter than 40℉/4℃, you will see condensation start to form on the chocolate. Chocolate and moisture don't go well together and this can sometimes cause discoloration or funny patterns on the eggs. You know this is happening if you see the chocolate with water drops on it. IF this happens, the eggs are still perfectly fine to eat they just don't look as pretty!
Storing in the Freezer
If you want to store your peanut butter eggs in the freezer, I suggest freezing them individually on the parchment-lined trays overnight and then transferring to either a freezer bag or another airtight container.
Due to the high fat content, you can eat these right from the freezer (my favorite way to eat them!) or you let them sit out at room temp to thaw. The important thing to remember is going from frozen to room temp can cause condensation to form which can discolor the chocolate and make it kind of sticky.
To avoid this, leave the eggs in the container at at room temp for several hours before plating to serve. If the egg is just for you and you don't want it to be sticky, wrap the frozen egg in plastic wrap and leave it on the counter for 30 minutes. In fact, if you are making these to keep and only plan on serving one or two at time, then you can freeze the tray and then wrap them in plastic wrap individually and place the wrapped eggs in a freezer bag or another airtight container.
However you decorate or store them, I certainly hope you love them when you eat them!

Peanut Butter Egg Recipe
Ingredients
Peanut Butter Filling
- 1 cup creamy peanut butter
- ¼ cup salted butter room temperature
- 1½ cups powdered sugar have extra on hand if needed
- ½ cup crushed pretzels (optional) about 1 cup whole mini pretzels
Melting Chocolate
- 12 ounces Dark Ghirardelli Chocolate chips
- 12 ounces Dark Ghirardelli Melting Chocolate
Instructions
Peanut Butter Filling
- Add peanut butter and room temperature butter to a medium size mixing bowl. With a hand mixer or stand mixer, blend them together until you have a fluffy mixture free of large clumps of butter.
- Add the powdered sugar in ½ cup at a time and mix on low speed until incorporated. It usually takes between 1¼-1½ cups of the powdered sugar to reach the correct consistency. You want the peanut butter filling to be firm enough that you can shape it without adding too much sugar that they are too sweet. If you can touch the filling and it doesn't stick to your fingers, that is the consistency you want.
- Line your trays with parchment paper and scoop out about 2 Tablespoons of the peanut butter filling into a ball and place on the tray. Leave several inches around each one so you can flatten and shape them.
- Place another piece of parchment over the top of the balls and gently press them down so they are about ¼"-½" thick. Repeat for the remaining trays. Place the trays in the refrigerator for about 5 minutes.
- Shape the cold circles of peanut butter filling into egg shapes with your fingers or by using two butter knives dipped in powdered sugar. Work with 1 tray at a time so the filling doesn't warm up or it becomes a little sticky and harder to shape. Place the trays into the freezer for at least 30 minutes. If you don't have the space in your freezer, then put them in the refrigerator for about 1 hour.
- While the trays are in the freezer, melt your chocolate. You can do this using a double boiler on the stove, the Ninja Foodi or Instant pot, or carefully in the microwave. See notes below for specific instructions for each of the melting methods.
- Once the peanut butter eggs are very cold and the chocolate has melted into a smooth consistency, pick the egg up and dip the bottoms in the chocolate and return to the parchment paper. While this step is optional, it prevents the fork marks on the bottoms and I think is a nicer presentation.
- Return the eggs with the bottoms dipped to a clean tray lined with parchment and put in the fridge. Repeat with the remaining trays.
- Remove one tray at a time and and hold one of the peanut butter eggs on a fork over the chocolate. Using a large scoop (wood or silicone is best), scoop up some chocolate and let it flow over the top of the egg. Make sure the sides are covered.
- Gently push the chocolate covered peanut butter egg off of the fork with a knife. Decorate before the chocolate sets with sprinkles, edible confetti, or anything else you like. If you want to decorate the tops with a different colored chocolate, then let the dark chocolate set up first. You can let them set up on the counter for about 1 hour or pop them in the fridge for 10-20 minutes. *Don't leave them in the fridge much longer or when you bring them out, they might form condensation which can lead to discoloration of the chocolate.
- Once they are completely set, put them on your platter. Serve & Enjoy!
- To keep them for longer storage, I recommend freezing them on the parchment lined trays overnight, then you can transfer them to a freezer bag or an airtight container. To thaw, make sure to keep them in the container and not exposed to the air or they might form condensation which can cause discoloration of the chocolate.
Notes
- Microwave: My least favorite, but quickest way is to use the microwave. While this is fast and convenient, I've ruined more chocolate than I've successfully melted because I'm too impatient to do it correctly. The best way to melt chocolate in a microwave is in a glass bowl and to microwave in short intervals, stirring after each one. I usually go on full power, but you can reduce to 50% if you want. I recommend no more than 45 seconds at a time for this amount of chocolate and make sure you stir each and every time to even out the heat. The chocolate will be hottest on the bottom and if you don't stir, it will end up overheating and seizing up on you.
- Ninja Foodi or Instant Pot: My most favorite way is to use the Ninja Foodi (Instant Pots work the same) with a large glass bowl. To do this, first make sure you have a glass bowl that fits on the rim of the inner pot. If you don't, you can use a smaller bowl, but you will have to place it on a rack (as high as you can get it) and wrap some foil to cover the gap between the Foodi pot and your bowl. Then you fill the inner pot to about 2" below the bowl and turn the sear/sauté on high. Put the chocolate in the bowl. Once it starts simmering, turn the heat down to low. Stir occasionally until all the chocolate has melted.
- Double Boiler: Place water in the bottom of the double boiler and the chocolate in the top. Place on the stove and heat the water to a simmer, then turn down to low. Stir the chocolate until it's melted.
Nutrition
ABOUT THE RECIPE AUTHOR, LOUISE LONG
Louise is a full-time recipe creator and food blogger @ The Salted Pepper. She has over 30 years of experience with cooking and recipe development. She owned a restaurant for several years and was a full-time RN until retiring to blog full-time.

She published her first cookbook in the Fall of 2018 and is very interested in writing several more.
Louise is also the creator of an online Ninja Foodi Pressure Cooking Course with over 100 instructional step-by-step videos. People absolutely rave about the course and all the value they have received from it.
Louise has several very active Facebook groups that help people with the basics of cooking and getting the most out of the Ninja Foodi.
Louise is also a YouTube creator and you can find most of her recipes in video format on The Salted Pepper YouTube channel.
She is very responsive to messages and eager to help in any way she can. Get more Information about Louise & contact information
I WOULD LOVE TO SEE WHAT YOU ARE COOKING UP IN YOUR KITCHEN! TAG ME @THESALTEDPEPPER ON YOUR FAVORITE SOCIAL MEDIA PLATFORM WHEN YOU MAKE A DISH!
BE SURE TO FOLLOW THE SALTED PEPPER RIGHT HERE ⇓⇓⇓⇓⇓



Brigid
Hi! I am totally going to make these with my sons this week on Spring break! Where do I find the Ghirardelli melting chocolate? Thanks! ~Brigid 🙂
Louise
I hope you all enjoy making them! I found the melting chocolate at walmart and Sam's has the bigger bag if you are a member.