

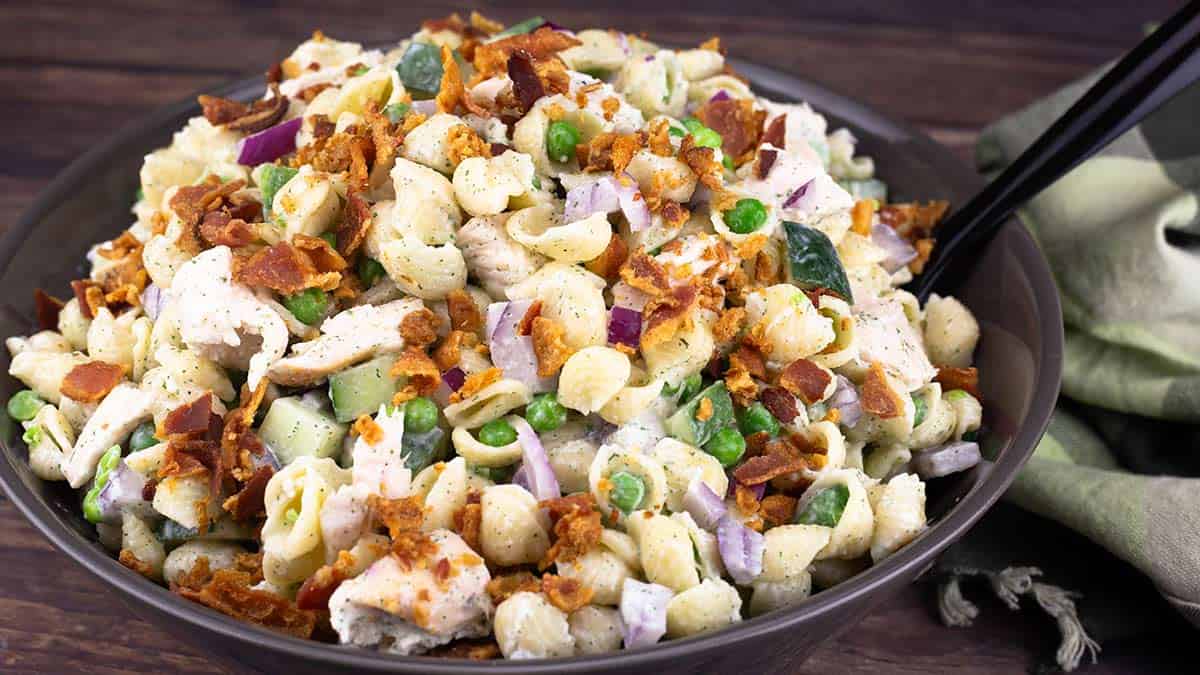
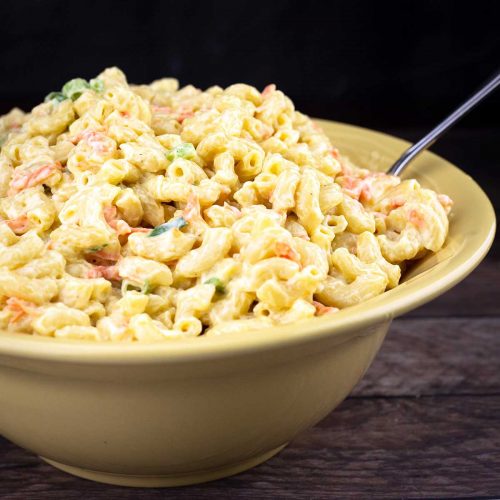
This chicken bacon ranch pasta salad recipe is super easy to make and is always a "go back for seconds" kind of dish! It makes the perfect side dish to bring to an outdoor party or bbq. The recipe amounts can easily be cut down to make just a few servings, or go all in and make the whole recipe if you are feeding a crowd.
The recipe makes about 15 cups of pasta salad, which completely fills one disposable half pan.
Would you like to save this recipe?
Suggested Kitchen Tools for Pasta Salad
- Pressure Cooker or a Large Pot for boiling pasta
- Large Spoon for mixing
- Large Mixing Bowl
- Serving Bowl
- Sharp Knife
- Cutting Board
Ingredients & Substitutions
The great thing about pasta salad is how customizable it is. You can use many different combinations of ingredients to make the pasta salad exactly how you want it.
Pasta
The type of pasta that you use is a personal preference and there are many to choose from. I like to use a smaller pasta that compliments the other ingredients in size with this recipe.
I tried this recipe with rotini pasta and I just didn't think the shape was right for the other ingredients. What you use is completely up to you, just keep in mind that different pasta cooks at different times so adjust your timing accordingly.
Small shells- 2 minutes PC time with an Immediate Release
Rotini pasta- 4 minutes PC with an Immediate Release
Penne pasta- 4 minutes PC with an Immediate Release
Elbow macaroni- 3 minutes PC with an Immediate Release
Bow Tie pasta- 4 minutes PC with an Immediate Release
Gluten-free pasta- The timing also depends on the shape, but gluten-free pasta cooks faster than wheat pasta so I recommend decreasing the pressure cook time by 2 minutes. For example; if you wanted to use Gluten Free penne pasta, PC for 2 minutes with a full natural release.
I enjoyed the small shells in this pasta salad because it kept all the ingredients to about the same size, making eating the chicken bacon ranch pasta salad very enjoyable!
Chicken & Bacon
I used both chicken and bacon in the recipe, hence the name, chicken bacon ranch pasta salad. However, you can change this any way you like. The amounts you add are also up to you; the recipe is simply a guideline based on what I found to be a good ratio of the meat for the best texture and flavor for a pasta salad.
The ratio of pasta is much greater than the ratio of chicken or bacon. If you wanted to make more of a chicken pasta salad, meaning more chicken than pasta, then I would only use 4-6 ounces of the pasta and increase the amount of chicken you use. You will probably need the same amount of dressing, but go by taste and texture.
I always use leftover chicken in this recipe, usually from a baked chicken. I primarily use the chicken breast, but you can use dark meat or a combination of the two.
This is a great salad to make with leftover rotisserie chicken. Just adjust the ingredients according to how many cups of leftover chicken you have.
Any kind of chicken will work in this recipe as long as it is cooked. While, technically, you could cube up chicken breast and pressure cook it with the pasta, you may not be happy with the look of it. I considered doing this myself and then thought about the particles that are usually left after pressure cooking chicken and decided against it.
If you are going to be cooking chicken breasts for this recipe, I recommend sous vide as the cooking technique for the most tender chicken. You can also grill it or bake it in the oven, just be sure not to overcook it or it will be pretty dry in the pasta salad.
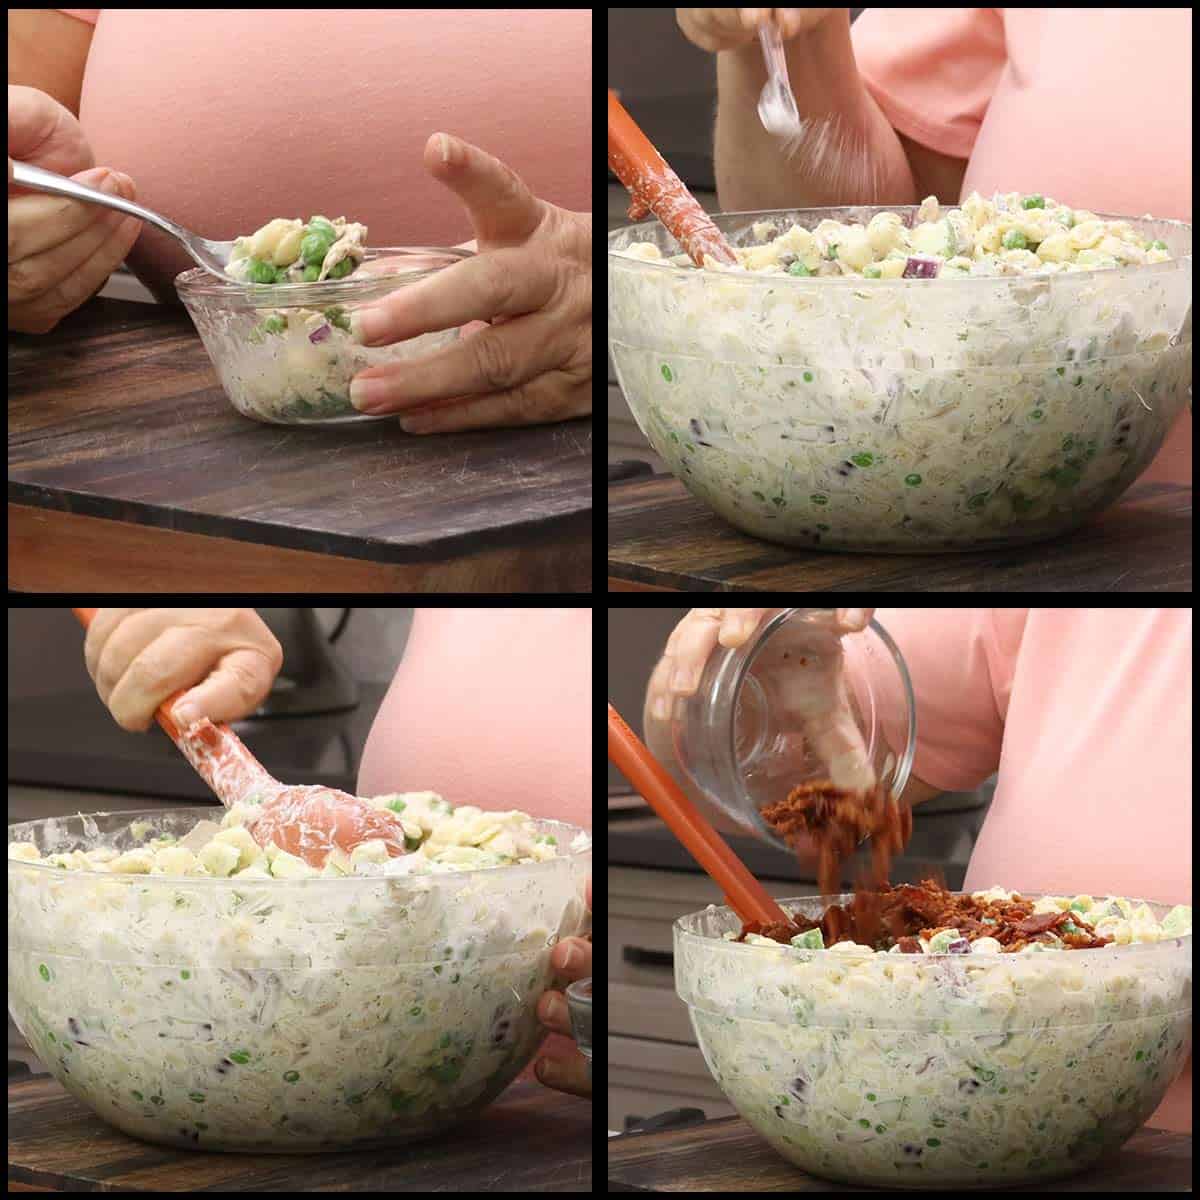
I use homemade bacon bits in this recipe made from strips of thin smoked bacon. I really recommend cooking the bacon this way for this recipe because you will end up with less fatty pieces of bacon in your pasta salad. The crispy bacon provides a great texture in the salad. Here is the recipe: Homemade Bacon Bits
You can also use well-cooked bacon that is crumbled. If you are in a pinch, you can use store-bought bacon bits, but they aren't as good in my opinion.
If you want to make this meatless, you can omit them both. You will definitely need to add some extra seasoning, especially salt because the bacon does add quite a bit of flavor to the pasta salad.
Vegetables
I used a combination of peas, cucumbers, and red onion as my vegetable choices, but you can change this up however you want.
When using peas, you want to use frozen peas or fresh peas that have been blanched.
The diced red onions can be omitted or switched to a white or yellow onion or chopped green onions. The onions do add flavor and crunch, so omitting them all together will change the recipe.
The fresh cucumber adds a delightful freshness to the pasta salad, but it is optional.
Seasonings & Dressings
This pasta salad uses a homemade creamy ranch dressing that is light and fresh tasting, but you can use your favorite ranch dressing if you don't want to make your own.
I also use homemade ranch mayo in this recipe. Combining the two gives the best flavor and results in a really creamy pasta salad.
You can certainly use all ranch dressing or all mayo and a packet or two of ranch seasoning. Sour cream is another option to add some additional tang.
The total amount of dressing/mayo I used in this recipe is 2 cups, but you might need more or less, so adjust the amount to your personal taste.
If you aren't quite getting the kick of ranch flavor you want, consider adding some additional dried dill, onion powder, and/or garlic powder to the pasta salad.
How to Make Chicken Bacon Ranch Pasta Salad
The great thing about chicken bacon ranch pasta salad and most pasta salads is the ability to make it ahead of time. You can prep all of the ingredients a day or two before you want to serve it and then quickly mix it all together about 30 minutes before serving.
Mise En Place (prep for recipe)
The following prep can be done a day or two before you want to make the pasta salad.
- Cook the chicken
- Make the ranch dressing
- Make the bacon bits
You can also use leftover chicken and store-bought ranch dressing. I really recommend making your own bacon bits, though; store-bought are not nearly as good!
Cook the Pasta
It is up to you how you want to cook the pasta and you can do this a day in advance, but I recommend adding the frozen peas and about ¾ cup of ranch dressing to the warm pasta before refrigerating it.
Pasta Salad Quick Tip
Adding some of the dressing to warm pasta results in a creamier pasta salad that has more flavor.
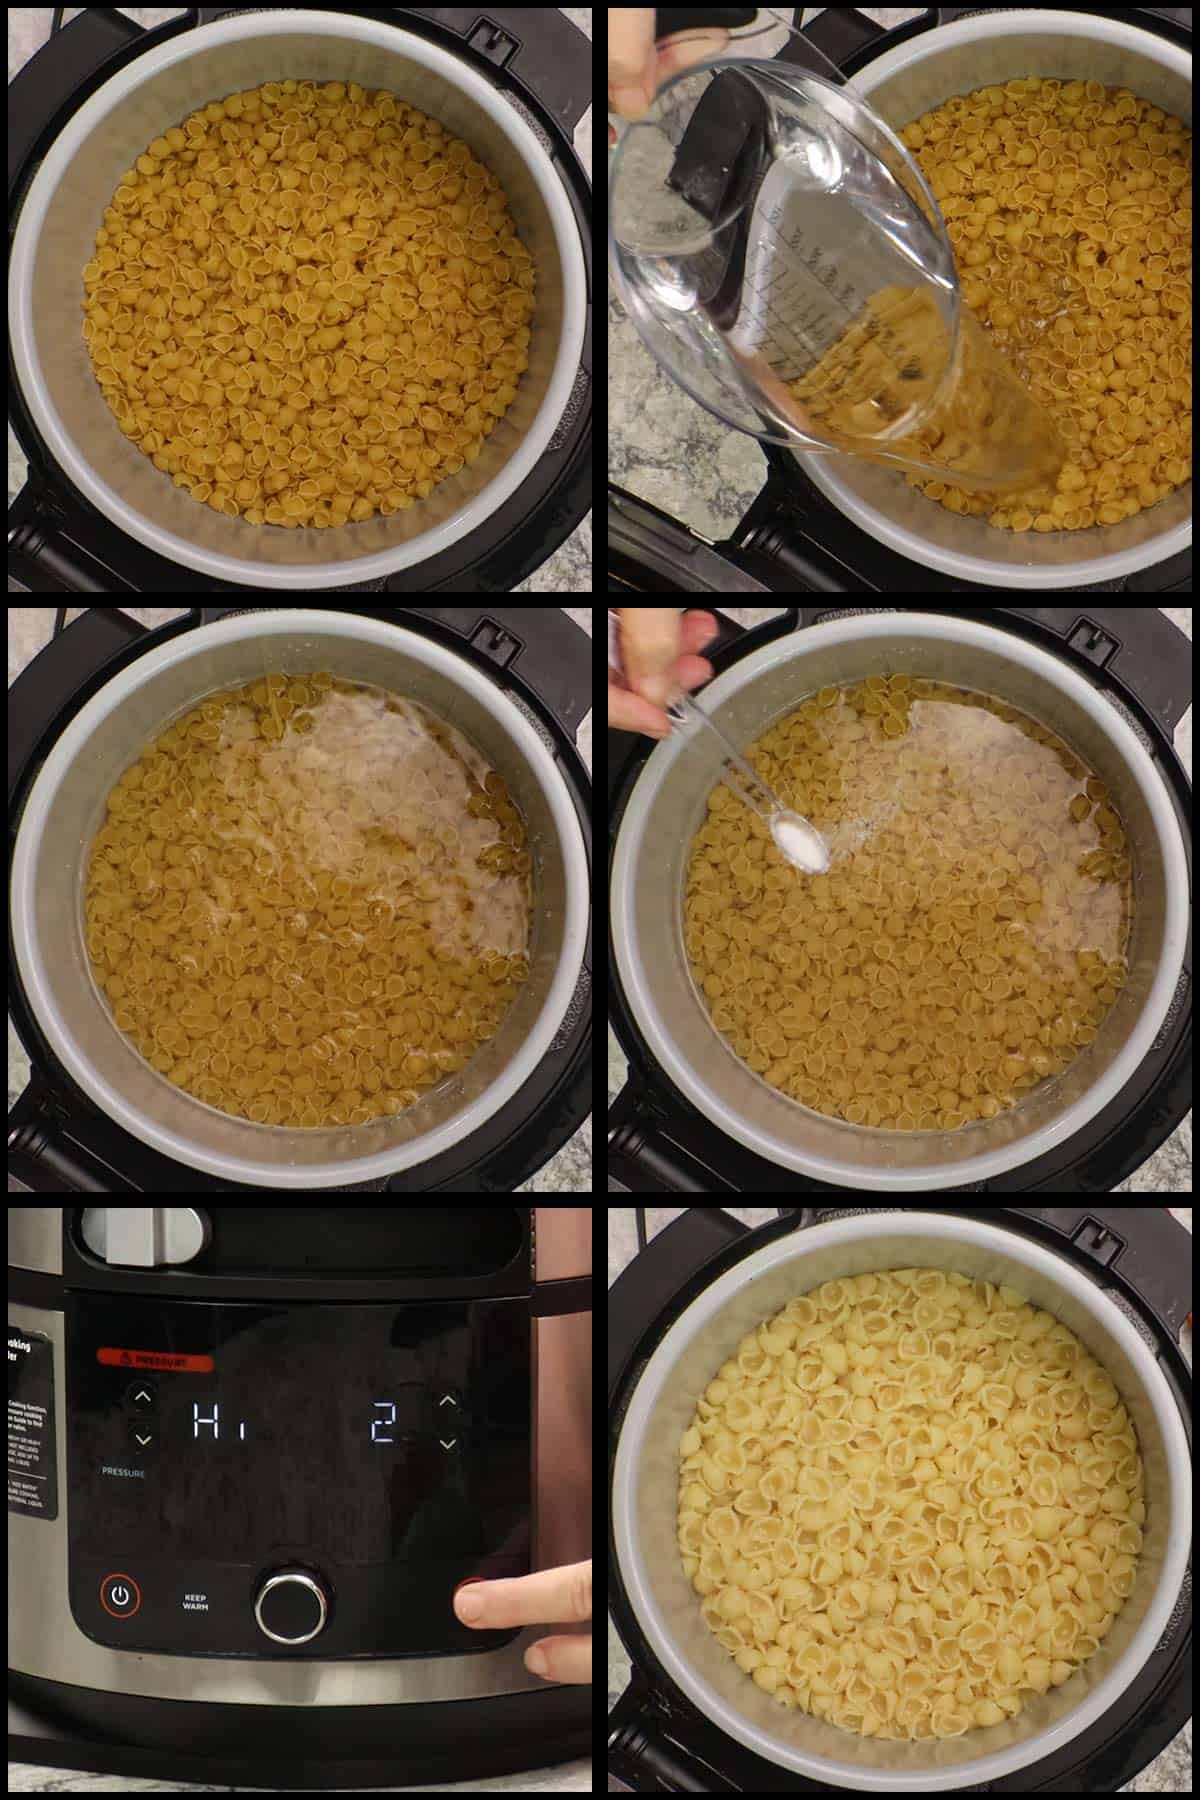
My preferred method is to pressure cook the pasta in my Ninja Foodi Pressure Cooker and Air Crisper. One of the cooking tasks that I do not like doing is draining pasta, so this avoids that!
Pressure Cooking the Pasta
Please refer to the ingredients and substitutions section for the timing of different pastas. Referenced below is the liquid amount and timing for (affiliate link)small shell pasta.
Add the pound of pasta to the inner pot of your pressure cooker. Add in just enough water to cover the pasta. In the Ninja Foodi this was 5 cups of water.
Add ½ teaspoon of salt.
Put the pressure lid on and turn the valve to seal. Pressure cook on high for 2 minutes. When the time is up, do an immediate release.
After the pin drops, open the lid and stir the pasta. You shouldn't have much liquid left at all. I would drain you if you have more than ¼ cup of liquid.
Stove Top Pasta Directions
Fill a large pot with water and bring the water to a boil over high heat. Add 1 Tablespoon of sea salt or kosher salt for 16 cups of water once the water starts to boil. Stir.
Add the pasta to the boiling water, stir and cook according to the package instructions plus add 1-2 minutes. For pasta salad, you don't necessarily want the pasta al dente (with a slight chew) and the package instructions are usually to cook it al dente.
Drain the pasta from the water.
Refrigerate
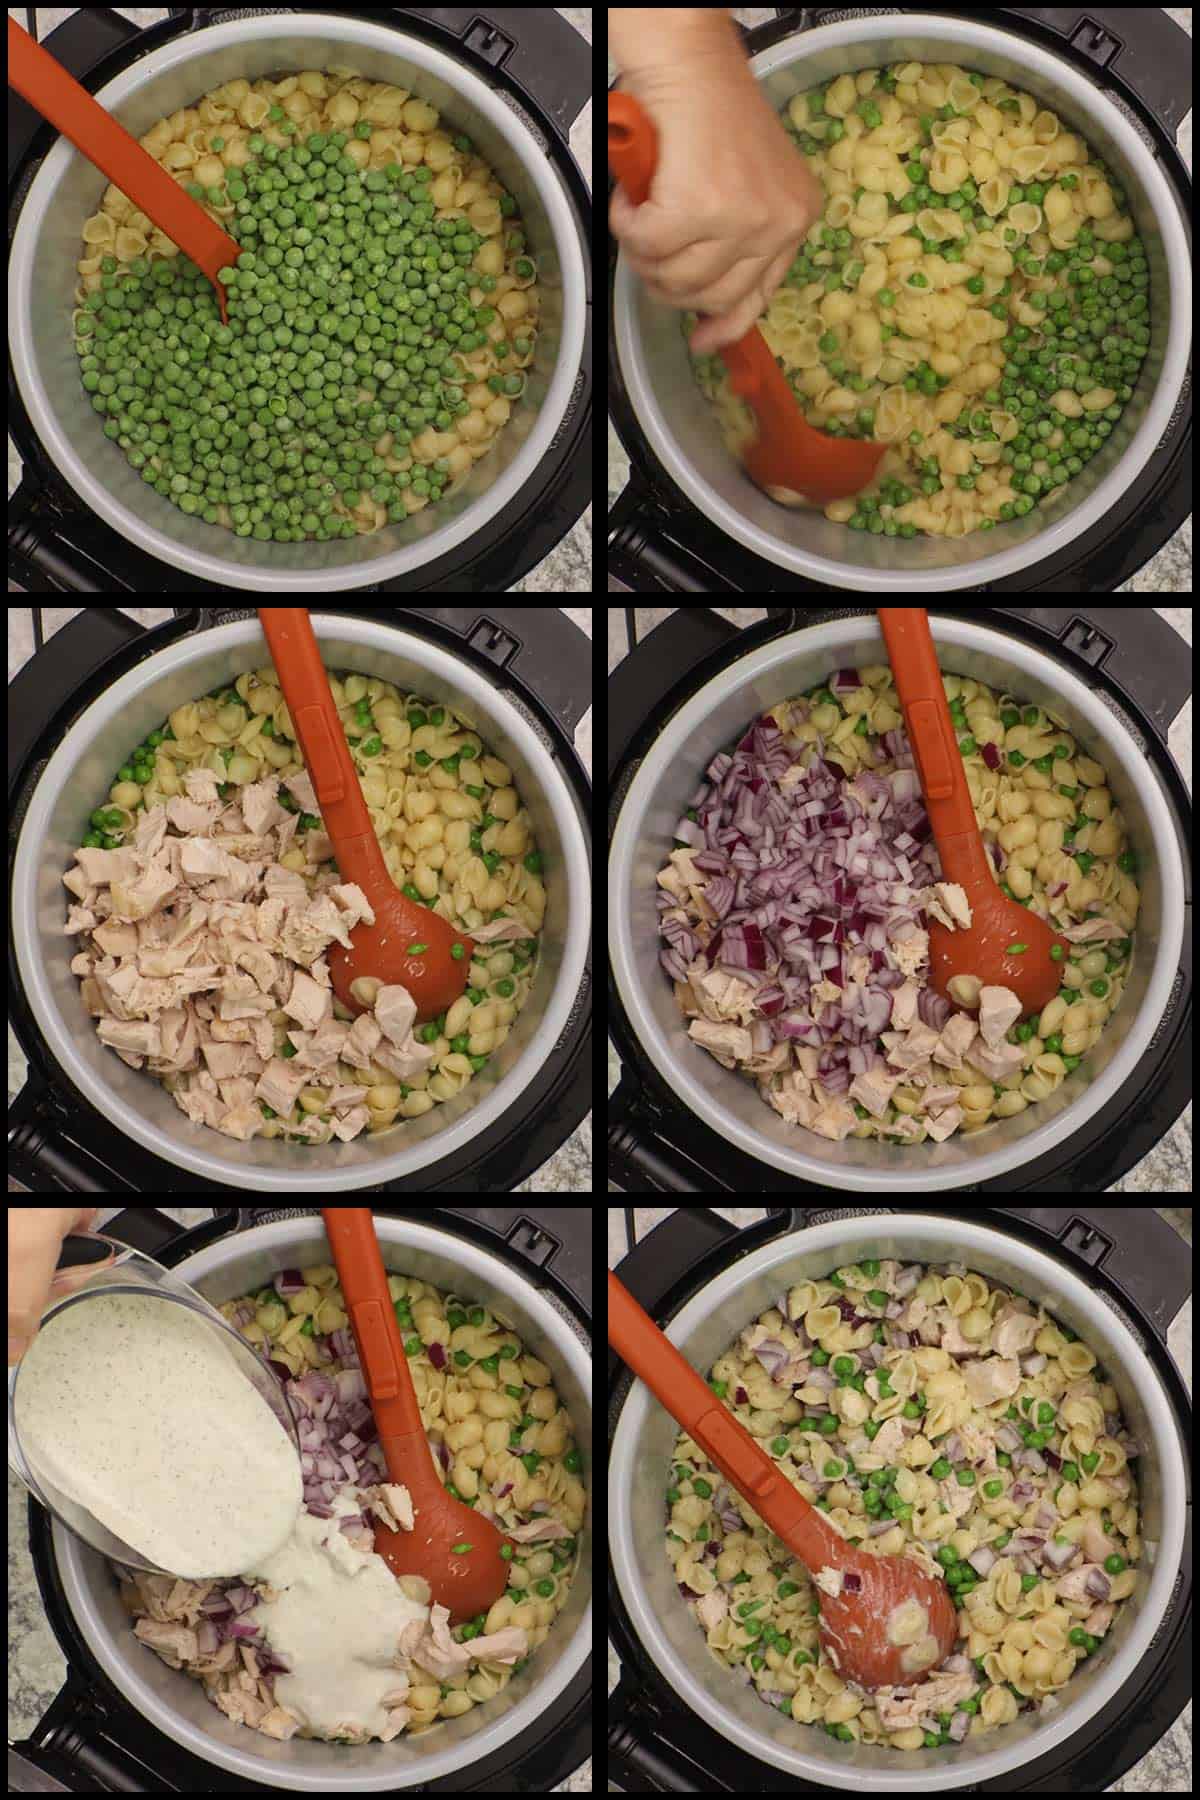
Immediately after the pasta is cooked, add the frozen peas, cooked chicken, red onion, and ¾ cup of ranch dressing. Stir well to combine ingredients.
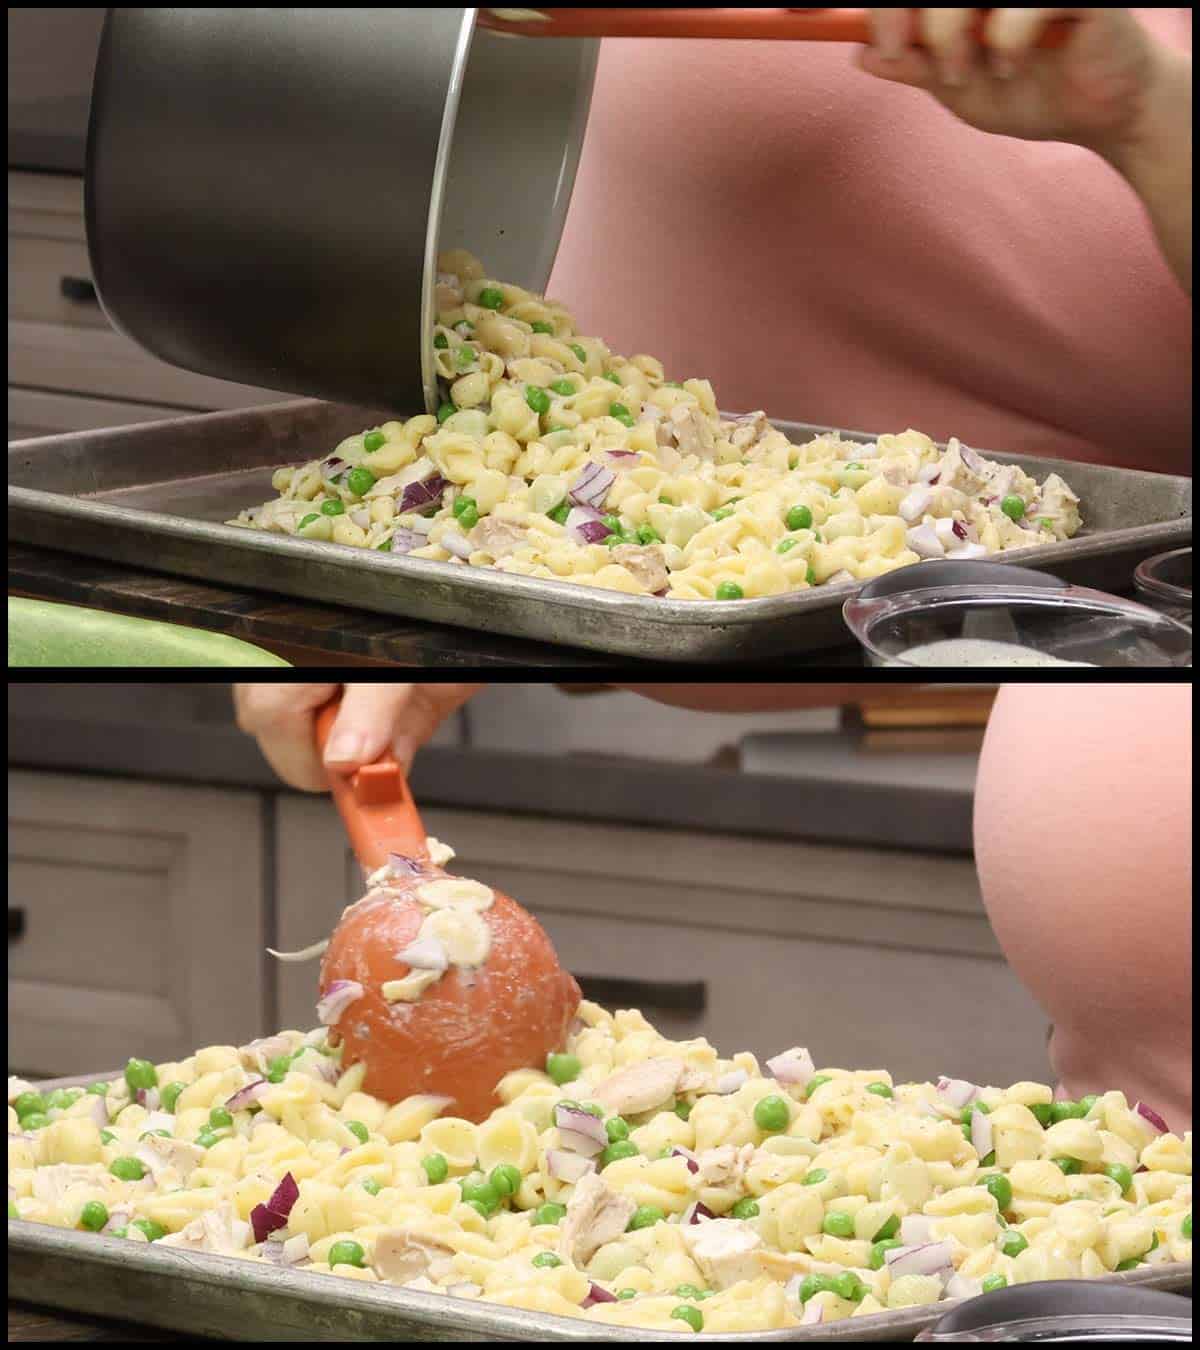
You can refrigerate the pasta in the pot it was cooked in or transfer it to a large bowl, half pan, or shallow tray. Refrigerate for 4 hours or until completely cool.
Quicker Cool
If you are in a hurry, transfer the pasta to a shallow tray before refrigerating. This will cool the pasta much quicker.
Finish the Pasta Salad
The day you want to serve the pasta salad, remove it from the fridge and add in the diced cucumber, remaining ¾ cup of ranch dressing, and ½ cup of homemade ranch mayo.
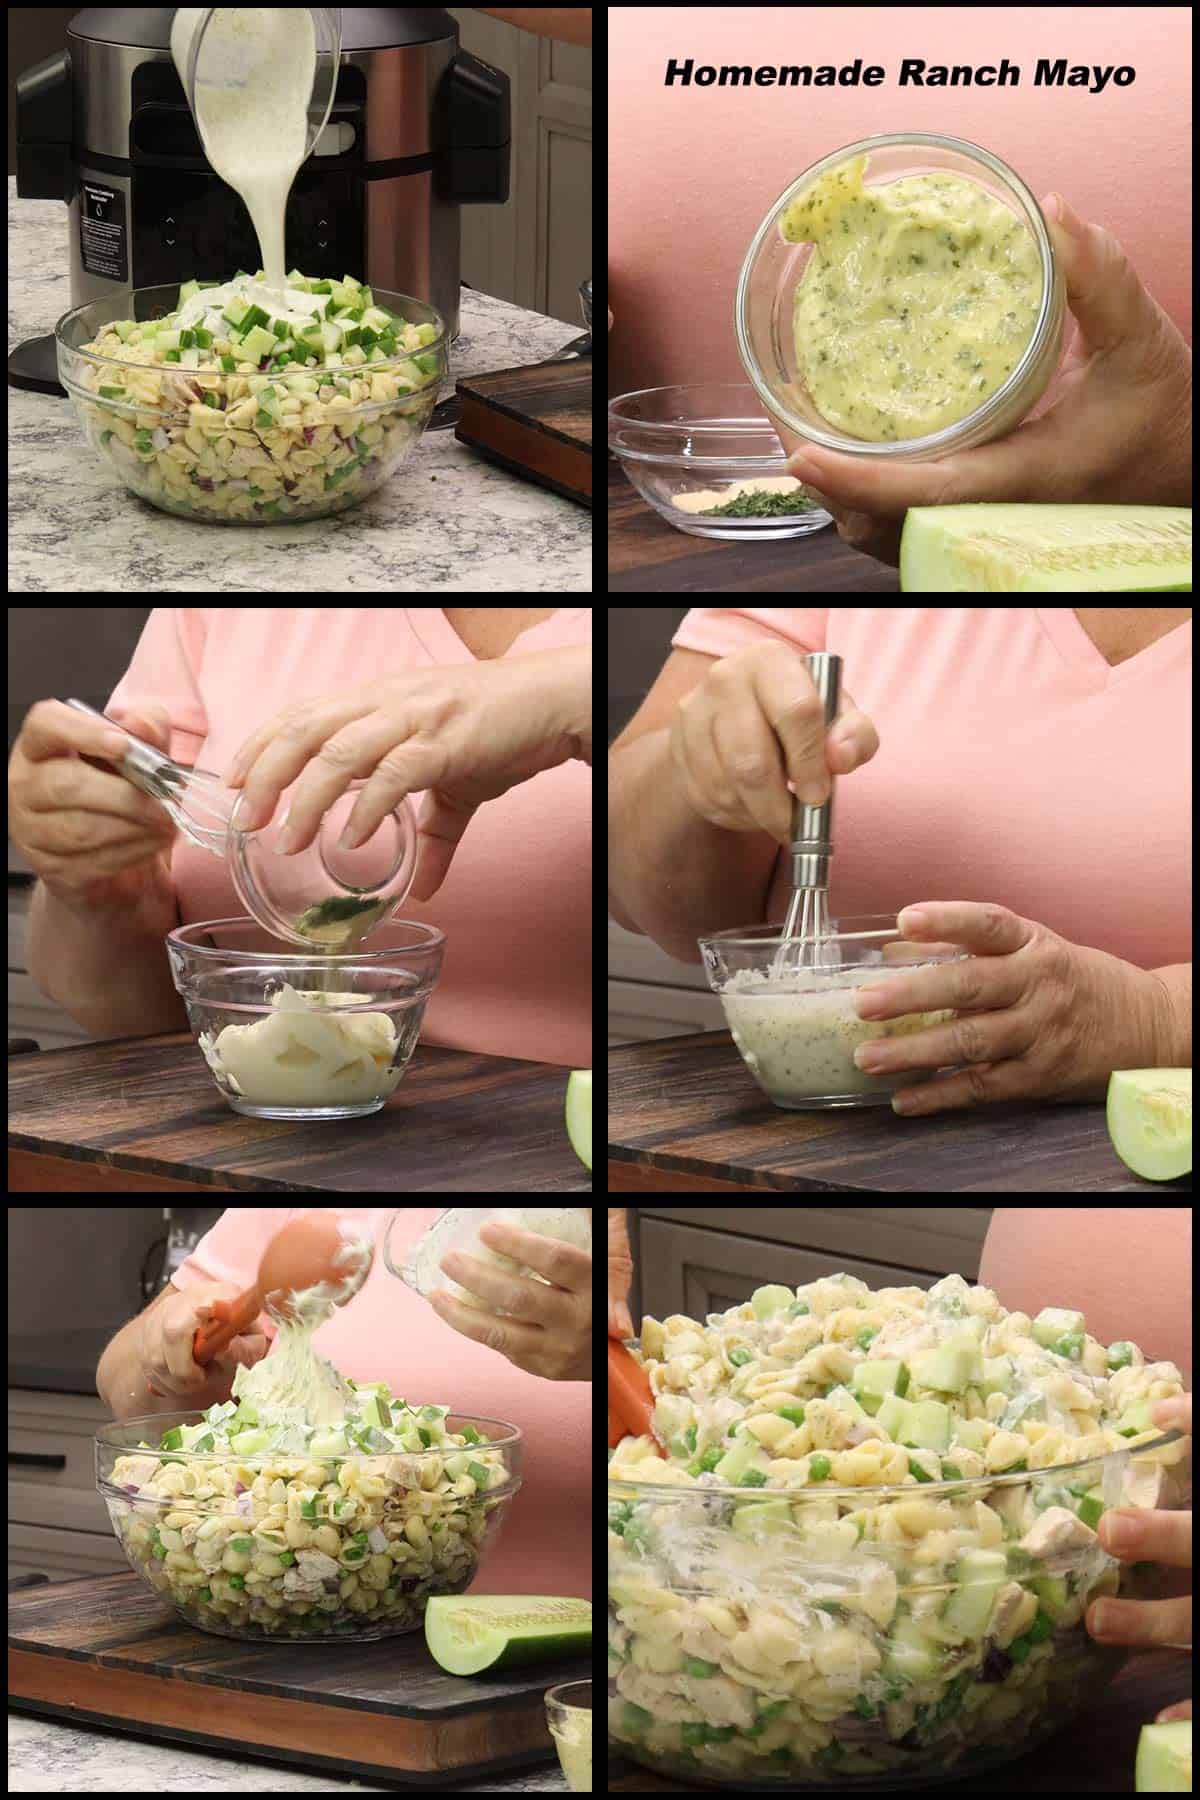
If you don't want to make your own homemade ranch mayo, use regular mayo and mix with the seasonings below.
Seasoned Mayo Recipe
- ½ cup mayonnaise
- ½ teaspoon dried parsley
- ¼ teaspoon dried dill
- ¼ teaspoon garlic powder
- ¼ teaspoon onion powder
Combine all ingredients in a small bowl and mix well.
Mix everything together really well and taste for seasonings. I usually add about 1 teaspoon of salt, but this will depend on the type of ranch dressing you use and your personal preference.
Refrigerate covered until ready to serve.
Serving Chicken Bacon Ranch Pasta Salad
Just before serving, taste for seasonings and add more to taste.
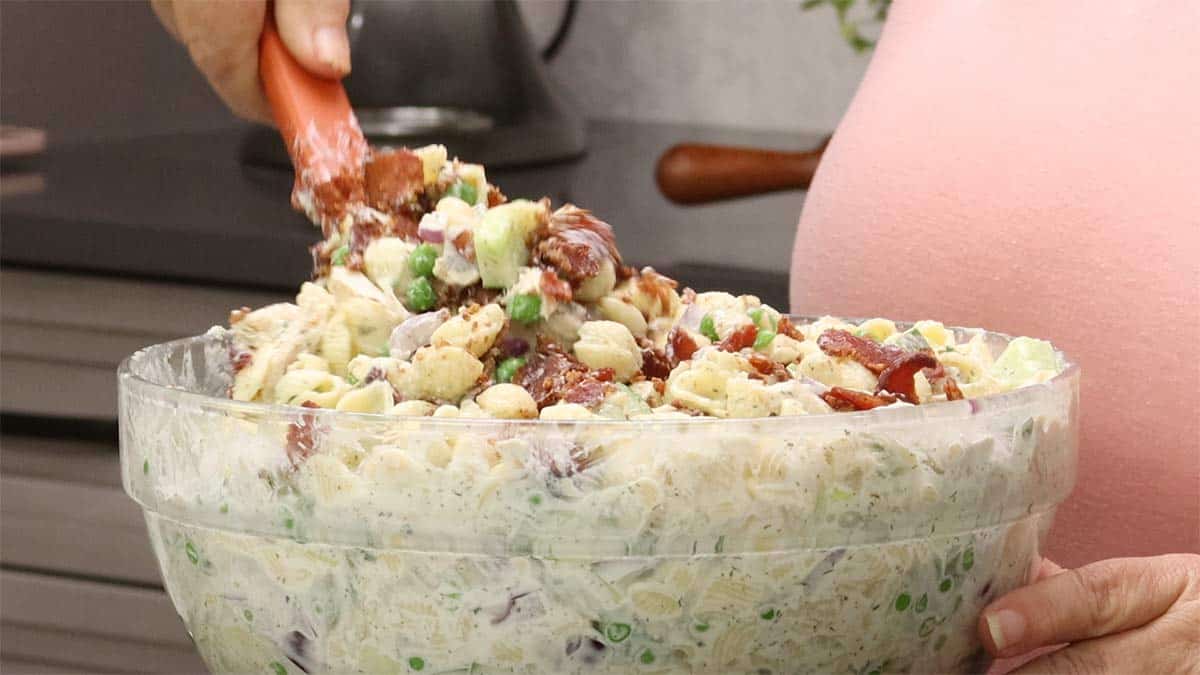
Add in the bacon bits and stir. Or, you can leave the bacon bits on top and let them get mixed in as people dig in.
Enjoy!
Storage Instructions
How to Store Leftover Chicken Bacon Ranch Pasta Salad
This pasta salad is made with perishable ingredients and should not be left out at room temperature for longer than 2 hours.
Refrigeration
Place the leftovers in a bowl and cover with plastic wrap or use a container with a lid.
Refrigerate for up to 3 days for maximum freshness. After 3 days the pasta salad tends to get too runny. It is safe to eat for up to 5 days.
Freezer
While technically you can freeze any food, I do not recommend freezing the pasta salad.
The texture will be very different when thawed and the pasta salad will be very runny.
Frequently Asked Questions
Sure! You can use whatever pasta you like, just adjust the cooking time as indicated.
Absolutely! The full recipe makes 15 cups and serves 30 people as a side dish. You can decrease all ingredients by half to make a half batch and all the instructions will stay the same.
If you need a double batch, double the ingredients and cook 1 pound of pasta at a time or, if pressure cooking the pasta, you will need to increase the liquid enough to cover the pasta and decrease the PC time due to a longer time to pressure. I would suggest PC'ing for zero minutes. If the time to pressure exceeds 20 minutes, turn the pressure cooker off and release the steam even before it goes under pressure to avoid overcooking the pasta.
Personally, I prefer it cold, but you can serve it warm if desired.
If you are looking for a hot meal that has all of these flavors, I would consider making this recipe: Chicken Bacon Ranch Sliders and instead of making sandwiches add in some cooked pasta.
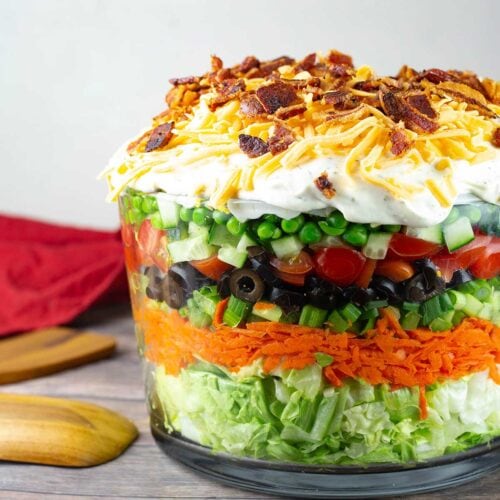
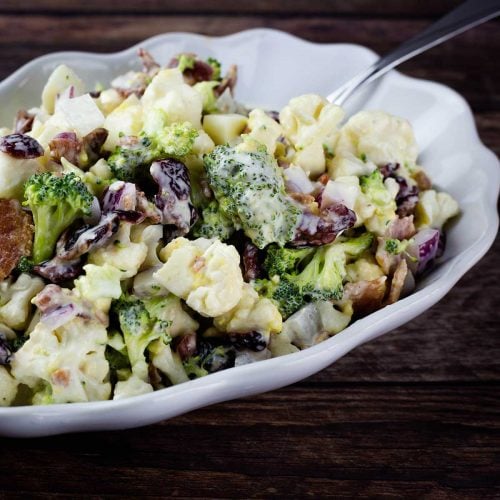
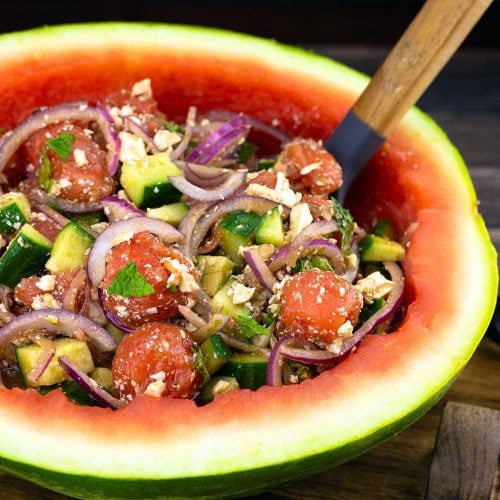
Party Style Side Dish Recipes!
Pasta salad is one of those go-to sides to make for a crowd because it is inexpensive and has so many variations!
Here are some other pasta salad and side dish ideas that are great for parties and potlucks.


Chicken Bacon Ranch Pasta Salad Recipe
Ingredients
- 1 pound (affiliate link)small shell pasta
- ½ teaspoon fine grind sea salt add to water if pressure cooking pasta
- 12 ounces frozen peas
- 1½ cups ranch dressing divided in recipe
- 2 cups diced or shredded cooked chicken
- 1½ cups diced red onion 1 large onion
- 2 cups diced cucumber 1 medium size cucumber
- ½ cup Ranch Mayo see recipe notes for a quick substitute
- salt and pepper to taste
- 1 cup homemade bacon bits
Would you like to save this recipe?
Instructions
Pressure Cooking the Pasta
- Add the small shells to the inner pot of the pressure cooker and cover with water which is about 5 cups. Sprinkle salt over pasta.1 pound small shell pasta, ½ teaspoon fine grind sea salt
- Close the pressure cooking lid and turn the valve to seal. Pressure cook on high for 2 minutes. When the time is up, immediately release the pressure.
- Open the lid and stir the pasta. If there is more than ¼ cup of liquid in the pot, drain the pasta.
Boiling Pasta Stovetop
- Fill a large pot with 16 cups of water and bring to a boil. Add 1 Tablespoon of salt and the pasta. Stir. Boil according to package directions, but add 1-2 minutes for slightly sofer pasta.
- Drain the pasta and return to pot or place in a large mixing bowl.
Step One Pasta Salad Assembly
- Immediately after cooking the pasta, add the frozen peas, diced chicken, diced onions, and ¾ cup of the ranch dressing.12 ounces frozen peas, 2 cups diced or shredded cooked chicken, 1½ cups diced red onion
- Mix the ingredients together and refrigerate for 4 hours. See the recipe notes if you need to cool the pasta quickly
Step Two Pasta Assembly
- Once the pasta has cooled completely, add the diced cucumber, remaining ¾ cup of ranch dressing, ½ cup of ranch mayo or seasoned mayo (see recipe notes) and stir until all ingredients are well blended.2 cups diced cucumber, ½ cup Ranch Mayo
- Salt and pepper to taste. Keep in mind the bacon bits will also add some saltiness. Refrigerate until serving.
Serving
- Just before serving mix in the bacon bits.1 cup homemade bacon bits
Notes
Recipe Yield: 1 full batch makes 15 cups of pasta salad
Seasoned Mayo Recipe
-
- ½ cup mayonnaise
-
- ½ teaspoon dried parsley
-
- ¼ teaspoon dried dill
-
- ¼ teaspoon garlic powder
-
- ¼ teaspoon onion powder
Nutrition
About the Recipe Author, Louise Long
Louise is a full-time recipe creator and food blogger @ The Salted Pepper. She has over 30 years of experience with cooking and recipe development. She owned a restaurant for several years and was a full-time RN until retiring to blog full-time.

She published her first cookbook in the Fall of 2018 and is very interested in writing several more.
Louise is also the creator of an online Ninja Foodi Pressure Cooking Course with over 100 instructional step-by-step videos. People absolutely rave about the course and all the value they have received from it.
Louise has several very active Facebook groups that help people with the basics of cooking and learning more about the appliances they love.
Ninja Foodi Pressure Cooker & Air Crisper 101
Ninja Woodfire Outdoor Grill & Smoker
Louise is also a YouTube creator and you can find most of her recipes in video format on The Salted Pepper YouTube channel.
She is very responsive to messages and eager to help in any way she can. Get more Information about Louise & contact information
I WOULD LOVE TO SEE WHAT YOU ARE COOKING UP IN YOUR KITCHEN! TAG ME @THESALTEDPEPPER ON YOUR FAVORITE SOCIAL MEDIA PLATFORM WHEN YOU MAKE A DISH!
BE SURE TO FOLLOW THE SALTED PEPPER RIGHT HERE ⇓⇓⇓⇓⇓
BRENDA JEWELL says
This looks wonderful especially right before a holiday!