
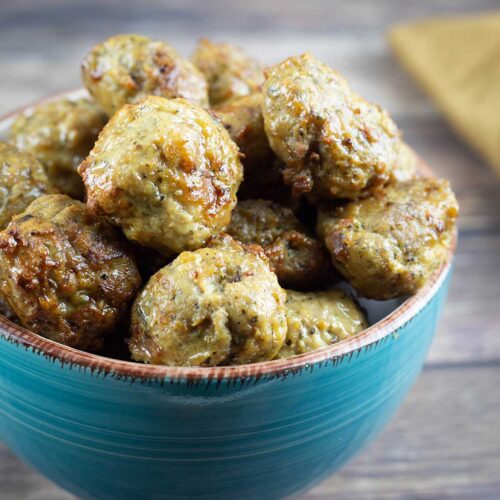
These are the BEST Keto Breadsticks and they are so easy to make. They only require a few simple ingredients and the flavor is outstanding! You can whip up a batch in under 20 minutes, which is way quicker than making traditional breadsticks from scratch, and they are low carb making them perfect if you are on the Keto diet or just want an easy low-carb recipe for breadsticks.
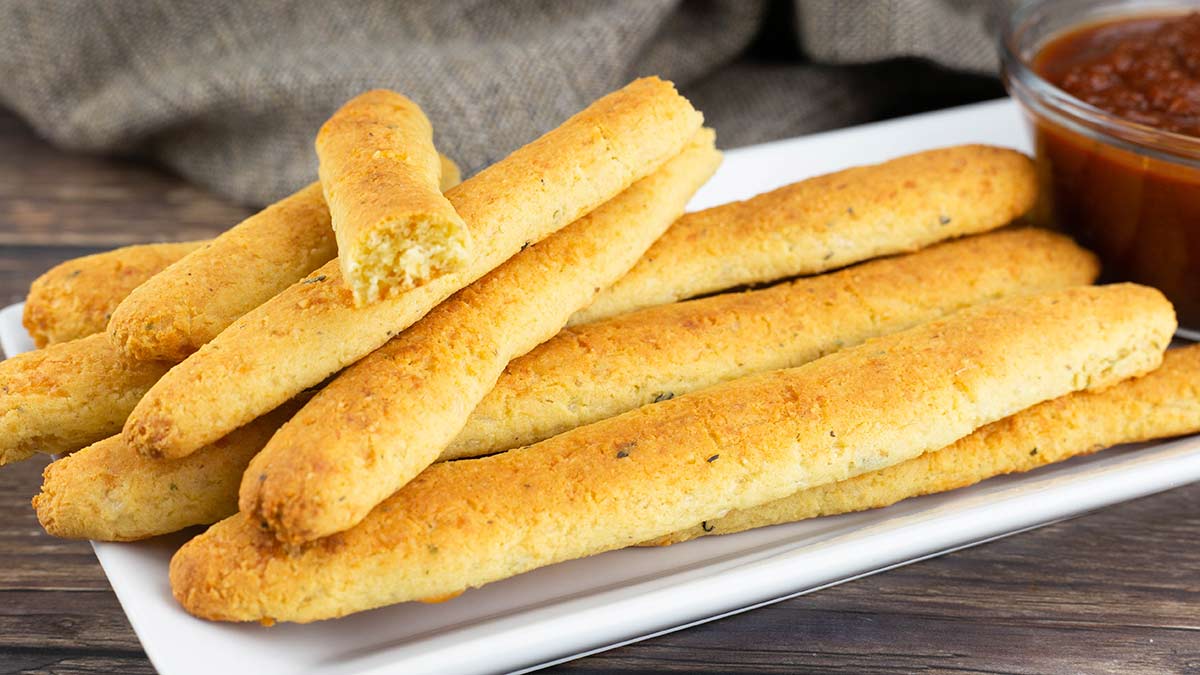
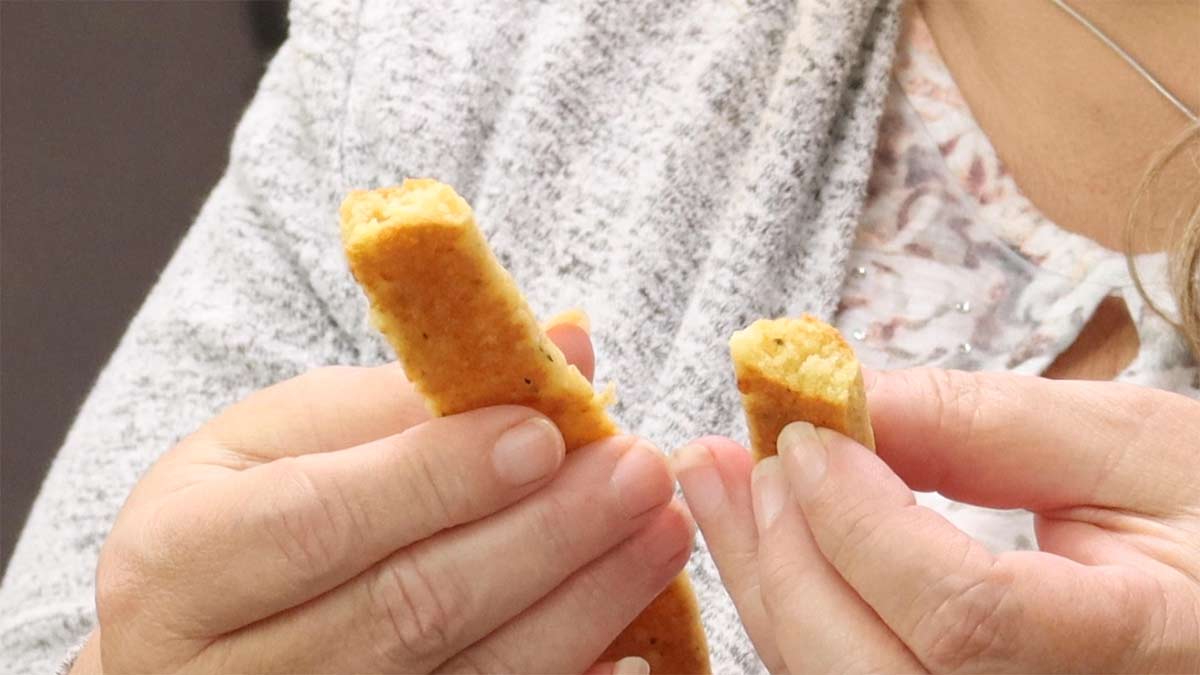
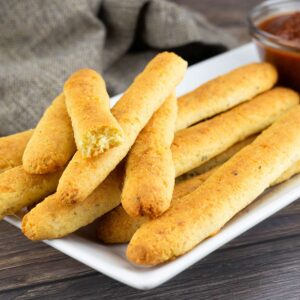
These breadsticks have a crispy exterior and a fluffy interior and are full of cheesy flavor. What I love the most is they don't have any weird flavors as some keto bread does. They are simply delicious from the first bite to the last.
Would you like to save this recipe?
I've seen a lot of recipes for keto breadsticks that use a fathead dough, xanthan gum, cream cheese, and a whole lot of other types of ingredients, but I found that this simple recipe is easier to make and I absolutely love the texture and the flavor. My husband and I love these keto cheesy breadsticks so much, we are finding tons of other uses for them.
The other day, I made a Chicken Caesar salad with homemade Caesar dressing and I cut leftover breadsticks into crouton size, tossed them in some oil, and air-fried them at a low temperature until they were super crunchy and now I can enjoy my salads with keto croutons!
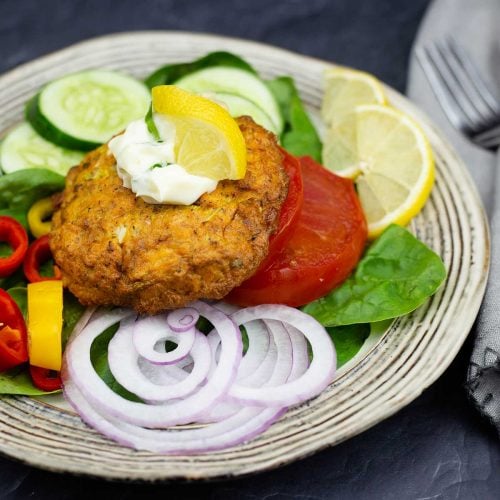
I also switched up the cheese and, instead of Italian cheese, I used cheddar cheese and made them into flat rounds and baked them. Then I made an open-faced tuna melt and it was delicious!
Ingredients & Substitutions
Flours
I used a combination of almond flour and coconut flour in this recipe and this combination produced the best results. Ordinarily, I do not like to use coconut flour because it really can be an overwhelming flavor, but in this recipe you can't even tell it is there. The almond flour is predominant in this recipe and the coconut flour is there because it is super absorbent and helps create the right texture for the dough.
I have not tried this recipe with any other types of low-carb flour, so I can't say how it would work out. If you can't have coconut flour, you may try using psyllium husk powder for its absorbency. I have also read that sunflower seed flour can be substituted for almond flour in recipes.
Dairy
The egg and cheese are extremely important in this recipe as it helps create the structure of the breadsticks. I have not tried the recipe with egg substitutes so I cannot say how it will work with anything other than eggs.
As far as the cheese goes, I do recommend using at least 25% mozzarella cheese combined with whatever other cheeses you like. Softer, but shreddable cheeses like cheddar, gouda, or Swiss are all great options if you want to change up the flavor of the breadsticks. To keep this recipe super easy, I used pre-shredded cheese, but you can absolutely use a cheese grater or even a food processor to freshly grate the cheese.
Really soft cheeses like cream cheese, blue cheese, feta, or brie can be added but only in a small amount because they will not provide the structure that grated cheeses do. If you wanted to add a pop of blue cheese flavor to your breadsticks, I recommend only using a Tablespoon or two and decreasing the cream to get the correct dough consistency.
Harder cheeses like parmesan and asiago can also be used in small quantities, but keep these types of cheeses to no more than 25% of the total cheese blend for the best results. I used 1 ounce of grated parmesan cheese and 3 ounces of an Italian blend cheese as my cheese mixture.
I used a touch of heavy cream in the recipe just to get the dough to the correct consistency so it will be pliable to easily form the breadsticks. This could be substituted for olive oil, soybean oil, avocado oil, butter, sour cream, yogurt, a little water, milk, almond milk, or any other liquid that you want to use. Just start out with a very small amount if the liquid is thin and not thick like cream.
Seasonings
The seasonings you use are completely up to you. Personally, I love garlic bread sticks, so I always add some garlic powder. I also add onion powder, Italian seasoning, and just a touch of salt. Don't be tempted to use more salt or seasonings that have salt in them because the cheese is plenty salty and even just ½ teaspoon of salt, which I used in the first test batch, was too salty.
Other dry seasonings you may want to try are basil, thyme, oregano, black pepper, or parsley. You can even add a pinch of red pepper flakes if you want your keto breadsticks a little spicy. Any combination of spices, as long as they don't include salt, will be an excellent addition and can change the flavor of the breadstick to pair well with any kind of food you are serving. I love recipes like this because you can use the base recipe and make any type of breadsticks that you want.
Baking Powder
I used baking powder in this recipe to help give the eggs a lift so the breadsticks would rise a bit. I have not tried the recipe without it, but I think the only thing that would happen if you omitted it is the breadsticks would be a little flatter.
How to Make Keto Breadsticks
Making the Keto Dough
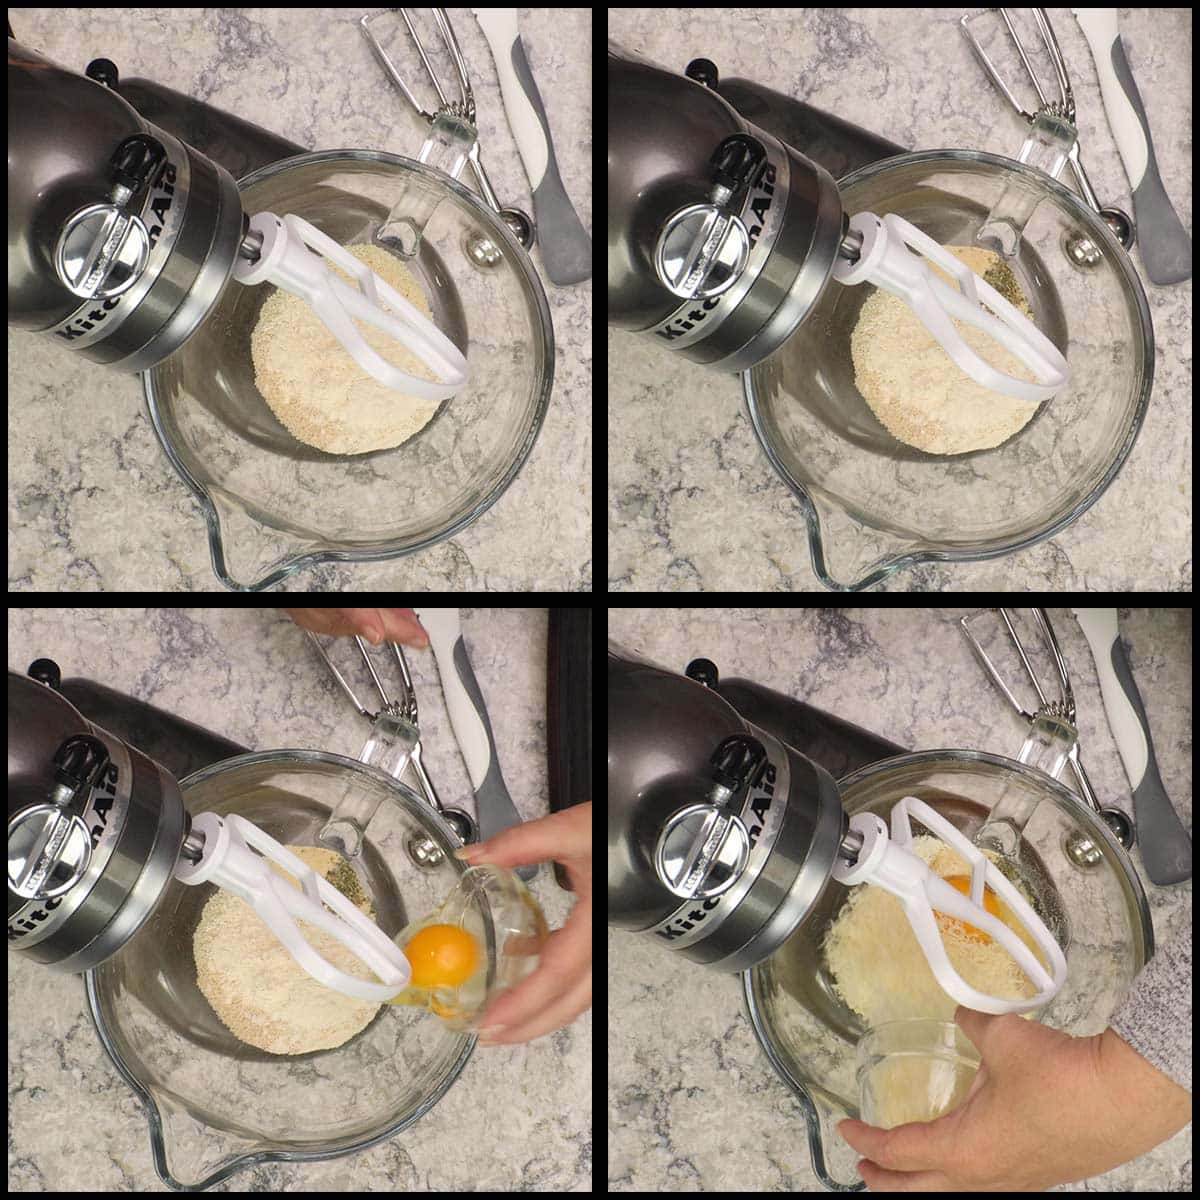
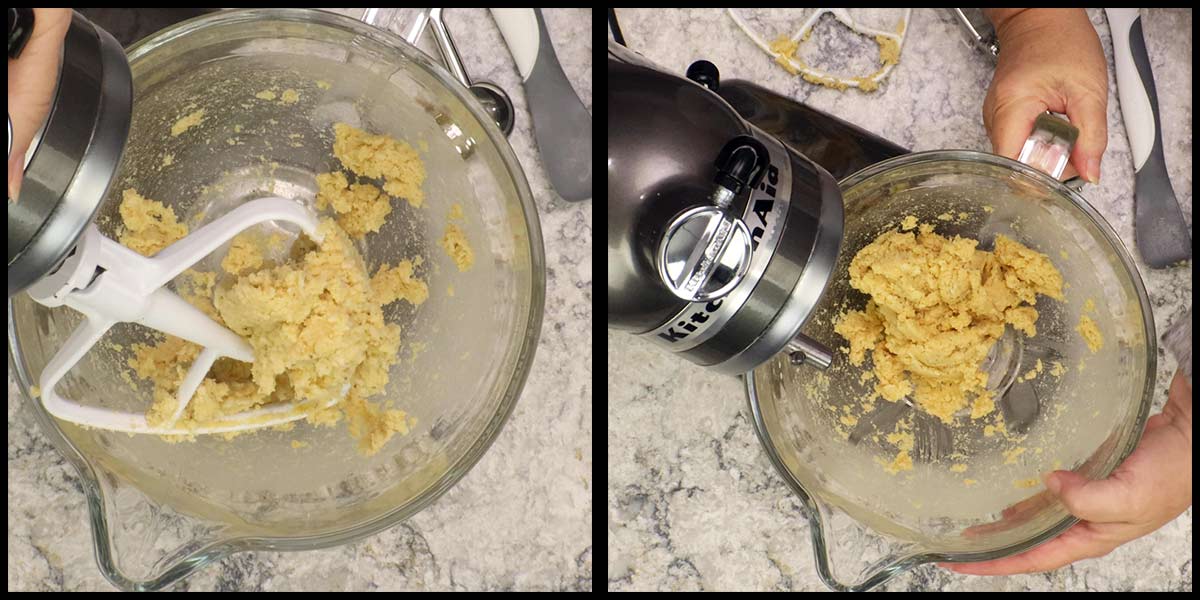
Using a stand mixer makes this recipe super easy, but you can also use a handheld mixer. Add the almond flour, seasonings, egg, cheese, and baking powder. Mix on low speed until the mixture comes together and then increase the speed to medium.
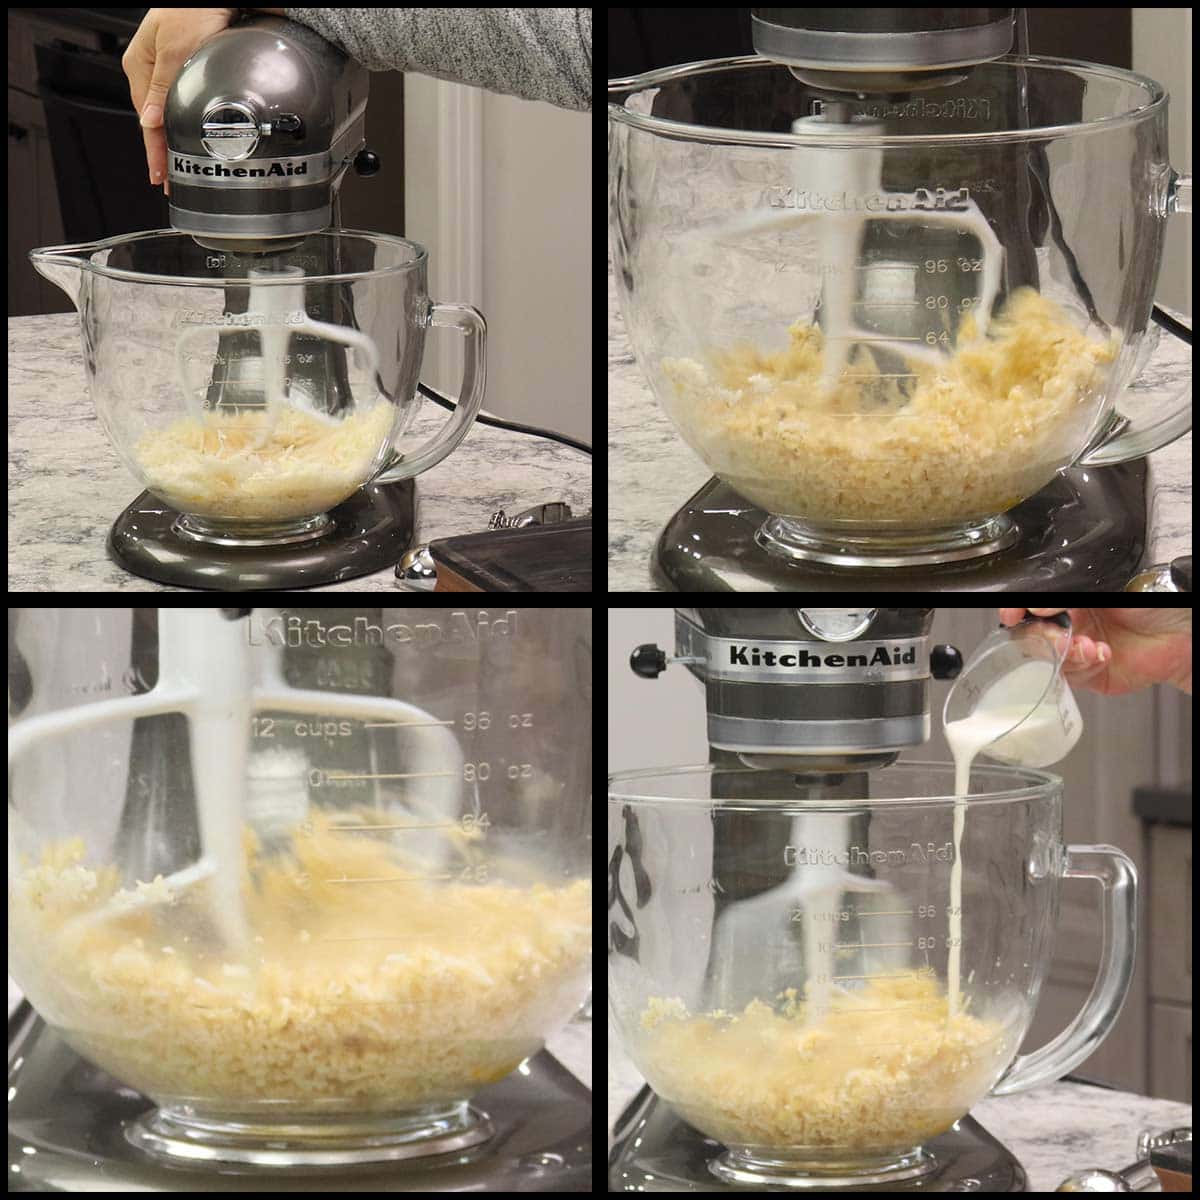
Continue mixing for 2-4 minutes until the mixture resembles a crumbly dough. Once it's crumbly, keep the mixer going on medium speed and add in 1 Tablespoon of the cream or you could use melted butter, if you prefer.
You will see the dough start to come together. Then add another Tablespoon of cream or butter. Mix until you have a dough that will hold together when you roll it. If your dough is too dry, it will crumble as you try to roll it and if it is too wet, it won't hold its shape. You can correct either of these by adding more cream or butter if the dough is too dry and a little more cheese or a very small amount (start with ½ tsp) of coconut flour if they are too wet.
If you don't have a stand or hand mixer and want to mix the dough by hand, you may want to put the cream and cheese into the microwave for 15-20 second intervals, stirring in between each one until the cheese melts. Make sure to mix the melted cheese with the almond and coconut flour in a mixing bowl before adding the egg so the egg doesn't start to cook if the cheese is still hot.
Forming the Breadsticks
Preheat the oven to 400℉/200℃.
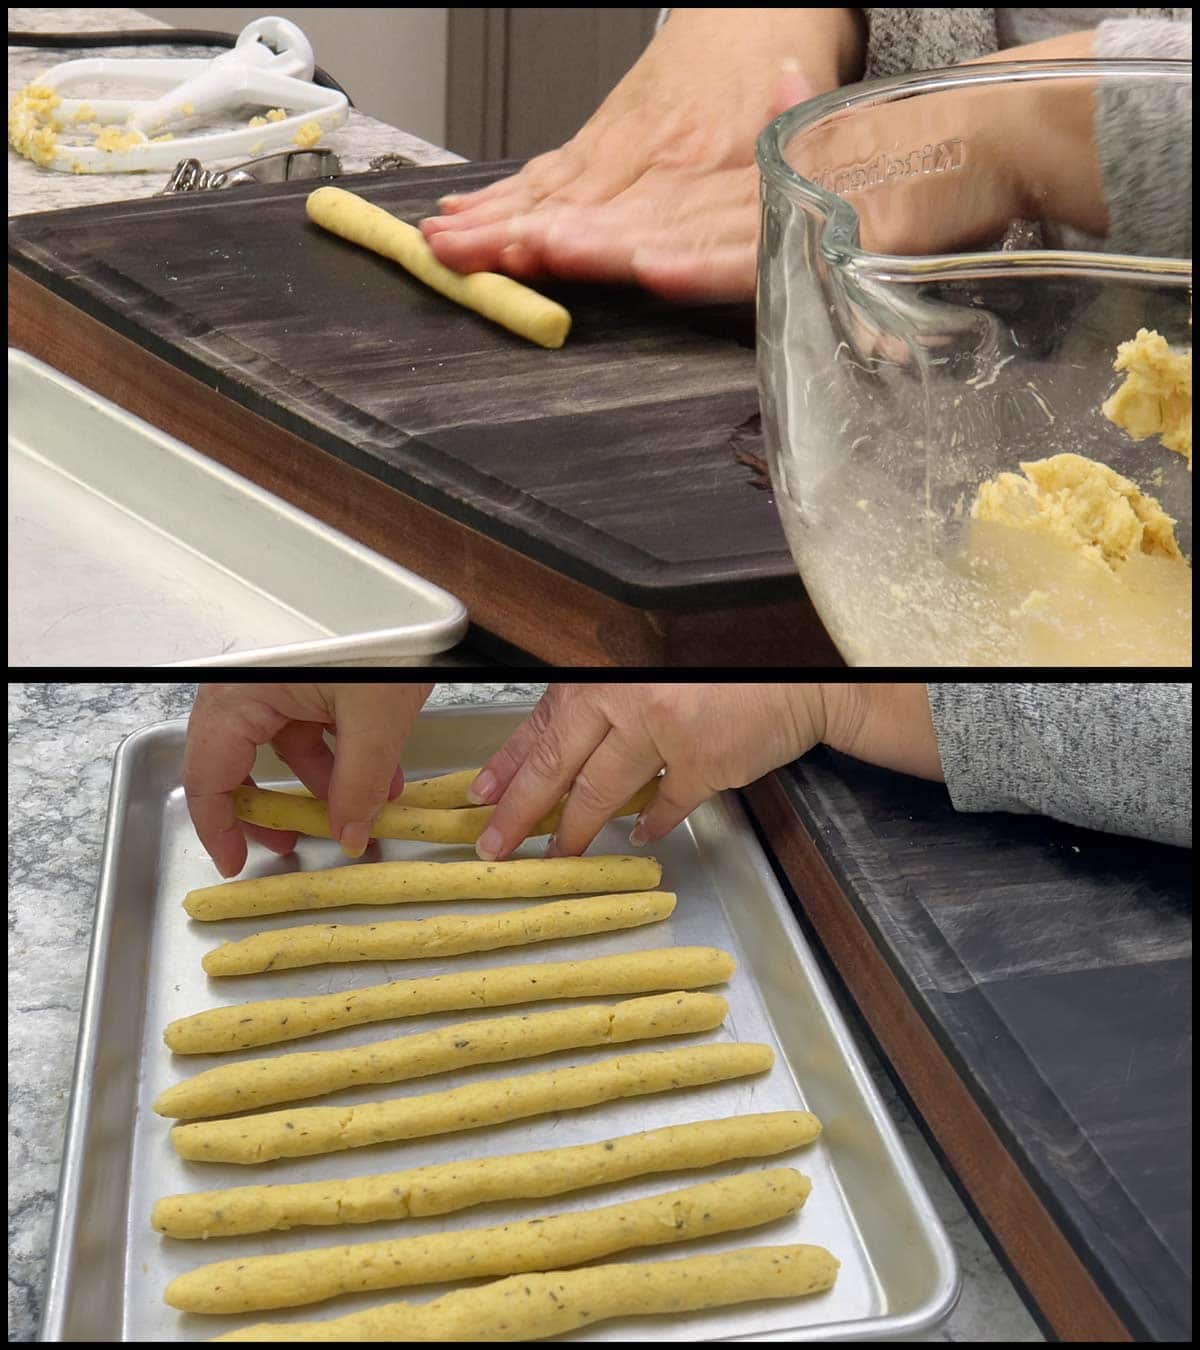
Take 2 Tablespoons of the dough and roll them out on your cutting board using your hands until they are about 8-10" in length and the diameter of a dime. You can make them shorter by using 1 Tablespoon of dough for each breadstick, but you want to keep the diameter about the size of a dime. If they are too thick, they won't have the same perfect texture of a crisp exterior and a fluffy interior.
Place each breadstick on a baking tray about ¾-1" apart. The breadsticks will spread a little bit and you don't want them to be stuck together. I have never had an issue with them sticking to the pan, but if you want you can certainly line the pan with parchment paper and then put the breadsticks on the prepared baking sheet.
Baking the Breadsticks
Place the pan with the breadsticks into a preheated 400℉/200℃ degree oven for 8-10 minutes or until they are golden brown.
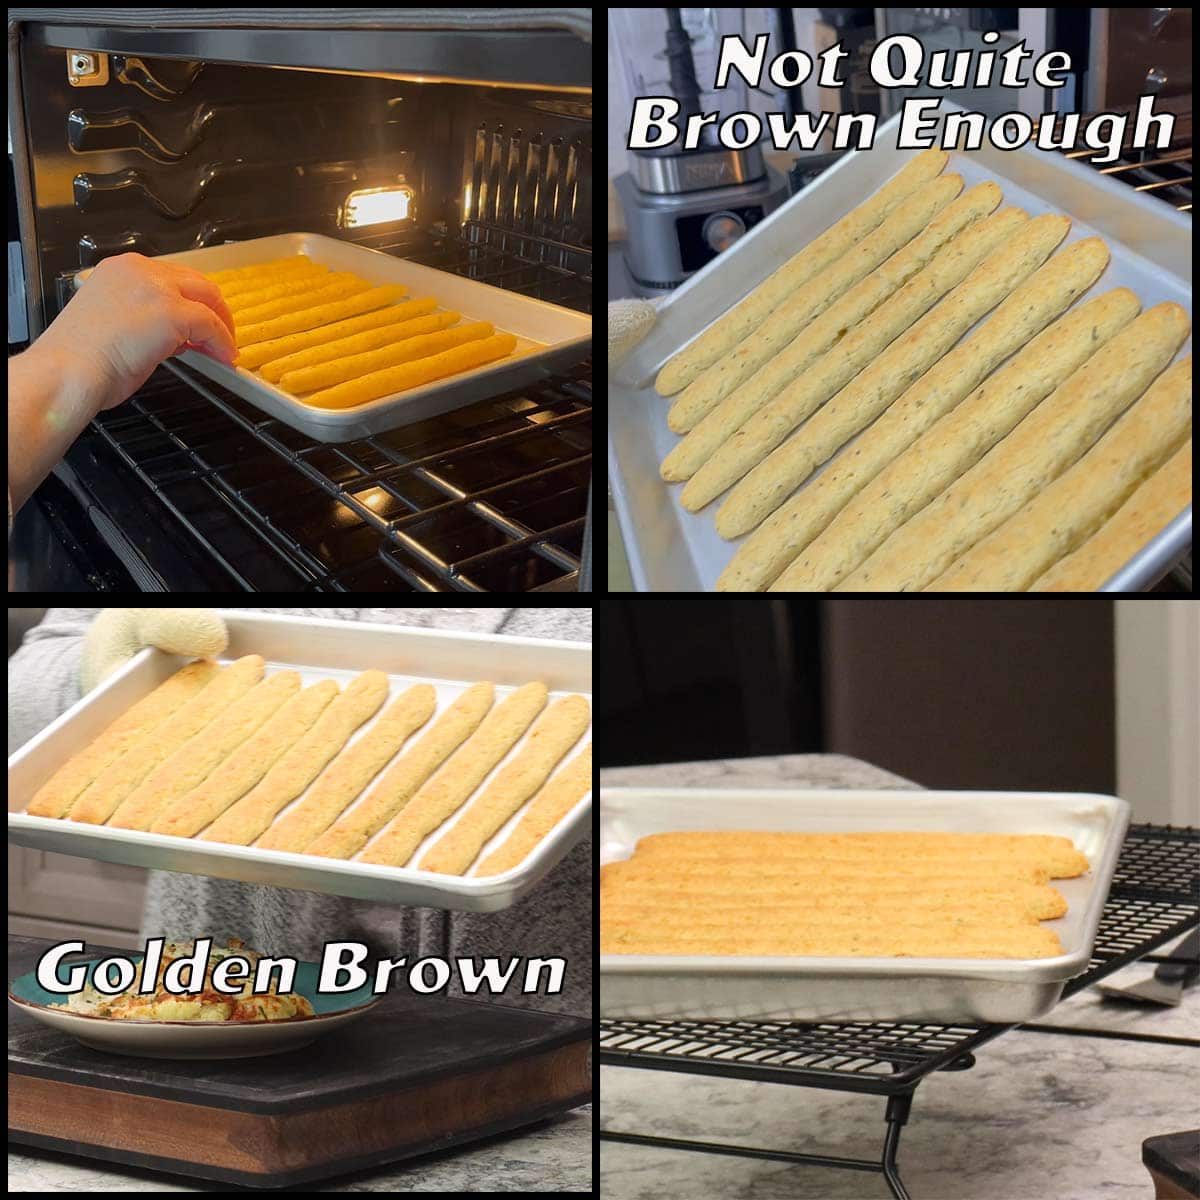
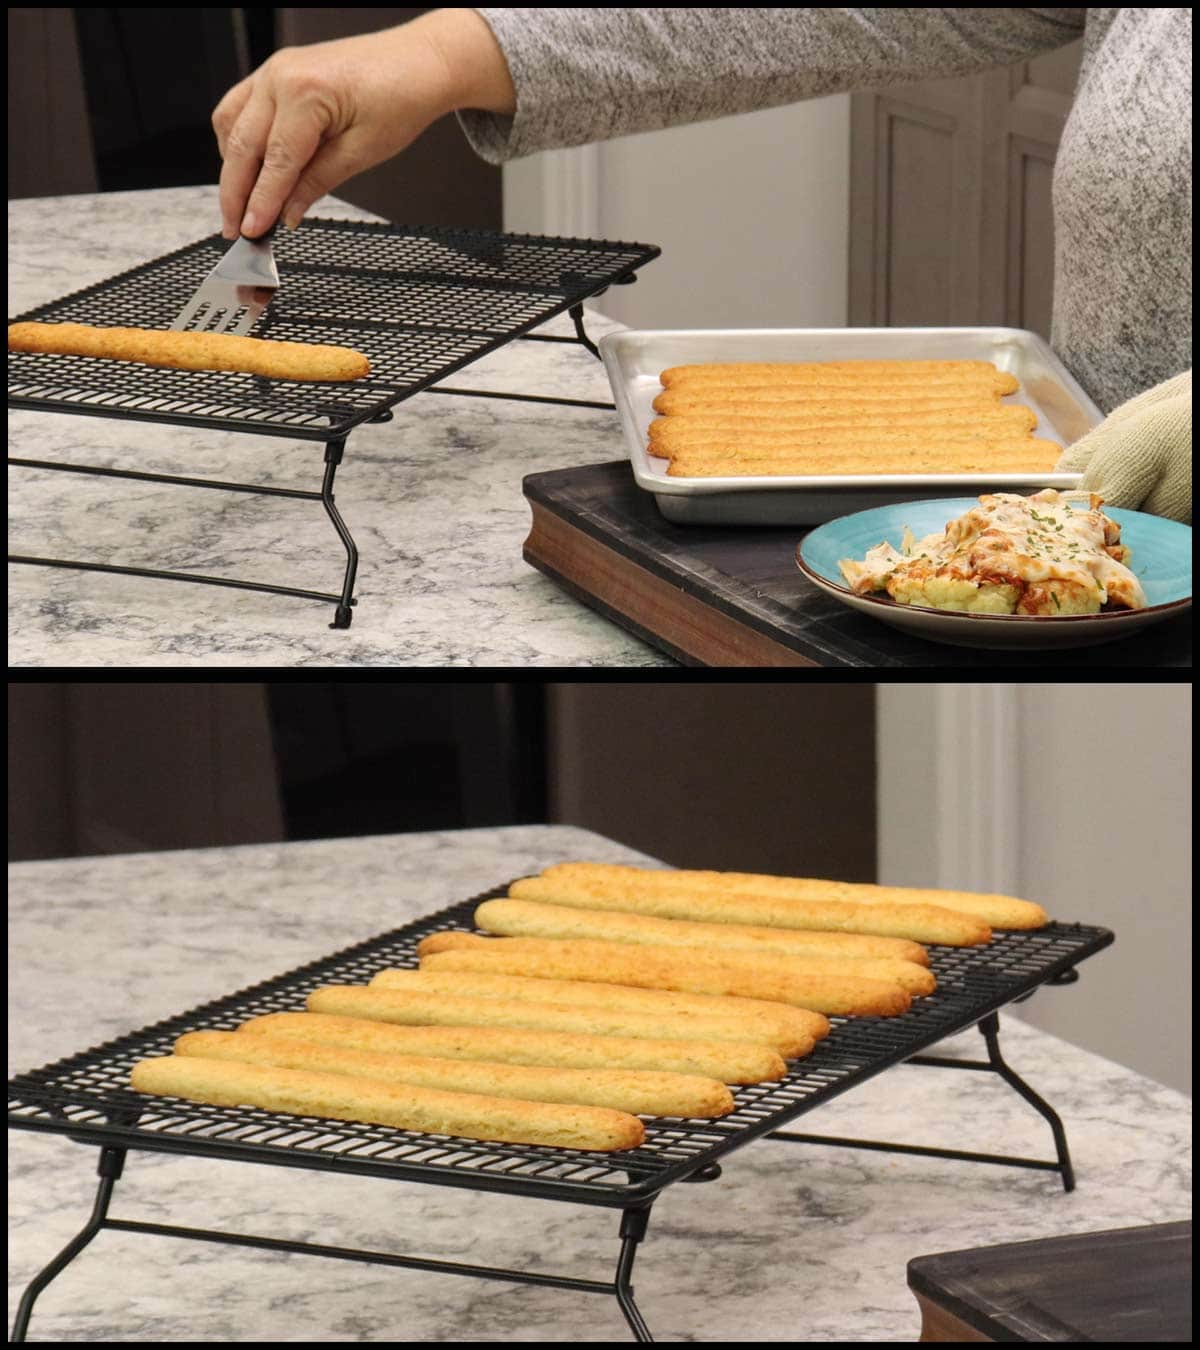
Remove from the oven and let them cool for 2-3 minutes on the tray and then place them using a spatula or another type of tool to carefully lift them off of the tray and onto a cooling rack. I like to serve them after they have been on the cooling rack for about 2 minutes, but they are still delicious at room temperature, just not as crispy.
You can make them ahead of time and then pop them back in the oven for just a few minutes to warm them up.
Serve them with your favorite marinara sauce or melted garlic butter for an appetizer or with your favorite Italian-inspired keto meal!
Storage & Reheating of Keto Breadsticks
The keto breadsticks should be cooled completely before storing in an airtight container or zip-loc baggie in the refrigerator and will stay fresh for 5-7 days. They can also be stored in the freezer for up to 3 months.
To reheat the breadsticks in the oven, preheat the oven to 350℉/175℃ and warm the breadsticks for about 5 minutes or until the outside crisps back up and they are heated through. I do not recommend going on a higher temperature because they can take on a funny flavor if they are cooked at too high of a temperature when reheating.
You can also air fry them to reheat, which is what I usually do. Place the breadsticks in your air fryer and air fry on 300℉/150℃ for 3-5 minutes.
If you want to turn leftover breadsticks into croutons, cut them in bite-size pieces and toss in a few teaspoons of oil. Bake at 250℉/120℃ for about 25 minutes or until they are crunchy all the way through.
You can also use your air fryer on the lowest heat setting, but watch them closely because you don't want them to get too dark before they dry out and get crunchy or they can end up with a funny flavor.
Frequently Asked Questions
Absolutely! You can make as much of the keto dough as you want. Simply increase all the ingredients and keep the baking time the same.
This recipe for keto breadsticks is gluten-free as long as the spices you use don't have any gluten in them. Most dried spices are gluten-free, but it is important to read the labels and know where they are packaged to determine if there is any chance of cross-contamination.
Spice blends like premixed rubs can sometimes contain wheat or barley, so it is especially important to read the labels when purchasing and using these types of spice blends.
More Low-Carb Recipes
I know you are going to love making this easy keto breadsticks recipe and if you want more ideas for delicious recipes that are perfect for a low-carb diet, here are some of my favorites.

Easy Keto Breadsticks Recipes
Ingredients
- ½ cup almond flour
- 2 Tablspoons coconut flour
- 1 ounce grated parmesan cheese
- 3 ounces grated Italian blend cheeses
- 1 large egg
- 2 teaspoons baking powder
- 1 teaspoon garlic powder
- ½ teaspoon onion powder
- ½ teaspoon Italian seasoning
- ¼ teaspoon fine grind sea salt or kosher salt
- 2 Tablespoons heavy cream
Would you like to save this recipe?
Instructions
- In the bowl of a stand mixer add the almond flour, coconut flour, baking powder, cheese, seasoning blend, and egg. Use the paddle attachment to blend the ingredients starting on low speed and then increase to medium speed until the mixture starts to come together and looks crumbly.½ cup almond flour, 2 Tablspoons coconut flour, 1 ounce grated parmesan cheese, 3 ounces grated Italian blend cheeses, 1 large egg, 2 teaspoons baking powder, 1 teaspoon garlic powder, ½ teaspoon onion powder, ½ teaspoon Italian seasoning, ¼ teaspoon fine grind sea salt or kosher salt
- Add 1 Tablespoon of cream at a time while continuing to mix the dough on medium speed. The dough is ready when it holds together. If it is too crumbly and breaks apart easily, add a touch more cream. If it is too wet, you can either add a little more shredded cheese or a very small amount of coconut flour.2 Tablespoons heavy cream
- Take 2 Tablespoons of the dough and place it on a cutting board or clean work surface. Roll it out into the shape of a breadstick by using the palm of your hands in a forward and back motion. The breadsticks should be about 8-10" long and about ¾" in diameter, which is about the size of dime.
- Lay each formed breadstick on a baking sheet. You can line the baking sheet with parchment, but it usually isn't necessary.
- Bake in a preheated 400℉/200℃ for 8-10 minutes or until golden brown. Remove and place the tray on a cooling rack. After they cool for about 2 minutes, carefully transfer the breadsticks to the cooling rack. They are fragile at this point, so use a turner or a spatula to move them. Allow them to cool another 2 minutes before serving.
- Enjoy the breadsticks with your favorite marinara or with a meal.
Notes
Nutrition
About the Recipe Author, Louise Long
Louise is a full-time recipe creator and food blogger @ The Salted Pepper. She has over 30 years of experience with cooking and recipe development. She owned a restaurant for several years and was a full-time RN until retiring to blog full-time.

She published her first cookbook in the Fall of 2018 and is very interested in writing several more.
Louise is also the creator of an online Ninja Foodi Pressure Cooking Course with over 100 instructional step-by-step videos. People absolutely rave about the course and all the value they have received from it.
Louise has several very active Facebook groups that help people with the basics of cooking and learning more about the appliances they love.
Ninja Foodi Pressure Cooker & Air Crisper 101
Ninja Woodfire Outdoor Grill & Smoker
Louise is also a YouTube creator and you can find most of her recipes in video format on The Salted Pepper YouTube channel.
She is very responsive to messages and eager to help in any way she can. Get more Information about Louise & contact information
I WOULD LOVE TO SEE WHAT YOU ARE COOKING UP IN YOUR KITCHEN! TAG ME @THESALTEDPEPPER ON YOUR FAVORITE SOCIAL MEDIA PLATFORM WHEN YOU MAKE A DISH!
BE SURE TO FOLLOW THE SALTED PEPPER RIGHT HERE ⇓⇓⇓⇓⇓
Jules says
Can you please check the print recipe button? My browser opens up a new window when I try to print the recipe. I have no issues printing other recipes. Thank you in advance!
Louise says
It's working fine for me, did you try to refresh your browser? This issue seems to happen randomly for people and refreshing usually fixes it. If it doesn't work for you, email me at louise@thesaltedpepper and I'll send you the printable version.