
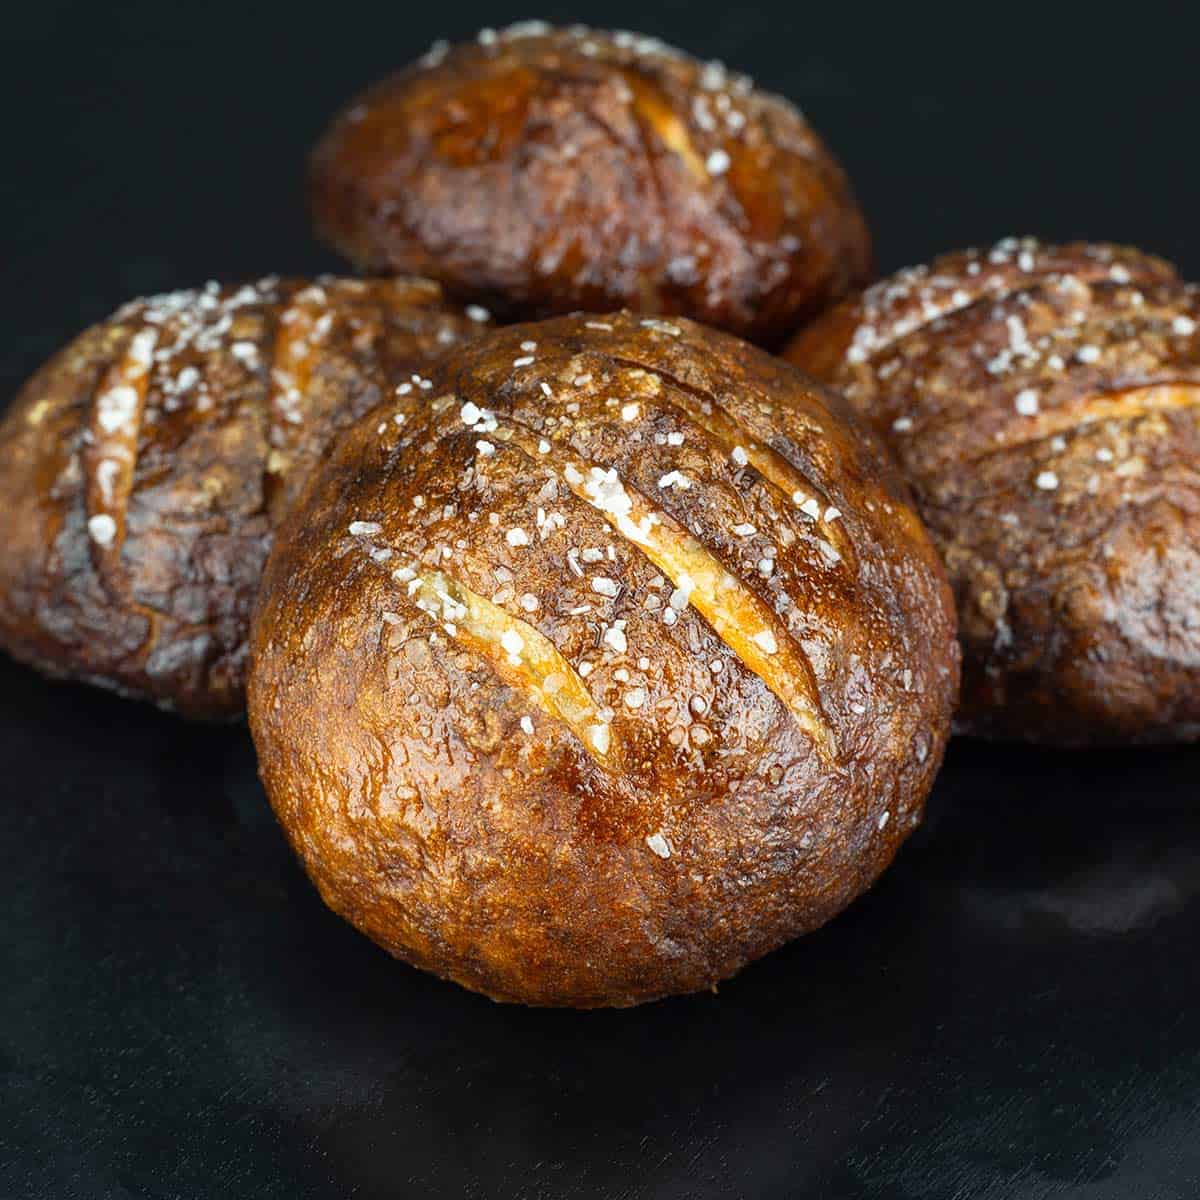
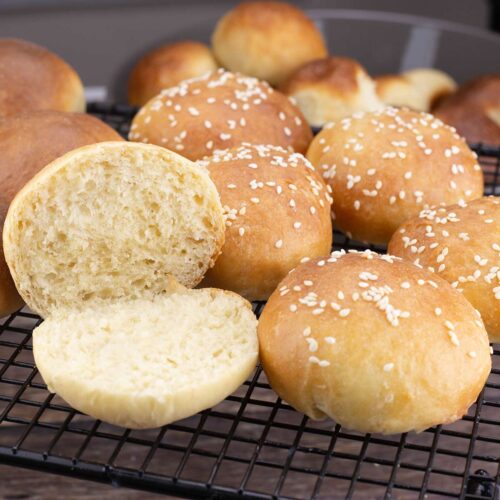
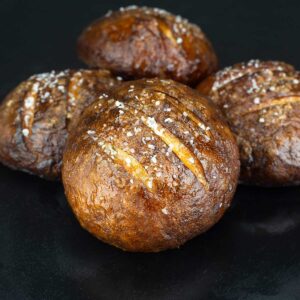
When you want delicious burger buns or rolls for pickle soup, this pretzel bun recipe will be your go-to! There are so many different uses for homemade pretzel buns and they are really easy to make. There are a few steps involved to get that signature pretzel look, texture, and taste, but they are entirely worth it!
Whether you want a crunchy, hard pretzel roll or a soft bun for sandwiches, this recipe will work! You can make a small batch of just 4 rolls like I did or double (even triple) the recipe and make more!
Would you like to save this recipe?
I use the same dough recipe as I do in my homemade pretzels, but simply shape them differently and the cooking instructions are different.
Dough for soft pretzels or pretzel buns is one of the easier doughs to make and doesn't require long proofing times, so you can make this recipe from start to finish in less than 90 minutes. Even if you have never made any kind of bread dough before, you can do this! In fact, I recommend starting with a simple dough like this one or a brioche dough if you are new to bread making.
Suggested Kitchen Tools for Pretzel Buns
- Large pot or Ninja Foodi
- (affiliate link)Pastry mat or flat working surface
- (affiliate link)Large slotted spoon
- Stand Mixer or large bowl for mixing dough
Ingredients & Substitutions
Yeast
I use instant yeast in this recipe. You can use rapid-rise or regular instant yeast without any changes.
If you want to use active dry yeast, then you will need to bloom the yeast first in some warm water, but you use the same amount.
I have not made this recipe with fresh yeast so I am not sure of the number of grams to use.
Flour
I used all-purpose flour to keep this recipe simple with ingredients that most people will have on hand.
You can use bread flour, but you will most likely need to increase your water a bit. Just add enough to get a slightly sticky dough. 1-3 tablespoons of extra water should do the trick. Add this after you mix the bread flour in with the other ingredients.
You can use gluten-free bread flour as long as it is a 1:1 ratio and specifically for making bread.
I do not recommend using cake flour or any other types of flour in this recipe. If you have dietary allergies or preferences that don't allow you to use all-purpose or gluten-free baking flour, I would look for a recipe that specifically uses the type of flour you want. Many of the alternative flours act very differently.
For example, coconut flour is VERY absorbent and would not work at all in the recipe, while almond flour is not absorbent at all and also would not work in this recipe. However, you may find a recipe that uses a combination of the two with other ingredients to make a keto version of a pretzel dough.
Baking Soda
This very important ingredient sets pretzel buns apart from regular buns. Ten cups of water is combined with ½ cup baking soda to make the baking soda bath.
The baking soda solution helps to create the Maillard reaction, which is responsible for the traditional brown color of pretzels.
Boiling the dough in this alkaline solution also creates the chewy texture that pretzels have.
You can also use a lye solution, but you have to be very careful with that, so it's much easier to use baking soda!
Salt, Sugar, & Butter
Salt
I use two different kinds of salt in this recipe. A fine-grained sea salt or kosher salt is added to the dough, and then a coarser salt is sprinkled on top of each bun.
You can buy pretzel salt, or you can usually find coarse sea salt or coarse kosher salt in most grocery stores, and that will work just fine.
You can omit the salt completely if you want to, or use it in the dough and not on top.
Sugar
The sugar in the dough is completely optional. It does boost the yeast and gives the dough a quicker rise, but you can omit it and just let the dough rise for a long enough time to double in size.
You can also use brown sugar instead of white sugar or honey if you prefer. Use the same amount as the white sugar.
How to Make Pretzel Buns
Even if you have never made any type of bread before, do not worry! These step-by-step directions will have you whipping out beautiful pretzel rolls in no time at all.
I would allow about 2 hours from start to finish if it is your first time making the recipe, but once you get the hang of it, it only takes about 90 minutes, and 30 minutes of that is the dough rising.
Quick Tip
You can double the dough recipe by doubling all the ingredients if you want to make 8 buns.
Making the Dough
The easiest way to make the dough is to use a stand mixer, but you can use a large bowl and a large spoon or spatula.
Mixing Bowl Directions:
In a large bowl, combine the yeast, sugar and water. Stir or whisk to combine. Add the flour and salt and stir until the flour absorbs the water and you have a sticky dough. *You can also use a bread machine to mix the dough.
You may need to add a little more flour if the dough is too wet or a little more water if is too dry. Wait about 5 minutes after mixing the dough before adding anything because it can take a few minutes for the flour to fully hydrate.
The dough will be sticky, but shouldn't be wet.
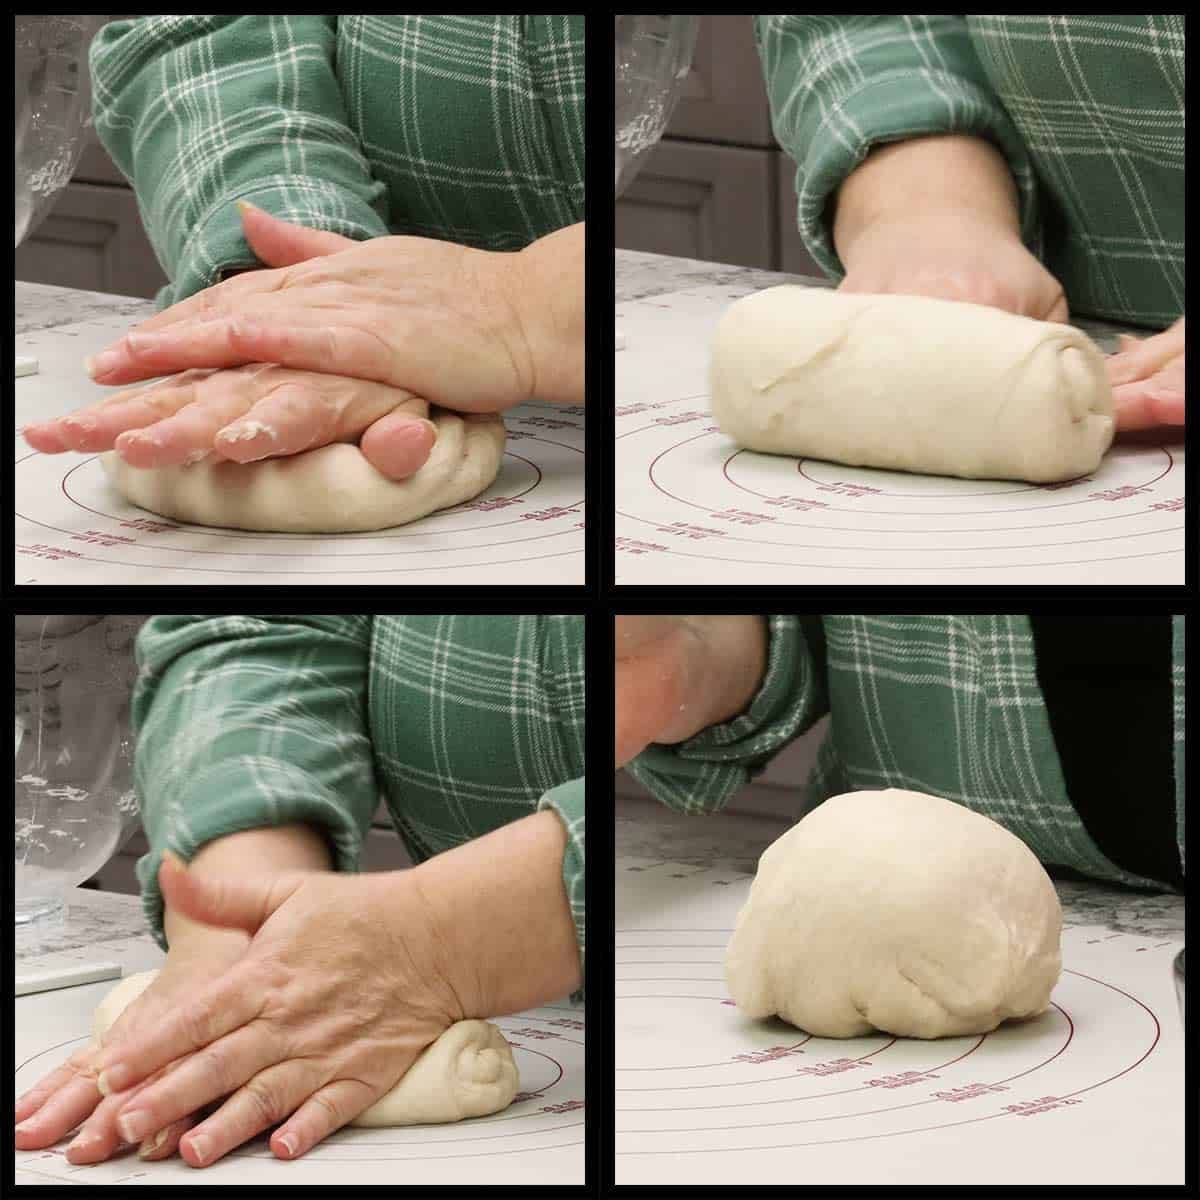
Turn the dough out onto a lightly floured work surface. *Your dough will be ragged looking at first and not smooth like mine looks in the pictures below but, as you knead it, it will start to smooth out. Form the dough into a ball and flatten it out. Sprinkle some flour on top and knead the dough by pressing the palms of your hands into the dough and pressing away from you.
Fold the dough back onto itself, turn the dough 90 degrees, and knead again. Continue to do this for about 10 minutes or until the dough becomes smooth and slightly tacky but isn't sticking to your hands. Use flour lightly as you knead but be careful not to add too much or your dough will become dry. It should feel nice and soft and tacky when done kneading.
Stand Mixer Directions:
Add the yeast, sugar, and water to the bowl of your stand mixer. Using the dough hook, turn the mixer on low speed and let the mixer run for 30 seconds to mix the yeast and sugar with the water.
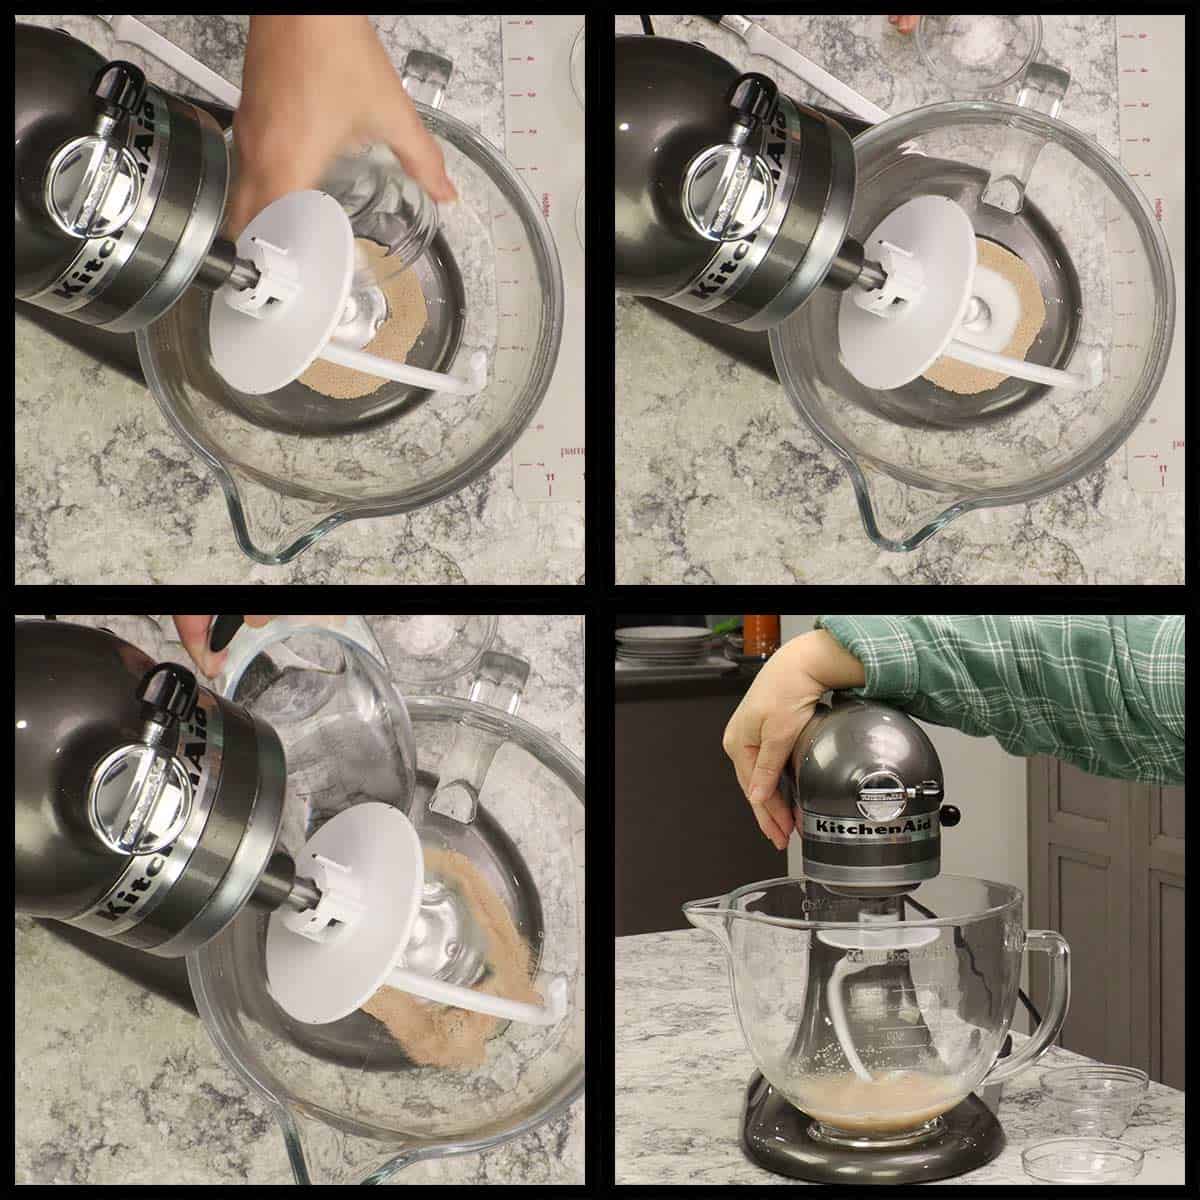
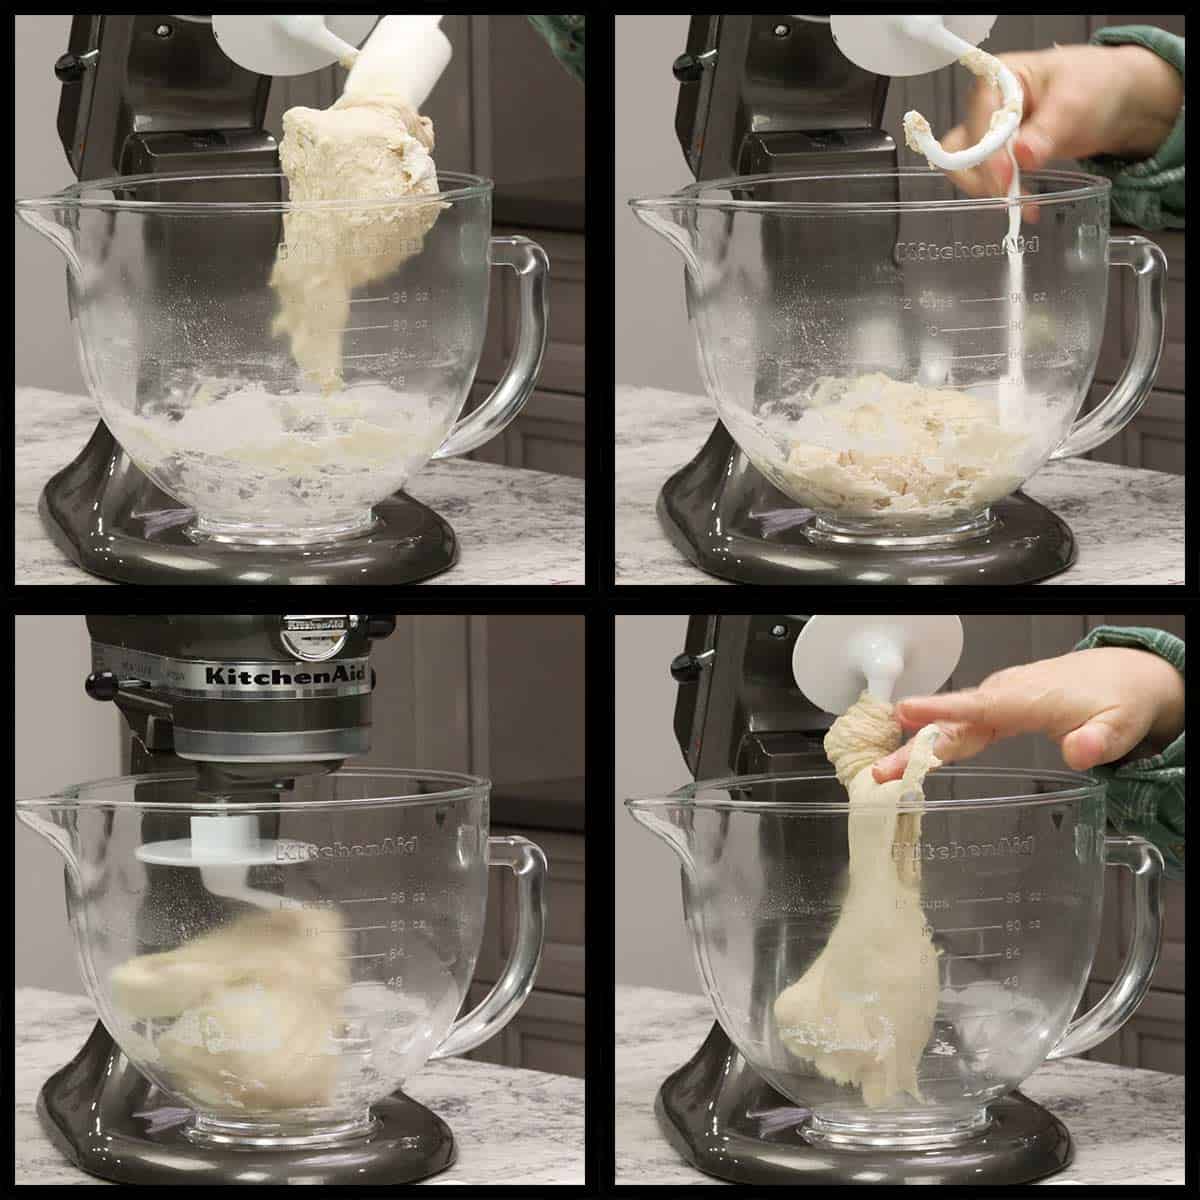
Add the flour and mix on low speed while it combines with the other ingredients. Add the salt and continue to mix on low speed until a sticky dough ball forms around the dough hook.
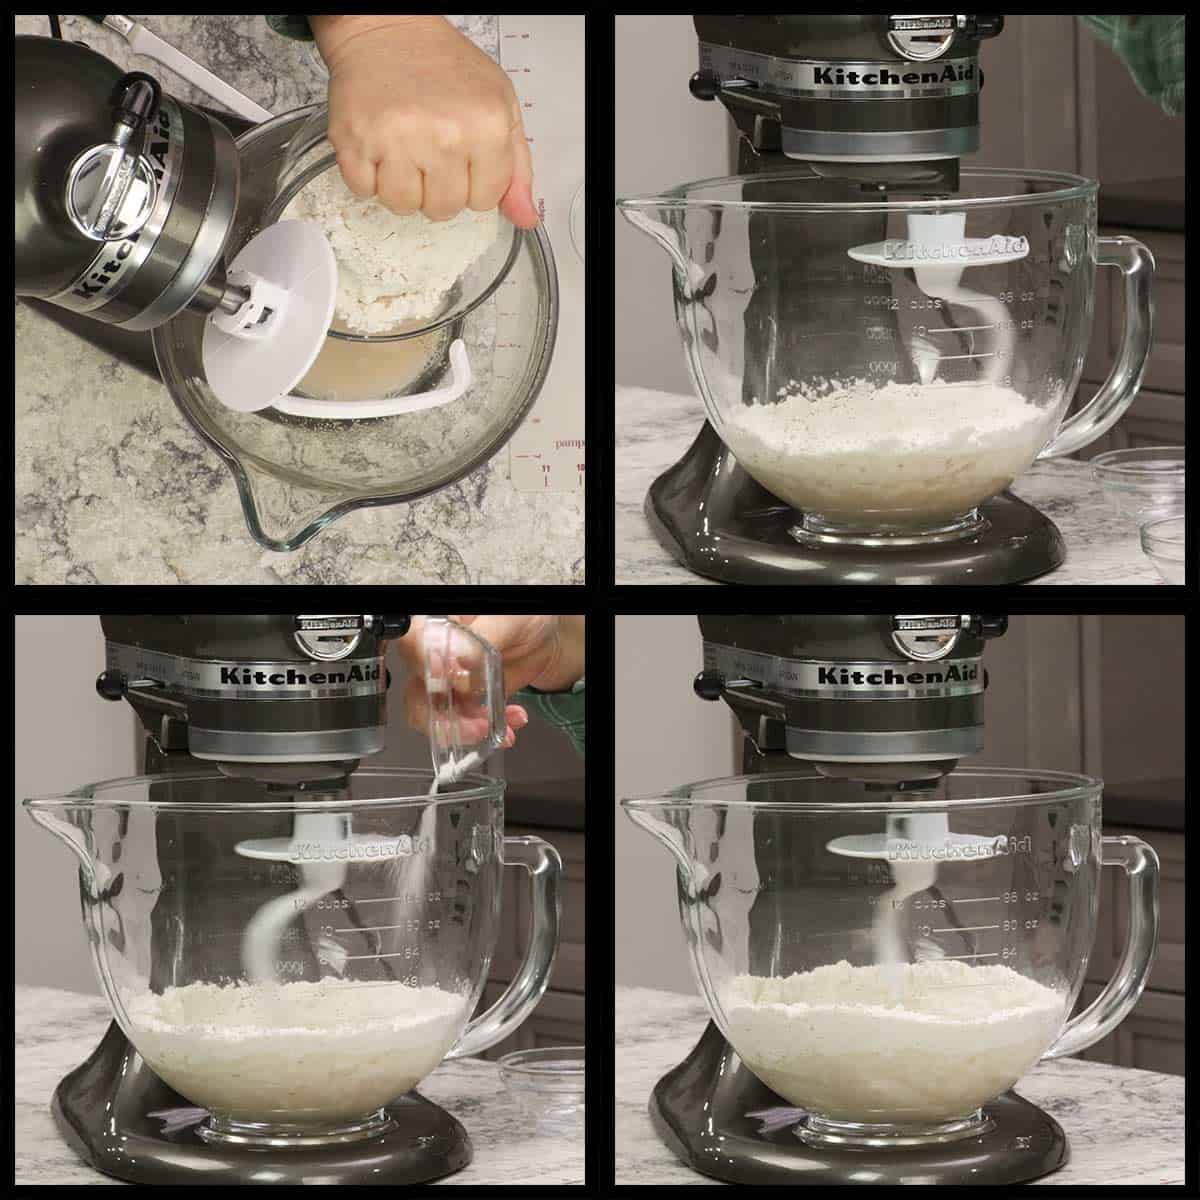
Scrape the dough off the hook back into the bowl and mix on medium speed for 3-5 minutes. The dough will smooth out and become less sticky. It should feel slightly tacky, but if it is sticking to your fingers than mix a little longer. You can also add just a small bit of flour if needed. Probably not more than 1 tablespoon. You don't want a dry dough, so make sure it feels tacky to the touch, but doesn't stick to your fingers and you will have the perfect dough for your pretzels.
Proofing the Dough
Proofing the dough is as simple as placing it in a bowl with a touch of oil coating the dough(optional), covering it with plastic wrap and letting it sit at room temperature until it doubles in size.
Depending on the temperature of your house, this can take anywhere from 1-2 hours. The time is not important, though; just make sure it doubles in size.
Properly proofed bread will spring back slowly when you poke your finger into it. If it springs back quickly, it isn't quite ready. If it never springs back and your fingerprint remains in the dough, it may be over-proofed, but it is better to over-proof than under-proof, so don't worry about it!
You can also put the dough in your oven with the light on to speed up the process or use a proof setting which many appliances have these days.
Proofing Dough in the Ninja Foodi or Ninja Combi
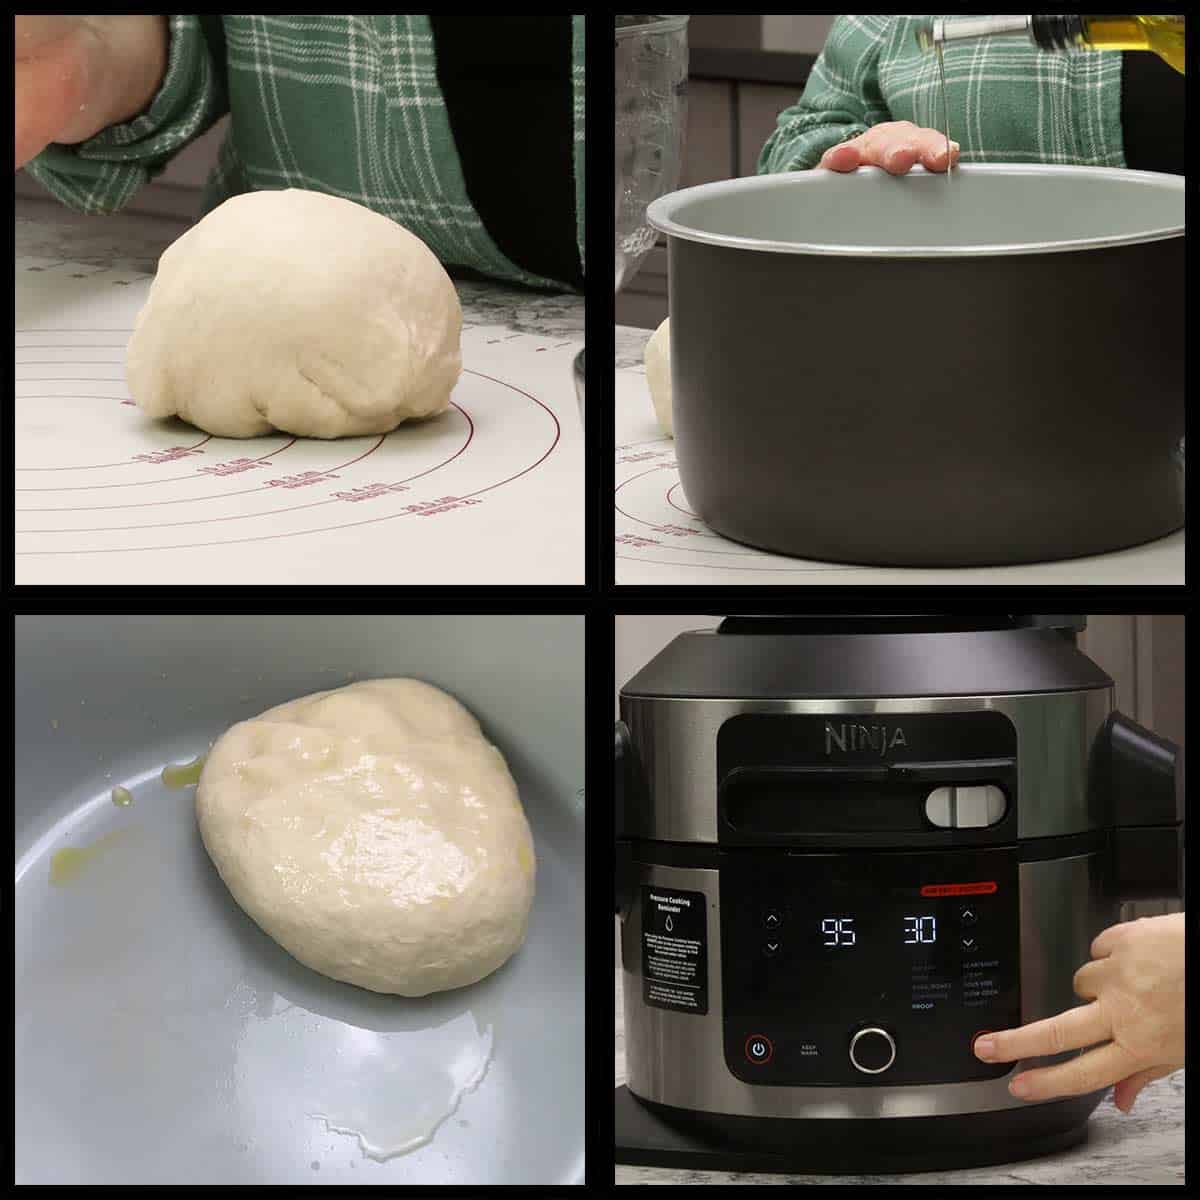
To speed the proofing process up, I use either my Ninja Foodi OL series with the proof function, the Ninja Speedi, or the Ninja Combi with the proof function. This allows me to set an ideal temperature of 95℉/35℃ and proof the dough in 30 minutes.
Speeding up the proofing process does affect flavor development in bread, but we aren't trying to develop flavor over a long proof time like you would with sourdough, so it is fine to speed things up.
Place the lightly oiled dough ball into the appliance you want to use for proofing. I use the inner pot or pan and set the dough directly in it for proofing. The proof function does not engage the fan so you don't have to cover the dough. Set the temperature to 90-95℉/32-35℃ and the time for 30 minutes.
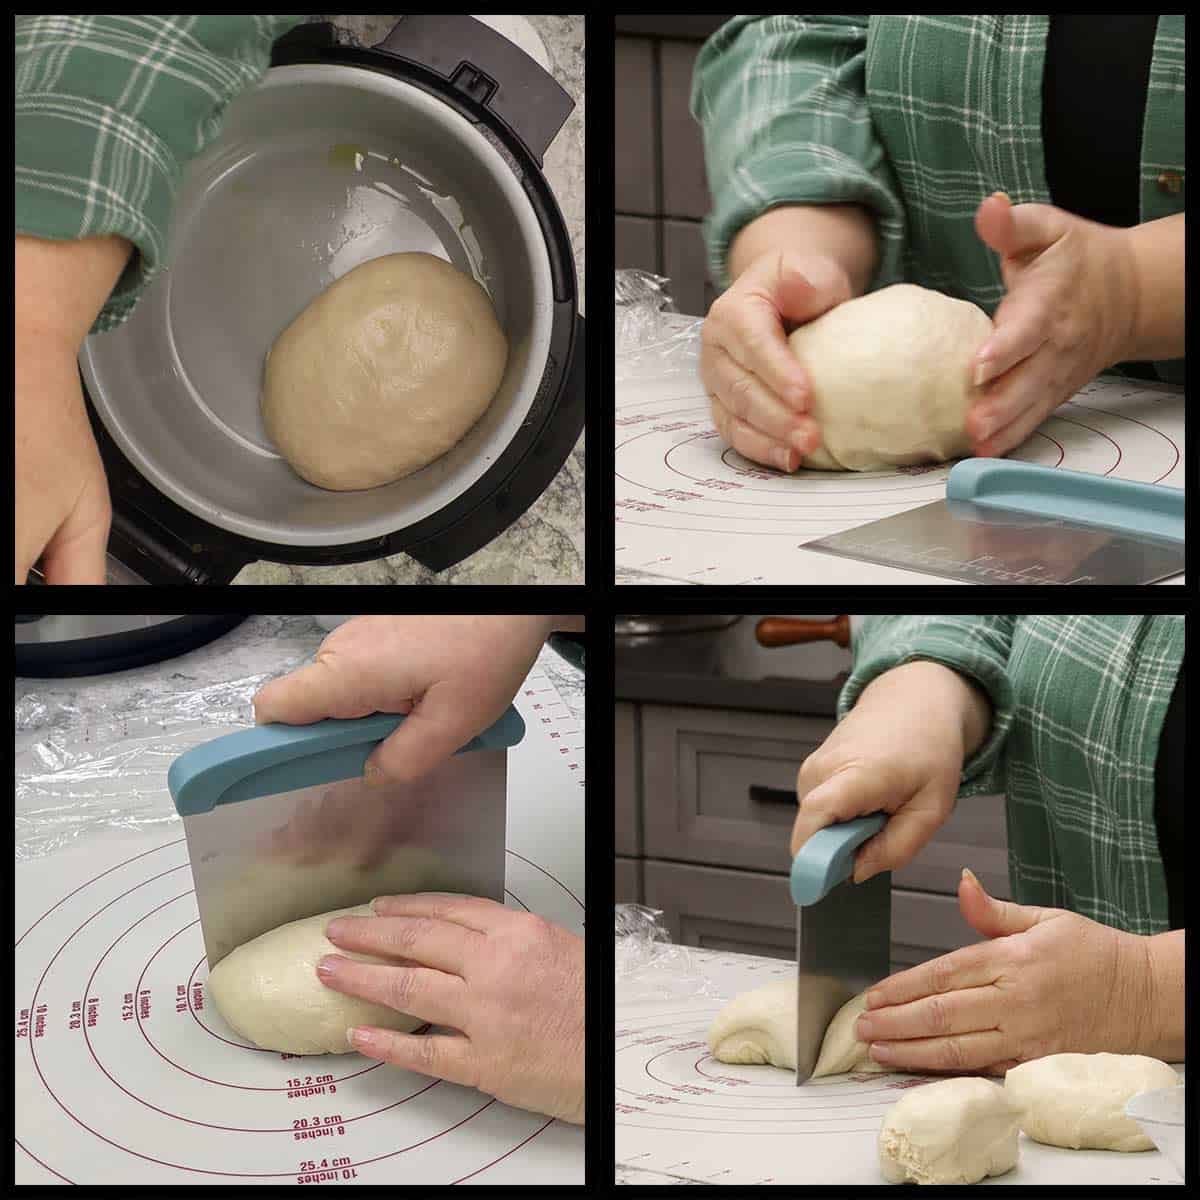
After the time is up make sure the dough has doubled in size. If it hasn't, proof another 15 minutes. Mine has always been ready in 30 minutes.
Remove the dough and place it on a clean work surface. Don't use any flour on the work surface and it's okay if the dough sticks a bit.
Cut the dough in 4 equal pieces. If you want to be precise you can weigh out 4 ounces for each bun, but I usually just eyeball it and it works fine.
Forming the Buns
There are a couple of ways you can form the buns and either works fine, it just depends on what you are more comfortable with.
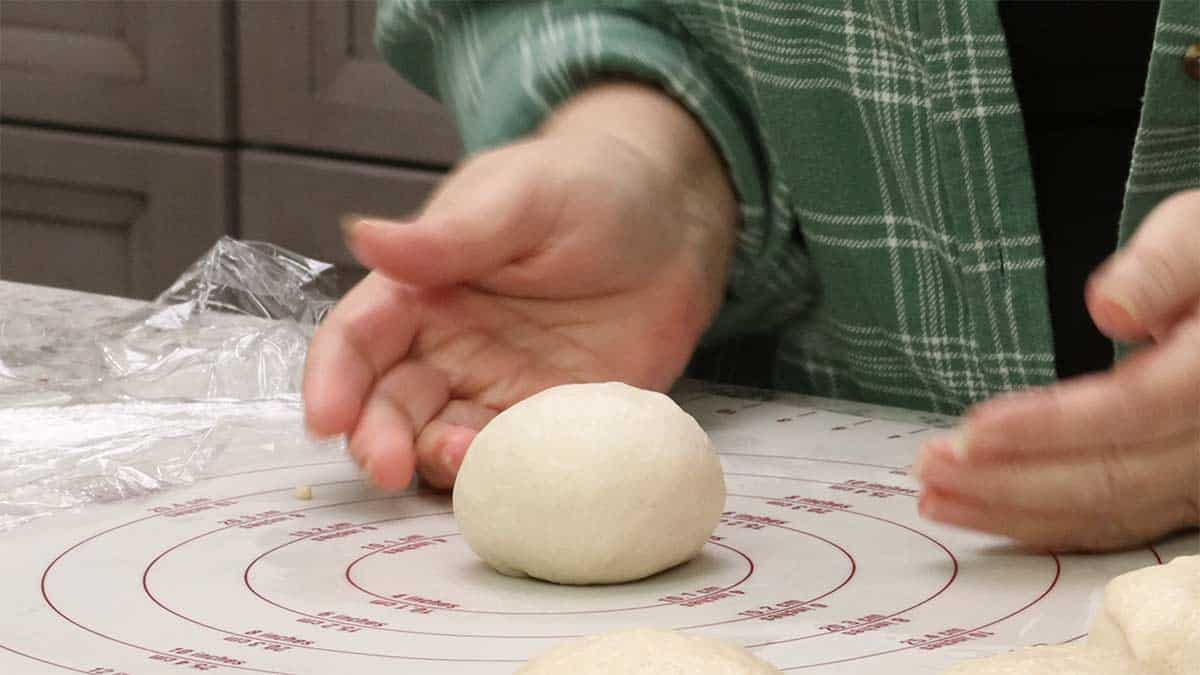
The way I usually do it is to take one piece of dough and roughly shape a ball. Then on a surface that doesn't have any flour on it, I cup the dough ball with edges of my hands and rotate the dough in a circle while pressing the dough underneath itself.
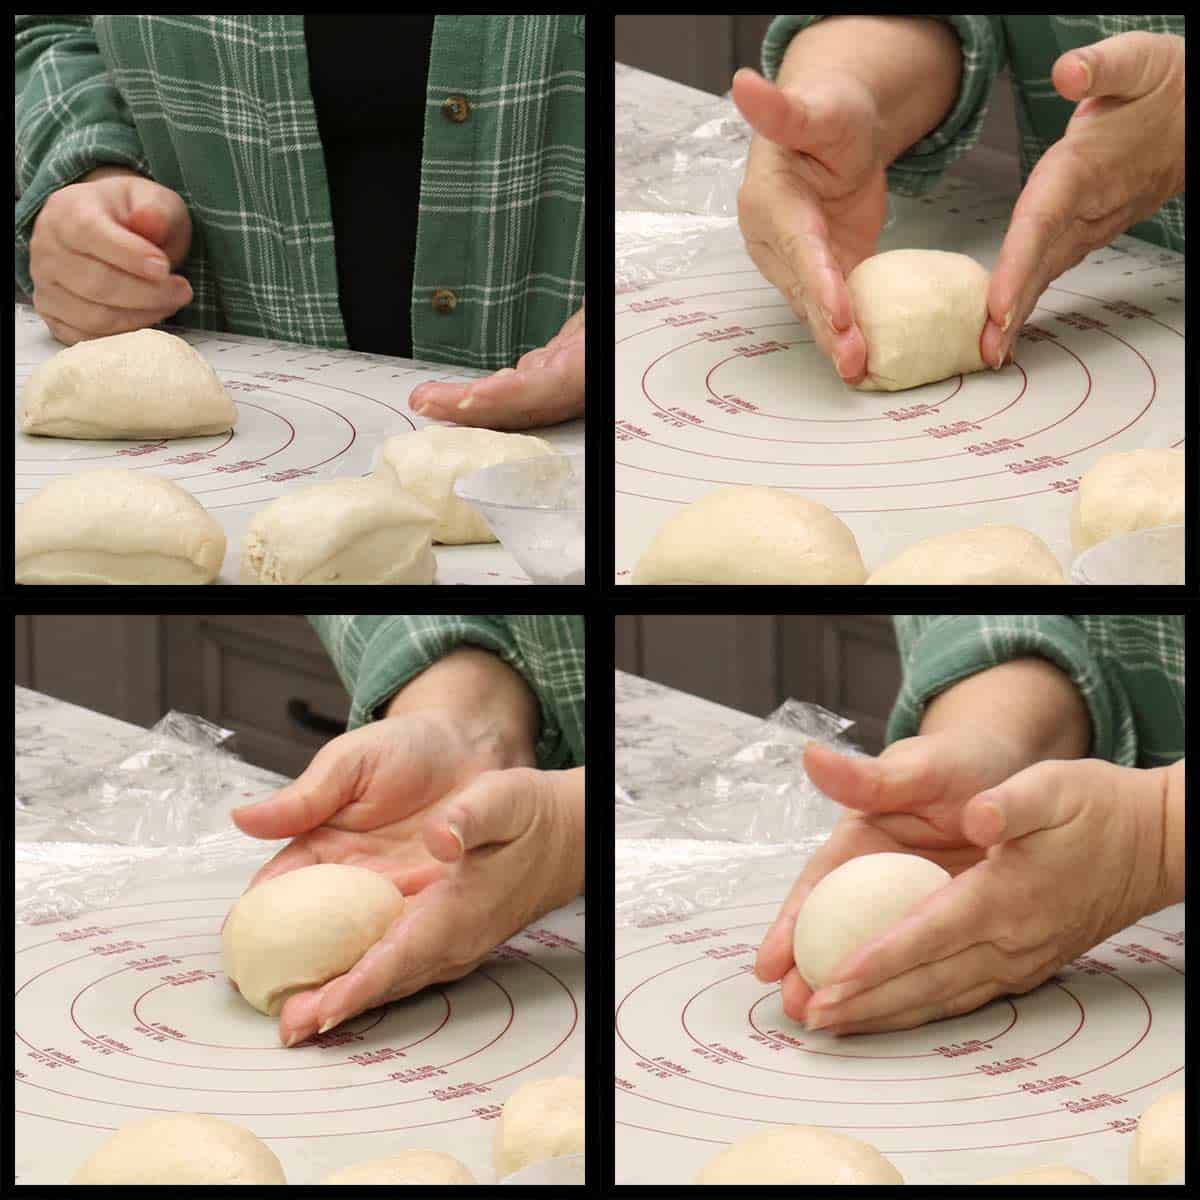
This creates tension on top of the dough helps it keep its shape in the oven. Even though we press the dough down flat, I still find that this helps and it also gives the buns a nice smooth finish.
The other way to form the buns is to sqeeze the ball between your thumb and first finger until tension is formed on the top. Then tuck the dough that is in your hand under the the ball of dough.
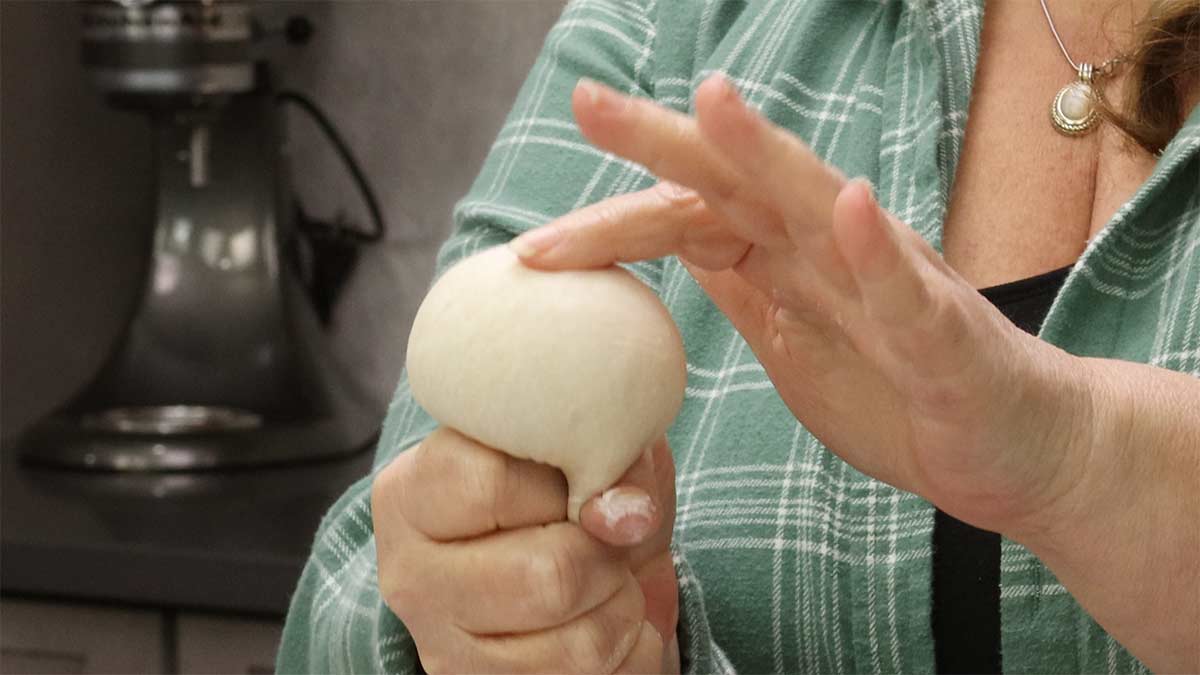
This is what your bun should look like after forming them using either method.
Sometimes pictures just aren't enough to explain the process, so here is a quick video showing you both of these techniques.
Once your ball of dough is formed, press it down into a 4" disc and place it on a lightly floured surface. Lightly flour the top as well and cover with loosely with plastic wrap or a tea towel. Repeat with the other 3 pieces of dough.
Let the dough rest and it will rise a bit while you get the baking soda bath ready.

Baking Soda Bath
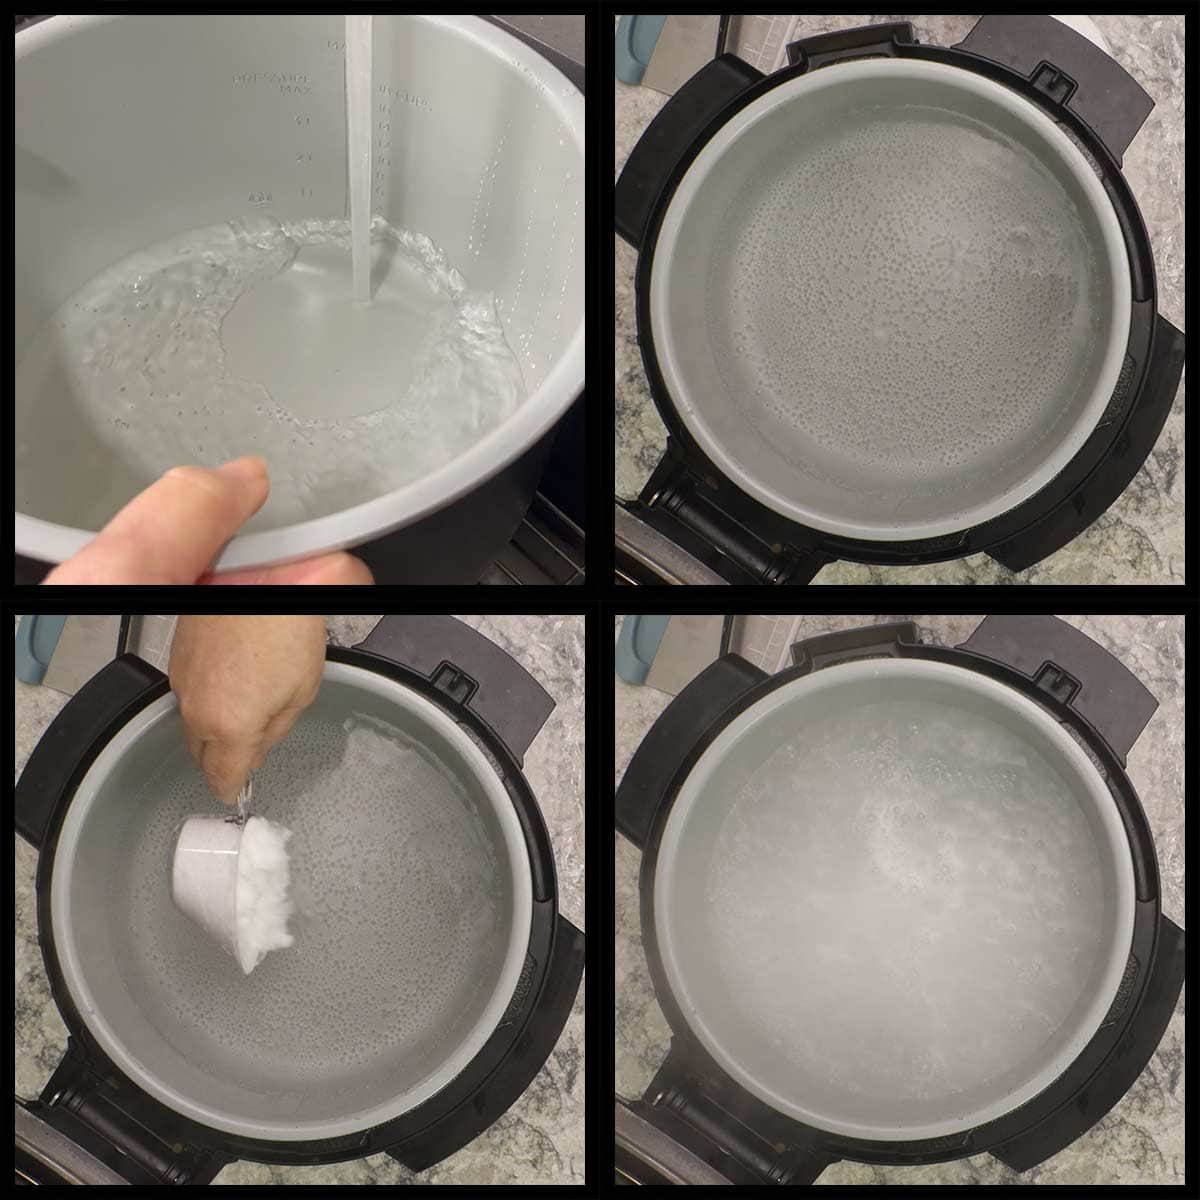
Fill the inner pot of the Ninja Foodi or a large pot on the stove with about 10 cups of water. If using a large stockpot on the stove, fill it about ½-⅔ full of water.
Use sear/sauté on the Ninja Foodi on high to bring the water to a boil. This takes about 10 minutes.
Quick Tip
Use a deep wide pot for the baking soda bath so it doesn't overflow.
On the stove turn the heat on high and bring the water to a boil. The time will vary based on how big your pot is and your stove.
Once the water is boiling (it doesn't have to be a rapid boil), add the baking soda and stir. It will fizz quite a bit; this is normal. Allow the pot to come back to a gentle boil.
Place a pretzel bun onto a large slotted spoon and lower it into the water bath. I can fit all 4 buns in the Ninja Foodi at once, but you may have to work in batches if your pot is smaller in diameter.
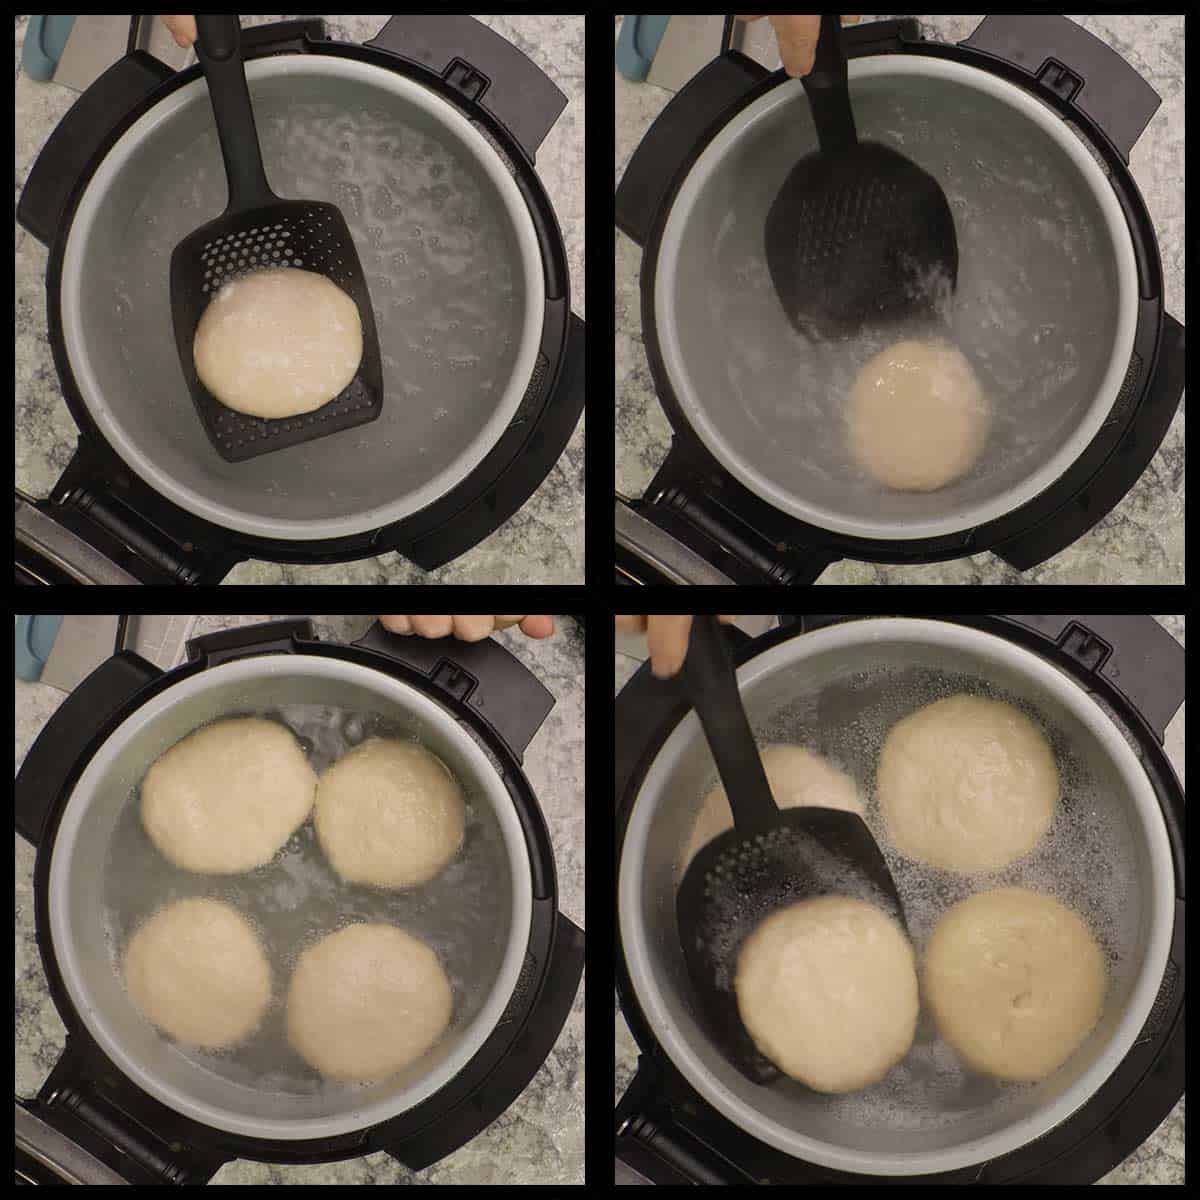
Let the buns cook in the soda bath for 1 minute and then flip them over and let them cook another minute. Remove them with a slotted spoon and place them on plastic wrap or a clean work surface.

Preparing the Buns for Baking
If you are going to be baking the buns in your oven or another appliance on bake or air crisp only, go ahead and preheat it to 400℉/200℃. If you are using the Combi, Speedi, or Ninja Foodi on Steam/Crisp you don't need to preheat.
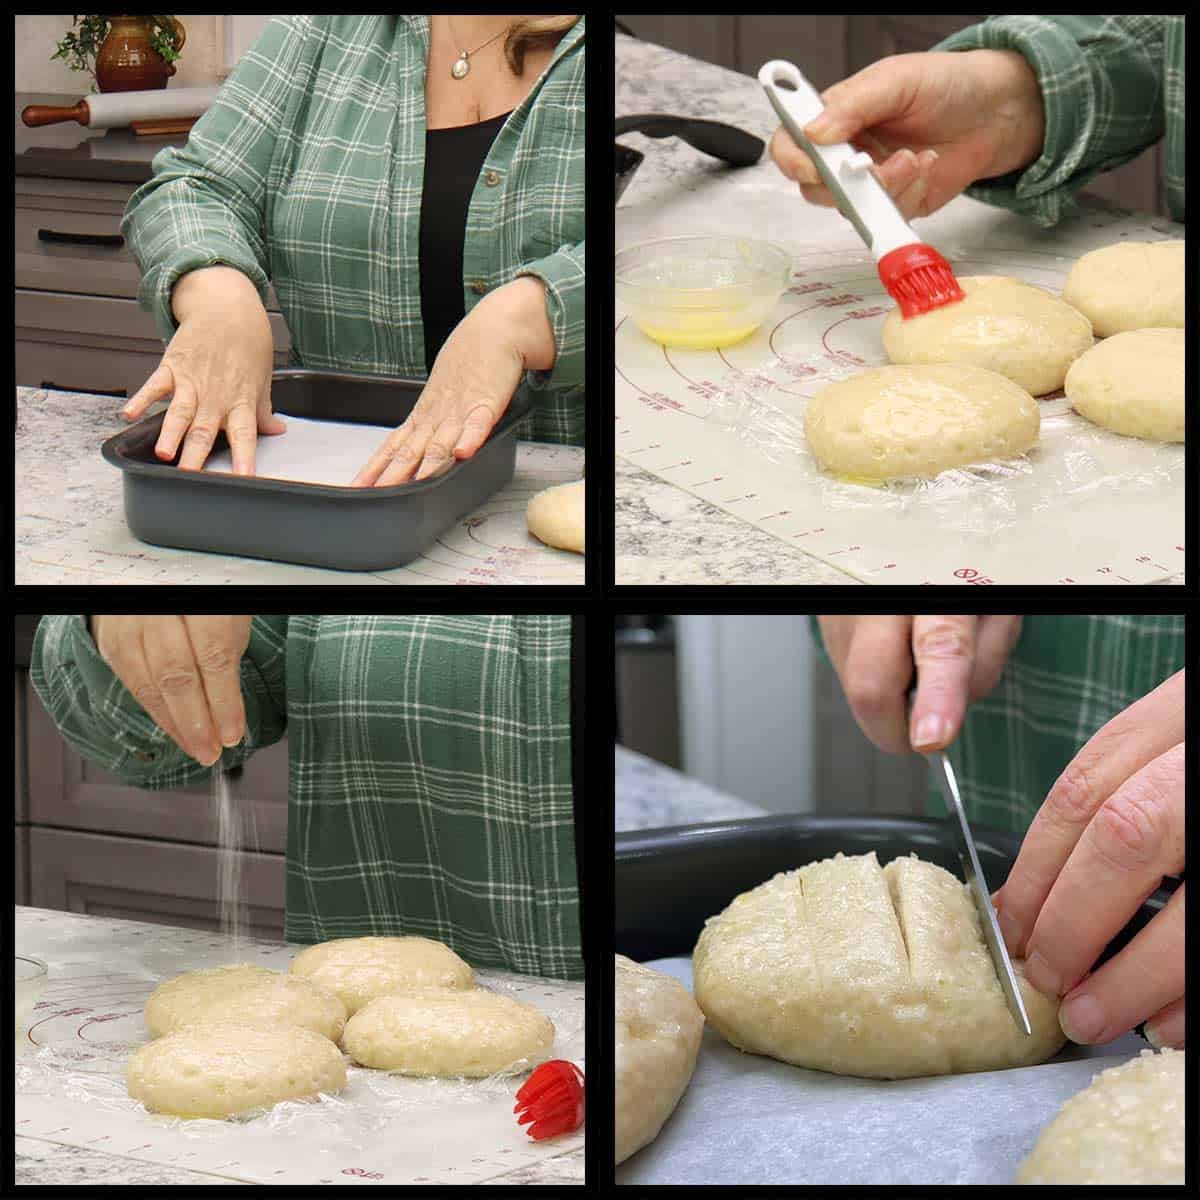
Line the pan or tray you are going to cook the buns on with parchment paper. This is important no matter what cooking method you use. It prevents the buns from sticking.
Quick Tip
When using any cooking method that involves a fan, like steam/bake, steam/crisp, air fry, or convection baking, trim any excess parchment from around the buns. If there is excess, the fan will blow the parchment and it can cover up the buns and impede the browning.
You can brush the buns with melted butter like I do or use an egg wash, or skip both and just move on to scoring and baking. I find the butter gives a nice look to the buns and also helps keep the salt in place.
Sprinkle the tops with pretzel salt or a coarse kosher or sea salt.
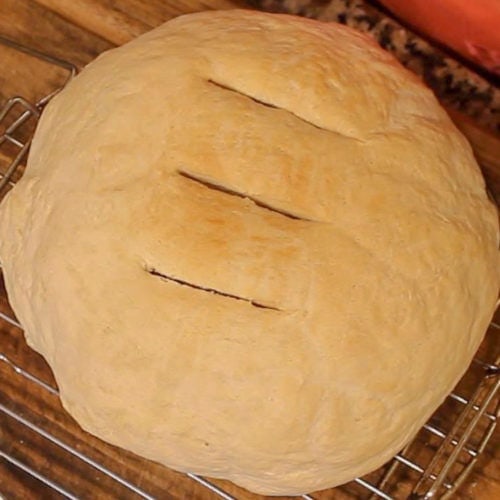
Using a sharp knife, bread lame, or scissors, make scores in the top of the buns about ¼" deep or so. You can do any design you like. Some people like to make an "X" but I really like the look of 3 slits with the longest and deepest one being in the middle.
Now your buns are ready to be baked!
Various Methods for Baking Pretzel Buns
I have tested this recipe using several different cooking methods and all of them worked out great. My favorite was using the Ninja Combi because I could bake all four buns at once and the little bit of steam in the beginning of the cooking process created a nice fluffy bun.
Oven Baking
If you are using convection bake, bake the buns on 375℉/190℃ for 15-18 minutes or until they become nice and dark and look like pretzel buns!
For regular baking with the fan, bake the buns on 400℉/200℃ for 15-18 minutes or until they are nicely browned.
You can check an internal temperature of the buns if you aren't sure if they are done and it should read 200-210℉/93-99℃ when they are done.
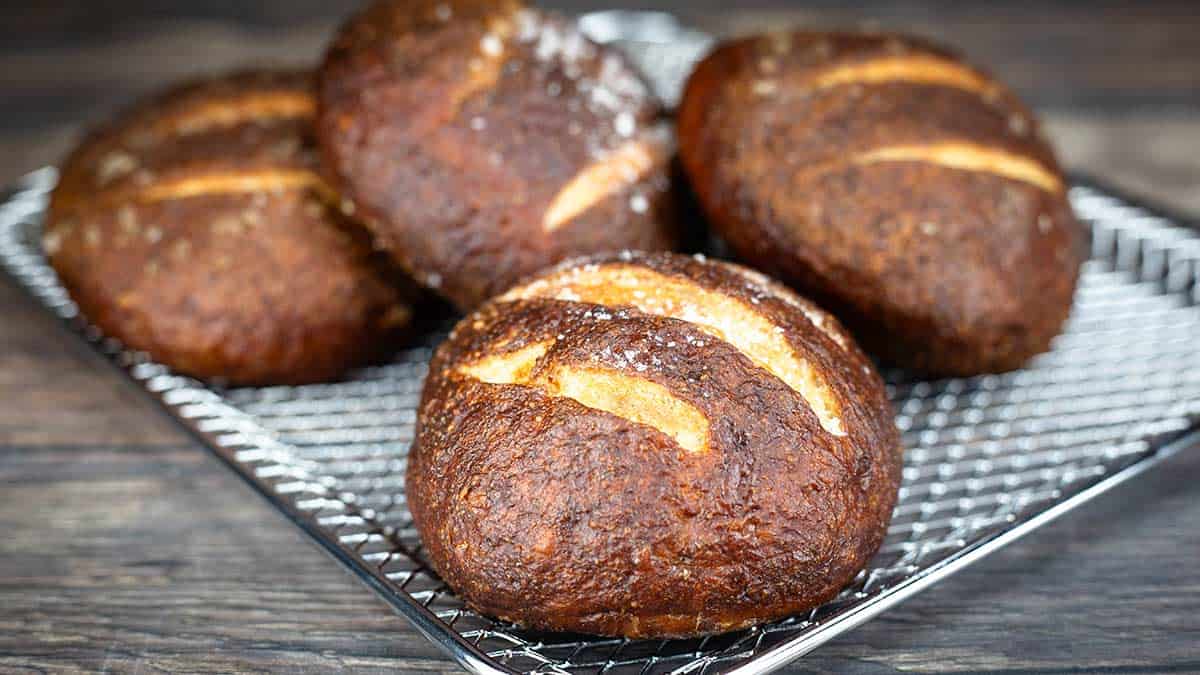
Remove them from the oven and brush with melted butter to soften the tops and give them a shine. Allow to cool.
Ninja Foodi or Ninja Speedi using Steam/Crisp
The only downside to using the Ninja Foodi OL Series is you can only fit 1-2 rolls in the basket or on the crisping tray at one time. However, it's a great method if you don't mind having to make them in batches. The buns that have already been boiled in the baking soda bath are fine to wait their turn!
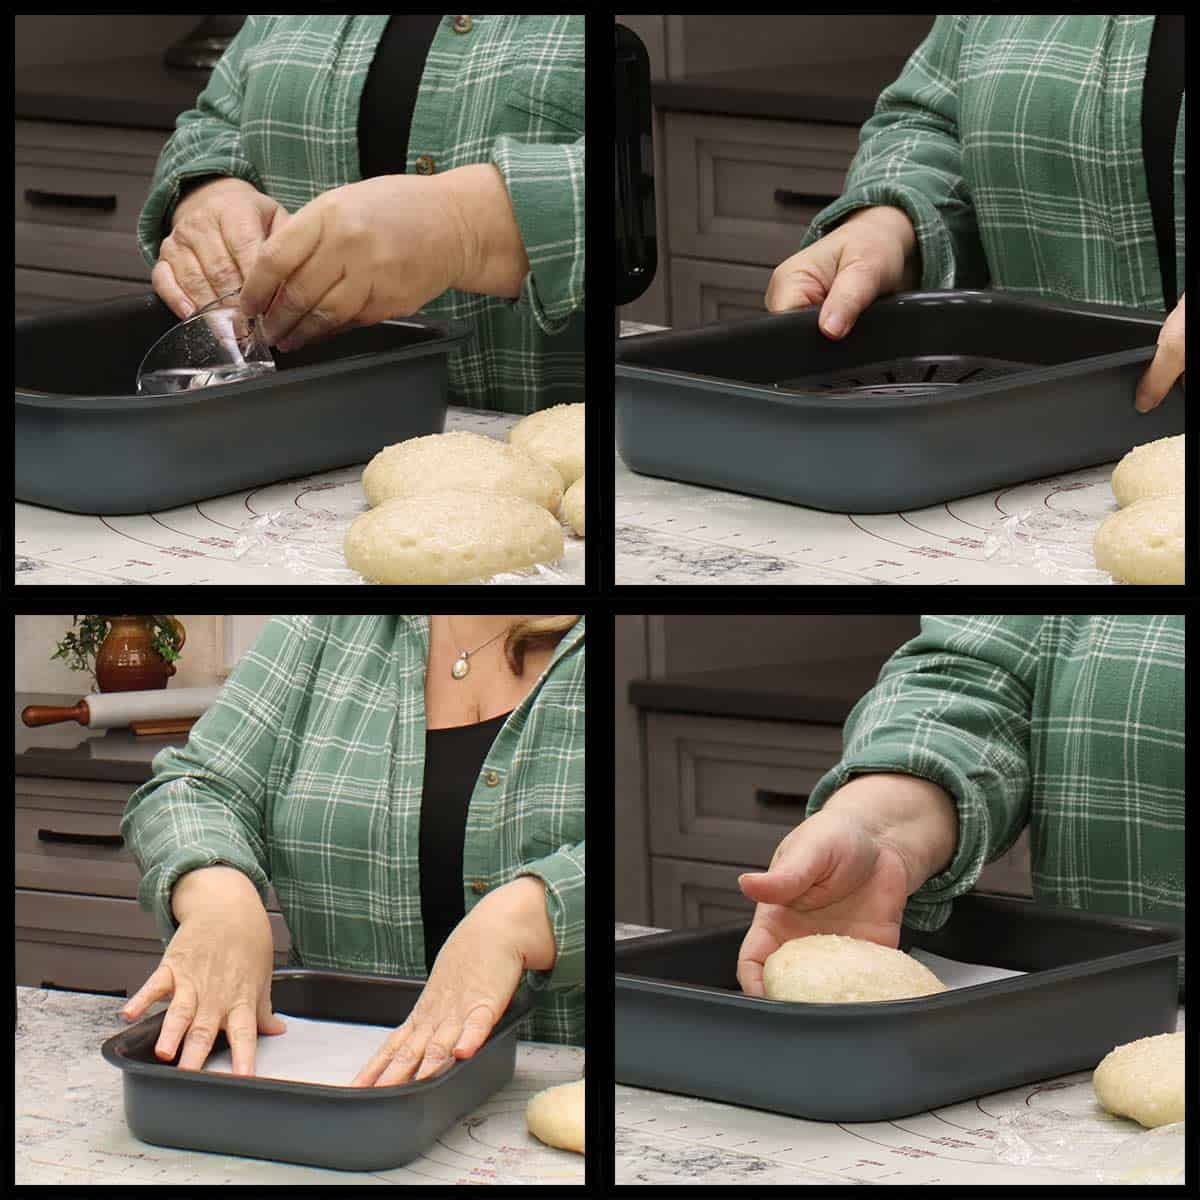
Place ¼ cup of water into the inner pot and line the basket or tray with parchment. Place the bun(s) on the parchment paper and make sure to trim up any extra parchment that may blow over onto the buns. In the Speedi you would have the tray in the low position.
Close the lid and slide the slider to the center position. Select steam/crisp and set the temperature to 350℉/175℃ and the time to 15 minutes. *Be sure you are on steam/crisp and not steam/bake. The preheat time is much longer on steam/bake and it will steam the buns for too long.
When there is about 3 minutes remaning on the timer countdown, open the lid and check on the buns. If they are nicely browned, they are done. If you want them a little darker, close the lid and let them bake the remaining time.
Remove the buns from the Foodi and brush with butter if you want the tops shiny and softer. Also wrap the buns in a clean towel if you want a softer bun.
Ninja Foodi using Bake or Air Crisp ONLY (2 lid models)
Steam and then Bake or Air Fry with the 2 Lid Models
While you can certainly steam the buns in the Foodi and then switch the lids to bake or air fry them, it isn't worth the hassle, in my opinion.
If you did want to do that, then put ½ cup of water in the inner pot and put the bun(s) in the parchment lined basket or crisping tray. Put the pressure lid on and make sure the valve is vented.
Select the steam function and set the time for 1 minute. Press start and let the Foodi preheat. Once the preheat is done and the countdown starts, turn the Foodi off. You aren't even going to let the 1 minute go by.
If you can open the lid right away and close the crisping lid. Set the temp to 350℉/175℃ and bake (or you can use air crisp/air fry) for about 10 minutes. Open the lid and see how they are browning. You can adjust your temperature up or down as needed. They should be done after 10-12 minutes of bake/air fry time.
Using Air Fry or Bake on the Ninja Foodi 2 lid models
This is my preferred way because it is so much easier and I don't think the benefits of steam make up for the effort in the previous instructions.
Set your bun(s) on the parchment lined crisping tray or basket. Close the lid and set the bake or air crisp (it really doesn't matter, but I would use air crisp if you want a crustier roll and bake for a softer one) to 325℉/160℃ and bake/air crisp for about 15 minutes.
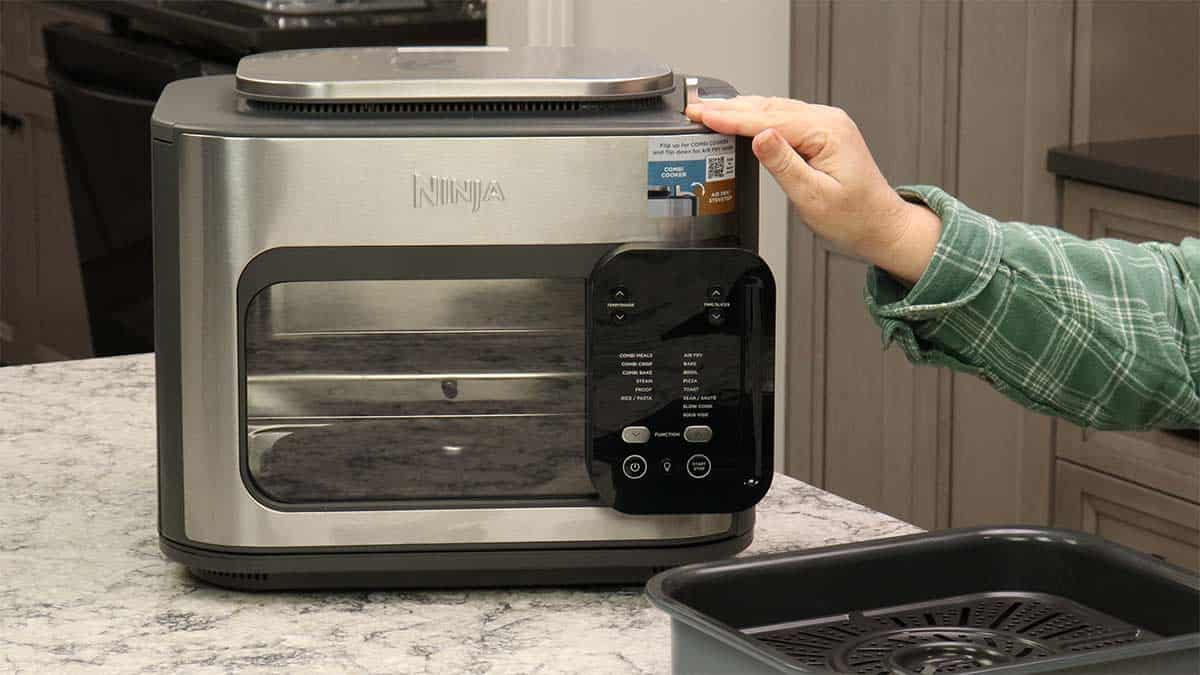
Ninja Combi Instructions
This was definitely my favorite cooking method because I was able to bake all 4 buns at one time with the benefit of steam!
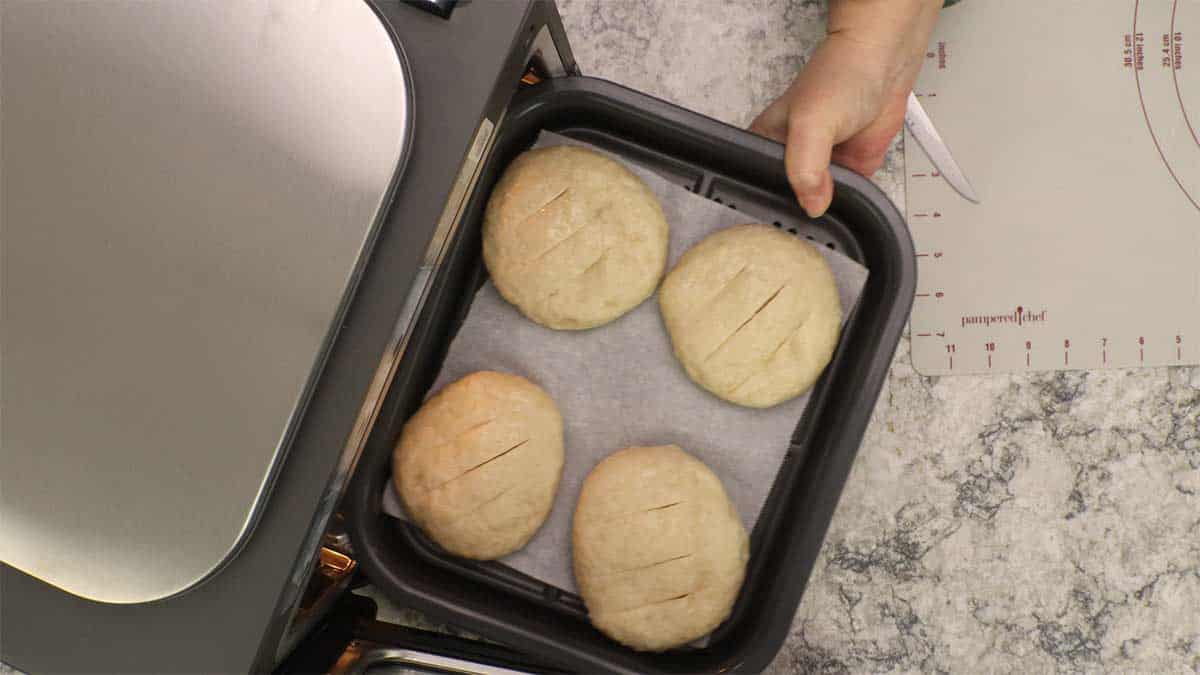
Line the crisping tray with parchment. Place ¼ cup of water in the combi pan. Put the tray into the pan and place the buns on the tray in each corner.
Put the combi pan into the Ninja Combi and make sure the lever is flipped up on the top of the appliance. Select Combi Crisp. This is very important because Combi Bake will have too long of a steam time.
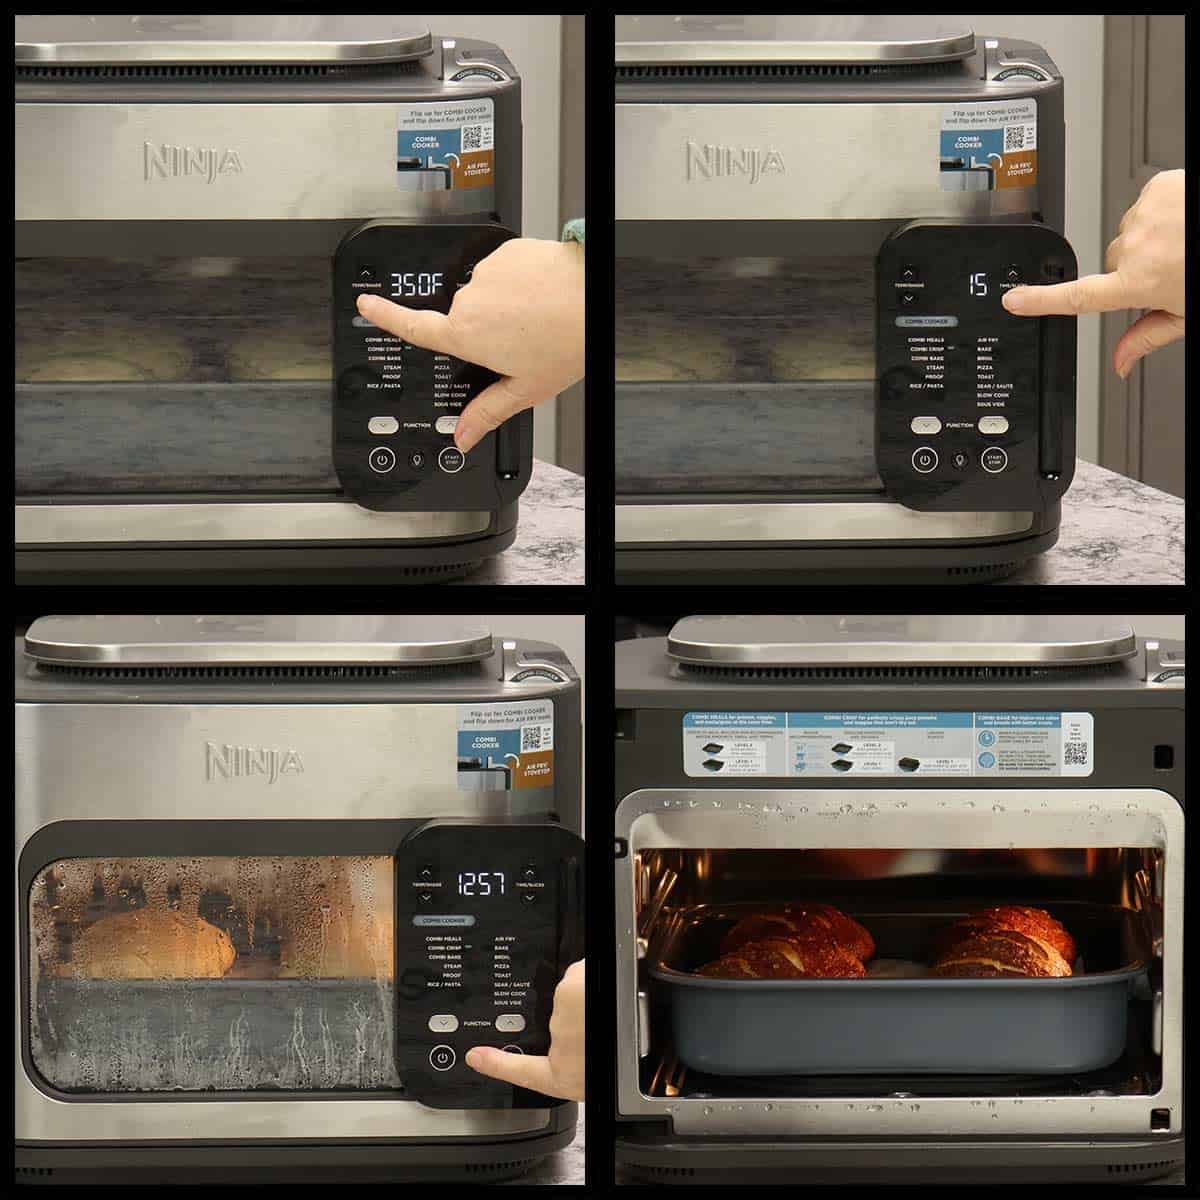
Set the temperature to 350℉/175℃ and the time to 15 minutes. Press start. When the countdown has about 3 minutes left, open the door and take a look at the buns. They are usually done in about 12-13 minutes. If they are nicely browned on top, they are done.
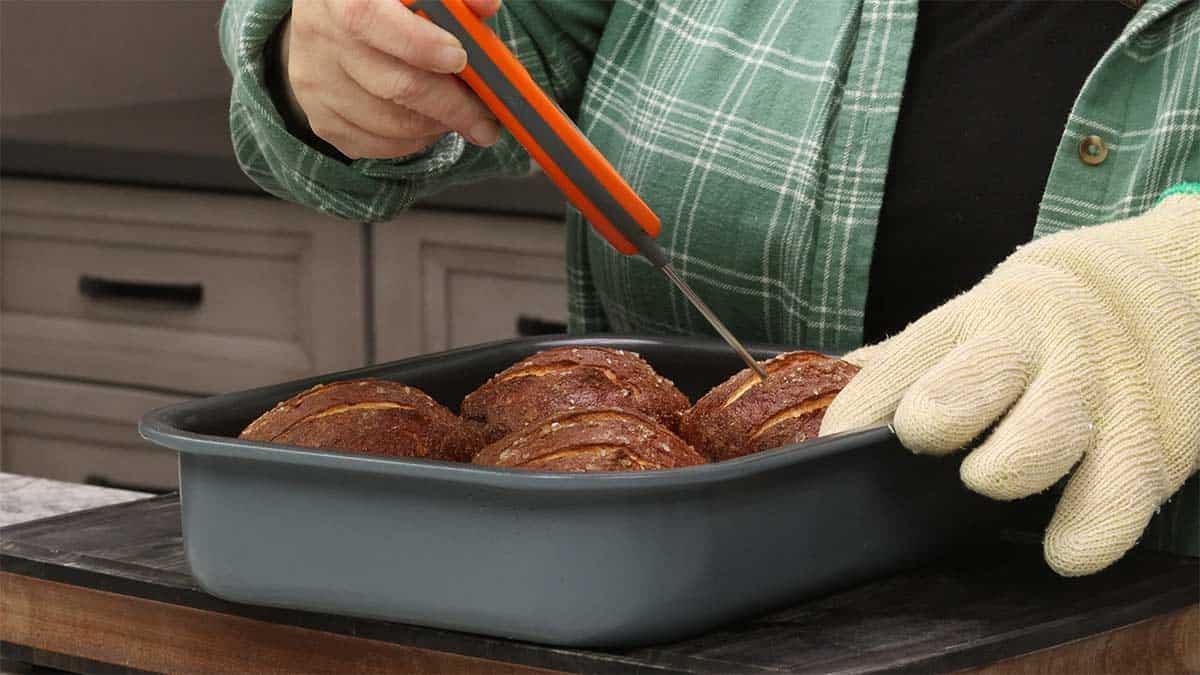
You can take an internal temperature, if you like, and it should be around 205℉/96℃.
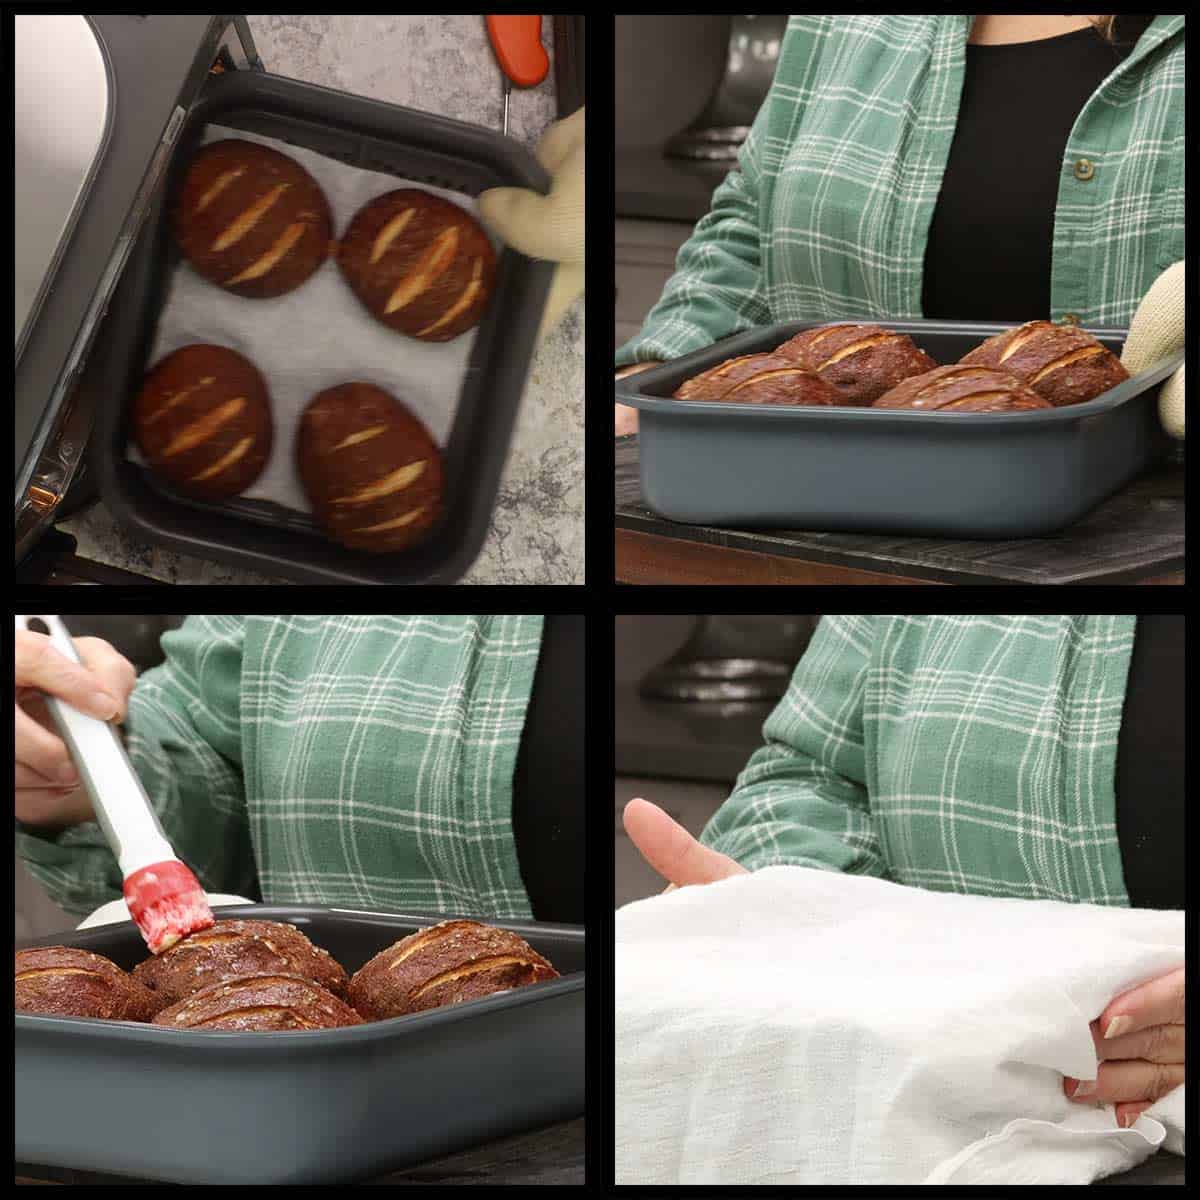
Remove the Combi pan from the oven and brush the bun tops with melted butter if desired. This will give them a shine and also soften the top. You can let them cool right on the tray without covering for a crunchier roll and if you want softer buns for burgers, cover the buns with a towel and let them cool.
Let them cool about 30 minutes. Serve and Enjoy!
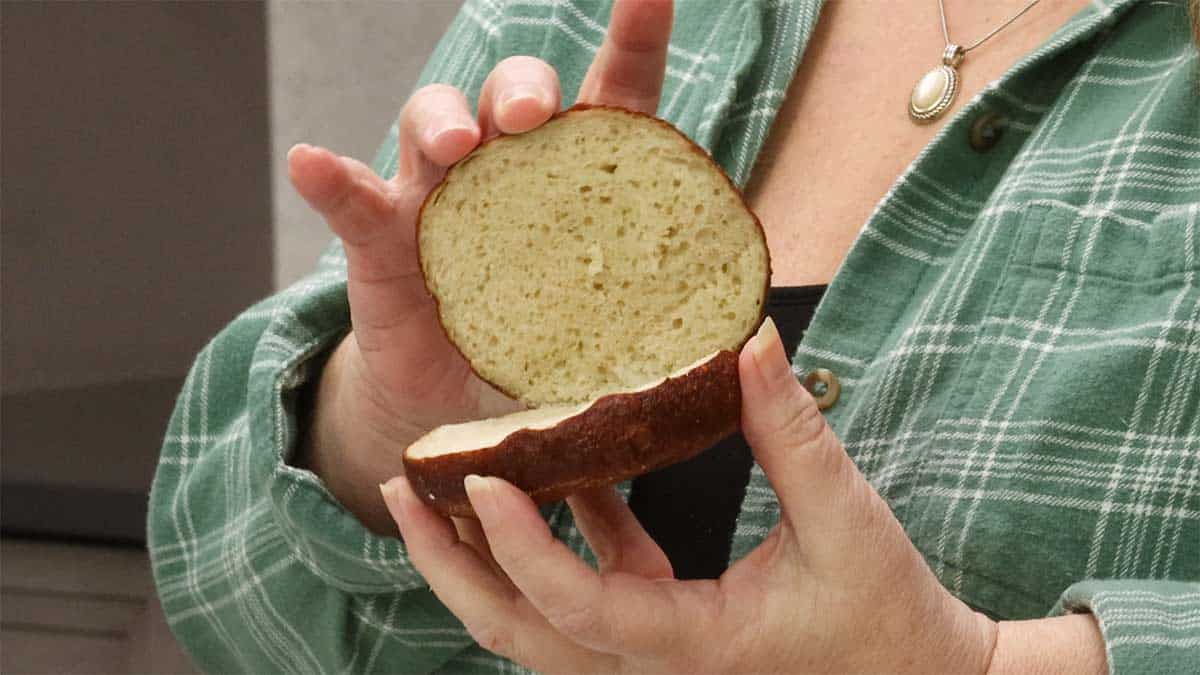
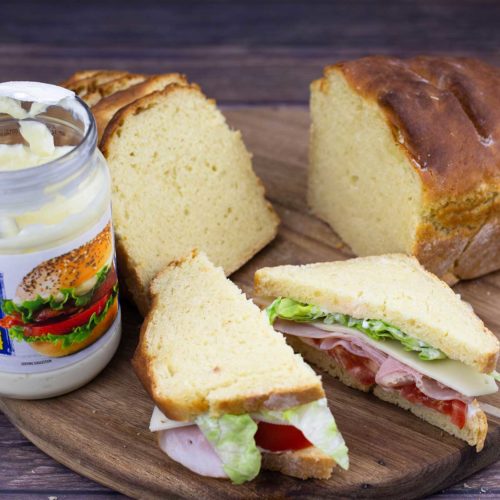
You can split them for burgers or other sandwiches.
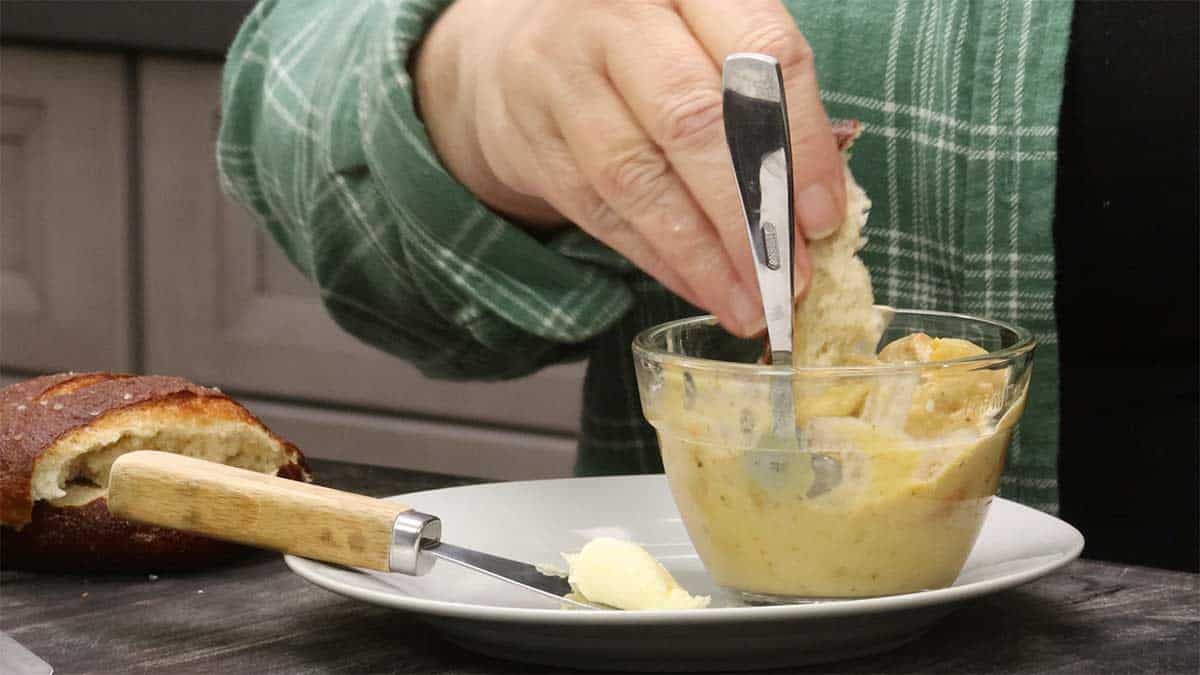
Or, serve them as rolls with a meal! I especially like them with Pickle Soup!
How to Store Pretzel Rolls
Pretzel rolls can be stored at room temperature for 1-2 days or in the refrigerator for 3-5 days.
Allow them to cool completely and place them in an air tight container or plastic bag to store either on the counter or in the fridge.
You can also freeze them for longer storage. I recommend wrapping each bun in plastic wrap once it is completely cooled and then wrapping in aluminum foil and placing them in a freezer bag. For optimal texture when thawed, use them within 3 months of freezing.
How to Reheat Pretzel Rolls
Crispy Roll
If you want a crispy outside to the roll and a slightly warm center, I would bake on 400℉/200℃ for about 5-7 minutes to reheat.
Soft Burger Roll
For a warm, but soft bun you can wrap the bun in foil and warm in a 350℉/175℃ oven for about 7 minutes.
You can also use steam/crisp or steam/bake on 400℉/200℃ with ¼ cup of water for about 3-5 minutes.
Frequently Asked Questions
Yes, the dough is exactly the same. You will just need to shape the dough into a pretzel shape before placing in the baking soda bath.
The bake time would also need to be adjusted.
Recipe ➡︎ Air Fryer Pretzel Bites
Absolutely! You can cut all the ingredients for the dough in half to make enough for 2 buns or double, even triple the dough ingredients for 8-12 buns.
All the other ingrediens and instructions stay the same.
If you want pretzel buns you do. This is what sets pretzel bread apart from regular bread. It creates the intense browning, gives the chewy texture and that pretzel flavor.
If you skip this step, you are simply making really good buns/rolls, but not pretzel rolls.
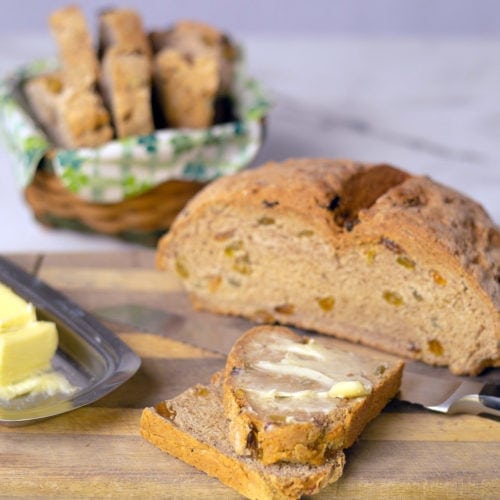
More Bread Recipes!
I love making all kinds of bread and have recipes for a very simple sandwhich style bread to more complicated bread recipes. I even have a no yeast bread recipe!
I'm sure you can find your next bread making recipe right. here!

Pretzel Bun Recipe
Ingredients
Pretzel Dough
- 2¼ teaspoons instant yeast 1 packet of rapid rise or instant yeast
- 1 Tablespoon white sugar or honey
- ¾ cup warm water about 105-115℉/40-46℃
- 2 cups all purpose flour
- ½ teaspoon fine grind sea salt or kosher salt
- oil for lightly coating dough before proofing
Baking Soda Bath
- 10-14 cups water
- ½ cup baking soda
Extras
- 1-2 Tablespoons melted butter
- pretzel salt
Would you like to save this recipe?
Instructions
Making the Dough
- In a large mixing bowl or the bowl of a stand mixer, combine the yeast, sugar and warm water. Whisk with a fork to combine.2¼ teaspoons instant yeast, 1 Tablespoon white sugar, ¾ cup warm water
- Add the flour and salt to the bowl. Hand Mixing: Use a spatula to stir the flour and salt into the wet ingredients until the flour absorbs all of the liquid. You should have a sticky and shaggy dough. Stand MIxer: Use the dough hook on low speed to combine all the ingredients until a sticky dough forms. This takes about 2 minutes or so.2 cups all purpose flour, ½ teaspoon fine grind sea salt or kosher salt
Kneading the Dough
- Hand kneading: Lightly flour a clean work surface and transfer the dough to the work surface. Dust with flour on top and begin kneading the dough by pressing the dough away from you, folding it back onto itself, turning it 90° and pressing it again. You can add flour so the dough doesn't stick to your hands or coat them in a bit of oil. You don't want to use too much flour or the dough will become too dry. Continue to knead the dough for 5-10 minutes or until it becomes smooth and slightly tacky but no longer sticks to your hands.
- Stand Mixer: Using the dough hook, turn the mixer up to medium speed and knead the dough for 3-5 minutes or until a smooth dough ball forms. It should be tacky, but not too sticky.
Proofing the Dough
- Lightly coat the dough with olive oil or another neutral oil and place in a bowl covered in plastic wrap. Let sit at room temp until it doubles in size. Usually 30-60 minutes.oil for lightly coating dough before proofing
- Using Proof Setting: If you have an appliance with a proof setting, you can speed up the process by using it. Lightly coat the dough in oil and place it into the pot of your appliance. Select the "proof" or "prove" function and set the temp to 95℉/35℃ and the time to 30 minutes. When the time is up the dough should be double the size. If it isn't, proof longer until it doubles in size.
Forming the Buns
- Once the Dough has doubled in size, transfer it to a clean work surface. Don't flour the work surface. Cut the dough into 4 equal pieces and form each piece into a bun.
- Place the dough piece on the un-floured work surface and shape the dough into a smooth ball by using the bottom edge of your hands to cup the dough at the base and tuck the dough underneath of itself as you rotate it in a circle. This creates tension on top of the bun. There is a short video in the written post so you can see exactly how this is done.
- Once you see a few bubbles on the top of the dough ball, you have tension and you can press the dough down into a 4" disc shape. Place the shaped bun onto a lightly floured surface and flour the top lightly. Cover with plastic wrap or a towel. Repeat for the remaining pieces of dough. Let the buns rest while you boil the water for the baking soda bath.
Baking Soda Bath
- Bring 10-14 cups of water to a boil. The amount of water you need depends on the size of your pot. It should be ½-⅔ full.10-14 cups water
- Once boiling, add the baking soda and stir. Let it come back up to a gentle boil.½ cup baking soda
- Add the formed buns into the baking soda bath and cook on each side for 1 minute. Use a slotted spoon to flip them over and when you remove them, make sure the smooth side is facing up.
- Place the buns on a clean plate or work surface. I usually set them back on the plastic wrap I used to cover them with.
Baking the Pretzel Buns
- Preheat the oven to 400℉/200℃. Line your tray with parchment paper.
- Brush the tops of each bun with butter and sprinkle some pretzel salt or coarse salt over the top. Using a sharp knife make 2-3 slices about ¼" deep into the top of the bun to score it.1-2 Tablespoons melted butter, pretzel salt
- Place the tray of buns into the oven and bake at 400℉/200℃ for 15-18 minutes. The buns should be nice and dark and the internal temp should be around 205℉/96℃.
- Remove from the oven. Brush with more butter if you want a shine. If you want a softer roll, cover them with a towel while they cool to trap in some steam.
- Allow to cool about 30 minutes. Serve & Enjoy!
Notes
Nutrition
About the Recipe Author, Louise Long
Louise is a full-time recipe creator and food blogger @ The Salted Pepper. She has over 30 years of experience with cooking and recipe development. She owned a restaurant for several years and was a full-time RN until retiring to blog full-time.

She published her first cookbook in the Fall of 2018 and is very interested in writing several more.
Louise is also the creator of an online Ninja Foodi Pressure Cooking Course with over 100 instructional step-by-step videos. People absolutely rave about the course and all the value they have received from it.
Louise has several very active Facebook groups that help people with the basics of cooking and learning more about the appliances they love.
Ninja Foodi Pressure Cooker & Air Crisper 101
Ninja Woodfire Outdoor Grill & Smoker
Louise is also a YouTube creator and you can find most of her recipes in video format on The Salted Pepper YouTube channel.
She is very responsive to messages and eager to help in any way she can. Get more Information about Louise & contact information
I WOULD LOVE TO SEE WHAT YOU ARE COOKING UP IN YOUR KITCHEN! TAG ME @THESALTEDPEPPER ON YOUR FAVORITE SOCIAL MEDIA PLATFORM WHEN YOU MAKE A DISH!
BE SURE TO FOLLOW THE SALTED PEPPER RIGHT HERE ⇓⇓⇓⇓⇓
Leave a Reply