

Whether you use your outdoor or indoor grill, you can get perfectly grilled pork tenderloin each and every time with these tips!
Would you like to save this recipe?
One of the things I like so much about the Ninja Foodi Indoor Grill is how fast it cooks! I mean fast! Pork Tenderloin only takes minutes to grill to a perfect medium rare and it stays juicy and tender.
No worries if you don't have the indoor grill, this will work on any outdoor grill or even in the oven! The secret is to manage the heat properly and cook the pork to temperature.
The most important thing when grilling pork tenderloin or other muscle cuts of pork (pork chops or pork loin, for example) is not to overcook it. Pork is a lean meat and, when grilled to well done, it tends to get dry and tough.
What I love about pork is that it is a blank slate that you can add your culinary touches to. I put a Cuban-inspired rub on the tenderloin because I was turning it into Cuban Sandwiches, but you can season it with whatever dry rub you like or give mine a try!
Frequently Asked Questions
The USDA used to recommend cooking pork tenderloin to an internal temperature of 160℉/71℃, but that has changed, thankfully.
The USDA now says that it is perfectly safe to eat pork that reaches 145℉/63℃ with a 3-minute rest time -- with the exception of ground pork, which should be cooked to an internal temperature of 160℉/71℃.
Even if your pork is slightly pink, it is completely safe as long as you reached those temperatures. The pink hue and juices in meat are not blood, they are myoglobin and the color should not be used to determine if meat is cooked properly.
This is a tough one for me to answer because I wish I could say "no" and leave it at that. However, that isn't the truth. You can grill a pork tenderloin from frozen, but I would never recommend it for a couple of reasons.
#1. You can't really season a frozen piece of meat, and seasoning is one of the most important things when it comes to grilling meat, in my opinion.
#2. Grilling from frozen really takes a lot of temperature management in order to slowly cook the meat at a low temp until it is cooked all the way through.
I recommend always thawing meat before grilling for the best outcome.
There are two main reasons to let your pork tenderloin rest before slicing.
Letting the tenderloin rest at least 5 minutes allows the carryover heat to finish cooking the tenderloin to the target temperature AND it allows the juices inside the meat to redistribute and be absorbed by the meat fibers, resulting in a juicier slice of meat.
The USDA recommends at least a 3-minute rest time, but I almost always let my pork tenderloin rest a full 10 minutes.
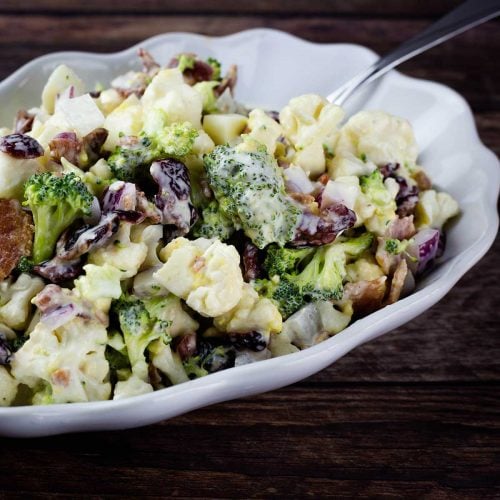
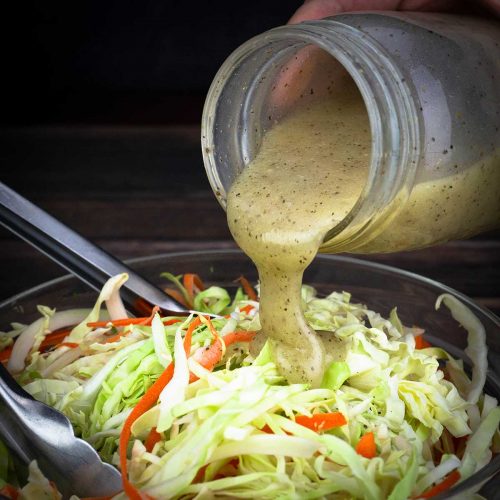
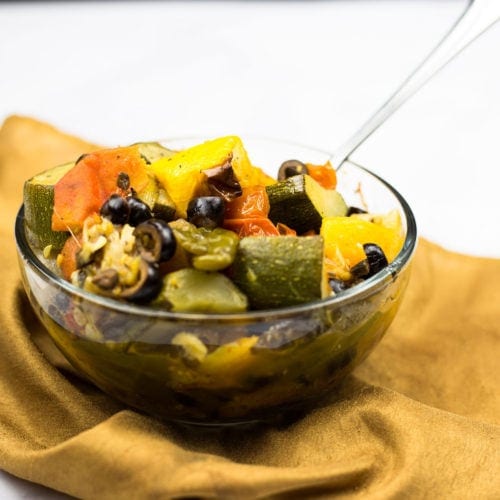
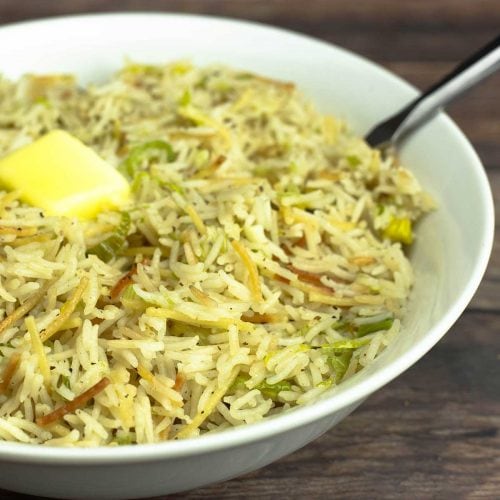
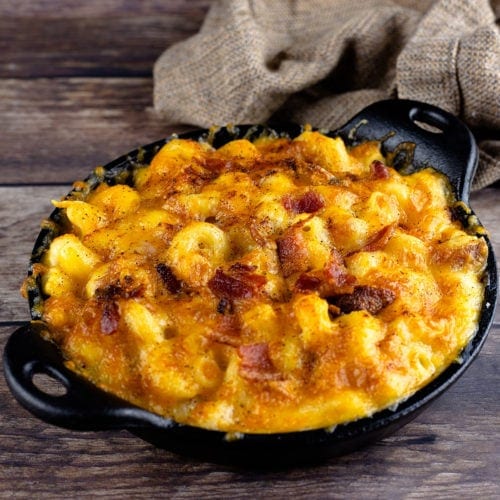
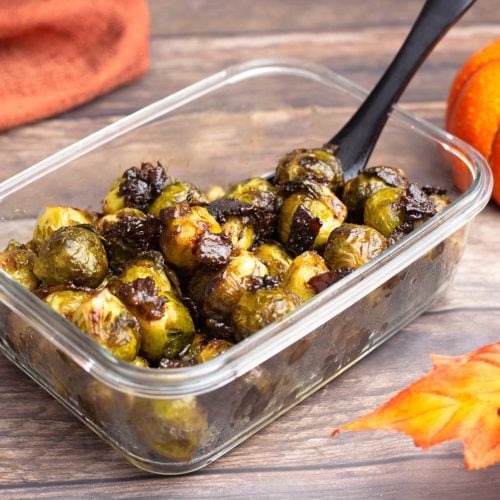
What to Serve with Grilled Pork Tenderloin
Need some ideas for sides to go with your pork tenderloin? Here are some of my favorites.


Cook Pork Tenderloin to Temperature Not Time.
Pork tenderloin is a fast-cooking cut of meat, in this recipe it was perfectly cooked in about 12 minutes with a 10-minute resting time, BUT this will vary based on several factors.
Instead of focusing on time, the focus should be on the temperature. I cannot stress enough the importance of a reliable and accurate thermometer. Every kitchen should have one.
I used to buy inexpensive instant-read thermometers and would have to replace them every 6-12 months. I was so excited when my husband gave me a (affiliate link)Thermapen MK4 for Christmas. It is a top-of-the-line thermometer that I use every day and it is going strong well after a year.
If you would rather have a dual-purpose thermometer, the (affiliate link)Pampered Chef Instant-Read with a probe also works great. The only thing I don't like about it is the on/off switch. It can be hard to push sometimes.
The cooking time of a pork tenderloin (or any meat, for that matter) also depends on the temperature of the meat PRIOR to cooking. Obviously, a frozen tenderloin is going to take longer than a thawed tenderloin, but it even goes further than that and I think many people forget this when following a recipe.
If the recipe states that the meat was removed from the refrigerator 30 minutes prior to cooking and you skip that step, your meat will take longer to cook and, if you don't manage the heat correctly, the outside can become very tough before the inside cooks to the correct temperature.
The size and style of oven or grill can also impact cooking time. One of the reasons the Ninja Foodi Indoor Grill cooks so fast is because it is compact (less heat loss) and also has a fan that runs and circulates the air. The larger the grill or oven, the more heat loss you have and that affects cooking times.
Because of all the variables that come into play when cooking meat, it should always be cooked to temperature and not cooked based on time. If you don't have a thermometer yet, get one. It will make cooking meat so much easier.
If you already have a thermometer or you are using the Ninja Foodi Indoor Grill with the integrated probe, you should test it for accuracy.
A thermometer that is off by more than 1-2° can really affect the outcome of some food, especially lean meats like pork tenderloin or chicken breasts.
Here is an article that I wrote on how to perform a quick test of your thermometer to see if it's accurate. My integrated probe on the Ninja Foodi Grill was off by almost 4-5° and I have to make adjustments in my target temp to account for that.
How to Test Your Kitchen Thermometer for Accuracy
If you test the Ninja Foodi Indoor Grill integrated probe, I'd love to know your results! Let me know in the comments or email me at Louise@thesaltedpepper.com
What is Carryover Cooking and Why is it Important?
Carryover cooking refers to the continued cooking that happens after the heat source is removed. This applies to all cooked food, but is mostly talked about with meat.
The amount of carryover cooking that happens varies based on size, shape, and the temperature it was cooked at, so it is helpful to understand the differences when determining when to remove the food from the cooking source and let carryover cooking finish cooking it to your target temperature.
Round or sphere shapes of meat (like pork tenderloin or pork loin) will have the most carryover cooking because they have the least surface area compared to their mass. Less surface area results in less heat loss at the surface, so the heat is transferred to the center of the meat instead. This is why a flat pork chop will have less carryover cooking then a pork loin.
The cooking temperature also has a lot to do with carryover cooking. Meat cooked at a high temperature, then removed from the heat source will rise in temperature during the resting time much more than meat that was cooked at a lower temperature.
For example: A pork tenderloin cooked in a 400℉/200℃ oven or grill will increase in temperature after it is removed from the heat source 10-15°, in my experience. Where, a pork tenderloin cooked in a 250℉/121℃ oven or grill/smoker may only increase in temperature by 5-7°.
Here is an article that goes deeper into the science of this, if you want more information: The Science of Carryover Cooking
How to Prepare a Pork Tenderloin for Grilling
Before I get into how to trim up the pork tenderloin, I do want to make sure you have a pork tenderloin and not a pork loin, because they are very different.
A pork tenderloin is a long, thin cylindrical cut of pork that averages about 1-1½ pounds in weight. A pork loin can either be a long, cylindrical cut of pork or it might be cut into a smaller roast, but no matter how it is cut, the diameter is about 3x the size of a tenderloin. A whole pork loin can weigh anywhere from a few pounds up to about 7 or 8 pounds, but usually in the grocery stores they are cut into smaller roasts.
Here is a picture of a 3 lb pork loin I made in the Ninja Foodi Pressure Cooker & Air Crisper. If you are interested in the recipe, it's in my digital Flavors of Fall Cookbook and here is the link: Flavors of Fall Cookbook by The Salted Pepper
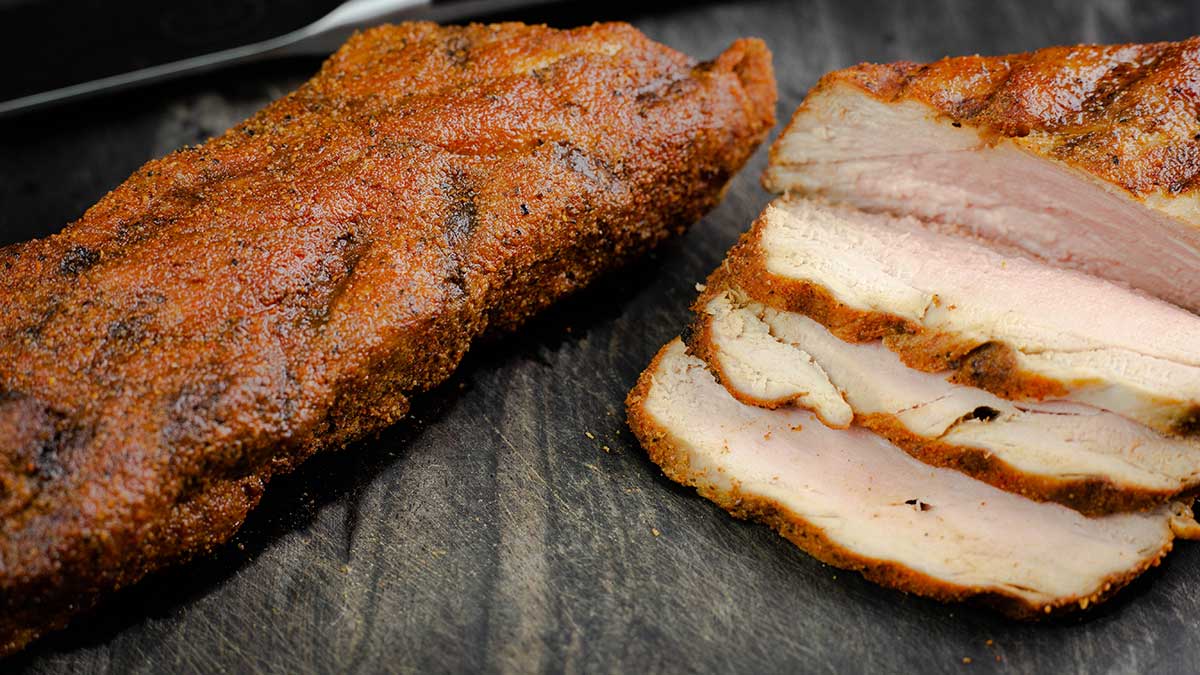
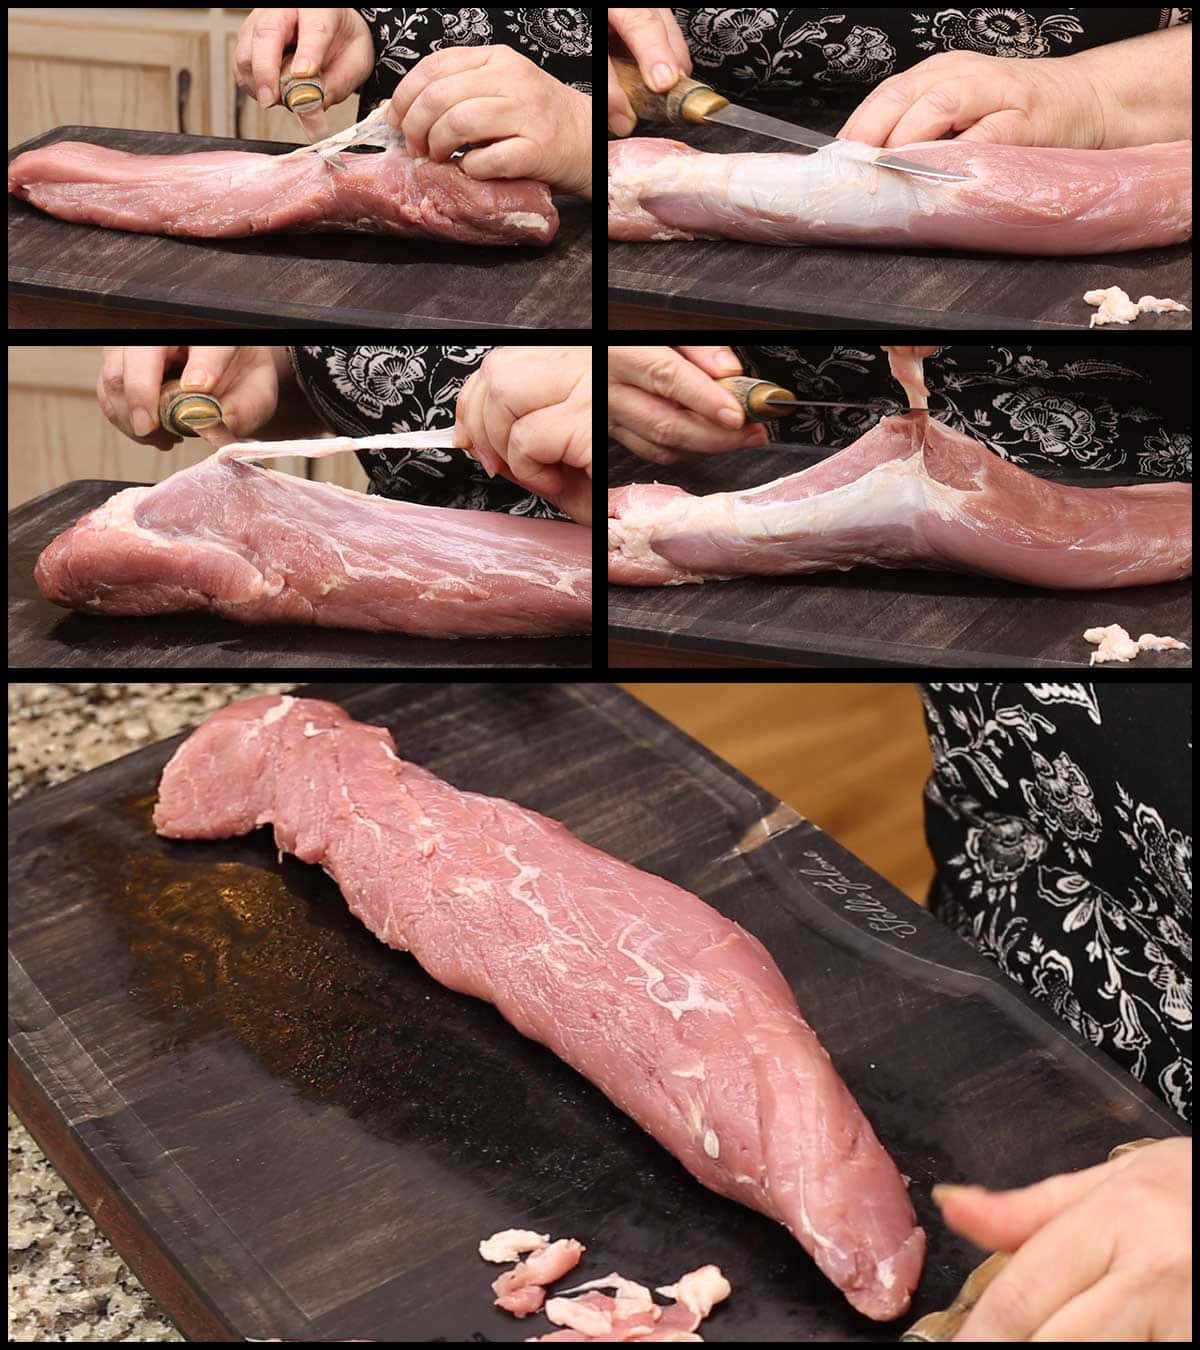
Alright, moving on. There is very little fat, if any on a pork tenderloin, but there is a very tough piece of connective tissue called the silver skin. It's shiny and white and usually only on one side of the tenderloin.
This has to be removed before grilling because it won't break down and, if left on, your tenderloin will curl and that area will have this really chewy piece attached. Not a pleasant experience.
Removing it is very easy, but a thin, sharp knife really helps. Some use a paring knife, but I prefer a filet knife with a nice pointy tip. The one I've had for over 10 years is a (affiliate link)Rapala 6" Filet Knife. Price shop because you usually find them for around $15 or so.
To remove the silverskin, insert the knife under one end of it and gently slide the knife just under the silverskin towards the other end. Pull up on the silverskin as you go and try not to cut into the meat if you can help it. I almost always get a little meat on there and I've cut off 100's at the very least, so please don't worry if you do!
Once the pork tenderloin is trimmed up, it's time to season it up. This can be as simple as salt and pepper or using any rub you like. In this recipe I chose a Cuban-inspired rub because I turned my tenderloin into Cuban wraps. They were delicious! I'll be posting that recipe soon!
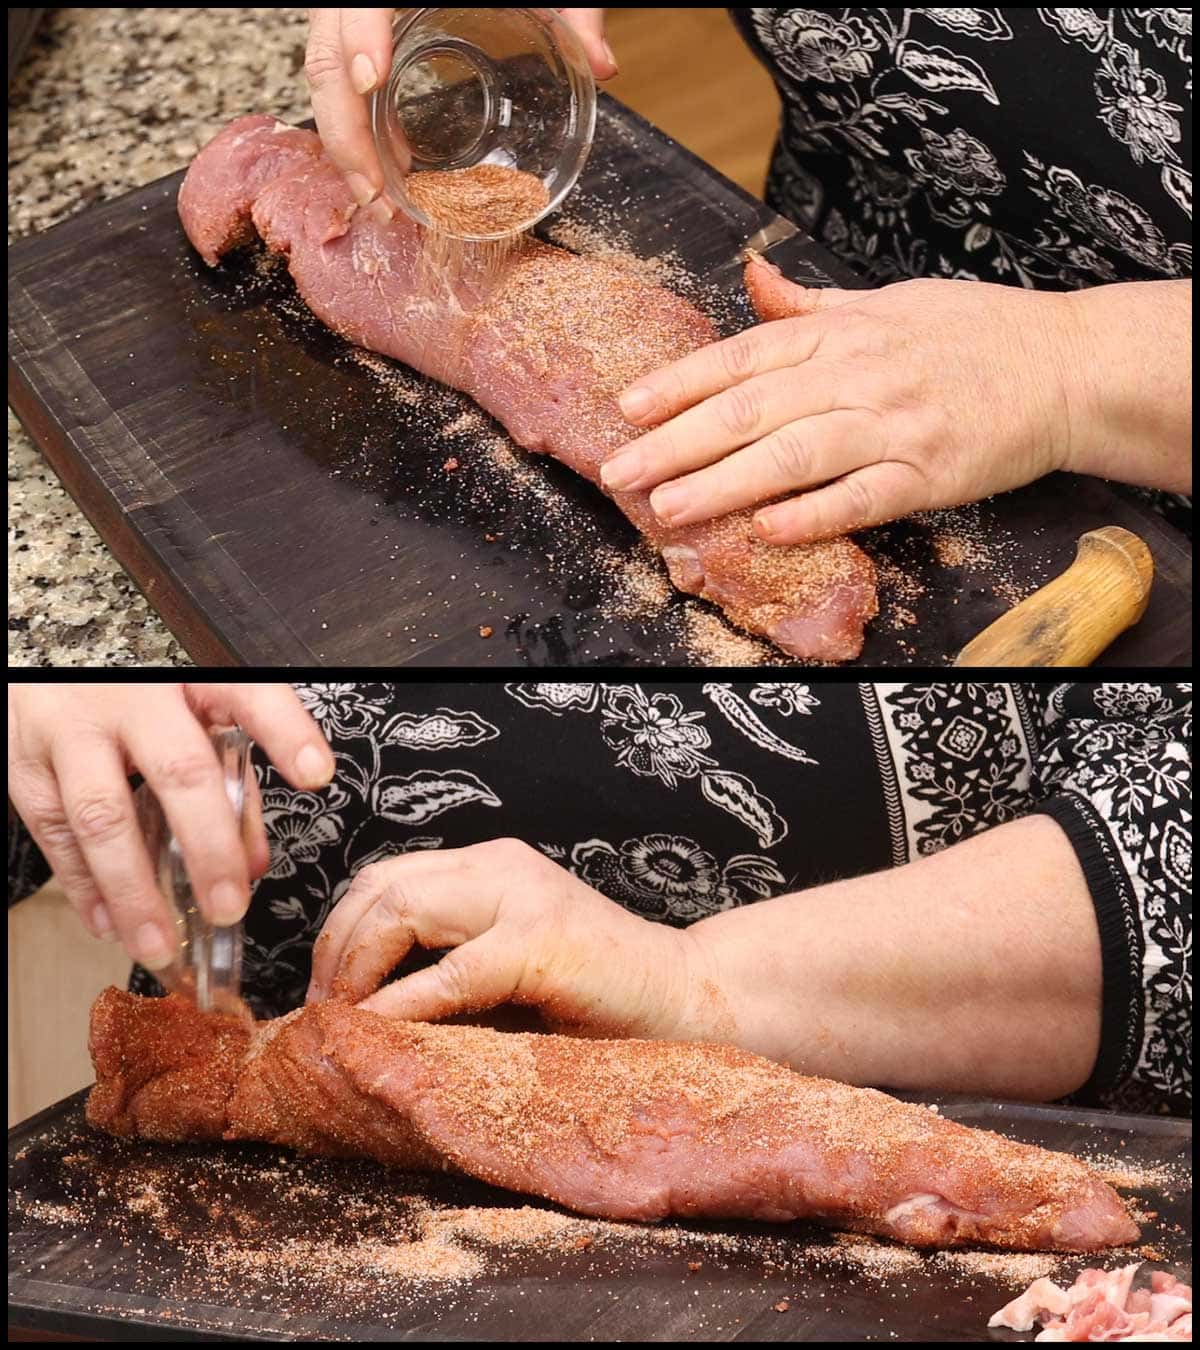
If you have the time, rub the pork tenderloin all over with the seasoning of your choice, wrap it in cling wrap and put it in the refrigerator overnight. This really helps to develop a nice crust because the rub combines with the juices from the meat.
However, if you are anything like me, you probably won't think about doing it the day before and that is perfectly fine, too!
If your pork tenderloin is just coming out of the refrigerator, let it sit out for about 30 minutes before grilling for the best sear and even cooking.
Now, let's grill it up!
Grilled Pork Tenderloin on an Outside Grill
The only major differences between grilling a pork tenderloin on an outdoor grill versus an indoor grill are where the heat source is located and circulation of the hot air.
In most outdoor grills, the heat source is coming from the bottom and in the Ninja Foodi Indoor Grill it is coming from the top. This used to bother me because I liked the way I could regulate temperature on an outdoor grill by lifting the cover to let heat escape, but now that I am managing my temperatures better in the indoor grill it's not so much of an issue.
With the indoor grill there is a fan that circulates the heat, where most outdoor grills don't have this. When the lid is down on your outside grill, the heat rises until it hits the lid and then is trapped, which provides heat from both the top and the bottom. However, there is more heat loss without a fan to actually push the air back down.
These are not negatives, but things to consider when grilling outdoors. Charcoal and propane grills are very different in the way the temperature can be regulated. It's easy to turn the propane down or even off to manage heat, but when cooking on a charcoal grill the temperature of the coals determines the heat.
When cooking lean meat on an outside grill, you will want to manage the heat for the best results. I always like to start at a nice high heat to sear the meat, but then lower the heat to finish cooking it without charring the outside.
On a charcoal grill, you can do this by having a hot side that is directly above the coals and a cooler side that is away from the coals. On a propane grill that has at least two adjustable knobs, I use one on the hottest setting and the other one dialed down to medium, or in smaller grills even low or off completely.
You can also manage heat by opening the lid to the grill to let the heat escape, but if you have a super hot grill grate, you can still get some charring and develop a tough outer layer to the pork tenderloin.
My suggestions for grilling the perfect pork tenderloin on an outdoor grill are to use a reliable probe style thermometer and preheat the grill on one side to the hottest setting to get the grate super hot.
Make sure to take your pork tenderloin out of the fridge at least 30 minutes before cooking. Season however you want, but if using a wet marinade, blot it dry before placing it on the grill to avoid burning it which can leave an unpleasant flavor.
Place the probe into the pork tenderloin at its thickest part through the side, not the top. Place the tenderloin on the hot grate and let it sear with the lid open. When the pork releases easily from the hot grate, turn it and sear the other side.
Keep an eye on the internal temperature because sometimes searing both sides is enough time for it to cook to an internal temperature of 135℉/57℃, which is the temperature that I like to remove my pork and allow the carryover cooking to do the rest. For more information about carryover cooking, see the frequently asked questions in the above section.
If you are below 135℉/57℃, move the pork tenderloin to the cooler side of the grill and close the lid. This will provide a gentle heat to cook the pork tenderloin to perfection without getting that hard crusty outer layer that tastes burnt and is way too chewy on a lean cut of meat.
If I'm using a gas grill, I usually dial back the hot side a bit so the grill isn't quite as hot with the lid closed. Every grill cooks a little differently, so it might take some adjustments to grill the perfect pork tenderloin for you, but you are well on your way with these little tips.
When the pork tenderloin reaches 135℉-140℉/57℃-60℃ remove it from the grill and let it rest for 5-10 minutes. Leave the probe in the meat while it rests so you can make sure it reaches at least 145℉/63℃ for 3 minutes AND so the juices don't leak out of the hole where the probe is.
In my experience, the tenderloin can increase up to 15° during the carryover cooking which I go over in the section above.
Grilled Pork Tenderloin in the Ninja Foodi Indoor Grill
The Ninja Foodi Indoor Grill has taken the market by storm. People are loving them! However, one thing I hear over and over in my Indoor Grill Facebook group is that people are having trouble with lean meats and they aren't sure what temperature to grill at for different meats.
I plan on doing an in depth article on this soon, but for now I'll discuss pork tenderloin and how to best manage the settings in the indoor grill.
Preheat on the Max grill setting with the grill grate in the grill. You can use either the standard grill grate or the (affiliate link)Sear 'N Sizzle grill grate.
While the grill is preheating, I usually trim and season the pork tenderloin if it isn't already done. Also make sure to take your tenderloin out of the refrigerator at least 30 minutes before you want to grill it in the Ninja Foodi Indoor Grill. This helps with searing and also with even cooking. Don't worry, it's not enough time that it's considered unsafe by food safety standards.
If you are using the integrated probe, then insert it into the side of the pork tenderloin right in the middle of the fattest part of the pork tenderloin. Do this before you put the pork on the grill. I forgot in the video and it was a pain to get in once the tenderloin was on the grill. I also recommend testing the probe for accuracy before using it for lean meats. The instructions for doing that are here: How to Test your Kitchen Thermometer for Accuracy
When the grill has preheated and it's telling you to add food, place the pork tenderloin on the grill and press down so the meat makes contact with the grill. This will give the best sear. Either place the tenderloin diagonally, like I did, or place it on one side of the grill or the other. This way, when you flip it, you have a hot grill grate to sear the other side of the meat. I did it diagonally, but in hindsight I should have just used one part of the grill grate and then flipped to the other side. Oh well, it worked fine.
Close the lid and turn the grill temperature down to medium.
If you are using the integrated probe, you can either use the preset temperatures for pork or use the manual. Either way, just make sure your set target temp on the grill is at least 10° less than the final temperature you want your pork to reach because the internal temperature will increase during the rest period.
If your probe is accurate, I recommend setting a target temperature of 135℉/55℃ for the most tender and juiciest pork tenderloin. My probe reads 5° hot, so I set my target temp for 140℉ which means the actual temperature of the meat reached 135℉ and after 5 minutes of rest time, it was up to 145℉ and reached 151℉ just before slicing. It was perfect for me.

I tested this recipe about 5 or 6 times and my carryover cooking increased the internal temperature by 15 degrees in 10 minutes. I can also tell you that if you don't have a thermometer, it took exactly 12 minutes (6 minutes, flip, and another 6 minutes) to reach medium rare each and every time I grilled a pork tenderloin.
Once the pork is grilled to a certain temperature, the Ninja Foodi Grill will tell you to flip it. Try to flip it onto a section of the grill that has been exposed to the direct heat and not where the pork tenderloin has been. This is only possible if you are cooking one pork tenderloin, so don't worry about it if you are grilling more than one.
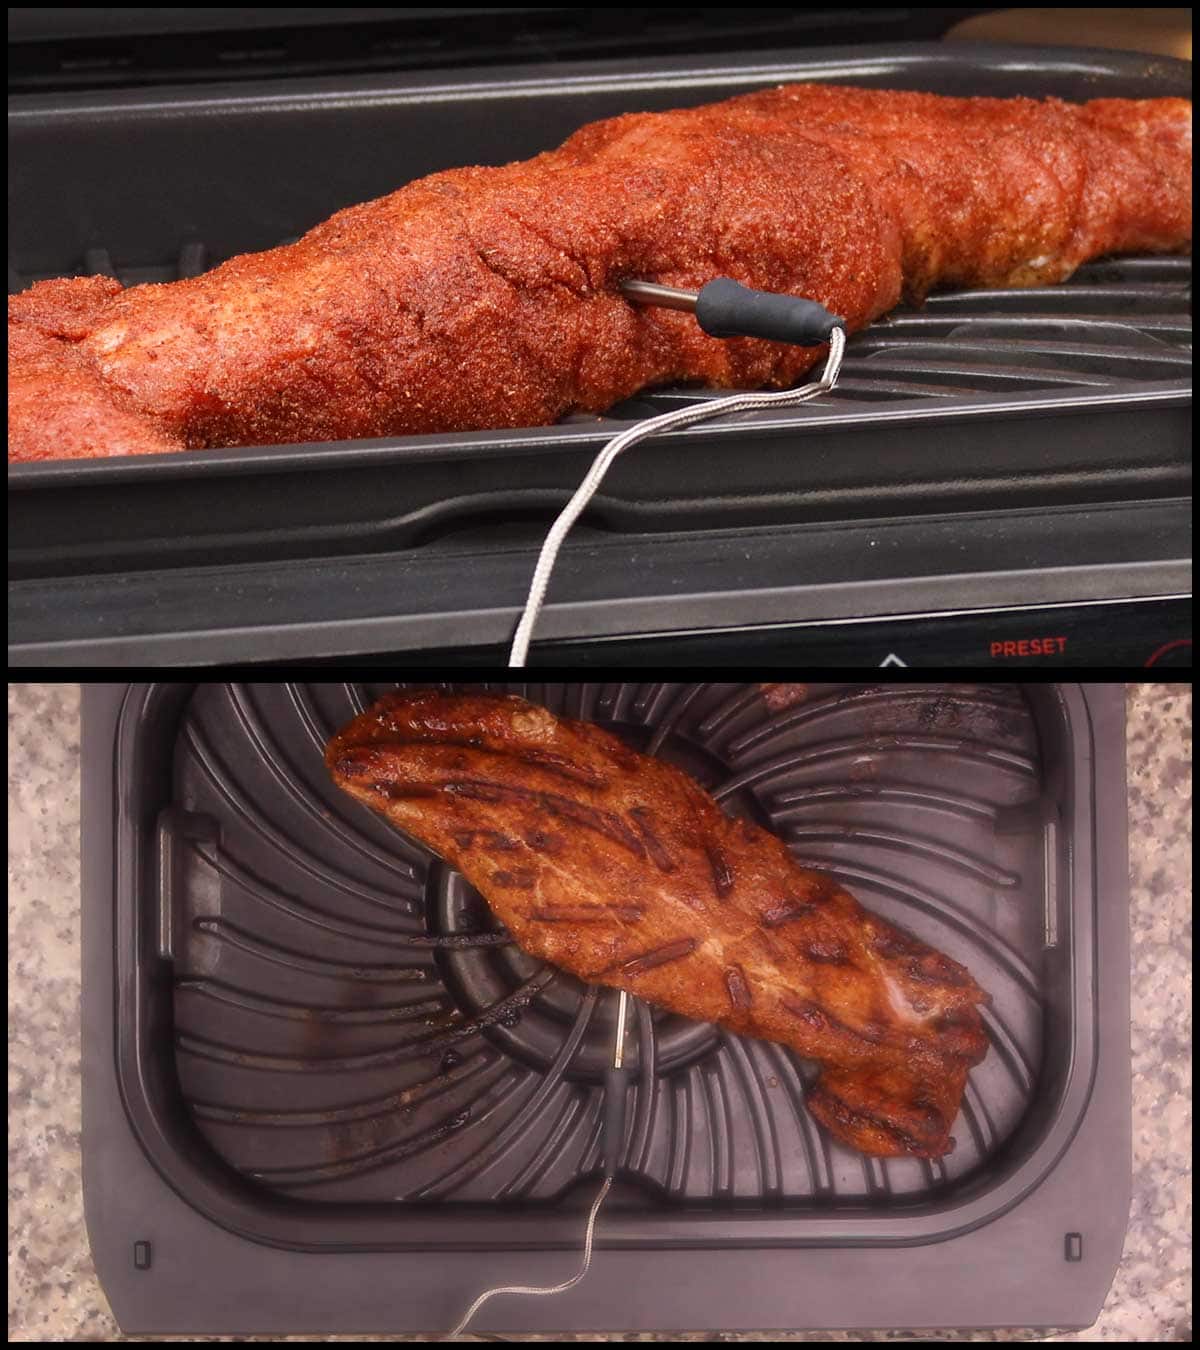
When the target temperature is reached (if you are using the integrated probe), the grill will turn off immediately and start the rest period countup. Remove the pork from the grill and place on a cutting board, but leave the probe in the meat.
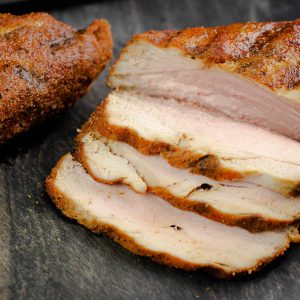
On the Ninja Foodi XL grill, you can press the manual button and the readout will change from timing the rest period to the temperature of the pork. Watch that and make sure your temperature gets to 145F/63℃. This has always happened for me within 5 minutes and then I let it rest another 5 minutes. You can shorten your rest period, but once it hits 145℉ make sure to let it rest for 3 minutes longer according the FDA guidelines for food safety.
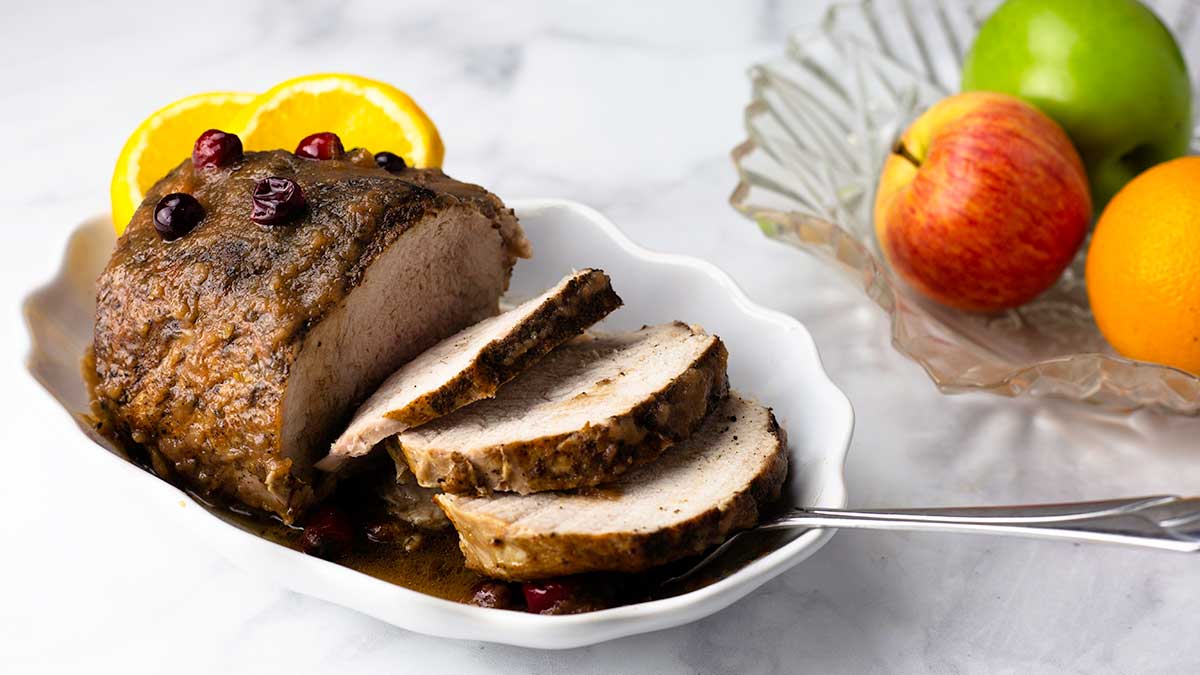
Once rested, slice the pork tenderloin and serve!
Grilled Pork Tenderloin with a Cuban inspired Rub
Equipment
- (affiliate link)Ninja Foodi Indoor Grill
Ingredients
- 1.5 lbs pork tenderloin average size for 1 pork tenderloin
Cajun Inspired Rub
- ½ Tablespoon sugar
- ½ Tablespoon smoked paprika
- 1 teaspoon sea salt
- ½ teaspoon black pepper
- ½ teaspoon cumin
- ½ teaspoon garlic powder
- ⅛ teaspoon cayenne pepper optional
Would you like to save this recipe?
Instructions
- Trim the silver skin off of the pork tenderloin. Rub the tenderloin with seasoning blend. Wrap in cling wrap and let sit in the refrigerator overnight if preparing the day before.
- Let the pork tenderloin sit at room temperature for at least 30 minutes prior to grill, but not longer than 1½ hours.
Grill Directions when using the Integrated Probe
- Preheat the Ninja Foodi Grill on Max Grill. Plug the probe into the side of the grill and Insert the probe thermometer into the side of the meat in the middle where the thickest part of the tenderloin is (if using the integrated probe). When it is finished preheat and prompts you to add the food, place the pork tenderloin either diagonal or on one side of the grill and press the meat down so it makes contact with the grate for the best sear.
- Close the lid and decrease the temperature of the grill to medium grill. Set the pork preset or the manual probe function to your target temperature. This can vary depending on how you want your meat cooked and how accurate your probe is. You can do a quick test for accuracy BEFORE you start cooking by following these instructions: How to test your kitchen thermometer for accuracy. Remember, carryover cooking will raise the final temperature by 10-15 degrees, so set your target temp at least 10 degrees less than you want the final temperature to be. I recommend setting the target temp at 135°F/55°C IF your probe is accurate. The carryover cooking will bring the internal temperature up to between 145-150°F/63-65°C during a ten minute rest period.
- When the grill prompts you to flip the tenderloin, flip it over onto an empty space in the grill and press down for the best sear. When the target temperature is reached, the grill will shut off. Remove the tenderloin and let rest on a cutting board. Leave the probe in the pork during the rest period to monitor the internal temperature and so the juices don't leak out. To switch from the rest period timer to the internal temperature on the XL grill, press the manual button and hold it down until you see the internal temperature of the meat on the display.
- Make sure the internal temperature reaches at least 145°F/63°C followed by a 3-minute rest period to meet the USDA safety recommendations for pork. I always do a 10-minute rest period so the fibers of the meat have time to reabsorb the juices before slicing.
- Remove the probe. Slice & Serve.
Grill Directions without the Integrated Probe
- Preheat on Max Grill. When it is finished preheat and prompts you to add the food, place the pork tenderloin either diagonal or on one side of the grill and press the meat down so it makes contact with the grate for the best sear.
- Close the lid and decrease the temperature of the grill to medium grill and set the time for 12 minutes on medium heat. This has been the time it took to cook to medium rare each time I tested the recipe.
- When the grill prompts you to flip the tenderloin, flip it over onto an empty space in the grill and press down for the best sear.
- When the time is up, remove the tenderloin and allow it to rest on a cutting board for 10 minutes. I recommend using an instant read thermometer to ensure that the temperature of the pork reaches at least 145°F followed by a 3 minute rest period.
- Slice and Serve
Brunna says
For the ninja grill without a probe, what is the remaining cook time after you flip the tenderloin over after 12 minutes?
Louise says
It's always best to cook to temperature and not time because the size, shape, and starting temperature of the meat are variables that affect total cook time. I talked about the timing in the written post for people who do not have a probe thermometer. The total cook time for my pork tenderloin was 12 minutes. I cooked 6 minutes on one side and flipped and cooked another 6 minutes. Your timing could vary. You also may like your pork more done than I do and that would mean you would cook longer.
Amanda says
How can we make this in the foodi 8qt? Sounds delicious (as always)! 😉
Louise says
You can certainly use the broil setting in the Foodi.
Elbridge Price says
How does one do a center cut pork loin roast in the Smart XL grill? You mention that a tenderloin is quite different. The Cuban rub sounds interesting. In the past, I have substituted granulated Swerve for the sugar (I'm diabetic) with excellent results. Unfortunately, there are not many roast meat recipes out there for the Ninja Smart XL grill...
Tom Hayes says
This is absolutely fantastic! Living in South Florida I am very familier with Cuban cuisine, and this matches any pork loin I have ever eaten! Try it!