Which model of the Ninja Foodi Indoor Grill is the right one for you? Let's go over the similarities and differences, so you can make an informed decision! Updated to include the newest Ninja Foodi Indoor Pro Grill & Griddle.
This is a very long article, so please use the table of contents to navigate to the sections that interest you.
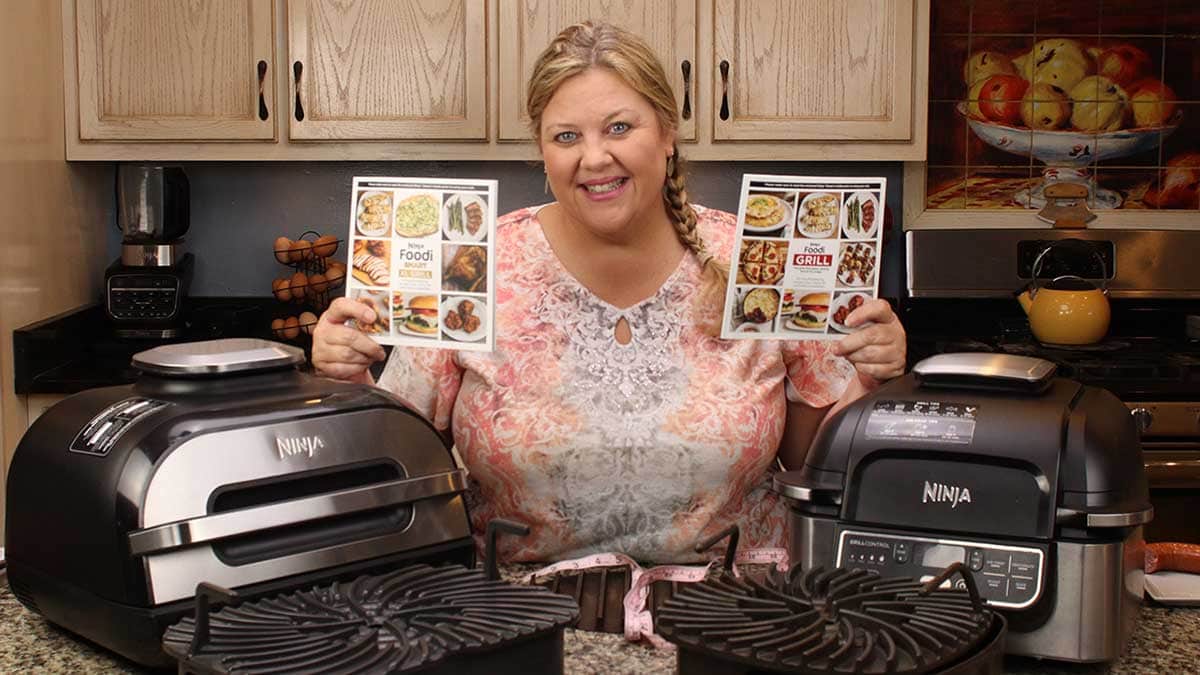
Ninja Kitchen has been busy putting out model after model of their Ninja Foodi line of appliances and they just released the newest version of the Ninja Foodi Indoor grill that has a griddle function.
You will notice a lot more detail in this post for the original grill and the XL grill and that is because the newest Ninja Foodi Indoor Pro Grill & Griddle is very new to me and I haven't had enough time to work with it yet. I definitely will update the post soon with more details.
Features of the Ninja Foodi 5 in 1 Indoor Grill
Let's start off with a brief overview of the features on the original (affiliate link)Ninja Foodi 5 in 1 Indoor Grill.
There are two different models, one has a probe to measure the internal temperature of the meat and one doesn't.
Model # AG301 is the Ninja Foodi 5 in 1 Indoor Grill without the probe attachment.
The features of this grill include; grill, roast, bake, air fry, and dehydrate.
*There are several different model numbers that I found associated with this style grill, but they are all going to have the same features IF it says 5 in 1. Walmart, I know, carries a Ninja Foodi indoor grill that is a 4 in 1 without dehydration. The model numbers can be confusing, so I suggest looking closely at the features and any extras that might come with certain models or refer to the chart below.
The Grill Setting
There are 4 settings for temperature when you choose the grill function
*Temperatures in Celsius are approximate, I do not have the model that shows the degrees in Celsius so I do not know the exact temperature settings that Ninja set for the features.
- Grill Low is 400℉/205℃
- Grill Medium is 450℉/230℃
- Grill High is 500℉/260℃
- Grill Max is 510℉/265℃
You would use the grill setting when you want to grill any type of meat, fish, or vegetables.
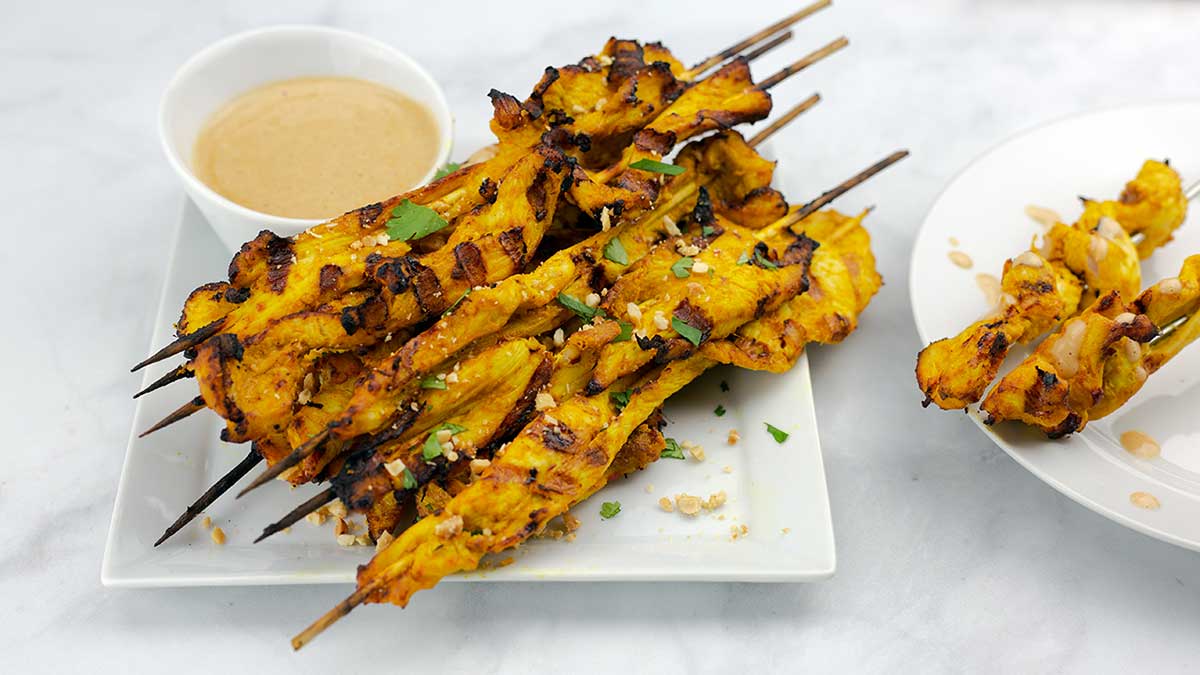
I used the grill setting to make these delicious chicken satay skewers. It was quick, easy, and done inside!
The Air Crisp Setting
*Temperatures in Celsius are approximate, I do not have the model that shows the degrees in Celsius so I do not know the exact temperature settings that Ninja set for the features.
The temperature ranges for the air crisp setting are 300℉-450℉/150℃-230℃.
The air crisp function of the indoor grill is fantastic! In fact, it came out ahead of the rest of the Ninja Foodi air fryers when I tested them out in this video.
Ninja Foodi Dual Zone Air Fryer Comparison & Review
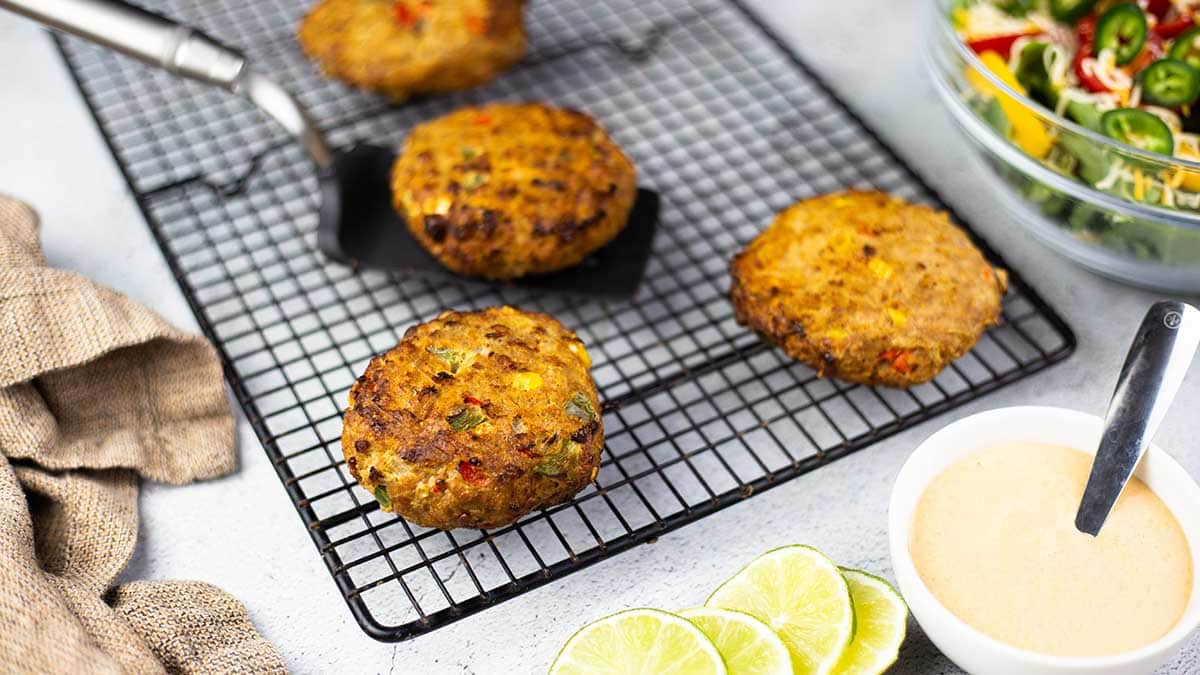
I used the air crisp setting for these Southwestern Turkey Burgers and it worked great.
The Roast Setting
*Temperatures in Celsius are approximate, I do not have the model that shows the degrees in Celsius so I do not know the exact temperature settings that Ninja set for the features.
The roast setting temperature ranges are 250-500℉/120-260℃
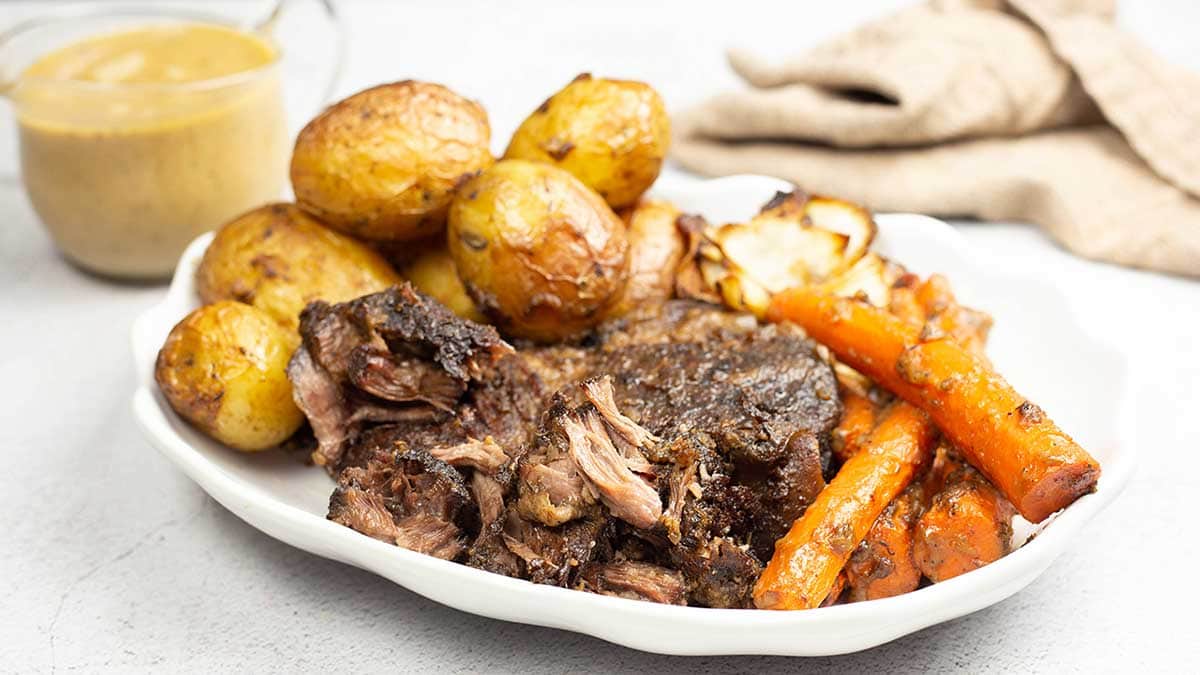
The roast setting is great when you want to cook something at a lower temp, like this pot roast or a small chicken.
The Bake Setting
*Temperatures in Celsius are approximate, I do not have the model that shows the degrees in Celsius so I do not know the exact temperature settings that Ninja set for the features.
The temperature ranges for the bake setting are 250-400℉/120-205℃
The bake setting can be used for a variety of cooking, but keep in mind that the only heat source is coming from above. So, if you want to make brownies or a type of casserole using the bake setting, decrease your temperature so the bottom has a chance to cook all the way through before the top gets too done.
The Dehydration Setting
*Temperatures in Celsius are approximate, I do not have the model that shows the degrees in Celsius so I do not know the exact temperature settings that Ninja set for the features.
The temperature ranges for the dehydration setting are 105-195℉/40-90℃.
You can use the dehydration setting for dehydrating fruits, meats, vegetables and anything else that you want to dehydrate. There is even a (affiliate link)dehydration rack that fits in the Ninja Foodi 5 in 1 Indoor Grill. I don't have the rack, so I can't say how well it works.
The dehydration feature is also great for making cold start yogurt!
There are often questions asked about the differences between the different settings and although I don't have confirmation of this, I think it is the fan speed. So, if you set the bake function on 400℉, the fan speed would be slower than if you set the air crisp function on 400℉.
Features of the Ninja Foodi Indoor Grill 5 in 1 with the integrated probe
I believe that Ninja Kitchen may be phasing out the Indoor Grill 5 in 1 with the integrated probe. I could not find it on their website.
I did find in on Amazon though: (affiliate link)Ninja Foodi 5 in 1 Indoor Grill with probe
It took some time to find the model number, but I think it's AG400.
I don't have (affiliate link)this model, but I'm pretty sure the features are the same with the same temperature ranges as the Ninja Foodi 5 in 1 Indoor Grill without the probe.
The size is the same as the Ninja Foodi 5-1 grill and I'm fairly certain it functions the same with the exception of the integrated probe.
The integrated probe is designed to work similar to the integrated probe on the Ninja Foodi 6 in 1 grill from what I just learned. You set the temperature and the grill shuts off when the meat reaches that temperature.
It sounds like it functions a lot like the 6 in 1 xl model, but doesn't have the presets.
I will say that there have been some complaints about the probe not working well and having to be replaced.
Since I don't have this model, I can only go by what is being discussed in Facebook groups. If you have any other information that you think I should add in this post, I always welcome feedback!
Features of the NEW Ninja Foodi XL Smart Indoor Grill
Most of the features and settings are the same on the Ninja Foodi XL Smart Indoor Grill, but there are some great added features! The smart technology with presets is very handy! However, there have been many reports of inaccurate temperature readings when using the integrated probe, so I do recommend testing the thermometer for accuracy and here is a video showing you how.
The Model of the (affiliate link)Ninja Foodi XL Smart Indoor Grill is FG551
The functions of the Ninja Foodi XL Smart Indoor Grill are the same with one exception. The XL Smart Grill has an added function of Broil.
*Temperatures in Celsius are approximate, I do not have the model that shows the degrees in Celsius so I do not know the exact temperature settings that Ninja set for the features.
The Grill Setting on the XL Indoor Grill
For some reason, I can't see the temperatures on the grill functions like I can on the 5 in 1 model, but I'm fairly certain that the temperature ranges are going to be the same.
You can set the grill function to low, medium, high, and max grill.
Air Crisp Setting on the XL Indoor Grill
The air crisp setting temperature range is 300℉-450℉/150℃-230℃.
As far as I can tell there aren't any discernible differences between the air crisp function on the various models work. They do a great job.
The Roast Setting on the XL Indoor Grill
The roast setting temperature ranges are 250-425℉/120-218℃. This is different from the original Ninja Foodi Indoor Grill and I'm not sure why Ninja lowered the maximum temperature by 75°.
I'm guessing it's because they added a 6th feature which picks up where the roast setting leaves off and that is the broil setting.
The Broil Setting on the XL Indoor Grill
This is an added feature on the new XL Indoor Grill and the temperature range is 450-500℉/230-260℃.
I have not used this function yet, but I can assume that it will just as well as the other functions.
The Bake Setting on the XL Indoor Grill
The temperature ranges for the bake setting are 250-400℉/120-205℃. These are exactly the same as the origianl Ninja Foodi Grill.
One thing to note about using the bake feature is that the depth of the inner pot is much shallower than in the original grill and I will get into the size differences a little later in this article.
The Dehydration Setting on the XL Indoor Grill
The temperature ranges for the dehydration setting are 105-195℉/40-90℃. These are the same.
You aren't going to be able to do much layered dehydrating in the XL Indoor Grill, but it will work fine for making yogurt, proofing bread, and dehydrating small amounts of food.
The dehydration rack that is available for the original Ninja Foodi Grill will not fit the XL Grill.
The Ninja Foodi XL Indoor Grill Smart Technology Feature
This is, by far, the biggest selling point for the NEW xl grill in my opinion. The funny thing is I bought the grill because I was intrigued by it and thought I would hate it.
I'm not a preset kind of person because I like to control the cooking of my food and tend to be a very hands-on type of cook. Turns out, I LOVE IT!
The way it works is, you insert the probe that comes with the grill into the meat and select the temperature that you want the meat cooked to and the grill monitors it and shuts off when it's done.
What I love about this is I don't have to check on the temperature while I'm cooking like you do with a meat thermometer that doesn't have bluetooth or wireless technology. Speaking of bluetooth and wireless technology, I sure wish Ninja Kitchen would enable that on all of the Foodi devices!
There are two options when using the smart technology feature, you can use the manual settings or use the built in presets.
Like I said before, I'm not a preset kind of cook, but I found the presets on the XL grill to be pretty handy, with one exception. That's the chicken preset which is set to an internal temperature of 170℉/76℃ and you can't adjust it.
I tried it once, just to see how it would turn out and my chicken was way overcooked and very dry. I suggest using the manual function instead when cooking chicken, especially chicken breast.
Other than the chicken, the other 3 presets have different levels of doneness that you can choose from so the meat is cooked the way you like it. Always remember when setting the preset or manual temperature to allow for at least 5° of carryover cooking. This means that your meat continues to cook AFTER you remove it from the grill and let it rest. The amount can vary, but plan on 5-10°.
Preset Options on the Ninja Foodi Smart XL Grill
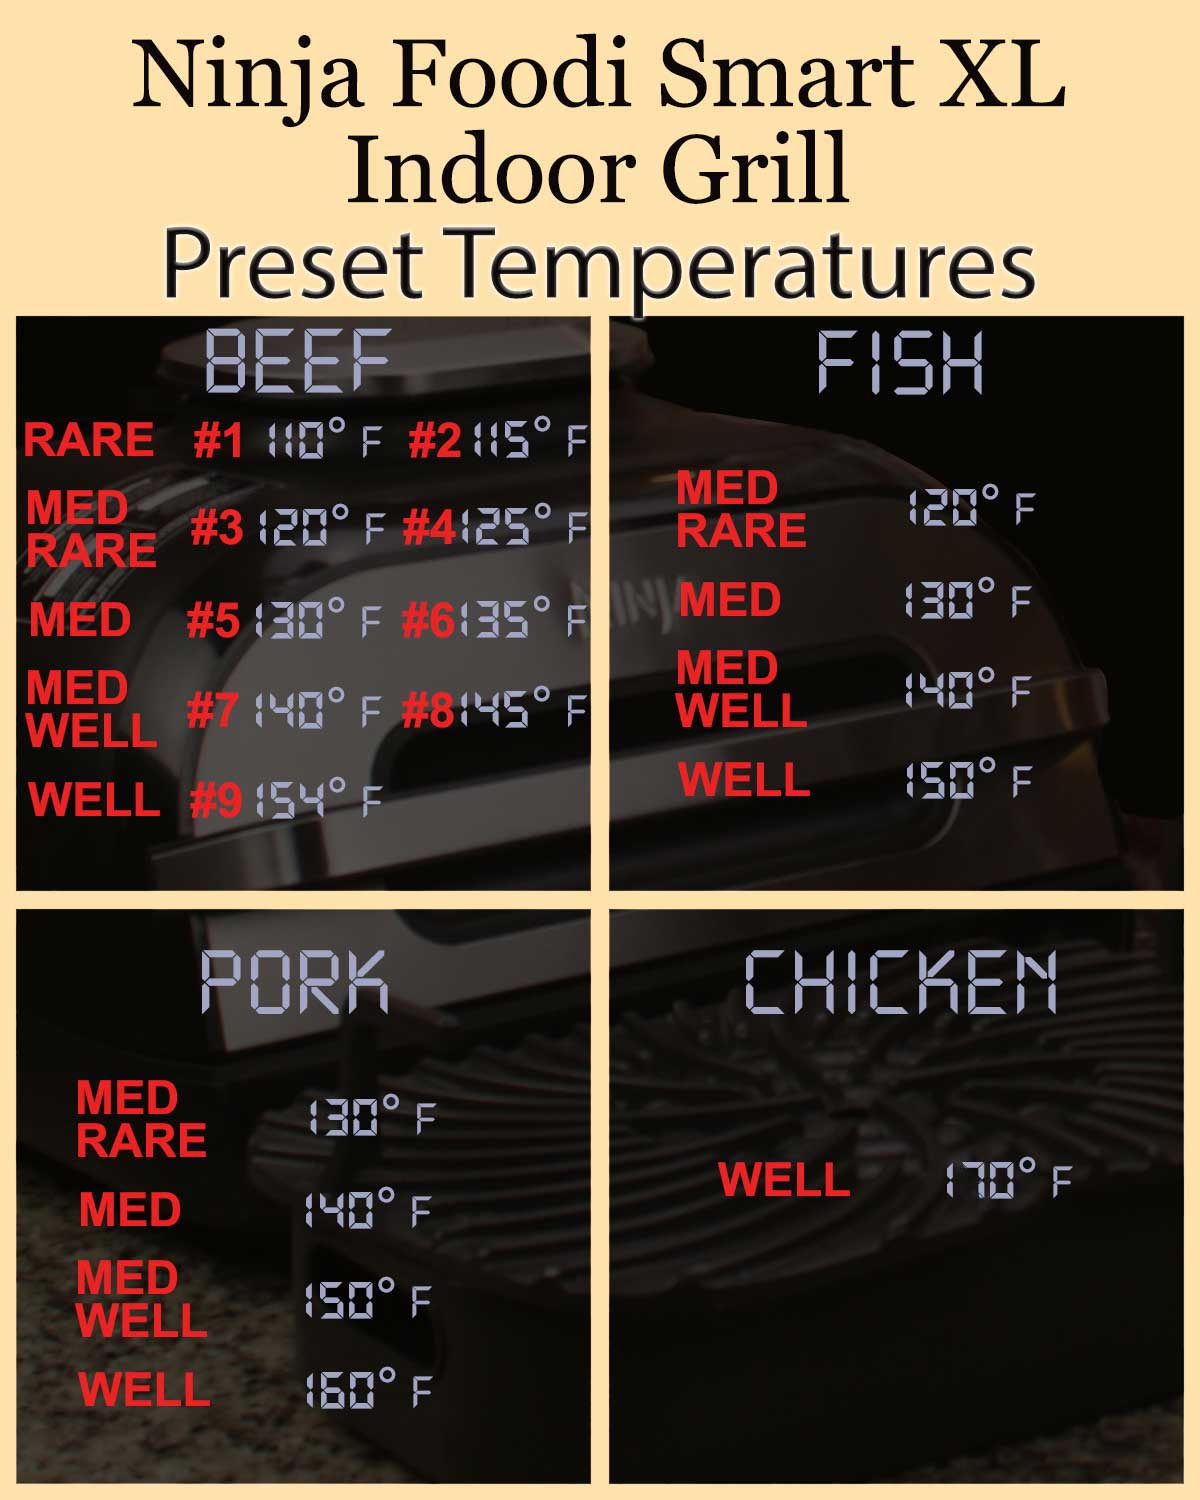
There are 4 different meat options available on the preset function and each one has different levels of cooking that you can choose from (except chicken).
You can use all the functions (bake, roast, broil, air crisp, and grill) except the dehydration function when using the presets.
The probe must be plugged into the side of the grill for the preset and manual buttons to light up. The probe is located on the side of the grill as is the receptacle that you plug the one end of the probe into.
Beef Preset Settings
There are 9 different levels of cooking to choose from.
*Temperatures in Celsius are approximate, I do not have the model that shows the degrees in Celsius so I do not know the exact temperature settings that Ninja set for the features.
- Setting # 1 is Rare which will cook the meat to an internal temperature of 110℉/45℃
- Setting #2 is Rare which will cook the meat to an internal temperature of 115℉/46℃
- Setting #3 is Medium Rare which will cook the meat to an internal temperature of 120℉/49℃
- Setting #4 is Medium Rare which will cook the meat to an internal temperature of 125℉/52℃
- Setting #5 is Medium which will cook the meat to an internal temperature of 130℉/55℃
- Setting #6 is Medium which will cook the meat to an internal temperature of 135℉/57℃
- Setting #7 is Medium Well which will cook the meat to an internal temperature of 140℉/60℃
- Setting #8 is Medium Well which will cook the meat to an internal temperature of 145℉/63℃
- Setting #9 is Well Done which will cook the meat to an internal temperature of 159℉/70℃
Pork Preset Settings
There are 4 different levels of cooking to choose from.
*Temperatures in Celsius are approximate, I do not have the model that shows the degrees in Celsius so I do not know the exact temperature settings that Ninja set for the features.
- Setting #1 is Medium Rare which will cook the meat to an internal temperature of 130℉/55℃
- Setting #2 is Medium which will cook the meat to an internal temperature of 140℉/60℃
- Setting #3 is Medium Well which will cook the meat to an internal temperature of 150℉/65℃
- Setting #4 is Well Done which will cook the meat to an internal temperature of 160℉/71℃
Fish Preset Settings
There are 4 different levels of cooking to choose from.
*Temperatures in Celsius are approximate, I do not have the model that shows the degrees in Celsius so I do not know the exact temperature settings that Ninja set for the features.
- Setting #1 is Medium Rare which will cook the fish to an internal temperature of 120℉/49℃
- Setting #2 is Medium which will cook the fish to an internal temperature of 130℉/54℃
- Setting #3 is Medium Well which will cook the fish to an internal temperature of 140℉/60℃
- Setting #4 is Well Done which will cook the fish to an internal temperature of 150℉/66℃
Chicken Preset Settings
There is only 1 option with this preset and I don't suggest using it because it overcooks the chicken.
- Setting #1 is Well Done which will cook the chicken to an internal temperature of 170℉/77℃
The safe internal temperature when cooking chicken is 165℉/74℃, so don't ask me why Ninja set this one 5° higher when I'm sure they realize that not only is that overdone, there will also be carry over cooking. I'm guessing some lawyers were involved in that decision.
Eating raw chicken that is contaminated with salmonella is a serious health risk for sure, but overcooking chicken to that degree isn't necessary or even suggested. I tried it. The chicken breast was horrible and I threw it away. It was so dry and tough.
Other cuts of chicken, like thighs, can handle that internal temperature much better.
I would recommend using the manual settings instead for chicken.
Manual Settings
The manual settings can be used with any type of food that you want to monitor the internal temp of or set a certain internal temp.
For example, you could insert the probe into a baking potato, select the function you want to use and set the temp for 205-210℉ and let it go. Keep in mind that you should check the outside of the potato to make sure your heat isn't too high and burning the skin, but other than that, the grill will cook the potato until it reaches your set degree and the grill will turn off.
The manual internal temperature settings range from 100-210℉/38-99℃
Frequently Asked Questions Regarding the Temperature Probe and Smart Functions
When cooking several chicken breasts, pork chops, or steaks at once, you are only able to insert the probe into one of them and I don't suggest trying to remove the probe from one piece of meat and move it to another. Instead, you can use an Instant Read or a second probe thermometer if you want to monitor the other pieces that don't have the probe inserted. If all of your pieces of meat/fish are about the same size, they should cook at about the same time.
If you are trying to cook a 1" thick pork chop and a 2" thick pork chop, at the same time, I would insert the probe into the thinner one and remove it when it is done. Then insert the probe into the thicker one and reset the grill to finish cooking.
Sure, but you will only be able to monitor one type at a time unless you have a second probe type of thermometer and monitor it manually.
If that is the case, then make sure to insert the probe that comes with the grill into the cut of meat that is going to take the longest, so the grill doesn't shut off on you.
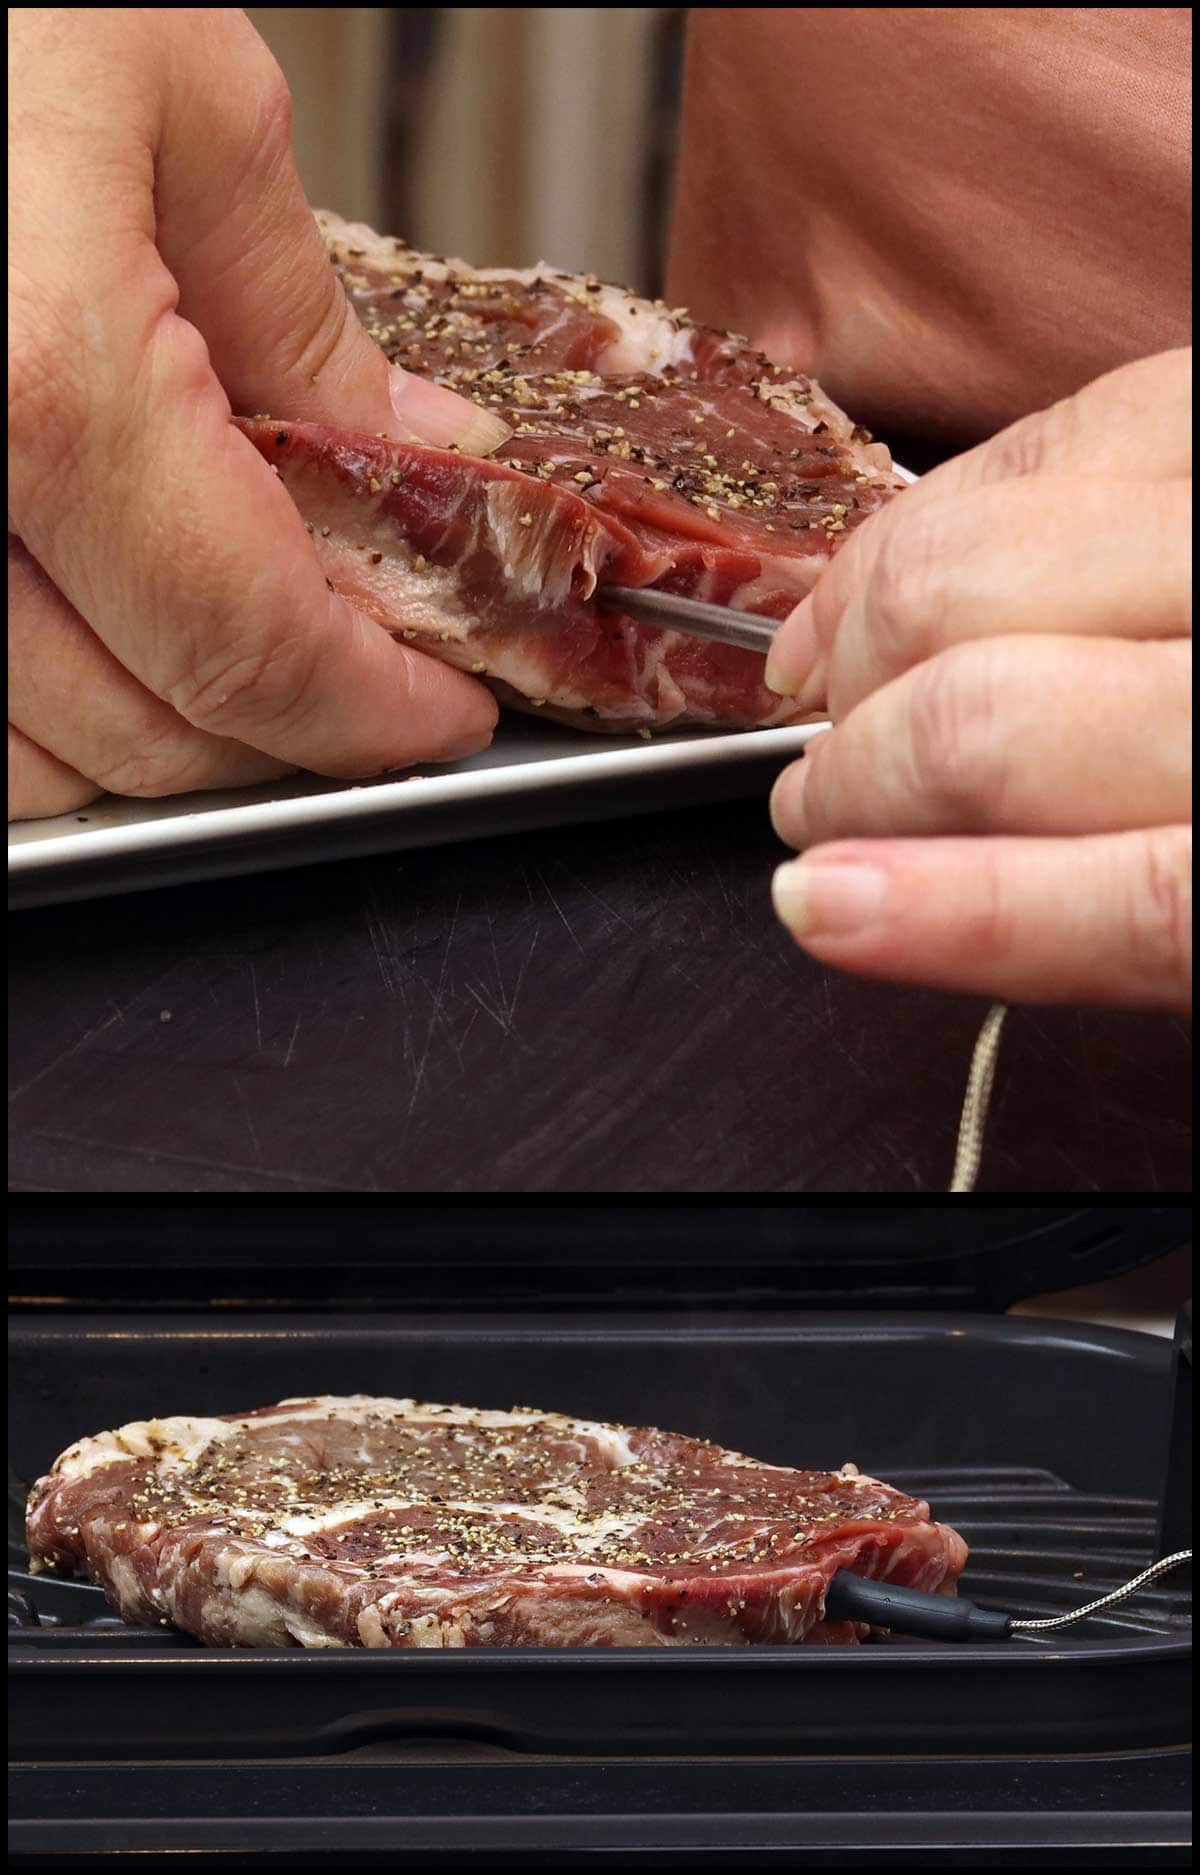
Yes! This is extremely important. You want the probe to measure the temperature of the meat right in the middle of the cut of meat or as close as you can get.
If working with a roundish cut of meat, it doesn't matter which edge you insert into, but if the depth is 1", you will insert it at 0.5" depth along the side of the meat towards the center.
If your meat is longer than it is wide, insert the probe on the shorter side of the meat ½ way of the depth. This is easier to view than explain, so here are some pictures.
Here is a quick video showing where the probe is located and how to insert it into the food.
What are the Size Differences Between the original Indoor Grill, the XL Indoor Grill, and the XL Pro Indoor Grill & Griddle?
There is not much difference in the height, the XL and the XL Pro Grill/Griddle is slightly higher than the original Grill. Although the depth of the cooking area is greatly reduced, the heating element is recessed back into the lid further than the 5 in 1 model and that is why it sits a bit taller.
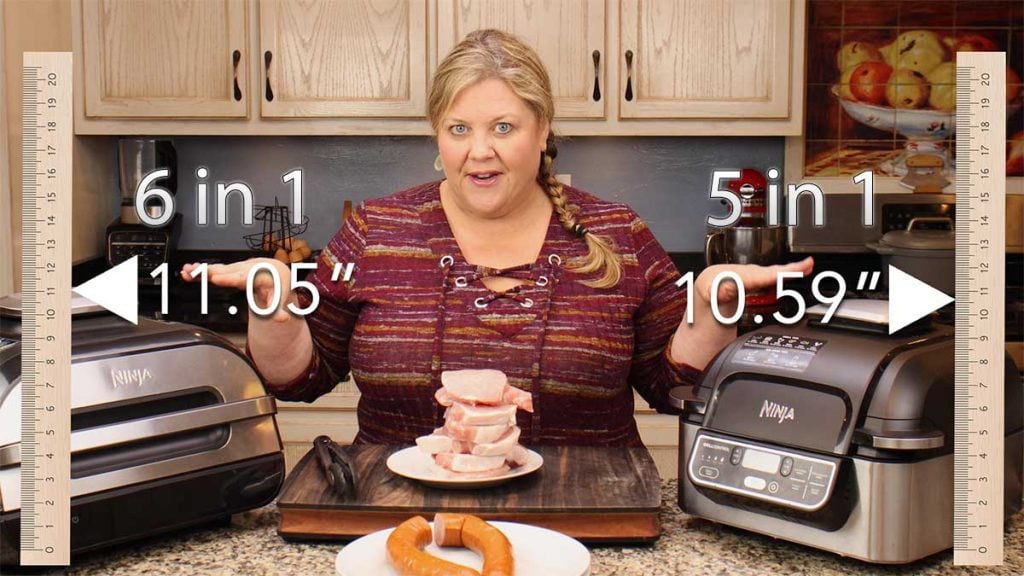
The depth (from front to back) of these two grills are also very similar.
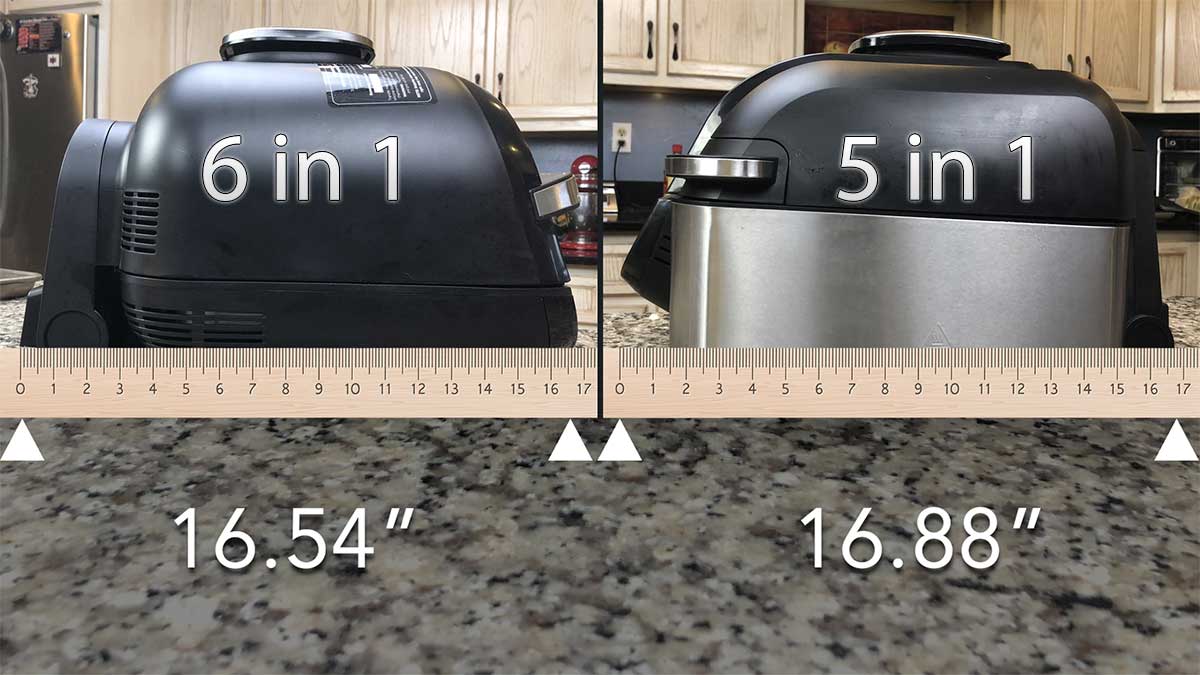
There is a difference in the width of the two models and it's pretty significant, BUT do you really get that much more surface area to cook on?
The answer is not really.
Here is the width of both.
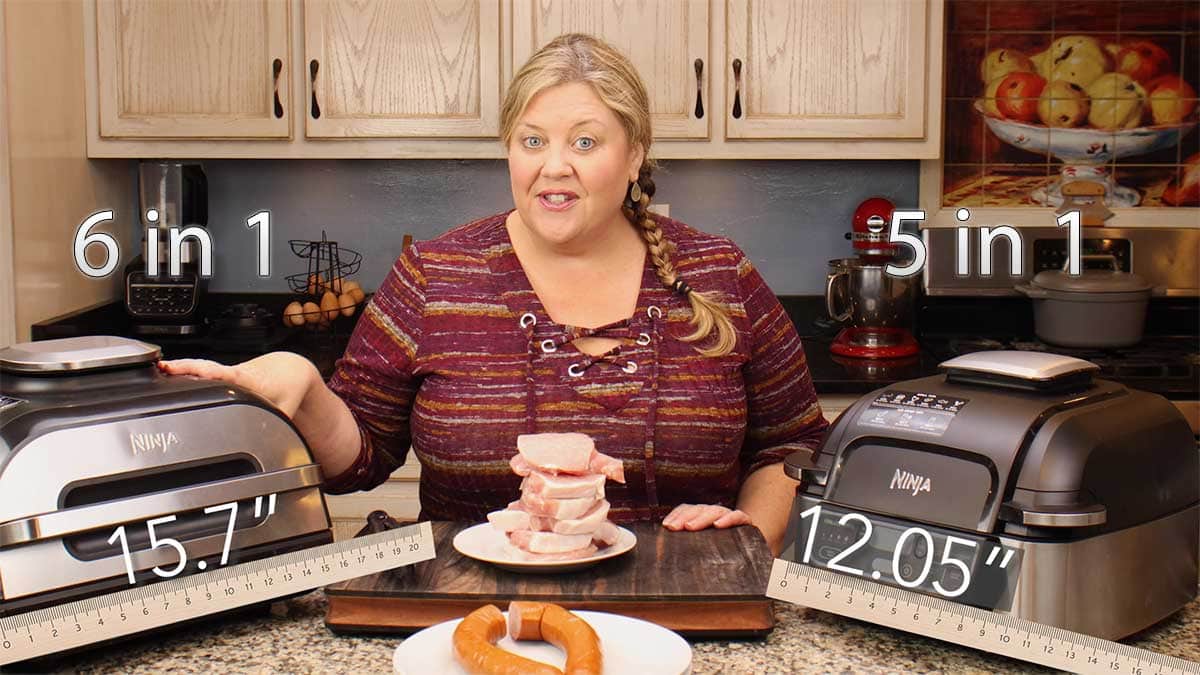
Based on these measurements, you would really think the surface area for cooking would be so much greater on the Ninja Foodi Indoor Grill 6 in 1, but it really isn't.
I do have to say that I prefer the rectangle shaped grilling surface more than the square, but when it comes down to it, you can cook 1 more pork chop on the 6 in 1.
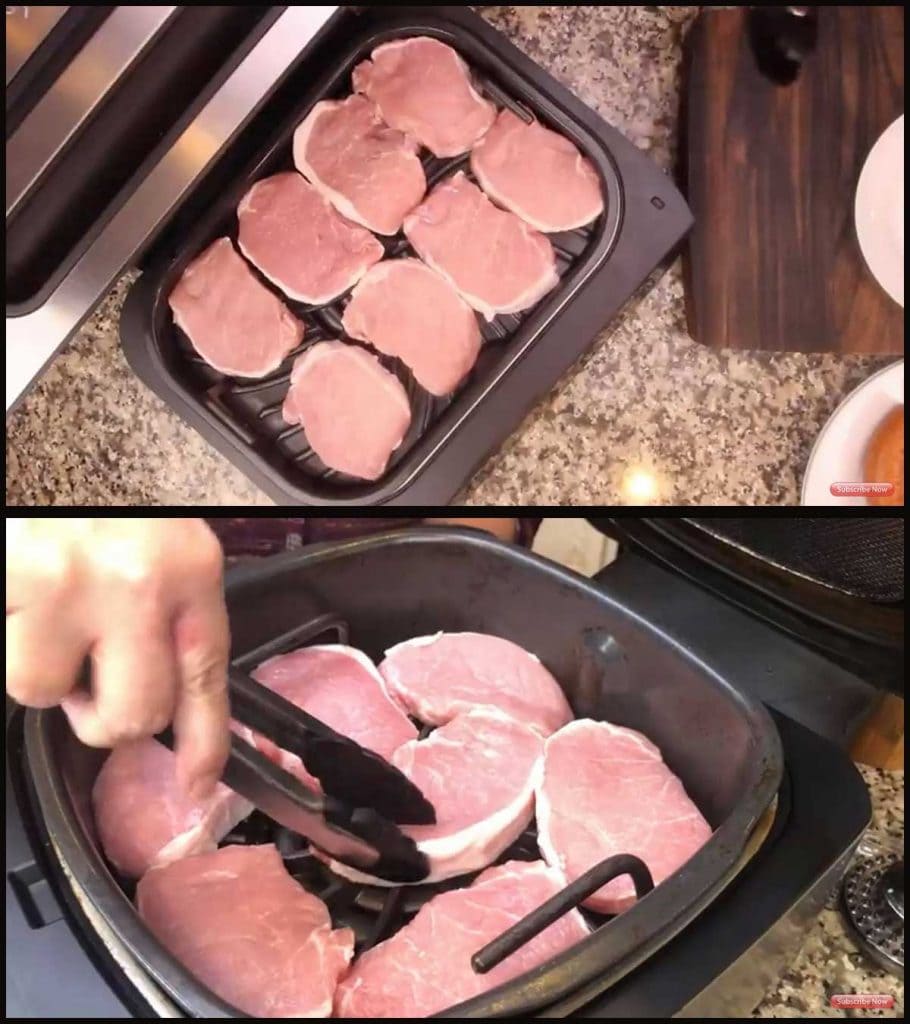
I think the biggest difference in size between the two grills is the depth of the inner pan.
The Ninja Foodi 6 in 1 Indoor Grill with Smart Technology has a much shallower inner liner pan.
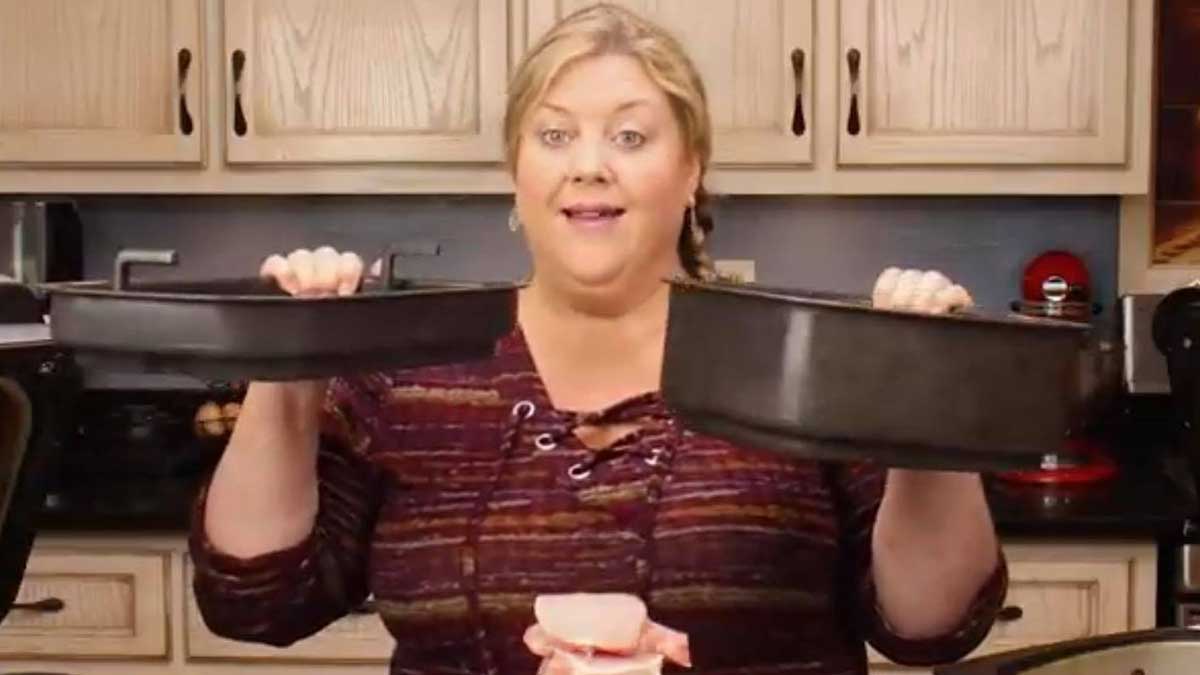
I have been told by a member of my Ninja Foodi Indoor Grill Facebook Group that he has successfully cooked a whole chicken in the 6 in 1 grill and although I think it probably was a small chicken, I am not doubting that it can be done. Remember that the heating element is recessed and that gives more room for taller types of foods, like roasts and whole chicken.
This is where your cooking style is going to come into play with which grill is right for you.
So, if you are a griller and a roaster the pan depth might not be that important. However, if you are a baker or casserole maker, the pan depth might just be an issue.
Not that you can't put a casserole in the shallow pan liner of the 6 in 1, you certainly can. What you can't do is put a round 8" pan in there. It's just a touch too narrow for that.
The newest XL Pro Grill & Griddle is not much different in size from the XL Grill, but since it has the heated grill plate on the bottom that has to be in to cook in the Grill, it is quite different in operation.
There is not an inner liner pan like the other two grills, so you have to have the grill plate in to cook anything. The grill plate is slanted, so while you could technically place a casserole dish on top of the grill plate to bake something, you may find that food doesn't cook evenly. For example, if you were making cornbread or brownies, your batter will tend move to the lowest area of the grill plate and make for an uneven top to your baked goods. This can also affect how it cooks.
You can put the griddle plate on the grill surface and place a small baking pan (about 8" x 8") on top and that will provide a level surface.
The other thing I've been experimenting with is using the griddle plate which has grilling type of rails on the bottom as a sandwich and burger press. I'll be sure to release a video and recipe once I play around with that more.
What comes with the Ninja Foodi Indoor Grills
All of the models of the original Grill and XL grill that have been released up to the date of this article come with a crisping basket and a grill grate. The XL Pro Grill & Griddle comes with the bottom grill plate and the griddle plate that sits on top.
There are accessories that you can add on, but make sure that you get the correct ones for the model of grill you have.
Here is a direct link to the Ninja Kitchen Website that shows the available accessories for the NEW 6 in 1 Smart XL Indoor Grill:
Accessories for Ninja Foodi 6 in 1 Smart XL Indoor Grill
Here is a direct link to the Ninja Kitchen Website that shows the available accessories for the 5 in 1 Indoor Grill:
Accessories for the Ninja Foodi 5 in 1 Indoor Grill
There are also third party, aftermarket accessories that you can purchase. For example, there is a (affiliate link)grill grate made specifically for the Ninja Foodi 5 in 1 Indoor Grill,
I can't speak about how the square grill grate works in the Foodi Grill because I don't have it. I do have the grill grate for the Ninja Foodi Pressure Cooker & Air Crisper and it works great in the Foodi and the 5 in 1 indoor grill.
You can also purchase a (affiliate link)Sear 'N Sizzle for the XL Grill, but it DOES NOT fit the XL Pro Grill & Griddle
Which Indoor Grill is Easier to Clean?
Let me start of by saying that both of the grill grates that come with the original Grill and the XL Grill are a pain to clean. This is probably one of the main reasons I didn't use the 5 in 1 Indoor Grill that much. Although there is a brush that comes with the grill, it's very difficult to get stuck on food off of the grill grate because of the rounded shape to the grilling surface.
I'm sure some will argue this point because the material is non-stick, but my experience is it is a pain to clean.
The XL Pro Grill & Griddle is much easier to clean because the rails are straight and not curved.
The inner liner of the 6 in 1 is easier to clean because it isn't as deep and you can apply more pressure to the sides when cleaning and it's much easier to get any buildup off of it.
The biggest difference in cleaning is definitely the lid itself. All of the grills have the grease filter screens that can be removed for cleaning and I recommend doing this frequently or you might start seeing some smoke issues. The XL has a heating element that is right in the center and recessed, so the lid itself where grease and residue collects is MUCH easier to reach.
Which Ninja Foodi Indoor Grill is the Better Buy?
It always boils down to the features, functions, budget and most importantly your cooking style.
If you want the most budget friendly Ninja Foodi Indoor Grill, then go with an older model. If you want all the bells and whistles and don't plan on using it for baking that much, go with the newest Indoor Grill & Griddle.
Personally, I like the flexibility of the new Indoor Grill & Griddle and love that you can sauté, make pancakes, and so many other things on the griddle. However, I don't do a lot of baking in any of the grills, so for my cooking style, I would choose the Grill & Griddle.
I also really love the XL grill because of the surface for air frying and grilling. Again, I don't do a lot of baking in the grill, so the depth is not important to me.
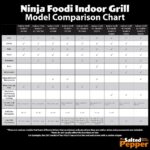
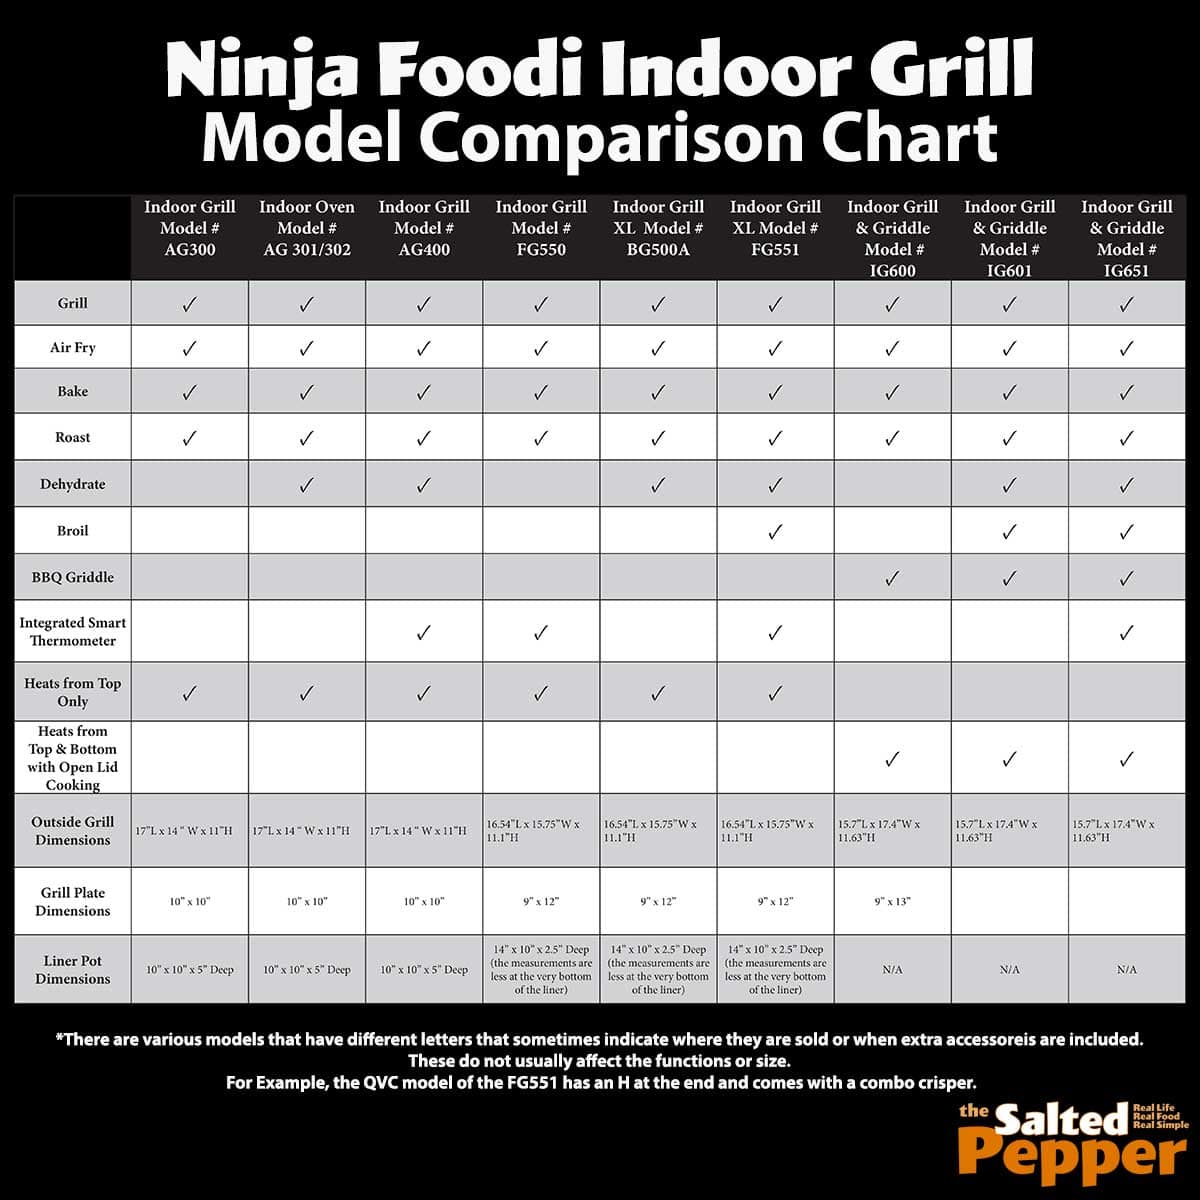
Here is a Quick Comparison Chart based on available functions.
Ninja Foodi Indoor Grill Model Comparison Chart
You can also download the PDF of the chart if you prefer: Ninja Foodi Indoor Grill Comparison Chart
ABOUT THE RECIPE AUTHOR, LOUISE LONG
Louise is a full-time recipe creator and food blogger @ The Salted Pepper. She has over 30 years of experience with cooking and recipe development. She owned a restaurant for several years and was a full-time RN until retiring to blog full-time.

Louise has several very active Facebook groups that help people with the basics of cooking and getting the most out of the Ninja Foodi.
Ninja Foodi Fresh & Healthy Meals
Seeing the need for easy, delicious, and high quality recipes, she is focusing all of her efforts creating recipes specifically for the Ninja Foodi. Her recipes are easy for the home cook to follow and provide step-by-step instructions.
Louise is also a YouTube creator and you can find most of her recipes in video format on The Salted Pepper YouTube channel.
She is very responsive to messages and eager to help in any way she can.
I WOULD LOVE TO SEE WHAT YOU ARE COOKING UP IN YOUR NINJA FOODI! TAG ME @THESALTEDPEPPER ON YOUR FAVORITE SOCIAL MEDIA PLATFORM WHEN YOU MAKE A DISH!
BE SURE TO FOLLOW THE SALTED PEPPER RIGHT HERE ⇓⇓⇓⇓⇓

Brian Theriot
I bought a ninja xl indoor grill....love the grill but im like you its a pain to clean....but i found a trick to clean it....fill the xl with water up to the gate add dawn soap turn on high for 15 to 20 min....the water will boil off any excess food or seasoning off the grill...very minimal if any brushing ....rinse with water for a clean grill...i think this tip is worth sharing with others
Love your videos and recipes
Louise
Thanks! I try to remember to pour water in when it is hot, but often forget. I'll try your way for sure!