- Ninja Foodi Possible Cooker Pro OR
- Ninja Foodi Pressure Cooker & Air Crisper or
- 6 quart pot for stovetop cooking
This recipe for Old Fashioned Chocolate Fudge is my twist on the Hershey Fudge recipe that has been around for decades.
This classic treat is all about simplicity and rich flavors, using just a few simple ingredients: milk, sugar, cocoa powder, butter and a hint of vanilla extract.

Would you like to save this recipe?
Whether you're using a Ninja Possible Cooker Pro or a traditional stovetop, this recipe is sure to be a hit with friends and family!
Making fudge can be intimidating and, while there are certain temperatures that need to be reached, my goal with this recipe was to remove the need for monitoring temperatures and go by time instead.
I have made this fudge in the Ninja Possible Cooker Pro and in the Ninja Foodi Pressure Cooker & Air Crisper using sear/sauté and have the exact cooking times you can follow as long as you make the recipe as written.
Suggested Equipment & Kitchen Tools for Chocolate Fudge
When making candy, it is important to have the kitchen tools you will need ready to go before you start cooking. These are the tools that I found extremely helpful when making this fudge recipe.
Kitchen Tools
- Wooden Spoon
- 8x8 square baking pan or baking dish with at least 2" sides
- Parchment paper
- Silicone Spatula
- Heat resistant surface like a wood cutting board.
Appliances
- Ninja Possible Cooker Pro: This is the recommended appliance for this recipe.
- Alternative Options: Ninja Foodi Pressure Cooker & Air Crisper using sear/sauté or a large heavy pot that is 5-6 quarts for stovetop directions.
Ingredients & Substitutions
When it comes to making fudge, especially this cocoa-based fudge, it is important to review what can and what cannot be substituted in order to have a successful outcome.
Sugar
This old fashioned fudge recipe uses white granulated sugar and it should not be substituted with other types of sugar. Even switching to brown sugar will result in a different outcome
Some fudge recipes use light corn syrup, but for this one to work as written you should use granulated white sugar.
Sugar substitutes will not work in this recipe. Fudge is made through the manipulation of sugar crystals, and artificial sweeteners do not have the same properties.
What you can make instead is a very thick chocolate ganache using cocoa powder, artificial sweeteners and heavy cream for a sugar-free version of fudge.
Milk
Whole milk is used in this recipe and should not be substituted with any other type of milk or your timings will be off.
If you want to try using alternative milks like skim milk, you will want to monitor your temperatures and will not be able to go by the timing in this recipe because the water content in skim milk is much higher than whole milk and it will take longer for it to evaporate and bring your sugar mixture to the correct temperature.
I recommend using a thermometer if you do decide to use a different type of milk to ensure that your fudge mixture reaches at least 237℉/114℃ before you add the butter and vanilla.
Cocoa Powder

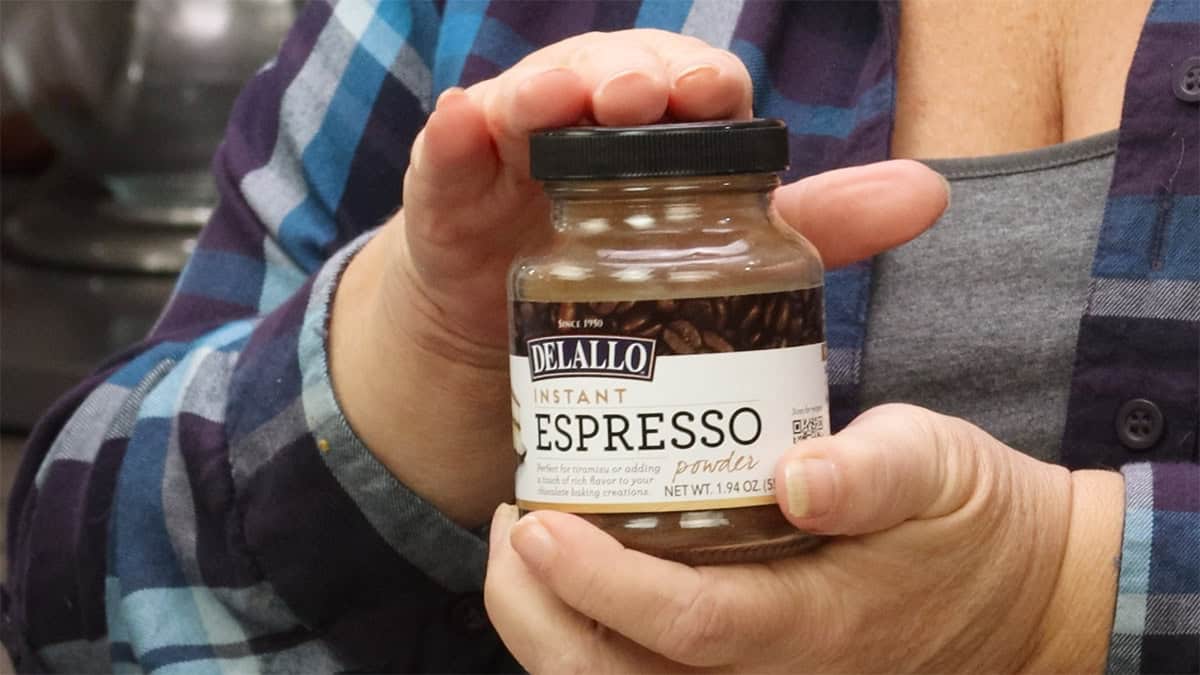
Traditionally, this fudge is made with regular cocoa powder, but I found that by adding both regular and dark cocoa powders along with espresso powder really made a difference in the flavor of the fudge and It isn't quite as sweet as when the fudge is made with all regular cocoa powder.
From what I have read, Hershey's regular cocoa is not dutch processed, but their special dark cocoa is dutch processed which results in a less bitter flavor. These two cocoa powders worked fabulously together when making old fashioned chocolate fudge!
It is completely up to you what combination of cocoa powder you use, you can use any ratios you like as long as the total amount is ⅔ cup.
The (affiliate link)espresso powder is optional and can be omitted without needing to substitute it with anything. I use a finely ground instant espresso powder made specifically for baking and it can usually be found in the baking aisle of most grocery stores.
Butter, Vanilla, & Salt
Using real butter is important in this recipe and I do not recommend using margarine or butter substitutes. You can use salted or unsalted butter. I use salted butter because that is what I always have on hand and I still add ¼ teaspoon of salt to bring out the chocolate flavors in the fudge. You do not need to increase the salt amount in the recipe if you use unsalted butter.
I use a fine grind sea salt in this recipe, you can use Kosher salt and not change the amount. However, if you want to use table salt, decrease the amount to ⅛ teaspoon or a pinch.
The vanilla extract or vanilla paste is optional, but it does round out all the other flavors in my opinion.
Later in the recipe article I will go over some variations for making different flavored fudge and, depending on what flavors you want, you can change the flavor of the extract.
For example, if you wanted a chocolate almond fudge, you would use almond extract instead of vanilla extract or, for a peppermint chocolate fudge, you would use peppermint extract and candy canes broken into small pieces.
How to Make Old Fashioned Chocolate Fudge
The first and probably most important part of making fudge is to decide how you are going to cook it.
If you have the Ninja Foodi Possible Pro Cooker or the Ninja Foodi Pressure Cooker & Air Crisper, I recommend using one of those appliances.
Most people run into problems when making candy because of the variables that occur due to using different size pots or different types of stoves. The material of the pot does make a difference as does the power of the burners on your stove.
It's not that you can't make this recipe on the stove, you absolutely can, but you will want to keep these variables in mind and adjust the cooking directions accordingly in order to have the best outcome.
You can also make this recipe in an Instant Pot using sear/sauté, but if you have a stainless pot you will want to reduce your heat to medium high or medium because the pot will conduct heat differently than the Possible Cooker pot or the Ninja Foodi ceramic lined pot.
Mise En Place (prep for recipe)
- Choose the Right Pan: Use an 8x8 baking pan with at least a 2-3 inch lip to pour the fudge into. A larger pan will result in thinner fudge and a smaller pan will result in thicker fudge. The fudge is about 1½" thick in an 8x8 pan.
- Butter the Pan: Lightly butter the corner and edges of the pan. This helps the parchment paper stick and prevents it from folding over when pouring the fudge.
- Line with Parchment Paper: Cut two pieces of parchment paper that are the width of the pan. Place one piece in the pan, pressing it into the corners, and fold the excess over the edges. Repeat with the second piece in the opposite direction. This method helps avoid wrinkles, ensuring smooth fudge corners.
- Butter the Spatula: Lightly butter the spatula to prevent the fudge from sticking during transfer.

- Measure out the ingredients: Have all the fudge ingredients measured out and ready to go. The butter should be room temperature and the milk should be cold right out of the fridge.
Mixing the Fudge Ingredients
Possible Cooker Pro
- Turn the Possible Cooker Pro on high sear/sauté and press start. The pot will start to preheat and you will see dashes going across the display. This preheat time takes about 5 minutes and is part of the cooking time. You do not wait for the preheat to finish before adding the ingredients and whisking them together.

- Add the sugar, cocoa powders, espresso powder, salt, and half of the milk.
- Whisk to combine and continue whisking until all lumps have disappeared and you have a smooth mixture.

- Add the rest of the milk and whisk to combine.

- Allow the preheat time to finish and when it says, "add food," on the display, don't do anything, it will go away on its own.
- Once the count up timer starts, switch the sear/sauté function to low by pressing the temp down arrow and it will start counting the time up again.
- From this point forward, do not stir the fudge until it is time to beat it after it cools.

- After about 4 minutes, you start to see some boiling around the edges of the pot. It is extremely important that you do not stir while the fudge is boiling or you will end up with gritty fudge.
- The fudge mixture will come to a rolling boil and stay that way for the remaining time (total of 25 minutes on the display). DO NOT STIR. I can't stress this enough. Stirring the fudge at this point will cause seeding of sugar crystals which will grow and make your fudge gritty.
- It's also important that you don't agitate the pot. Just leave it alone and let it cook for a total for a total of 25 minutes. DO NOT put the lid on the pot. This will cause the fudge to overflow and make a mess.
Quick Tip
Avoid Stirring: As the mixture begins to boil (around 4-5 minutes in), resist the urge to stir. Stirring can cause the fudge to become gritty. Allow the mixture to rise and boil without interference.

When the 25 minutes is up, turn the Ninja Possible Cooker Pro off. I have made this recipe so many times and this timing has always brought the fudge mixture to the correct temperature, so you don't have to worry with monitoring temperatures.
However, you can take a temperature of the mixture if you are concerned it didn't cook long enough and temperature you want is between 235-240℉/113-115℃ which is soft-ball stage.
Another way to double check that the fudge has reached the correct temperature is the cold water test. Place a few Tablespoons of very cold water in a small bowl and drop a few drops of the fudge mixture into the water.
Once the mixture hits the water, it should form into a ball that can be squeezed flat but doesn't dissolve.
If it dissolves, your mixture hasn't cooked long enough and if it doesn't flatten when squeezed, your mixture has cooked too long.
Adding the Butter & Vanilla
Once the 25 minutes is up and the Possible Cooker is turned OFF, add the butter and vanilla paste or extract. DO NOT STIR.
The butter can be added in one piece (total of 5 Tablespoons).
I cannot stress the importance enough that you DO NOT STIR until the fudge mixture has cooled down.
Recommended: Remove the pot from the possible cooker and place it on a heat resistant surface like a wood cutting board.
Not Recommended: You can leave the pot in the possible cooker, but it will take longer to cool and you will want to monitor the temperature of the fudge mixture to make sure it is cool enough before beating it. The fudge mixture needs to cool to below 150℉/65℃ before you stir or beat it.

Cooling the Fudge
Let the fudge sit undisturbed for 15 minutes. This is the amount of time it took during my test batches for the fudge to cool down to below 150℉/65℃ which is the temperature I found to work the best for beating the fudge.
There are many different opinions on how cool the fudge should be before beating it, but when I let the fudge cool down to lower temperatures it always became hard, dry and crumbly.
At higher temperatures it became gritty.
Beating & Pouring the Fudge
For me, this has always been the hardest part of making old fashioned fudge. Many people suggest that you beat the fudge until it just starts to lose its shine, but when I have done that it turned out too dry and crumbly.
So, I beat it for about 6 minutes and pay attention to the way it separates in the pot. Once it doesn't flow back together quickly after stirring and the bubbles have gone from small to elongated, the fudge is ready to be poured (or scooped) into the prepared pan.
I recommend using a wooden spoon to beat the fudge because the wood will not be a source of heat transfer like a metal utensil would be. Silicone is also fine to use.
Another thing that can be confusing is what does "beating the fudge" actually mean?
Here is a short video showing you my process for "beating the fudge."
Some people are very aggressive when they move the fudge mixture around in the pan, but what I do is more like a hard stirring.

Quick Tip
Beating the fudge helps the fudge set up and NOT form large sugar crystals which causes the fudge to be gritty.
Once the fudge starts to separate from the bottom of the pot and doesn't flow back together quickly, it is ready to be poured.

Using the buttered spatula, pour/scrape the fudge out of the pot into the prepared pan.
As you can see below, my fudge started to set up a little too much before I got it in the pan. This is because I didn't work quickly enough while filming the video and the fudge cooled down too much.
Please do not worry if this happens to you. This batch of fudge I made was one of the best ones with a creamy smooth texture and it looked like a pile of mess at first!
*There will be some fudge left in the pot. Just add some milk, half and half, or heavy cream and heat it back up to make some delicious chocolate milk or hot chocolate.

If your fudge poured instead of clumped like mine did, you are done now and you can set the fudge to the side and let it set up at room temperature for about 2 hours before cutting it.
If your fudge didn't exactly pour into the pan and is not smooth, grab a piece of parchment about the size of the pan and use it to press the fudge down in the pan until it is in an even layer and smooth on top.

Let the fudge sit at room temperature for at least 2 hours before cutting it. I don't recommend putting it in the fridge until it is packaged properly or it may dry out too much.
You can freeze or refrigerate the entire slab of fudge once it has fully set and those instructions are in the section for Storage of Fudge later on in this article.

Once it has fully set, remove the fudge from the pan using the parchment paper as handles. Set the fudge on a flat surface and peel back the sides of the paper.
Cut strips about 2" apart and then cut across those strips 2" apart to make 2" squares. You will get about 36 pieces of 2" fudge from this recipe.

You can make the pieces bigger or smaller, but I find the 2" squares to be the perfect bite of this rich fudge!
How to Make Old Fashioned Fudge in the Ninja Foodi Pressure Cooker & Air Crisper
The process is the same so please refer to the instructions for the Possible Cooker for details and photos. The only difference is you turn the sear/sauté to medium instead of low once it starts to boil.
Here are the steps:
- Turn Ninja Foodi on high sear/saute
- Add sugar, cocoa powders, salt and espresso
- add ½ of the milk and whisk to combine.
- Once all clumps are gone add rest of milk and whisk until smooth and bring to a boil, stirring occasionally. This takes about 5 minutes.
- Once the mixture is boiling, reduce the temperature to medium and allow to boil for 25 minutes without stirring. Temp should reach 238-240°F
- Turn the Foodi off
- Add butter and vanilla but do not stir
- Remove pot from heat and let cool without stirring for 15 minutes or until temp is 140°F
- Begin beating fudge with wooden spoon until small bubbles become large bubbles and the mixture gets thicker.
- Once it starts to separate from the bottom of the pot and doesn't flow back together quickly, pour the fudge into the prepared pan and let it sit at room temperature to set up.
How to Make Old Fashioned Fudge on the Stove
The process for making fudge is the same on the stove as it is in any other cooking device. The only differences will be in the timing and that depends on the pot you are using and your stove.
It is hard to give exact timing, since there are variables that I cannot account for, but if you are using a 5-6 quart heavy bottomed pot (not thin aluminum), it usually takes 25-30 minutes for the mixture to get to 235-240℉/113-115℃ which is soft-ball stage.
It may also take a little longer for the fudge to cool depending on the material of your pot.
For these reasons, I recommend following the recipe, but going by temperatures and not strictly times when making the fudge on the stove.
Storage Instructions
How to Store Leftover Fudge
Fudge can be wrapped in plastic and left at room temperature for up to a week and does not need to be refrigerated. In fact is is better if it is left at room temperature especially for serving.
Refrigeration
If you do want to refrigerate your fudge, wrap it really well in plastic wrap and make sure it is in airtight container or it tends to dry out and become crumbly.
Cut fudge will dry out much quicker than uncut fudge, so only cut what you are serving and refrigerate or freeze larger blocks for the best quality.

Freezer
If the fudge is in a large block, wrap it in plastic wrap and then aluminum foil and place it in a freezer bag or freezer container.
If the fudge is cut into pieces, place them as close together as you can and wrap them in plastic wrap. Wrap again in aluminum foil or place them in an airtight container and freeze.
The fudge can be frozen indefinitely, but use it within 6 months for the best quality.
Allow the fudge to come to room temperature before serving.
More Candy Recipes!
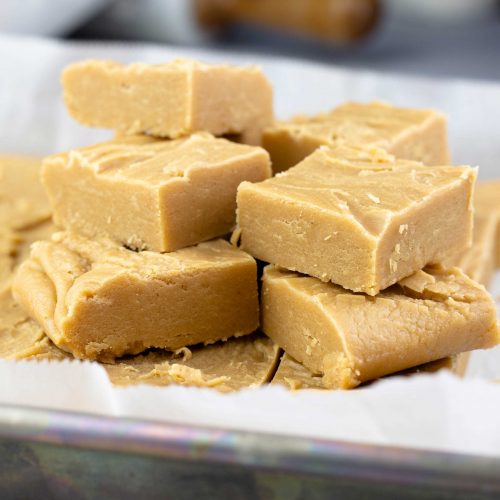
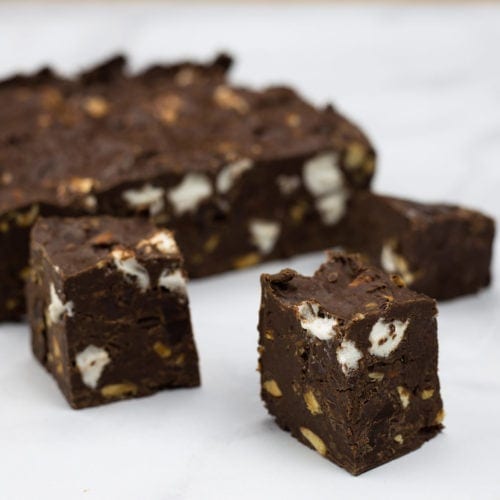
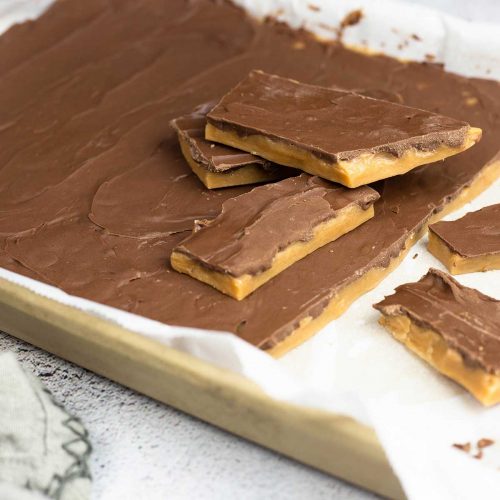
Whether it is Christmastime or any other time, candy making can be so much fun!
If you are new to making candy, give these easy recipes a try.

Old Fashioned Chocolate Fudge Recipe
Equipment
- Ninja Foodi Possible Cooker Pro OR
- Ninja Foodi Pressure Cooker & Air Crisper or
- 6 quart pot for stovetop cooking
Ingredients
- 3 cups granulated sugar
- ⅓ cup dark cocoa powder unsweetened
- ⅓ cup regular cocoa powder unsweetened
- 1 Tablespoon espresso powder for baking
- ¼ teaspoon kosher or fine grind sea salt
- 1½ cups whole milk divided in recipe
- 5 Tablespoons salted or unsalted butter room temp. Have a little extra butter available to butter the pan.
- 1 Tablespoon vanilla paste or vanilla extract
Would you like to save this recipe?
Instructions
Prep for Recipe
- Butter the corners and sides of an 8"x8" baking pan (sides of the pan should be at least 2" high). Cut two pieces of parchment about 8"x12" and place one piece into the pan and press it down so it adheres to the pan. Place the other piece in the opposite direction and press it into the pan. Butter a silicone spatula and set it to the side.
Ninja Possible Cooker Instructions (see recipe notes for other cooking methods)
- Turn the Ninja Foodi Possible Pro Cooker on HIGH sear/sauté. Add the sugar, espresso powder, salt and cocoa powders.3 cups granulated sugar, ⅓ cup dark cocoa powder, ⅓ cup regular cocoa powder, 1 Tablespoon espresso powder for baking, ¼ teaspoon kosher or fine grind sea salt
- Add ¾ cup of the whole milk and whisk to incorporate the sugar and cocoa with the milk and form a thick paste-like mixture. This makes it easier to remove all the clumps rather than adding in all the milk at once. Gradually add the remaining milk into the sugar/cocoa mixture and stir frequently.1½ cups whole milk
- Continue to stir the mixture until the Ninja Foodi Possible Pro Cooker has finished preheating and when it says to "add food" don't do anything. It will start counting up in time on its own. *DO NOT PUT THE LID ON
- Once you see the timer on the display, reduce the sear/sauté temperature to low and do not stir. Allow the mixture to come to a boil and cook for 25 minutes or until the temperature reaches 234-238℉/112-114℃. This is the soft ball stage and what you want for fudge. See recipe notes for the cold water test if you don't have a thermometer and just want to double check that you have reached soft ball stage.
- Add the butter and vanilla paste, but do not stir!5 Tablespoons salted or unsalted butter, 1 Tablespoon vanilla paste or vanilla extract
- Immediately remove the pot from the Possible Cooker and place the pot on a heat resistant surface like a wood cutting board. Let the fudge cool for 15 minutes undisturbed. The temperature should be less than 150℉/65℃
- Using a wooden spoon, start stirring the fudge mixture vigorously for about 6 minutes. You will begin to see the fudge thicken and as soon as you can part the mixture with your spoon and it doesn't flow quickly back together, pour the fudge into the lined pan and use the buttered spatula to scrape the fudge from the bottom of the pot.
- If your fudge began to harden too quickly and didn't flow into the pan well, you can place a piece of parchment over the top and gently press it into the pan so that the fudge is in an even layer.
- Let the fudge sit, uncovered, at room temperature for 2 hours before cutting it. Cut into 2" squares and serve at room temperature.
Notes
- You won't have the preheat time, but the mixture still only needs to cook for 25 minutes.
- Instead of switching to low sear/sauté once the mixture is boiling, reduce the heat to medium.
- Bring the sugar, cocoa powders, salt, espresso, and milk to a boil and reduce the heat to medium. The mixture should still be boiling and continue to boil until the temperature reaches 238℉/114℃ which is soft ball stage.
- Once soft ball stage is reached, add the butter and vanilla. Do NOT stir.
- Allow the pot to cool until the temperature reaches 150℉/65℃
- Follow the rest the instructions as written.
- Fill a bowl with very cold water
- Drop just a small amount (like ⅛ of a teaspoon) of the fudge mixture into the cold water and it should immediately form a soft ball that is formed.
- When removed from the water it should flatten just a bit and feel soft.
- If the ball does not form in the water, the fudge has not reached soft ball stage. If the ball doesn't feel soft, it has gone past soft ball stage.
Nutrition
About the Recipe Author, Louise Long
Louise is a full-time recipe creator and food blogger @ The Salted Pepper. She has over 30 years of experience with cooking and recipe development. She owned a restaurant for several years and was a full-time RN until retiring to blog full-time.

She published her first cookbook in the Fall of 2018 and is very interested in writing several more.
Louise is also the creator of an online Ninja Foodi Pressure Cooking Course with over 100 instructional step-by-step videos. People absolutely rave about the course and all the value they have received from it.
Louise has several very active Facebook groups that help people with the basics of cooking and learning more about the appliances they love.
Ninja Foodi Pressure Cooker & Air Crisper 101
Ninja Woodfire Outdoor Grill & Smoker
Louise is also a YouTube creator and you can find most of her recipes in video format on The Salted Pepper YouTube channel.
She is very responsive to messages and eager to help in any way she can. Get more Information about Louise & contact information
I WOULD LOVE TO SEE WHAT YOU ARE COOKING UP IN YOUR KITCHEN! TAG ME @THESALTEDPEPPER ON YOUR FAVORITE SOCIAL MEDIA PLATFORM WHEN YOU MAKE A DISH!
BE SURE TO FOLLOW THE SALTED PEPPER RIGHT HERE ⇓⇓⇓⇓⇓







Diane says
Could you add nuts with this recipe?
Louise says
Sure, I would add them in when you start to beat the fudge.
Kyle DeWeese says
Louise thank you so much!