

- Standard size loaf pan
- 2 mixing bowls
- Whisk
- Silicone spatula
- Small Saucepan
- Zester
- fine mesh strainer
- Instant-read thermometer
- Cooling rack
- Parchment Paper
- Thin spatula
- Slicing knife
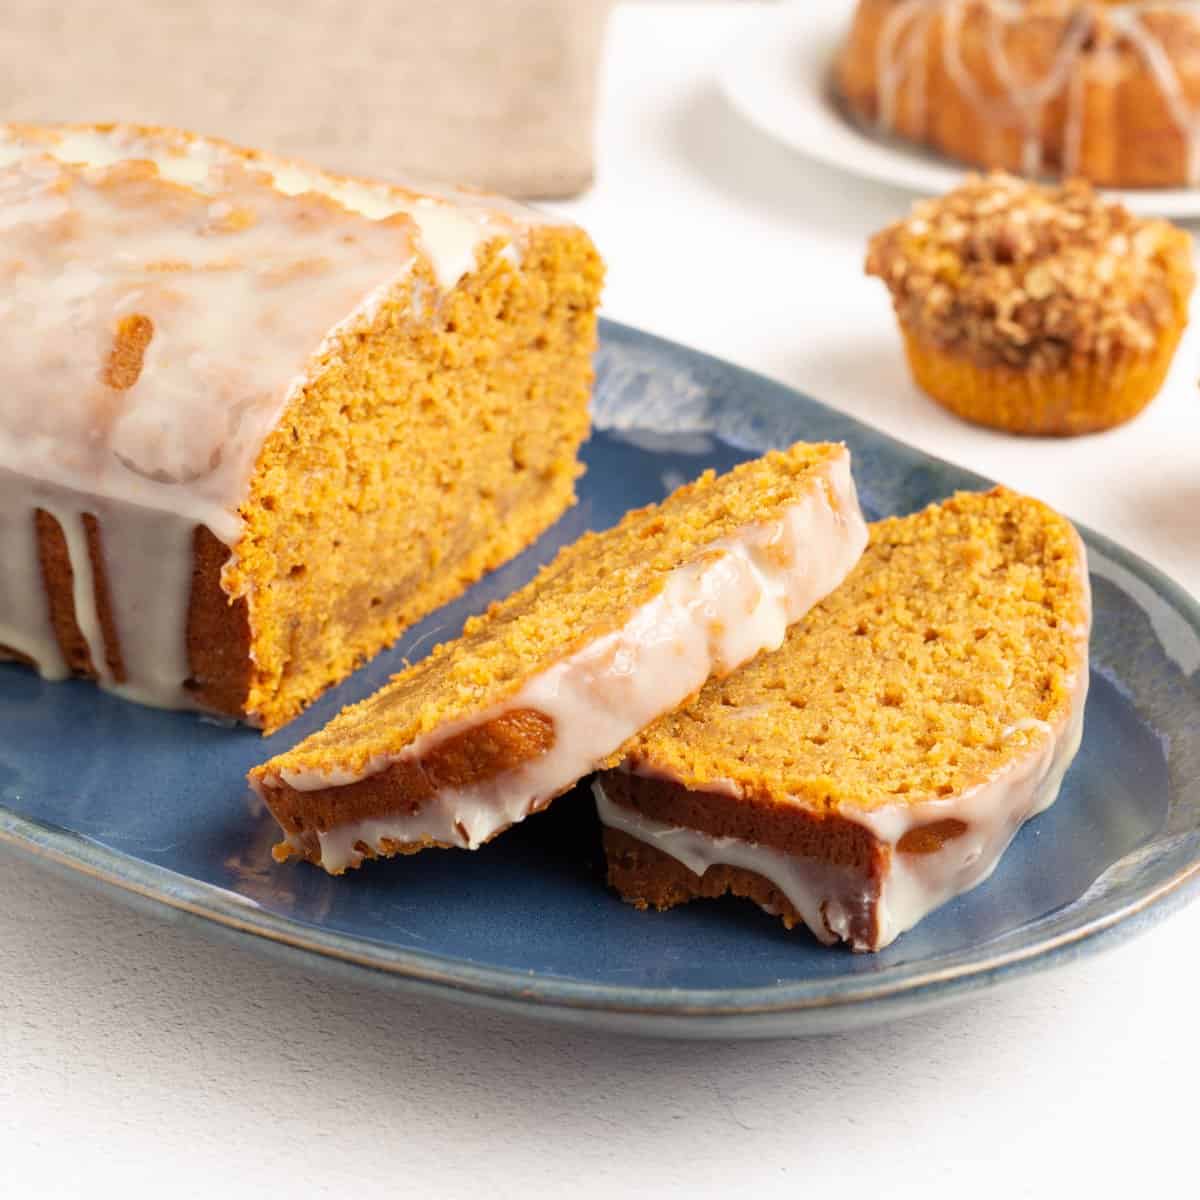
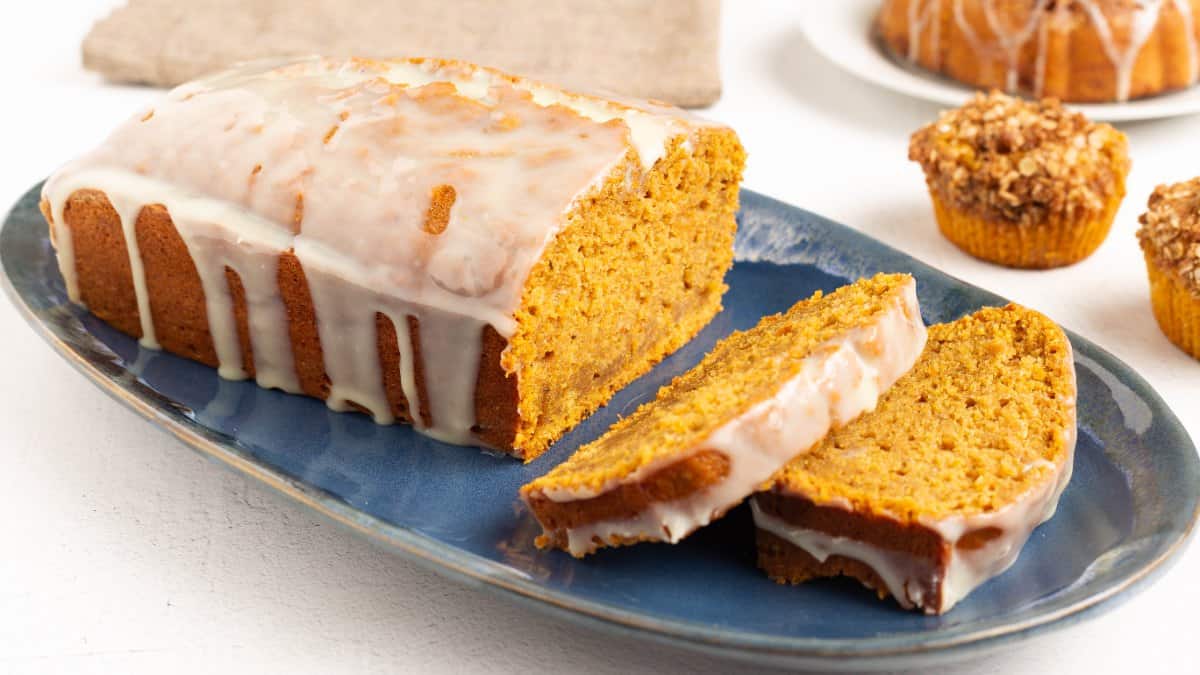
This glazed pumpkin bread is the only pumpkin bread recipe you'll ever need. It's a soft, moist, perfectly spiced loaf made from scratch with nothing more than a whisk and a spatula (no mixer, no mixer at all), and it's finished with an orange-flavored white chocolate glaze that is the best orange glaze I've ever made. Whether you want a loaf, muffins or little mini buns, this one batter does it all.
Most pumpkin bread glazes are made with powdered sugar or maple syrup. Mine is a thin white chocolate ganache infused with fresh orange zest, and I think it's more flavorful, it sets up better, and it isn't too sweet. I also bake my loaf low, at 325℉/165℃ on the middle rack. Lower temperatures cook more evenly and help the center finish cooking before the top gets too done, which keeps the entire loaf softer.
Would you like to save this recipe?
Quick breads are super easy to make, but there are a few tips that make all the difference, and I'm going to walk you through every one of them.
- why quick breads crack on top
- how to tell when your loaf is really done
- why it only stays in the pan for 10 minutes once it comes out of the oven
Once you see how simple it is, this will be your go-to pumpkin bread.
Suggested Kitchen Tools for Glazed Pumpkin Bread
- Standard size loaf pan (light, dark, glass or stoneware all work)
- 2 mixing bowls
- Whisk
- Silicone spatula
- Small saucepan (for the glaze)
- Zester
- Fine mesh strainer
- Instant-read thermometer
- Cooling rack
- Parchment paper
- Thin spatula (for loosening the sides of the loaf)
- Slicing knife
Ingredients & Substitutions
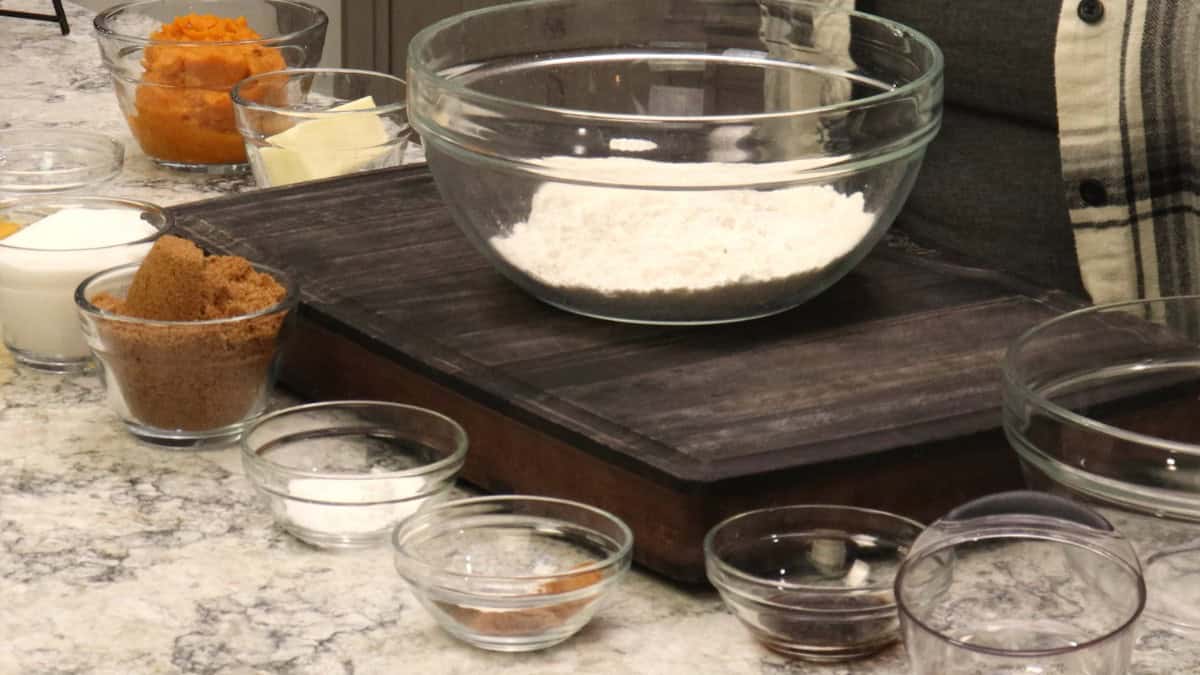
Don't let the ingredient list overwhelm you. These are really simple ingredients, and most of them are probably already in your pantry. Let's take a closer look at each one.
Pumpkin Puree
Used in Recipe: 1 cup of plain pumpkin puree, canned or homemade.
What it Does: Pumpkin is the star of the show. It brings the flavor, the color and a lot of the moisture. Make sure it is just plain pumpkin puree, not the spiced kind and not pumpkin pie mix, since we're adding our own spice blend. One 15-ounce can gives you enough for this recipe plus another half batch, which is perfect for a few muffins. Have a little pumpkin puree left in the can? My Ginger Pumpkin Brownies use just half a cup, and they are delicious.
Substitutions: Homemade pumpkin puree works beautifully, but make sure it's pretty thick and well drained. Homemade puree tends to be a little looser, and you don't want it too wet in this recipe.
Flour, Salt and Warm Spices
Used in Recipe: 1⅔ cups of all-purpose flour, ½ teaspoon of fine grind sea salt, ¼ teaspoon of ground cloves, ½ teaspoon of nutmeg and 1 teaspoon of cinnamon.
What it Does: The flour gives the bread its structure. I whisk the spice blend right into the flour first so it gets evenly incorporated, and that way every slice is perfectly spiced. Get every little bit of those spices into the bowl; they bring so much flavor to the bread.
Substitutions: Kosher salt works in place of the fine grind sea salt. This recipe was made and timed with all-purpose flour, so I recommend sticking with it.
Baking Powder and Eggs
Used in Recipe: 2 teaspoons of baking powder and 2 large eggs.
What it Does: Baking powder is what makes this a quick bread. It leavens the batter, meaning it makes it rise, with no yeast and no waiting. The eggs help it rise as well, and they bind everything together.
Substitutions: There's no need to whip the eggs first; they break up just fine when you whisk them in with the sugar. Make sure your baking powder is fresh so you get a good rise.
Brown Sugar, White Sugar and Vanilla
Used in Recipe: ¾ cup of packed dark brown sugar, ¾ cup of white granulated sugar and 1 teaspoon of vanilla extract or vanilla paste.
What it Does: I use dark brown sugar because I really love the flavor of the molasses it brings to pumpkin bread. The sugars go in with the wet ingredients. You could mix them in with the dry, but you'll have a much easier time blending everything together this way. Vanilla rounds out all of those warm spices.
Substitutions: Light brown sugar is perfectly fine; the only difference between dark and light brown sugar is the molasses. Use vanilla extract or vanilla paste. I use my homemade vanilla paste, which takes about 5 minutes to make and will save you money at the store. You'll find my Homemade Vanilla Bean Paste recipe right here on my website.
Butter, Oil and Water
Used in Recipe: ¼ cup of melted butter, ¼ cup of neutral oil and ½ cup of water.
What it Does: We use both fats because they act differently in this bread. The butter brings tons of flavor, and the oil keeps the bread light and moist. So do me a favor and use both of them. The water goes in last, and it adds the extra hydration that gives you a nice, loose batter.
Substitutions: I use avocado oil, but any neutral oil you like will work. Please don't make it with only butter or only oil; you want the flavor of one and the moisture of the other.
Orange White Chocolate Glaze
Used in Recipe: ½ cup of white chocolate melting wafers or white chocolate chips (about 4 ounces), ½ cup of heavy cream and the zest of 1 orange.
What it Does: Together these make a thin ganache, steeped with fresh orange zest. The orange flavor is delicious with the pumpkin and warm spices, and a white chocolate glaze sets up better than a powdered sugar glaze without being too sweet.
Substitutions: Melting wafers and chips both work fine; chips just take a little longer to melt. I use a navel orange, but any orange will work, even a little clementine. If you want to boost the orange flavor, you can add a little orange oil, but I found the zest alone works perfectly fine.
How to Make Glazed Pumpkin Bread
This pumpkin bread takes about 20 minutes of hands-on time and 50 to 60 minutes in the oven. The glaze needs about an hour to steep, so you'll start it while the bread cools. Here is everything you need to know!
Preheat the Oven and Whisk the Dry Ingredients
- Preheat the oven to 325℉/165℃ with the rack in the middle slot, so your pan gets really good overall heating.
- Measure the dry ingredients: 1⅔ cups of all-purpose flour, ½ teaspoon of fine grind sea salt, ¼ teaspoon of ground cloves, ½ teaspoon of nutmeg, 1 teaspoon of cinnamon and 2 teaspoons of baking powder.
- Measure the wet ingredients: ¾ cup of packed dark brown sugar, ¾ cup of granulated sugar, 2 large eggs, ¼ cup of melted butter, 1 teaspoon of vanilla, ¼ cup of neutral oil, 1 cup of pumpkin puree and ½ cup of water.
- Have a little butter and 1 tablespoon of flour ready for the pan.
- For the glaze, measure ½ cup of heavy cream and ½ cup of white chocolate wafers or chips, and have an orange and a zester ready.
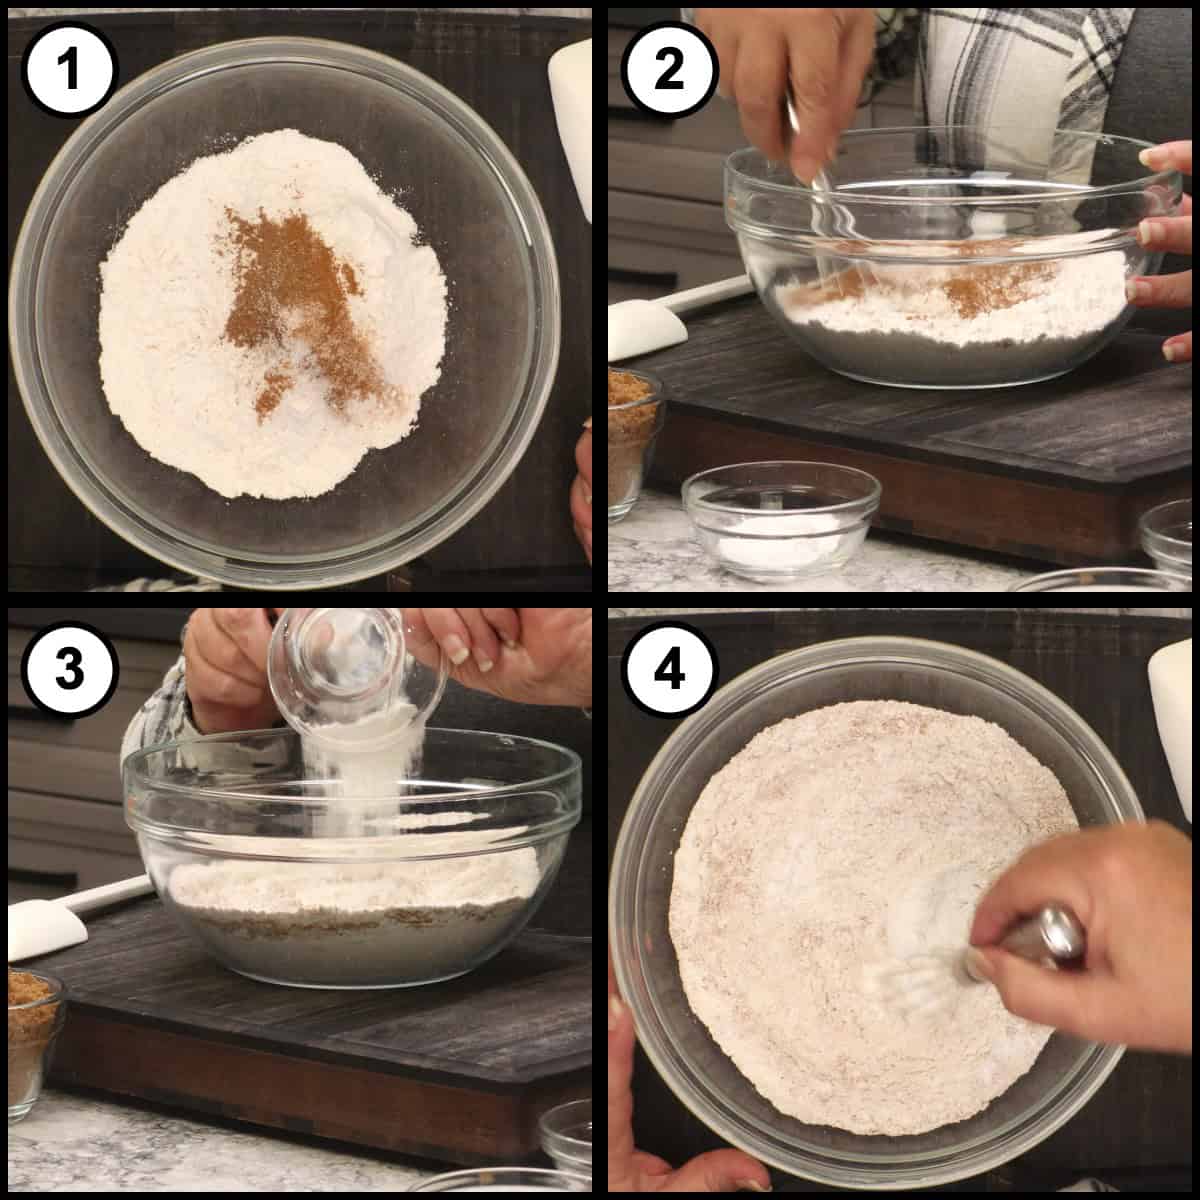
Add the flour to a mixing bowl, then add the spice blend right on top: the salt, cloves, nutmeg and cinnamon. Whisk so the spices get evenly incorporated into the flour. Then add the baking powder, whisk again, and set the dry ingredients aside.
Whisk the Sugars, Eggs and Butter
In a second mixing bowl, add the dark brown sugar, the granulated sugar, the eggs and the melted butter. You can whip up the eggs first if you like, but they break up just fine as you whisk. Keep whisking until the eggs are broken up and the sugar is blended with no clumps.
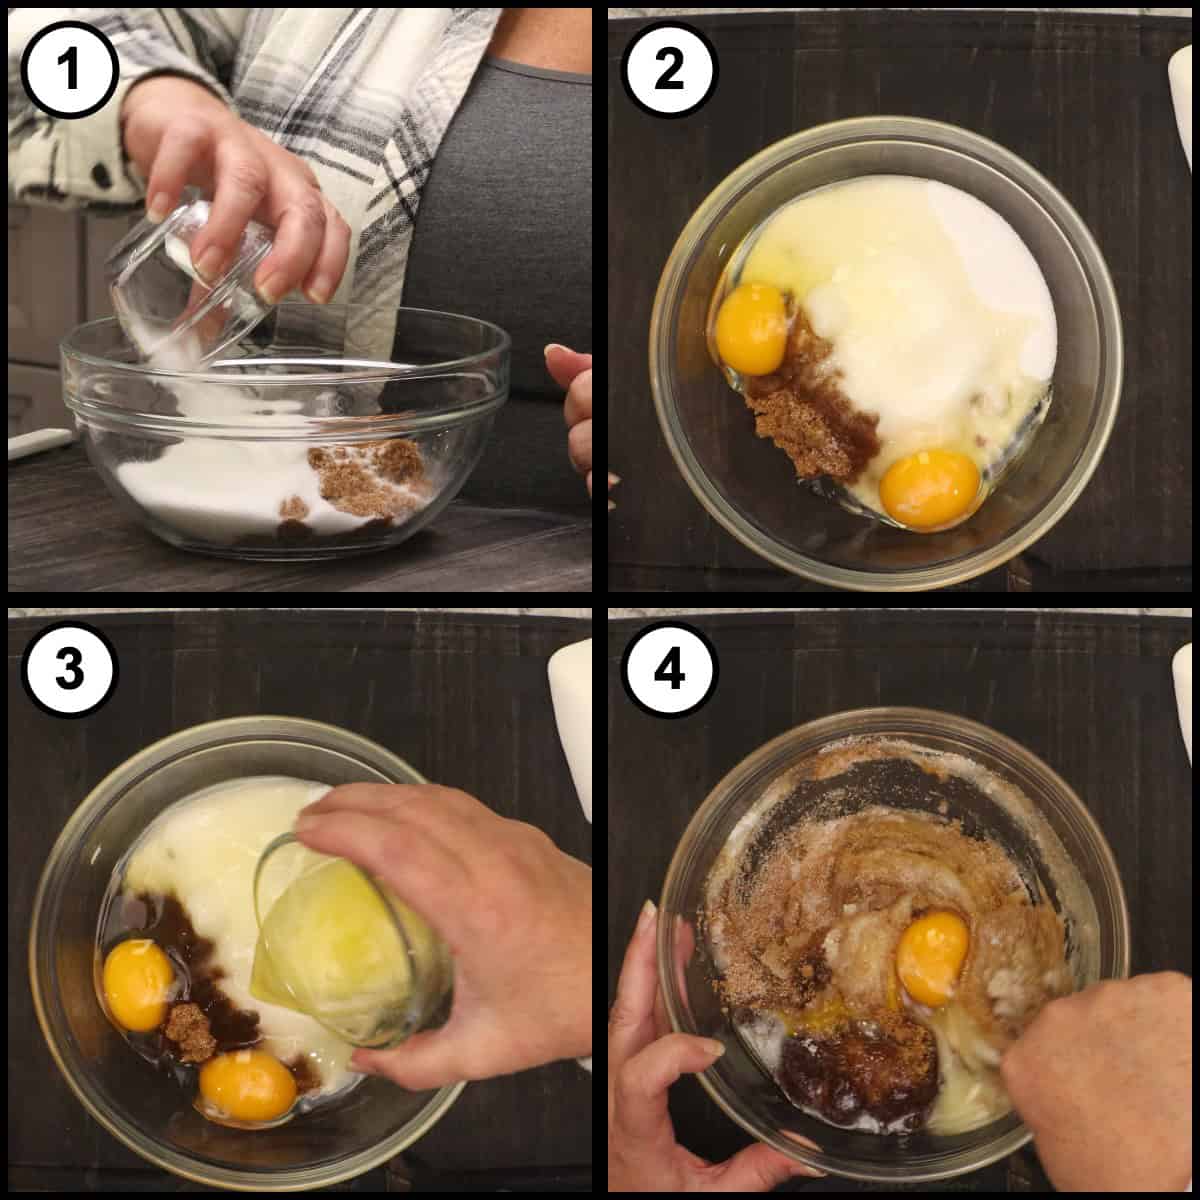
Whisk in the Vanilla and Oil
Now whisk in the vanilla, then the oil, until the mixture is nice and smooth. Vanilla extract or vanilla paste both work perfectly fine here; I use my homemade vanilla paste.
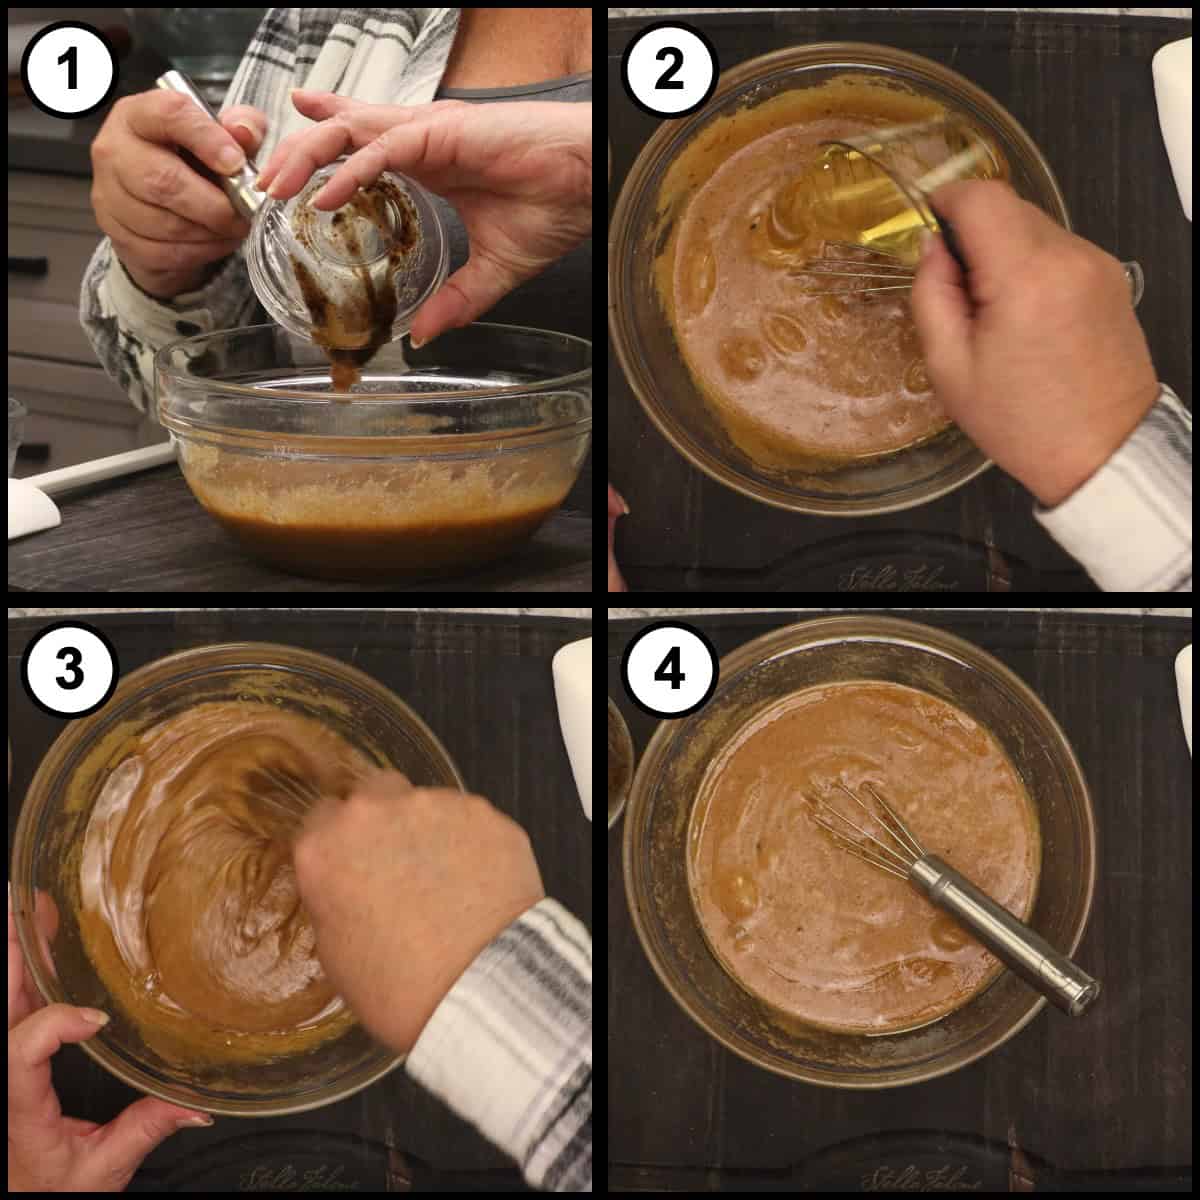
Whisk in the Pumpkin
Finally, add the pumpkin puree and mix it really well. Scrape every bit of it out of the measuring cup, and whisk until the wet ingredients are smooth with no streaks of pumpkin left.
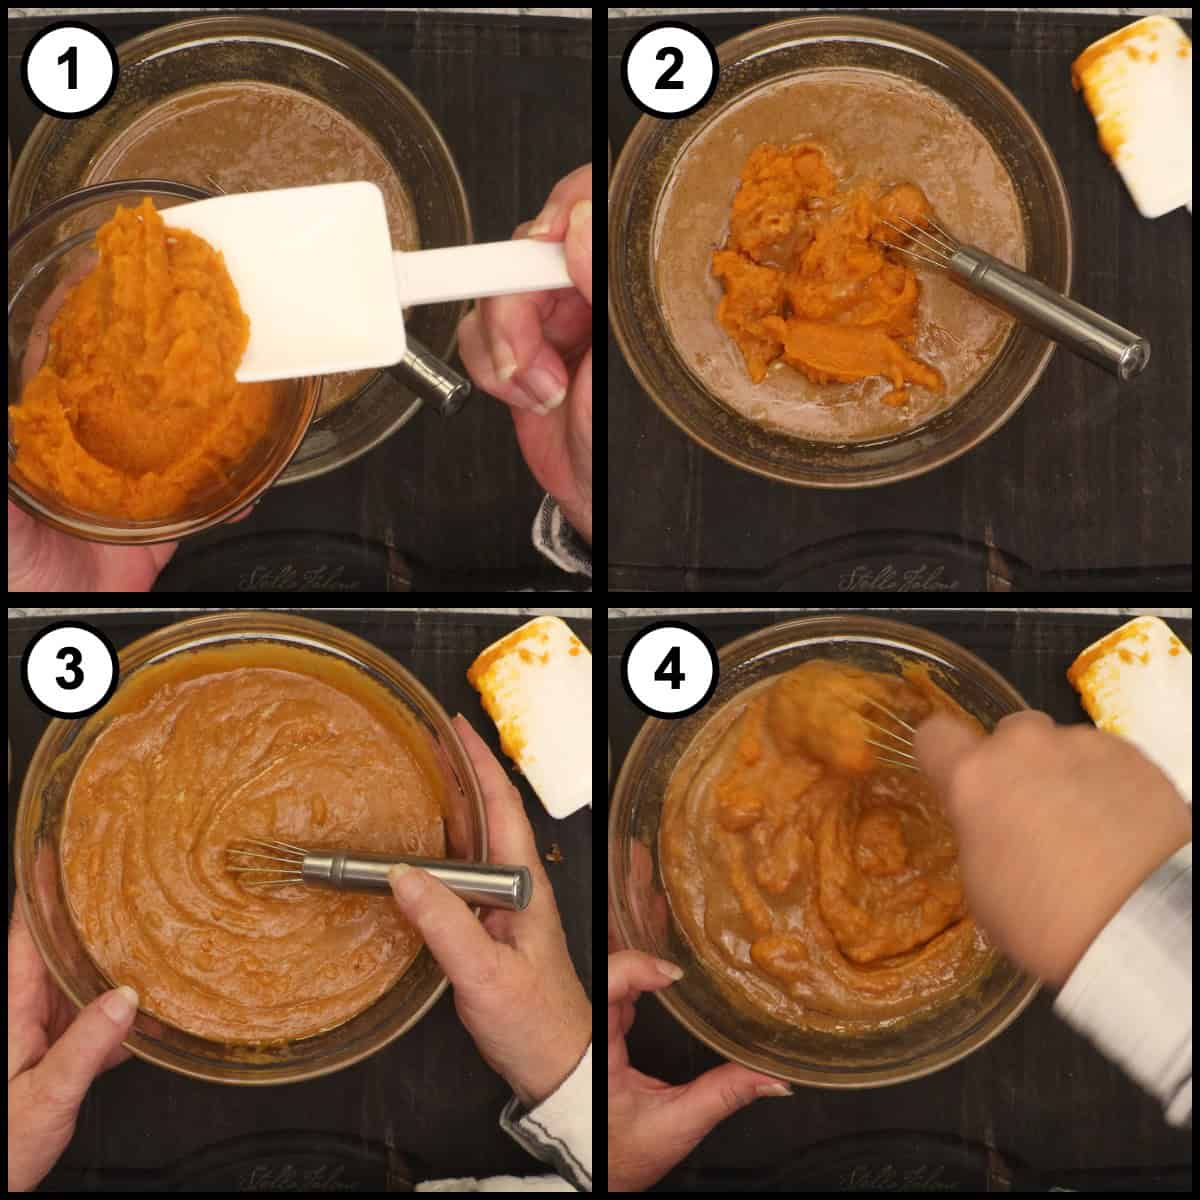
Butter and Flour the Pan
Butter a standard size loaf pan really well, with a little extra in the corners, since the flour doesn't like to stick there. When I get down to the end of my butter, I save the wrappers and use them to butter my pans. My mom always did the same thing with a little piece of wax paper, and it keeps your fingers a little bit cleaner. Not perfectly clean, but a little bit cleaner!
Sprinkle in 1 tablespoon of flour, then tap and turn the pan so the flour moves around the bottom and the edges. If there are a couple of spots that aren't covered, don't worry about that; it won't make any difference. Turn the pan over the bowl and knock out the extra flour a couple of times.
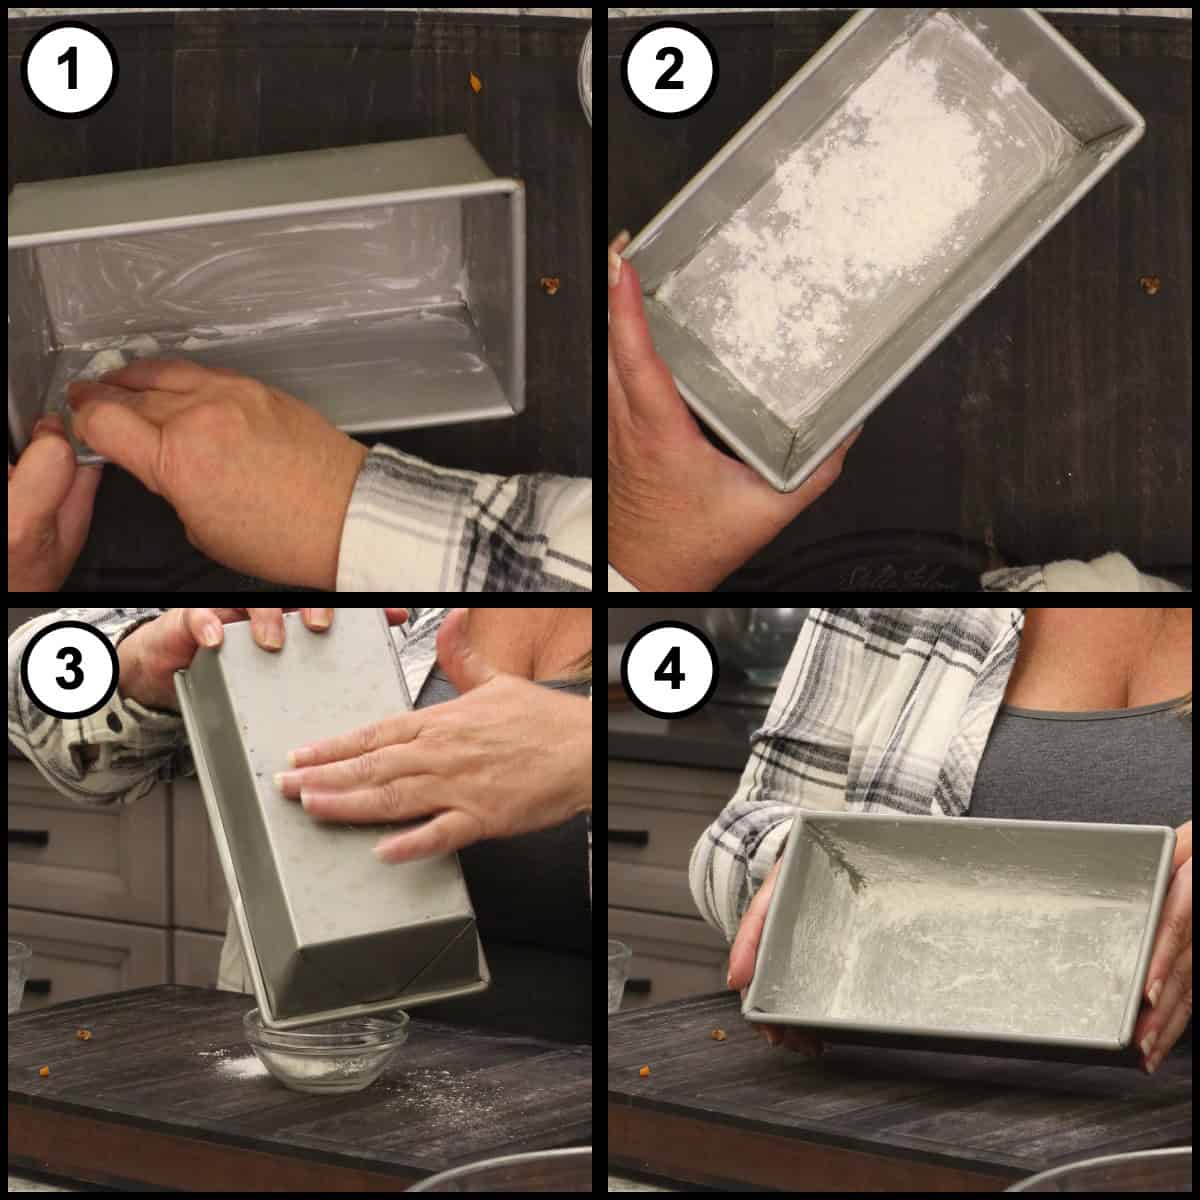
Fold the Wet Ingredients Into the Dry
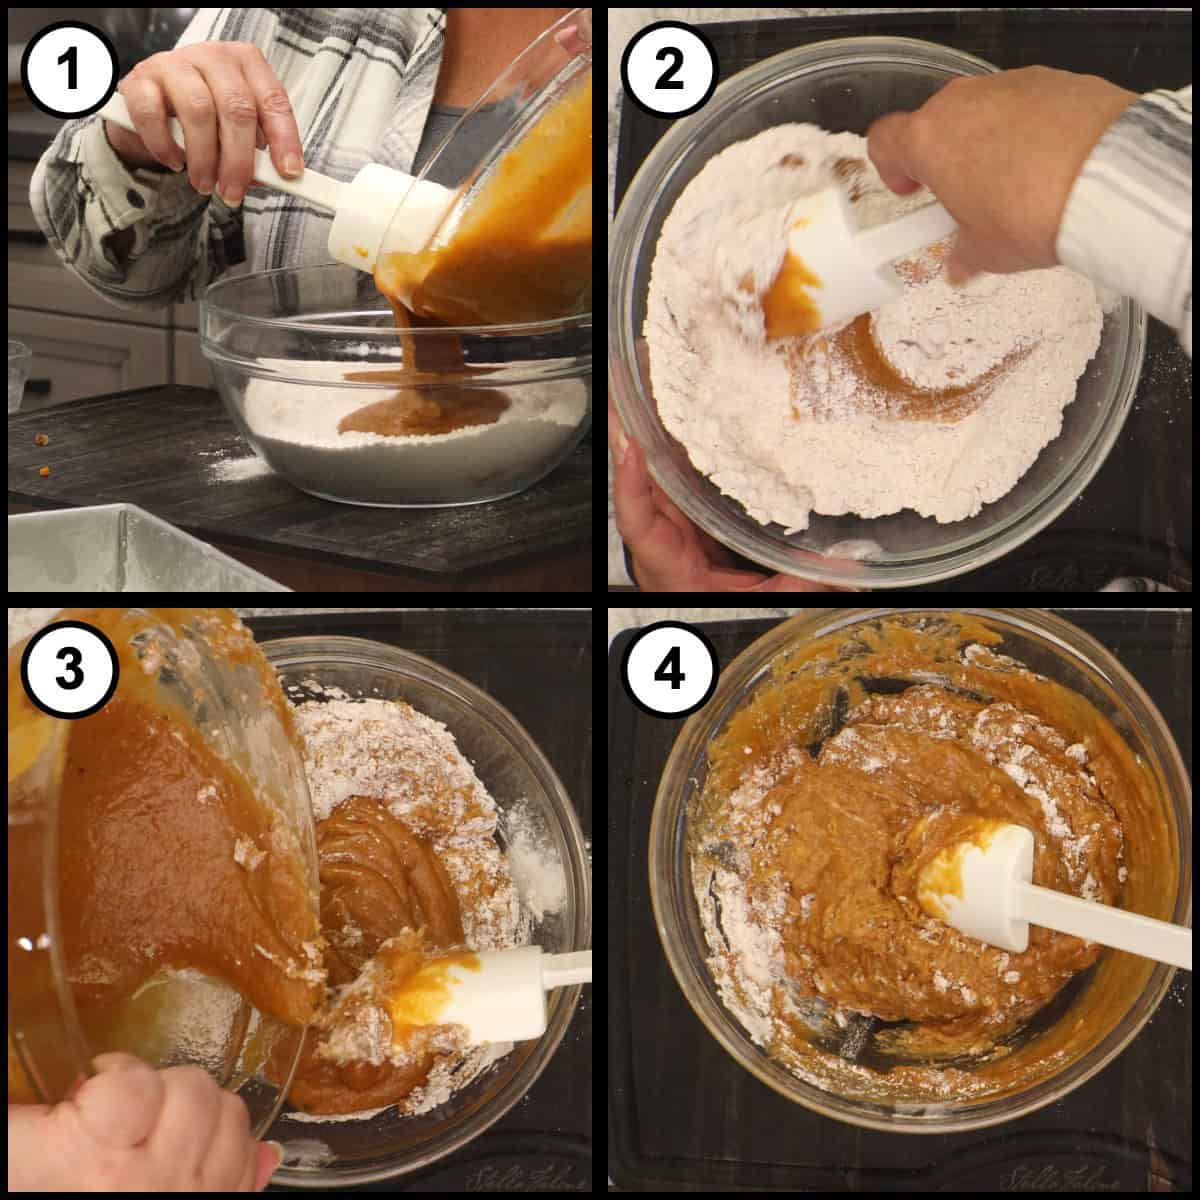
Now we combine the two, and remember, we don't want to overmix. Pour about a third of the wet ingredients into the dry ingredients and fold them in with the spatula. Add another third and fold again. You can also add the dry ingredients to the wet if you prefer; I honestly don't think it makes a difference.
Fold in the Water
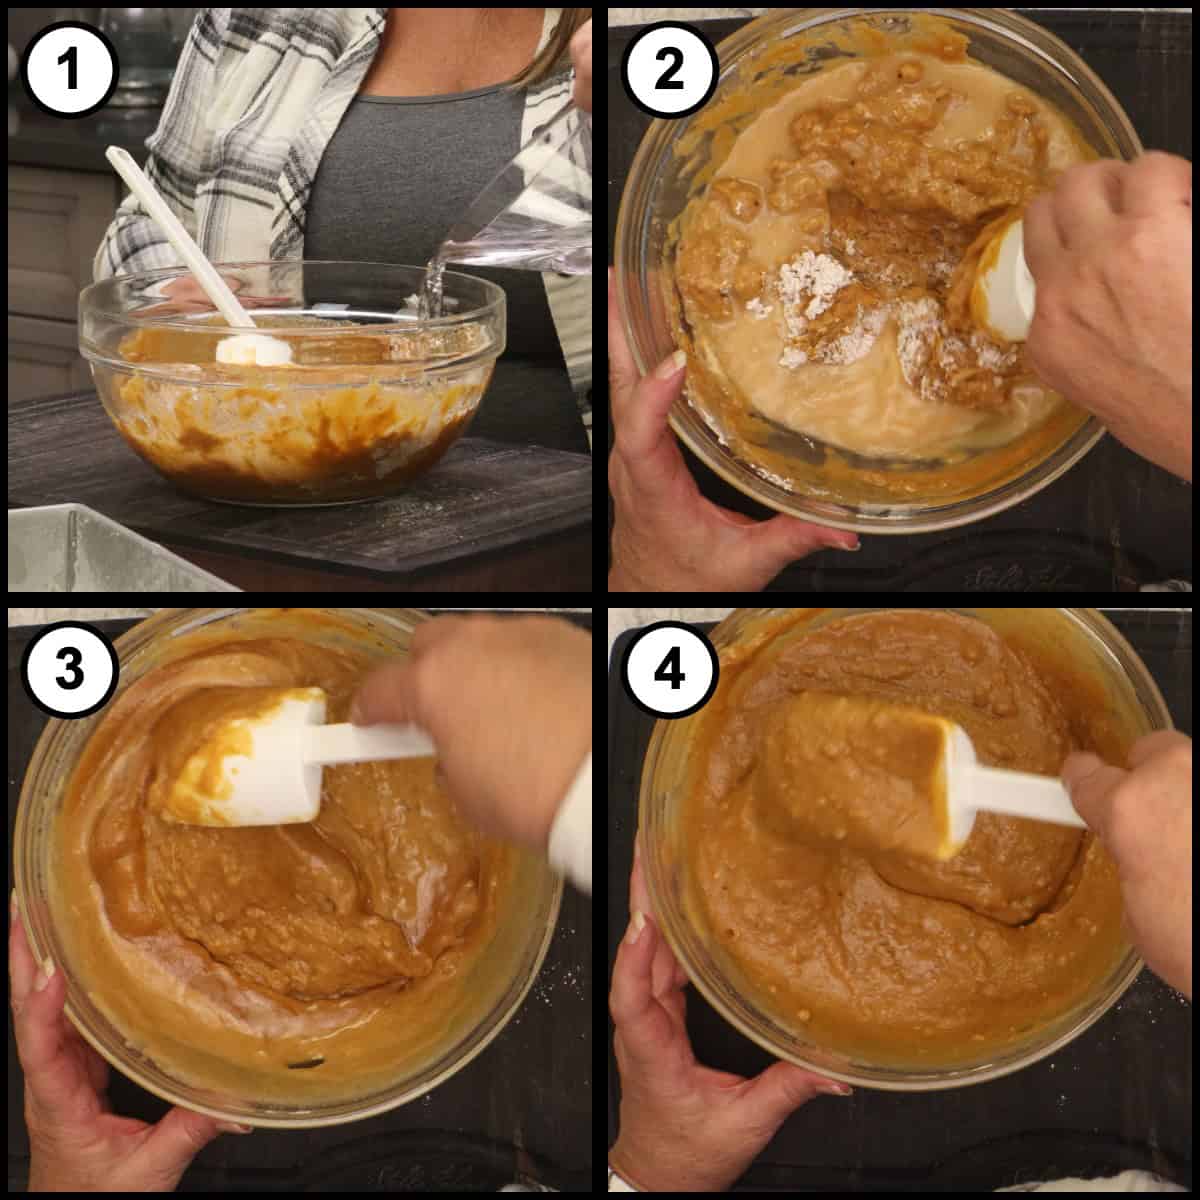
Add the ½ cup of water, which loosens everything up, and fold. Then add the rest of the wet ingredients and fold about 10 times or less, just until it all comes together. You'll have a nice, loose batter.
Quick Tip
Use only a whisk and a spatula for this recipe, no mixer at all. Overmixing is what creates a dense, tough quick bread. Fold the batter just until it comes together, about 10 folds or less once everything is in, and you'll get a super moist, light texture.
Bake Low and Slow, Then Cool 10 Minutes in the Pan
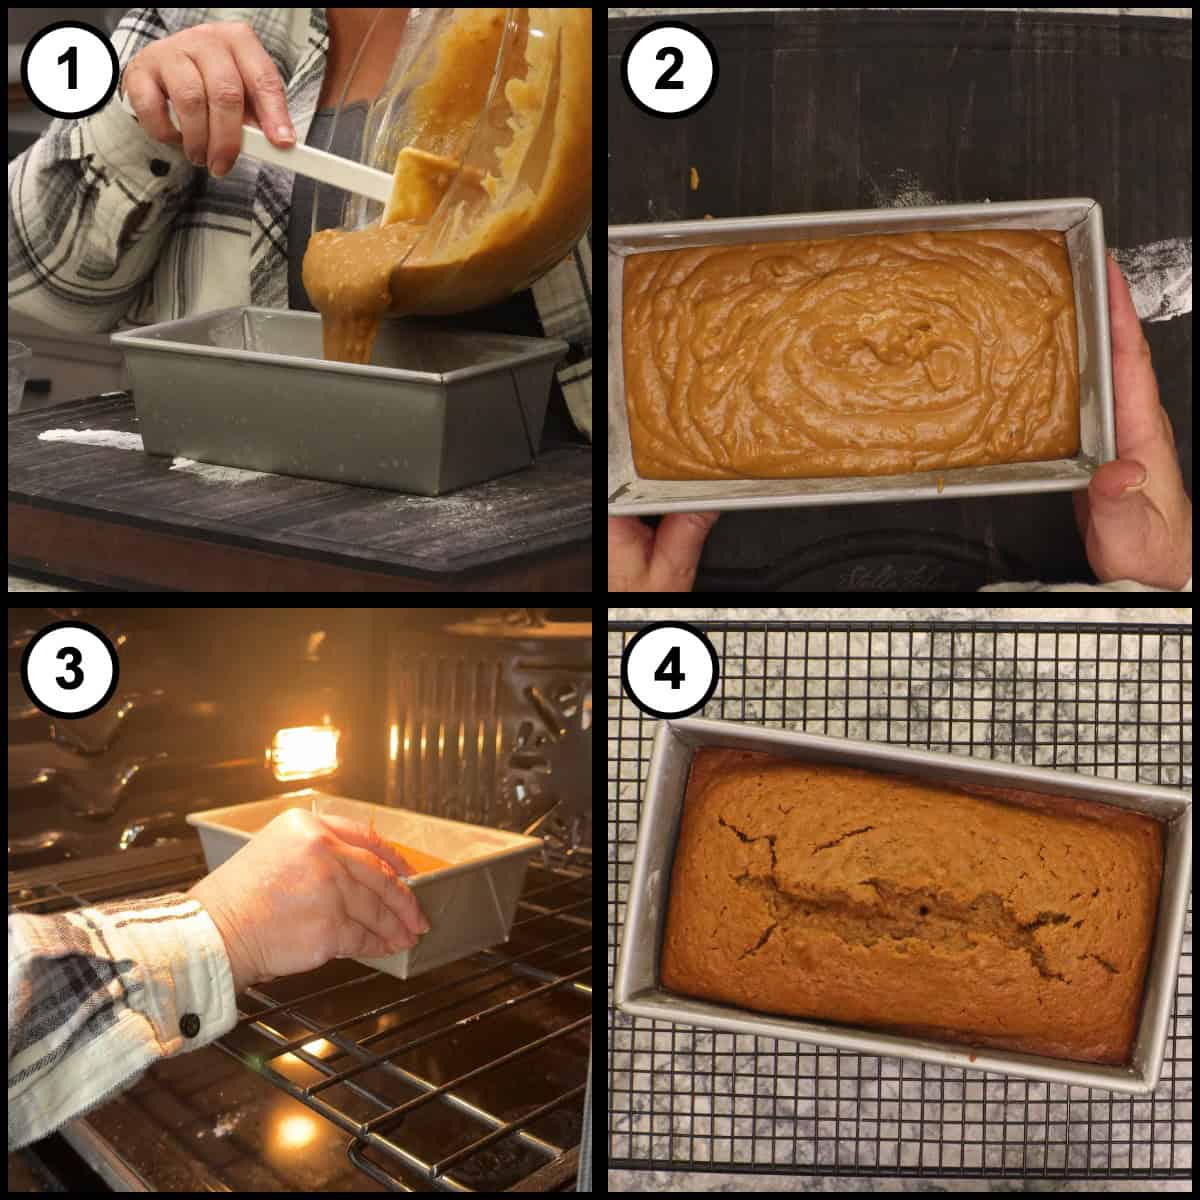
Pour the batter into the prepared pan and bake on the center rack for 50 to 60 minutes. Here's why I bake at 325℉/165℃. If you've made quick breads before, you may have had this happen: they look beautiful while they bake, and then all of a sudden the top cracks and things bubble up and over. That happens because steam builds up in the middle of the loaf, and the steam needs someplace to go. As the very center heats, it pushes up, and that's why you get all those cracks. In a loaf pan you have to get the center done, so a lower temperature and a longer bake help, and they also stop the top from overbrowning.
Your oven could run a little hotter or a little cooler than mine, so it's important to know how your oven runs. If your oven runs hot, you might even go down to 300℉/150℃. With my oven, 325℉/165℃ works great; with my old oven, 350℉/175℃ worked fine. Use your judgment, but somewhere between 325-350℉/165-175℃ is the range. Finding your sweet spot is a little bit of trial and error.
You'll still get a dome, and that's perfectly fine. For the first 25 minutes or so the bread rises nice and flat, and in the last 20 minutes or so the dome forms. You're not going to avoid it, and you don't want to. Sometimes you'll have a crack down the middle and sometimes a few smaller cracks on the sides. It doesn't matter; it will taste delicious.
At 50 minutes, take a peek. If the batter where the top split is still really glossy, that's your first indication it's not done. If the loaf jiggles too much, it needs more time too. Mine needed 10 more minutes, for a total of 60 minutes at 325℉/165℃, but yours could take 65 minutes or a lower temperature, depending on your oven. Don't take it out of the oven until it looks dry. If it looks goopy, it is not cooked.
You can also use a thermometer. Go straight down into the middle of the loaf and look for an internal temperature of about 205℉/96℃. Mine read 210℉/99℃, and that didn't hurt anything. If your thermometer comes back goopy, even if it's reading something like 190℉/88℃, it still needs more time.
A lot of recipes use a toothpick test, but I prefer to temp my quick breads. Temping is the most accurate way of determining doneness, because it tells you exactly what's happening in the very center of the loaf.
Once it's done, set the pan on the cooling rack for 10 minutes. You don't want it to cool completely in the pan. It tends to stick, and the steam building up inside can dry it out and overcook it.
Quick Tip
An instant-read thermometer takes the guesswork out of quick breads. Go straight down into the center and look for about 205℉/96℃. Along with a top that looks dry, not glossy, that's how you know the center is finished.
Turn It Out and Cool Completely
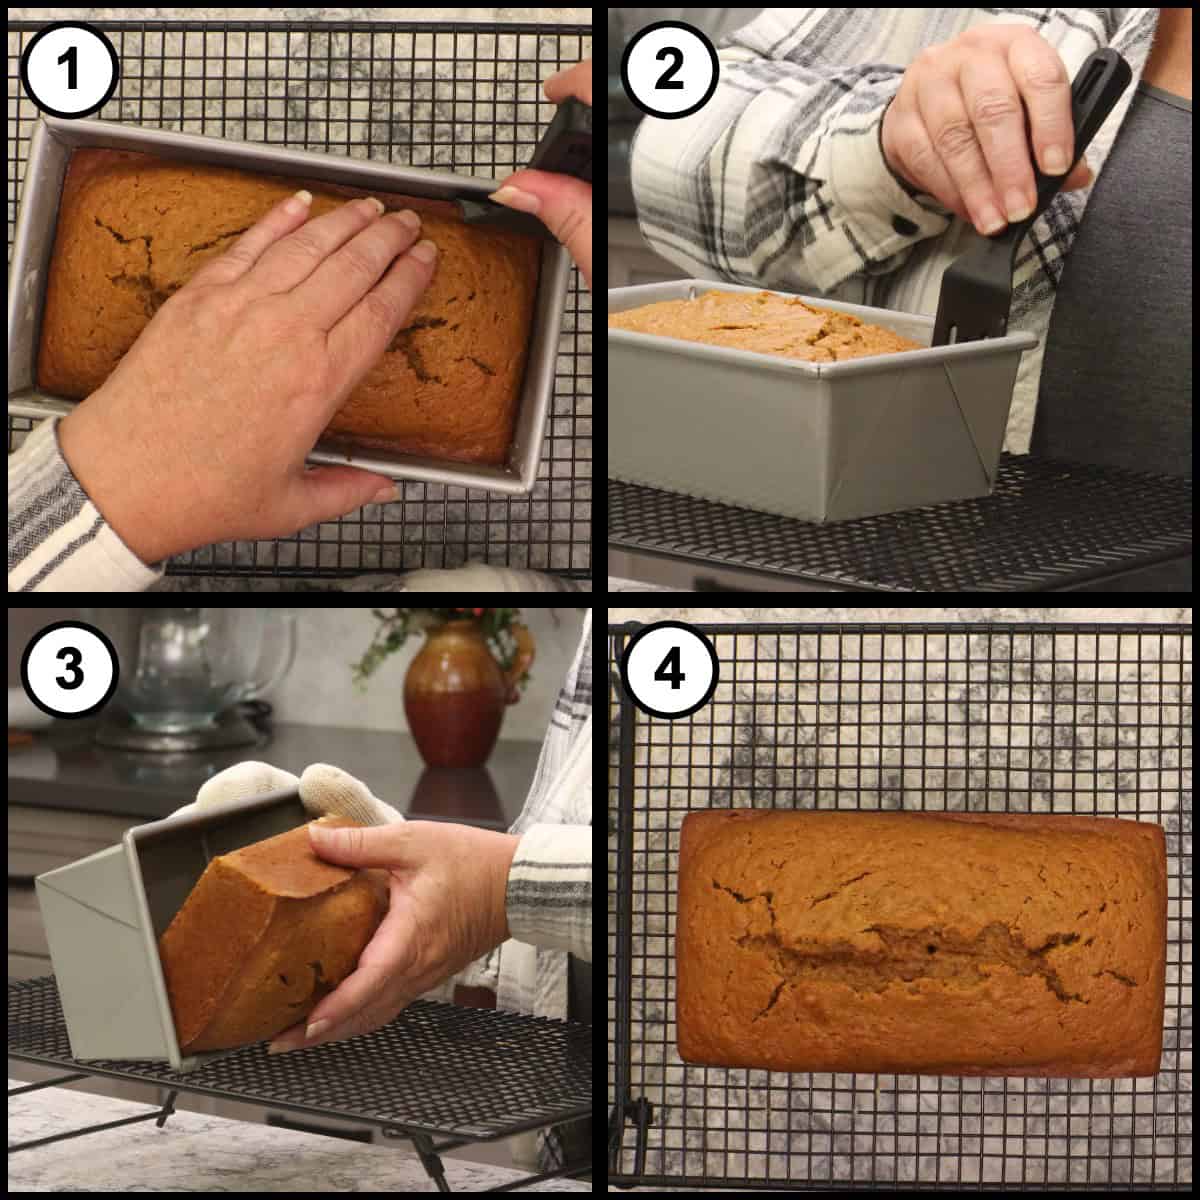
After 10 minutes, it's time to remove the bread from the pan. For a little extra insurance, run a thin spatula down the sides of the pan. It's not really necessary if you buttered and floured your pan, but this is always the moment of truth, isn't it? The pan will still be warm, so use some protection for your hands, then turn the bread out onto the cooling rack.
Now let it cool completely before glazing. I know you want to taste it, but not yet. It needs to finish setting up, and it finishes cooking through with the residual heat.
Steep and Strain the Orange Cream
While your pumpkin bread is cooling, make the glaze. It's super easy, but the orange zest needs to steep in the cream for about an hour, so do this step now. Essentially, what we're making is a thin ganache.
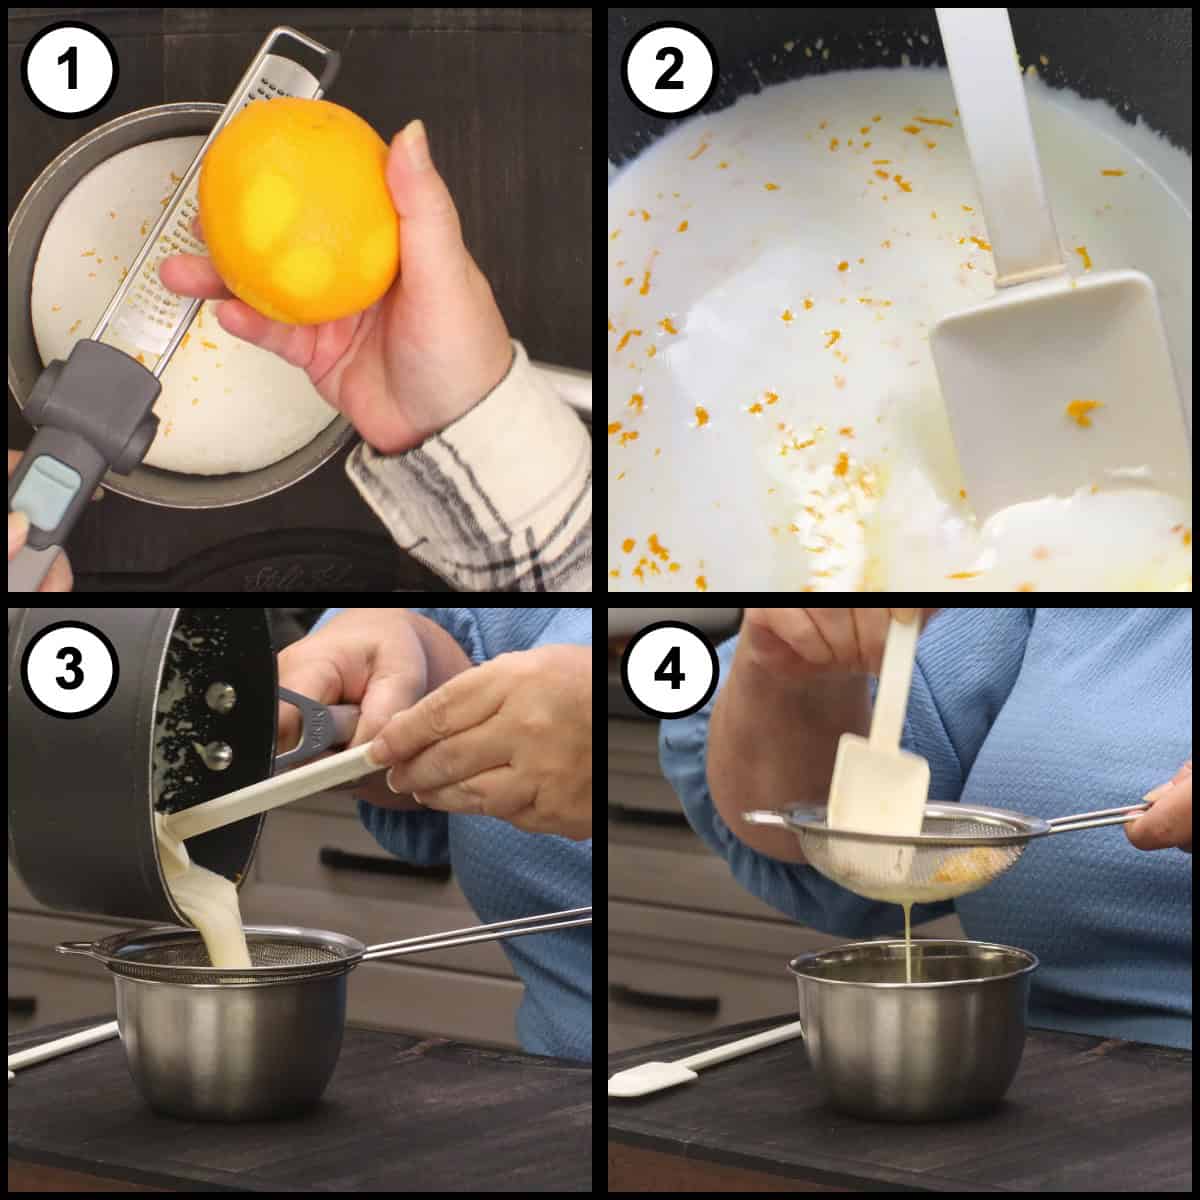
Pour the ½ cup of heavy cream into a small saucepan and zest the orange right over the pot, so the little spray of orange essence drops in too. Only go to the first thin layer of skin. You don't want to see the white pith; it's bitter and it will throw off the flavors. You'll need about a tablespoon of zest, but honestly, I don't measure. I zest the entire orange, and if you have more, it won't hurt. Use or wrap the orange soon afterward, since it dries out once the skin is removed.
Heat the cream on medium just until it starts to simmer. We don't want to boil it, but we do need a little heat to extract the flavor, so don't go too high too fast. Stirring helps release steam and keeps the temperature in check. Once it reaches that little bit of a bubble, take it off the heat and let it steep at room temperature for about an hour.
If you want to steep it longer, you can leave it in the refrigerator overnight in a sealed container, or at room temperature for up to 2 hours with something over the top so it doesn't form a skin. When it's done, give it a stir and pour it through a fine mesh strainer, pressing down to get every bit of cream and orange flavor out. Give the saucepan a quick rinse and dry it.
Melt the White Chocolate Into the Cream
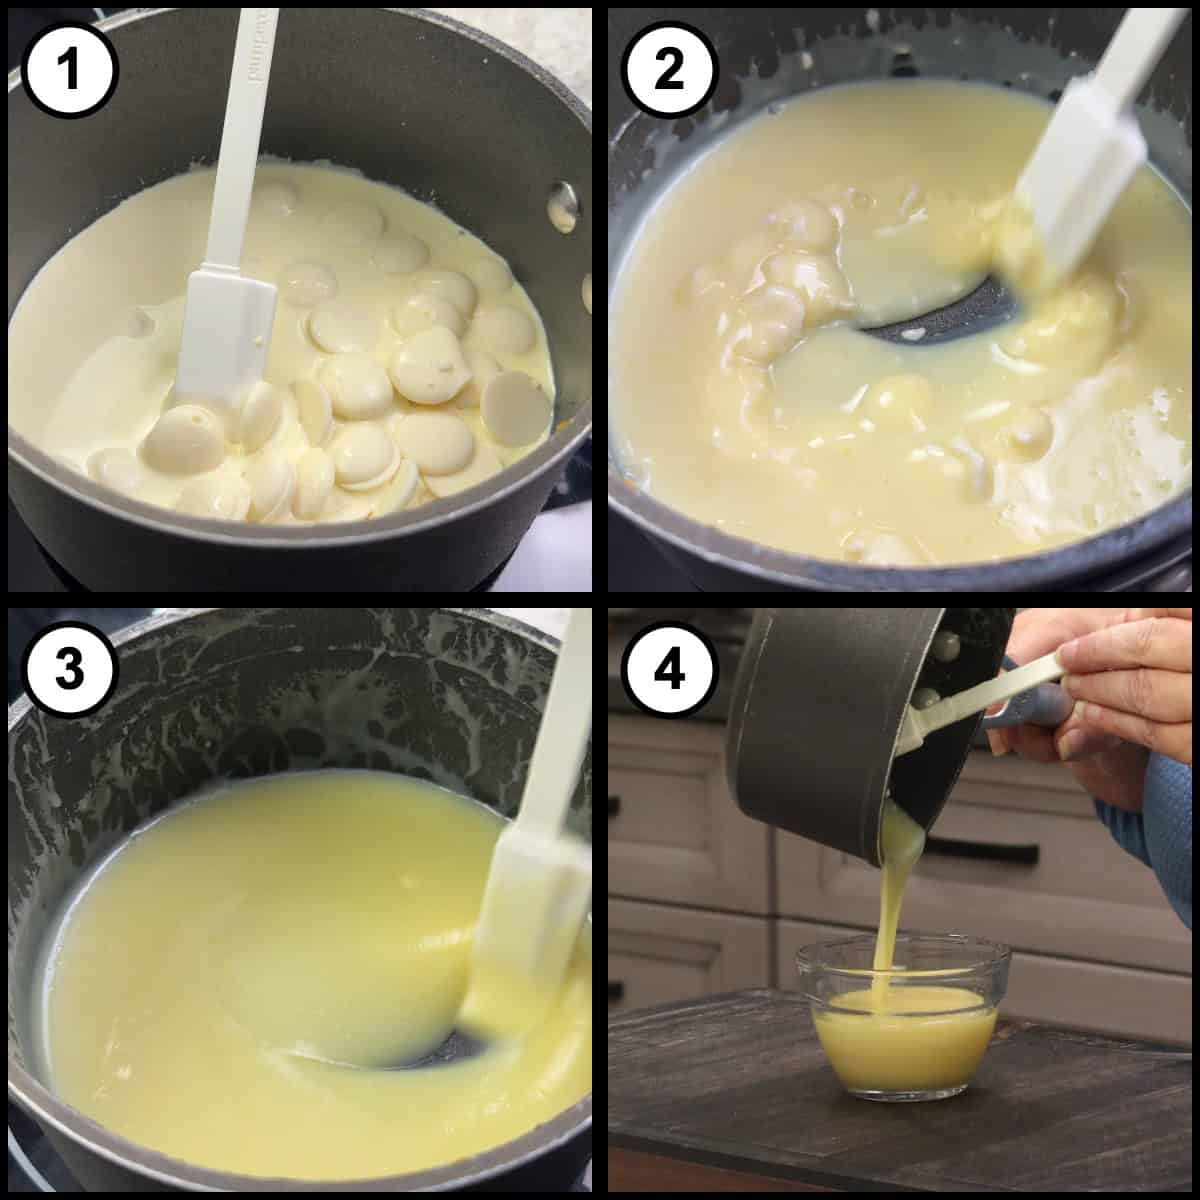
Add the white chocolate to the clean saucepan, scrape the cream back in, and set it over low heat, stirring until the chocolate melts. You can also warm the cream in the microwave on 50% power and stir in the chocolate, but I find the stovetop is just as fast, I'm in complete control, and I never overheat the cream. Pour the glaze into a bowl and let it cool for about 5 minutes. If you poured it over the bread right away, it would just drip right off.
Glaze and Slice
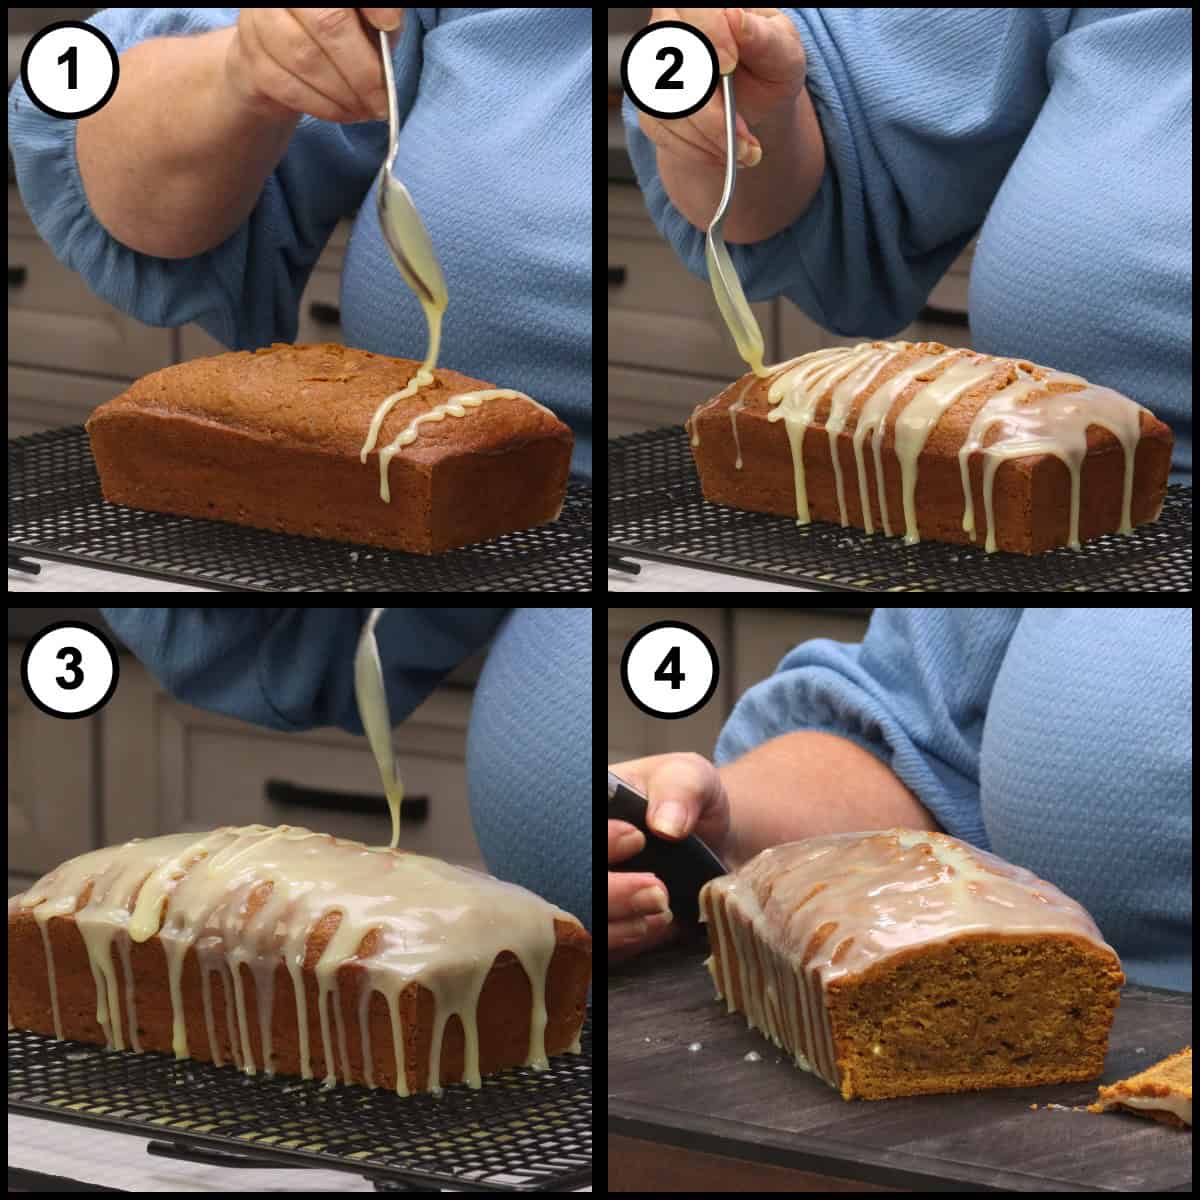
Once the glaze has a nice, smooth consistency and isn't too hot, you're ready to glaze. Put a piece of parchment down and set the cooling rack with the pumpkin bread right on top, so the glaze can drip down the sides. You could literally just pour it over the top and let it drip, but I like to do it in layers. Spoon the glaze over the top and let the excess drip down, let it set up a little bit, then add another layer. Sometimes I'll do 2 or 3 layers; it just depends on what I'm in the mood for. You can always scoop up what's underneath and put that on top too.
Let the glaze set up, or put the bread in the refrigerator to help it set a little quicker. If you've waited long enough, you can cut it right away; it will just be a little sticky. A slicing knife cuts it like a dream. Oh my goodness, perfect pumpkin flavor, perfectly spiced.
This glazed pumpkin bread is delicious on its own, with a little extra glaze drizzled over each slice. It's a wonderful treat with a cup of coffee or tea.
Glazed Pumpkin Bread
Equipment
- Standard size loaf pan
- 2 mixing bowls
- Whisk
- Silicone spatula
- Small Saucepan
- Zester
- fine mesh strainer
- Instant-read thermometer
- Cooling rack
- Parchment Paper
- Thin spatula
- Slicing knife
Ingredients
Dry Ingredients
- 1⅔ cups all-purpose flour
- ½ teaspoon fine grind sea salt or kosher salt
- ¼ teaspoon ground cloves
- ½ teaspoon ground nutmeg
- 1 teaspoon ground cinnamon
- 2 teaspoon baking powder
Wet Ingredients
- ¾ cup dark brown sugar, packed light brown sugar works too
- ¾ cup granulated sugar
- 2 large eggs
- ¼ cup butter, melted
- 1 teaspoon vanilla extract or vanilla paste
- ¼ cup neutral oil such as avocado oil
- 1 cup plain pumpkin puree canned or homemade; not spiced and not pie filling; homemade should be thick and well drained
- ½ cup water added last, while folding the batter
For the Pan
- butter, for greasing the pan
- 1 tablespoon all-purpose flour for flouring the pan
Orange White Chocolate Glaze
- ½ cup heavy cream
- 1 orange, zested about 1 tablespoon zest; any orange works, even a clementine
- ½ cup white chocolate melting wafers or white chocolate chips about 4 oz
Would you like to save this recipe?
Instructions
- Preheat the oven to 325℉/165℃ with the rack in the middle position. If your oven runs hot, set it to 300℉/150℃.
- In a mixing bowl, add 1⅔ cups of all-purpose flour, then the spice blend: ½ teaspoon fine grind sea salt, ¼ teaspoon ground cloves, ½ teaspoon nutmeg and 1 teaspoon cinnamon. Whisk to incorporate the spices into the flour. Add 2 teaspoons of baking powder and whisk again. Set aside.1⅔ cups all-purpose flour, ½ tsp fine grind sea salt, ¼ tsp ground cloves, ½ tsp ground nutmeg, 1 tsp ground cinnamon, 2 tsp baking powder
- In a second mixing bowl, add ¾ cup packed dark brown sugar, ¾ cup granulated sugar, 2 large eggs and ¼ cup melted butter. Whisk until the eggs are broken up and the sugar is blended with no clumps.¾ cup dark brown sugar, packed, ¾ cup granulated sugar, 2 large eggs, ¼ cup butter, melted
- Whisk in 1 teaspoon of vanilla, then ¼ cup of neutral oil. Add 1 cup of pumpkin puree and mix really well.1 tsp vanilla extract or vanilla paste, ¼ cup neutral oil, 1 cup plain pumpkin puree, ½ cup water
- Butter a standard size loaf pan well, using a little extra butter in the corners. Sprinkle in 1 tablespoon of flour and tap and turn the pan to coat the bottom and sides. Knock out the excess flour.butter, for greasing the pan, 1 tbsp all-purpose flour
- Pour about a third of the wet ingredients into the dry ingredients and fold with a spatula. Add another third and fold. Add ½ cup of water and fold. Add the remaining wet ingredients and fold about 10 times or less, just until the batter comes together. Do not overmix.
- Pour the batter into the prepared pan and bake on the center rack for 50 to 60 minutes.
- The bread is done when the top looks dry, the batter in the split on top is no longer glossy, the loaf does not jiggle, and a thermometer in the center reads about 205℉/96℃. If it is not done, bake for another 5 to 10 minutes and check again.
- Set the pan on a cooling rack for 10 minutes. Run a thin spatula down the sides, then turn the bread out onto the cooling rack. Do not let it cool completely in the pan. Let it cool completely before glazing.
Orange Glaze
- For the glaze, zest the orange directly over a small saucepan holding ½ cup of heavy cream, taking only the colored layer of the peel and none of the white pith. Heat on medium just until the cream starts to simmer; do not boil. Remove from the heat and let it steep at room temperature for about 1 hour.½ cup heavy cream, 1 orange, zested
- Stir the cream and pour it through a fine mesh strainer, pressing to get every bit of cream out. Rinse and dry the saucepan. Add ½ cup of white chocolate, pour the cream back in, and stir over low heat until the chocolate melts.½ cup white chocolate melting wafers or white chocolate chips
- Pour the glaze into a bowl and let it cool for about 5 minutes, until smooth and no longer hot.
- Set the cooling rack with the bread over a sheet of parchment paper. Spoon the glaze over the top and let the excess drip down the sides. Let it set a few minutes, then add a second layer (and a third, if you like), scooping up the drips from the parchment. Let the glaze set, or refrigerate briefly to set it faster, then slice and serve.
Notes
• Use only a whisk and a spatula. No mixer of any kind is needed, and overmixing makes a dense, tough quick bread. • The glaze cream needs to steep for about 1 hour, so start it while the bread cools. It can also steep overnight in the refrigerator in a sealed container, or up to 2 hours at room temperature, covered so it does not form a skin. COOKING TIPS
• Bake on the middle rack for even heating all around the pan.
• If the batter in the split on top is still glossy or the loaf jiggles, it needs more time. Look for a dry top and about 205℉/96℃ in the center.
• Cool the bread in the pan for only 10 minutes. Left in the pan, it tends to stick and the trapped steam can dry it out and overcook it. NUTRITIONAL DISCLAIMER
Nutritional information provided is an estimate based on typical ingredient values and standard portion sizes. Actual nutritional content may vary significantly depending on specific brands used, ingredient substitutions, preparation methods, portion sizes, and individual cooking techniques. For precise nutritional information tailored to your specific ingredients and preparation, please consult with a registered dietitian or use laboratory analysis. This information should not be used for medical nutrition therapy or to manage medical conditions without professional guidance.
Nutrition
Alternate Cooking Instructions
- Muffins or mini buns: This batter makes wonderful muffins and little mini buns. They bake for less time than the loaf because there's less depth, so start checking early and look for a dry top and about 205℉/96℃ in the center.
- Bundt cake: A Bundt pan has a center core that helps disperse the heat more evenly, so it bakes faster than a loaf pan. Check for doneness the same way.
- Sheet cake: You can make this into a sheet cake too. With much less depth, the timing will be quite a bit shorter, so keep an eye on it.
- Any loaf pan: A light-colored, dark-colored, glass or stoneware loaf pan will all work. Each bakes a little differently, so trust the dry look and the internal temperature more than the clock.
- Glaze in the microwave: Warm the strained cream in the microwave on 50% power, then stir in the white chocolate until it's smooth.
Half Batch: Pumpkin Muffins and Mini Bundts
Have a little pumpkin left in the can? A half batch makes about 6 standard muffins or 4 large ones, or a mix of muffins and mini Bundts.
Ingredients
- ¾ cup plus 1 tablespoon all-purpose flour
- 1 teaspoon baking powder
- ½ teaspoon cinnamon
- ¼ teaspoon nutmeg
- ⅛ teaspoon cloves
- ¼ teaspoon fine sea salt
- 6 tablespoons white sugar
- 6 tablespoons brown sugar, light or dark
- 1 large egg
- 2 tablespoons butter, melted
- 2 tablespoons avocado oil or other neutral oil
- ½ teaspoon vanilla extract or paste
- ½ cup plus about 1 ½ tablespoons pumpkin puree (the rest of the can)
- 2 tablespoons water
- ½ cup white chocolate chips (optional)
Oat Crumble Topping
- 3 tablespoons oats
- 2 tablespoons dark brown sugar
- 1 tablespoon all-purpose flour
- ¼ teaspoon cinnamon
- 1 tablespoon cold butter
Directions
- Heat the oven. Use 425℉/218℃ for muffins with taller domed tops, or 350℉/177℃ for standard muffins or mini Bundts. Grease the muffin tin or mini Bundt pan well.
- Make the crumble. Stir together the oats, brown sugar, flour and cinnamon. Cut in the cold butter with a fork until crumbly. Keep it in the refrigerator until it goes on, so the butter stays cold.
- Whisk the dry ingredients. In one bowl, whisk the flour, baking powder, cinnamon, nutmeg, cloves and salt.
- Whisk the wet ingredients. In a second bowl, whisk the sugars, egg and melted butter. Whisk in the vanilla and oil, then the pumpkin.
- Fold it together. Fold the dry ingredients into the wet in stages, then stir in the water, about 10 folds or less. If the batter looks wet from the extra pumpkin, add about 1 tablespoon more flour. Gently fold in the white chocolate chips.
- Fill the pans. For muffins, fill the cups. Fill them almost to the top for large muffins. For mini Bundts, put the crumble in the bottom of the pan, then add the batter. The batter can rest in the pan for up to about 30 minutes. After an hour, the baking powder loses some lift.
- Top the muffins. Sprinkle the crumble over the muffins right before they go in the oven.
- Bake. They're done when the tops look dry and the centers read about 205℉/96℃.
- Standard muffins: 350℉/177℃ for about 18 to 22 minutes.
- Large muffins: 350℉/177℃ for about 25 minutes.
- Domed tops: Bake 5 minutes at 425℉/218℃, then drop to 350℉/177℃ without opening the door and bake about 15 more minutes. My large muffins took about 28 minutes total. My oven has a hot spot, so I turned the pan partway through.
- Mini Bundts: Skip the high-heat start and bake at 350℉/177℃ for about 12 to 15 minutes. If they're in the oven with muffins, check the Bundts first.
- Unmold the Bundts. Flip the mini Bundts out of the pan. The crumble ends up on top.
Storage & Reheating Instructions
How to Store Leftover Glazed Pumpkin Bread
Let the glaze set completely before you store the bread.
- Refrigerator: The glaze is made with heavy cream, so store glazed pumpkin bread covered or in an airtight container in the refrigerator. Chilling also helps the glaze set up.
- Leftover glaze: Keep any extra glaze covered in the refrigerator so you can drizzle it over slices when you serve them.
Quick Tip
Don't toss the glaze that drips onto the parchment. Scrape it back into the bowl and serve it alongside the bread, so everyone can add a little drizzle of orange white chocolate glaze to each slice.
How to Reheat Glazed Pumpkin Bread
- Room Temperature: Let slices from the refrigerator sit on the counter for a few minutes to take the chill off.
- Microwave: If you like it warm, heat a single slice for just a few seconds. this will melt the glaze.
Frequently Asked Questions
Steam builds up in the middle of the loaf as it bakes, and it needs someplace to go, so the center pushes up and the top cracks. Baking at a lower temperature, around 325℉/165℃, helps the center cook more evenly and keeps the top from bubbling up and over. A dome and a crack down the middle are completely normal, though. You're not going to avoid it, and it will still taste delicious.
Don't take it out until the top looks dry. If the batter where the top split is still glossy, or if the loaf jiggles, it needs more time. The most accurate way to check is a thermometer straight down into the center; look for about 205℉/96℃. If the thermometer comes out goopy, even at 190℉/88℃, give it more time.
Use plain pumpkin puree only, not the spiced kind and not pie mix, because this recipe adds its own spice blend. Homemade puree works great as long as it's thick and well drained. Homemade can be a little looser, and you don't want the batter too wet.
They act differently in the bread. The butter brings tons of flavor, and the oil keeps the bread light and moist. Using both gives you the best of each, so please don't make it with only butter or only oil.
Yes. After heating the cream with the orange zest, you can let it steep overnight in the refrigerator in a sealed container. At room temperature, it can steep for up to 2 hours with something over the top so it doesn't form a skin. Strain it, then melt in the white chocolate when you're ready to glaze.
Absolutely. This batter works for muffins, mini buns, a Bundt cake or even a sheet cake. The bake time will be shorter than the loaf because there's less depth, so check early. One 15-ounce can of pumpkin gives you enough for this recipe plus a half batch, which is perfect for a few muffins.
Variations
- Raisins or nuts: I often add raisins or nuts to my pumpkin bread. Fold them into the batter at the end.
- White chocolate chips: When I made muffins with this batter, I put white chocolate chips in them, and they were delicious.
- Cream cheese icing: If you bake this as a sheet cake, a little cream cheese icing on top would be delicious in place of the orange glaze.
- Extra orange: Add a little orange oil to the glaze for a stronger orange flavor.
- Light brown sugar: Swap the dark brown sugar for light brown sugar for a little less molasses flavor.
- A different pan: Bake the same batter as muffins, mini buns or a Bundt cake. Timing changes with the depth of the pan, so check for doneness early.
More Pumpkin Treats for Fall
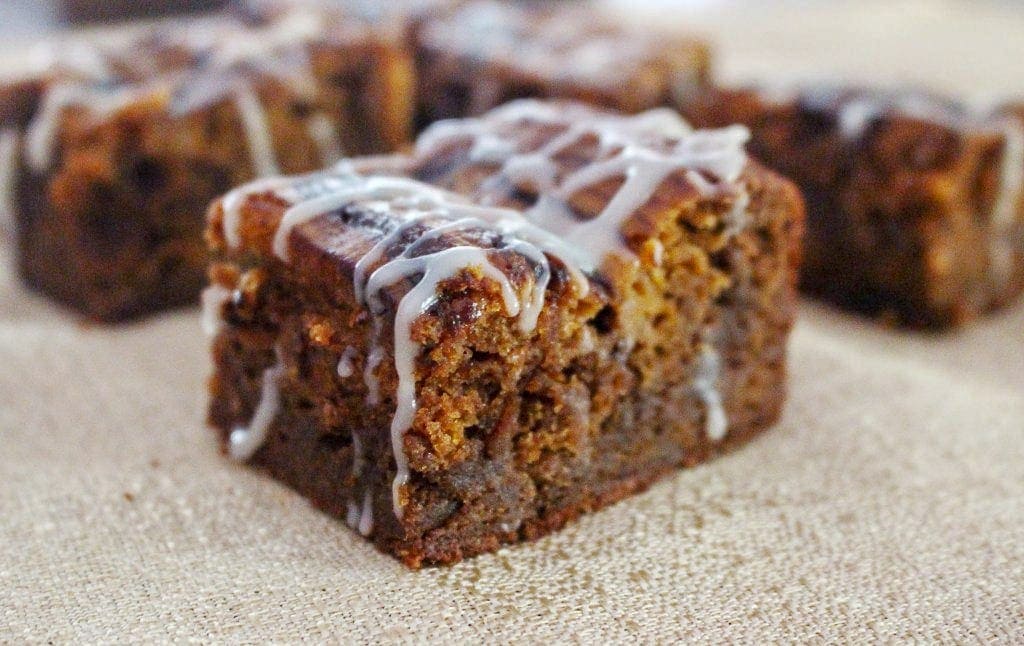
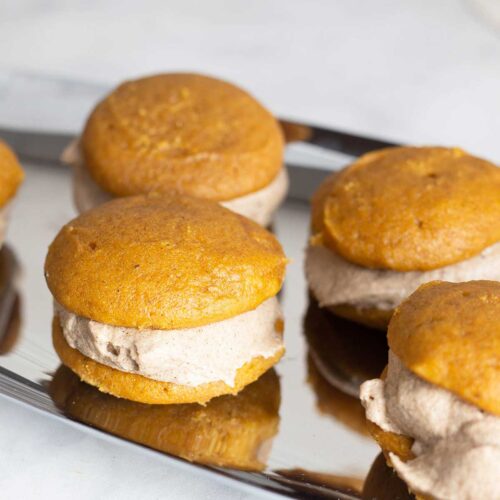
If you have a little extra pumpkin on hand, here are a few more of my favorite fall treats. From brownies to biscotti, they're all simple to make and so delicious. Happy Baking!


About the Recipe Author, Louise Long
Louise is a full-time recipe creator and food blogger @ The Salted Pepper. She has over 30 years of experience with cooking and recipe development. She owned a restaurant for several years and was a full-time RN until retiring to blog full-time.

She published her first cookbook in the Fall of 2018 and is very interested in writing several more.
Louise is also the creator of an online Ninja Foodi Pressure Cooking Course with over 100 instructional step-by-step videos. People absolutely rave about the course and all the value they have received from it.
Louise has several very active Facebook groups that help people with the basics of cooking and learning more about the appliances they love.
Ninja Foodi Pressure Cooker & Air Crisper 101
Ninja Woodfire Outdoor Grill & Smoker
Louise is also a YouTube creator and you can find most of her recipes in video format on The Salted Pepper YouTube channel.
She is very responsive to messages and eager to help in any way she can. Get more Information about Louise & contact information
I WOULD LOVE TO SEE WHAT YOU ARE COOKING UP IN YOUR KITCHEN! TAG ME @THESALTEDPEPPER ON YOUR FAVORITE SOCIAL MEDIA PLATFORM WHEN YOU MAKE A DISH!
BE SURE TO FOLLOW THE SALTED PEPPER RIGHT HERE ⇓⇓⇓⇓⇓
Sherri says
This pumpkin bread is such a beautiful color! And that orange glaze...OMG! So perfect! 🙂
Louise says
Thank you so much! I'm definitely in love with this glaze!
Annissa says
This is the perfect bread for fall season and on thanksgiving too! Love the twist of flavors!
Louise says
Thank you!
ali randall says
I love quick bread because they are so tasty and make the best homemade gifts for the holidays. The idea of orange glaze with the flavor of pumpkin is right up my alley. Delicious!
Louise says
I tried a few different glazes, but this one just knocks it out of the park!
Liz Schoch says
I love the idea as giving this for a gift! And I totally agree on not wanting to drag out your mixer. If you can avoid it and still get a lovely treat, do it!
Louise says
I know, right? My mixer weighs a ton!
Cliona says
What a gorgeous recipe! I've never had pumpkin bread before, it's definitely a must-make!
Louise says
Thank you, you will love it! It's so easy to make too!