
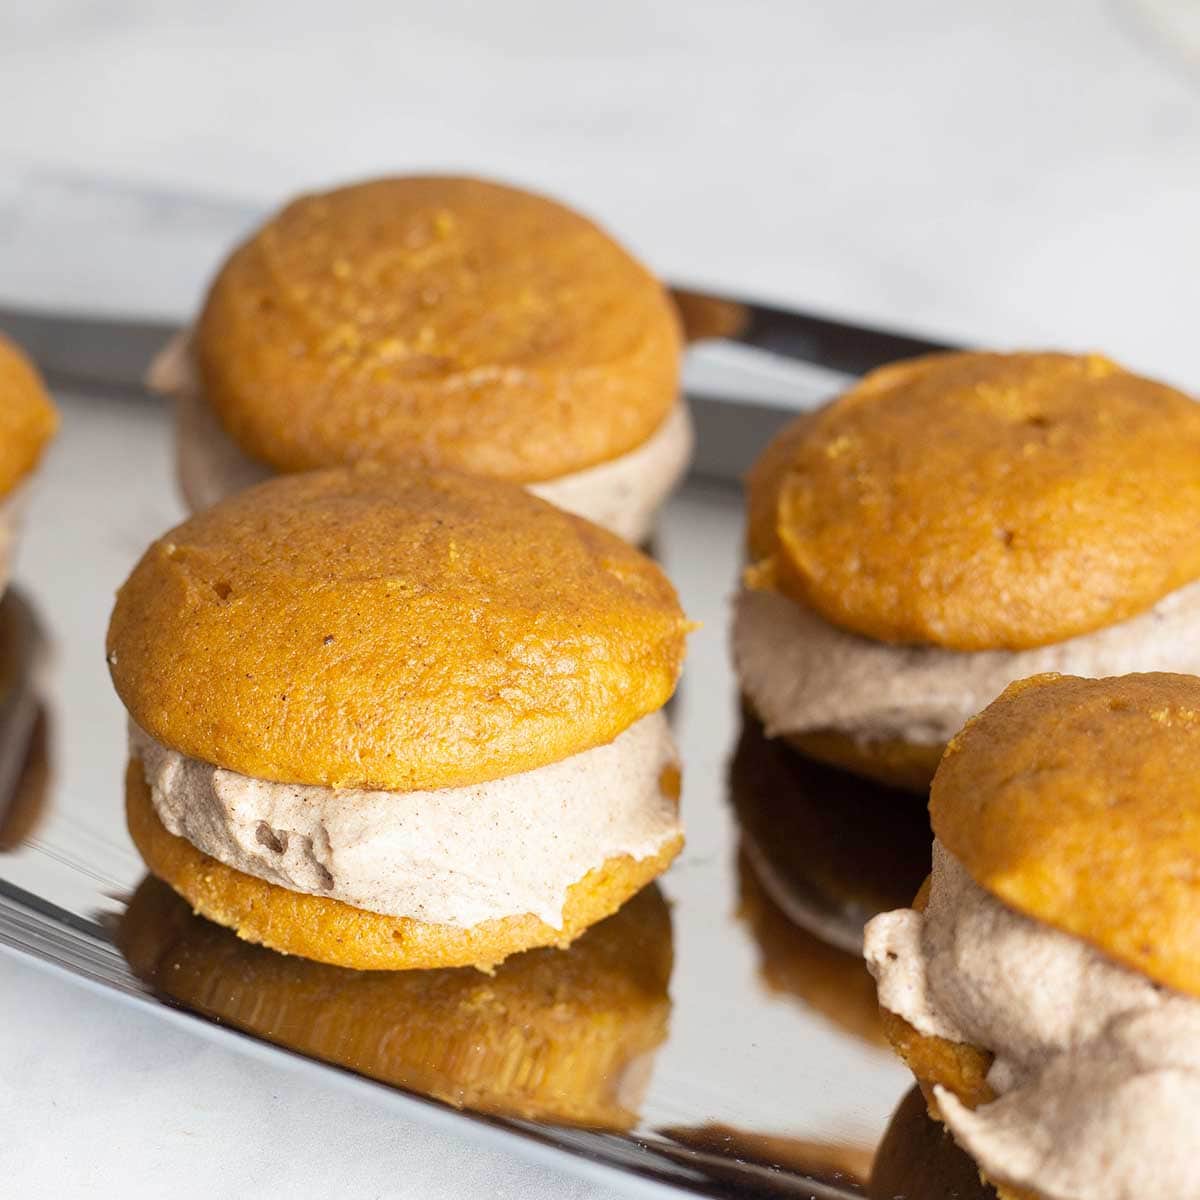
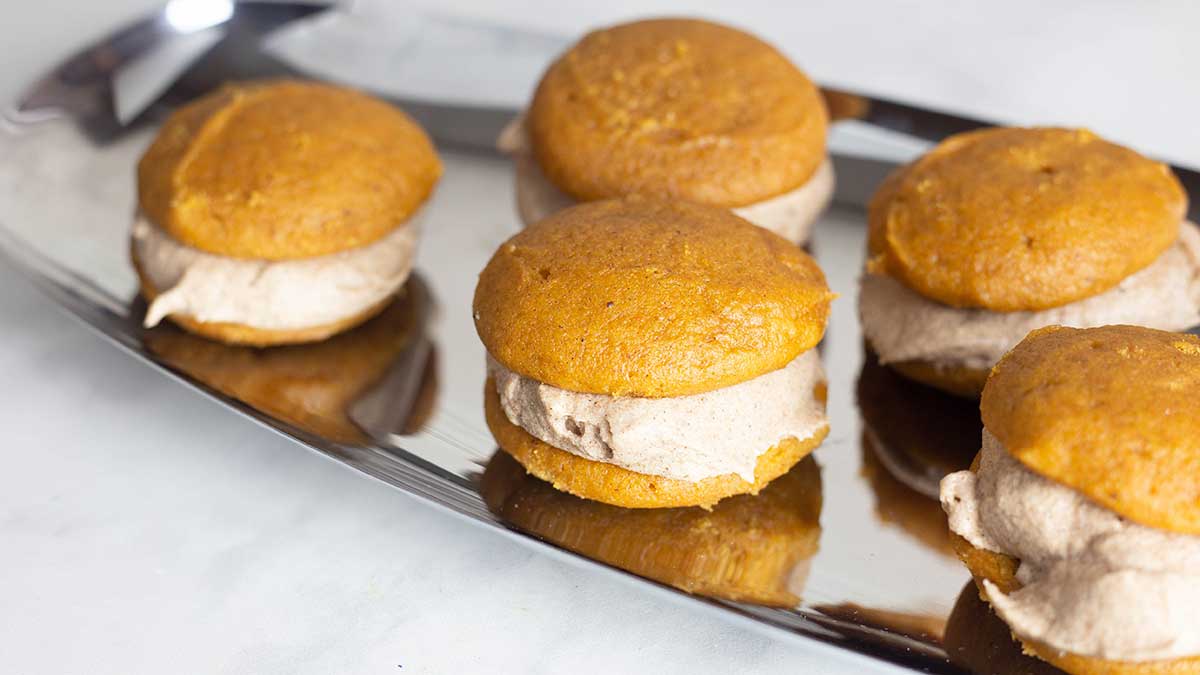
Making whoopie pies is somewhat of a speciality of mine. I used to make traditional whoopie pies (chocolate cookies with a sweet cream filling) for the restaurant I owned, and everyone LOVED them. This year, I decided to incorporate some warm spices with pumpkin flavor and make Pumpkin Whoopie pies. The combination of soft pumpkin cookies with a delicious creamy filling make these the perfect fall treat!
I must say they are a huge hit with Jeff's co-workers and I took them to my hair salon and they were gobbled up in minutes. Everyone is raving about them and they are super easy to make.
Would you like to save this recipe?
In this recipe I'm using a variation of my pumpkin bread recipe for the sandwich cookies and a cinnamon spiced Ermine buttercream as the filling. The buttercream is light and airy and absolutely delicious. As a bonus, Ermine buttercream is one of the easiest buttercreams to make, in my opinion. It's practically foolproof.
An electric mixer comes in handy for this recipe, though either a stand mixer or a hand held mixer is fine. I also like to use a cookie scoop so that my pumpkin cookies are uniform.
Ingredients & Substitutions
Pumpkin
I used pure pumpkin from a can, not the pumpkin pie filling. You could also process your own pumpkin to make a pumpkin puree or switch up the pumpkin for a butternut squash puree if you prefer.
Spices
Instead of using a pumpkin pie spice, I used a combination of cinnamon, cloves, nutmeg, and allspice in both the pumpkin cookie and the buttercream.
Pumpkin Pie Spice blend is usually a blend of the same spices I used, but with the addition of ginger. You can definitely substitute pumpkin pie spice if you like, and I would suggest using about 1½ teaspoons of pumpkin pie spice in the pumpkin cookies and 2 teaspoons of pumpkin spice in the spiced buttercream filling.
You can also omit the cloves and/or allspice if you don't have them handy or don't like them. The choice of spices that you use are completely up to you, but be careful not to use too much more cinnamon than the recipe calls for because too much cinnamon can result in an unpleasant bitter taste.
Ermine Buttercream

I like using this style of butter cream as the filling for whoopie pies because it's super flavorful, but not overly sweet. This is a flour-based buttercream that is very easy to make, but if you want to switch up the filling for an American or Swiss buttercream, it's perfectly fine.
In fact, if you are gluten free, you will definitely want to use a different filling or you could try making the Ermine Buttercream with gluten free flour, but honestly I think making an American buttercream would be easier. Just add some cinnamon and spices to your favorite buttercream recipe and it will be delicious.
Keep in mind that American buttercream is very sweet (made with powdered sugar, butter, and a touch of milk) and will be much sweeter than an Ermine or Swiss buttercream. This is the main reason that I don't use in this recipes or any of my recipes, it's just too sweet.
Swiss buttercream is a little more time consuming to make because you have to lightly warm egg whites with sugar over a double boiler and that takes some time and patience, but it is less sweet than American Buttercream.
Pumpkin Cookies
The pumpkin cookie batter is basically a slightly revised version of pumpkin bread. So, it is considered a quick bread, leavened by baking powder. What I love about this recipe is how easy it is to whip up.
You don't need any fancy equipment; a bowl and a spoon will work fine. I used my KitchenAid Mixer just because it was available, but it absolutely isn't necessary. Basically, you dump in all the ingredients and mix it up.
If you are gluten free, you can certainly make the recipe with a good quality gluten free flour that is a 1:1 substitution with all purpose flour and designed for baking. Although I haven't tried using gluten free flour, I have heard great things about (affiliate link)Bob's Red Mill GF flour.
Extras
There are plenty of different additions you could make to the recipe to create your own spin on things and create a variety of flavors. Here are a few that come to mind.
- Add in about 1 cup of raisins to the pumpkin cookie batter for a pumpkin raisin cookie.
- Add in about 1 cup of white chocolate chips to the pumpkin cookie batter for pumpkin and chocolate chip whoopie pies.
- Put in about ¾ cup of chopped walnuts or pecans into the cookie batter for pumpkin nut whoopie pies. OR, you could add the nuts to the ermine buttercream, if you prefer.
Sizes of Whoopie Pies
There isn't any right or wrong to how small or big you make your whoopie pies, but there are some reasons why you may want them smaller or larger, depending on what you are doing with them.
I do recommend using the same size scoop to make the cookies so they are uniform in size and the tops match the bottoms. You can use cookie scoops, or even a small ice cream scoop will work.
Mini Whoopie pies
These would be perfect for a dessert tray where you want to give people several different 1-3 bite desserts.
I also like using mini whoopie pies if I am giving them away. You can package 6-12 mini whoopie pies into a clear clamshell tray and they make a beautiful gift.
Mini whoopie pies use about 1 Tablespoon ((affiliate link)small Pampered Chef scoop) of cookie batter per cookie, so a total of 2 Tablespoons for each mini pumpkin whoopie pie and 1-1½ half tablespoons of spiced buttercream filling.
This recipe will make around 24 whoopie pies. The smaller whoopie pies may take less time to cook, so start checking them after 8 minutes of bake time. They usually take around 12 minutes total.
Medium Whoopie Pies
These are about 4" in diameter and the perfect size for a single serving dessert. This is the size I make them most of the time because it's just enough to feel satisfied without wanting to grab for a second one.
You will use about 2 Tablespoons ((affiliate link)medium pampered chef scoop)of cookie batter per cookie or a total of 4 Tablespoons per whoopie pie and about 2-3 Tablespoons of the buttercream filling per whoopie pie.
This recipe will yield about 12 medium whoopie pies. The perfect cook time is 15-17 minutes.
Large Whoopie Pies
The only time I would make these large whoopie pies is if I were selling them at a bake sale or something like that. They are pretty big and can easily be split between two people.
You will use 3 Tablespoons ((affiliate link)large pampered chef scoop) per cookie or a total of 6 Tablespoons per whoopie pie and about 3-4 Tablespoons of buttercream filling per whoopie pie.
This recipe will yield about 8 large whoopie pies. The cook time may be slightly longer than 15 minutes, but no more than 20 minutes.
How to Make Pumpkin Whoopie Pies
Mise En Place
Mise En Place is a French cooking term meaning everything in place. It's what chefs use to describe the detailed prep work that goes into a recipe before any actual cooking. This practice not only saves time in the long run, it also helps prevent mistakes and missed steps in cooking and baking.
You can either choose to measure out all of the ingredients, or work on the buttercream ingredients first and, when that is chilling, measure out the cookie ingredients. This is my preferred way so I keep the ingredients separate.
No matter how you decide to proceed with the prep, there are a few things that are very important to do before starting to make this recipe.
- Take the butter out for the buttercream icing so it comes to room temperature.
- Preheat the oven to 325℉/160℃ at least 20-30 minutes prior to baking the pumpkin cookies.
- Prepare your cookie trays or sheet pans by lining them with parchment paper or spraying with a baking spray.
- Decide what size you want your whoopie pies to be and find a scoop or spoon to make even-sized cookies.
Ermine Spiced Buttercream Directions
Once you have measured out your ingredients for the buttercream and have taken the butter out of the refrigerator, it's time to make the pudding part of the buttercream.
Since this type of buttercream is a flour-based buttercream, the flour has to be cooked, and we do that by making a pudding on the stove. I find that a 1.5 Qt saucepan is the perfect size for this recipe. I used the (affiliate link)Ninja Foodi Neverstick Cookware and it does a nice job because it's nonstick and has a heavy bottom, meaning it won't scorch easily. If you are using a thinner pot or one made out of aluminum or even stainless steel, you may need to lower your temp a little.
Mix the flour, sugar, and spices together in the cooking pot and turn the stove on medium low.
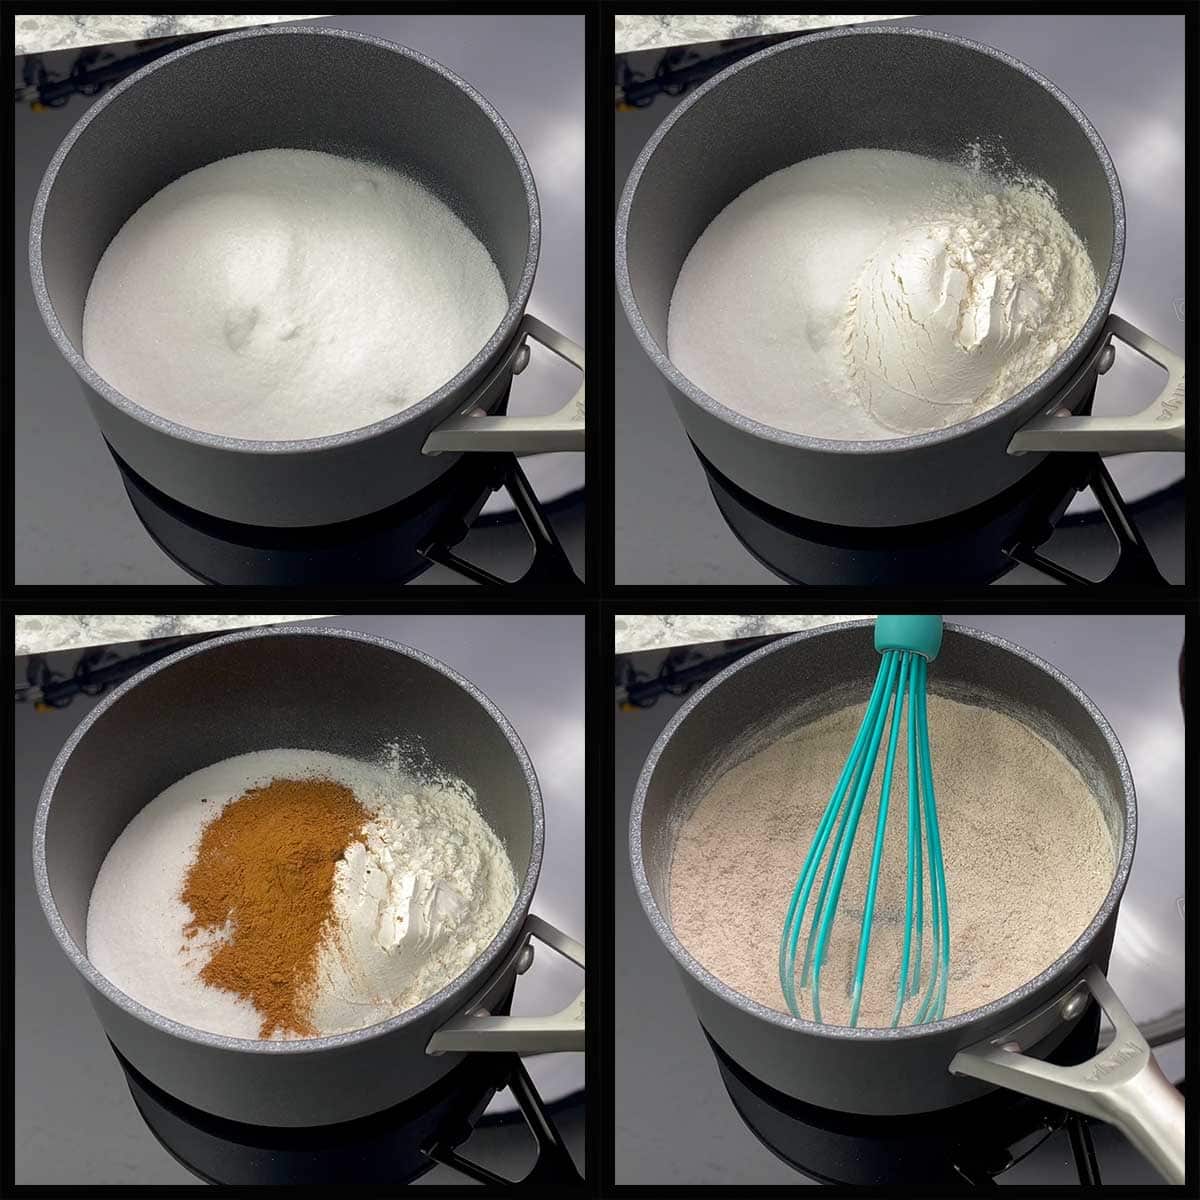
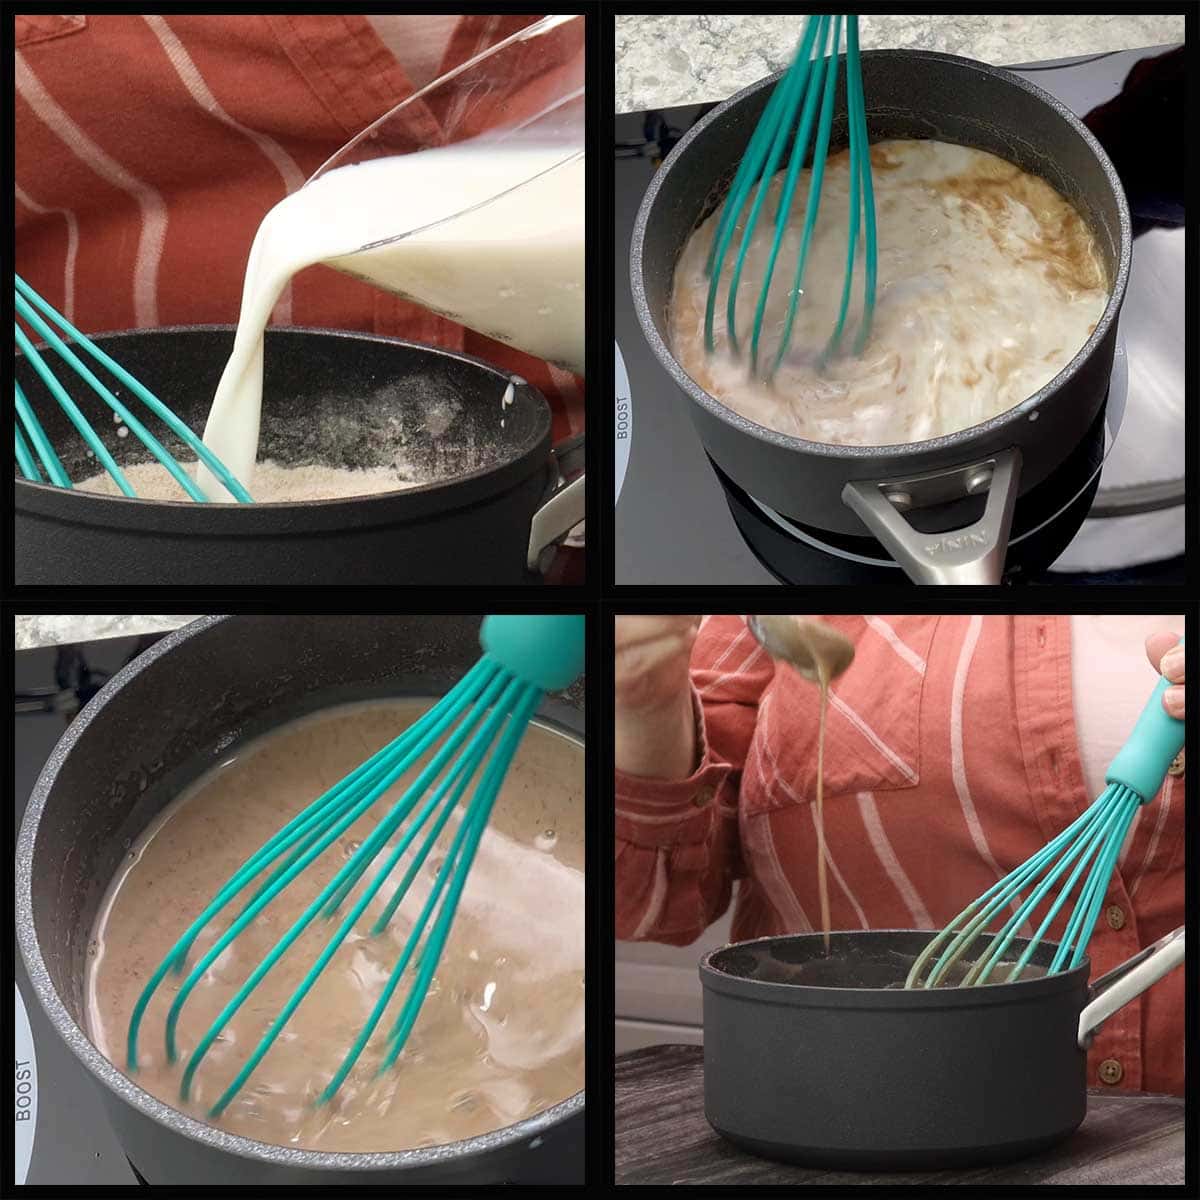
Add in about ¼ cup of the milk into the sugar and flour mixture and whisk until smooth. By adding in the milk in small increments, you will greatly reduce the risk of clumping.
After the initial ¼ cup of milk, I usually add about ½ cup of milk at a time and make sure to whisk well between additions. The heat should remain medium low.
Once all the milk is added in, continue cooking while whisking constantly until the mixture starts to thicken. This usually takes about 5 minutes. You can turn your heat up to medium, but don't stop whisking, or you may scorch the mixture.
Once the mixture has thickened to the point of being like pudding that hasn't cooled yet (or gravy), turn the stove off and remove the pot from the heat.
You can transfer the pudding mixture into another container for cooling or leave it in the pan. I usually transfer it because it gets it out of the hot pan and allows it to cool faster.
Whether you transfer it or not, you do want to cover the container with plastic wrap and make sure the plastic wrap touches the surface of the mixture so you don't develop a hard skin on the pudding.
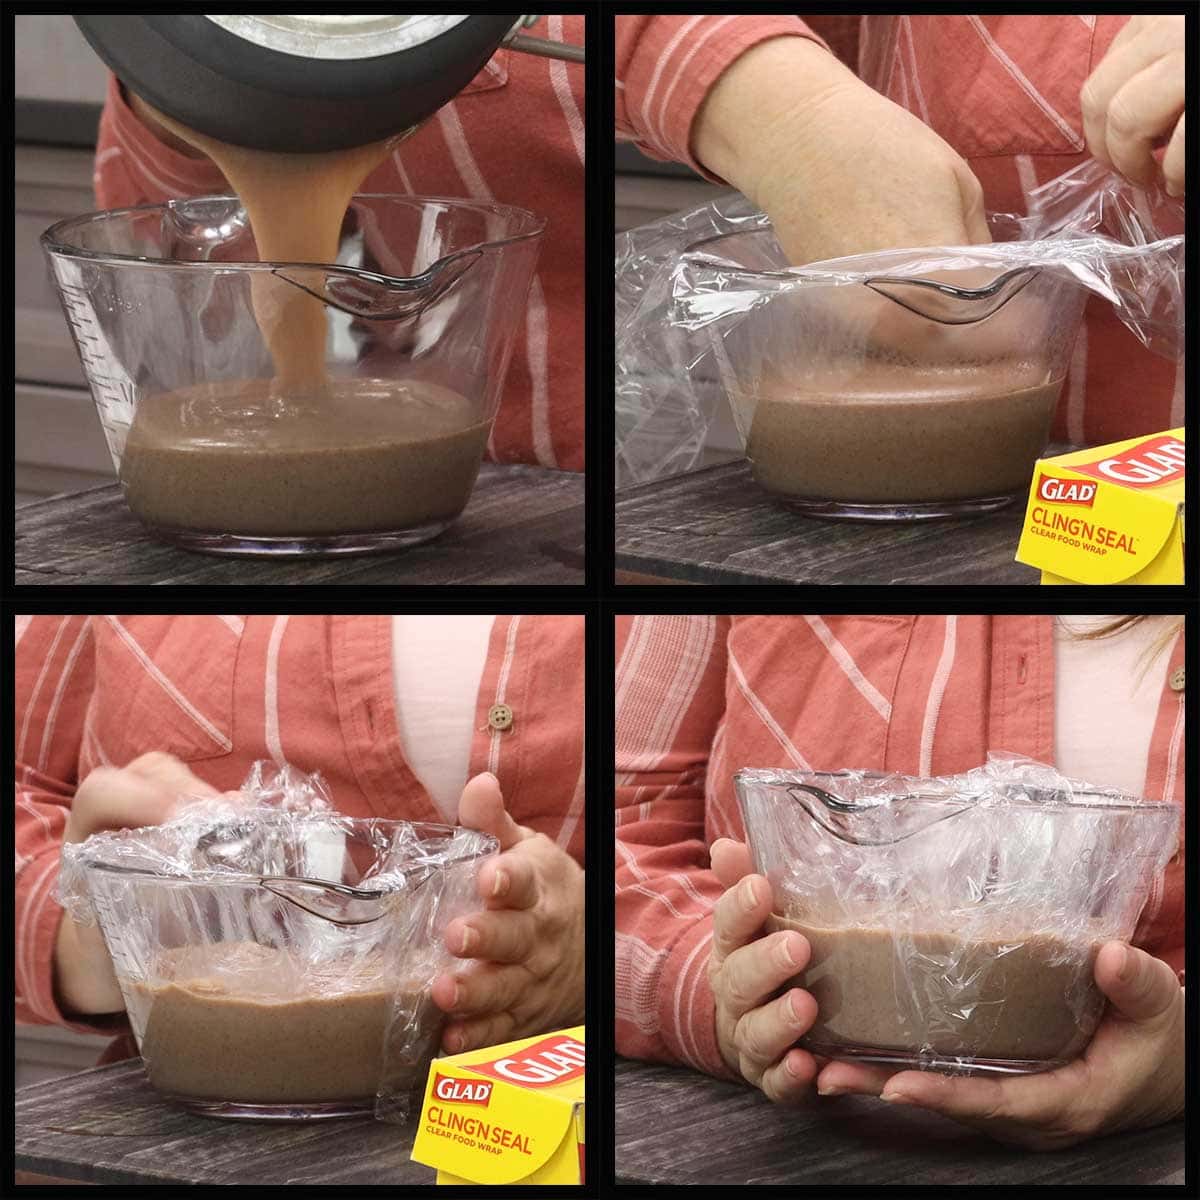
Chill the pudding mixture in the refrigerator for 1-2 hours. If you need to speed this process up, you can always put the mixture in a shallow bowl and it will chill faster. The goal is to have the mixture about room temperature when you mix it with the butter.
Now is a great time to make the pumpkin cookies!
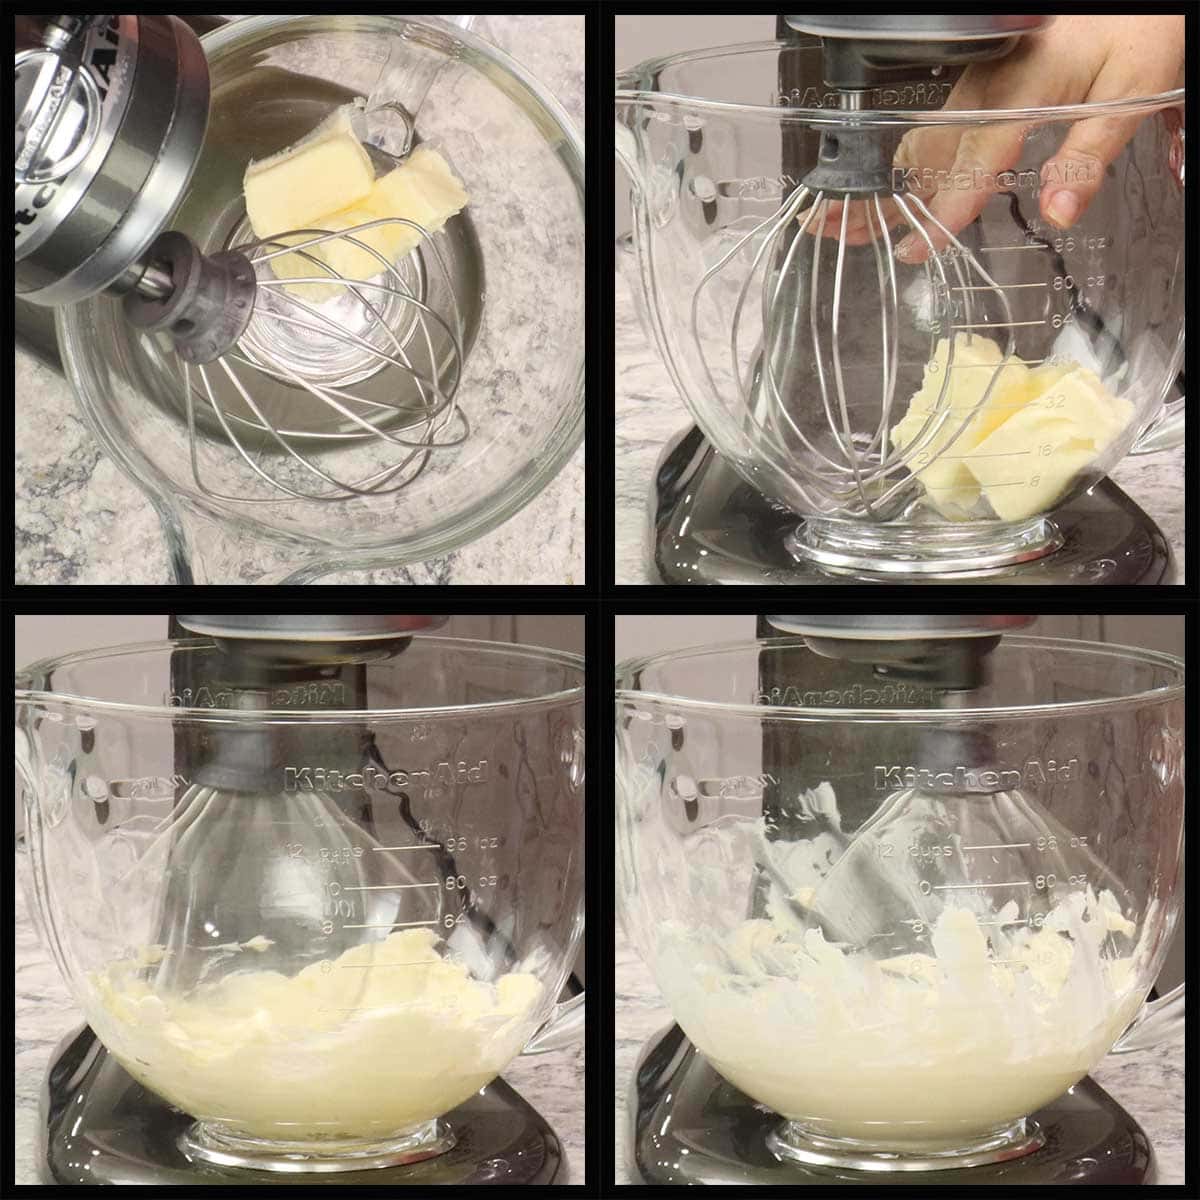
Once the pudding mixture has cooled enough, place your room temperature butter into the bowl of stand mixer or into a medium mixing bowl if using a hand mixer.
Use the whisk attachment on the stand mixer to whip the butter until light and fluffy. This takes 2-3 minutes. You will see the butter lighten up and increase in volume.
Once the butter is fully whipped, turn the mixer on medium speed and slowly pour in the pudding mixture. Stop and scrape down the sides of the bowl as needed.
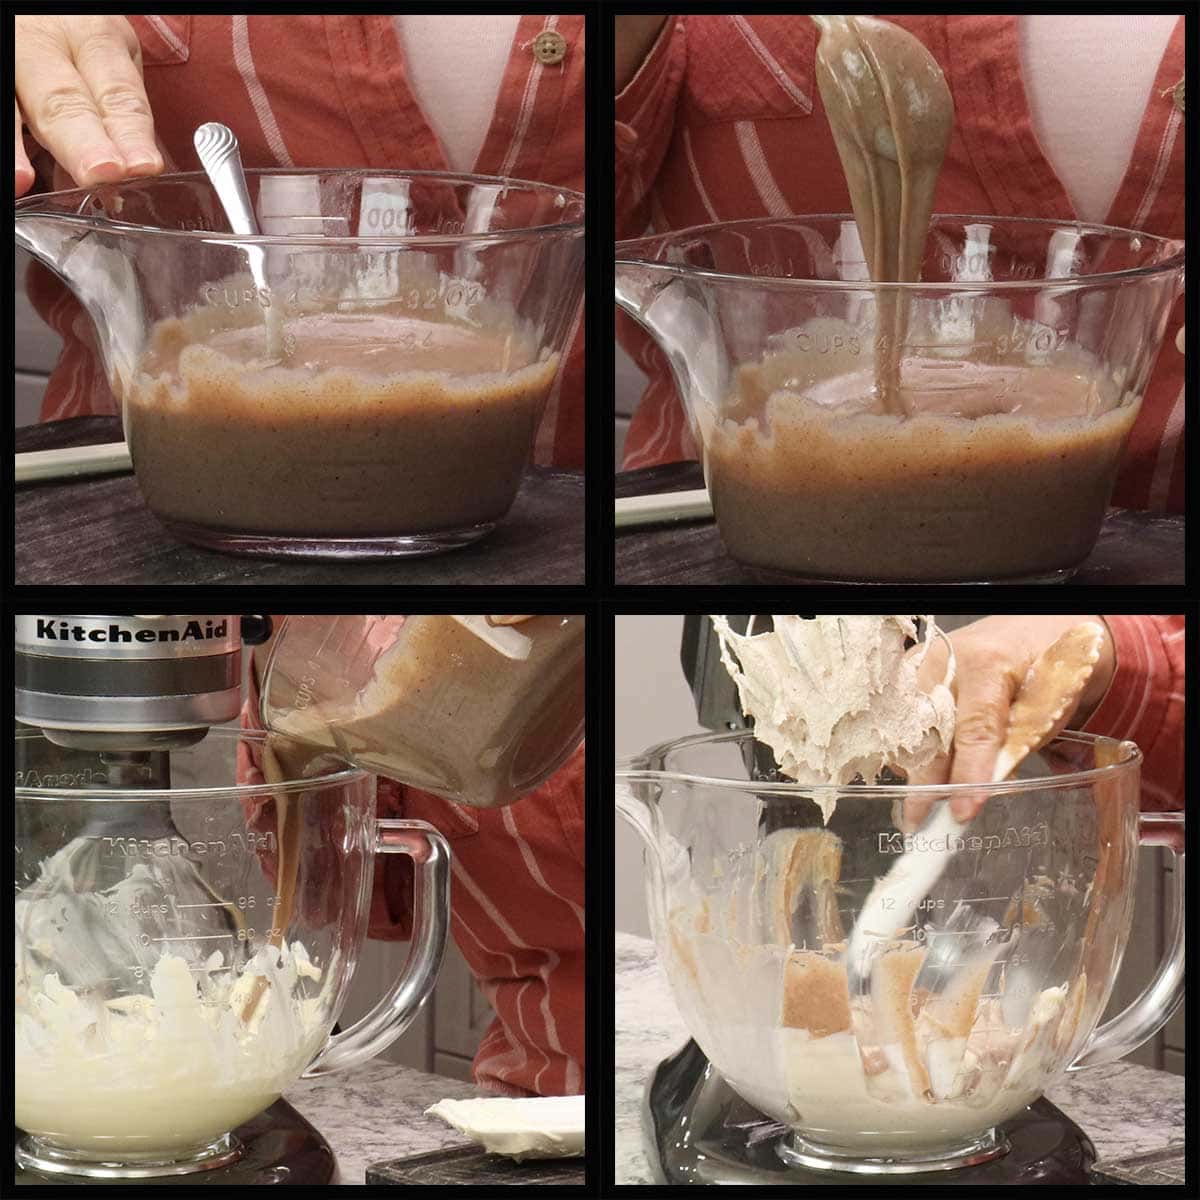
Continue adding in the pudding mixture and scraping down the sides of the bowl until all the pudding mixture is well combined with the butter.
While not necessary, sometimes I will switch over to the paddle attachment and whip the buttercream another minute or so to smooth it out. If you notice the buttercream starting to split or look grainy, it could be getting too warm. Simply pop the bowl into the refrigerator for 30 minutes and then mix on medium speed until smooth.

The buttercream should be light and smooth. Give it a taste for spices and add additional cinnamon or any other spices as needed. Blend together well. Set the buttercream aside until you are ready to assemble the pumpkin whoopie pies. It can be left at room temperature for up to 6 hours.
Pumpkin Cookie Directions
Once you have all of your ingredients measured out, it is time to make up the cookie batter. While I'm using a stand mixer, it is not necessary at all. You can use a medium bowl and a spatula or a hand mixer. It's a really easy cookie batter to make.
Make sure your oven is preheated and the cookie trays prepared.
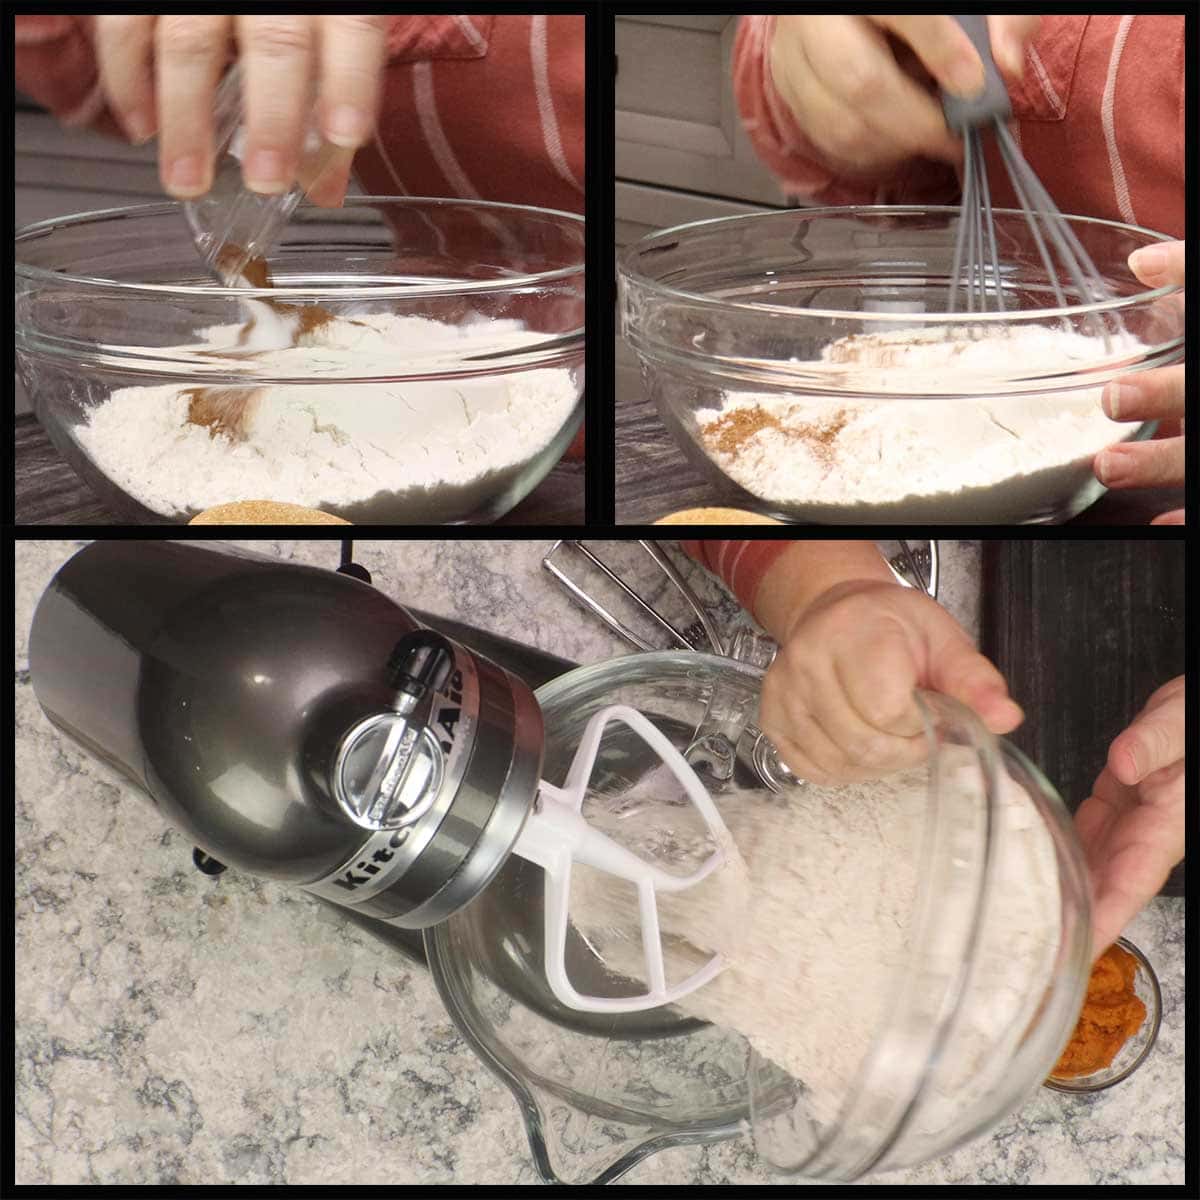
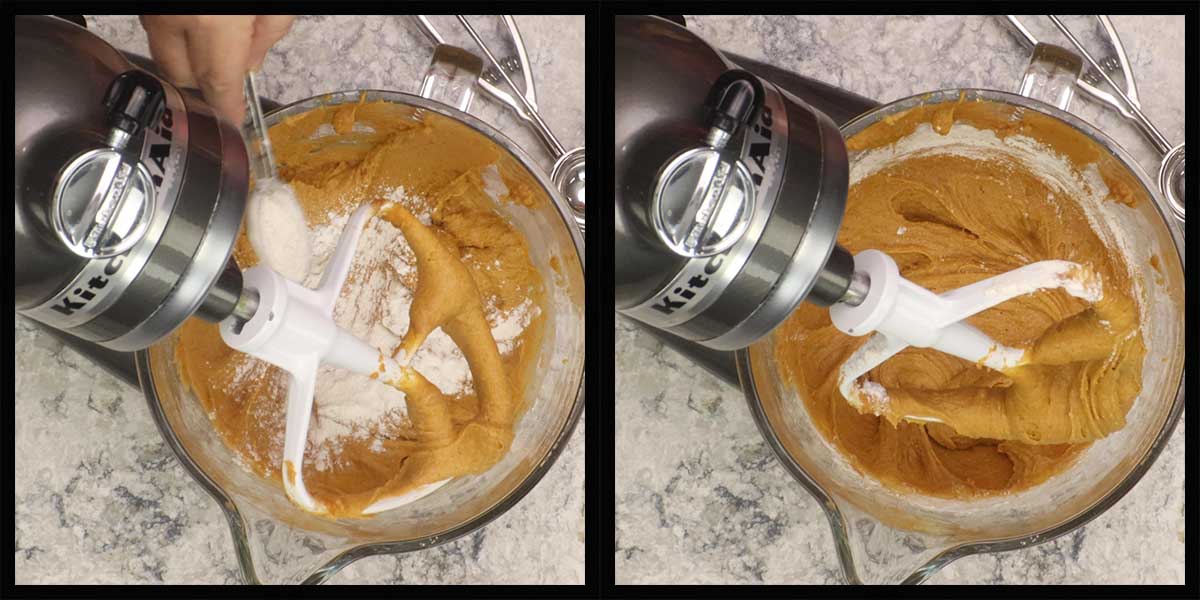
Add the flour, baking powder, spices, and salt to the bowl and whisk to combine. This will distribute all the spices throughout and help avoid any clumping when the wet ingredients are added.
Next, add in all the remaining ingredients: pumpkin puree, brown sugar, eggs, melted butter, and vanilla extract. *If you are going to mix the batter by hand, lightly beat the eggs with a fork before adding to the bowl so they incorporate easier.
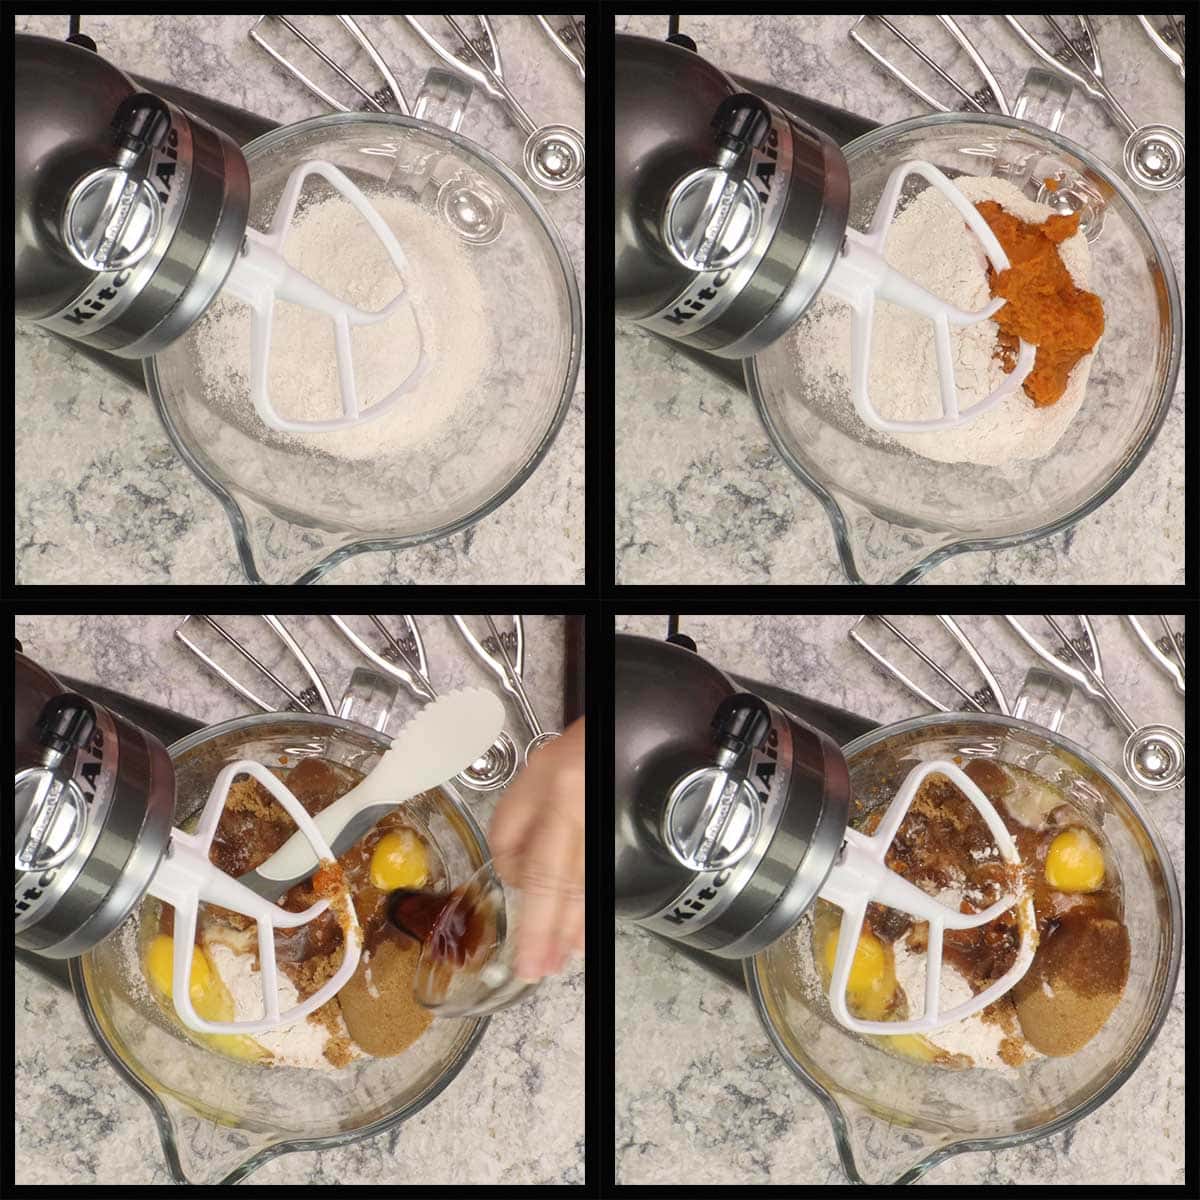
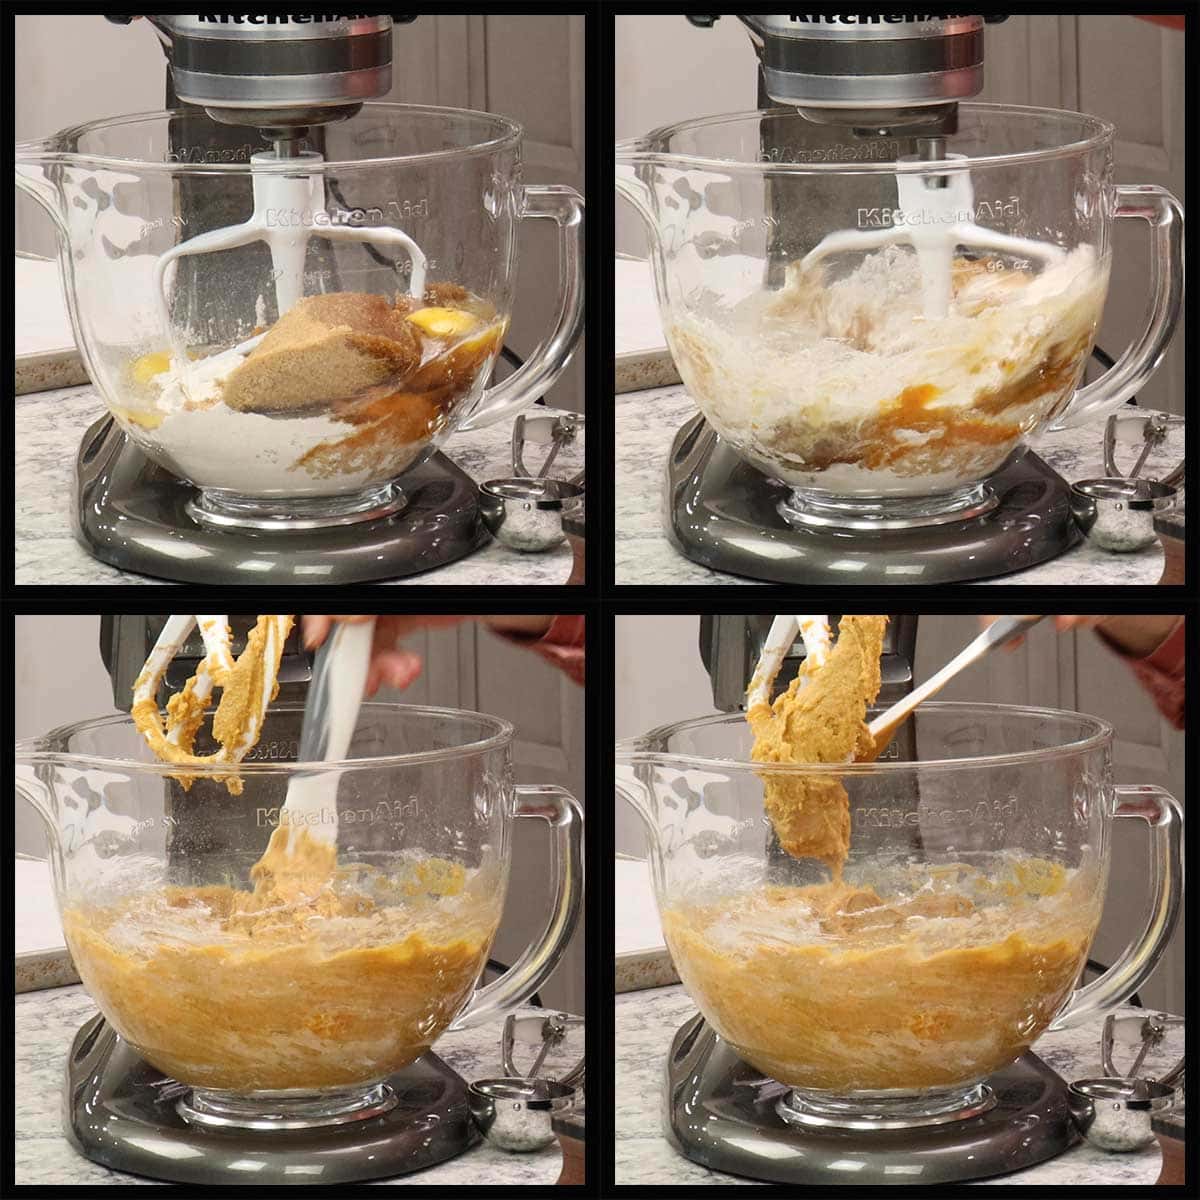
Mix on low to medium speed just until all the ingredients are combined. You can stop here if you want slightly sticky whoopie pie cookies. They have the perfect flavor and the texture of nice soft cookies, but when you pick them up, they sometimes leave a little trace on your fingers.
If you are serving them at a party, you may not want your guests to get their fingers messy with the whoopie pie and it's an easy fix. Just add another ¼ cup of flour and mix into the batter, making sure to scrape down the sides. You do lose just a tad of moistness in the cookie, but you will have clean fingers.
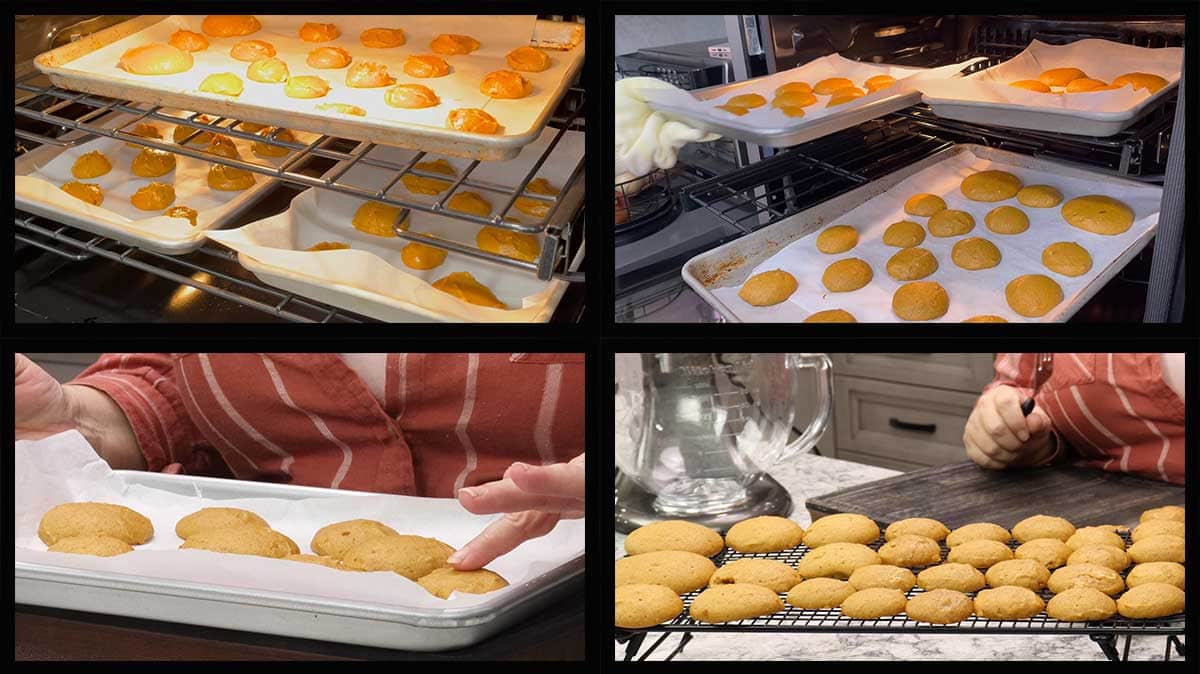
Place your desired size scoop of the batter onto the cookie sheet, leaving about 2 inches between each cookie.
Bake the cookies on the prepared cookie sheet in a preheated oven on 325℉/160℃ for 12-15 minutes for small (1Tablespoon) size cookies, 15-17 minutes for medium (2 Tablespoon) size cookies, and 17-20 minutes for large (3 Tablespoon) size cookies.
Check on the whoopie pies after about 8-10 minutes. Rearrange the racks in the oven by bringing the bottom trays up to the top and moving the top trays to the bottom, if necessary.
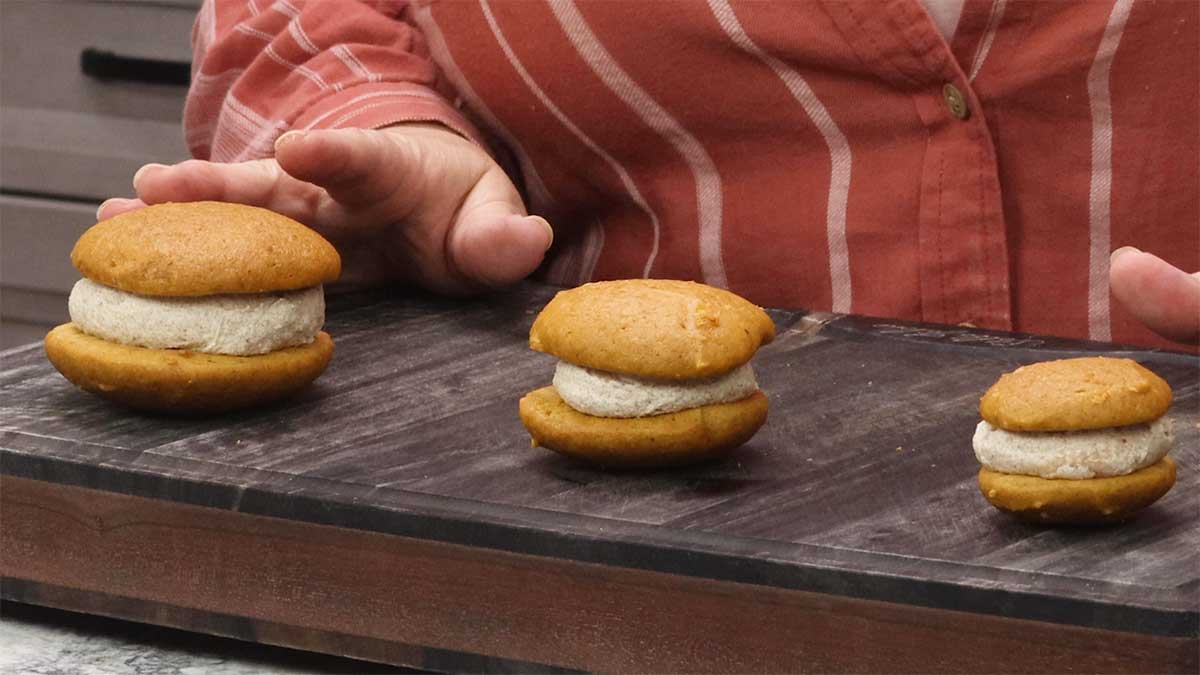
Bake until the tops are set and not sticky to the touch. Remove from oven and transfer to cooling racks to cool. The cookies must be completely cool before assembling them or the filling will melt.
Assembling the Whoopie Pies
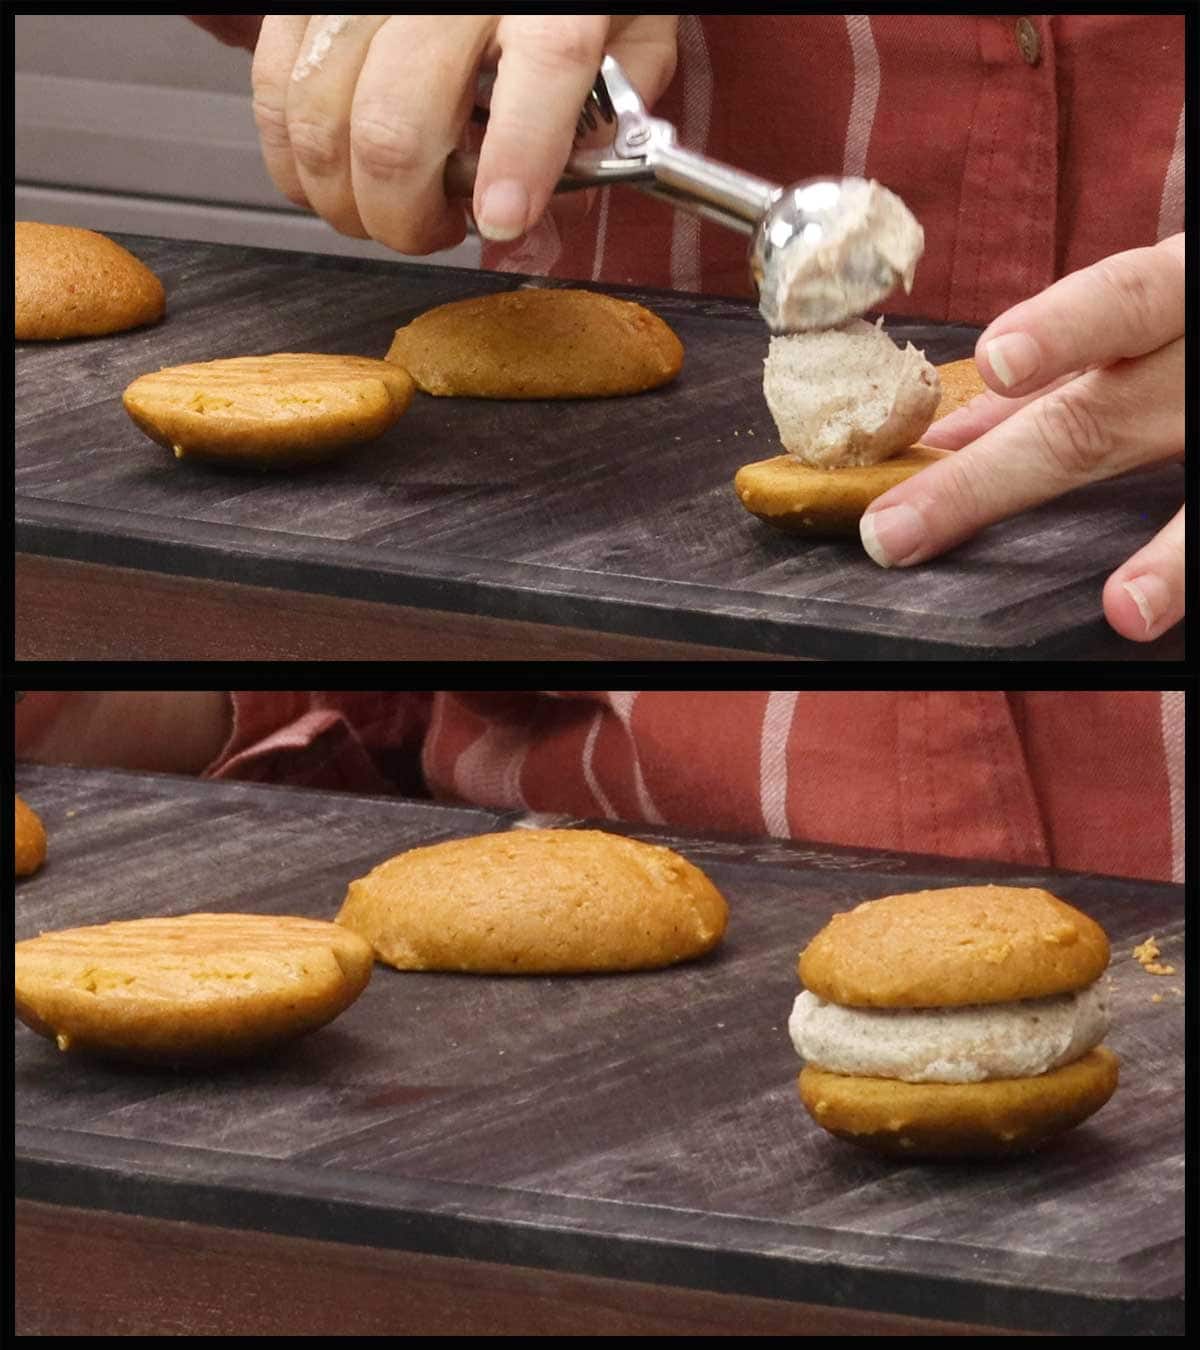
Once the spiced buttercream is finished and the cookies have cooled, you can fill them. I like to use the same amount of filling as I used for the cookie. So, if the cookie used one Tablespoon of batter, 1 Tablespoon of filling is usually a good amount.
There really isn't any need to be specific, though. Just throw a large dollop of the buttercream onto the flat side of a pumpkin cookie and top it with another pumpkin cookie (flat side towards the buttercream) and you have a perfect fall dessert called a pumpkin whoopie pie!
Repeat for the remaining cookies. Serve immediately or store for later!
Storage of Whoopie Pies
Personally, I like to refrigerate my whoopie pies in a single layer or with parchment paper between each layer because I like the buttercream to firm up a bit, but you can also store them at room temperature for up to 6 hours.
You can also store them in the refrigerator for a couple of days in an airtight container, but after about 4-5 days, I do find that they dry out some. Wrapping each one individually in plastic wrap does help keep them moist longer.
For longer storage, they freeze beautifully. Freeze in a single layer on a parchment lined tray until completely frozen. Wrap each whoopie pie in plastic wrap and store in the freezer. You can put several wrapped whoopie pies in a freezer bag for extra protection.
Frequently Asked Questions
Most popular fillings for whoopie pies are either a buttercream icing or a marshmallow fluff type of filling. However, you can fill them with whatever creamy filling you like.
Yes, you can easily make a double batch or even triple the recipe by simply increasing the ingredients accordingly.
You can leave them at room temperature for up to 6 hours, but this will vary based on the filling. Some fillings are stable at room temperature much longer and others need to be refrigerated within 2 hours.
They will last 3-5 days in the refrigerator before they start to dry out some. If they are wrapped well, they can last a week or longer in the fridge.
In the freezer, they will last at least 3-6 months. Freezing them in a single layer on a parchment lined tray and then individually wrapping them in plastic wrap before putting them into a freezer bag will keep them fresh tasting the longest.
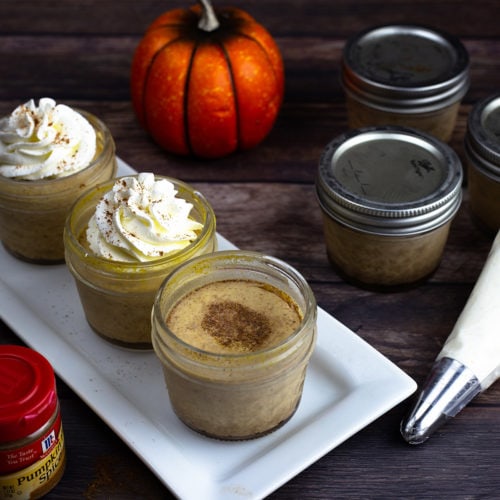
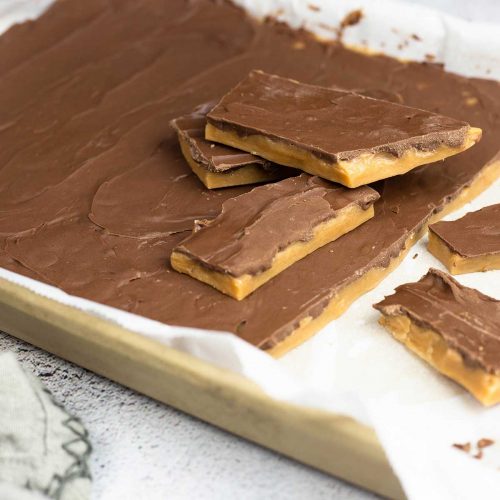
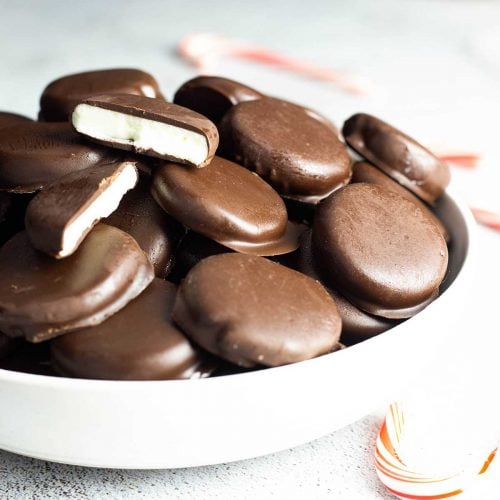
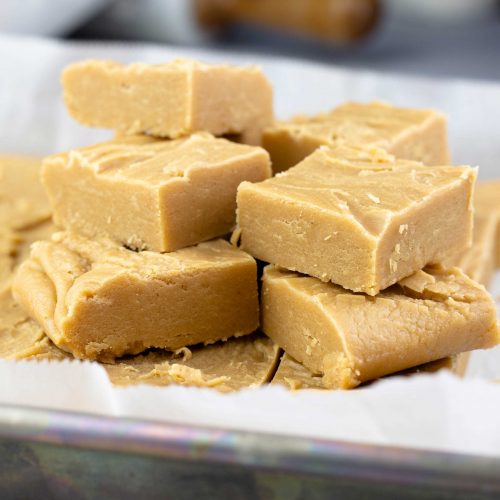
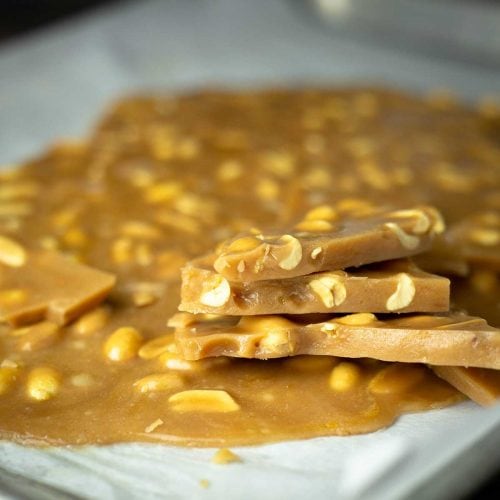
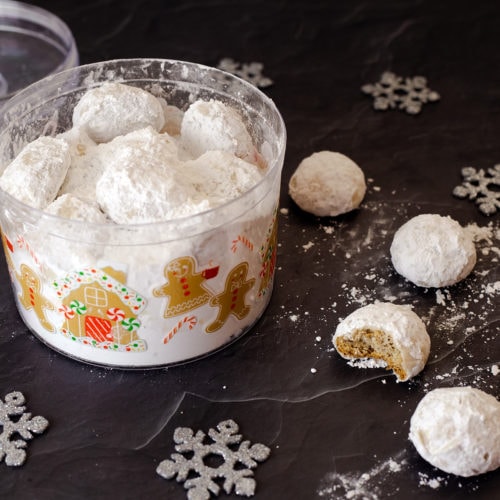
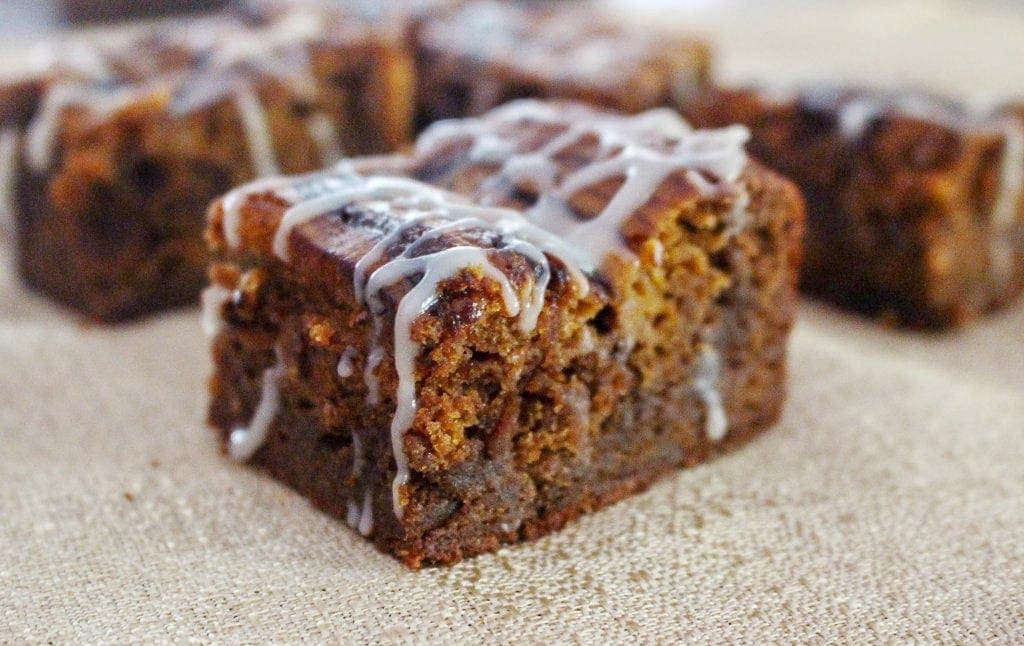
Dessert & Candy Recipes for a Dessert Tray
One of my favorite things to make when entertaining at home is desserts and candy and I especially love finger desserts and candy so people can try a few different things instead of commiting to 1 kind of cake or 1 piece of a pie.
These recipes, along with the pumpkin whoopie pies are perfect for a dessert tray or to make and give as gifts.

Pumpkin Whoopie Pie Recipe
Equipment
- Oven & Stovetop
- Stand or Electric Mixer
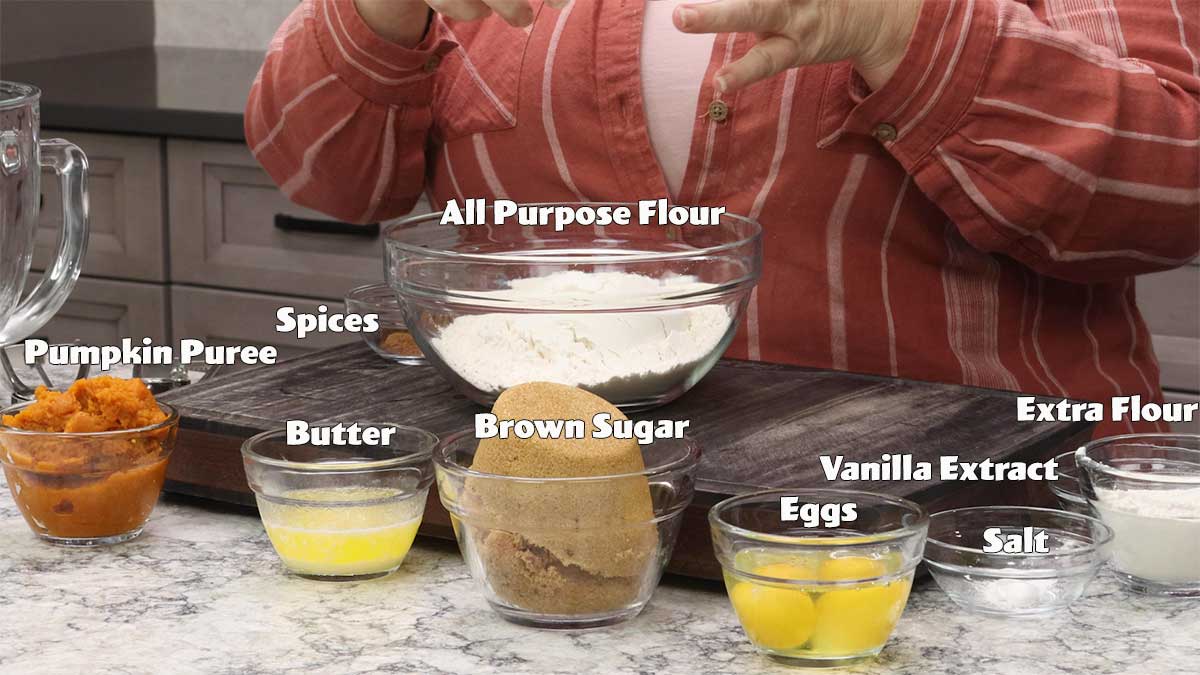
Ingredients
Ermine Spiced Buttercream
- ¾ cup Sugar
- ⅓ cup all purpose flour
- 1½ teaspoons ground cinnamon
- ½ teaspoon nutmeg
- ¼ teaspoon allspice
- ¼ teaspoon fine grind sea salt
- 1½ cup whole milk
- ¾ cup butter salted or unsalted at room temperature
Pumpkin Cookies
- 2¼ cups all purpose flour
- 1 teaspoon baking powder
- 1 teaspoon ground cinnamon
- ½ teaspoon fine grind sea salt
- ¼ teaspoon ground cloves
- ¼ teaspoon allspice
- 1 cup pumpkin puree
- 1½ cups packed brown sugar
- 2 large eggs
- 4 Tablespoons melted butter
- 1 teaspoon vanilla extract
Would you like to save this recipe?
Instructions
Ermine Spiced Buttercream
- Make sure your butter is out of the refrigerator so it can come to room temp.
- Add the sugar, flour, salt, and spices to a 1½-2 quart saucepan. Turn the heat on medium low and whisk to combine everything.
- Slowly pour in about ¼ cup of milk and whisk until smooth. Continue adding in the milk in ¼-½ cup increments and whisk after each addition until smooth. By slowly adding the milk, you will reduce the likelihood of clumps forming. It's also important to keep the heat at medium low or medium, any hotter and the flour will thicken too quickly and you may have lumps.
- Once all the milk is added in and the mixture is smooth, continue heating over medium low heat for about 5-7 minutes, whisking constantly. The mixture will begin to thicken. Once it is about the thickness of a pudding (before chilling) or gravy, remove from the heat.
- You can chill the flour/sugar mixture (pudding) in the same pot or transfer it to a bowl. Make sure to cover it with plastic wrap and press the plastic wrap onto the surface to avoid a skin from forming. Refrigerate for 1-2 hours. The temperature should be about room temperature when mixing with the room temperature butter. You can speed up the chilling process by using a shallow container with the pudding mixture spread out on the bottom.
- While the pudding is chilling, you can make the pumpkin cookies. Also, make sure your butter is at room temperature before proceeding to the next step.
- Place the room temperature butter into the bowl of a stand mixer with the whisk attachment or use a large bowl with a hand mixer. Whip the butter on high speed until it lightens in color and becomes fluffy. This takes about 2-3 minutes.
- With the mixer running on medium speed, add in about ¼-½ of the room temperature pudding mixture and whisk until combined. Repeat until all of the pudding mixture is combined. The buttercream should be light and fluffy. You can switch over to the paddle attachment and beat for another minute or two if you need to smooth out the buttercream (this is not necessary though.)
Pumpkin Cookies
- Preheat the oven to 325°F/160°C. Melt the butter in the microwave or on the stove.
- You can use a stand mixer, a handheld electric mixer or mix the cookie batter by hand. If you are using a bowl and spatula to combine everything, lightly whip the eggs first to make it easier for them to evenly combine with the other ingredients.
- In the bowl of a stand mixer or large mixing bowl, add 2 cups of the flour, spices, baking powder, and salt. Whisk together to combine, making sure to break up any clumps of spices so they distribute through the flour.
- Add the melted butter, eggs, sugar, pumpkin puree, and vanilla extract to the dry ingredients and mix until combined. The batter should be slightly sticky to the touch, but thick enough to hold it's shape. For a sticky and soft cookie, 2 cups of flour is usually enough, but if you want the cookies a little firmer, add in the remaining ¼ cup of flour and mix to combine. *See notes below
- Use between 1 and 3 Tablespoons of batter for each cookie depending on how big you want the whoopie pies. A 1 Tablespoon scoop will give you a small whoopie pie that is about 2-3 bites. A 3 Tablespoon scoop is a large size whoopie pie, probably too much for one person to eat, but usually what you see in shops that sell whoopie pies.
- Scoop the batter onto the prepared cooking sheet, leaving about an inch between each cookie to allow for spreading. Bake in a preheated oven on 325°F/160°F for 15-17 minutes. The tops should be set completely and the cookies should release easily from the pan.
- Remove the cookies from the tray with a spatula and let them cool completely on a cooling rack. This is very important because if you try to fill the cookies while they are warm, the filling will melt and become a greasy mess. You can pop them in the fridge to cool faster, but leave them in a single layer until they are completely cool or they can stick to each other.
Assembling the Pumpkin Whoopie Pies
- Once the Spiced Buttercream is mixed up and the cookies have cooled completely, it's time to assemble the whoopie pies.
- Each whoopie pie needs two cookies that are about the same size. Usually the amount of filling is equal to the number of Tablespoons you used for the cookie size, but you can use as much or as little as you like.
- Place a scoop of the spiced buttercream onto the flat bottom of one pumpkin cookie. Place a second cookie on top with the flat bottom facing the buttercream. Repeat until all the whoopie pies are assembled.
Storage of Whoopie PIes
- Personally, I like to refrigerate my whoopie pies in a single layer or with parchment paper between each layer because I like the buttercream to firm up a bit, but you can also store them at room temperature for up to 6 hours.
- Room Temp: Up to 6 hours
- Refrigerator: 3-5 days when stored in a covered container
- Frozen: 3-6 months when frozen and stored correctly. Freeze in a single layer until completely frozen. Wrap each whoopie pie in plastic wrap and store in the freezer. You can put several wrapped whoopie pies in a freezer bag for extra protection.
Notes
Nutrition
About the Recipe Author, Louise Long
Louise is a full-time recipe creator and food blogger @ The Salted Pepper. She has over 30 years of experience with cooking and recipe development. She owned a restaurant for several years and was a full-time RN until retiring to blog full-time.

She published her first cookbook in the Fall of 2018 and is very interested in writing several more.
Louise is also the creator of an online Ninja Foodi Pressure Cooking Course with over 100 instructional step-by-step videos. People absolutely rave about the course and all the value they have received from it.
Louise has several very active Facebook groups that help people with the basics of cooking and learning more about the appliances they love.
Ninja Foodi Pressure Cooker & Air Crisper 101
Ninja Woodfire Outdoor Grill & Smoker
Louise is also a YouTube creator and you can find most of her recipes in video format on The Salted Pepper YouTube channel.
She is very responsive to messages and eager to help in any way she can. Get more Information about Louise & contact information
I WOULD LOVE TO SEE WHAT YOU ARE COOKING UP IN YOUR KITCHEN! TAG ME @THESALTEDPEPPER ON YOUR FAVORITE SOCIAL MEDIA PLATFORM WHEN YOU MAKE A DISH!
BE SURE TO FOLLOW THE SALTED PEPPER RIGHT HERE ⇓⇓⇓⇓⇓
Amber says
Delicious!
Louise says
Thank you!