
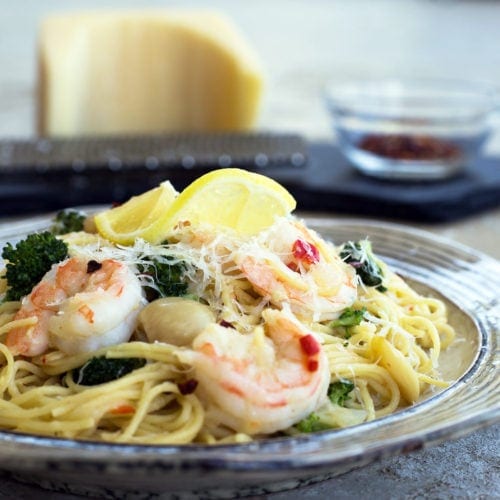
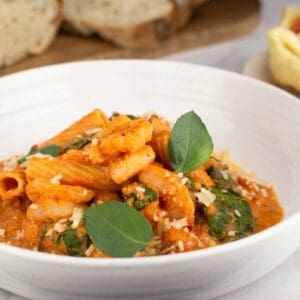
This shrimp and spinach pasta is a quick and easy meal that anyone can make with easy-to-find ingredients, and it's ready in under 30 minutes!
This is the recipe to make when you want to impress friends and family with minimal effort! This recipe is fancy enough for date night and easy enough for a weeknight dinner!
Would you like to save this recipe?
One of my favorite things about this recipe is that the ingredients are mostly pantry staples and easy to keep on hand for those nights you are craving a delicious pasta, but need a quick dinner.
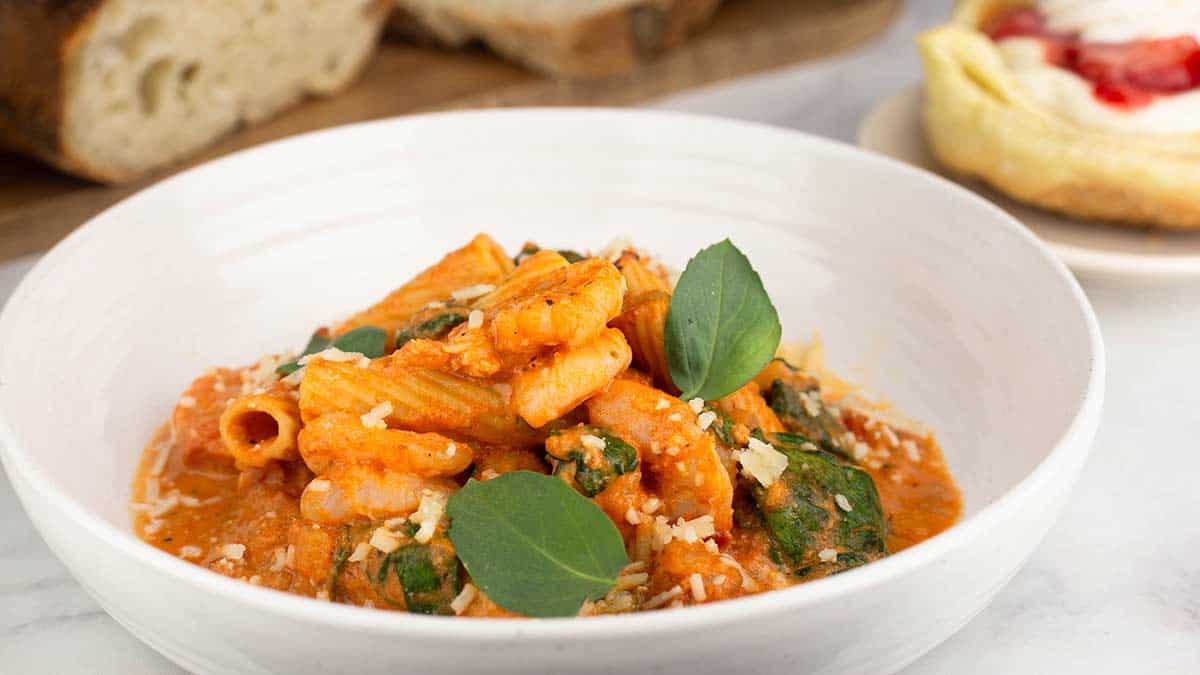
The perfectly cooked pasta is coated in the most delicious creamy tomato sauce and tossed with shrimp and fresh spinach. I have to say that this recipe gives shrimp scampi a run for its money!
Suggested Kitchen Tools for Shrimp & Spinach Pasta
- Electric Pressure Cooker or large pot for boiling pasta
- 5-quart skillet with lid or a large pot to make the sauce
Ingredients & Substitutions
This recipe uses easy to find ingredients that can be customized in many ways so that you can make a delicious pasta dinner that you and your family will love.
Shrimp
I recommend using raw shrimp in this recipe and Large or Jumbo are the best choice. The size of the shrimp I recommend is about 21-25 per pound, which is the perfect bite in this pasta recipe. Frozen or fresh shrimp can be used. You will thaw the shrimp before adding it to the pasta.
I advise against getting really large shrimp that are 8-12 count per pound; even though they do look impressive in a dish, they are often rubbery and tough. If you do want to use colossal shrimp, try using sous vide to cook them and then add them to the dish just before serving. This will ensure that they are perfectly cooked.
If you want to use previously cooked shrimp, add them when you add the spinach so they only warm through and don't overcook.
You can use cooked lobster or scallops in place of or in addition to the shrimp if you wanted more seafood in the dish. You can add large seared scallops on top which would be very impressive or you can add bay scallops when you add the shrimp since both cook very quickly.
The shrimp can also be omitted in this recipe for a vegetarian-friendly version.
If you wanted to substitute a different kind of protein like chicken or sausage, I would add it at the beginning when you add the onions. You can sauté it with everything else and then make sure to let the sauce simmer before you add the parmesan and cream until the protein you are using has cooked completely.
It is also perfectly fine (and delicious) to double up on the protein by adding both sausage and shrimp. You could even take the pasta in a completely different flavor profile by omitting the parmesan cheese and adding cajun seasonings instead of the Italian-inspired ones. It would be amazing that way.
Spinach
I recommend using fresh baby spinach in this recipe. The tender spinach cooks quickly in the sauce and can be added at the end just before serving. If you want to use larger spinach (adult spinach), you will need to cook it a few minutes longer. I use about 4 cups of spinach, which, when wilted, is a very small amount. However, you can use as much or as little spinach as you like. You can also omit the spinach and serve the creamy shrimp pasta with a side salad.
I don't recommend using frozen spinach because it will give off so much liquid, making your sauce very thin. If that is all you have on hand, then add it when you first start making the sauce and decrease the beef or chicken broth (or stock) to ¾ cup.
You can also add in any kind of fresh veggies that you like, just add them to the sauce based on the time they take to cook. For example, if you wanted to add small zucchini chunks to the pasta sauce, I would add them when you add the shrimp because they will cook in the time it takes for the shrimp to cook. If you want to add mushrooms, I would add them in the beginning when you start to make the sauce. The mushrooms will have the best flavor and texture if they are sauteéd in olive oil before you add the onions. You want to cook them in a single layer so they brown and don't steam.
Pasta
The pasta you use is entirely up to you. The sauce usually dictates the type of pasta in a dish, and parma rosa sauce goes with many different pasta shapes. I chose rigatoni pasta because the creamy tomato sauce clings to it and gets trapped in the holes and you get sauce in every bite. It turned out amazing!
You can also use penne pasta or farfalle pasta if you want to stick with shorter pasta. If you want to serve it with a longer pasta, fettuccini or pappardelle pasta are both great choices. You want a sturdier and thicker long pasta, so I don't recommend using spaghetti and definitely not angel hair pasta.
The most important thing about the pasta in this recipe is that is cooked just under al dente before adding to the sauce. It simmers in the sauce for at least 5 minutes so I recommend cooking it 1-2 minutes less than the package instructions direct. This way, when you serve the shrimp and spinach pasta, the pasta is al dente, meaning it has just the slightest bite. Of course, if you like softer pasta, cook it per the instructions, and it will be perfect when serving.
Parma Rosa Sauce
This recipe uses a parma rosa sauce, which is my new favorite pasta sauce! It combines the tanginess of a tomato-based sauce with the slight sweetness of alfredo sauce for the perfect balance of flavors. It is also known as tomato cream sauce or pink sauce. Usually, it is a smooth sauce, but I like to add fire-roasted tomatoes, so I have chunks of tomato in the sauce. You can definitely use fresh tomatoes instead and I recommend cherry or grape tomatoes. You will need about 8-10 ounces of them. Cut them in half before adding to the sauce so the liquid is released.
For a list of substitutions in the sauce, go to the sauce recipe here: Parma Rosa Sauce.
The tomato cream sauce is super easy to make and I recommend making it fresh, but you can substitute two parts marinara sauce and one part alfredo sauce if you are pressed for time. I would choose high-quality jarred sauces if you aren't making the sauce from scratch.
You can also substitute the creamy sauce for a straight tomato sauce or lighten things up with a garlic butter sauce more like a scampi.
How to Make Shrimp & Spinach Pasta with Tomato Cream Sauce
Preparation is key when making fast moving dishes like this one. Don't skip the Mise En Place (prep) in this recipe. The goal is to have a nice relaxing cooking experience and preparing the ingredients ahead of time is a crucial step in that process.
Mise En Place
This recipe moves fast once you start cooking, so it is very important to have all of your ingredients prepped and ready to go. The time it takes to do this will vary on your skill level. I can prep everything in about 10 minutes, but if you are new to cooking or a little slower in the kitchen, I would allow a good 20 minutes or so. Some of the prep can be done the day before.
Thaw the shrimp: This can be done the day before you want to make the pasta or just before you make it.
You can remove the shrimp from the freezer and put them into a sealed container to thaw overnight in the refrigerator, or you can do a quick thaw that takes about 10 minutes by putting the frozen shrimp in a colander in the sink and running cold water over the shrimp until they are thawed.
You can also put the frozen shrimp in a bowl of cold water, but you will need to break the shrimp up because they tend to stick together and I also change out the water every 5 minutes. This method is a little slower, so plan on 15-20 minutes to fully thaw the shrimp.
Once the shrimp are thawed, peel them and devein them if needed. Keep the shrimp in the refrigerator until you start the cooking process to preserve the freshness. I don't like to keep seafood out at room temperature for more than 30 minutes before cooking.
Prep the Vegetables: I prefer to do this right before making the recipe so the onion and garlic are fresh, but you can do it up to 24 hours prior to making the recipe.
Mince the garlic and chop the onion into about ¼-½ dice.
Gather the Remaining Ingredients: This can be done anytime before you want to cook the dish.
I think it's super important to make sure you have things like can openers, all the spices measured out in a bowl, and measure the beef or chicken broth as well as the cream. This way you don't end up in a situation where you don't have enough of an ingredient and have to scramble to figure out what to use instead. I have been there and done that way too many times!
Cooking the Pasta
If you are cooking the past on the stove, you will want to get the pot of water boiling about 10-15 minutes before you start cooking. It doesn't matter if you start this before you start prepping for the recipe because the water can boil for several minutes until you are ready to add the pasta.
I use my Ninja Foodi pressure cooker to cook the pasta, and I start that process just before I begin to make the sauce, and the timing works out perfectly.
Stove Top: Fill a large pot with 10 cups of water and bring to a boil. When the water is boiling, but before you add the pasta, add ½ Tablespoon of kosher or sea salt. Let the water come back to a boil before adding the pasta.
The rigatoni pasta is going to take about 10 minutes to cook just under al dente so I would wait to add it until after you get the parma rosa sauce going.
I would add the pasta just as the sauce is starting to simmer before you add the parmesan and cream. For different pasta types, I would cook one minute less than the package directions.
Quick Tip
Make sure to save some of the pasta water and add it to any leftovers which helps keep the sauce nice and creamy when reheated.
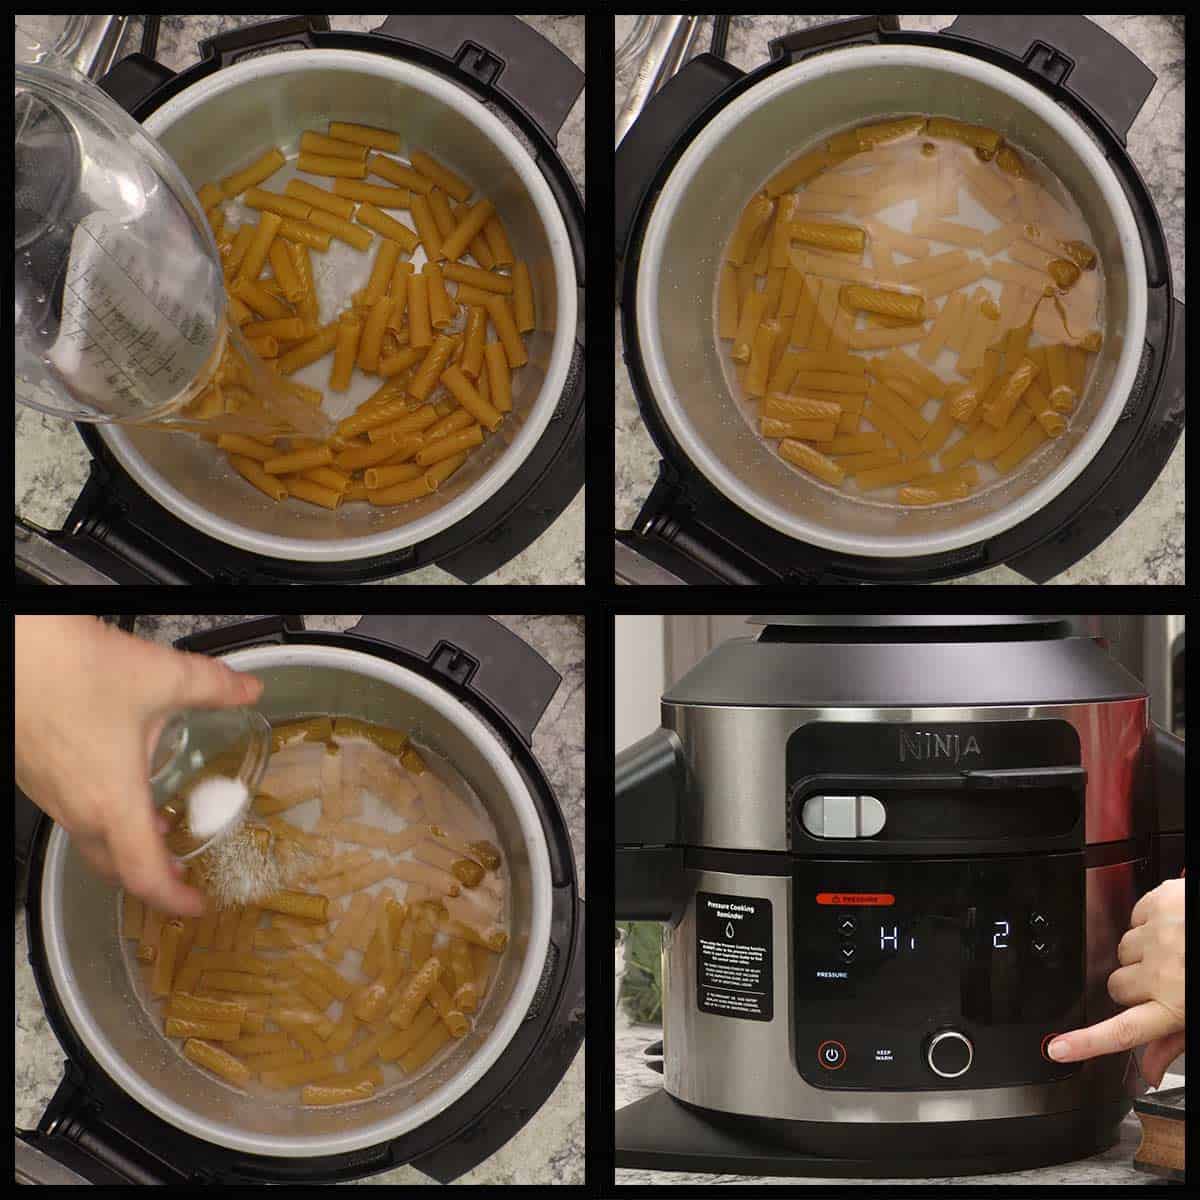
Pressure Cooker: Add the Rigatoni to the inner pot of the pressure cooker and add cold water just until the pasta is completely covered. For 8 ounces of Rigatoni, I used about 3¾ cups of water. The amount of water will vary depending on the type of pasta you use and so will the cook time. I start the pressure cooker just before I start making the sauce and the timing works out perfectly.
Here are my suggestions for cooking time based on different dry pasta types. I don't recommend using a pressure cooker if you are cooking fresh pasta, boil it on the stove for the best results because it cooks very fast.
- Rigatoni: 2 minutes of PC time with an immediate release of pressure
- Penne: 2 minutes of PC time with an immediate release of pressure
- Farfalle: 3 minutes of PC time with an immediate release of pressure
- Fettuccini: 1 minute of PC time with an immediate release of pressure
- Pappardelle: 1 minute of PC time with an immediate release of pressure
Add 1 minute to cooking times for softer pasta.
When the pasta is done, you can leave it in the water for a few minutes if you need a little more time to finish the sauce. Make sure to reserve at least 1 cup of the pasta water in case you need to thin out the sauce. It also is great to add some of the pasta water to any leftovers before refrigerating or freezing. It helps when reheating the shrimp and spinach pasta.
Making the Parma Rosa Sauce
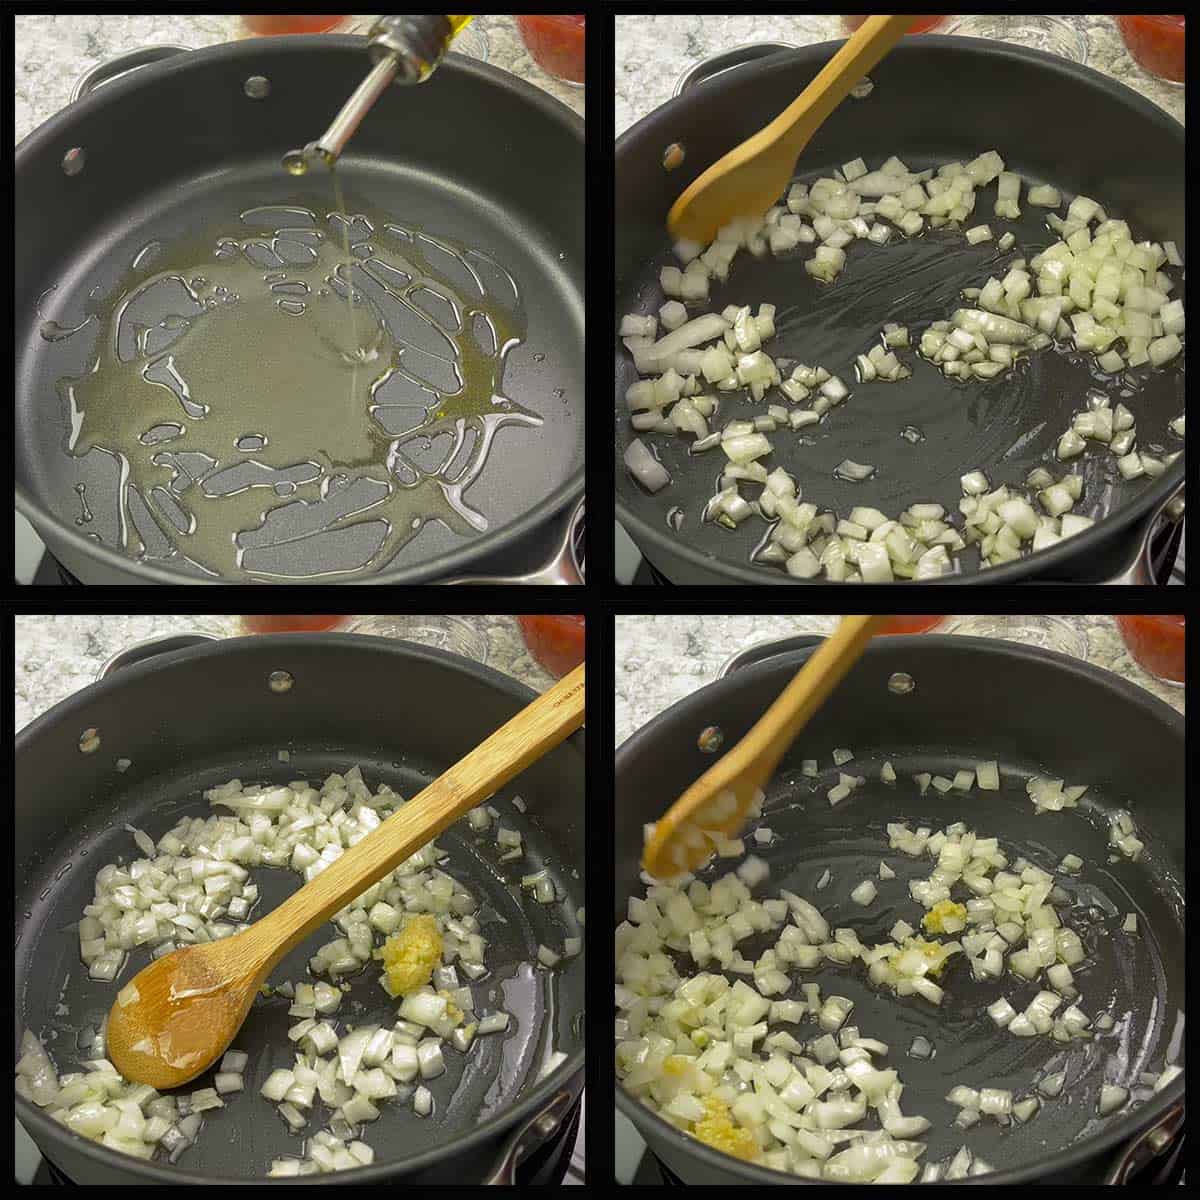
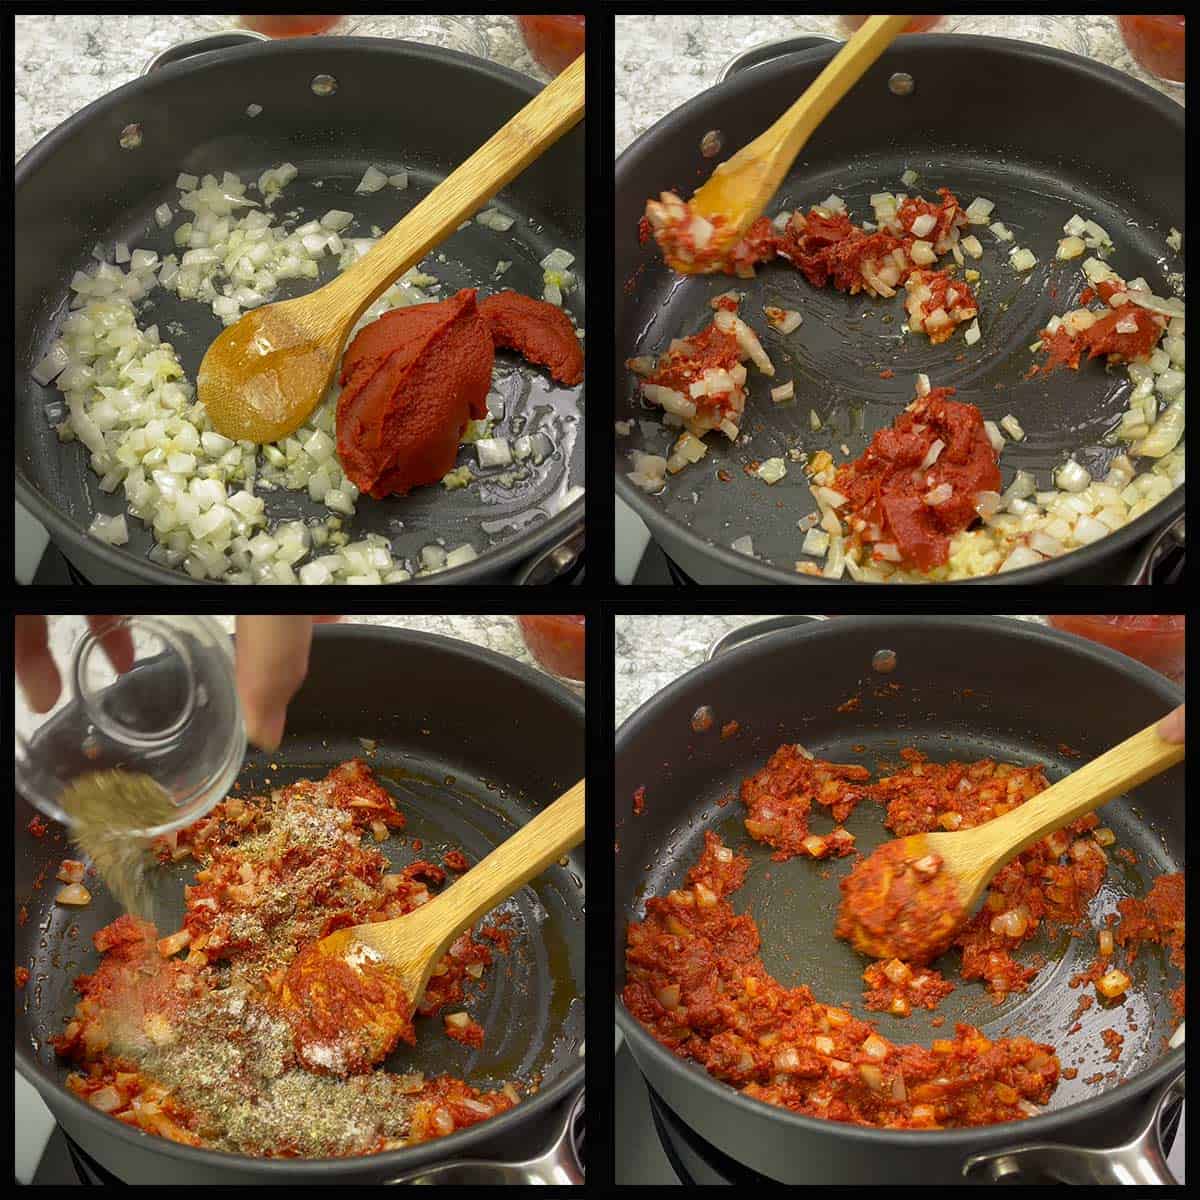
Heat a large skillet over medium-high heat for a couple of minutes and add 3 Tablespoons of olive oil. Heat the oil for about 3 minutes and add in the diced onions.
Sauté the onions for about 2 minutes and then add in the minced garlic.
Cook just until the garlic is fragrant, about 1 minute.
Add the tomato paste and break it up in the skillet. Add the seasonings and stir well. I like to sauté the tomato paste and seasonings for about 2 minutes before adding in the liquids. This reduces the tinny taste that is sometimes present in canned tomato paste.
Quick Tip
The Parma Rosa Sauce can be made 1-2 days ahead of time and heated with a little pasta water on the day you want to serve your shrimp and spinach pasta.
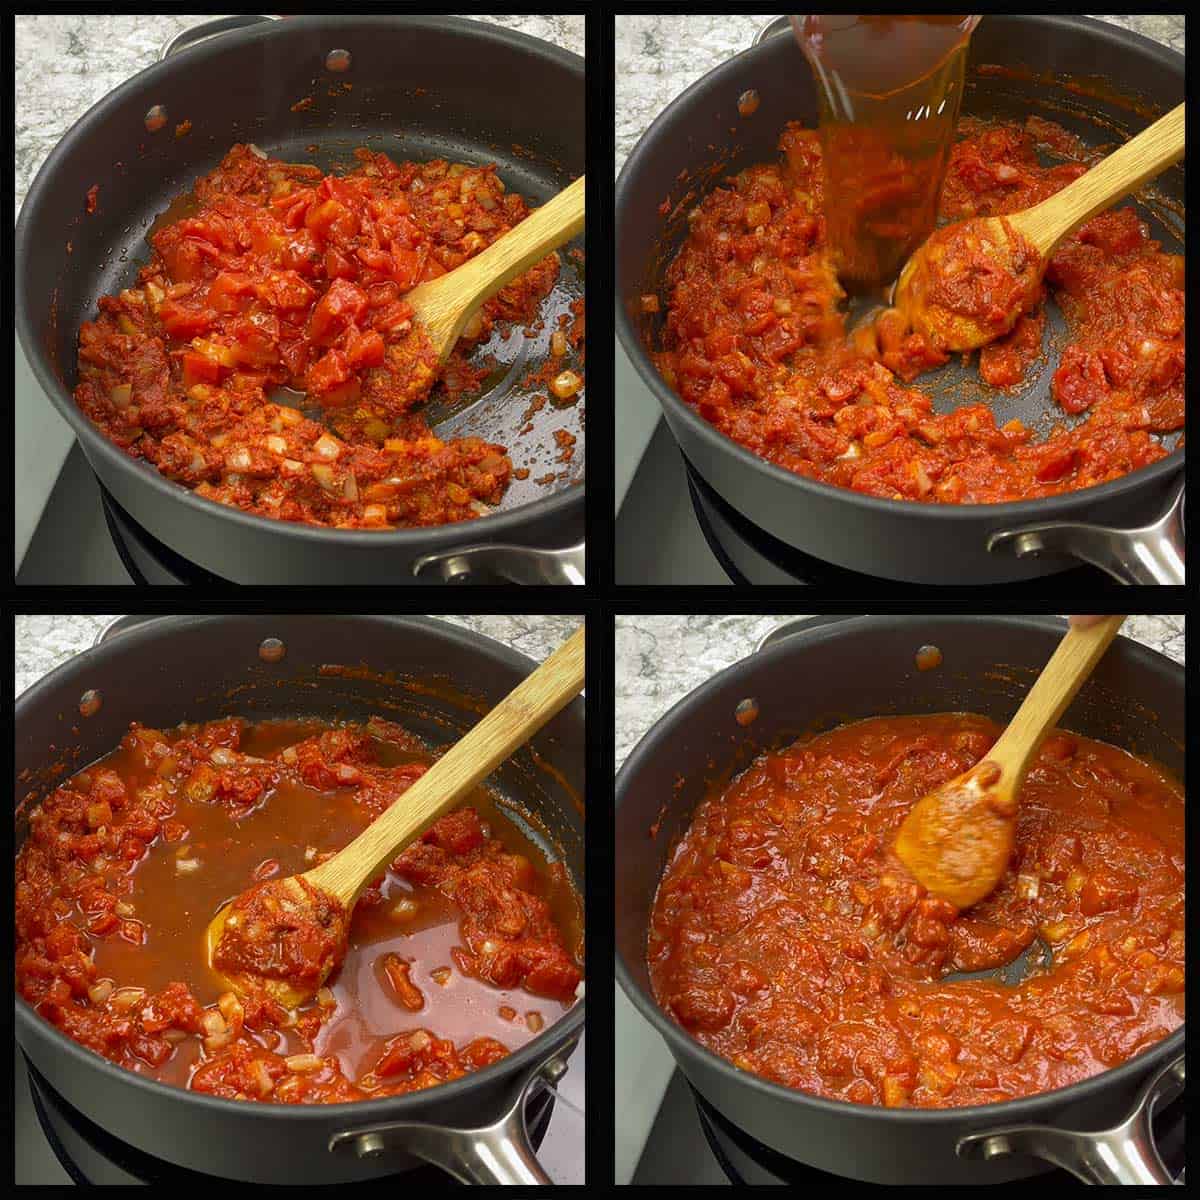
Add the fire-roasted tomatoes and the chicken stock or beef stock (broth is fine, too) and stir to combine the tomato paste with the liquid.
Simmer the sauce for about 5 minutes.
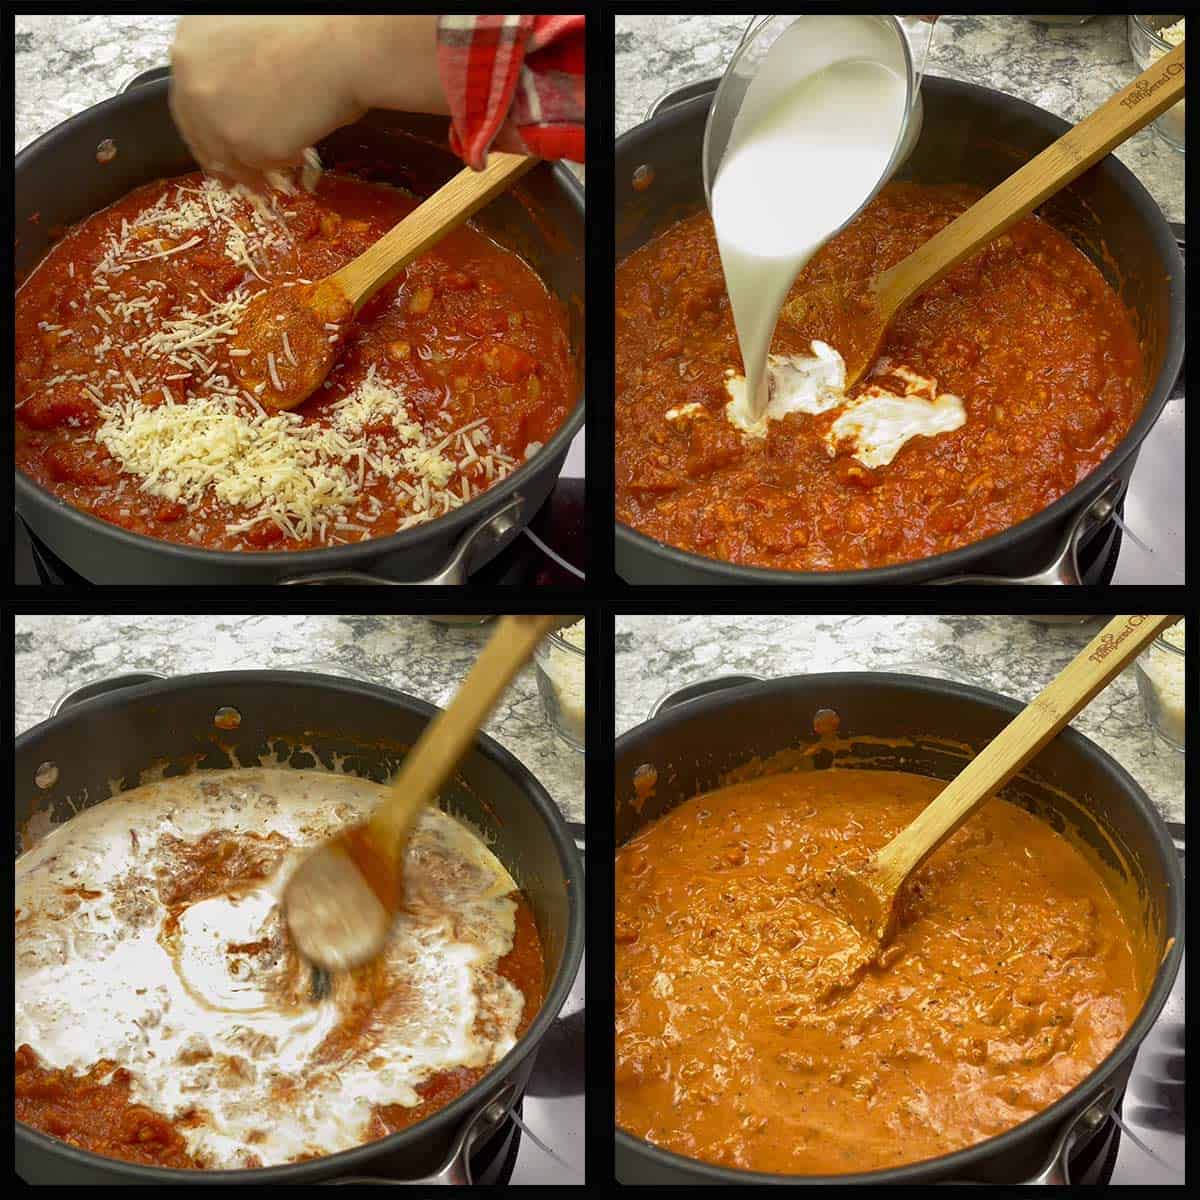
Reduce the heat to medium-low, and add in ½-1 cup of grated parmesan cheese, depending on how cheesy you want your sauce.
Stir to melt the cheese and add ½-¾ cup of heavy cream. Stir to incorporate the cheese and cream into the sauce.
I usually add ¾ cup of parmesan cheese and ½ cup of cream, but if you want your sauce a little lighter in color add more cream. Add more parmesan cheese if it isn't as thick as you want. If it is thicker than you want, add some of the pasta water.
Taste for seasonings and add more seasonings as desired.
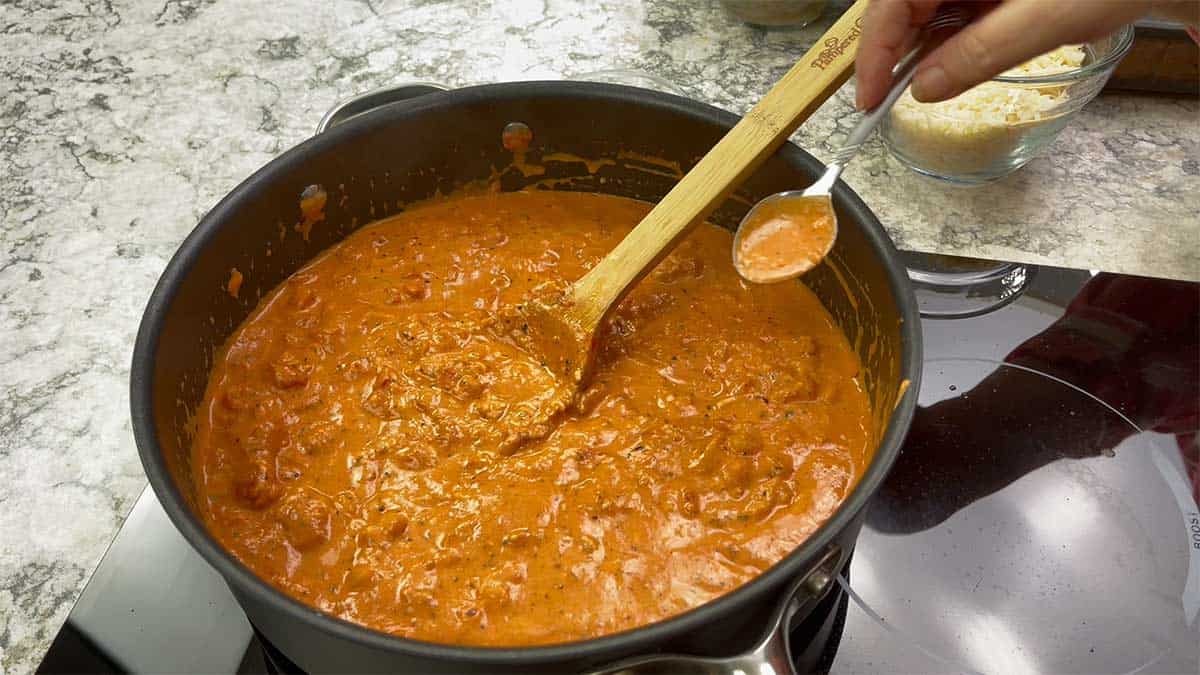
Finishing the Shrimp and Spinach Pasta
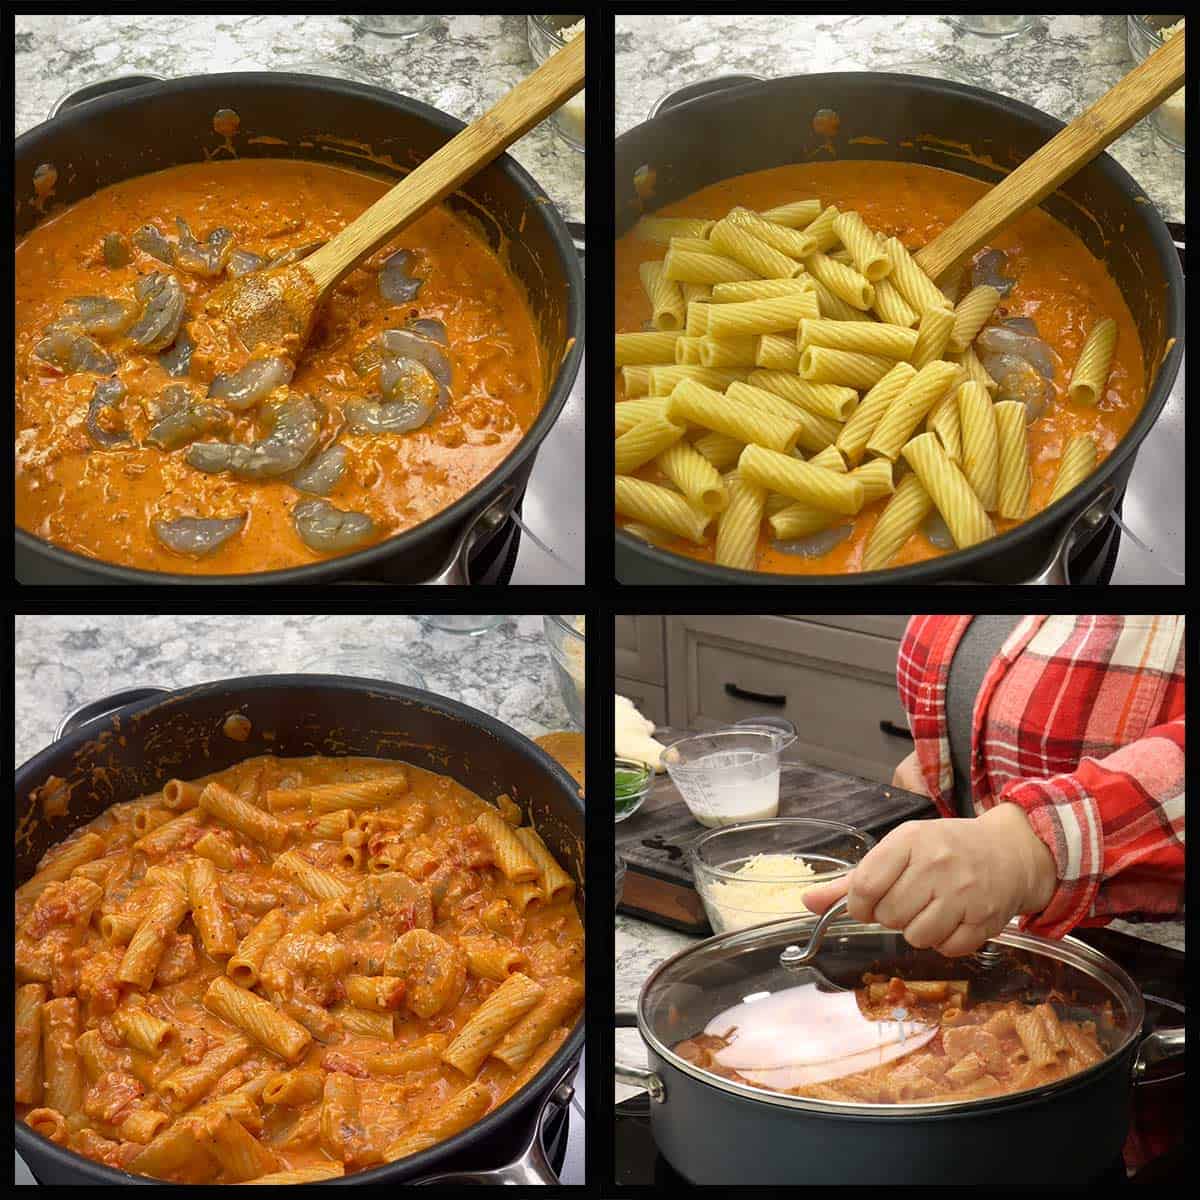
When the parma rosa sauce is done, add the shrimp and drained pasta. Stir to combine and cover the skillet.
You can turn the heat down to low if needed, you want the sauce to be at a simmer, but not boiling.
The shrimp take about 5 minutes to cook, and I stir after about 3 minutes.
Keeping the skillet covered will cook the shrimp faster and prevent the sauce from becoming too thick, but you can certainly simmer uncovered and if the sauce thickens too much, add in some pasta water.
Just before serving, add in the fresh spinach and stir into the pasta so it wilts. I also add some fresh basil at this time, but that is completely optional.
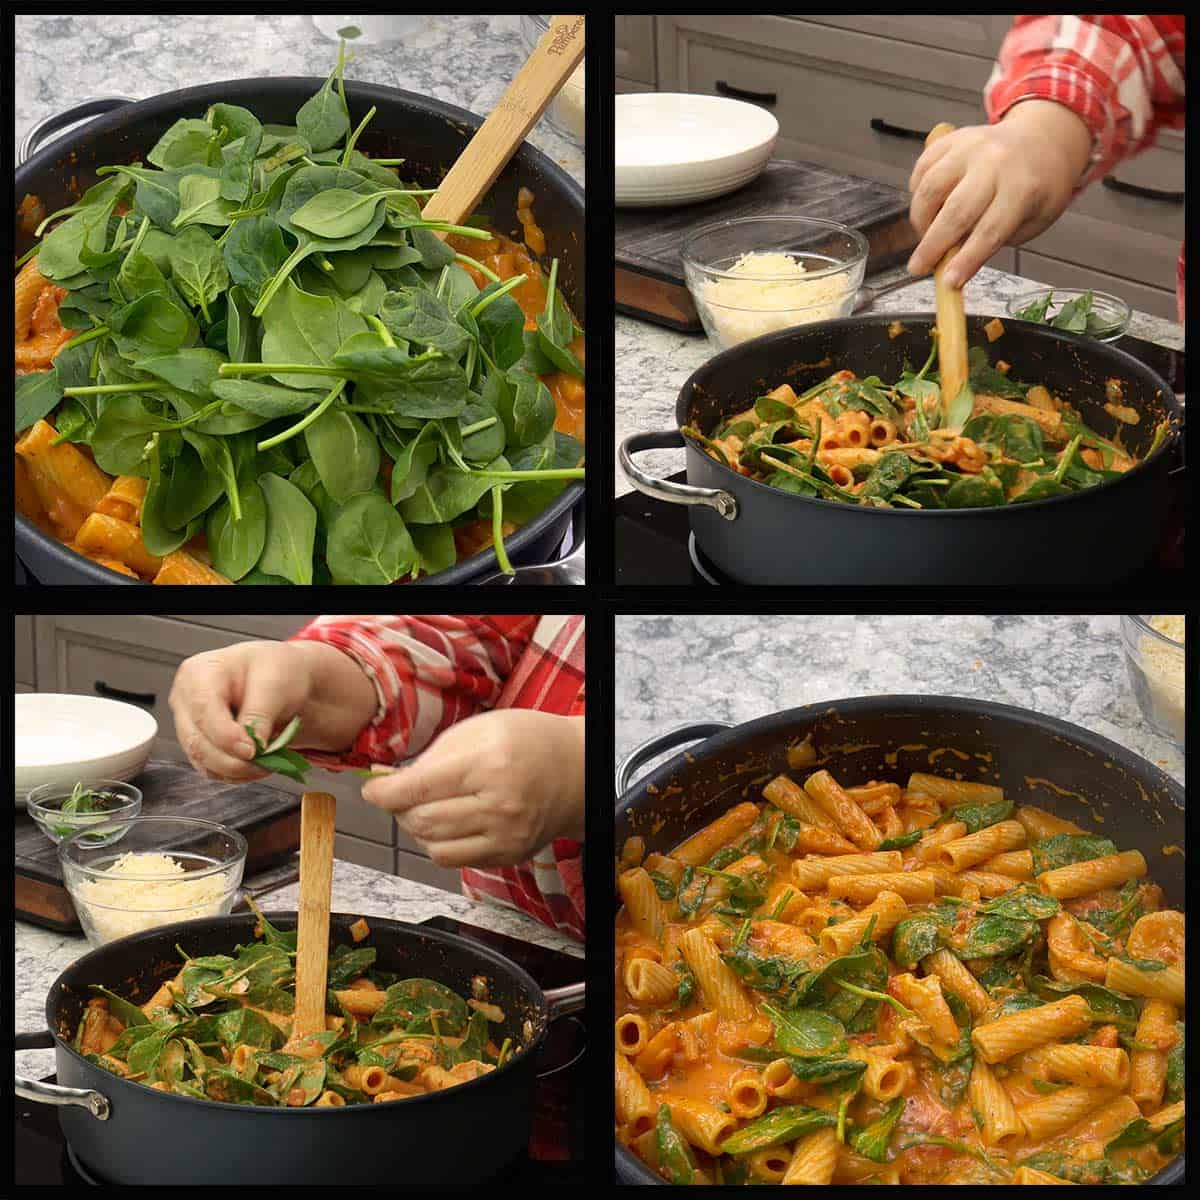
Plate the pasta and garnish with fresh basil and freshly grated parmesan cheese. Cracked black pepper is also a great addition. If you like things spice add a pinch of red pepper flakes on top!
Serve with a crusty bread for an amazing meal that is perfect for busy weeknights! Trust me, the whole family is going to love this one, even the kids!
Enjoy!
Pressure Cooking Instructions
First, let me start by saying that I have NOT tested this recipe in the pressure cooker.
However, it is very similar to other recipes I have, like Ninja Foodi Spaghetti and One-Pot Sausage and Peppers Pasta, so I feel comfortable giving you my suggestions if you want to make this a one-pot pressure cooker meal.
Turn the Ninja Foodi (or Instant Pot) on and select sear/sauté to high heat. Add in 3 Tablespoons of olive oil and heat for 2-3 minutes.
Add the diced onions and sauté for 1-2 minutes. Add in the minced garlic and sauté for one minute while stirring. Add the canned fired roasted tomatoes, seasonings, and 3 cups of beef broth or chicken broth. Stock is also fine to use.
Add the pasta and stir. Most of the pasta should be covered by liquid. If it isn't, I would add a little more liquid.
Put the pressure lid on and set the time for 2 minutes of high pressure cooking. Make sure the valve is in the sealed position. Press start.
When the time is up, move the valve to vent and immediately release the pressure. Open the lid and stir to break up any pasta that might be sticking together.
Select the sear/sauté mode on medium and add in the tomato paste, grated parmesan cheese, and heavy cream.
Stir to combine.
Add the raw shrimp and stir. Turn the Fooodi off and close the lid and let sit for 5 minutes or until the shrimp is fully cooked. You can also keep the heat on medium and stir occasionally while the shrimp cook.
Fold in the spinach just before serving and allow to wilt. Add the fresh basil if using.
Serve and enjoy!
Storage & Reheating Instructions
How to Store Leftover Shrimp and Spinach Pasta
Having tested this recipe several times, I have had plenty of leftovers and I'm happy to say that this recipe reheats very well!
Keep in mind that the pasta will get a little softer and each time you reheat it the shrimp do cook a little more, but I was still very happy with the leftovers!
Refrigeration
I recommend adding a little bit of pasta water to any leftover shrimp and spinach pasta that you are going to store. The amount you add depends on the amount of leftovers. I would go with about 2 Tablespoons of pasta water for every serving.
Place the leftovers in an air tight container and store in the refrigerator for up to 3 days.
Freezer
Before freezing it is very important that the leftover pasta is cold, so I recommend refrigerating the leftovers overnight before freezing them. I also recommend adding some pasta water before freezing which really helps keep everything nice and creamy when reheated.
If the food is warm when packaged for freezing, steam can be produced inside the container or freezer bag, resulting in ice crystals forming.
Air is another issue when freezing food, so make sure you choose a container that is the proper size for the amount of leftovers. You don't want a 3-cup container for 1 cup of leftover pasta or there will be too much air trapped in the container which can lead to decreased quality of the reheated pasta.
My preferred method for freezing is using a vacuum sealer which eliminates this issue.
Once the pasta is cold, transfer it to an air tight container or freezer bag. Get as much air out of the bag as possible if you aren't vacuum sealing.
Freeze the pasta for up to 3 months for the best quality.
How to Reheat Shrimp and Spinach Pasta
Steaming
One of my favorite ways to reheat pasta dishes is to steam them. I do this in the Ninja Foodi.
Place the leftovers in a covered container and place 2 cups of water in the Ninja Foodi. Put the covered container on the rack in the low position and set the Ninja Foodi up for steaming.
The amount of time you set will depend on the quantity of leftovers you are reheating and if they are frozen or thawed.
For frozen pasta, I set the time for 20 minutes and open the lid after about 15 minutes to stir the pasta. It is also a good idea to add a little cream or broth to the pasta so it is creamy and delicious when served. Continue steaming until it is heated through.
For refrigerated pasta, set the time for 10 minutes and open the lid after about 7 minutes to stir and add some liquid.
Stovetop
This method works best for thawed pasta. Add a little cream or broth to the pot or pan you are using to reheat the pasta in and add in the leftovers.
Heat over a low heat while stirring frequently until the pasta is warmed through.
Frequently Asked Questions
The way to make this recipe low-carb would be to substitute the pasta with zucchini noodles or Spaghetti Squash.
Yes, you can make as much or as little as you want by simply increasing or decreasing the ingredient amounts.
Make sure you have a pot or pan big enough to accommodate all of the ingredients if you are doubling the recipe. A single recipe will fill a 5-quart skillet.
If you are pressure cooking the pasta and want to double it, your time to pressure will be increased so I would decrease the pressure time to 1 minute and do a natural release for 1-2 minutes before releasing the remaining pressure.
Sure. If you still wanted to have a lighter pink sauce, then I would use soy milk or another type of dairy free milk. Nut milks would be a good choice. I would not use coconut milk because it will change the flavor too much.
You can use nutritional yeast instead of the parmesan cheese.
More Pasta Recipes!
There are so many different types of pasta recipes from light and summery to total comfort food perfect for the colder weather.
Here are some recipes you will love!
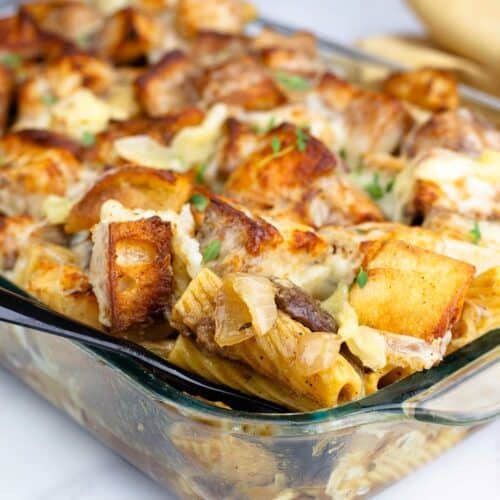
- French Onion Pasta
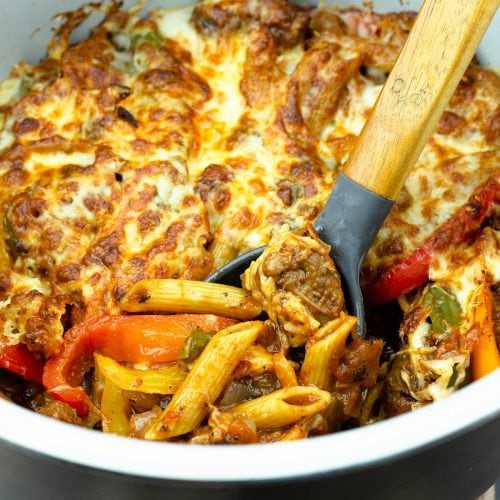
- One-Pot Sausage Peppers & Pasta ~ Pressure Cooker Recipe
- Quick & Easy Chicken Carbonara ~ Ninja Foodi or Pressure Cooker Recipe
- Garlic Parmesan Chicken Pasta
- Lemon Garlic Pasta with Vegetables ~ Ninja Foodi or Pressure Cooker Recipe
- Easy Shrimp Scampi in the Ninja Foodi
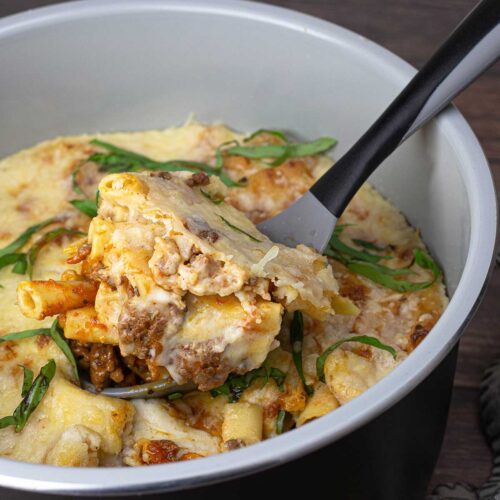
- Ninja Foodi Baked Ziti
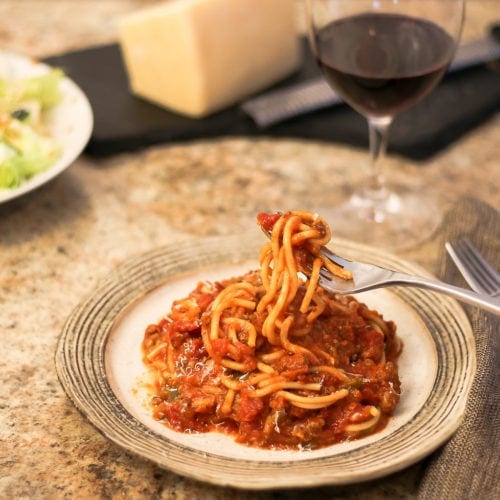
- Ninja Foodi Spaghetti Recipe
Shrimp & Spinach Pasta in a Creamy Tomato Sauce
Ingredients
Shrimp & Spinach Pasta
- 8 ounces Rigatoni Pasta
- water for boiling pasta 3-4 cups if pressure cooking and 8-10 if boiling on the stove
- salt for boiling pasta 1 teaspoon if pressure cooking and ½ Tablespoon if boiling on the stove
- 1 pound Large Raw Shrimp 21-25 Count per pound, thawed, shelled, and deveined.
- 4 cups baby spinach
Parma Rosa Sauce
- 3 Tablespoons Olive Oil
- 1 cup sweet or yellow onion ¼-½" dice, about 1 medium onion
- 1 Tablespoon minced garlic about 4-5 cloves
- 6 ounces tomato paste
- 1 teaspoon kosher or fine grind sea salt
- 1 teaspoon dried basil or 1 Tablespoon chopped fresh basil
- ½ teaspoon black pepper
- ½ teaspoon dried oregano
- pinch of red pepper flakes optional
- 14.5 ounces Fire Roasted Tomatoes
- 1 cup beef broth chicken broth can also be used
- ½-¾ cup heavy cream
- 4-6 ounces parmesan cheese grated, about ¾-1 cup
Optional Garnishes
- grated parmesan
- fresh basil
Would you like to save this recipe?
Instructions
Mise En Place (prep for recipe)
- Thaw the shrimp. Dice the onion, and mince the garlic. Measure out the remaining ingredients and have them close by.1 pound Large Raw Shrimp, 1 cup sweet or yellow onion, 1 Tablespoon minced garlic, 1 teaspoon kosher or fine grind sea salt, 1 teaspoon dried basil, ½ teaspoon black pepper, ½ teaspoon dried oregano, pinch of red pepper flakes
Boiling the Pasta
- Pressure Cooker Instructions: This can be started after you prep all the ingredients and are ready to make the sauce. Place the 8 ounces of Rigatoni into the inner pot of your pressure cooker and add just enough water to cover the pasta. This will be about 3¾-4 cups of cold water. Add the salt. Put the pressure lid and make sure the valve is set to seal. Set the pressure cooker on high for 2 minutes. Press start and Begin to make the sauce.8 ounces Rigatoni Pasta, water for boiling pasta, salt for boiling pasta
- Stove Top Instructions: Start the pot of water boiling when you start prepping for the recipe. Fill a large pot with 8-10 cups of water and bring to a boil. Add the salt (you can use more since you have more water) and allow the pot to return to a boil before adding the pasta. Add the pasta when you are half way done making the parma rosa sauce. This is just before you add the parmesan cheese and cream. Once the pasta is added, cook 1 minute less than the package instructions state.8 ounces Rigatoni Pasta, water for boiling pasta
Making the Parma Rosa Sauce
- Heat a 5-quart skillet over medium-high heat for about 2 minutes. Add the olive oil and heat for 2 minutes. Add the diced onion and sauté for 2-3 minutes.3 Tablespoons Olive Oil, 1 cup sweet or yellow onion
- Turn the heat down to medium. Add the minced garlic and stir. Cook until fragrant, about 1 minute. Add the tomato paste and break it up in the skillet. Cook for 2 minutes, stirring constantly so the garlic and tomato paste doesn't burn.1 Tablespoon minced garlic, 6 ounces tomato paste
- Add the seasoning blend and stir well. Add the fire-roasted tomatoes and the beef or chicken broth (or stock). Stir to combine and simmer on medium heat for about 5 minutes. This is when you want to add your pasta to the boiling water if you cooking the pasta stovetop.14.5 ounces Fire Roasted Tomatoes, 1 cup beef broth
- Add about 2 ounces (about ½ cup) of the parmesan cheese and stir to combine. You can add as much or as little cheese as you like. I usually use about ¾ cup in the sauce and then extra for garnish. The more cheese you add, the thicker the sauce will be. If it is too thick, you can thin it out with more cream or pasta water.4-6 ounces parmesan cheese
- Add in the heavy cream and stir to combine. Maintain the heat so the sauce is gently simmering. You do not want it to boil, so reduce the heat as needed. You can add as much or as little cream as you want to the sauce. I usually add ½ cup to the sauce and then add a little more to the leftovers before refrigerating them.½-¾ cup heavy cream
- By this time the pasta should be done. Drain it, but reserve some of the pasta water in case you need it (and it's great to add to leftovers before freezing). Stir in the cooked pasta and add the shrimp. Stir well and cover the pan. The shrimp will take about 5 minutes to cook and the sauce should remain at a low simmer the entire time. Stir every couple of minutes to move the shrimp around so they cook evenly.
- Once the shrimp are fully cooked and you will be able to tell because they curl up and turn a light pink in color, add the baby spinach, a cup or two at at time, and stir into the pasta. Once all the spinach is added, turn the heat off and cover until serving. It is best to serve it within 5-10 minutes.4 cups baby spinach
- Scoop out the pasta into a bowl or plate and garnish with grated parmesan and fresh basil if desired. Enjoy!grated parmesan, fresh basil
Nutrition
About the Recipe Author, Louise Long
Louise is a full-time recipe creator and food blogger @ The Salted Pepper. She has over 30 years of experience with cooking and recipe development. She owned a restaurant for several years and was a full-time RN until retiring to blog full-time.

She published her first cookbook in the Fall of 2018 and is very interested in writing several more.
Louise is also the creator of an online Ninja Foodi Pressure Cooking Course with over 100 instructional step-by-step videos. People absolutely rave about the course and all the value they have received from it.
Louise has several very active Facebook groups that help people with the basics of cooking and learning more about the appliances they love.
Ninja Foodi Pressure Cooker & Air Crisper 101
Ninja Woodfire Outdoor Grill & Smoker
Louise is also a YouTube creator and you can find most of her recipes in video format on The Salted Pepper YouTube channel.
She is very responsive to messages and eager to help in any way she can. Get more Information about Louise & contact information
I WOULD LOVE TO SEE WHAT YOU ARE COOKING UP IN YOUR KITCHEN! TAG ME @THESALTEDPEPPER ON YOUR FAVORITE SOCIAL MEDIA PLATFORM WHEN YOU MAKE A DISH!
BE SURE TO FOLLOW THE SALTED PEPPER RIGHT HERE ⇓⇓⇓⇓⇓
Leave a Reply