Turkey Wellington is a great alternative to just roasting up a turkey breast, and the presentation is simply spectacular! It's a great make-ahead recipe, because you can prep and roast the turkey up to 3 days before you want to serve it, and then simply wrap it in the puff pastry and bake until golden brown!.
If you usually serve a turkey breast for Thanksgiving dinner, you and your guests will be blown away by the turkey wellington!
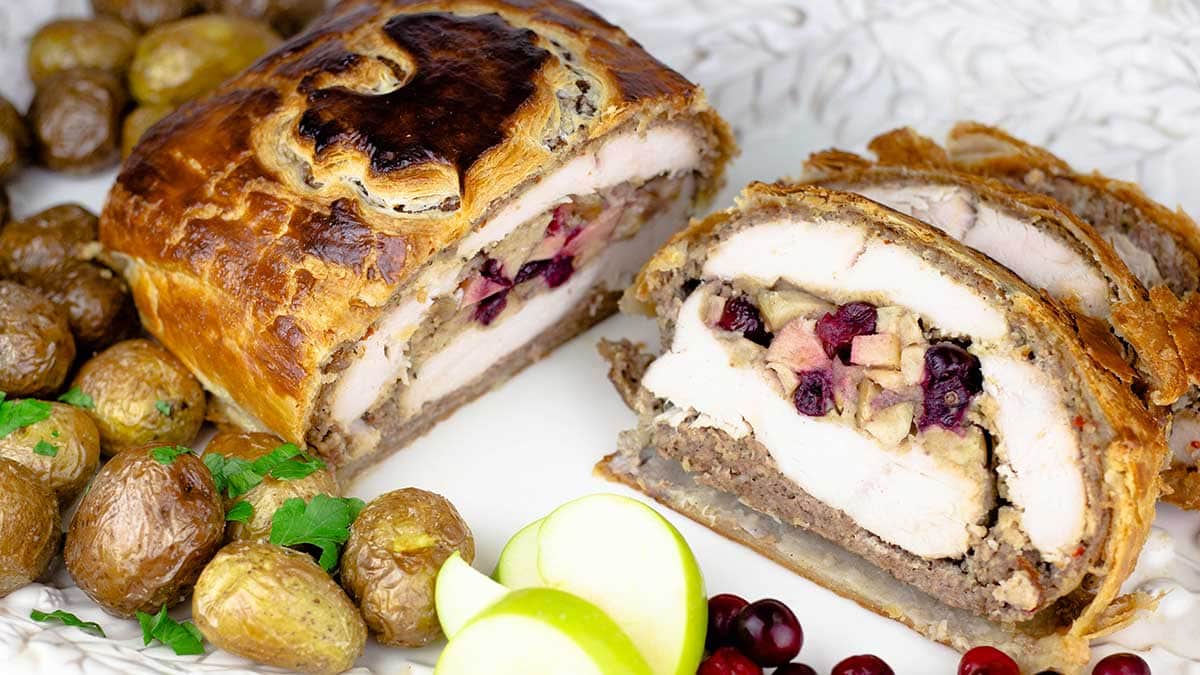
You may be familiar with beef wellington, a beef filet with a mushroom filling wrapped in puff pastry. They can be made as single serving sizes or as a large filet roast. In this turkey wellington recipe, I use a boneless turkey breast and turn it into a beautiful dish that is then sliced and served.
I recommend reading through this entire post before making the turkey wellington, so you understand the steps involved. This is not a hard recipe to make, but it has several steps and may seem overwhelming at first glance. It's not, I promise.
It doesn't take any kind of advanced kitchen skills to make turkey wellington, but have the right supplies and setting aside enough time will make it even easier.
Recommended Supplies
When making this turkey wellington recipe, it's important to be prepared and know what you need in advance. There are several steps and each one uses certain types of supplies that are going to make your life much easier. These aren't anything special or hard to find, you probably have most, if not all, of them already.
To make this recipe you will want to have the following supplies.
- (affiliate link)meat thermometer
- parchment paper
- plastic wrap
- (affiliate link)sharp knife
- (affiliate link)rolling pin
- (affiliate link)pastry brush
- sheet tray for baking
Ingredients & Substitutions
Turkey
I used a whole turkey breast that was boneless with the skin on. These usually come in 3 pound bags, but I have found that the turkey itself does not weigh 3 pounds because they also include the gravy packet in the total weight. Plan on each whole turkey breast weighing about 2.5 pounds. There are various brands that you can buy at the grocery store and often times they are frozen, so make sure to purchase it far enough ahead of time to let it thaw in the refrigerator. Mine took about 24 hours to thaw, but it's fine to thaw for 2-3 days in the fridge before using.
One thing to note: when you open up the turkey breast, it may be in one piece, two pieces, or three pieces. Don't let that worry you! Although the process is slightly different for a turkey breast in pieces, it's completely doable, and I'll go over that in the recipe.
If you wanted to use a prepackaged turkey tenderloin, you certainly can. Some are marinated and some aren't. If yours is marinated, just make sure the flavors will pair well with the other ingredients. For example, garlic and herb or oven roasted flavors would be fine, but I wouldn't use one with a lemon pepper flavor. The turkey loins are much smaller than the breast and usually come two to a pack. You can either pound each one so it's the same thickness and put the stuffing between the two and then proceed with the directions for when the whole turkey breast comes in pieces, or you could butterfly each one and make two turkey wellingtons. Since you will be cooking to temperature and not time, you would cook the sausage-wrapped tenderloins until the internal temperature reaches 165°F. They will not take as long as a whole turkey breast.
You can also use chicken breasts instead of turkey and make individual wellingtons.
Sausage
This recipe uses ground breakfast sausage that is in a roll and without the casing. You can use any kind of sausage that you like, but you will need to remove it from the casing, if it has one, like Italian sausage usually does. The sausage plays two roles in this recipe, it protects the turkey breast from drying out AND it seals the turkey breast with the stuffing inside, so it's easy to wrap in puff pastry. I have made the recipe with both 1 pound and 2 pounds of sausage and it is much easier to roll out the sausage and wrap it around the turkey when you use 2 pounds; however, it can be done with 1 pound, or even 1½ pounds would be just fine. If your turkey is in several pieces, I recommend using at least 1½ pounds of sausage.
If you wanted to omit the sausage, you will need to use kitchen twine or put the turkey breast back into the netting it came with after stuffing (that might prove difficult since the turkey is larger after stuffing it. Depending on how your turkey breast comes (1 piece or several), you may need to secure with toothpicks and wrap in kitchen twine before roasting it.
Another option would be to wrap the turkey breast (after stuffing it) with bacon. I thought about doing it that way, but was concerned that the bacon wouldn't get crispy enough on the side that touches the turkey. If you want to try it, I would use thin bacon instead of thick bacon and make sure the bacon covers the entire turkey breast in 1 layer as much as possible. Slow roasting at a lower heat will help with crisping and rendering the bacon, but once it's chilled and then wrapped in puff pastry, I have a feeling it will soften from the steam. I'm a fan of crispy bacon, so I stuck with sausage.
Stuffing
I used an apple and cranberry stuffing in this recipe, but you can use any kind of stuffing that you want. The juices from the turkey will moisten the stuffing as it cooks, so I would use a drier stuffing rather than a super moist stuffing.
If you don't like cranberries, simply omit them. I've tested the recipe with and without cranberries and, while both are delicious, you really have to like the tartness of the cranberries to like the stuffing with them in there. The apple does provide some sweetness, but it's nothing like the sweetness of a cranberry relish, unless of course you use a cranberry apple relish in the stuffing! You can also use craisins or dried cranberries, if you prefer.
If you wanted to make this lower carb (skip the pastry, of course), a mushroom and pecan (or walnut) stuffing would work great in this recipe.
Puff Pastry
I have tried the recipe both with homemade puff pastry and store-bought, both are delicious. While the homemade puff pastry was a little flakier and had a better flavor, making your own can be time consuming and store-bought works great. You can certainly skip the puff pastry altogether, if you wanted to lower the carb count. This is a great recipe to make keto because you only have to use a keto type of dressing and skip the pastry.
The presentation without puff pastry looks more like a meatloaf, but when you cut into it, you still have the layer of sausage with the layers of turkey with stuffing in between.
How to Make Turkey Wellington
Thawing & Preparing the Turkey Breast
Thawing
If you are starting with a frozen turkey breast, this recipe can take up to 3 days to make, so it's important to plan ahead. Mise En Place is the French culinary term for "everything in its place" and the first step in this recipe is to thaw the turkey.
It's important for the turkey breast to be thawed completely for this recipe. To safely thaw the turkey breast, leave it in the original package and put it in the refrigerator for at least 24 hours or up to 48 hours.
If you don't have a full 24 hours to allow the turkey breast to thaw, you can thaw it in cold water. Since the temperature of the turkey is colder (frozen) than cold tap water and heat is transferred from hot to cold in order to reach a state of equilibrium, the cold water will transfer heat to the frozen turkey breast and thaw it quicker than in the fridge. Water is a much better conductor of heat than air, so this process is quicker, but a little more hands-on.
To safely thaw meat submerged in cold water, you need to change out the water every 30 minutes. This is to ensure that the temperature never goes above 40℉/4℃ long enough for bacteria to start multiplying.
Thawing a frozen turkey breast submerged in cold water will take about 2-3 hours.
Prepping the Turkey
You know the saying in Forrest Gump, "Life is like a box of Chocolates, you never know what you're gonna get." Well... this is true with boneless turkey breasts, in many instances.
Unless you are lucky enough to know a good butcher or can get a fresh turkey breast, you are pretty much at the mercy of whatever you find when you unwrap your turkey breast, and it varies quite a bit.
The first time I tested this recipe, I bought a brand name boneless turkey breast that comes with a gravy packet, weighs in at 3 pounds total package weight, and can usually be found easily in most grocery stores. It was perfect. The turkey breast was intact, had a nice shape and I made the recipe.
I then bought two more to complete the recipe testing and, although these were the same brand and from the same store, what I found inside was completely different! When I removed the netting from one of them, the turkey breast was in 3 pieces of all different sizes.
I opened the second one and encountered the same thing. Determined to make this work, I tried many different things and finally came up with an easy way (although a tiny bit different) to make Turkey Wellington EVEN if your turkey breast is in pieces.
When I filmed the recipe video, I had one turkey breast that was mostly intact, but there was a chunk separated from the main breast and I got one that was a complete mess. It was in one piece, but so poorly butchered that there was no way to butterfly it, so I cut it into 3 pieces.
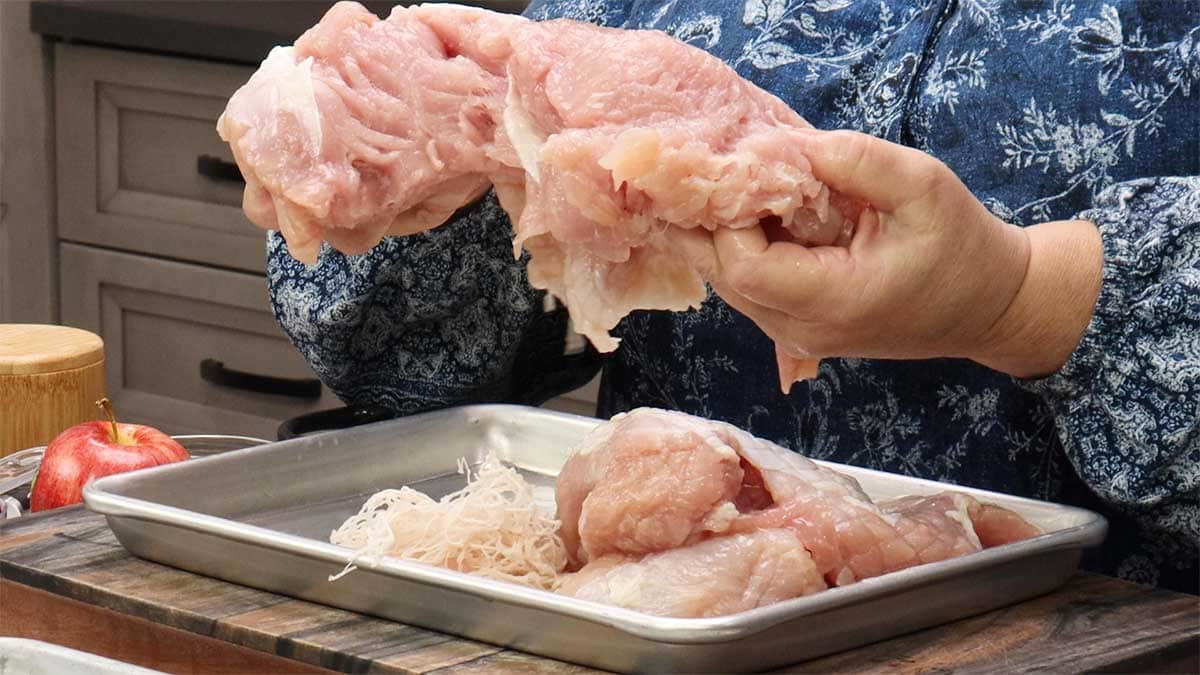
So, no worries, remove the netting and see what you are working with. No matter if you are lucky enough to get an intact turkey breast or one in pieces, you still want to remove the skin with a sharp knife, by running the knife just under the skin and separate it from the breast. The skin comes off very easily.
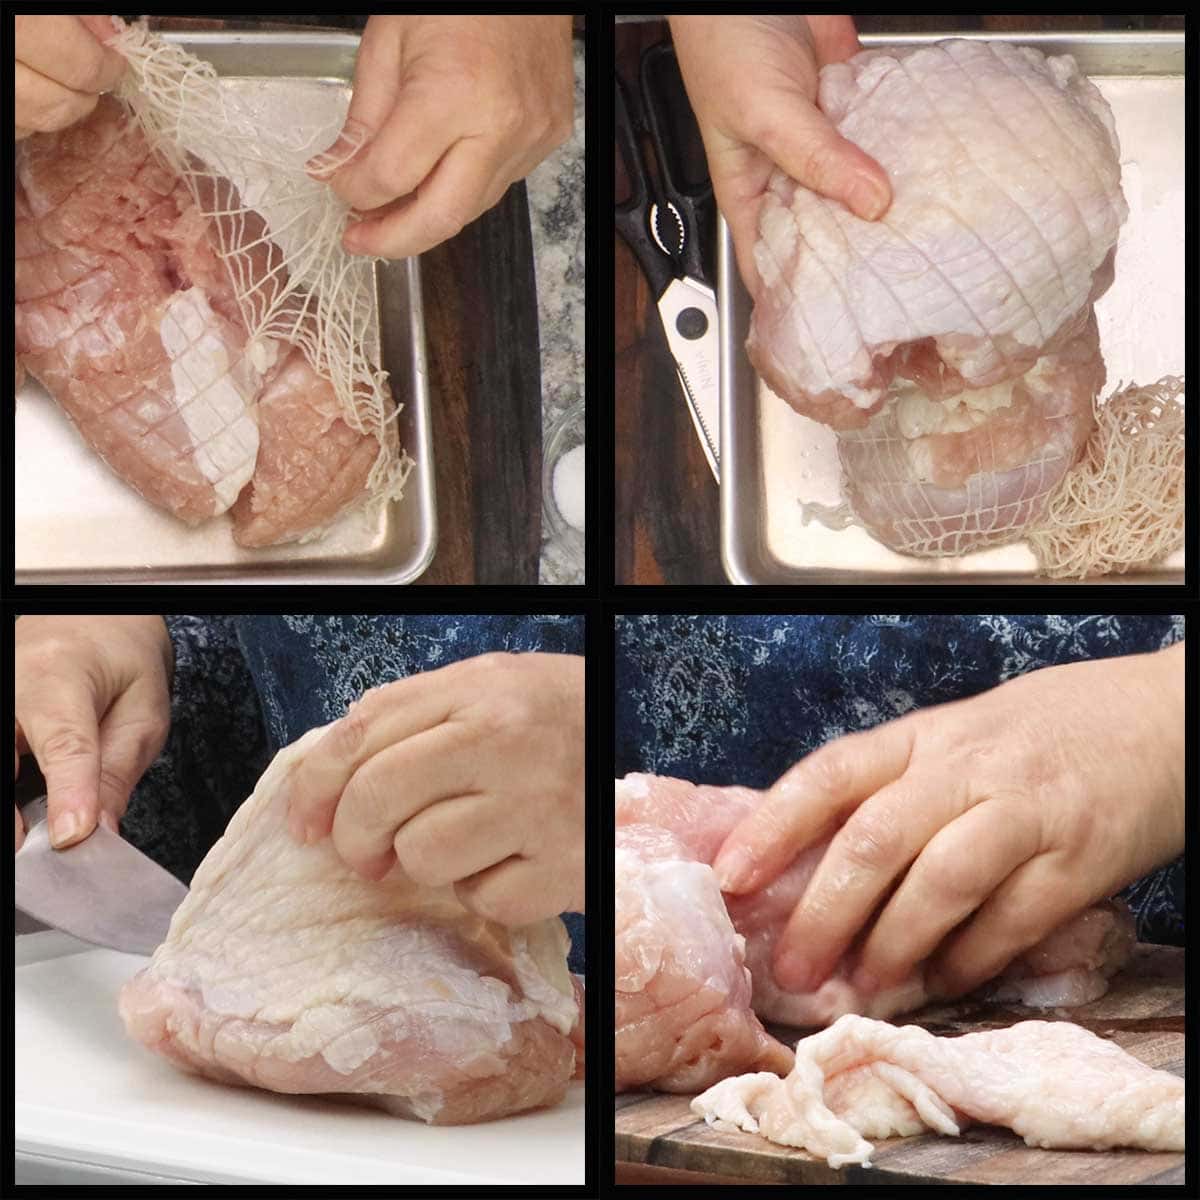
Once you know the condition of your turkey breast and the skin is removed, it's time to butterfly or pound the turkey pieces to an even thickness.
Butterflying an Intact Turkey Breast
Place the turkey breast on a cutting board and run a sharp, (affiliate link)8" Chef's knife through the middle of the turkey breast. Try to keep each side as even as possible and cut far enough into the turkey breast so that you can lay it open and it lays flat on the cutting board.
If you don't cut far enough, you won't have the stuffing evenly distributed and if you cut all the way through the breast by accident, then simply use the technique for wrapping when the turkey breast is in pieces.
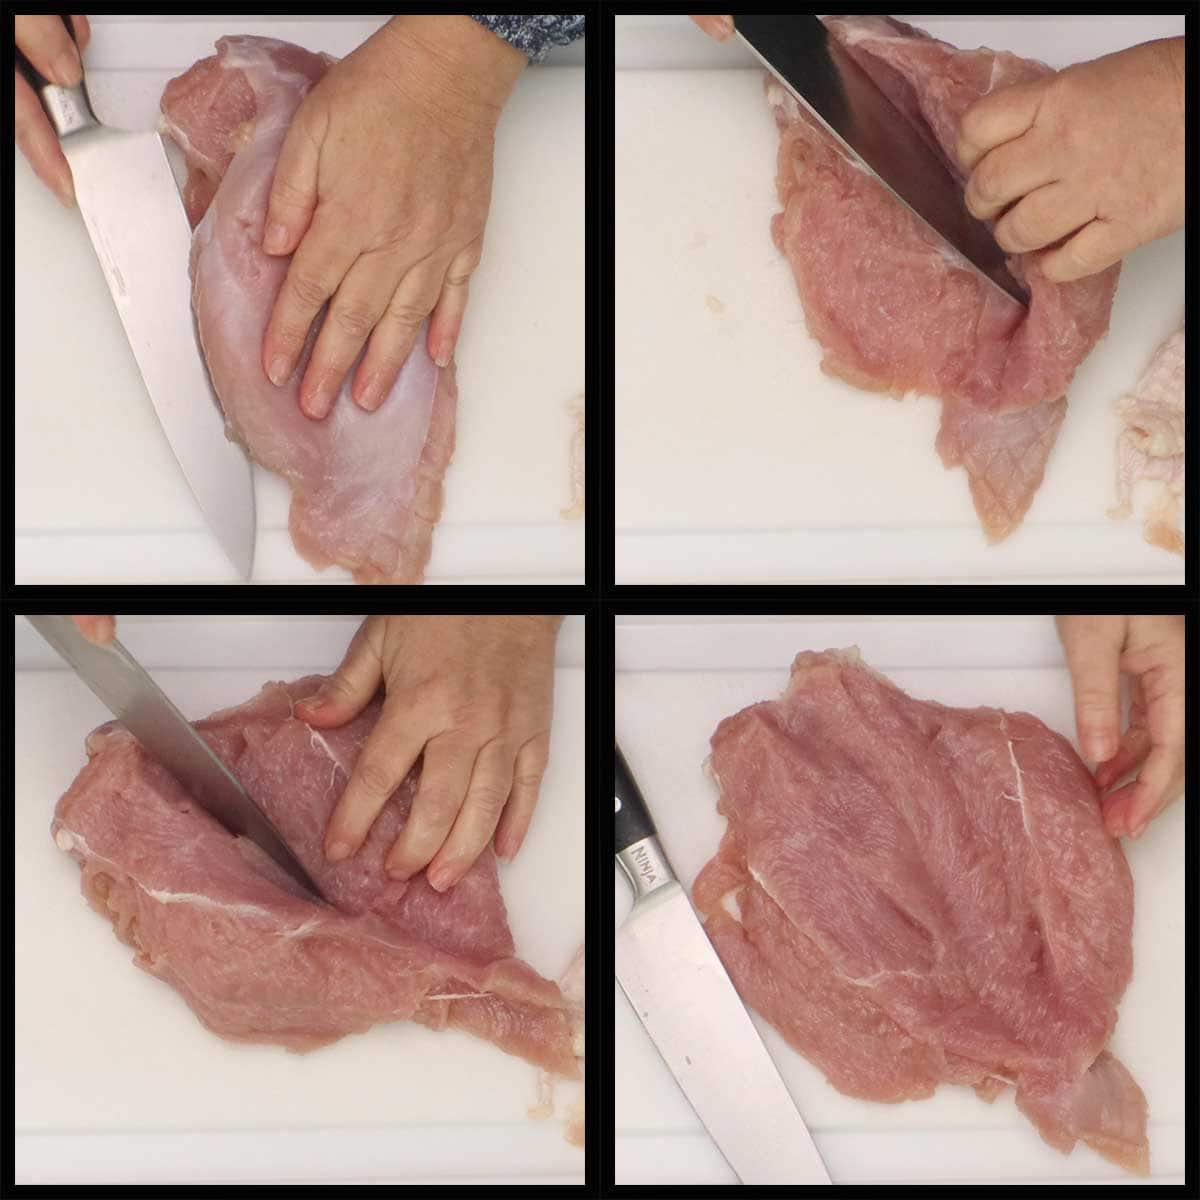
Lightly salt and pepper both sides of the turkey breast and, if you aren't going to stuff it within an hour, wrap the turkey in plastic wrap and refrigerate until you want to stuff it.
Cutting and Pounding Turkey Breast in Pieces
If you end up with several pieces of turkey breast or a poorly butchered one, please don't worry. It works just fine.
While this will vary depending on the number of pieces and sizes of them that you have, what you want to end up with is either 2 as close to equal size pieces of turkey as you can, 1 larger piece and 2 smaller ones or even 4 smaller pieces will work.
Place the pieces of turkey breast on a cutting board or other clean flat surface and cover with plastic wrap.
Using a mallet or the smooth end of a (affiliate link)meat tenderizer, pound each piece so that the thickness is about the same. This can vary depending on your turkey breast, but each piece should be between 1-1½" thick.
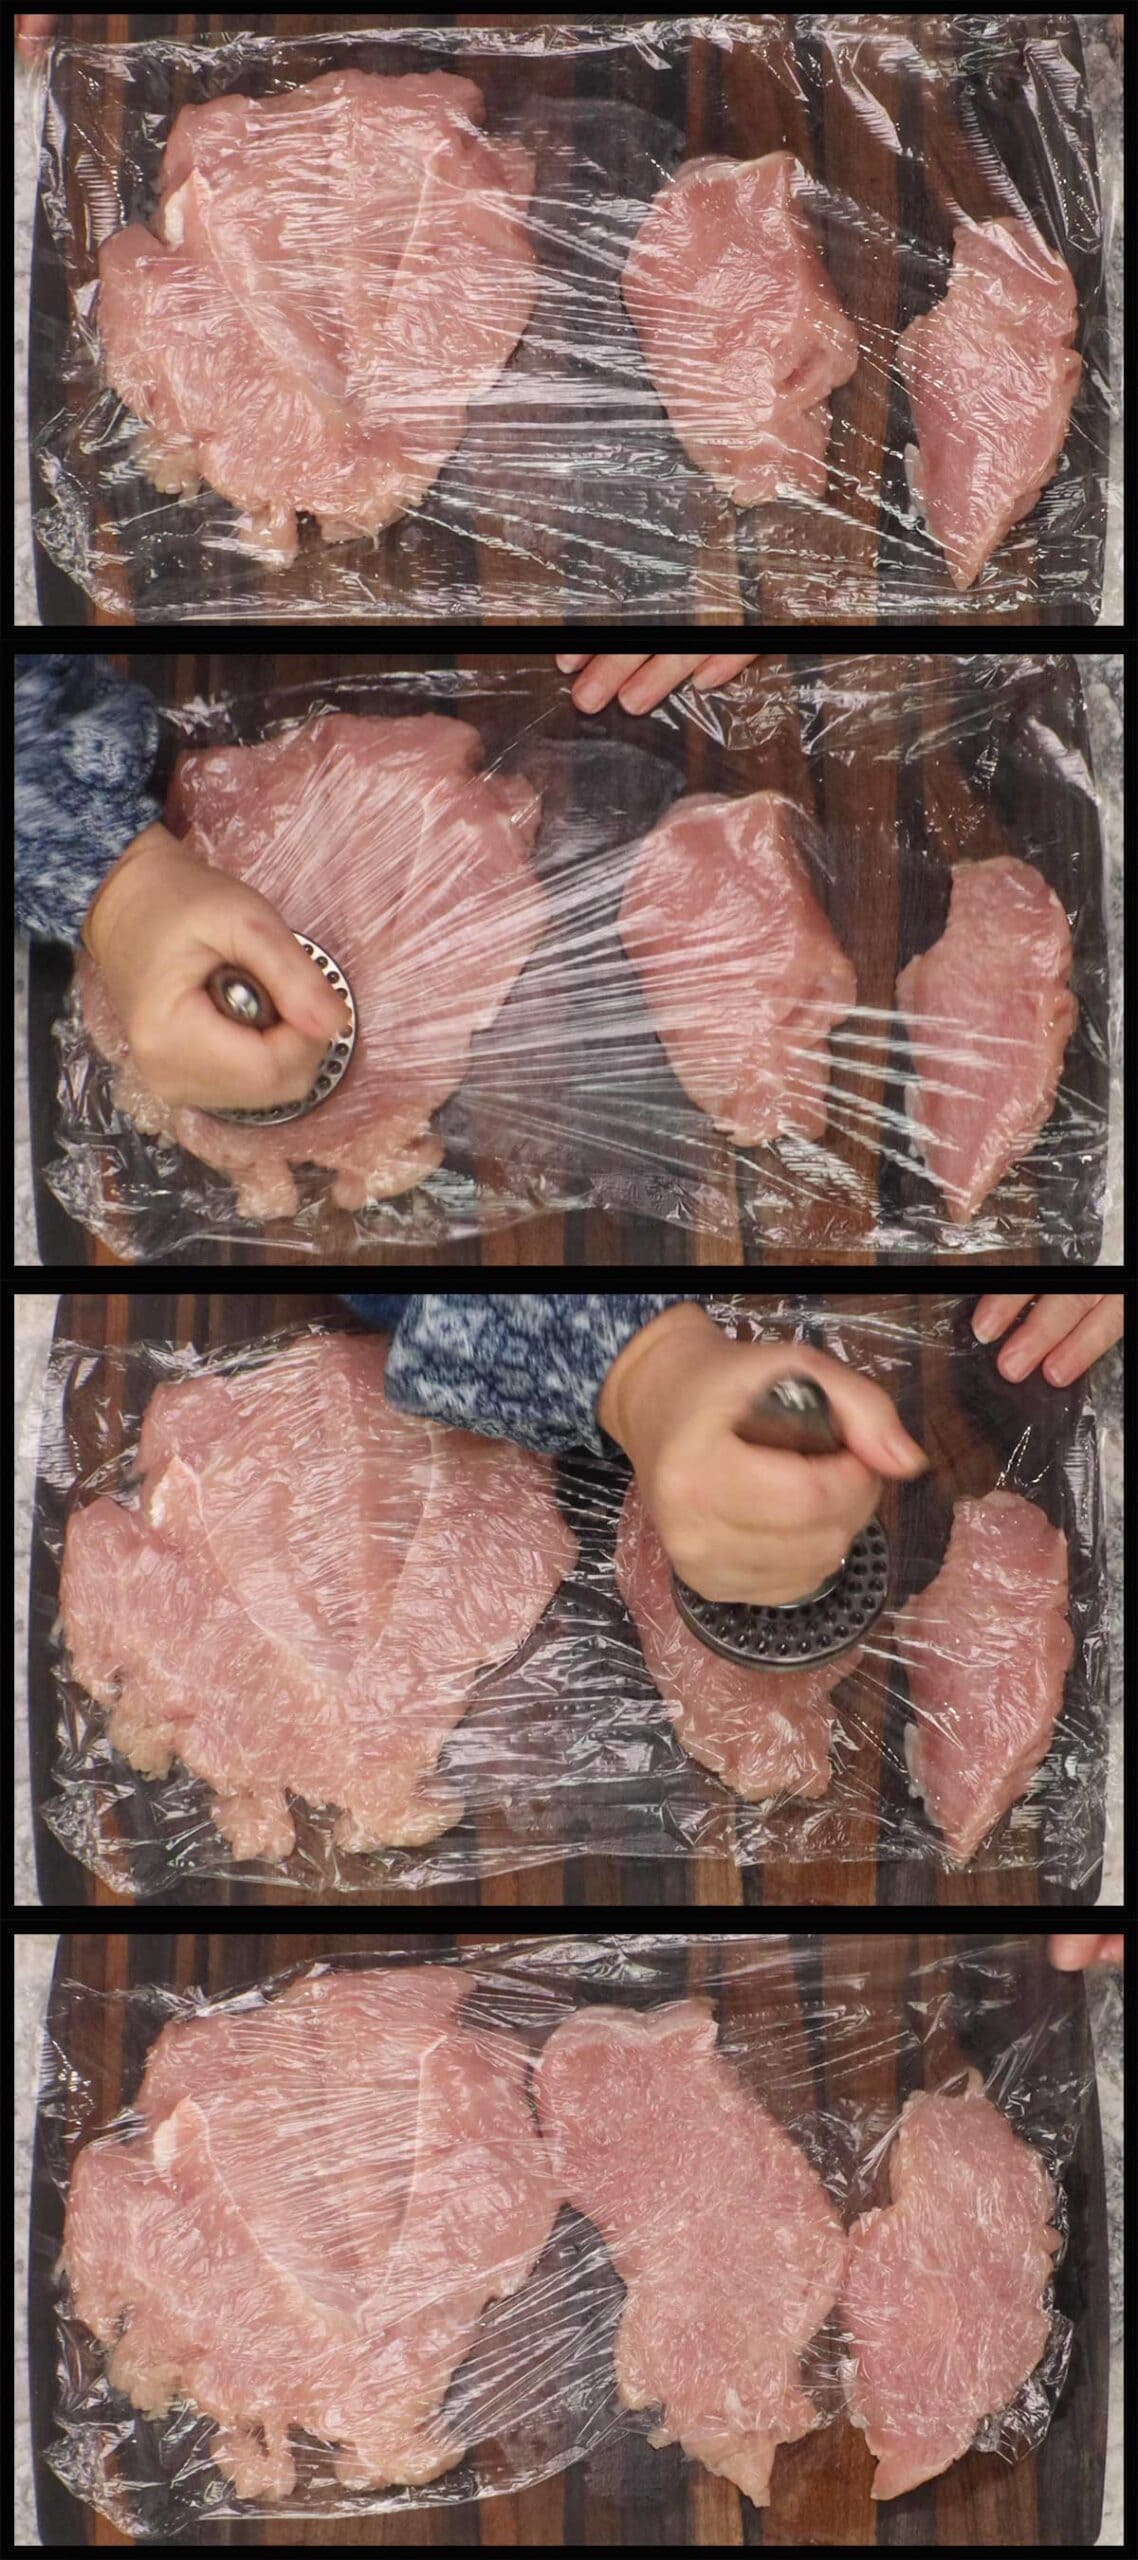
Lightly season with sea salt and pepper each piece of turkey on both sides. If you are not going to make the stuffing and stuff the turkey breast within 30 minutes or so, wrap in plastic and place the turkey in the refrigerator.
Making the Apple & Cranberry Stuffing
This simple stuffing comes together in just minutes.
Chop the apple (you can use any kind of apple you like) into about ¼-½" pieces. You want them no bigger than the cranberries. You can leave the skin on the apple or peel it.
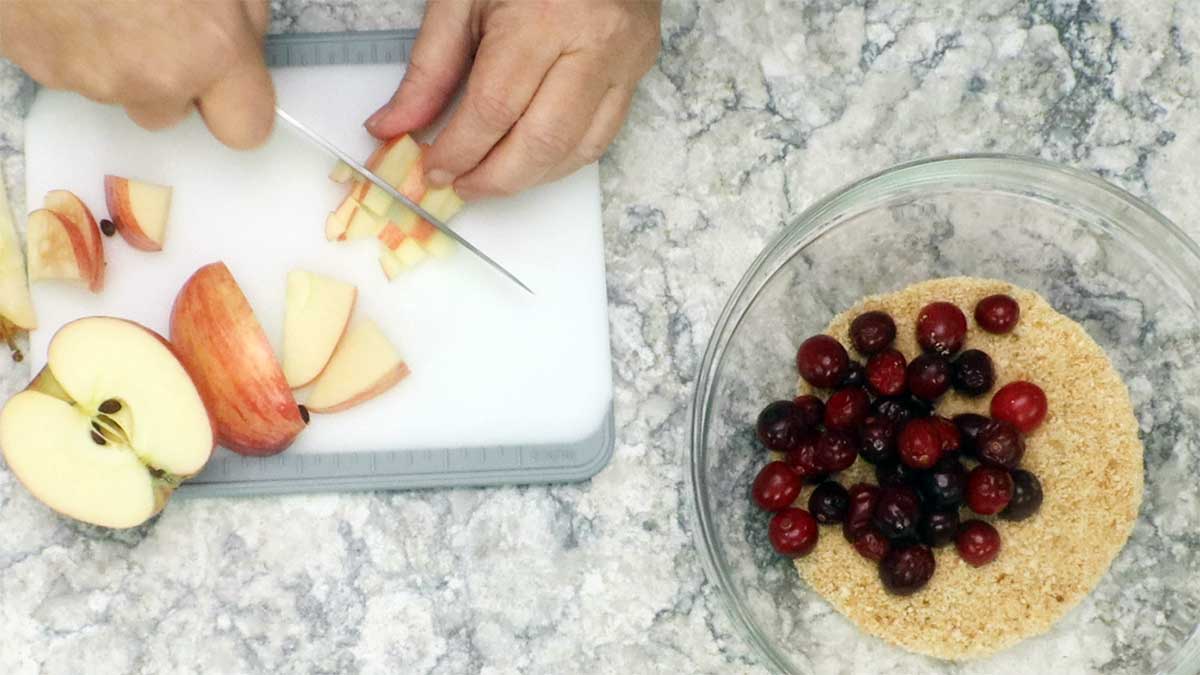
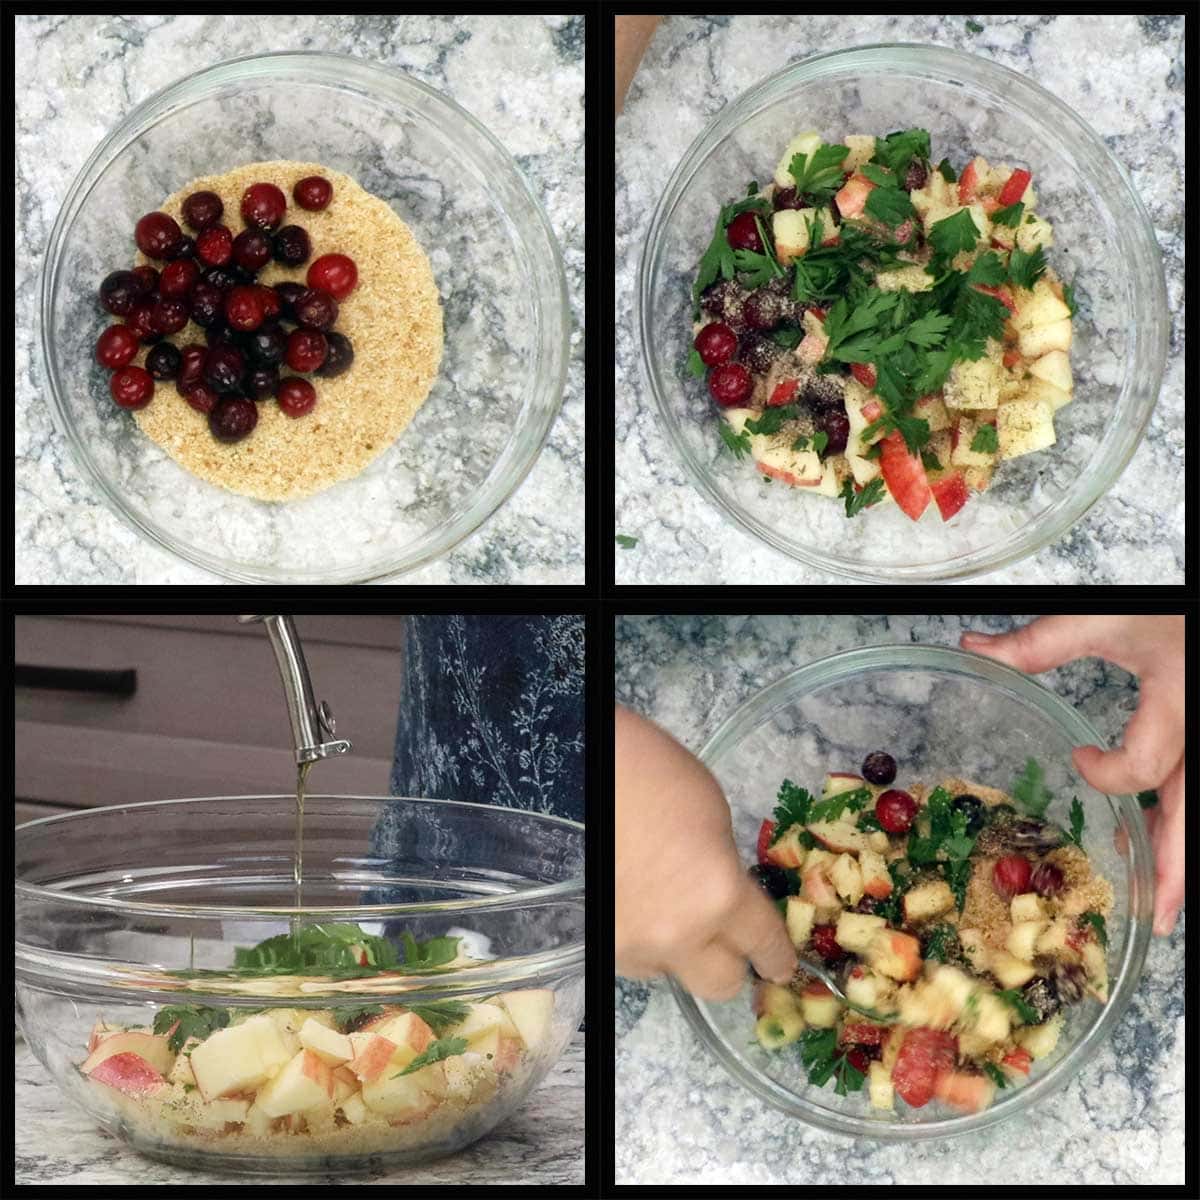
Add ½ cup of breadcrumbs to a medium size mixing bowl along with the fresh cranberries (frozen and thawed is fine), diced apple, seasoning blend, chopped parsley, and olive oil.
Toss to mix together. You want to make the stuffing just before using so the apples don't start to turn brown. Also, the cranberries are tart in this stuffing and if that isn't a flavor that you like, then either omit the cranberries or add in some brown sugar to sweeten things up a bit.
Stuffing the Turkey Breast
The process for stuffing the turkey breast is just slightly different depending on if you have 1 butterflied breast or a breast you had to cut into pieces and pound out.
Stuffing Butterflied Breast
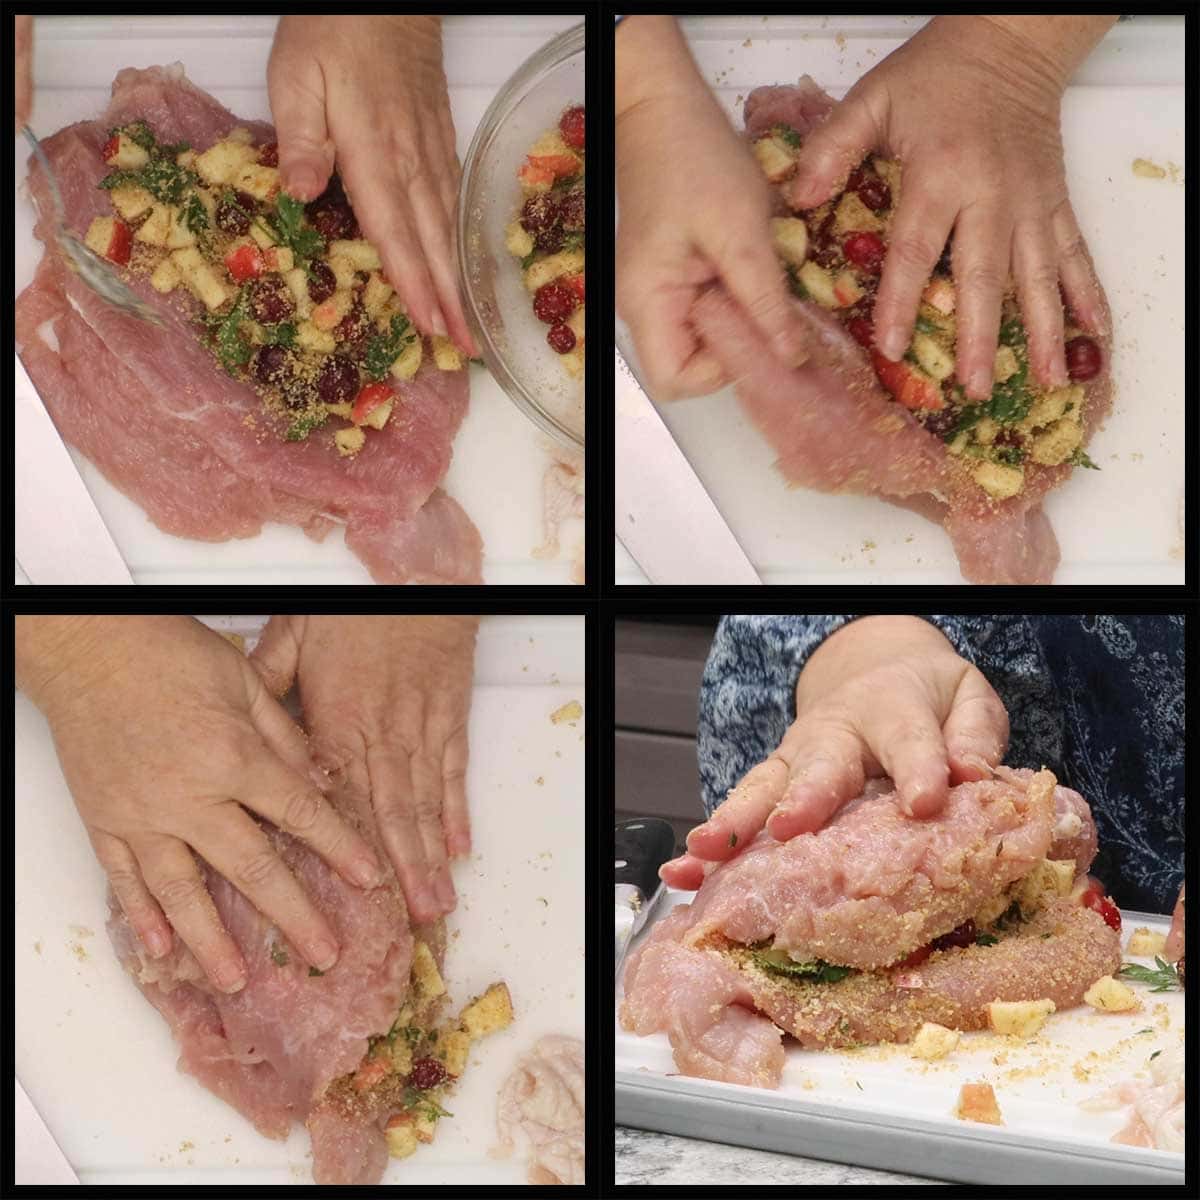
Lay the butterflied turkey breast flat on a cutting board and spoon the stuffing onto the left side of the turkey if you are right handed and the right side if you are left handed.
Only use as much stuffing as you can pile on and try to get it as close to the edges as possible, don't worry if some falls out. You may not use all of the stuffing, but try to use at least 1-1½ cups.
Fold the other side of the turkey breast over to cover the stuffing and try to get the edges to meet as much as possible.
Stuffing a Turkey Breast in Pieces
If your turkey is in pieces, it is easier to stuff once it is on the sausage, so skip to the next step and roll out the sausage first.
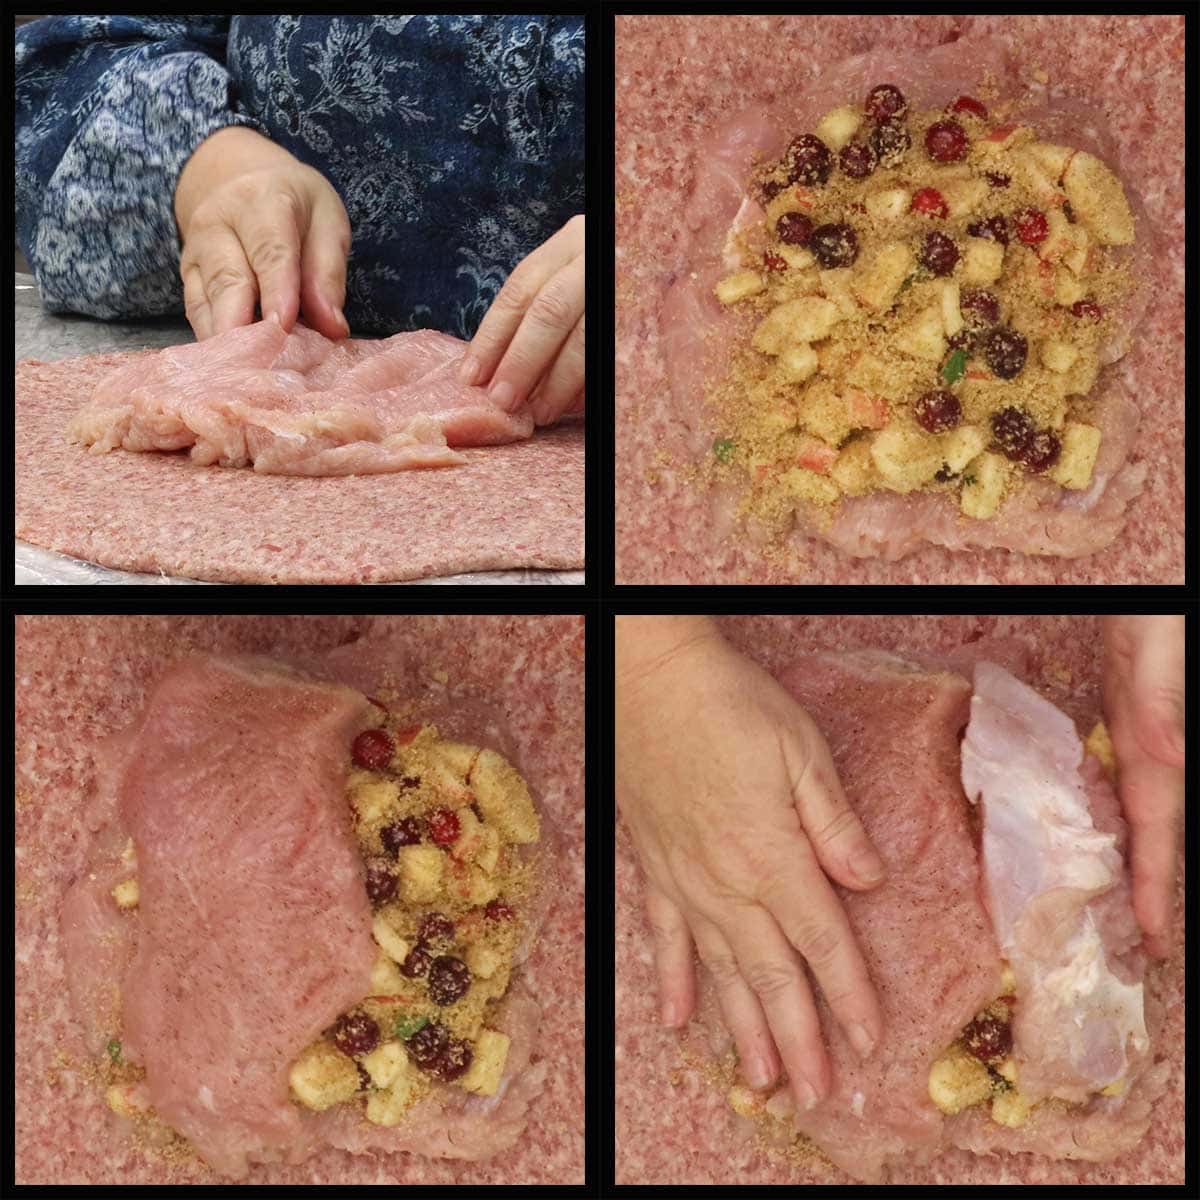
Once the sausage is rolled out, place the largest piece of pounded turkey in the middle of the sausage and spoon the stuffing over the top. Place the other two pieces on top. If you have 4 pieces, place two on the bottom, layer the stuffing on top and cover with the other 2 turkey pieces.
Rolling out the Sausage
It's important that your sausage is thawed completely, but cold when rolling it out. You also want to make sure the sausage isn't in any type of casing. Breakfast sausage in a roll is what I used, but you can use other sausage if you like.
On a large, flat surface, place plastic wrap that will cover a 24"x24" space. Place the sausage in the middle and if the sausage is in 2 rolls, squish them together and form one round mound of sausage.
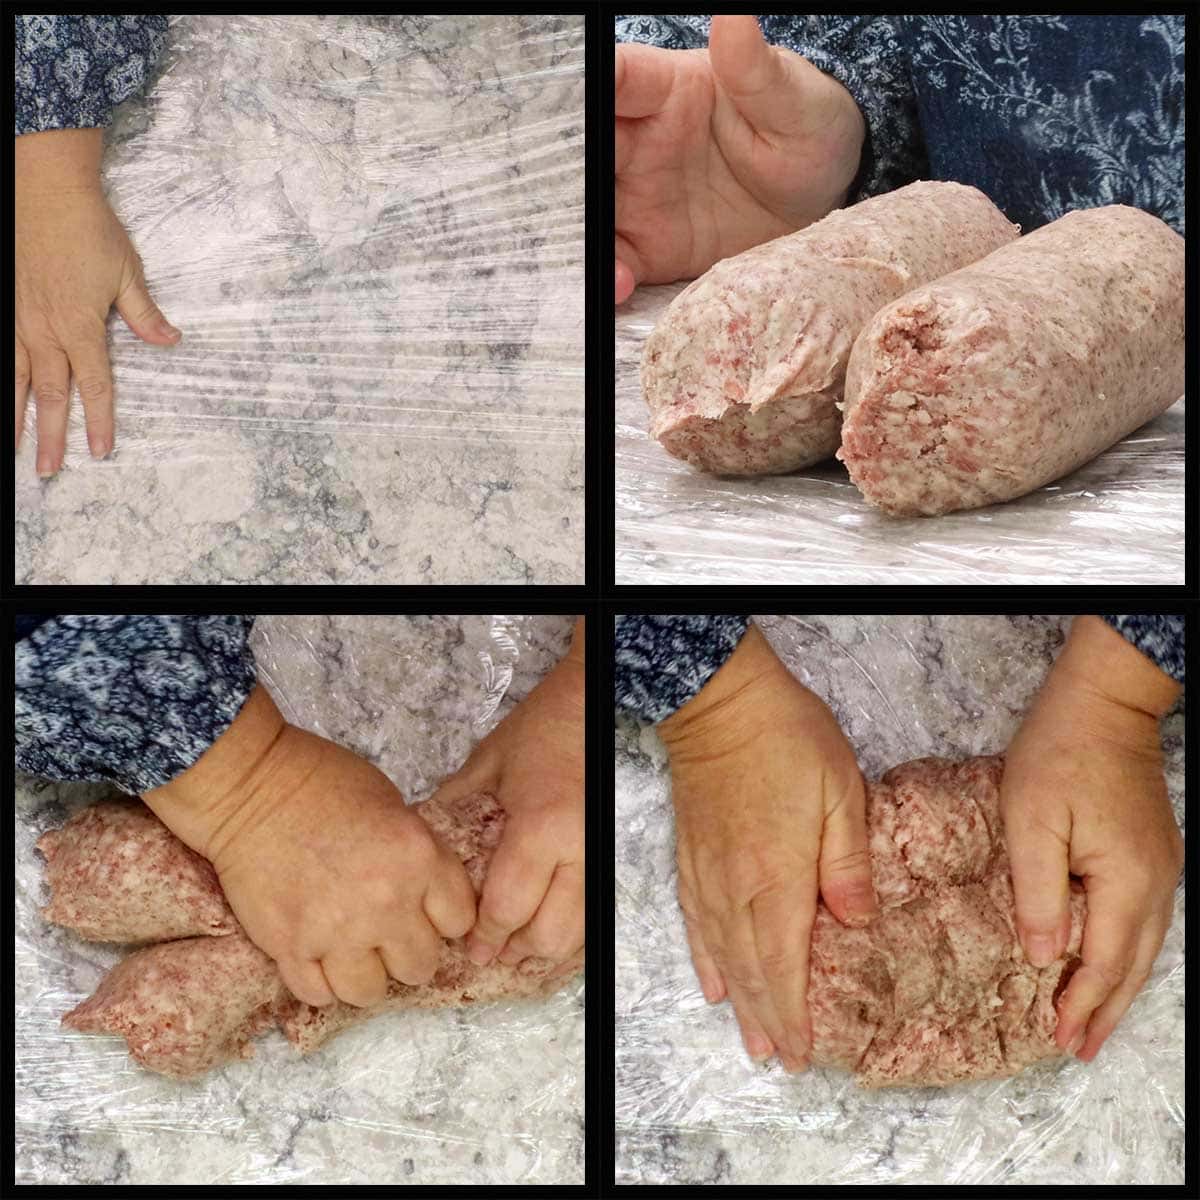
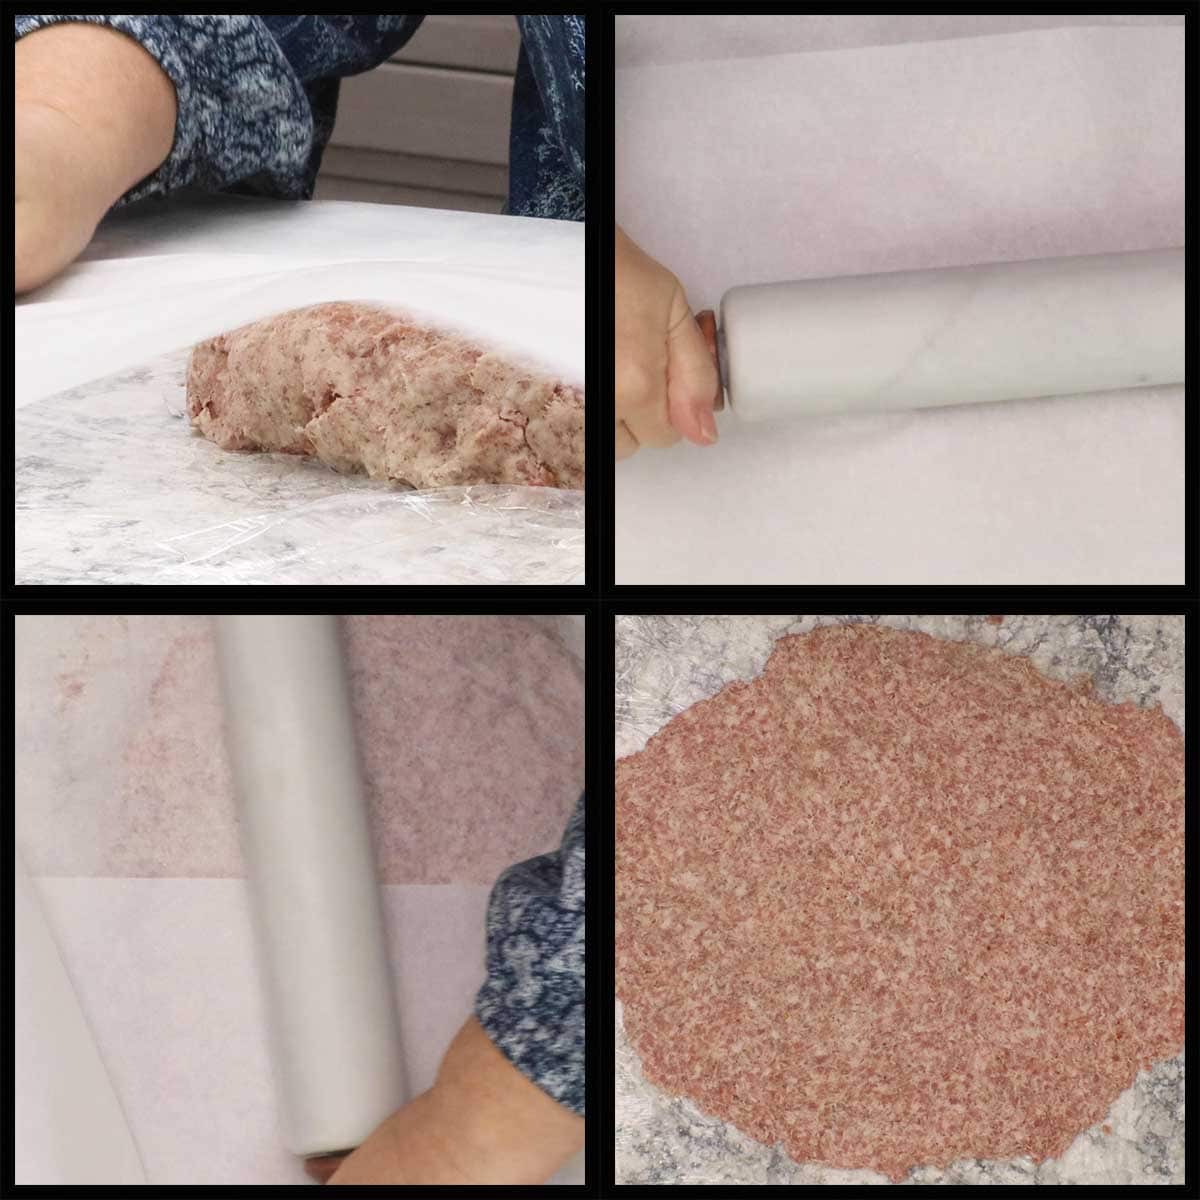
Cover the sausage with a piece of parchment paper that is as big as the plastic wrap. Place a rolling pin in the middle and start to roll out the sausage.
The sausage can be round or square and should be about the size of a large pizza. Try to get the sausage as even of a thickness as you can.
Wrapping the Stuffed Turkey Breast in Sausage
Once the sausage is rolled out, it's time to wrap the turkey breast in it.
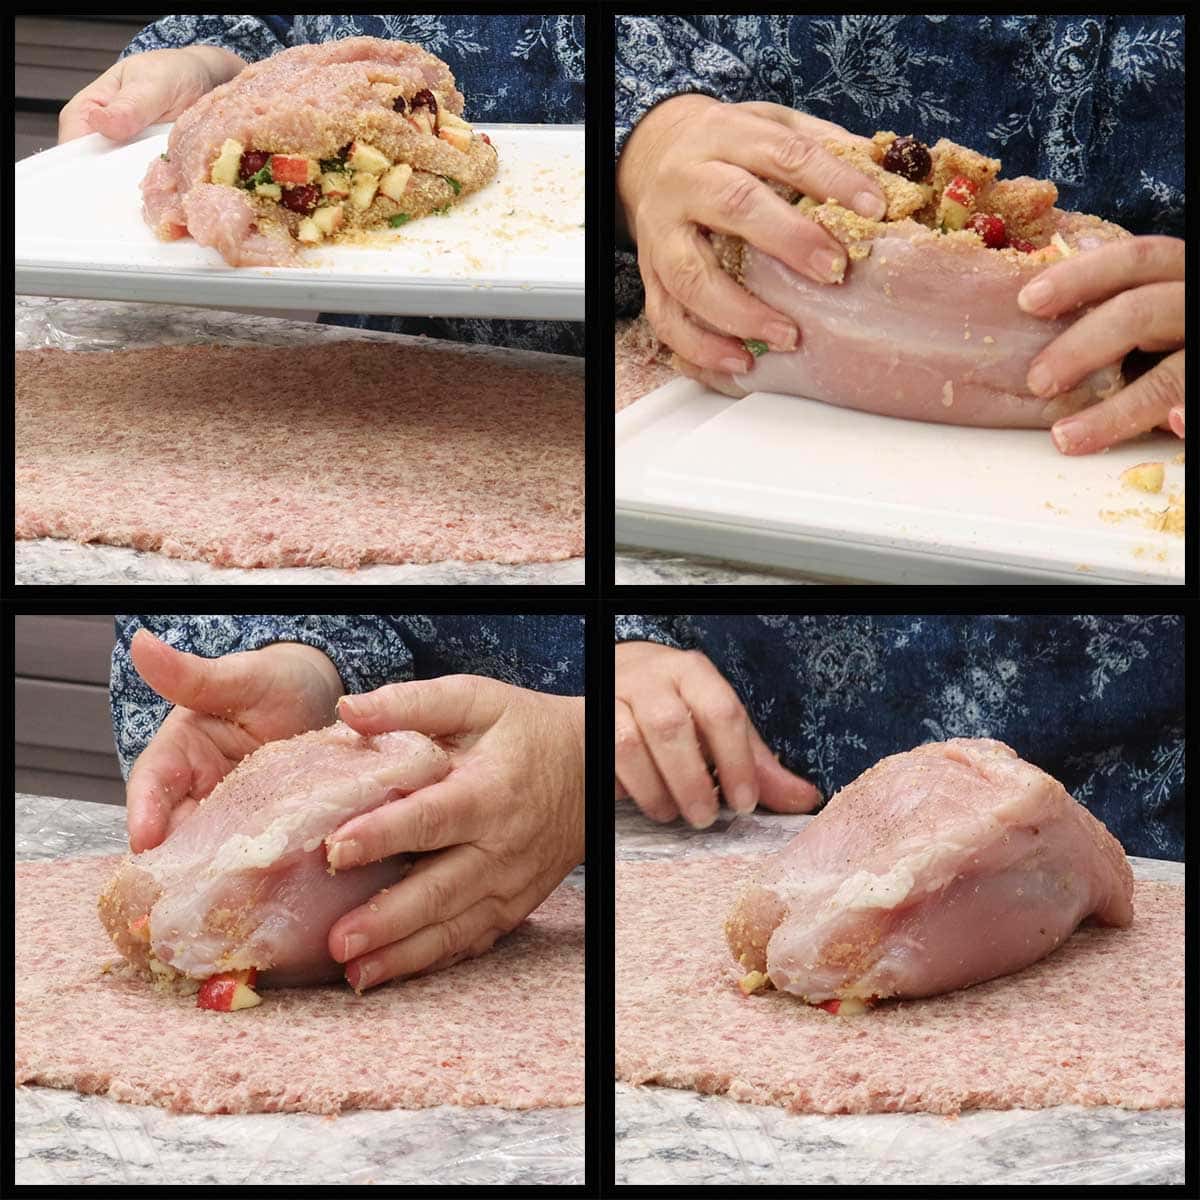
Carefully place the stuffed turkey breast in the center of the sausage, seam side down. The reason for this is the sausage tends to be thickest in the center and you want to make sure the opening where the seam is is fully covered with sausage and won't break open and let the stuffing fall out.
If your turkey is in pieces, you will place the largest piece in the center of the sausage, place stuffing on top and then cover with the smaller pieces as instructed in the above step for stuffing the turkey breast.
The wrapping is the same for either the butterflied turkey breast or the one in pieces.
Using the plastic wrap, you are going to wrap the turkey in the sausage by bringing up the bottom and folding it over the turkey. Gently pull the plastic wrap way from the sausage after it is on the turkey.
Fold one of the sides of the rolled out sausage onto the turkey breast and pull the plastic back.
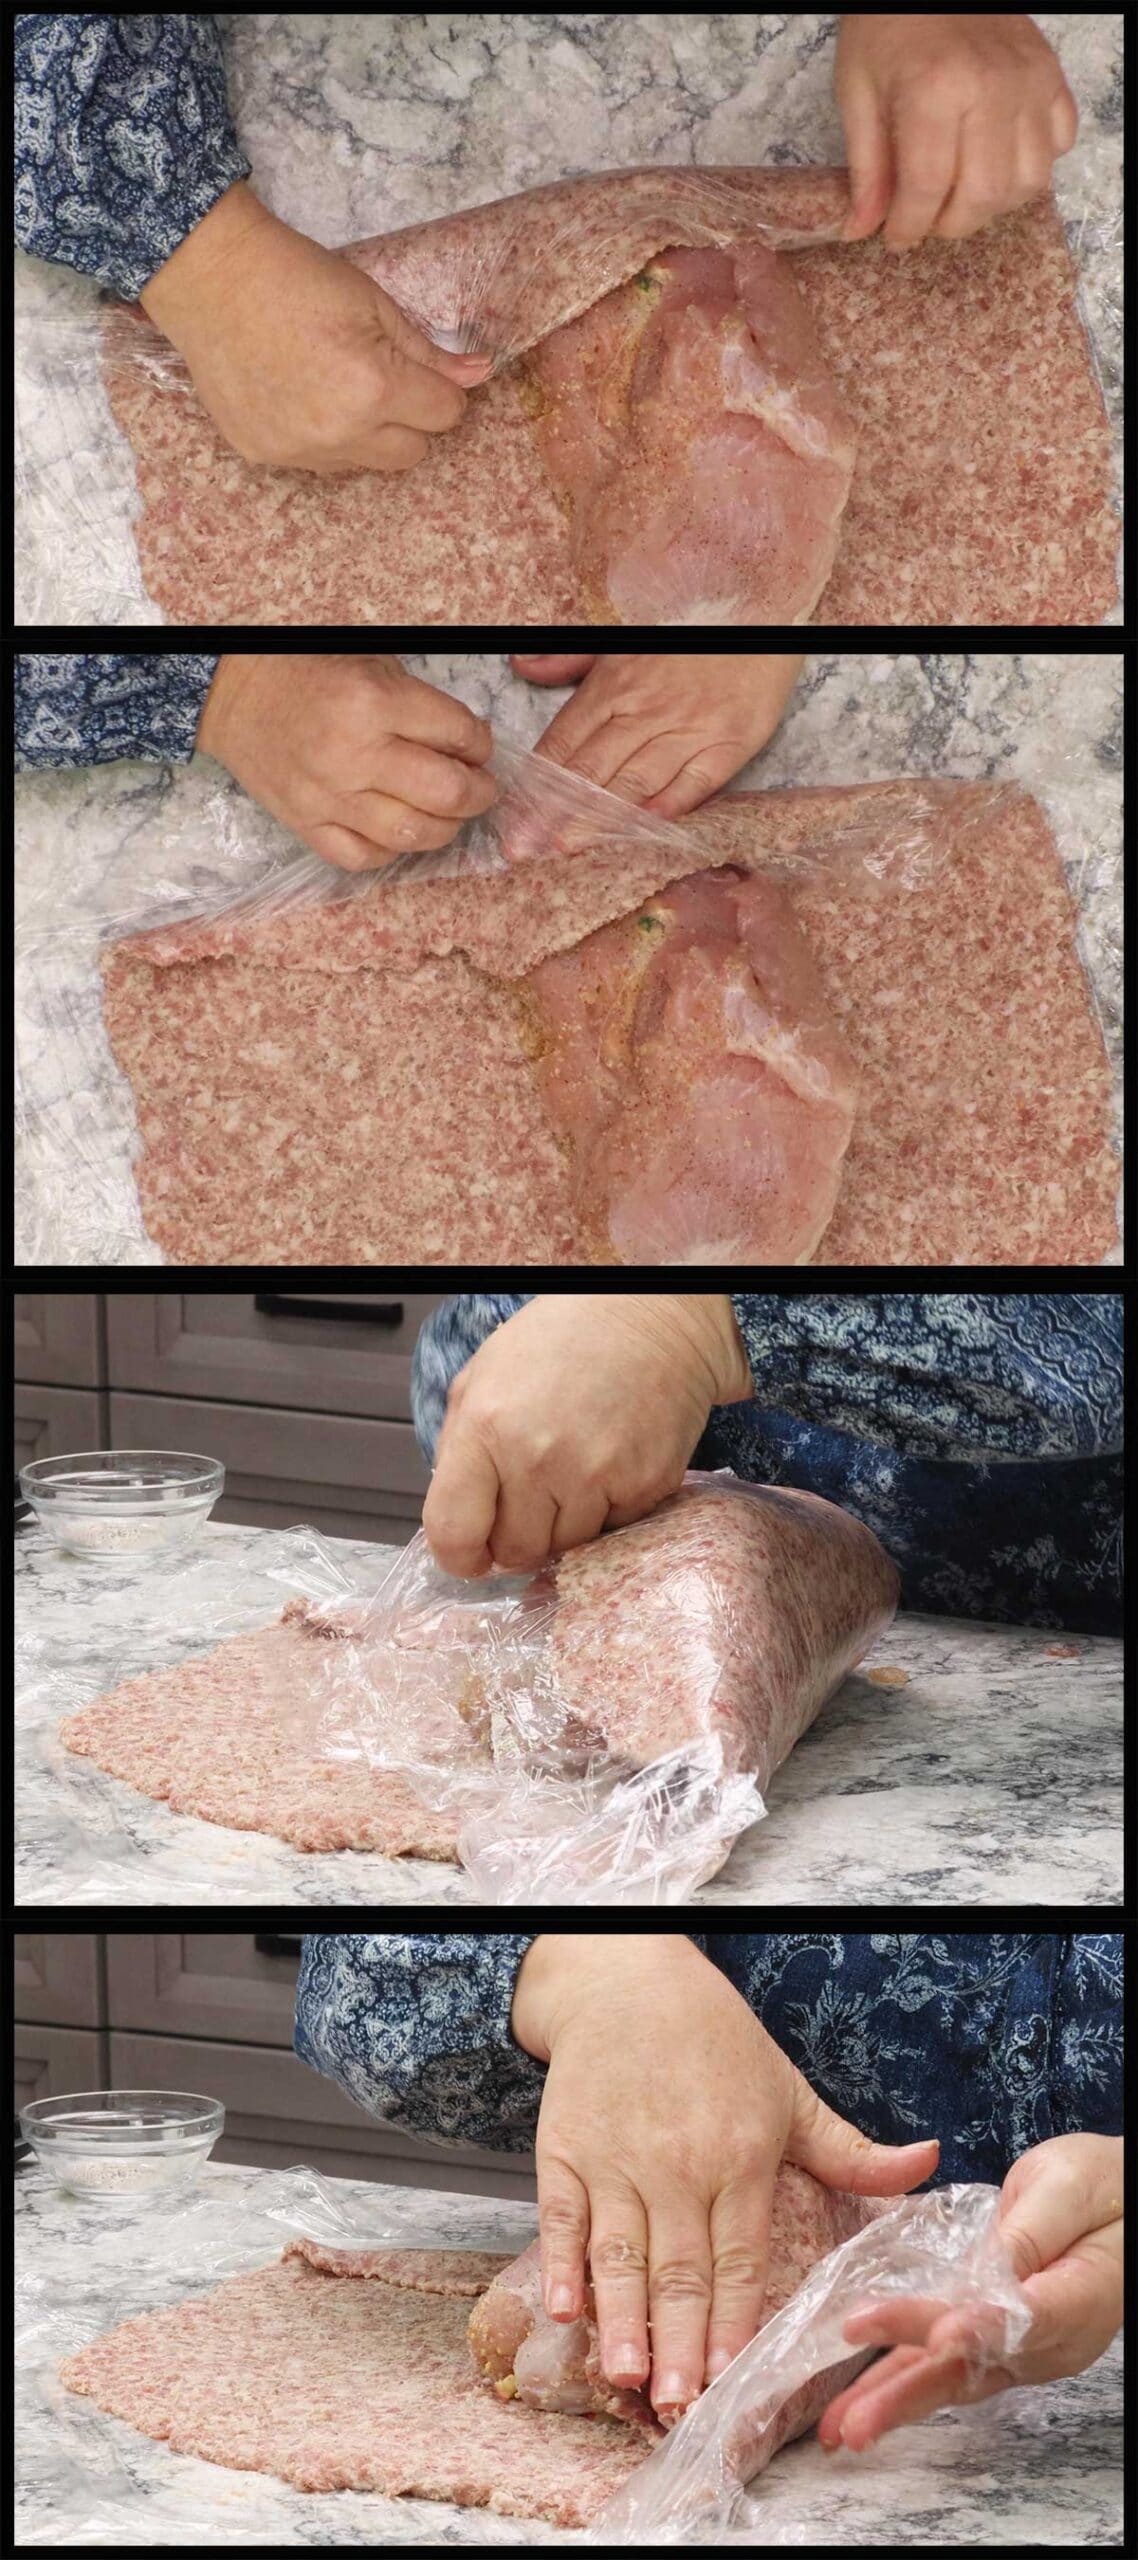
Repeat with the other end of the sausage and then bring the other side over to complete the wrap.
The sausage is loose at this point, so take your hands and press it so it forms to the turkey breast. Make sure that the entire turkey breast is covered with the sausage. If there are any holes, move the sausage from a thicker area to cover it up.
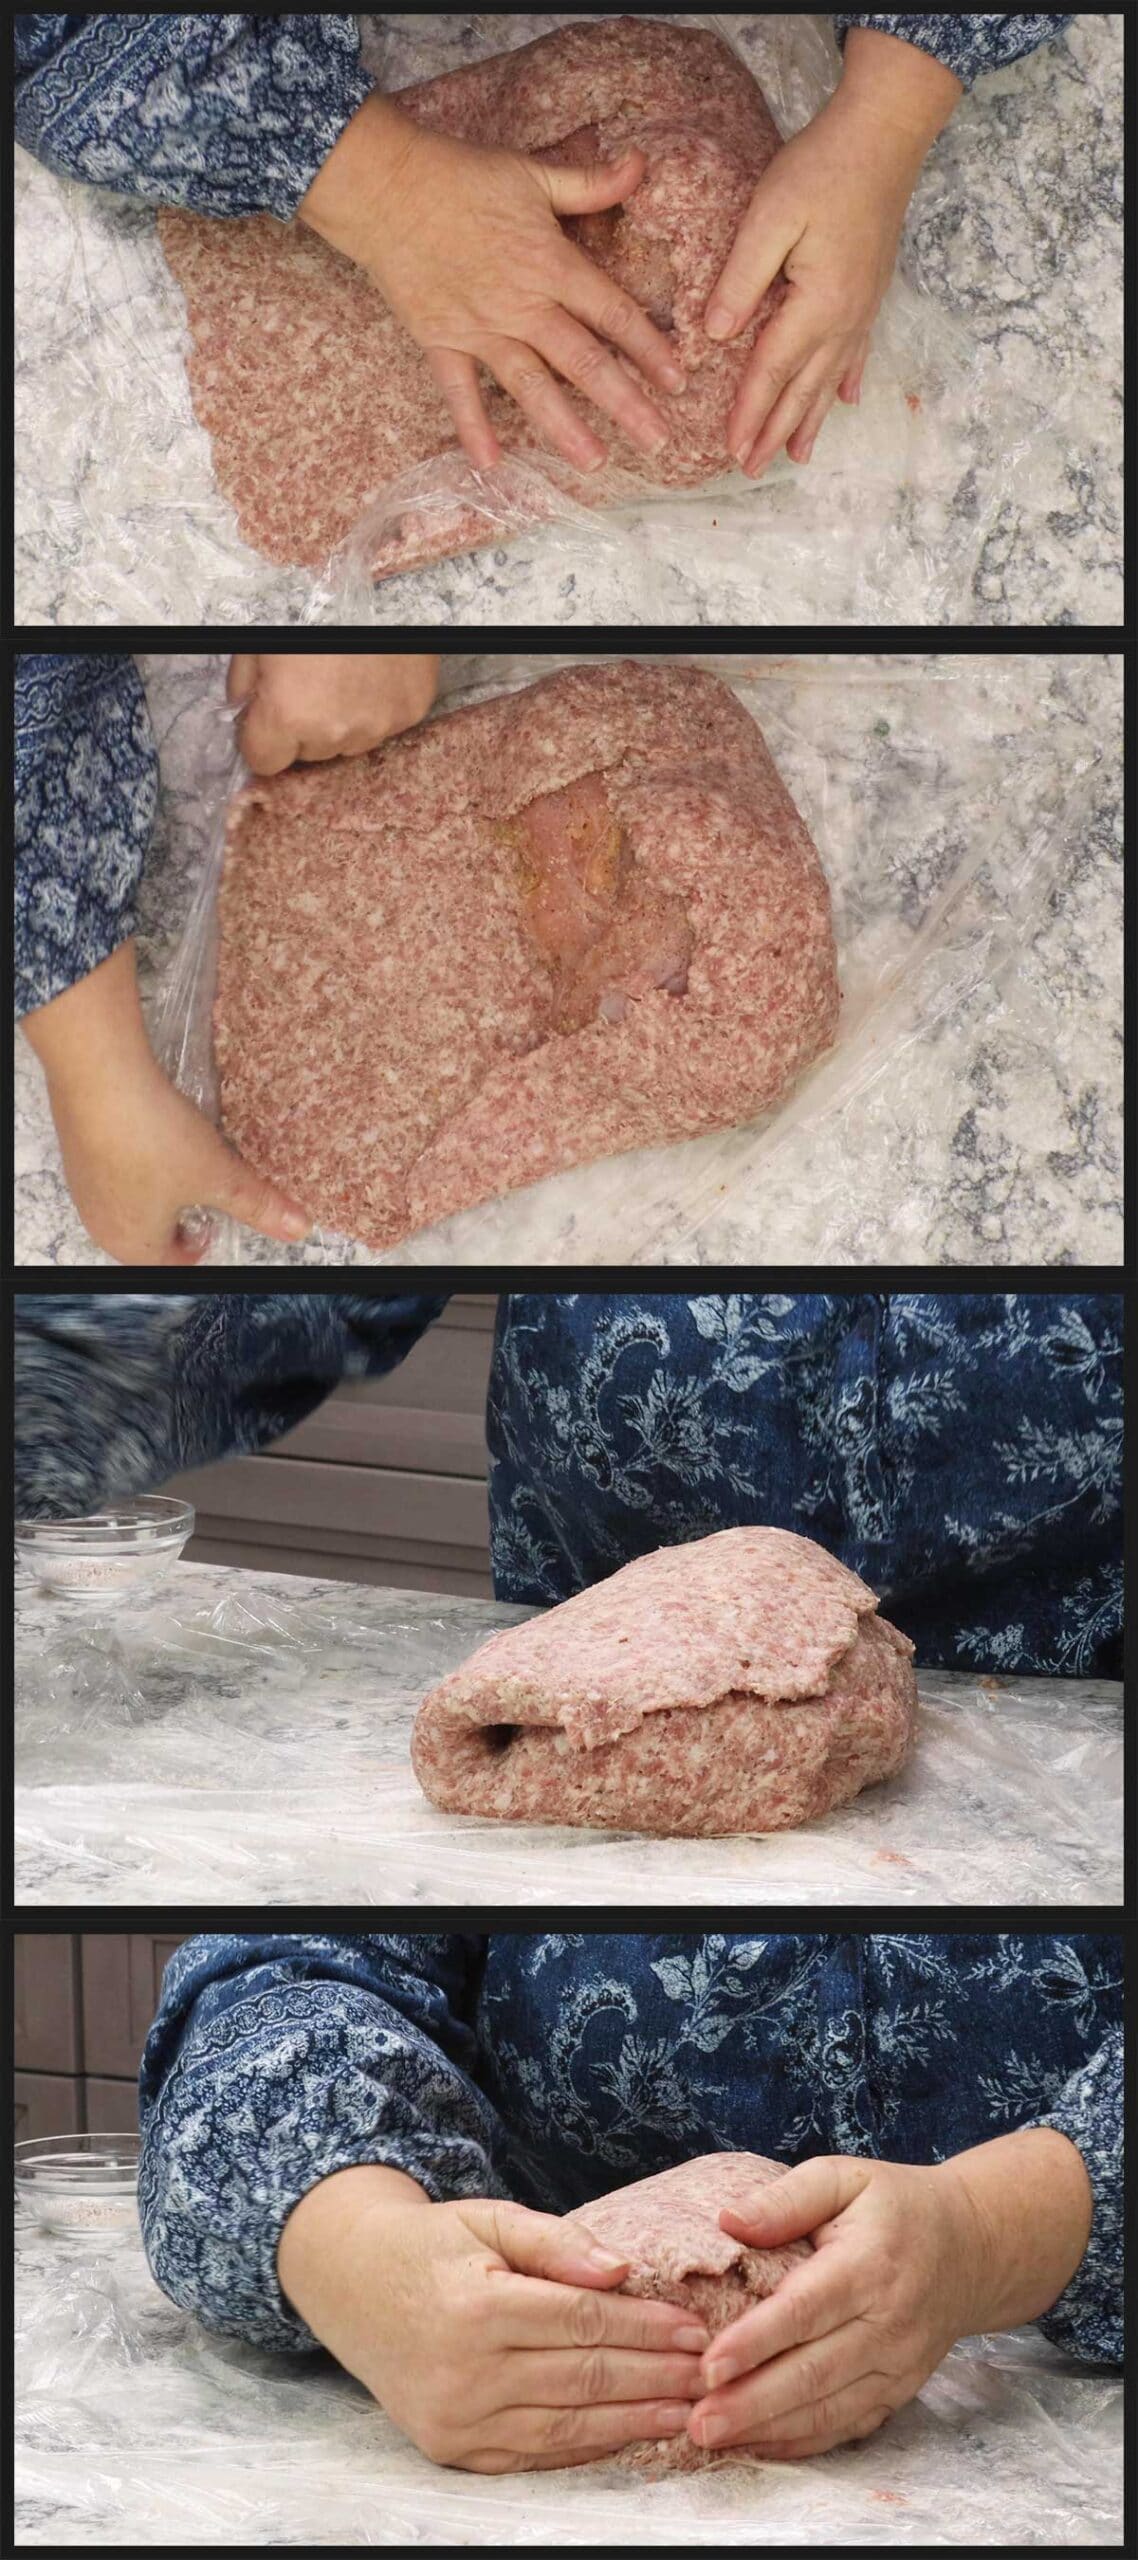
Once the sausage is completely wrapped and pressed onto the turkey breast, you can transfer it to a baking pan IF you have a turkey breast that is butterflied and not in pieces.
Turkey Breast that is in pieces
If you have a turkey breast that is in pieces, there is one extra step that you will need to do and that is to wrap the sausage covered turkey back in the plastic wrap and freeze it for 30 minutes.
The reason this is so important is because if you try to transfer the turkey to a baking sheet now, it will fall apart. With a butterflied turkey breast we only have one opening where the stuffing could come out and it's easy to transfer to bake, but with one that has openings all around the turkey, it must be frozen in the plastic wrap or you will end up getting frustrated. I know this from experience!
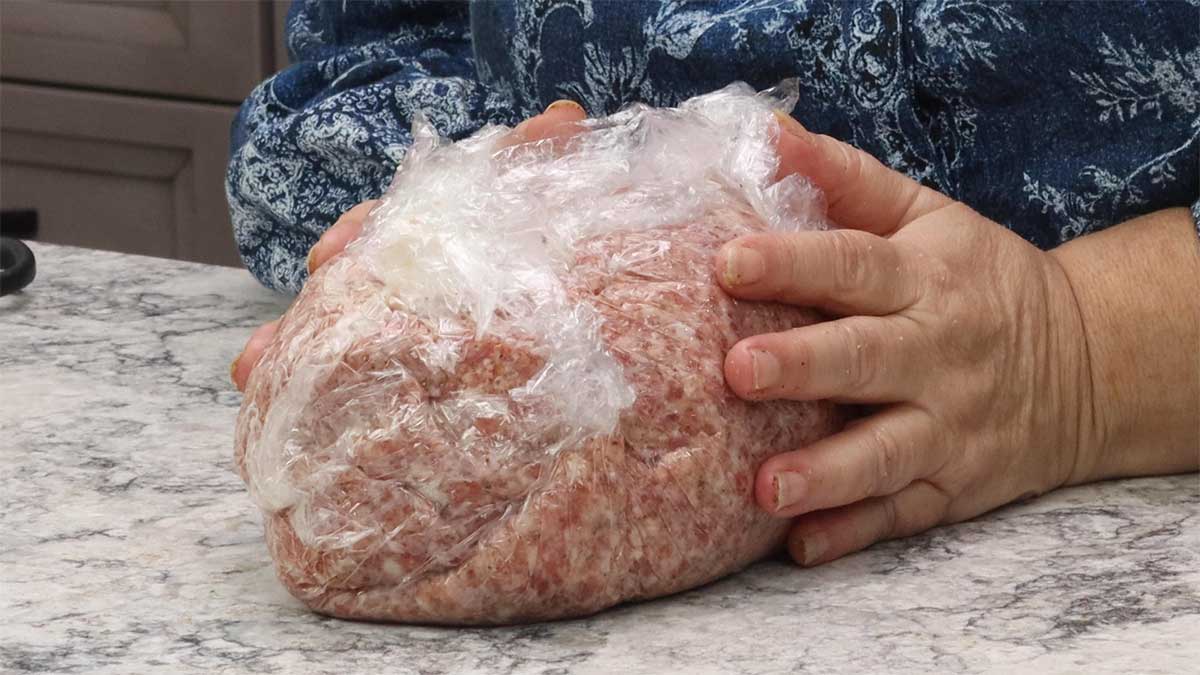
Oven Roasting the Turkey Breast
Gently roll the wrapped turkey breast onto the baking tray or cookie sheet, using the plastic wrap to help roll it.
This step is the same whether you have a butterflied turkey breast or one in pieces. If your turkey breast was in the freezer to help hold it together, remove the plastic wrap and place it on a baking tray.
We are going to use a low oven temperature to slow roast the turkey breast so that the sausage cooks slowly and doesn't split. There is no set time for this because it will depend on the temperature and size of your turkey breast. It's important to have an accurate meat thermometer and roast in a 275℉/135℃ oven until the internal temperature reaches 165℉/74℃ in the very center where the stuffing is. No need to preheat before putting the turkey in the oven.
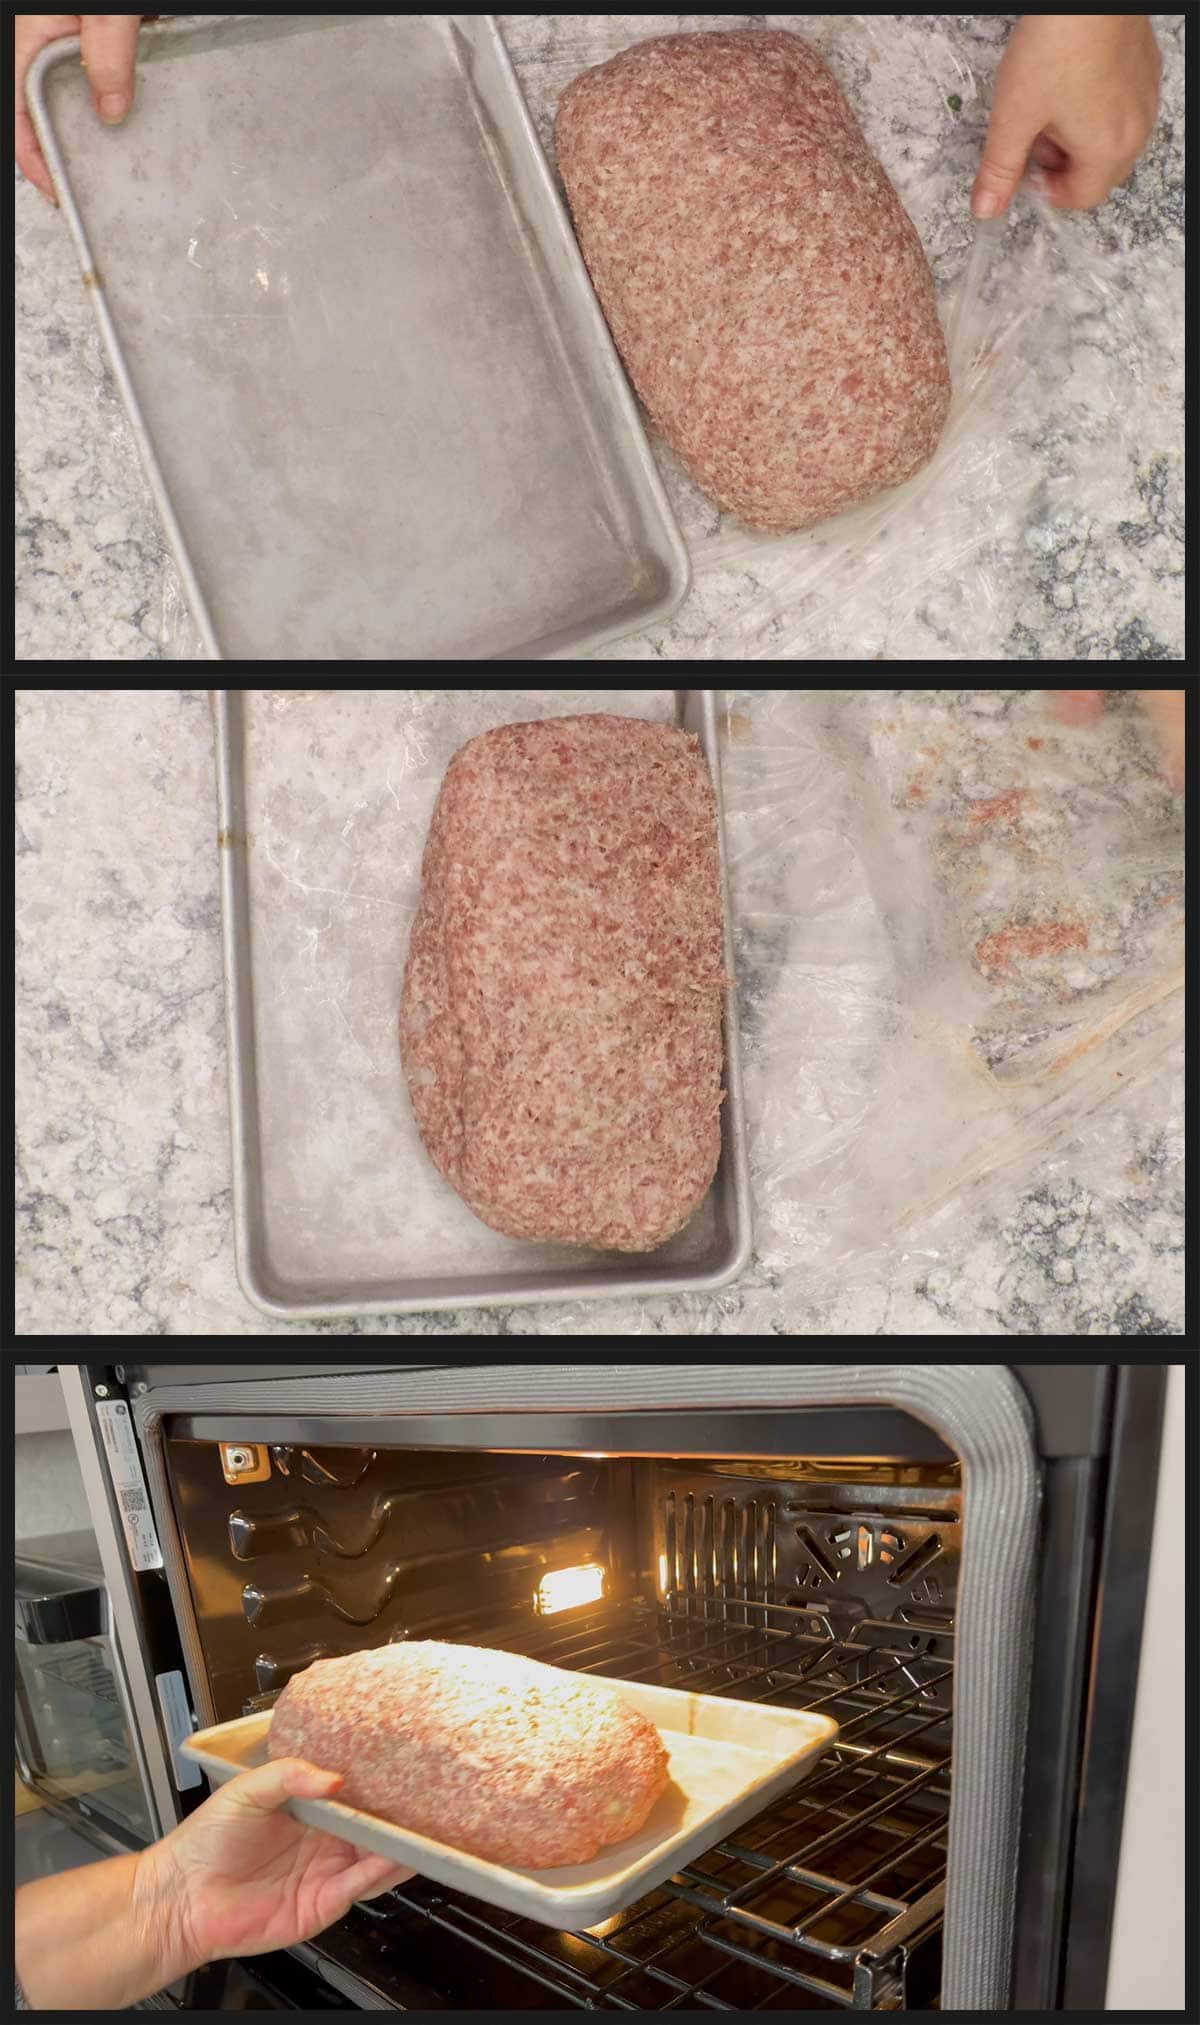
On average, this takes between 60-90 minutes for the turkey to fully cook. Once it is done and the internal temperature in the very middle is 165℉/74℃, allow it to cool.
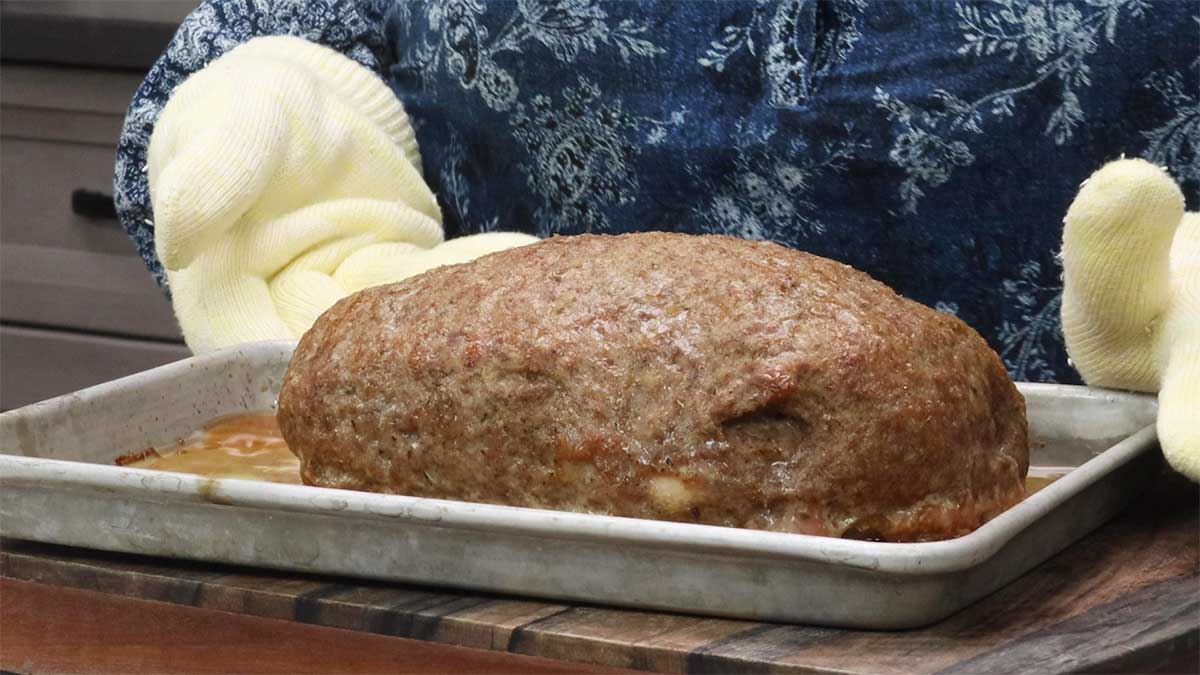
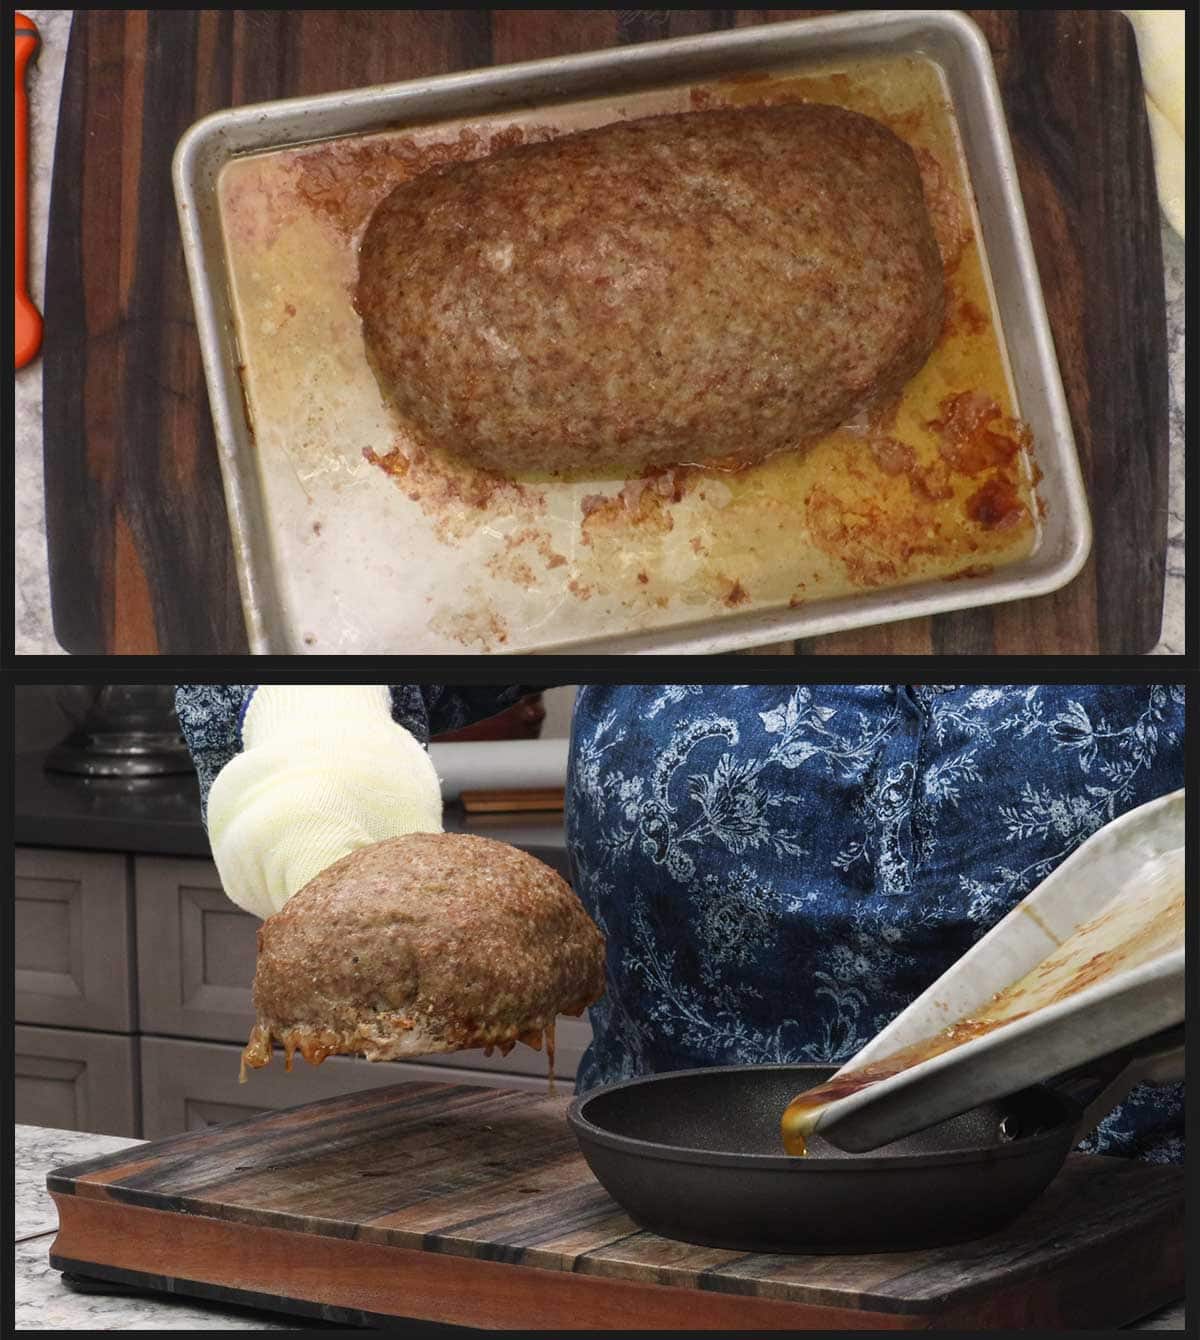
If you want to make the pan gravy using the drippings and the skin, remove the turkey from the baking pan and place on a cutting board. Pour the fat and juices from the pan into a bowl or small saucepan.
Wrap the cooked turkey in plastic wrap and refrigerate for 1-2 hours or until the outside is cool to the touch. This is so the puff pastry won't start to melt when wrapped around the turkey.
You can prepare the turkey, up to this point, up to 3 days before you want to serve it and leave it wrapped in plastic wrap in the fridge.
When you are ready to wrap it in puff pastry and bake it, remove from the refrigerator about 90 minutes prior to baking to take the chill off. This will lessen the time it takes to bake with the puff pastry.
Wrapping the Turkey in Puff Pastry
Once the sausage wrapped turkey is cool to the touch, you can wrap it in the puff pastry. If you are using frozen puff pastry sheets, remove it from the freezer and thaw in the refrigerator for 6-8 hours or at room temp for 1-2 hours.
For the best results with puff pastry, it needs to stay as cool as possible, but can't be frozen when you want to roll it out. For this reason, I recommend thawing in the fridge whenever possible.
Make up an egg wash by lightly whipping one large egg with 1 Tablespoon of water in a small bowl. Set aside for later.
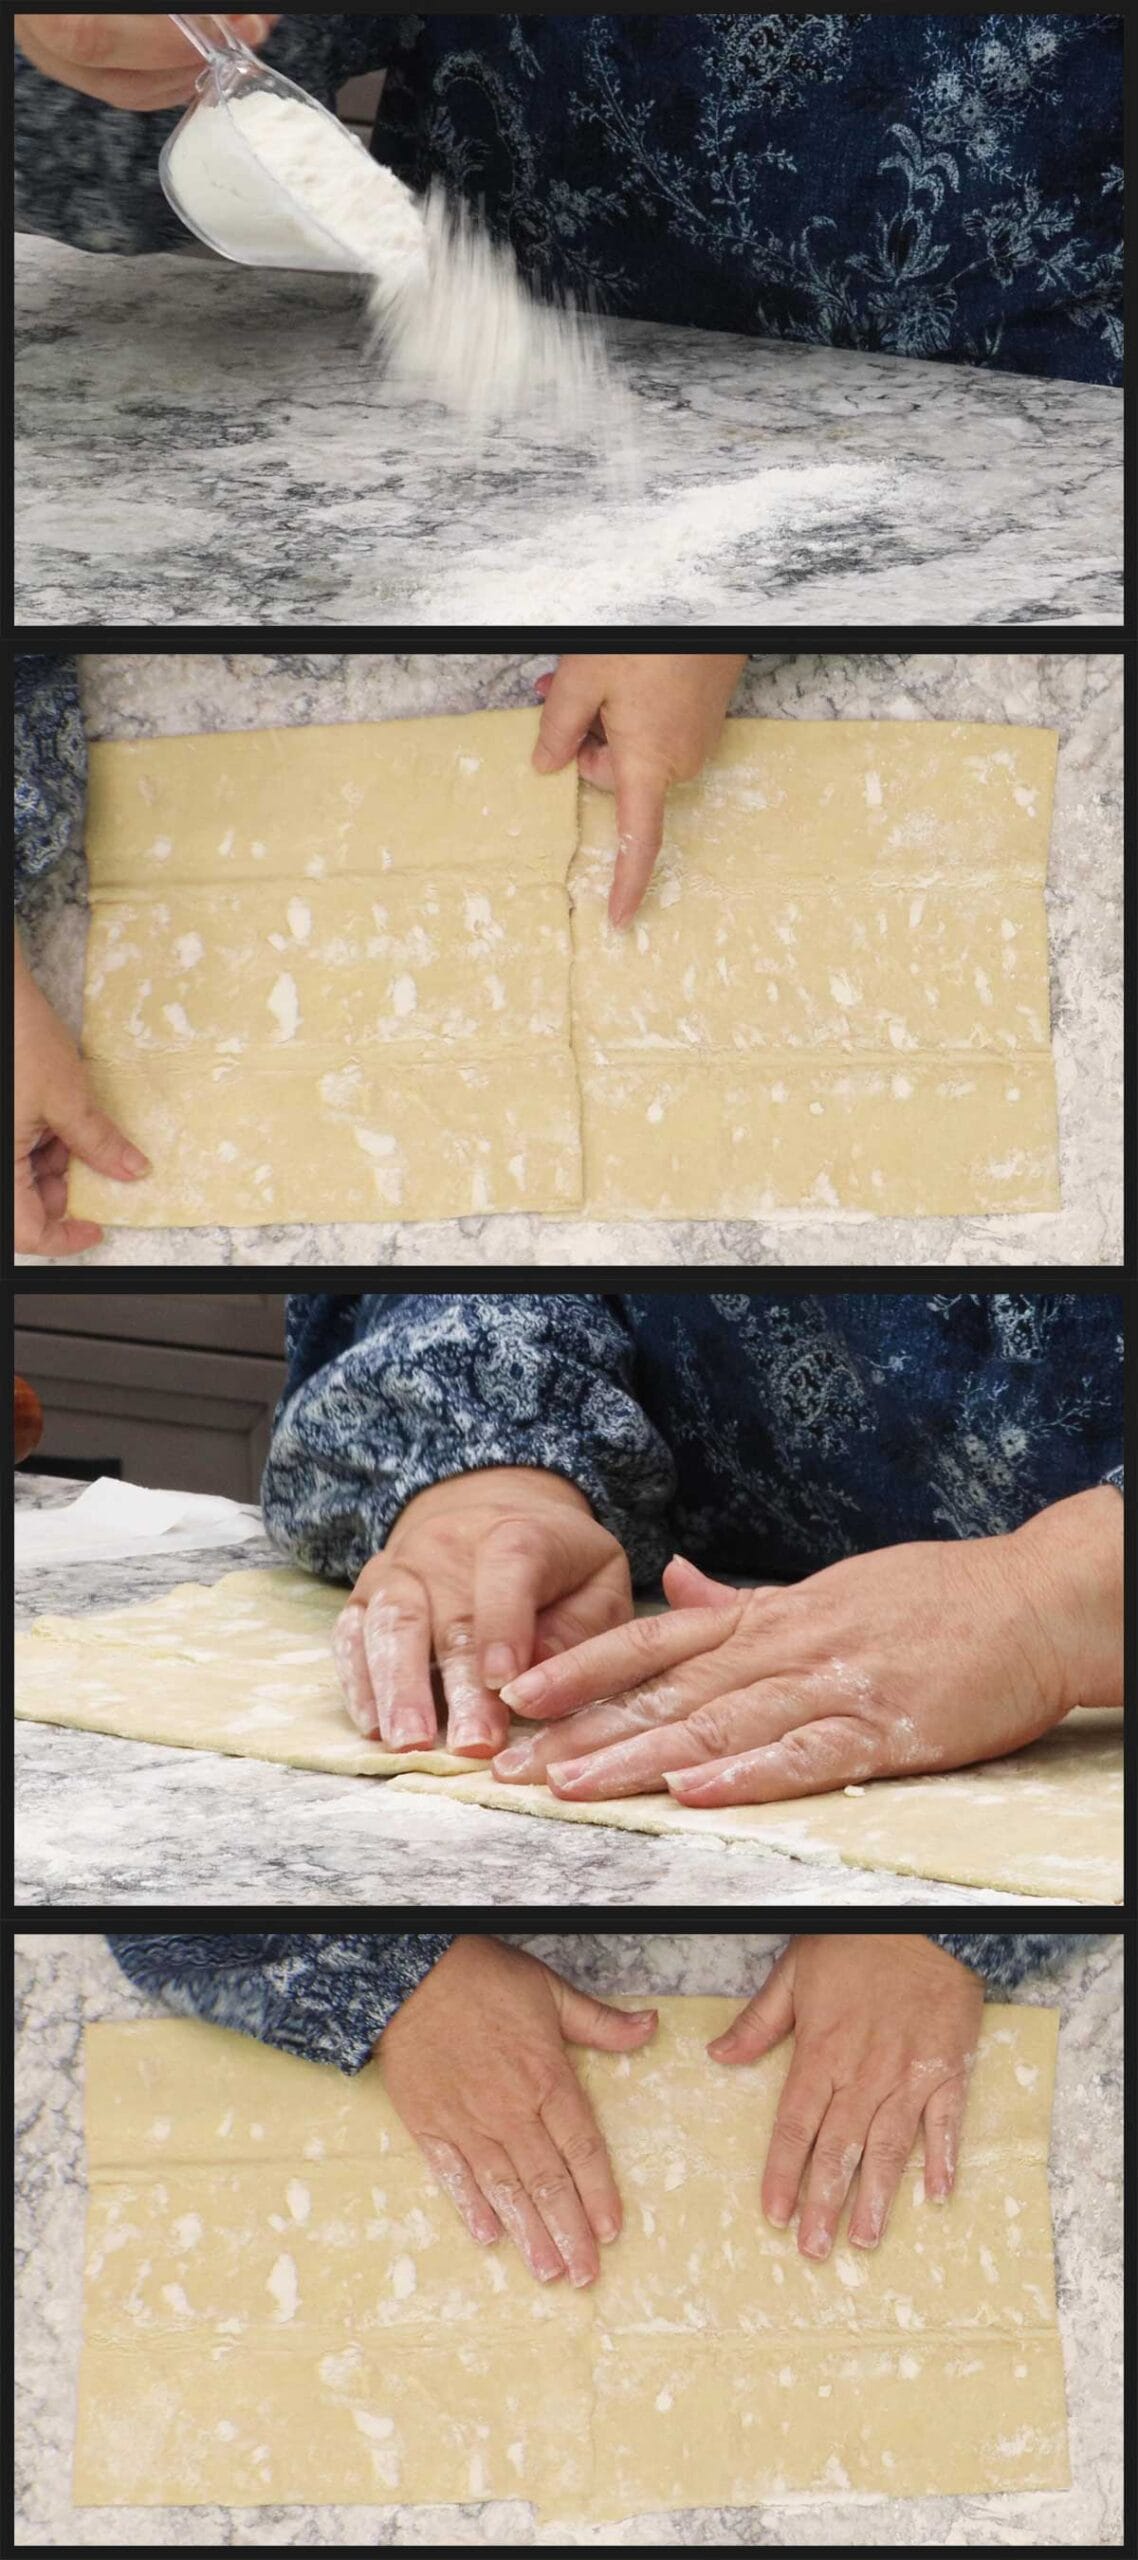
Lightly flour a large work surface. You will need at least a 36" x 36" space to roll out the puff pastry dough. The flour will help prevent the dough from sticking to the surface.
Frozen puff pastry comes in two sheets and you will want to use both of them for this recipe. Although you will end up with excess puff pastry, it's going to make it a lot easier to wrap the turkey.
Line up both sheets and press together the edges to form one large sheet.
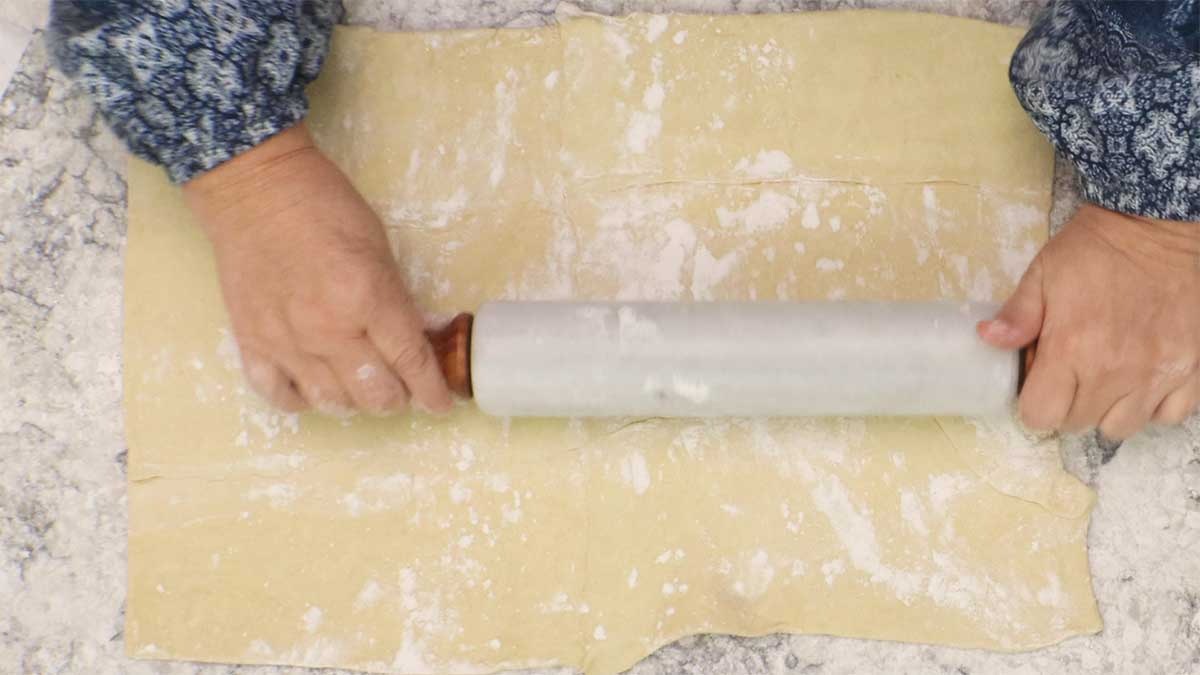
Lightly flour the top of the puff pastry and roll out until you have a large square that measures about 18" x 18". If the rolling pin is sticking to the pastry, sprinkle with flour.
Once the puff pastry is big enough to wrap the turkey in, place the turkey, rounded side down onto the center of the dough.
Bring one side of the puff pastry over the turkey breast like you would if you were wrapping a package. Trim the excess pastry from the ends. This will prevent thick areas of puff pastry that may not cook evenly.
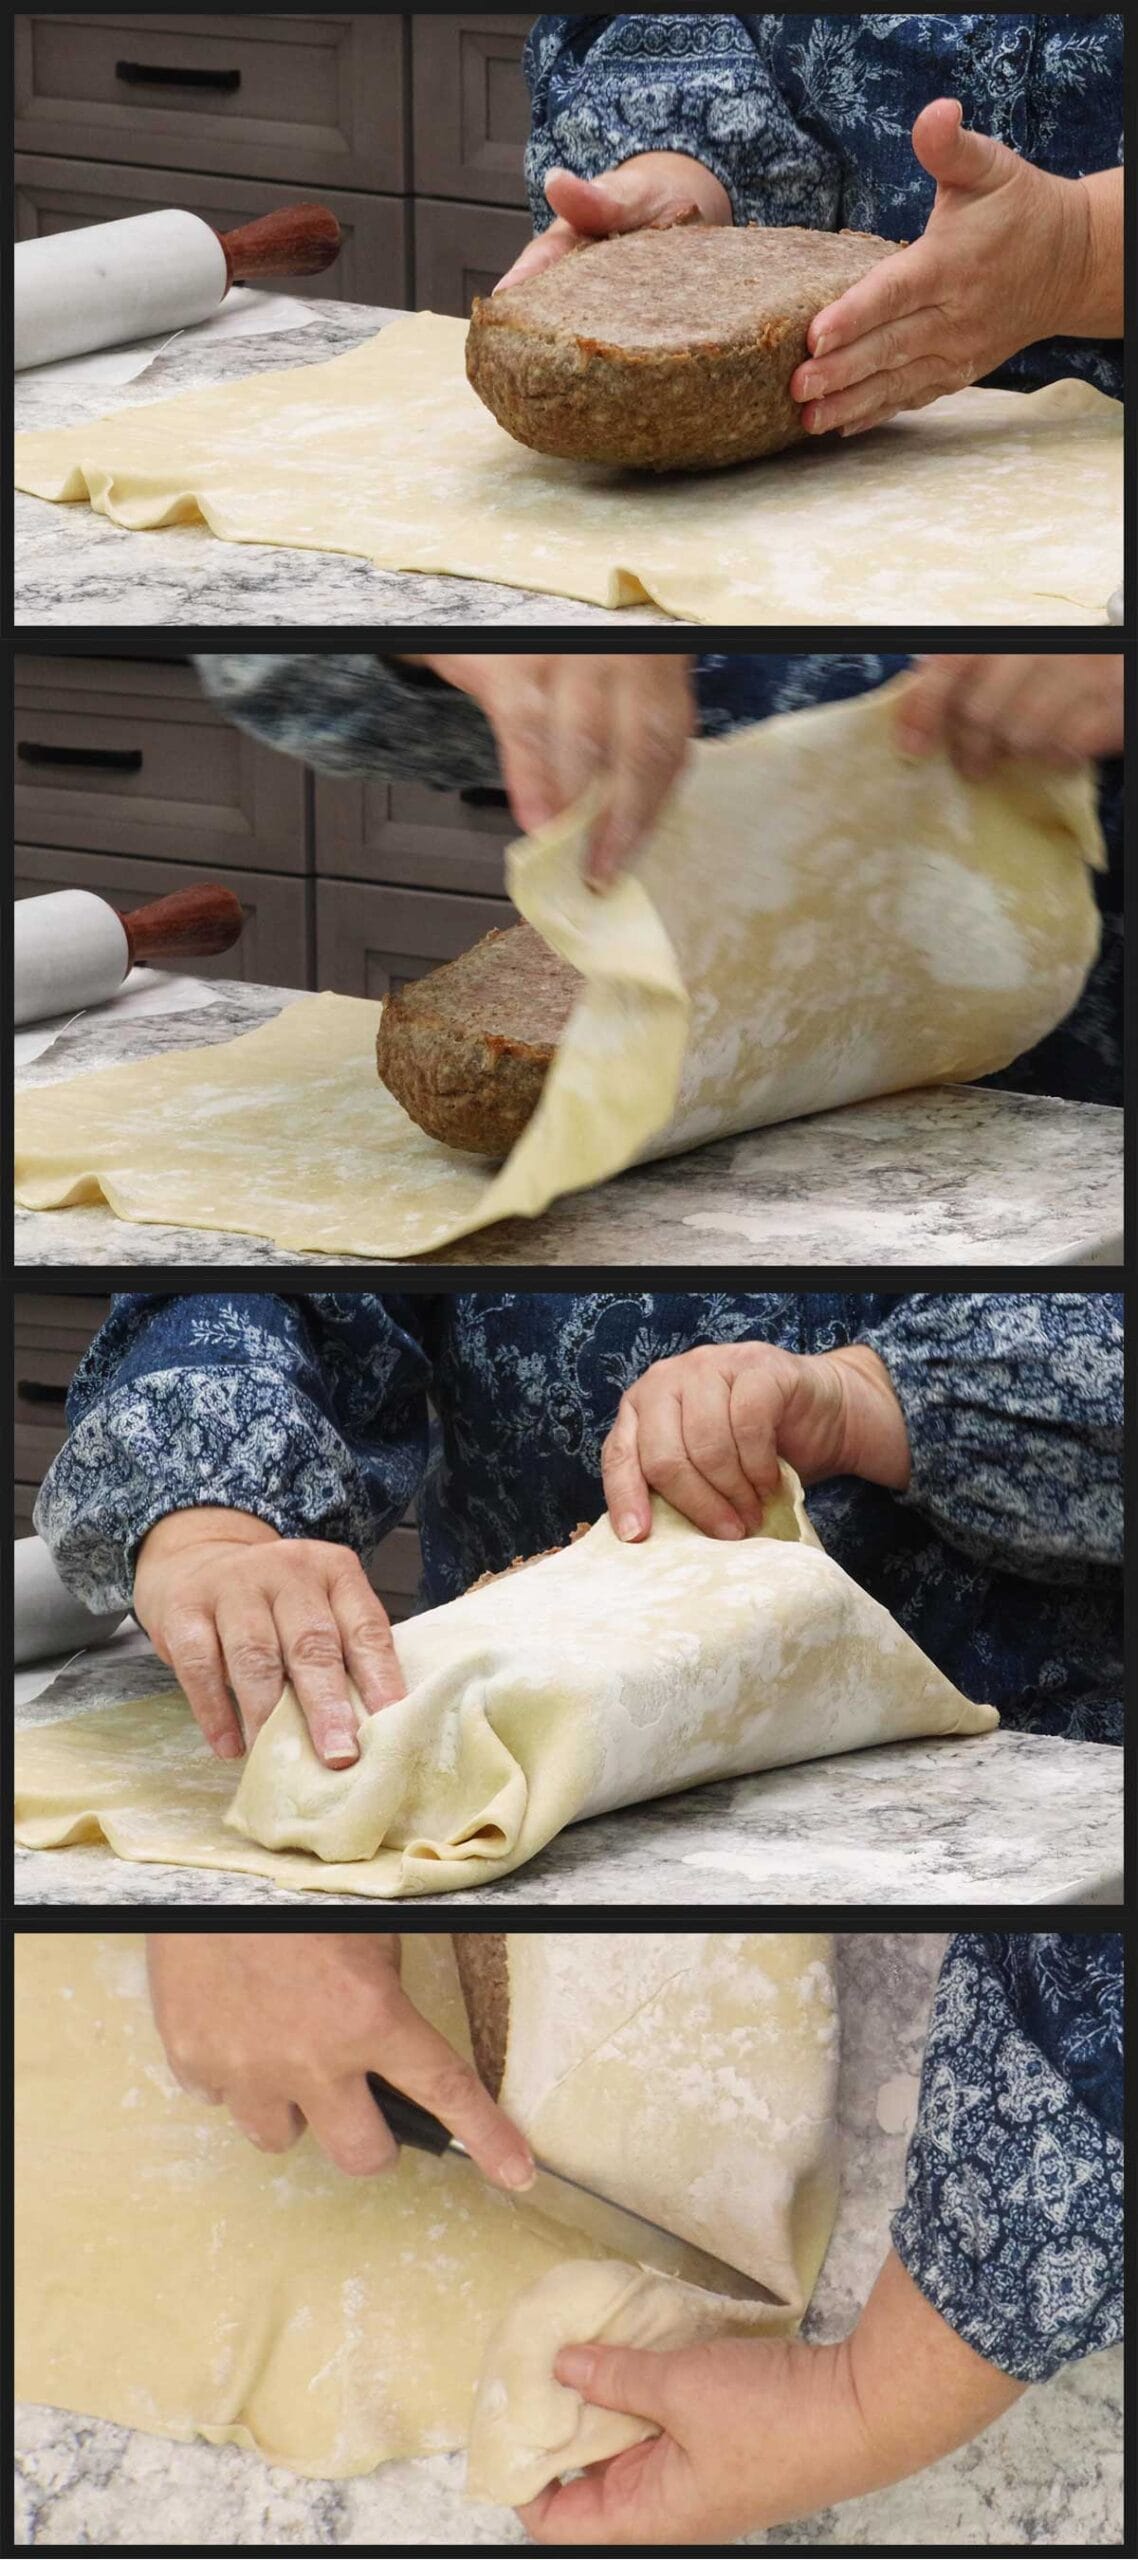
Once the excess pastry is trimmed, lightly brush the edges along both ends of the puff pastry with the egg wash. Fold up each end on to the turkey and press so the edges adhere to the folded side of the puff pastry.
This is just like wrapping a present, but instead of tape, the egg wash and pressing glues everything together.
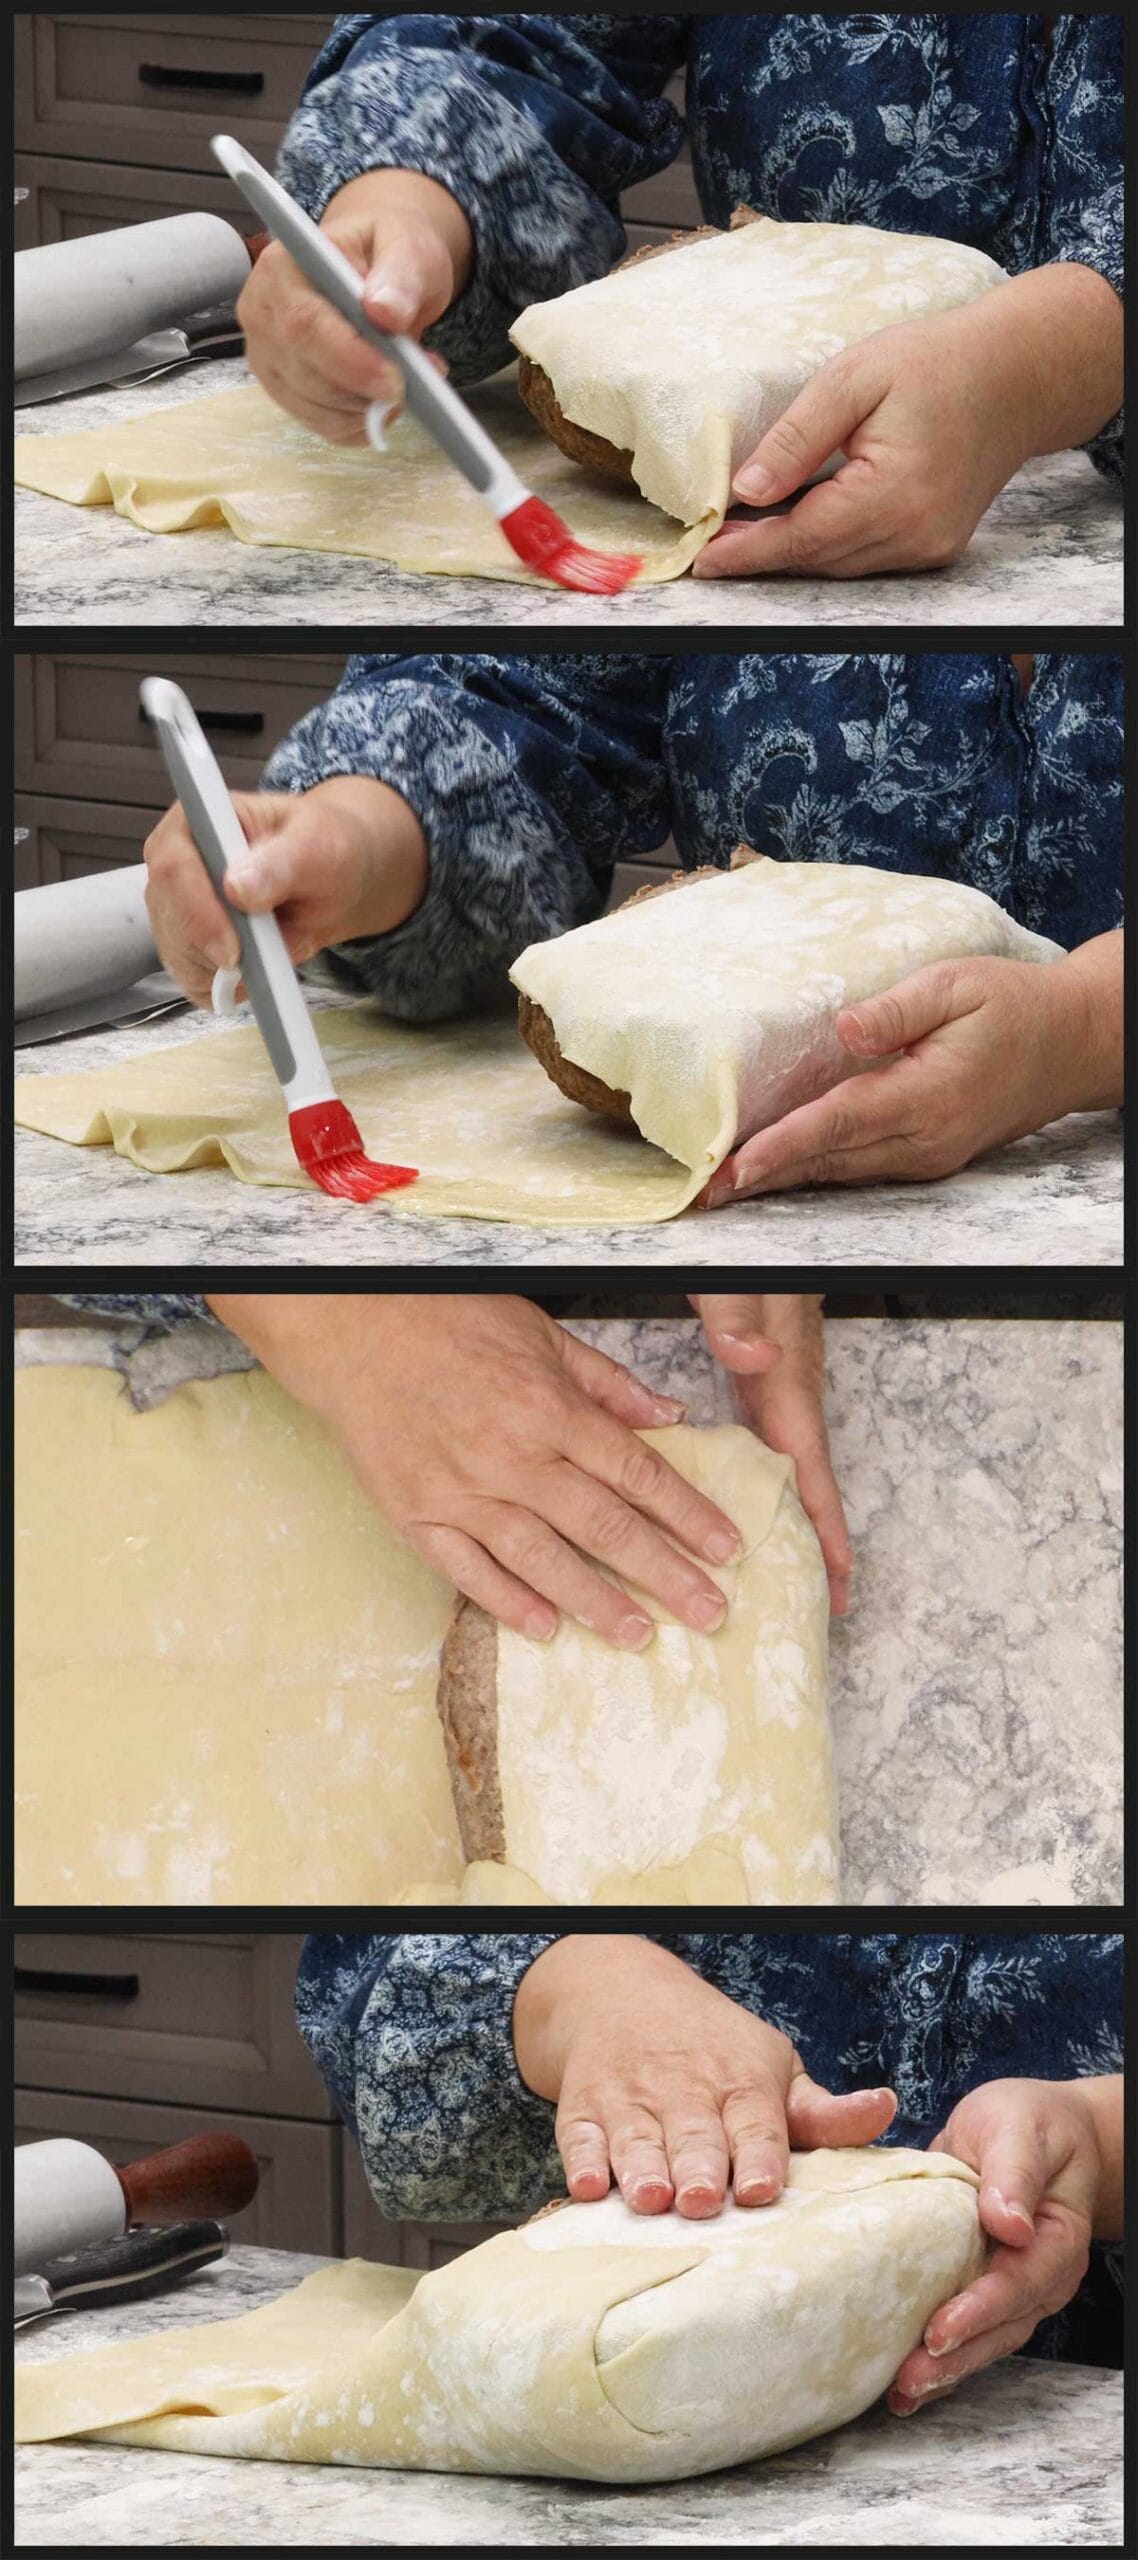
Trim the excess pastry from the corners closest to the turkey and remove the excess pastry from the long end. You only want the puff pastry to fold over to the middle or so of the turkey.
Brush the edges with egg wash and fold the final flap of pastry over the turkey and press together.
Carefully flip the turkey over onto a baking pan with the rounded side up.
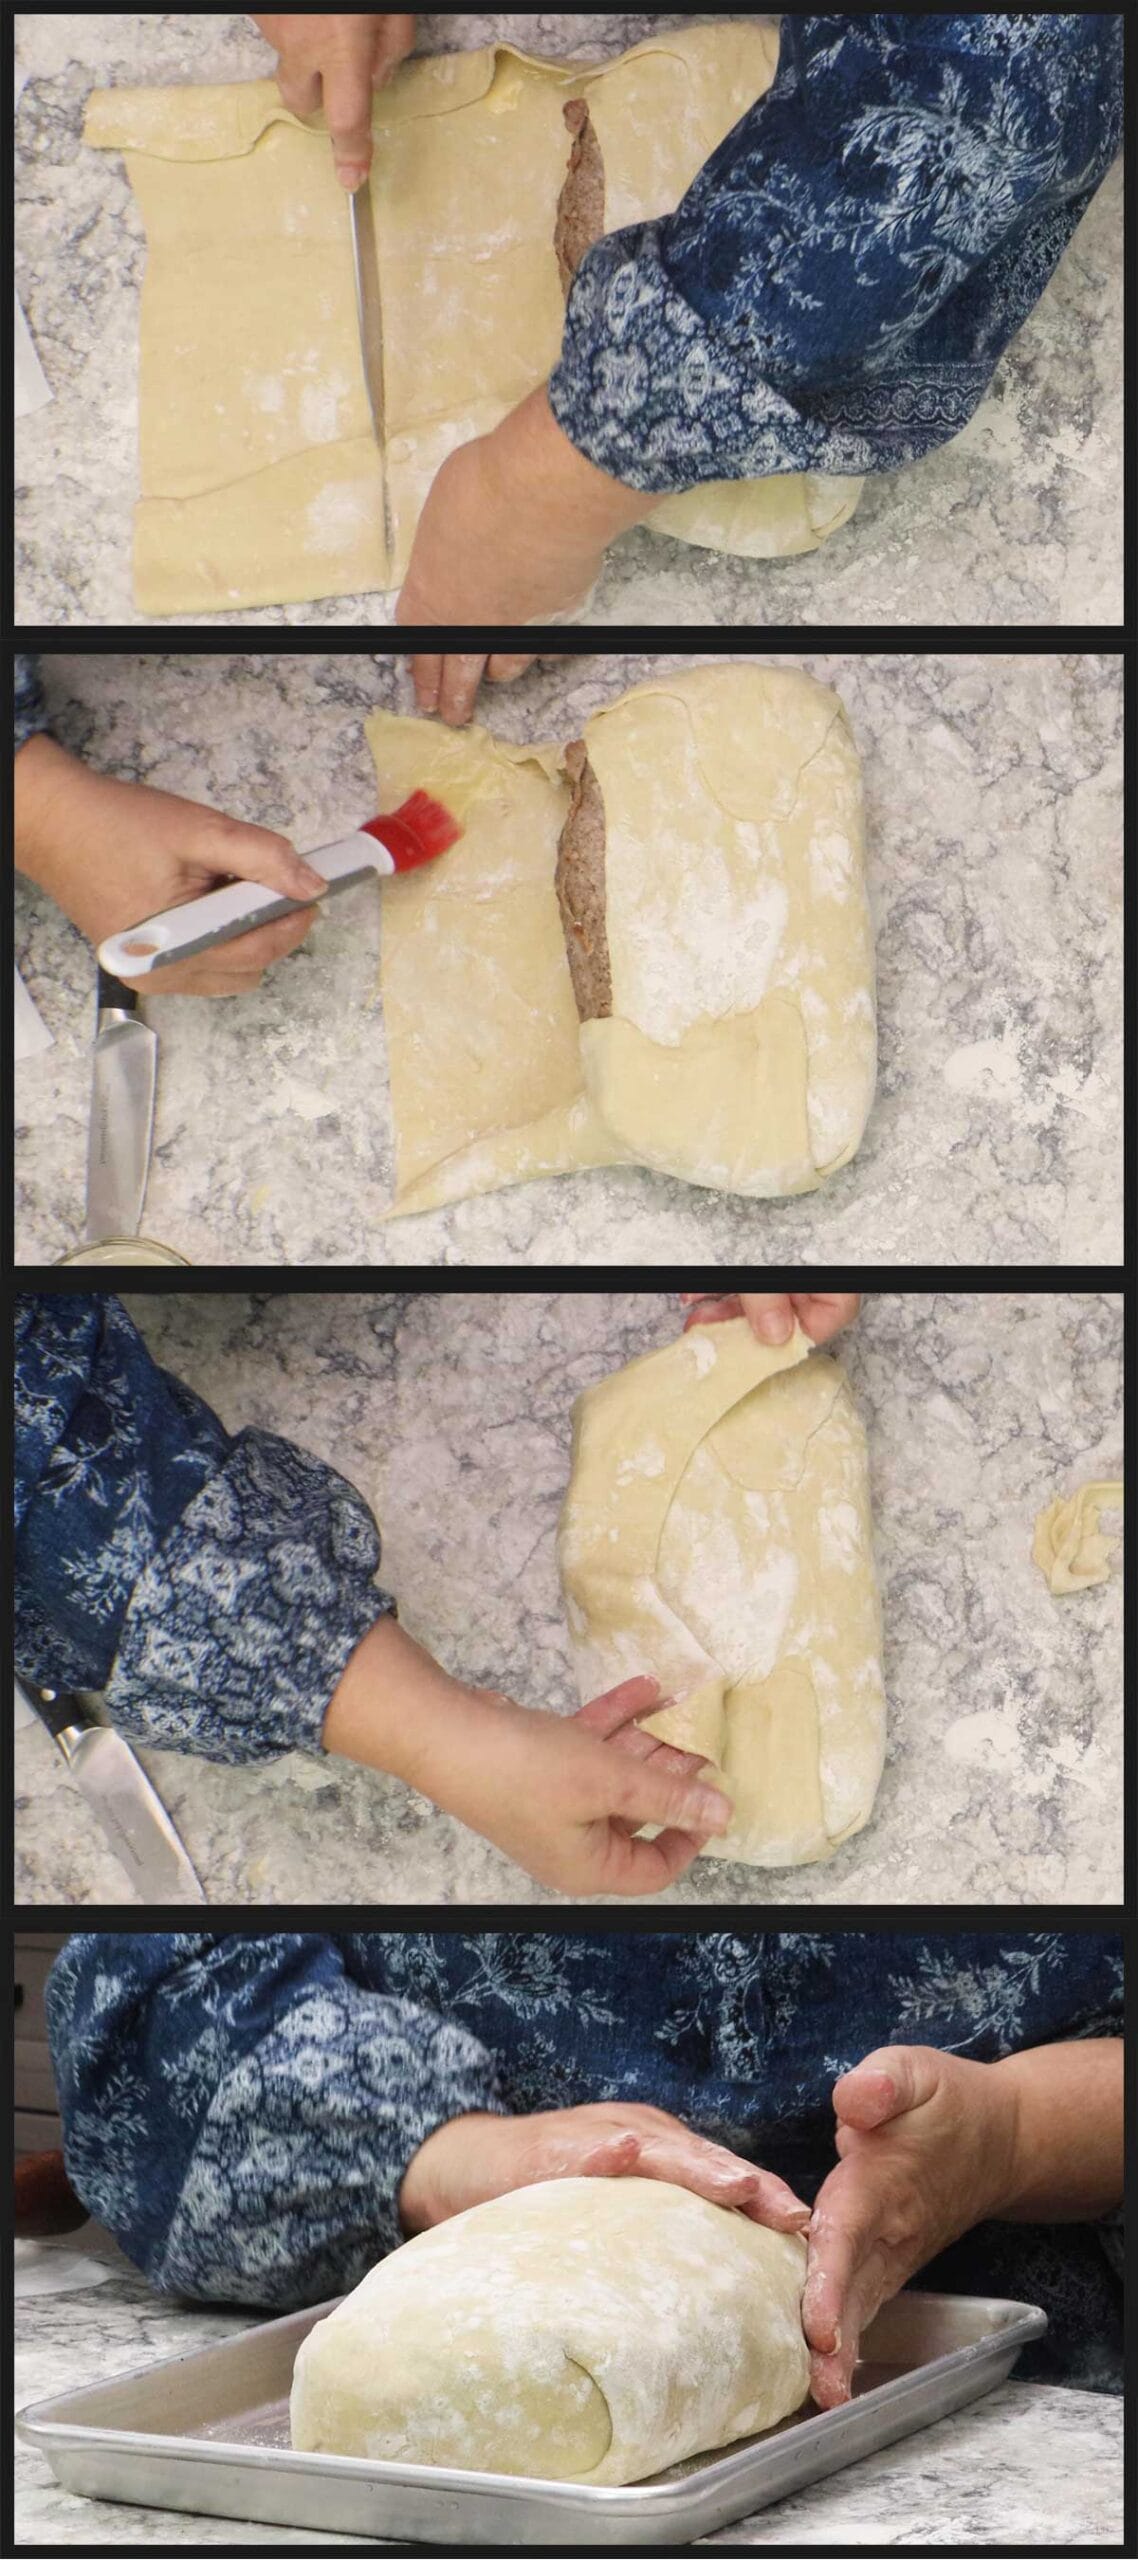
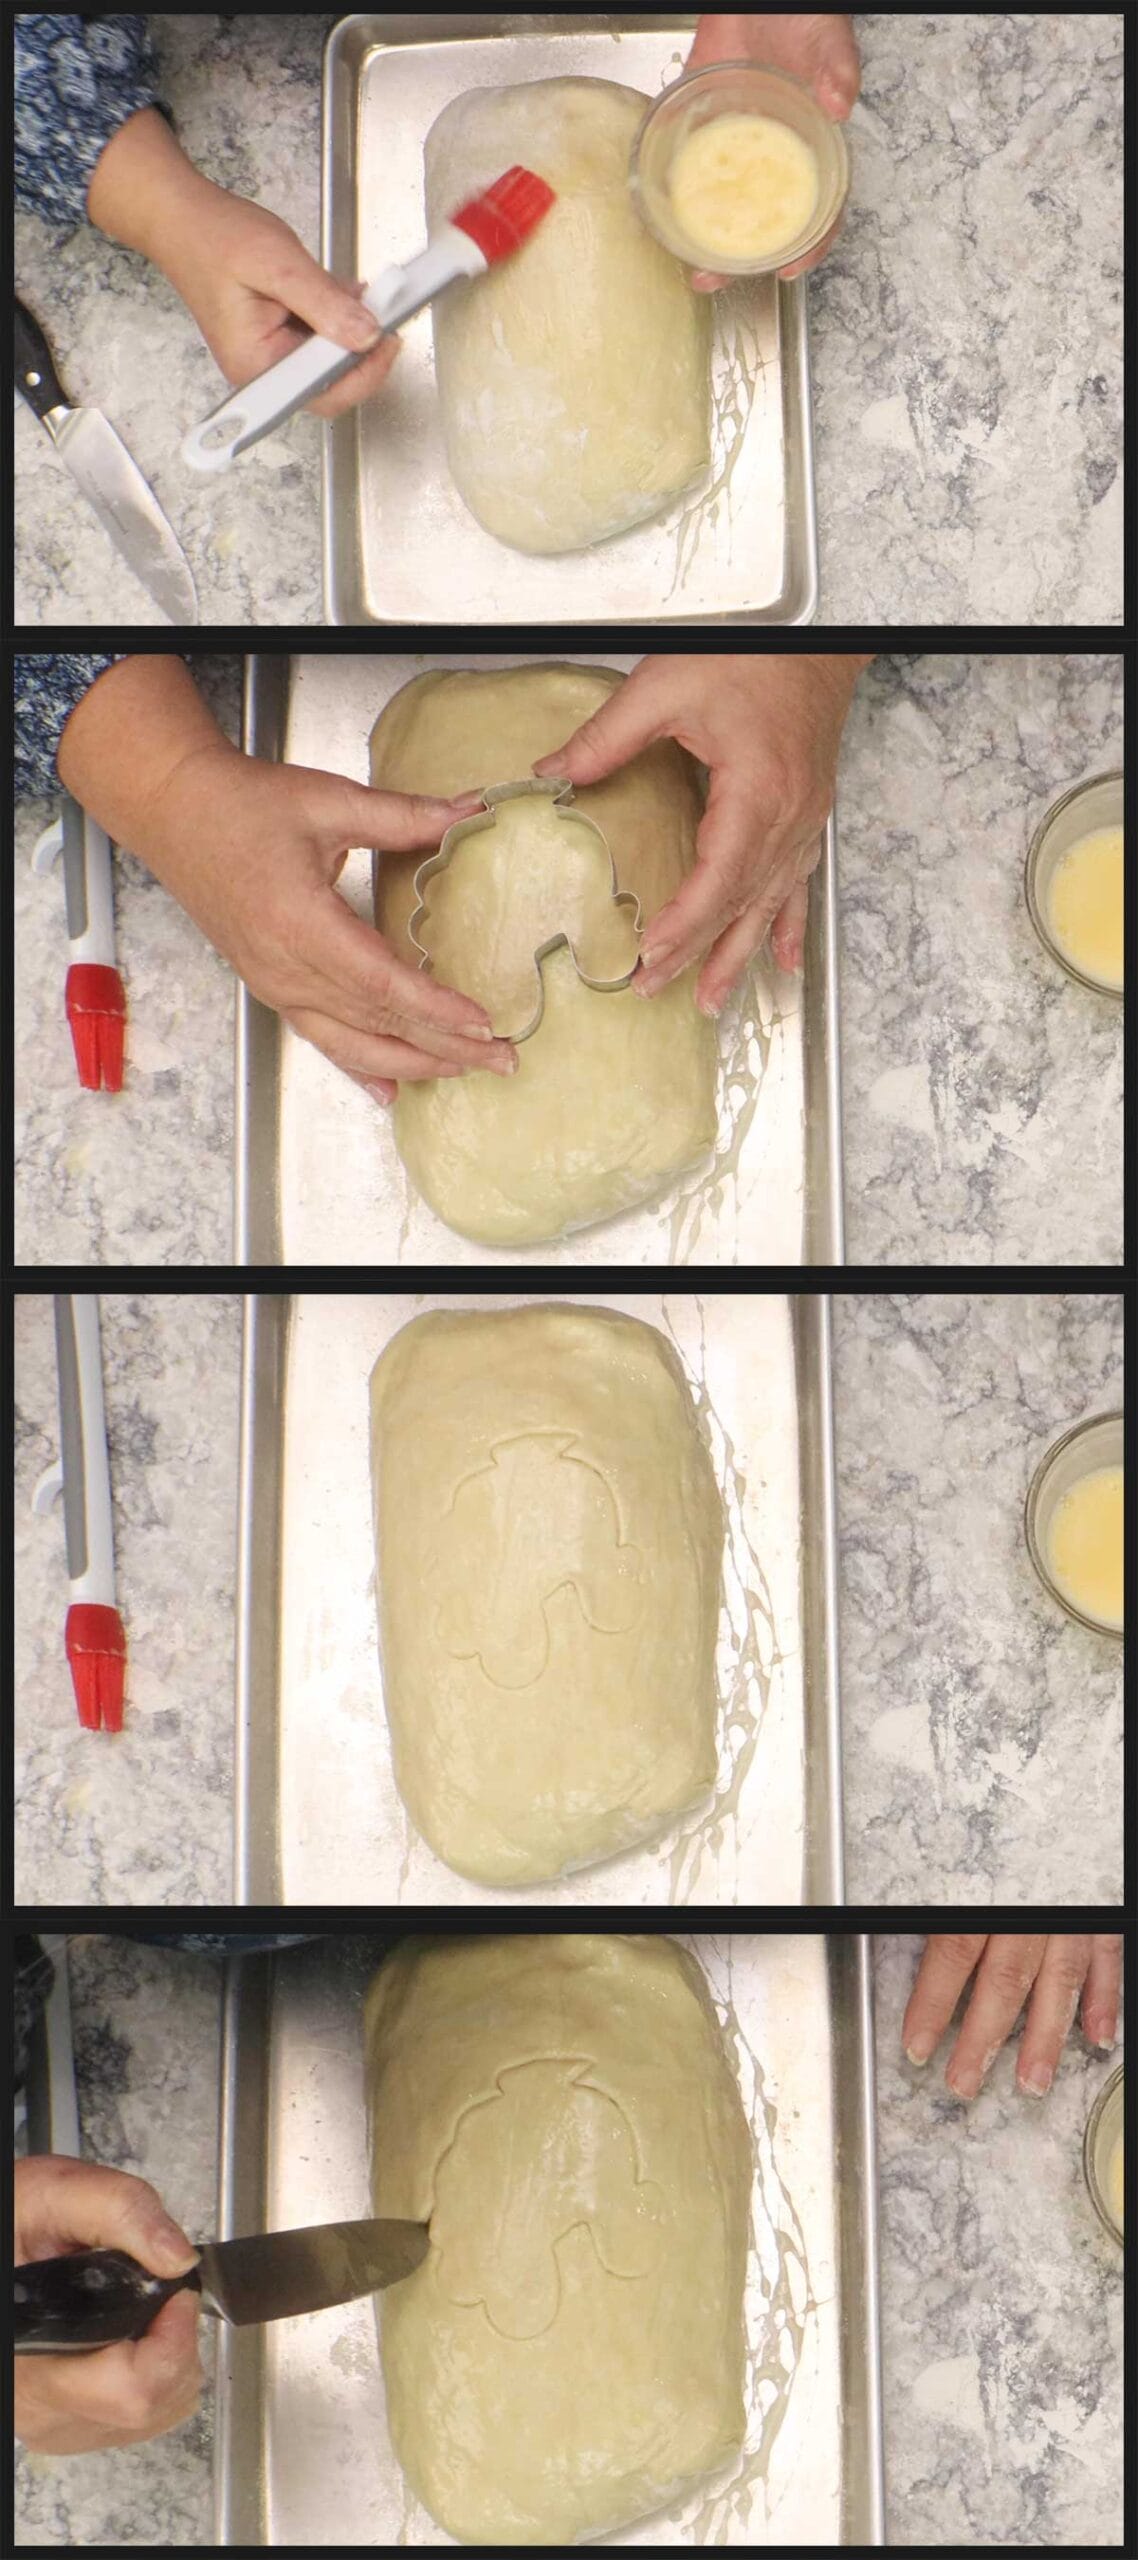
Gently brush any excess flour off of the puff pastry and brush the top and all sides with the egg mixture.
Either cut a few slits in the top of the pastry to allow steam to escape or make little cuts in a diamond pattern or press a cookie cutter into the top to separate a portion of the puff pastry from the rest.
I used a turkey cookie cutter and it turned out beautifully. Press the cookie cutter into the top of the pastry and gently roll it to make the design. If you see areas that didn't cut all the way through, trace around the design with a knife.
If you don't have a cookie cutter, you can print out any shape you want, trace it into parchment and cut out the shape. Place the whole piece of parchment over the top, positioning the area that is cut out where you want it and use a sharp knife to cut the shape using the parchment as your guide.
Now, you are ready to bake it or you can wrap it in plastic wrap and refrigerate it until you want to bake it. I wouldn't wrap it in the puff pastry much more than 24 hours before you want to bake it and make sure to remove the plastic wrap while it's cold.
Baking Turkey Wellington
Preheat your oven to 450℉/230℃ before placing the Turkey Wellington into the oven. You want it to go into a very hot oven so the puff pastry starts to cook quickly. As the butter melts in the pastry, it produces steam and the steam puffs the layers.
Bake in a preheated oven, uncovered at 450℉/230℃ for 17-20 minutes. When it's golden brown, lower the temperature to 275℉/135℃ and bake until the internal temperature reaches 165℉. Even though the turkey and sausage are fully cooked, the USDA recommends bringing all food back up to temperature when reheating. This will ensure that if any bacteria did have a chance to grow it will be killed before serving.
If the top is getting too brown, but the internal temp is not high enough, tent some aluminum foil over the top to protect it from burning.
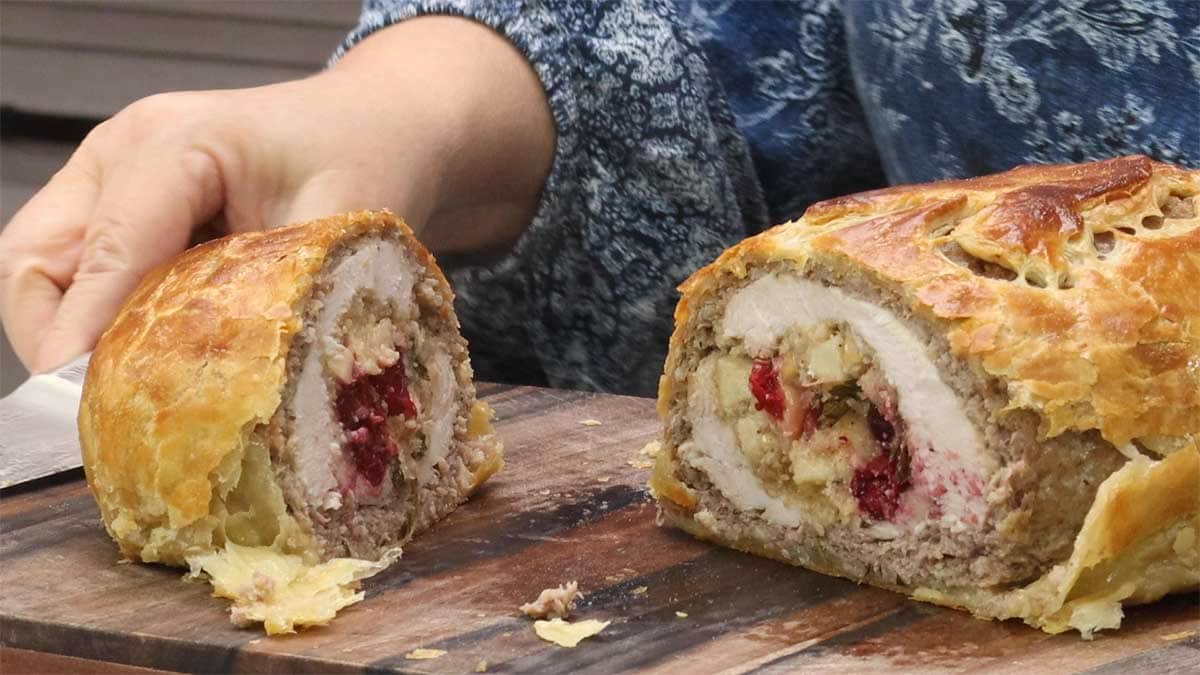
Once the internal temperature has reached 165℉/74℃ in the very center where the stuffing is, remove from the oven and uncover. Slice and serve!
How to Make Pan Gravy for Turkey Wellington
Here is a quick video showing you how to make the pan gravy.
Frequently Asked Questions
Absolutely! You could portion out the turkey breast and either butterfly the smaller cuts or just top with the stuffing and then wrap in sausage. The process is the same, but the cook time would be much less. You can use the same temperatures and cook to temperature, not time.
If you have leftovers, make sure they are completely cool and then wrap each slice or wrap bigger pieces in plastic wrap securely. Wrap in foil and then put into a freezer bag. Freeze for up to 3 months.
Side Dish Recommendations for Turkey Wellington
You can pretty much serve any kind of green vegetable or a side salad with Turkey Wellington and skip the starch since there is a layer of stuffing and it's wrapped in puff pastry, but where is the fun in that!
I can imagine that Turkey Wellington is a special kind of dish reserved mostly for the holiday season and these side dishes will be perfect alongside your wellington.
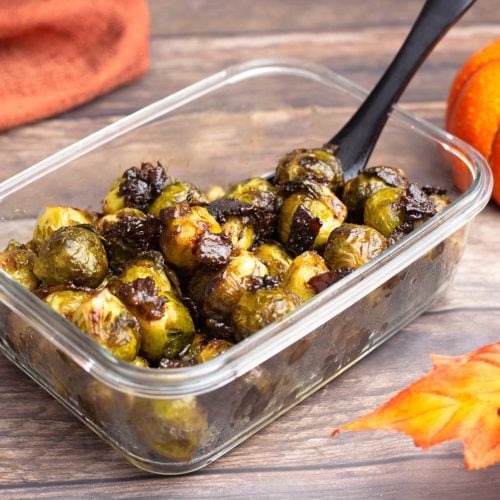
- Candied Brussels Sprouts
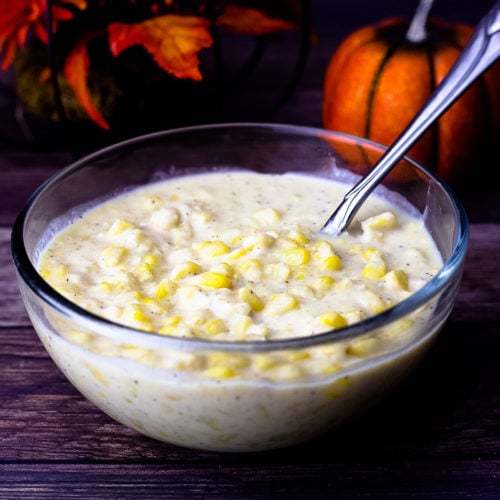
- Homemade Cream Style Corn in the Hot Cold Blender
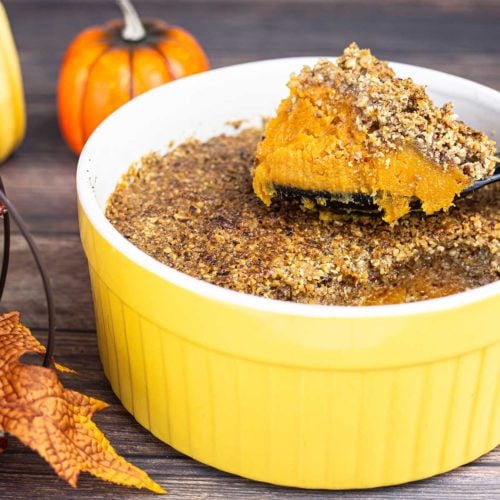
- Sweet Potato Casserole with a Toasted Pecan Topping (Ninja Foodi or Pressure Cooker recipe)
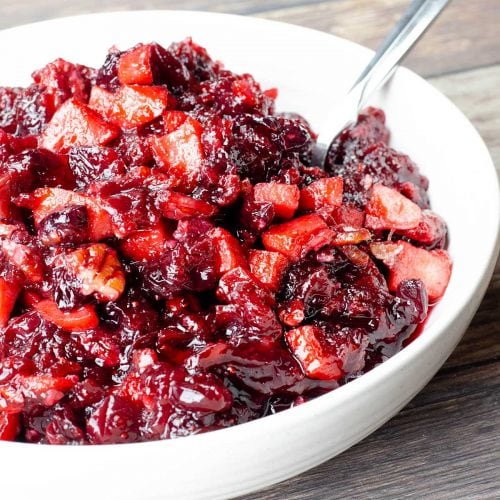
- Cranberry Apple Chutney ~ Pressure Cooker Recipe
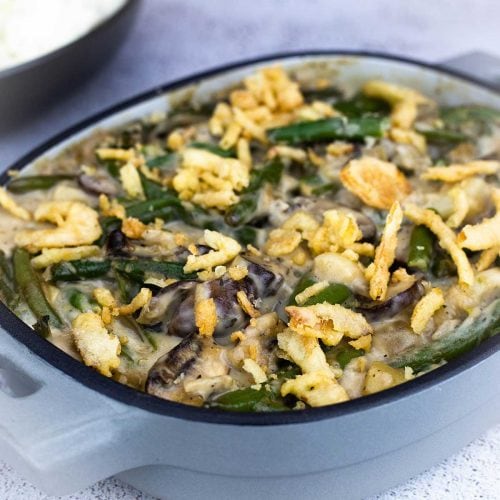
- Ninja Foodi Green Bean Casserole w/ Air Fried Onions
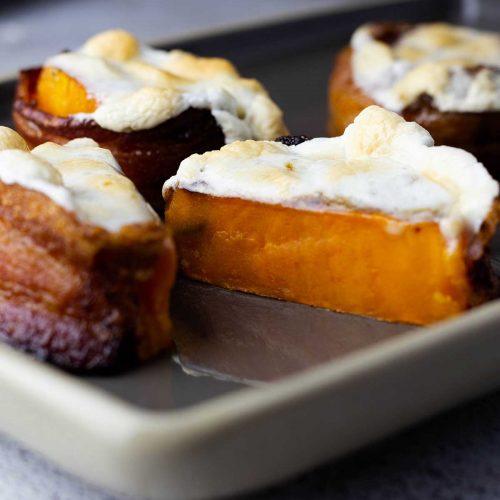
- Bacon Wrapped Candied Sweet Potatoes
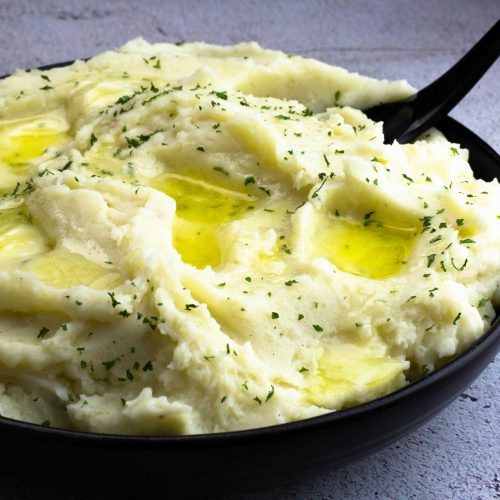
- Ninja Foodi Mashed Potatoes
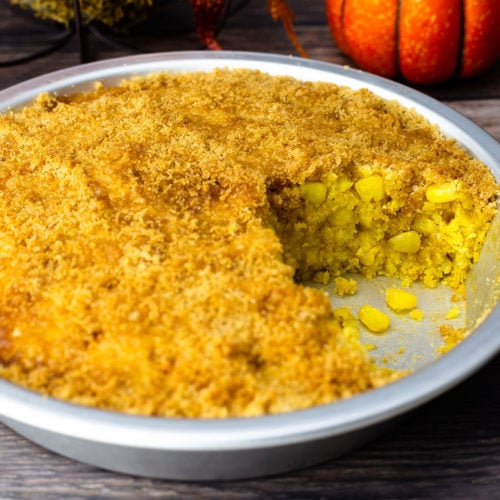
- Sweet & Sassy Corn Pudding in the Ninja Foodi
Turkey Wellington Recipe
Ingredients
Turkey Wellington
- 2-3 pound turkey breast, boneless
- ¼ teaspoon fine grind sea salt
- ¼ teaspoon black pepper
- 1½ cups cranberry apple stuffing recipe included
- 2 pounds breakfast sausage, out of casing
- 2 sheets puff pastry plus some flour to prevent sticking
- 1 large egg
- 1 Tablespoon water
Cranberry Apple Stuffing
- ½ cup bread crumbs plain
- ½ cup whole fresh cranberries frozen and thawed is fine
- 1 medium gala apple dice in ¼-½" size
- ½ teaspoon fine grind sea salt or kosher salt
- ¼ teaspoon black pepper
- ¼ teaspoon dried thyme leaves or 1 teaspoon fresh thyme leaves
- ¼ teaspoon garlic powder
- ¼ teaspoon onion powder
- 2 Tablespoons Olive OIl
- chopped parsley optional
Pan Gravy
- skin from turkey breast lightly salted and peppered
- 2 cups chicken stock
- 3 sprigs fresh thyme
- juices and fat from pan after cooking turkey wrapped in sausage
- ¼ cup flour
- salt and pepper to taste
Instructions
Mise En Place
- Thaw the turkey breast in the refrigerator at least 24 hours before making the recipe.
- Thaw the puff pastry in the refrigerator 6-8 hours before wrapping the turkey breast in the pastry.
- Keep the sausage cold in the refrigerator until just before you roll it out.
Cranberry Apple Stuffing
- In a medium size bowl, add the ingredients for the cranberry apple stuffing and mix together.
Butterflying the Turkey Breast
- Remove the netting from the thawed turkey breast. Using a sharp knife, run it under the skin between the turkey breast and the skin to remove the skin. Save the skin if you want to make gravy with it.
- Take a sharp knife and cut through the middle lengthwise to butterfly the breast. You don't want to go all the way through, but take the cut far enough so the breast will lay open and flat on the cutting board.
- Lightly salt and pepper both sides of the turkey breast.
Stuffing and Encasing Turkey Breast in Sausage
- With the butterflied breast open, spoon stuffin on one side. You may not use it all, but try to use at least 1-1½ cups. Fold over the other side of the breast to cover the stuffing.
- Place a large piece of plastic wrap on a clean flat surface that is at least 24" x 24", a clean countertop works great.
- Place the sausage in the middle of the plastic wrap and if it not all in one roll, then mash it together to form a large mound. Cover with parchment paper (the size of the plastic wrap) and roll out the sausage with a rolling pin. You want the sausage to be as big as a large pizza, so about 18-20".
- Place the stuffed turkey breast seam side down in the middle of the sausage. Fold up the sides and ends of the sausage and press to form the sausage to the turkey breast.
- Place onto a baking pan and bake in the oven on 275℉/ 135℃until the internal temperature (in the middle where the stuffing is reaches 165℉/74℃). This can take anywhere from 60-90 minutes and if the turkey and stuffing is cold, it will take longer. Cook to temperature, not time. The low temperature is prevent the sausage from cracking open, so if you decide to turn up the heat, don't do it for at least 30 minutes.
- Cool in fridge for at least 1-2 hours or until the outside is cool to touch. If you are making pan gravy, drain the juices and fat off the tray into a pan.
Wrapping in Puff Pastry
- Whisk one egg with 1 Tablespoon of water in a small bowl.
- When the sausage on the outside of the turkey is cool to the touch, you can wrap it in puff pastry.
- On a clean work surface at least 36" x 36" sprinkle a few Tablespoon of flour and spread out. Place the two sheets of puff pastry side by side and join the edges by pressing together.
- Using a rolling pin, roll out the dough until it is about 16" x 20" and about ¼" thick.
- Place the turkey breast, rounded side down, in the middle of the puff pastry. Fold over one of the sides and remove excess puff pastry with scissors or a knife from the corners. Brush the edges of each end of the puff pastry with egg mixture and fold up onto the turkey breast. Press to seal the edges.
- Trim the excess puff pastry from the corns and the remaining flap, you only want enough puff pastry to come to about the middle of the turkey breast. Brush all the edges with egg mixture and fold the flap onto the turkey breast. Press to seal the edges.
- Turn the wrapped turkey over onto a baking pan. Brush off any excess flour and brush the tops and sides with the egg wash. Either cut a few slits in the top or press a cookie cutter into the top to make a design and allow the steam to escape.
Baking Turkey with Puff Pastry
- Preheat the oven to 450°F/230°C. Place the turkey into the hot oven and bake for 17-20 minutes or until golden brown. Check the internal temperature through one of the slits in the top.
- If the temperature has not reached 165℉/74°C in the very middle, lower the oven temperature to 275℉/135℃ and continue to bake until it does. This can take anywhere from 30 minutes to 60 minutes depending on how cold the turkey was when you wrapped it in the pastry. If the pastry is getting too dark on top, tent the pan with foil to protect the top from the direct heat.
- Once the internal temperature has reached 165℉/74°C, remove from the oven. Slice and serve!
Pan Gravy
- Place the seasoned turkey skin into a small pot, about 1.5 qt sauce pan works great. Turn the stove on medium heat and let the skin brown and render some fat. Add in the fresh thyme and chicken stock. Bring to a simmer and simmer for about 10-15 minutes.
- Into a small pan, add the juices and fat from cooking the turkey and sausage. Turn the heat on medium and add in about ¼ cup flour, whisk to combine. The flour should absorb almost all of the fat and the mixture will thicken. Strain and add in 1 cup of the simmered chicken stock and whisk until smooth.
- Add as much chicken stock as you need to in order to reach the desired consistency. Salt and Pepper to taste.
Notes
Nutrition
ABOUT THE RECIPE AUTHOR, LOUISE LONG
Louise is a full-time recipe creator and food blogger @ The Salted Pepper. She has over 30 years of experience with cooking and recipe development. She owned a restaurant for several years and was a full-time RN until retiring to blog full-time.

She published her first cookbook in the Fall of 2018 and is very interested in writing several more.
Louise is also the creator of an online Ninja Foodi Pressure Cooking Course with over 100 instructional step-by-step videos. People absolutely rave about the course and all the value they have received from it.
Louise has several very active Facebook groups that help people with the basics of cooking and getting the most out of the Ninja Foodi.
Louise is also a YouTube creator and you can find most of her recipes in video format on The Salted Pepper YouTube channel.
She is very responsive to messages and eager to help in any way she can. Get more Information about Louise & contact information
I WOULD LOVE TO SEE WHAT YOU ARE COOKING UP IN YOUR KITCHEN! TAG ME @THESALTEDPEPPER ON YOUR FAVORITE SOCIAL MEDIA PLATFORM WHEN YOU MAKE A DISH!
BE SURE TO FOLLOW THE SALTED PEPPER RIGHT HERE ⇓⇓⇓⇓⇓

Patti
Yes, a lot of work but worth every minute!! Family says that this recipe needs to be on repeat!!
Louise
I am thrilled everyone loved it!